Design Elements | Inspiration For Our New Cottage

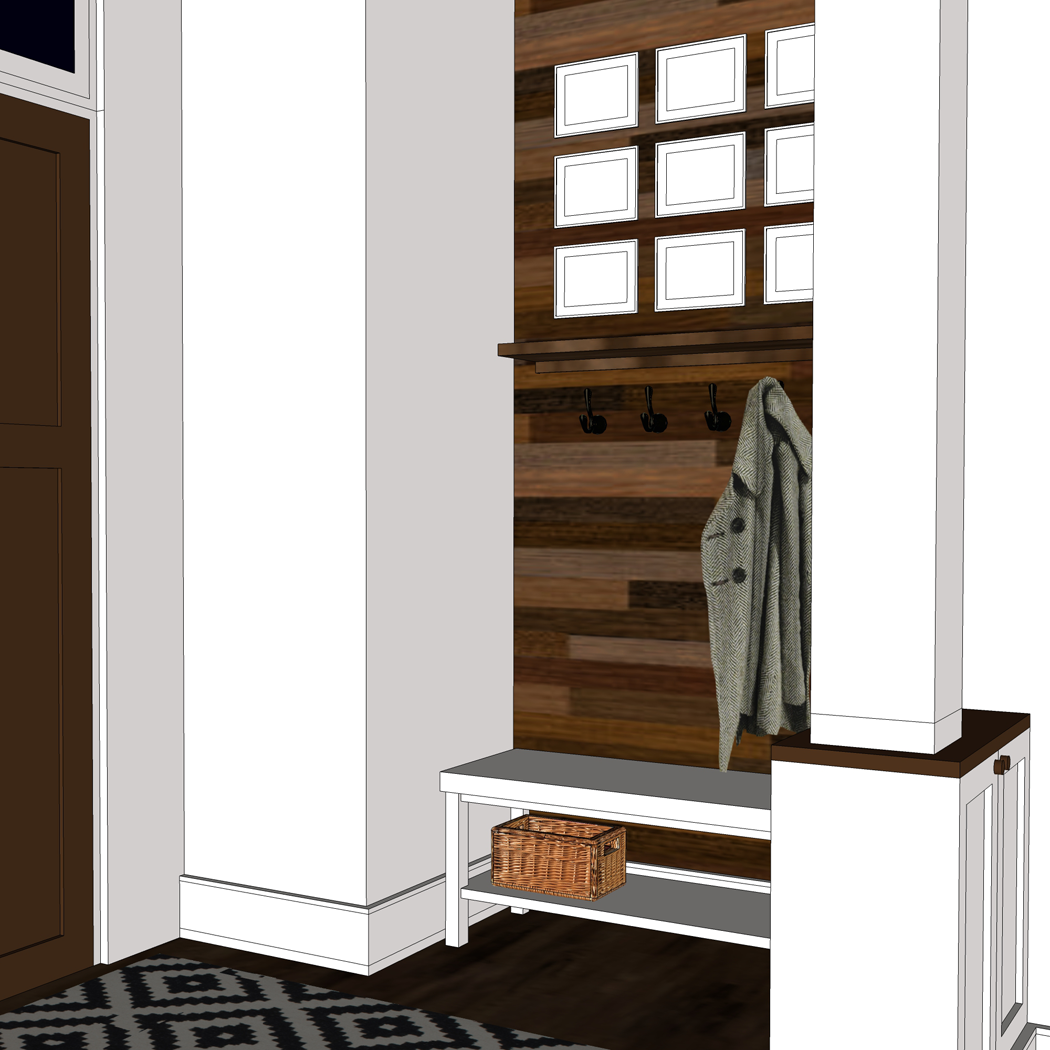
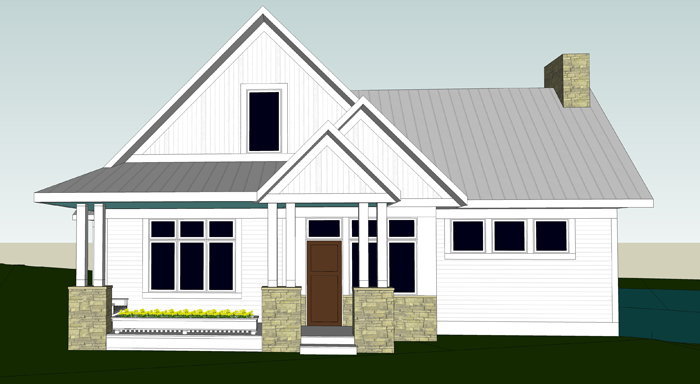
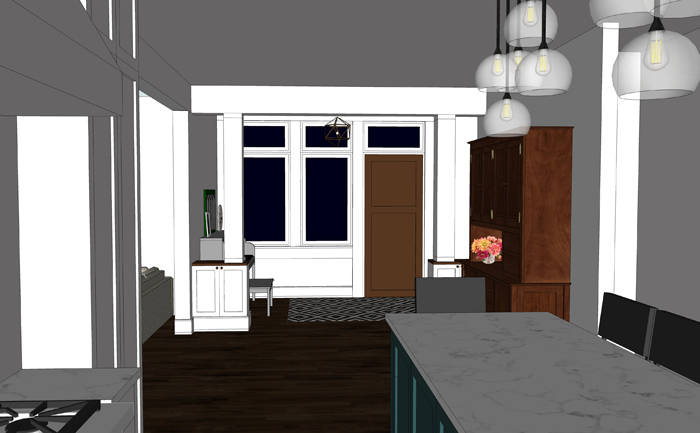
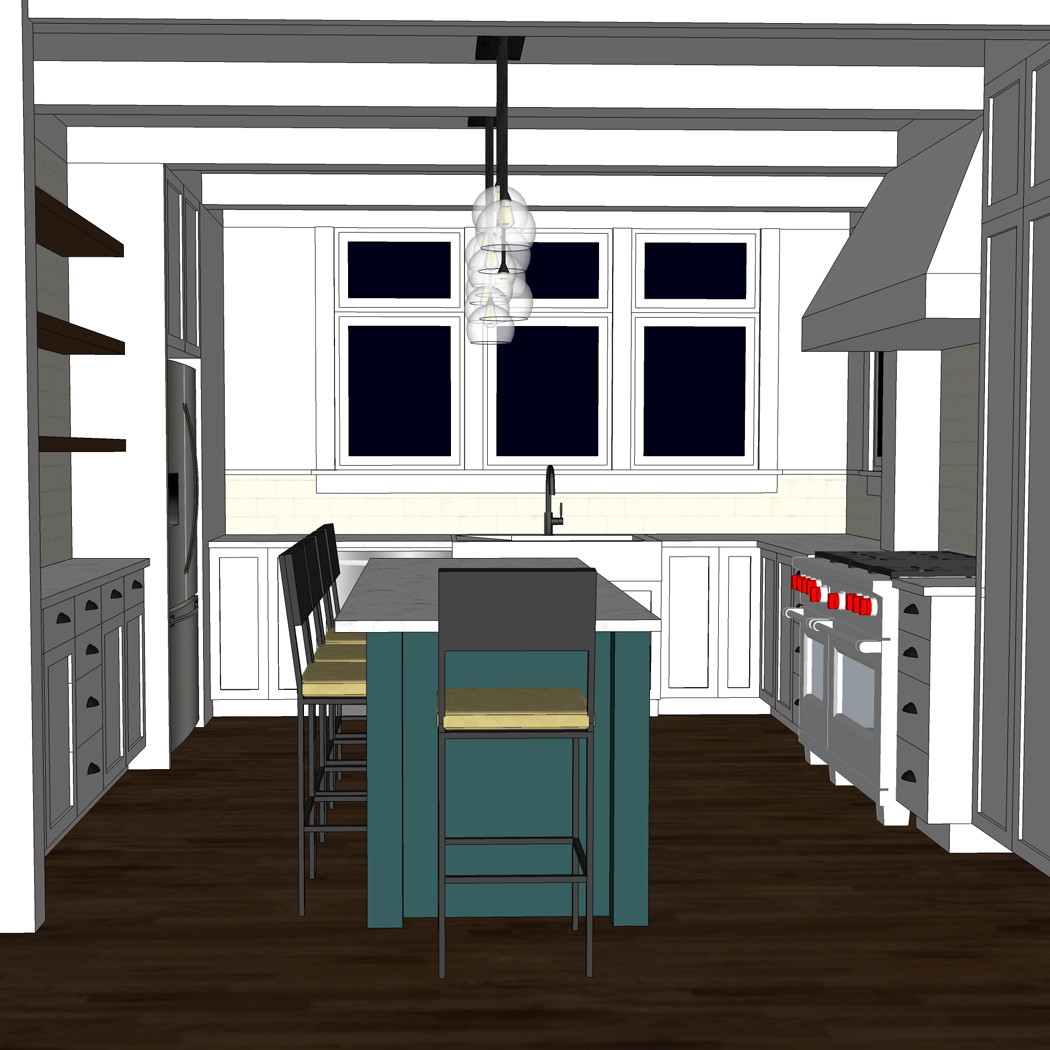
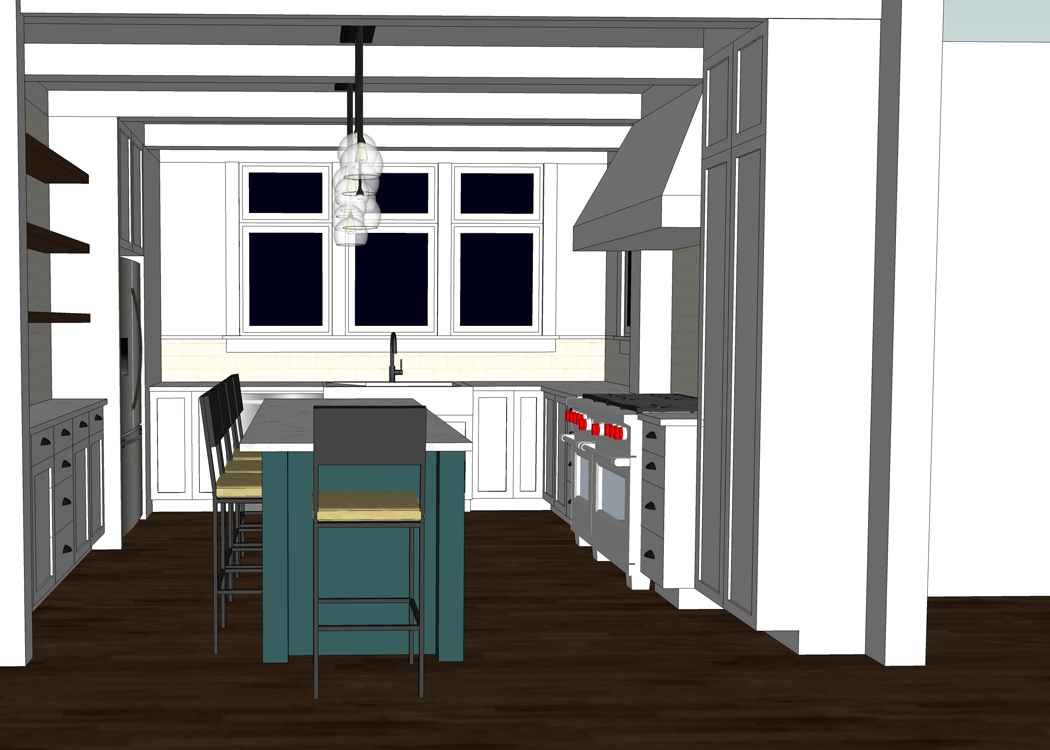
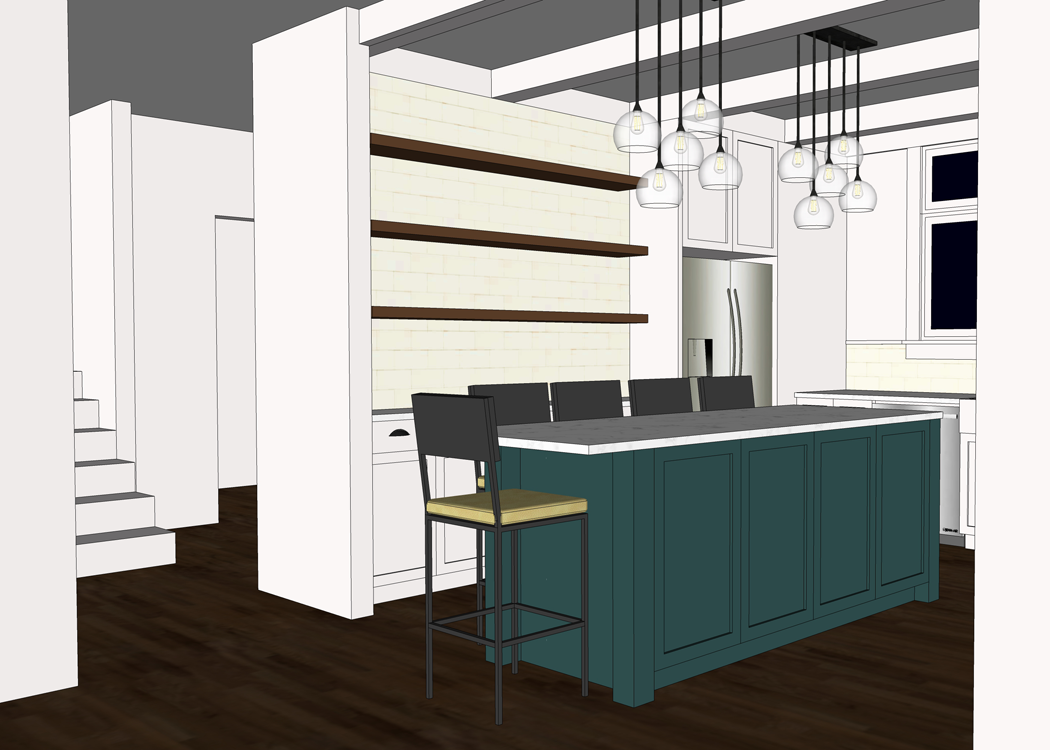
Today I am excited to share with you a few of the design elements we are planning for our new cottage. Hopefully, by the end of this post you will have a good sense of what our finished interior space might look like.

Home design ideas for a newly built cottage

OUR FOREVER HOUSE

To be honest, I haven’t given a ton of thought to the interiors of any of the houses we have lived in. I think, in part, it is because I knew we would only be living in them temporarily.

This house though, being our forever house, has caused me to think more critically. We want to be very intentional about what we surround ourselves with.

antiques used in a cottage style home. vintage scale

MIXING OLD WITH NEW

Though we are building a brand new home, we feel it is important to incorporate items that have seen a bit more life, and wear and tear. The reason for this is twofold. Number one, we don’t want to feel that we can never touch anything, or be worried that our kids might break something.

Number two, we feel that a new house can seem a bit bland and stark if everything is perfect and new. A mix of found items can really help to give the interiors a casual, comfortable, and lived-in and vibe.


MAIN DESIGN ELEMENTS

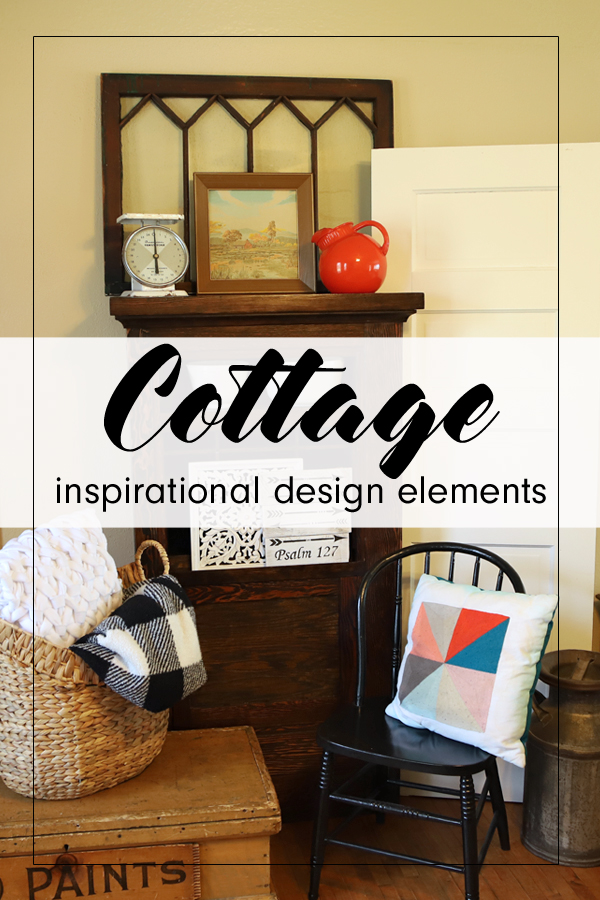
There are four main categories of inspiration that I will be discussing: geometry, color, texture, and specialty items. They all work together to form an overall design style that is simple and orderly while also comfortable and casual.
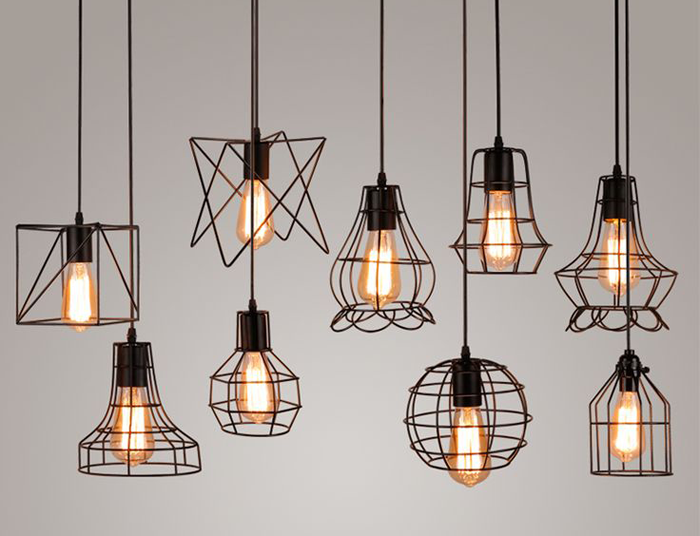
Geometry

As an architecture major, I am fascinated with geometry. I love how simple lines and shapes can come together to form something interesting and beautiful.

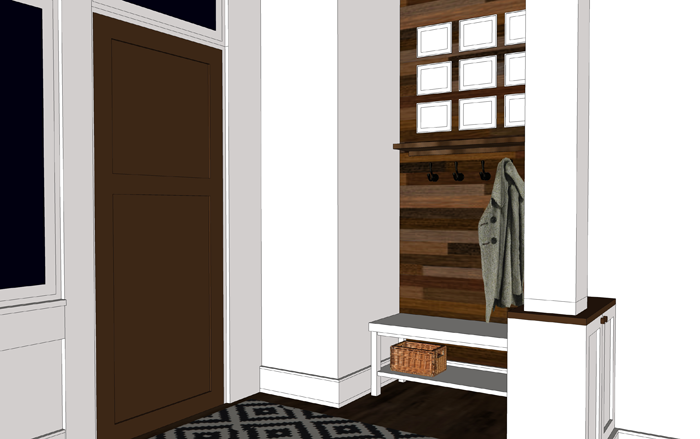
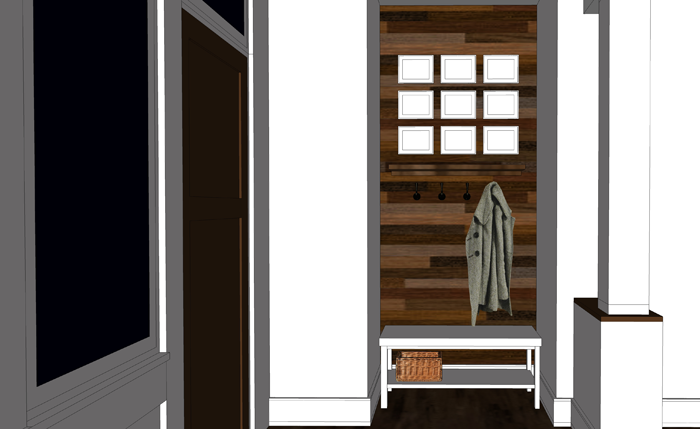
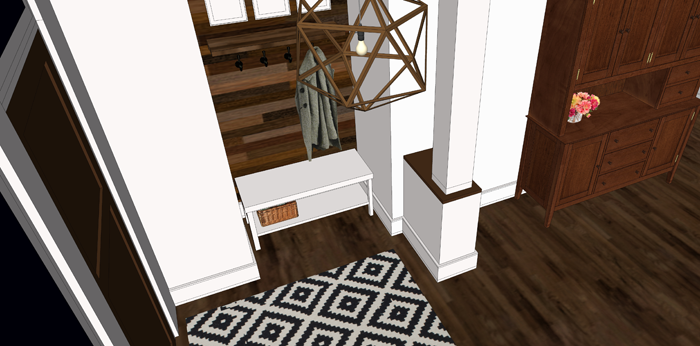
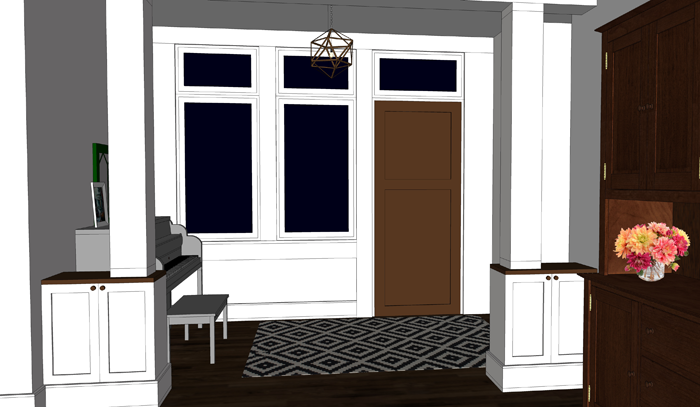
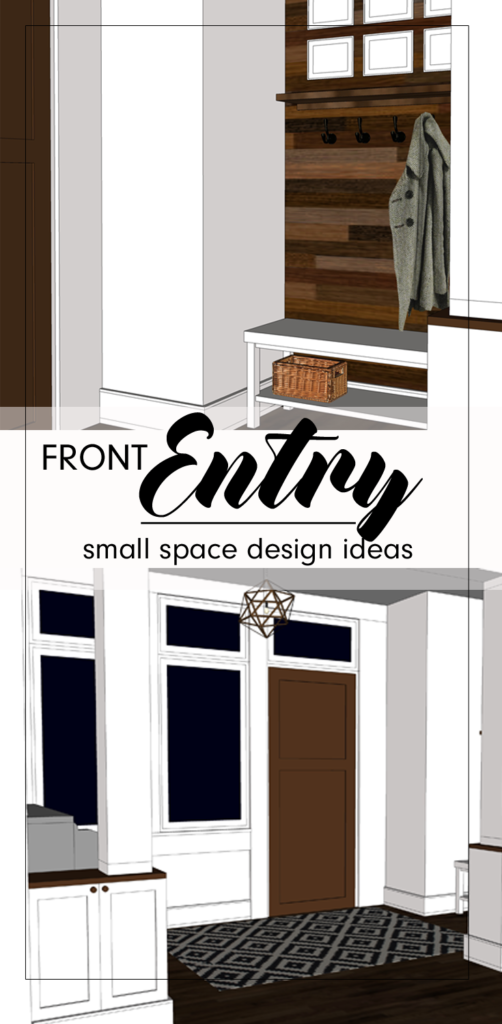
One example of how we plan to incorporate geometric design into our new cottage is the five panel doors we have chosen. They mimic the pair of wooden doors we refinished last summer. I think they have a classic look that will pair well with the simple lines of the cottage.

Design elements for a comfortable cottage feel

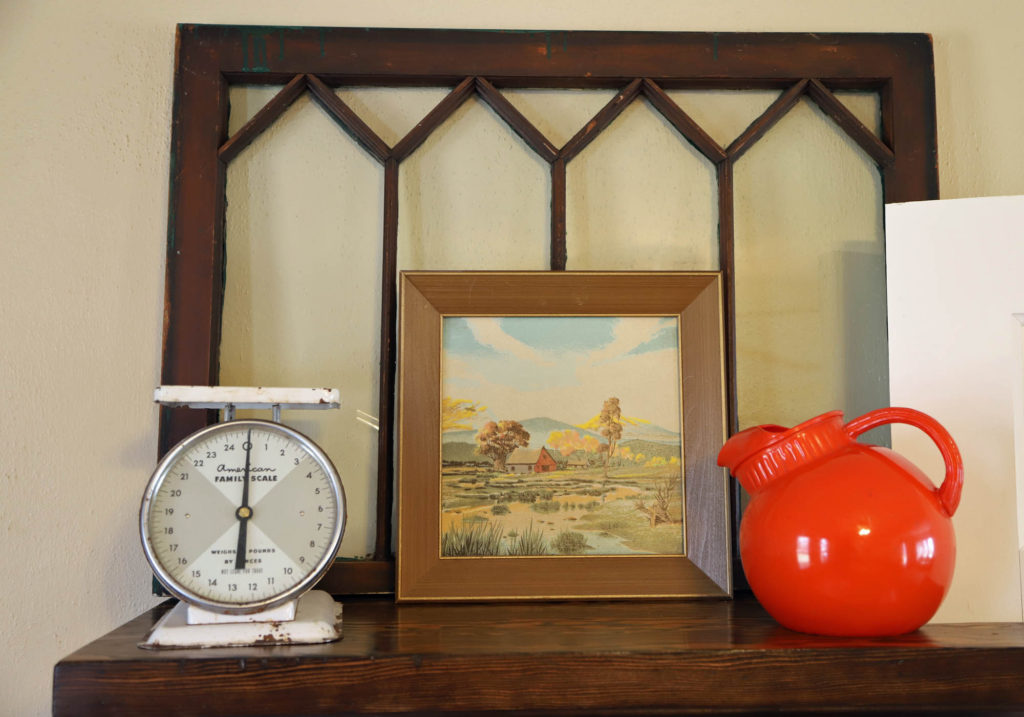
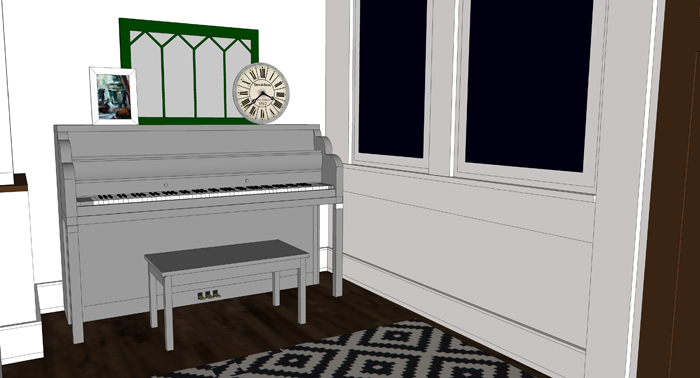
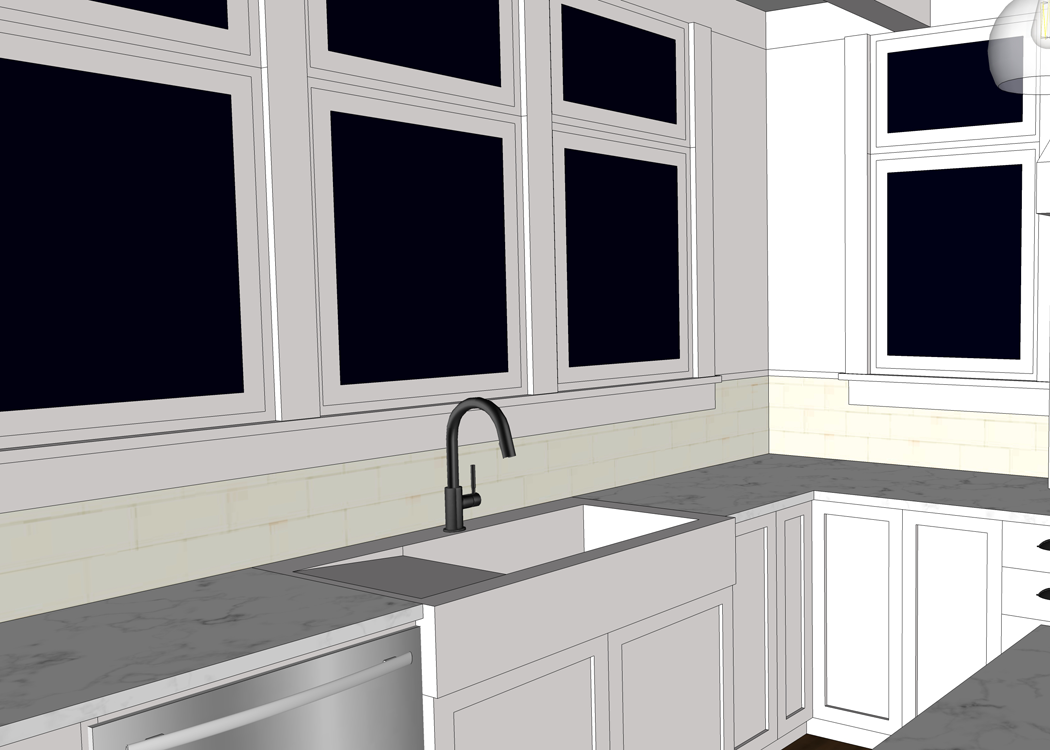
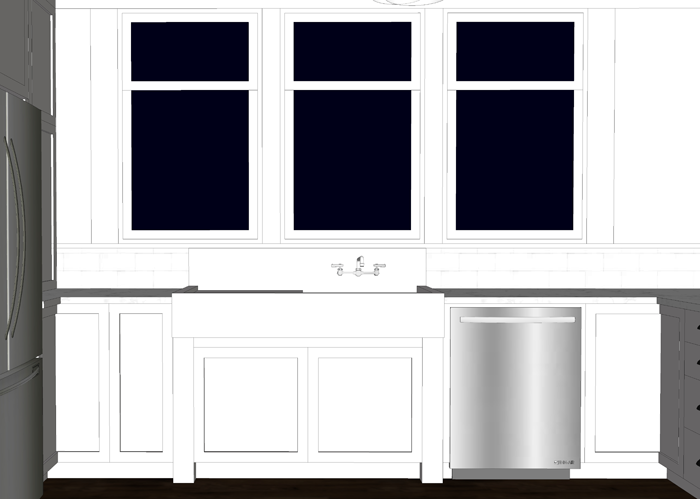
This window also displays basic, yet interesting geometry. I saw it out of the corner of my eye one day when I was browsing through an antique shop. Though it was priced higher than I wanted to pay, I could not get my mind off of it. Eventually came home with me, and we have loved it ever since.
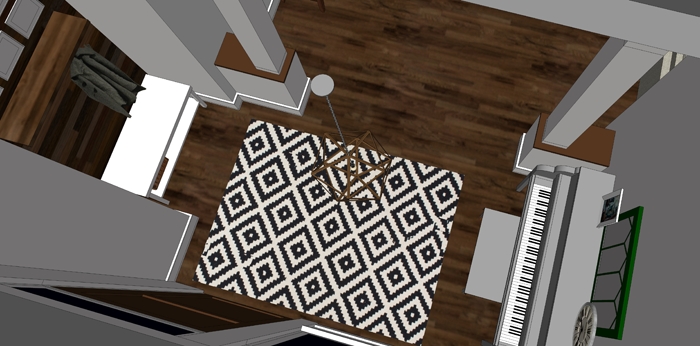
Color Scheme

When it comes to color theory, I am definitely one who prefers a mostly neutral palette, with pops of interesting color. Knowing what colors to ‘pop’ with has been something I have slowly learned through the years.

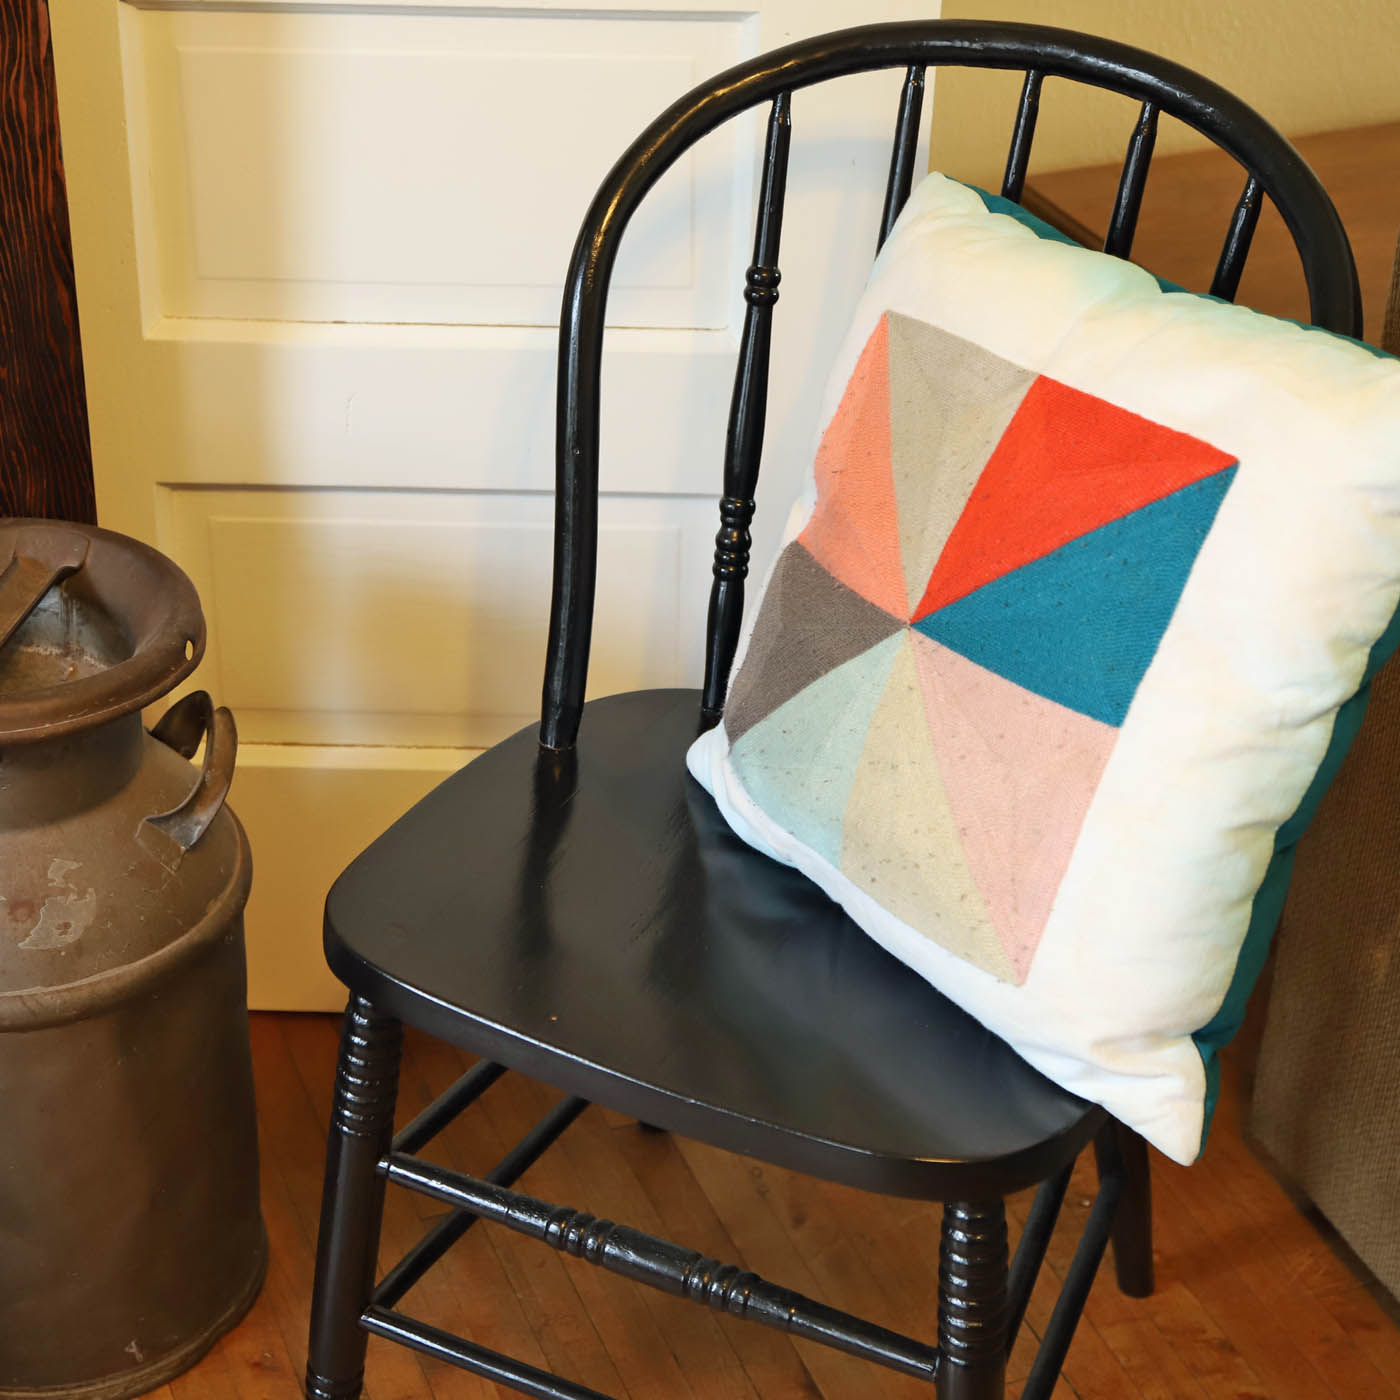
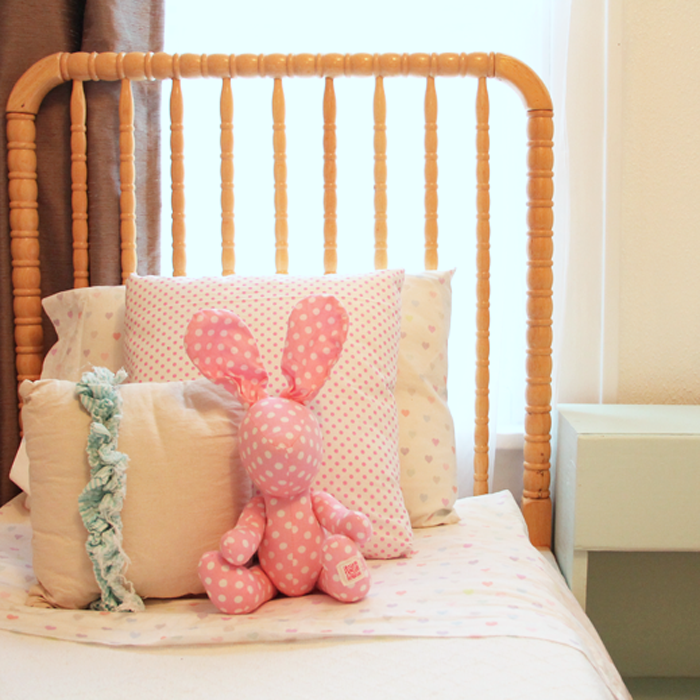
In fact, the realization of the color scheme for our new house came to me a bit by accident. A few years ago I purchased this simple pillow. It kind of spoke to me, even though I couldn’t really put my finger on why. The pillow has been a mainstay in our living room since that day, and every time I look at it I smile.


Interior design ideas incorporating neutral decor with pops of color

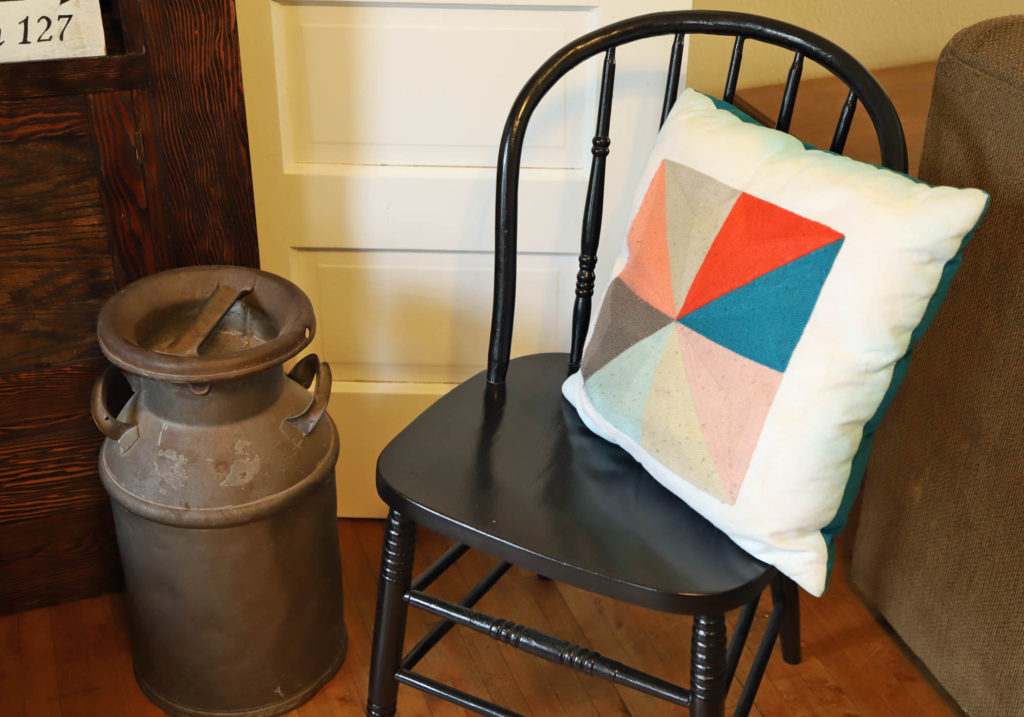
It wasn’t until recently that I realized that the pillow brings a couple of my very favorite design elements to life. The geometric pattern is simple, and pleasing to the eye. But also, the colors themselves are those I tend to gravitate toward. With the exception of the tan color, which I would replace with a mustard yellow.

Without even knowing it, I have been accumulating items with these colors and bringing them into our home.

This rust-red pitcher, for example, adds just the right amount of color. And the small lithograph print features many of my favorites.

vintage red pitcher


Texture

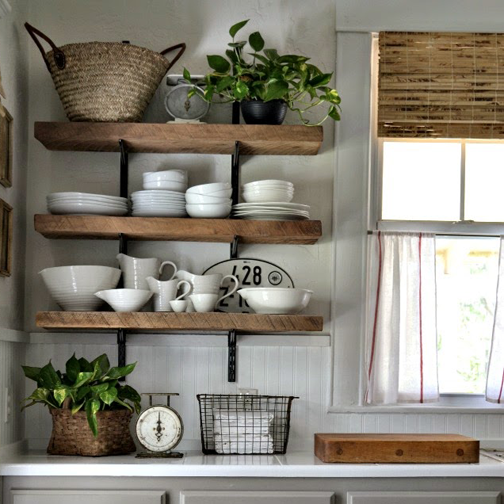
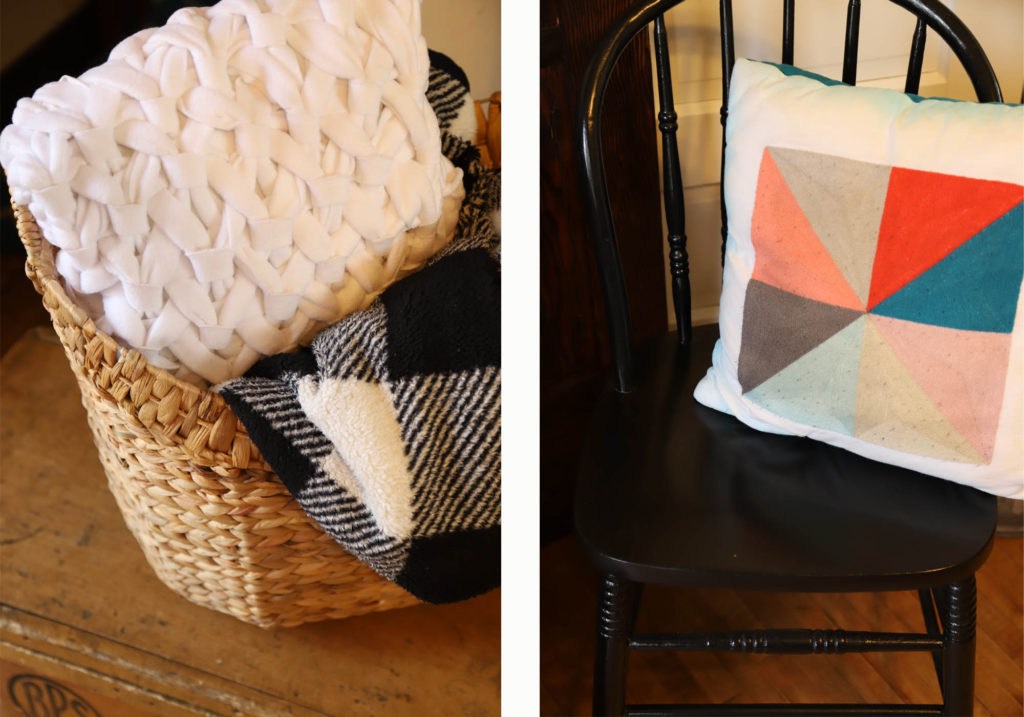
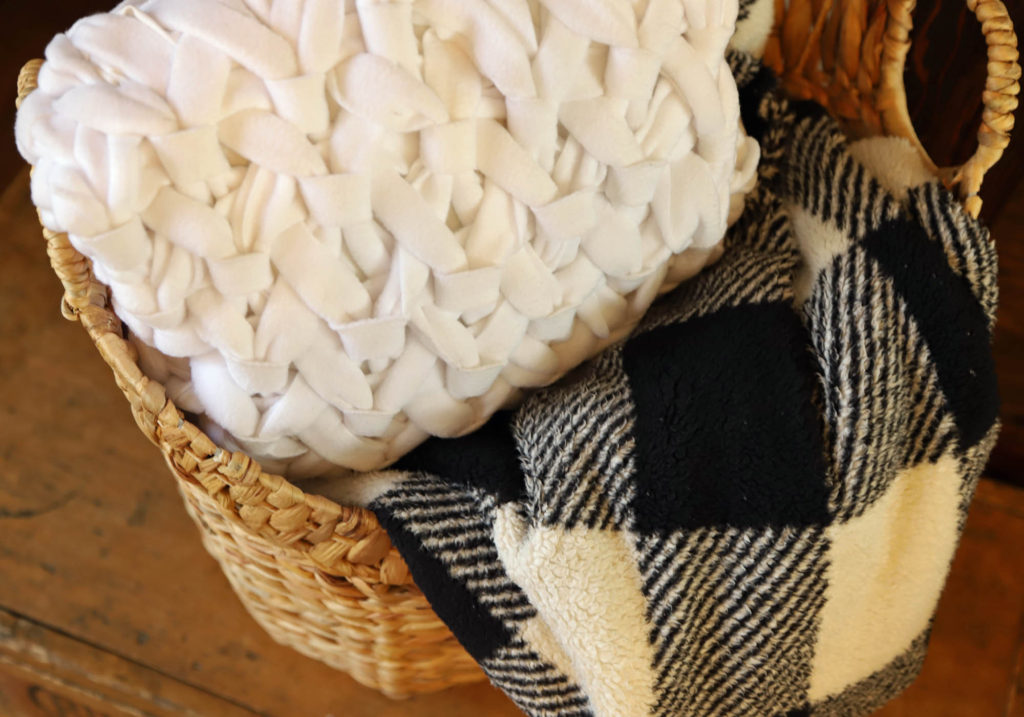
I am a huge fan of texture. More specifically, neutral texture. It is one of the reasons I am a sucker for a woven basket or a macrame wall hanging.

textured home decor

This pillow is one of the ways that I added a bit of texture to our home decor. I created a blog post a while back which details the steps to make one for yourself. I will be re-doing the video link in the near future. There have been people who have tried to make the project and have commented that the video could use a few more step by step instructions.

diy textured knot pillow

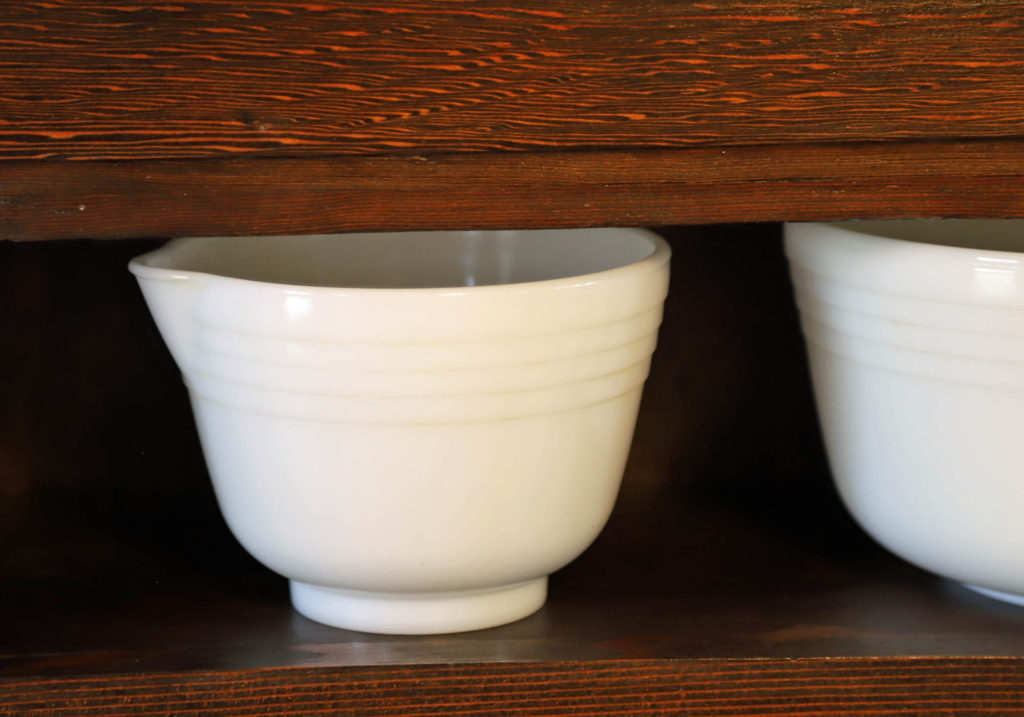
Other textured items might be really subtle. This pair of white bowls, for example, have a small bit of ribbing around their rims. I think this tiny bit of detail really adds visual interest to an otherwise ordinary piece.

vintage design elements incorporated into a brand new cottage home


Special Items

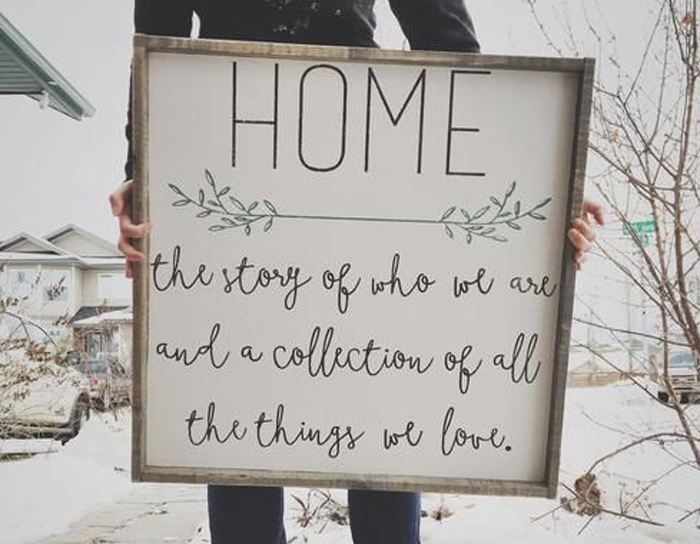
A house filled with generic, store bought items will not have the same feeling as one adorned with well loved items. Displaying items that bring you joy or remind you of someone you love is the perfect way to make a new house feel like home.

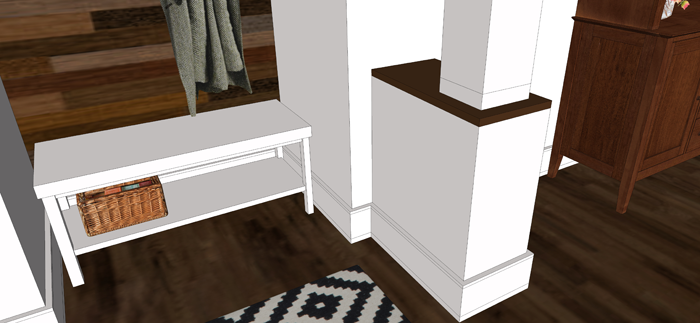
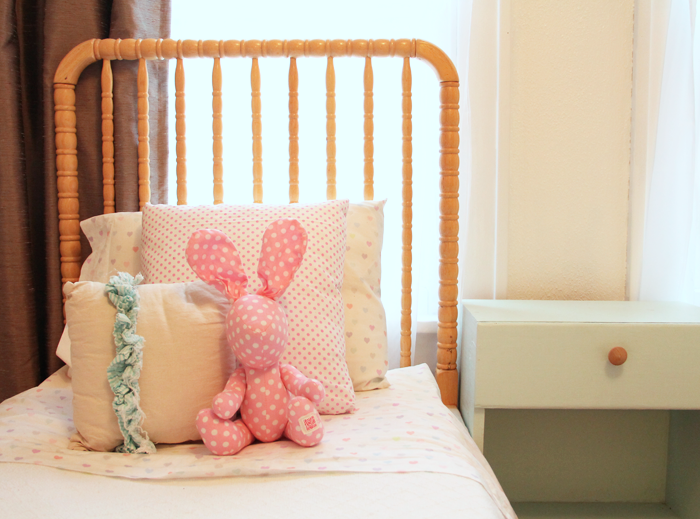
We have special items of all types that we plan to utilize at our new cottage. The cabinet in this vignette, for example, is one of a set that my husband painstakingly restored this past winter. He put so much effort into them, and they are absolutely stunning!

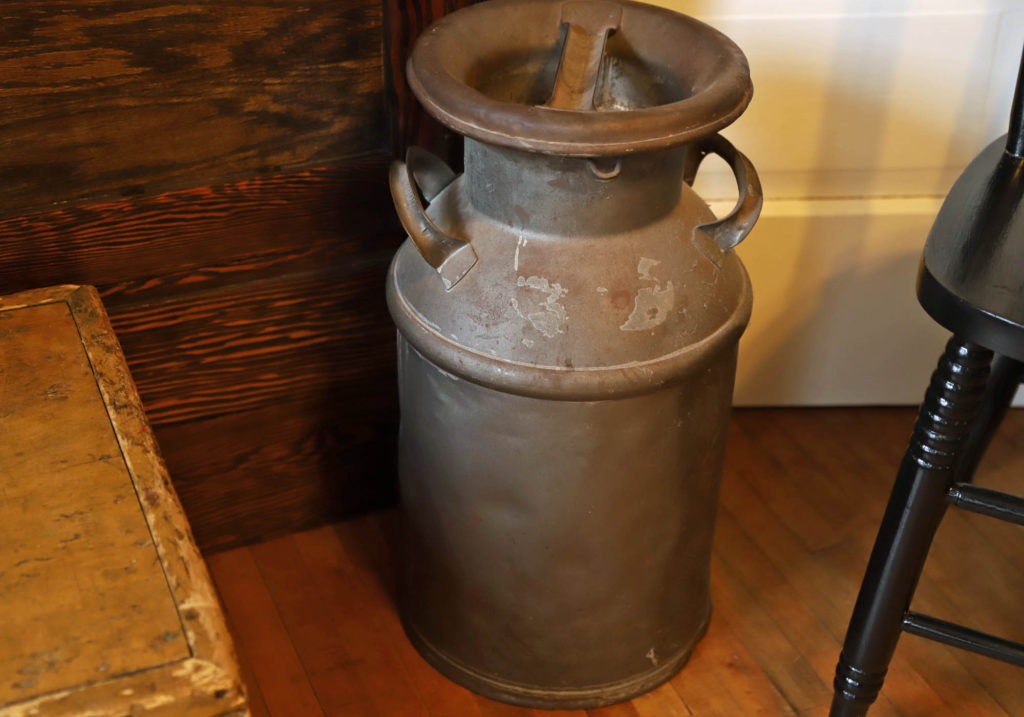
A cream can, saved from the run down farmstead of my great-grandparents, will become a special conversation piece in the cottage.

vintage cream can


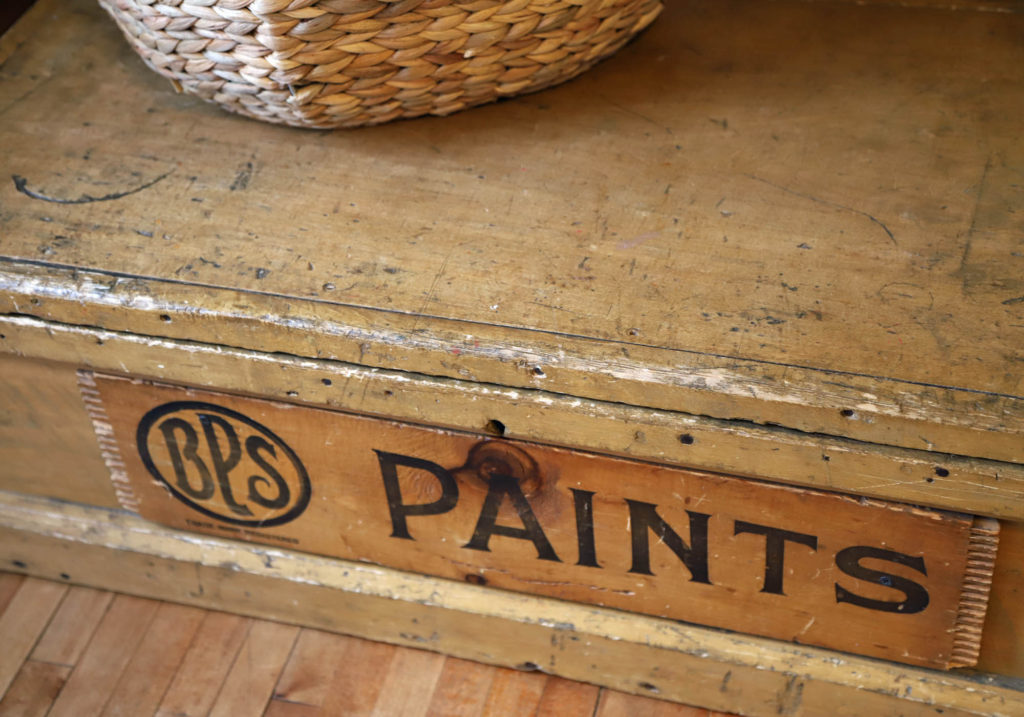
This crate has been used as a toy box for many years by our children. We plan to bring it with us when we move. Although it may eventually be filled with different items, it will forever hold the memories of a time when our kids were younger and enjoyed it as a toy box.

BPS paints crate

We are so excited to see all of these design elements come to live in our new home! If you would like to be the first to know about the construction timeline, be sure to subscribe to my email newsletter. I will be sending out house information there first. Also, consider subscribing to the Arrow Hill Cottage YouTube Channel. There, I plan to post a house building update once per week, as soon as we break ground.

Thanks for stopping by! I enjoy sharing this journey with all of you!


TAKE A CLOSER LOOK

In this video, I do a little walk-through of each piece in the vignette. I describe the design elements and talk about each piece and how they represent the elements.


PIN THESE IDEAS

cottage design elements


A FARMHOUSE SINK FOR OUR COTTAGE

They say that the kitchen is the heart of the home; And a beautiful kitchen is high on the priority list of many homeowners. I am in agreement with these sentiments. After all, if my family is going to be spending a lot of time in one room, it should function well AND look nice.

The kitchen for Arrow Hill Cottage will have a classic look, with clean materials and tons of natural light. But I have to say, in all honesty, the feature I am most excited about is the kitchen sink.


Time for a little story:

About eight years ago, when my husband Craig’s family was helping his grandparents clean out their farmhouse (the very one we are living in at the moment), I spotted a cast iron sink laying in the weeds on their property – ready to be hauled away by a scrap metal collector who was paying by the pound. I am pretty sure I let out an audible shriek, then quietly and as calmly as possible, asked Craig to please find out more about it.

Turns out that it was the farmhouse’s original 1920’s kitchen sink that was removed (and tossed outside) in the late 60’s, when the room was remodeled to a more modern style.

It didn’t take too much begging for his grandparents to agree that we could save it from the pile. Craig though, needed a bit more convincing. Mostly because the thing was a beast, and hauling things around is low on his list of favorite things to do. He loves me though, and eventually gave in to my desire. We had absolutely no place to store the relic of a sink, and so we asked Craig’s parents if we could keep it in one of the sheds on their property until we built our house. And that is exactly where it has been ever since.

Craig was there last weekend, and I asked him to get a few measurements for me so that I could fine tune the kitchen design a bit more. He took pictures of the sink – in all her muddy, rusty glory – and seeing them made me fall in love all over again.


We will need to look into getting it refinished – probably at a body shop – but even with that expense I believe we are sitting on a great deal. I saw a very similar model on Etsy selling for $1,800! Another sink, on Ebay is listed for close to $1,000. Even reproduction models are over $700!

There are a couple of challenges that this farmhouse/apron sink will present. One is finding wall mounted faucet hardware. They aren’t quite as common as the counter mounted variety.

I like the look of this bronze faucet from Wayfair.


I have a feeling that lever handles might be a bit easier to operate though – so this option from American Standard might do the trick.


This one with a pull out spray faucet would be very functional – but I’m afraid it might not quite be in the budget. Maybe I can find something similar for less when the time comes to make a decision.


Another challenge will be determining how to lay the counter material. This sink style was originally designed to be a free standing unit. It probably had matching legs at some point. Kitchen design & style has changed quite a bit since the 20’s.

I am still pretty set on using a quartz counter-top material. I love the clean look. The sink will will either need to be set a bit lower than the counter height, so that the counter material can overlap the edges – to ensure that no water slips onto the cabinet below – similar to this:


OR possibly more likely, because of it’s integral back-splash, we will need to set the sink up higher and butt the counter-top material into the sides, like this:


The final design challenge that I can foresee, and perhaps the largest, is the placement of the sink itself. Because it is a single bowl sink, the placement of the faucet will be further to the right (and not in the center of the overall unit. There will be three large windows on the wall where the sink will be located, and I am unsure if I want the entire sink to be centered on the middle window (and hence, the faucet offset), or the faucet / sink basin portion centered on the middle window. Maybe you can all help me out.  Tell me which you prefer!


SINK UNIT CENTERED ON MIDDLE WINDOW


FAUCET CENTERED ON MIDDLE WINDOW


I should note that the dishwasher will likely have a cabinet panel front, so that it blends with the rest of the cabinetry. I feel like it seems to have more space on the right of the sink. Thoughts? Maybe I should take another look at the window placement and series?

Please comment below or via social media. Would love some help!


DIY TODDLER BED | RE-PURPOSED CRIB

What should you do when your child outgrows his/her crib? Consider re-purposing it into an adorable DIY toddler bed, using this simple tutorial.


repurposed crib into a toddler bed. Adorable DIY toddler bed
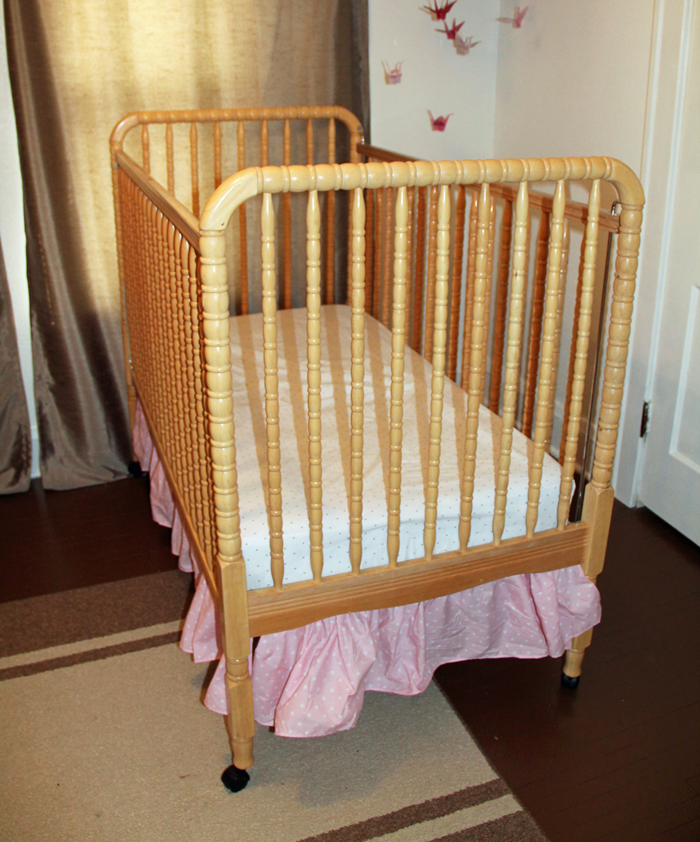
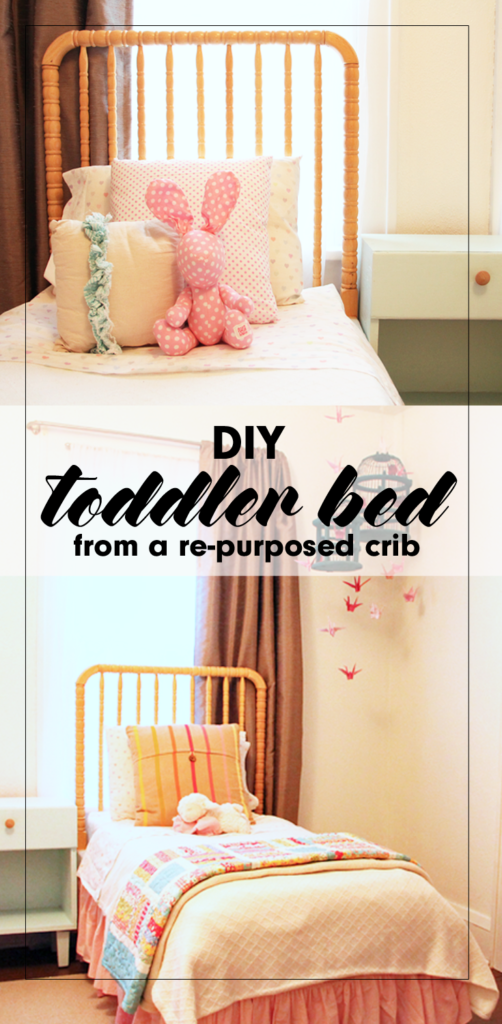
Not many moments spark the same amounts of joy and sadness as when the youngest child of the family finally outgrows the crib. With the celebratory occasion of assembling the ‘big boy/girl’ bed comes the equally emotional moment of taking the crib apart.

We were faced with this exact scenario in the months before we took the trip to China to finalize {K}’s adoption. {M} had always loved the security of her crib, the same crib that all three of our sons had also slept in, but at 3 1/2 years old, it was finally time for her to say goodbye as well.

converting an unused crib into an adorable toddler bed

It was at that moment we were faced with a difficult decision. What do we do with the crib? Maybe you are nearing this milestone and have had the same question. Today I am offering a tutorial explaining our personal crib re-purpose DIY project.


THE CRIB BEFORE

Our simple, Jenny Lind style crib was well loved but it’s natural wood finish and spindle details had a charm that we wanted to preserve.


crib transformed into toddler bed in 5 easy steps

It was given to us as a hand me down before {D} was born, over 11 years ago. Needless to say, it was equipped with the notorious ‘drop side’ – a feature now considered dangerous. We had long ago disabled the drop side, but legally the crib was no longer eligible to sell (or give away). Even still, the crib had a beautiful Jenny Lind style, and the thought of throwing it in the garbage just didn’t sit right with us.

We brainstormed a few different ideas, and eventually decided that the best option for our family was to turn this ONE crib into TWO toddler beds – one for 3 1/2 year old {M} and one for her 6 1/2 year old sister {K}, who has arthrogryposis and is small for her age. We knew they would both fit comfortably in the smaller sized bed for a while, and that the bed DIY project could save us some money as well!


CREATING THE DIY TODDLER BED

I’ll be honest that at the time of the project I wasn’t thinking in terms of getting enough pictures for a tutorial. I only have a few photos, but will try to fill in the gaps with words. If you have any questions about the process we used, feel free to comment below or send me an email!

STEP ONE

My husband Craig disassembled the crib, which actually made {M} very angry! She couldn’t see our ‘vision’ at the time and was just upset that he was breaking the comfy place where she loved to sleep. Essentially, all pieces of the crib were used to create the new beds with the exception of the hardware and the spring mat.

STEP TWO

We purchased standard 2×4 material, and Craig cut them to assemble a three sided ‘box’ that would hold the crib mattress. Because we planned to use the two tall sides of the crib as headboards, he only needed to make legs for the end of the box. He reinforced the center with a 2×4 cross base.

creating a diy toddler bed

diy toddler bed framework using crib parts as headboards


STEP THREE

Craig attached the assembled ‘box’ to the headboards, making sure everything was level. He then set one side rail into each of the ‘boxes’. The side rail piece spreads the weight from the mattress out over the 2x4s included in the ‘box’ construction.

using an old crib to make a diy toddler bed

STEP FOUR

The crib mattresses were then added. They were a perfect fit, as demonstrated by this goofy picture of {L}. Crib mattresses are a standard size, but they can vary slightly. If you try this project you will want to base your dimensions on the crib mattress you have. We happened to have two mattresses, one that was used in the crib and another that we had for a different toddler bed.

building a diy toddler bed


STEP FIVE

Dress it up! I created pink ruffle bed skirts using this easy tutorial. They really were simple to make, but a bit time consuming! I used muslin fabric to cover up the exposed 2x4s near the mattresses.

toddler bed diy ruffled bed skirt

I also found some adorable heart bedding from Pottery Barn Kids. Grandpa and Grandma purchased the bedding as a gift for the girls. A king sized texture blanket was the perfect size to cut in half, allowing me to make two matching comforters. Topped with accent pillows, and comfy colorful quilts, the beds look super cute on each DIY toddler bed!

girl bedroom bedding

repurposed crib turned into diy toddler bed


FINISHED IN THE ROOM

The finished beds look so sweet set up together in the room. I still love walking by and admiring them, over a year later!

old crib turned into two diy toddler beds

The girls really enjoy sharing a room and their little beds fit perfectly into their bright and cheery space. Although I am having fun designing their new shared space for Arrow Hill Cottage, I will be sad when we have to retire (or pass on) these special beds their daddy made them!

simple do it yourself toddler bed from an old crib


MORE SHARED BEDROOM DETAILS

Just for fun, here are a few more details of their shared bedroom.

girl bedroom reading nook

This rocker was Craig’s grandparents. We had it reupholstered before our first child was born, and have used it in the nursery ever since. It is a special piece. Next to it we have a bookshelf, making this the perfect spot for reading.

girl bedroom tour

The bookcase itself is a vintage piece from our local Carnegie Library, which is now closed. I love that the girls are able to see the fronts of the books when making their selections.

diy girl bedroom decor

Above the bookcase is a DIY piece that I put together using a mirror frame, which I spray painted white. I covered the mirror with a fabric. It is attached with temporary adhesive, because I imagine in the future the girls may opt to use the mirror itself. The heart was made by weaving strips of paper grocery bags.


girl bedroom decor ideas

Both of our girls were adopted from China – {M} at the age of two in 2015 and {K} at age six in 2017. We always want them to be aware of their beautiful birth culture. The paper crane bird cage/ mobile symbolizes peace and longevity. I folded each of the cranes by hand using a variety of pink patterned paper. The dresser was mine when I was a little girl. It was a gift to me from my grandpa, and I love that I can pass it down to daughters of my own.

shared girl bedroom ideas

Above the dresser are more symbolic and special pieces, including two panda bears from China – one from each trip.

diy toddler bed

We painted the floor in the girls room, and the entire upstairs of this rental house, a chocolate brown color. It has held up very well and is actually something I am considering for the new house.


PIN THIS DIY TODDLER BED IDEA

I hope you enjoyed this little tutorial and the impromptu room tour! I would love to see the creative ways you have re-purposed a piece into something new!

diy toddler bed from a re-purposed crib


FRONT ENTRYWAY DESIGN IDEAS

A front entrance for guests is a great feature to add to any home. It doesn’t need to be a large space, but having it laid out well is important. Today I am sharing the front entryway design ideas I have for Arrow Hill Cottage.

Although our home will have an attached garage, and our family is most likely to enter and leave in that direction, I wanted to make sure to include a straightforward front entrance – where we expect visitors to enter. I’m not sure about you, but our garage has a tendency to become cluttered and dirty far faster than any other space we own – and we don’t want our visitors to experience our day to day.


ENTERING FROM OUTSIDE

As you can see in this image, the front door will have a prominent position. Although the house is not symmetrical, your eye is drawn to the small gable above the door.

creating a charming front entryway

In case you noticed… yes, I am still #teamplanter, and it remains as part of the design, at least for now. If you have no idea what I’m talking about – go ahead and visit THIS POST to learn all about the debate.

The large stone pillars and double columns frame the view.  I’m sure there will be some sort of feature light fixture here also, but I haven’t made any decisions on that yet. And yes, I am dreaming of a light blue bead-board ceiling for the porch. Love.


cottage front entrance. Covered porch with sweet and simple front entry

I have chosen a solid wood door. Because there will be windows directly next to and above it (transom), I felt that including a smaller pane of glass within the door itself would complicate the arrangement. The windows should provide plenty of natural light (this wall will be south-west facing)


INSIDE THE ENTRYWAY

Stepping through the door, you are welcomed with a space approximately 6 feet deep by 12 feet wide. The room is partitioned from the dining room by a pair of built-in cabinets and columns.

front entryway with custom built ins and columns used to divide space

We will likely have our builder or cabinet maker create these cabinets and columns, but This Old House wrote a fantastic post about how you can make this a DIY project. I purposely chose to offset the built-in slightly from the alcove since the wall finish and the cabinet finish will be different. This will help eliminate a clumsy transition from cabinet to wall. The baseboard trim will help to tie everything together.

front entryway design ideas for our new home. Simple white bench in front entryway

As I mentioned in this post, we have found that with fewer closets we are less likely to hold onto items we don’t need. This entry is indeed the perfect opportunity to live that theory. Because most of our family’s shoes, coats and bags will be coming in through the back entry / mudroom, we won’t need much for storage near the front entry. Instead of using the recessed space as a closet, I am opting to leave the alcove open and instead will incorporate a bench with simple hooks and a shelf above.

simple front entryway design ideas

This alcove also lends itself to the inclusion of a feature wall. At the moment, I am thinking that beautiful rustic barn wood would serve as the perfect surprise. The feature wall will serve as a backdrop for a family photo gallery.

gallery photo wall in front entryway. front entryway design ideas for our new cottage

This post, from the blog Ivory Lane , has given me a ton of inspiration for the entryway gallery. I love the simple nature of the metallic frames, white picture mats, and black and white images.


ACCESSORIES + DETAILS

On top of the small shelf above the coat hooks, I envision some cute artwork that represents our family. These number squares are amazing.

cute front entryway decorations

image source


I also love sentimental signs and would love to work something like this into the entryway space.

front entryway sign idea. This simple phrase is beautiful and would be perfect in the front entryway of a home

image source


Opposite the bench area is where I envision our piano being placed. We own a low grade piano that is natural wood and wood grain veneer at the moment. I would love to paint it a soft gray color and decorate it with special accessories – such as the vintage green cottage window that I recently purchased at an antique store. I know there is some debate about painting pianos, but they make it look so easy on Pinterest, and I am really intrigued by the results.

piano positioned in front entryway

Nobody in our family is a concert pianist, but we do enjoy having a piano to tinker around on. In this location it is available, but set aside so that it isn’t in the way of other daily activities.

For the center of the room I would like to find a special light fixture. I am thinking something with a metallic finish, probably a hanging pendant.

front entryway design ideas. new home design

Perhaps something from this collection would work well.

wire framed pendant light fixtures for the front entryway. Front entryway design ideas for our new home

image source

The floor will require some sort of durable rug that will mostly protect the wood floors. I love the idea of a black and white patterned rug.

view of small and simple front entryway

This website seems to have a wonderful selection of rugs to choose from.


decorative features for our front entryway


ADDITIONAL ENTRYWAY VIEWS

And now for a few more views of the entryway. First, a view from above – one that nobody will ever experience in real life. It shows the overall space well.

front entryway floor plan layout


A view from the kitchen (standing near the stove) looking toward the entry. You can see the kitchen design in this post. The space between is the dining room, of which I am still working on designing. The only thing I know for sure is that I want to include some sort of antique hutch on the long wall.

view of front entryway from the kitchen


Another room that is still a blank slate is the living room. Besides knowing that I want to include a large sectional sofa for our large family, there are still a lot of decisions to be made here. This is a view of the entryway as seen from the living room. Again, that large open space will eventually house our dining table.

front entryway design ideas. open concept floorplan layout

I am really loving how the main level is laid out. The flow seems like it will work well for our family. In this image you can see the stairs leading to the bedrooms (up) and the family room (down). That blank spot at the landing is where the largest window of the house will be positioned. I’m excited to see the design of the stairs come together.

Maybe I will work on that next!

UPDATE: Our floorplans changed quite a bit since this was originally posted. You can see our revised design HERE.


PIN THESE ENTRYWAY DESIGN IDEAS

feeling inspired? Be sure to save this post for later!

front entryway design ideas. small space design solutions for your home. How to create a simple, small entryway design for your home

SATURDAY SKETCHBOOK: KITCHEN BASIC DESIGN

I spent some time this week diving into the interior of Arrow Hill Cottage. With just over 18 months remaining before we break ground, I want to get as many details ironed out as possible. I figure that the more decisions that are made on paper, the less surprises that might arise during construction.

This may end up being the most well planned house of all time…. because this mama doesn’t like surprises! Ha!

First up on the detailing docket is the kitchen. I wanted to start on it first, because I know that kitchens are the most complicated room in basically any house on the block. Ours is no different. So many decisions need to be made! You can see the basic floor plan layout of the kitchen in this post. The plan is basically still the same, but some of my initial ideas about which cabinets go where have changed.

This is the view of the kitchen- standing in the dining space. It can be seen, by a long view, from the front door. The blank space you see on the right is the living room, which obviously hasn’t been detailed yet. The connection between these three spaces (kitchen, dining, living room) is great. There is definition of space but the rooms flow freely into one another.

A closer view of the space. I am loving the bright and airy feeling it has so far. I feel like your eye is drawn to the wall of windows, which was my intention. Out those windows will be a beautiful view of wooded acreage.

In fact, standing at the sink – which is a reclaimed piece from Craig’s grandparents home – there will be a panoramic view of nature. I think that this view, and the natural light that will be pouring in, will make monotonous kitchen work seem more bearable. Maybe.


Turning toward the right side of the room, I have placed the range. This is a 48″ wide Wolf range. It is far more luxurious than any appliance we have ever owned; but I have heard only great things about this brand. And, I think it looks wonderful in the space.

The vent hood above would have to be custom made by the cabinet manufacturer. I imagine the ‘pillars’ on either side of the stove to have secret pull out compartments for spices and oils. Another detail that will need to be worked out. I’m envisioning something like this photo.


image source

To the right of the stove is a tall cabinet. At the moment, I am thinking that the doors of this cabinet will be telescoping, and when open will reveal the microwave and pantry storage.

In the center of the room is the lovely 7 foot long island. Having a large island in my kitchen has been a dream of mine for a very long time.

I want the island to be standard counter height so that it can be used as extra prep space. I am thinking that the counter top will be of the same material as what the perimeter cabinets have – some type of white granite perhaps- but I would like the base cabinetry painted a different color to add interest and to give the island more of a ‘furniture’ look.

The back side of the island will have storage cabinets, while the other side will feature spots for seating. I have a bit of a debate going on in my own head right now. Should the bar stools have backs or not?

I imagine stools with backs might be more comfortable, but they also look a bit more clunky and may not be as visually pleasing. If you have an island with seating, can you please comment below letting me know which style of seating you have (backs or no backs), and what your thoughts are? Thanks!

Let’s just take a minute to admire the ceiling, shall we? I am really pushing for some beam elements. I’m not sure yet if they will fit in the budget, but I want to get them planned out anyway. If we can’t do them right away it may be something we add in the future.

I have not formally chosen light fixtures for the kitchen, but am kind of liking the idea of purchasing multiple ‘similar looking’ pendants and clustering them above the island. An arrangement something like this photo


image source

Gorgeous, right? I think it would be an unconventional arrangement, but something that might fit perfectly in the house. Cottages are known for their eclectic style, after all.


The final side of the room features a shallow cabinet and counter, which I imagine will be perfect as a breakfast bar or as a buffet during gatherings.

Our property has many mature oak trees, some of which will need to be removed to make room for the house. Craig and I are hoping that we can find someone local that would be able to mill the removed trees into boards. These boards could then be made into special items for the house itself, including the dining room table and possibly the shelving here in the kitchen.

I love the idea of using the open shelves to house pantry items that can be stored in cute glass containers, such as pasta, sugar, and oatmeal. I could also see myself storing our frequently used plates, bowls and tumblers on these shelves. We’ll see how dusty the house gets. If it gets to be too much of a maintenance issue, maybe the shelves will be for display items only.

I love how this family utilizes open shelving.


image source

The fridge will have it’s own little corner of the kitchen. One thing our kids are really looking forward to is the availability of crushed ice and cold water on demand. It’s the simple pleasures.

One last look of the kitchen – the view from standing in the living room. You can see the stairs off to the side, and I can just about imagine my hungry little children wandering down from their bedrooms for breakfast in this beautiful space. I am loving the design progress I have made so far!

Let me know what you think! Any tips or suggestions?


COTTAGE ROOM DESCRIPTIONS {UPPER LEVEL}

As promised, I’m back today to describe the upper level rooms.  If you missed part 1 of the series, the main level, you can find it HERE.

Generally speaking, the second level is made up of only 3 main spaces + a hall to connect them:  the boys room, the girls room, and the kid bathroom.  We debated having a second level at all, but in the end decided that we would rather have a smaller house footprint, which will allow us to use and enjoy more of the land, than to have all rooms on one level with a larger footprint.  That meant we were going to be building a muli-level house.

Below is the layout of the upper level.  Use it as a guide while you read through the descriptions, and take a look at our Pinterest boards (which are linked at the end of each room description).  They show some inspiration images I have found for each space.  * As mentioned before, these floor plans are currently not showing any real detail – will be working on adding detail for future posts.

{STAIRS/HALL} Because the upper level is going to be fairly small, we wanted to provide a bit of ‘unexpected’ space.  Therefore, the hallway will be fairly large and will feature a small nook for a desk or a chair. The hall will serve as access to each of the rooms, circulation space really, but we want to make sure it also feels like a place where a person or two can stay a while.  The stair landing will provide a ton of natural light with a large window facing west. Depending on space, we may try to incorporate some bookcases and/or a window bench there as well. (PINTEREST)

{BATHROOM} We went through SO many different ideas for the upstairs bathroom situation.  Two smaller bathrooms, one for the boys and one for the girls, accessed only through the bedrooms to make them more private. A Jack and Jill scenario where they can share through doors entering each of the bedrooms.  No bathroom upstairs. Ultimately, we decided that because we have children of both gender, we wanted the bathroom to be accessed by a single door for privacy purposes and accessed through the hall space so that it was available to everyone (including people visiting when the main level bathroom is occupied). This room will have some varied ceiling heights due to the slope of the roof-line, but generally speaking no portion of the room should have head height less than 5′.  The shower will tuck in under the portion of the roof that provides cover for the main level living room (there is no second level above that room).  Looks wise we want the bathroom to be classy, yet kid friendly for now.  Those kids are eventually going to be grown ups who visit with their own families, and we want to make sure that the bathroom is accommodating for all types of scenarios. (PINTEREST)

{GIRLS BEDROOM} This is a room that I have had in my mind for years and years, long before {M} ever joined our family.  I had a vision of two matching beds flanking a single window, with a night stand in between.  I’m not sure that exact furniture arrangement will be what we go with – but the room is set up in such a way that it is a possibility. The decor will be light, bright and airy – with a vaulted ceiling – and there will be two closets under the roof eaves (with sloping ceilings as well) – one on each side of the room.  We may turn one of them into a little hideaway space for the girls to play in. (PINTEREST)

{BOYS BEDROOM} We also debated back and forth about this room.  A LOT.  We were initially thinking that we would have 3 bedrooms on this level, with the smallest going to the oldest child living at home; But carving space for 3 bedrooms meant that each bedroom was really quite small, and maybe not as functional as we would like.  Taking some cues from {D}’s small bedroom that he occupies right now at the farmhouse, we realized that a small space for sleeping is actually quite cozy and serves as a nice private getaway.  He loves it.  Therefore, we decided that we would have one large bedroom for all three of the boys, with a shared common space to include the closet, dressers, books, toys, chairs for reading, music, etc – and three smaller sleeping nooks that surround it.  They are not labeled on the image above, because we have not yet decided who will get which nook.  I’m really looking forward to designing these little sleeping spaces, and I know each boy is excited to make it his own. Oh, and did i mention that this room will have vaulted ceilings as well and there is potential for a small loft/ fort space for the shared part of the bedroom? Yeah. (PINTEREST)

There you have it – the basic Upper Level floor plan.  I’ll be back next week to describe the final layout of the home, the lower level!

In the meantime, check out ALL of Arrow Hill Cottage’s Pins!


COTTAGE ROOM DESCRIPTIONS {MAIN LEVEL}

It seems that this blog has been taking on a bit of a mixture – some family, some DIY, and probably not enough of the future cottage!  I thought it would be helpful to explain a little more about each level of the cottage and how the rooms are positioned + why we decided to have certain features (such as a pool!).  My fantastic IT team (aka: Craig, my husband) is working on getting me some software that will allow real-time video recording while I design with my computer programs.  That’s going to be really fun to work with in the future, but it isn’t quite ready  yet – so for now I will give you the text + graphics version.

I’m going to start out the series today with the Main Level of the cottage (*Keep in mind that for now these are shown as just basic spaces without detail/colors added… in fact, no windows are being shown yet either.  The details will come, I promise!) Use the image below as a guide as you read through the descriptions, and take a look at our Pinterest boards (which are linked at the end of each room description).  They show some inspiration images I have found for each space.

{FRONT PORCH}  (This is likely to be one of my favorite spaces).  My vision for the porch is complete serenity – a place to sit and read, listen to nature.  I also want it to have a fun vibe – with pops of color.  It will be the main point of entry for guests, and probably at times for our family as well.  (PINTEREST)

{ENTRY}  Entering through the front door, to the left is a space for a small bench and some coat hooks overhead.  I’m thinking of incorporating some special artwork, maybe some family photos.  I would love for this space to be a glimpse of the life of our family.  The piano will probably also be in this space, along the other wall. (PINTEREST)

{DINING ROOM} I am dreaming of some partial height walls between the Entry and Dining spaces, perhaps built in cabinets for books or special collections.  Our table will need to be large, obviously, maybe a rectangular farmhouse style?  I definitely want to find a cute antique hutch to place along the wall.  Filling it with amazing glassware would make me SO happy!  (PINTEREST)

{LIVING ROOM} As mentioned in this post, the living room will be the place of gathering in our home.  It will be given the most detail attention for sure.  There will be vaulted ceilings, a fireplace, and TONS of windows.  The windows facing the backyard/ wooded area will be accented by a lovely window bench, something I have been dreaming of for years.  The window bench will be made of two slip covered twin sized mattresses (maybe tufted?!) and will serve as extra sleeping space for guests (and also probably naps for us! yay naps!) (PINTEREST)

{KITCHEN} Open to the dining room and right around the corner from the mudroom, the Kitchen is in a prime location.  Right now I envision it as an all white/ mostly white space, with maybe a colored tile back splash.  It will have a large center island – eeeee!!! – and a entire wall of pantry cabinets.  I have been finding all sorts of fun storage ideas on (PINTEREST)

{GARAGE} This will be the very first attached garage that our family has ever experienced.  I personally have seen so many examples where the garage overtakes the look of the house, and when planning began I was thinking that the cottage would surely have a detached garage.  However, soon after bringing {K} home, we realized that it made the most sense for her sake that the garage have direct access to the home.  And so, with a little more designing, I was able to come up with a solution that kept the garage somewhat ‘hidden’ from view – though it will cause more expense for a longer driveway.  Worth it I think! (PINTEREST)

{MUDROOM} Since our marriage 15 years ago, Craig and I have lived in three different houses and not one of them has had a proper mudroom.  This space is more important than ever now that we have a large family.  As described in this post, I dream of a well organized space with lots of storage and functionality. (PINTEREST)

{MAIN BATHROOM} I am probably way more excited about the location of this bathroom than I should be.  The thought that we will be able to just walk in from outdoors and use the bathroom or wash our hands without having to track through the entire house just makes me giddy!  It will be a 3 piece (toilet, sink(s), shower) bathroom and will also serve as the bathroom for the main floor bedroom. (PINTEREST)

{MAIN BEDROOM} We hesitate to call this the ‘master’ bedroom because that label evokes the idea of a very large space with an attached walk in closet and bathroom.  It will be our bedroom, but won’t have all the bells and whistles that are considered the standard these days.  We decided to make this room a little smaller so that more square footage could be devoted to the common living spaces (kitchen, dining, living room).  Despite it’s small size though, it will still have plenty of style.  See our inspiration for this space by clicking on the link! (PINTEREST)

That’s it!  7 rooms + the garage and front porch.  Simple!  I’ll be back next week to describe the second level!

In the meantime, check out ALL of Arrow Hill Cottage’s Pins!