AROUND HERE: AUGUST 2018

Around here we have been…


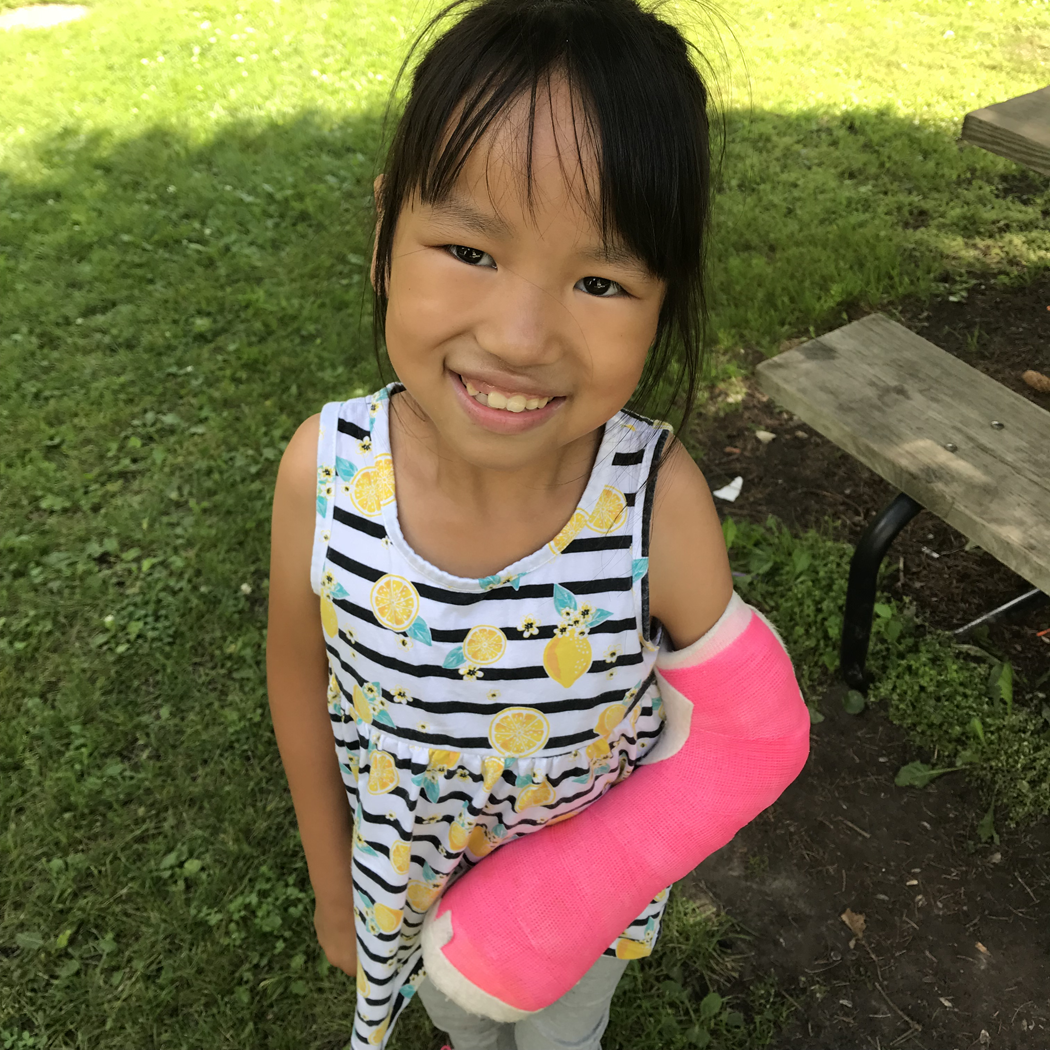
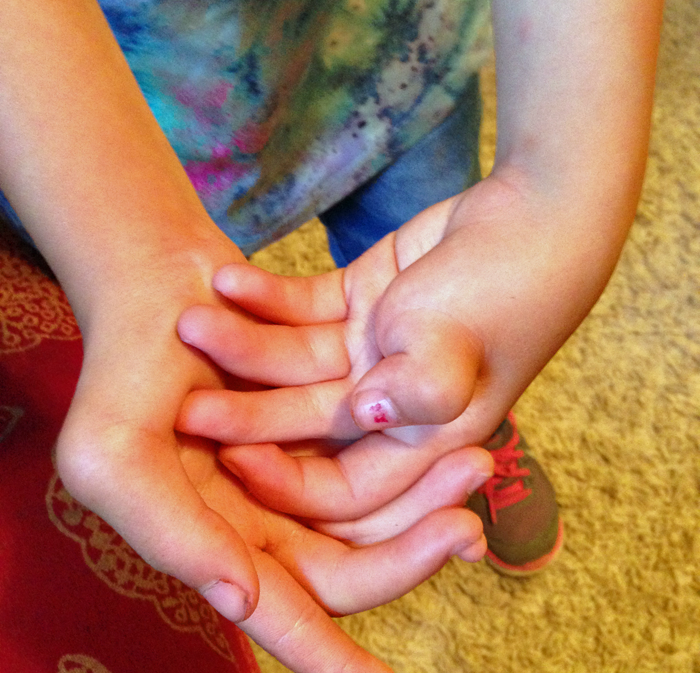
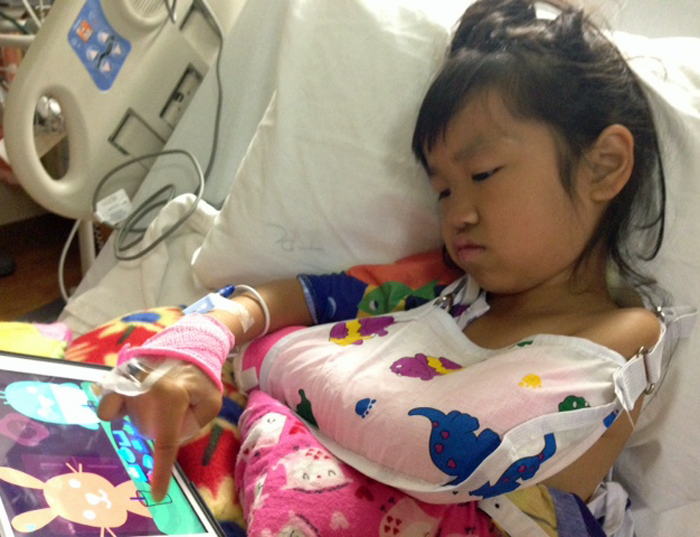
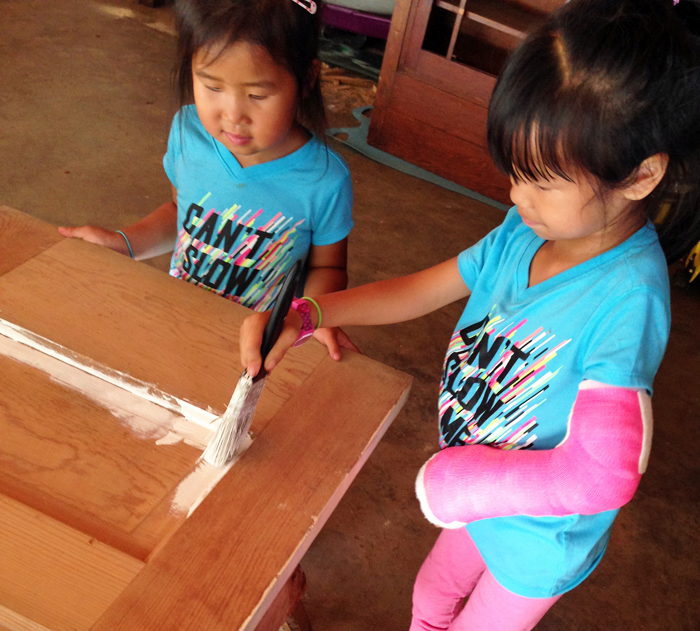
HEALING. {K} had her follow up appointment to see how her hand is healing. The doctor was very happy with how things looked, but decided that it could use one more month in a cast. She was a bit bummed at the news, but we trust the doctor’s recommendation. If she were to fall on her wrist or thumb before it was completely healed, it could mean more surgery.

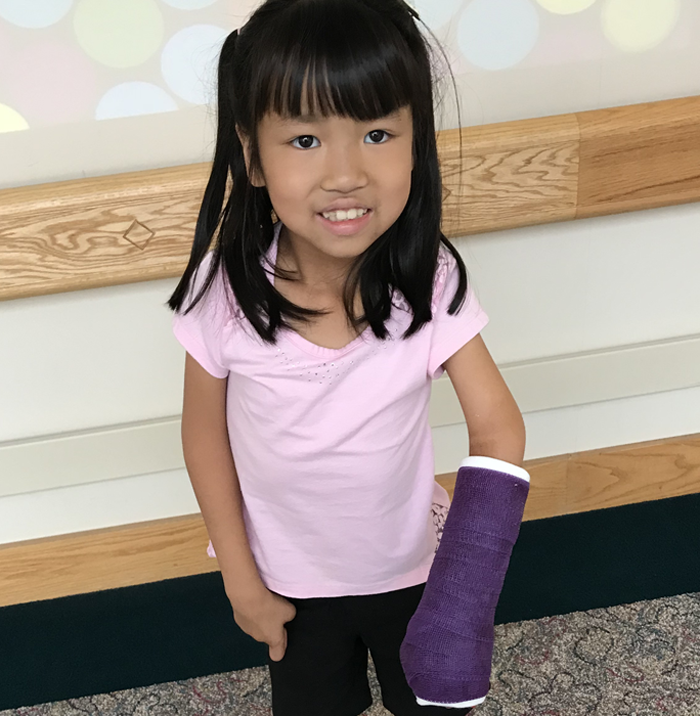
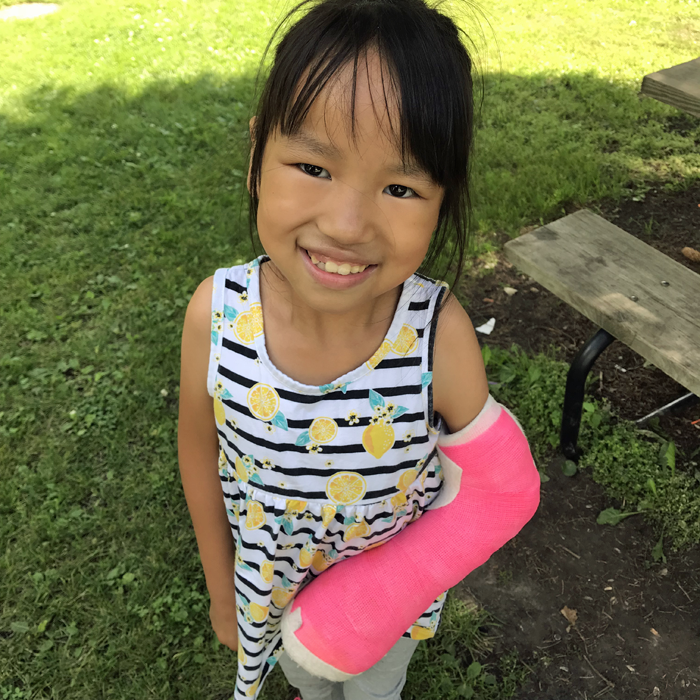
She chose a purple cast this time – for the Vikings.


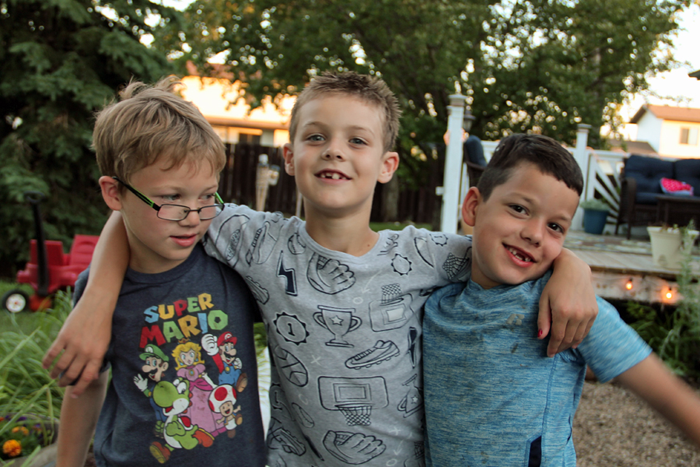
MAKING memories with family. All three boys, Craig, and both grandpas were able to attend a pre-season Vikings game in Minneapolis. For both {I} and {L}, it was their first time at an NFL game. Sadly, the Vikings lost to the Jaguars and didn’t seem to play their best.

That didn’t seem to matter to the boys. They had fun all the same and came home with huge smiles on their faces.


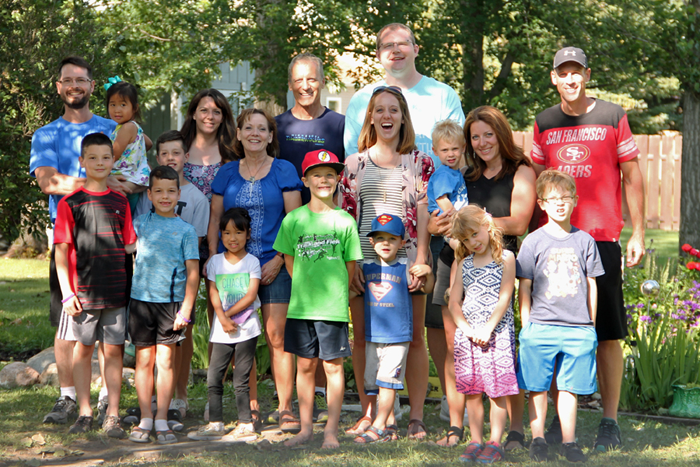
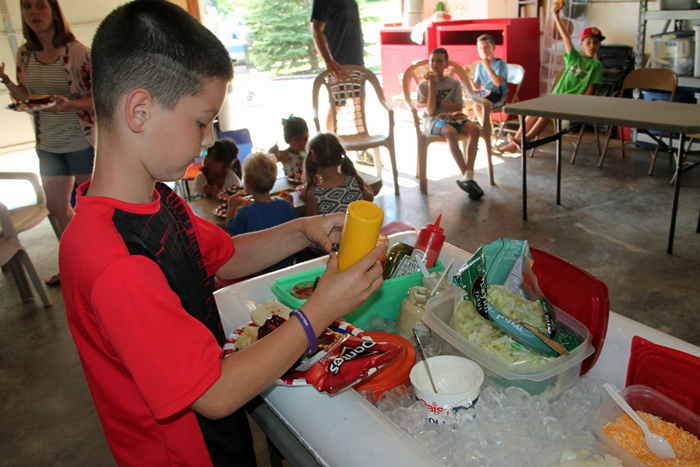
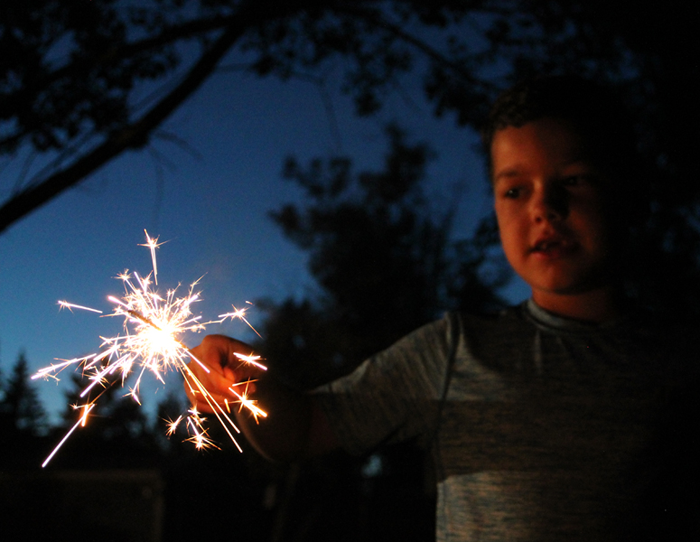
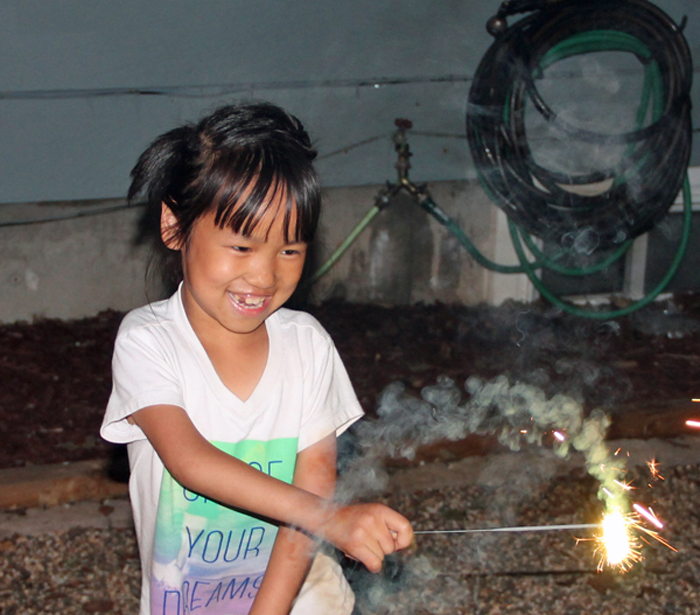
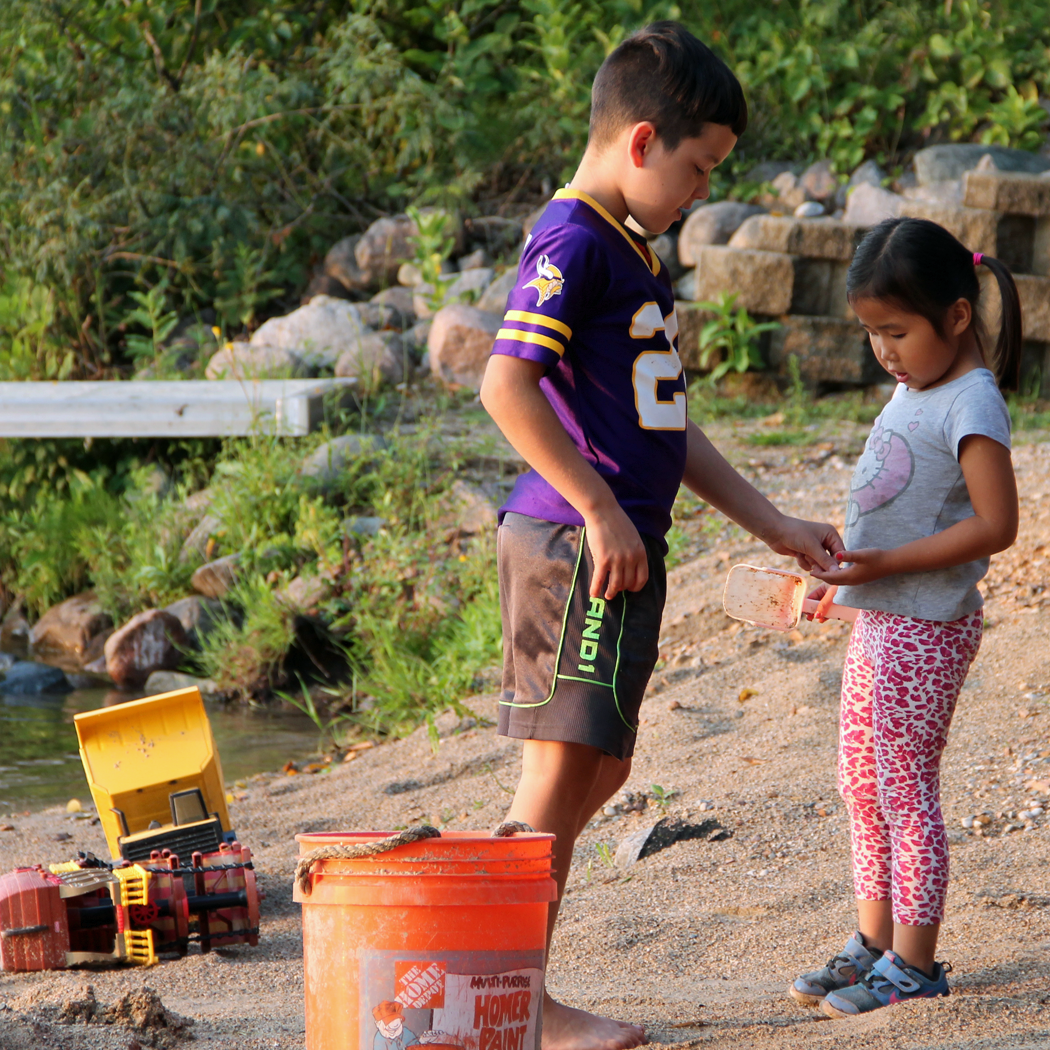
ENJOYING the last days of summer. It really is hard to believe that summer is nearly over. It is going into the record books as one of the most enjoyable breaks we have ever had as a family. I was trying to figure out the reason it has been so great, and have come to the conclusion that it is likely because we have had no major life events this year. No moving to a new house, no adoptions, no adding of new family members. Just us and the gorgeous weather.

We have been spending the last couple of weeks at the Fireman Cabins here in our town. A stay there is a perk of the Fire Department. Craig had signed up for our stay before his retirement, so this – our 11th year – will be our last official stay.

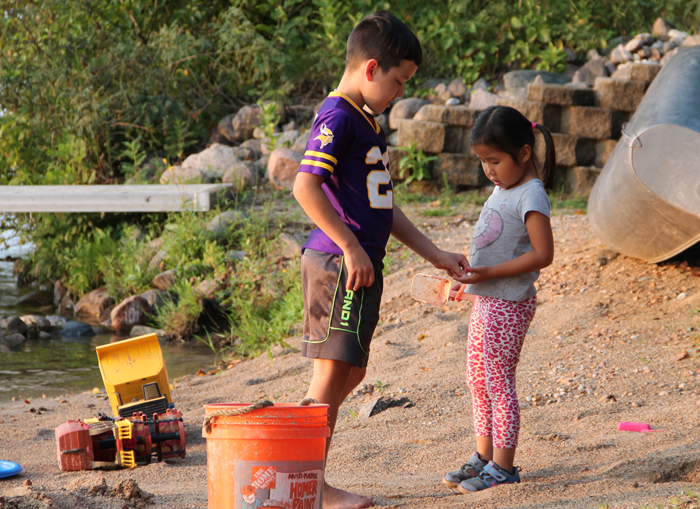
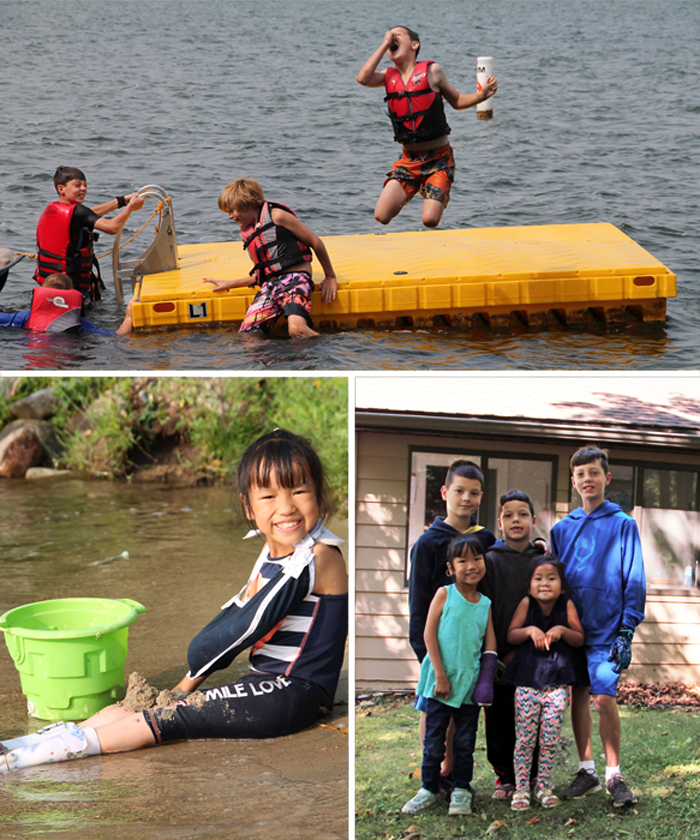
We have always loved our time at the cabins. There is something so peaceful and relaxing about the setting.


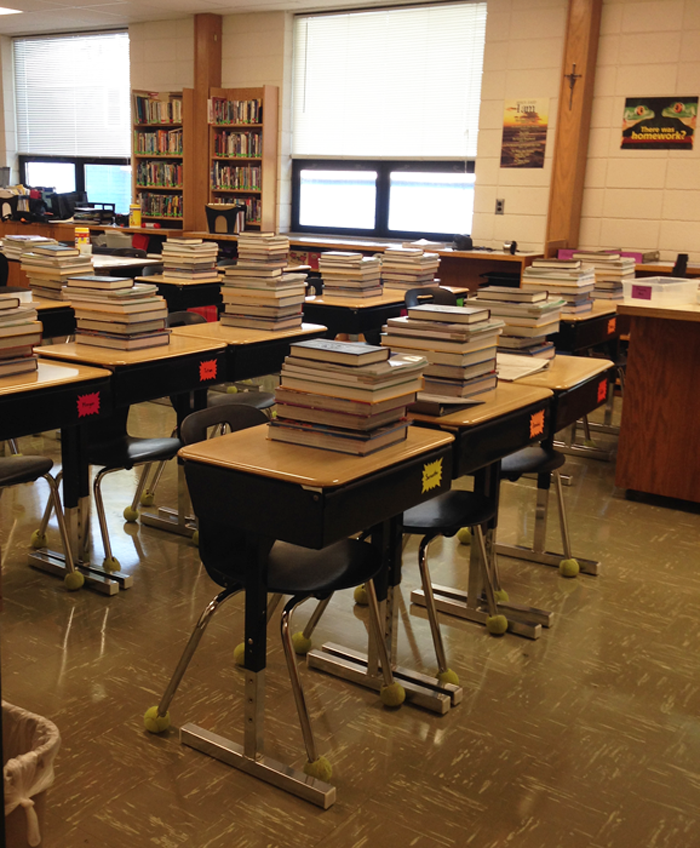
PREPARING for the start of school. This school year, six of our seven family members will be spending time at school. Angela accepted a position as a part time pre-Kindergarten classroom aide. It just so happens that miss {M} will be in her class, something they are both pretty excited about. Angela has been doing training with her colleagues in preparation.

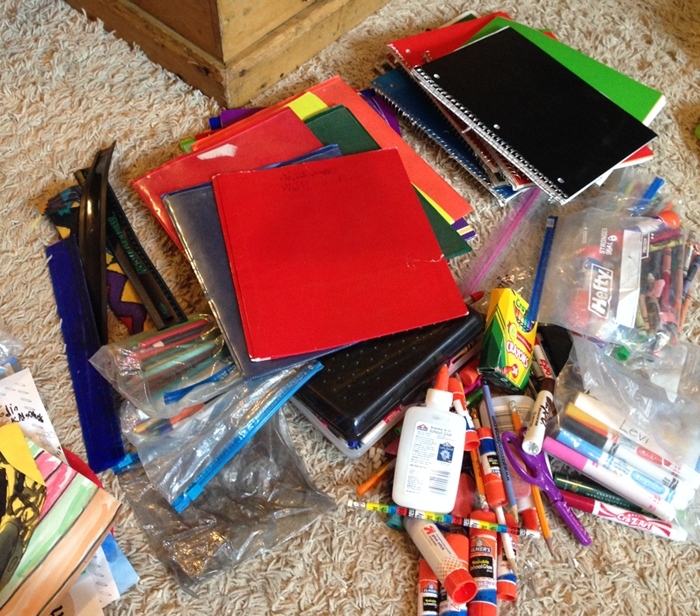
She has also been sorting through school supplies and divvying them up among the kids. It’s amazing how many pencils we have! Back to school open house was yesterday, when the kids were able to meet their teachers, find their lockers, and see where they will sit in their classrooms. They are probably most excited to spend more time with their friends, and not so much looking forward to the extra work load that is sure to come.


{K} worked very hard this summer to get through the list of sight words her teacher had given her. The goal was that if she was able to learn them all, she would be able to get her very own library card. She did it, and was all smiles!


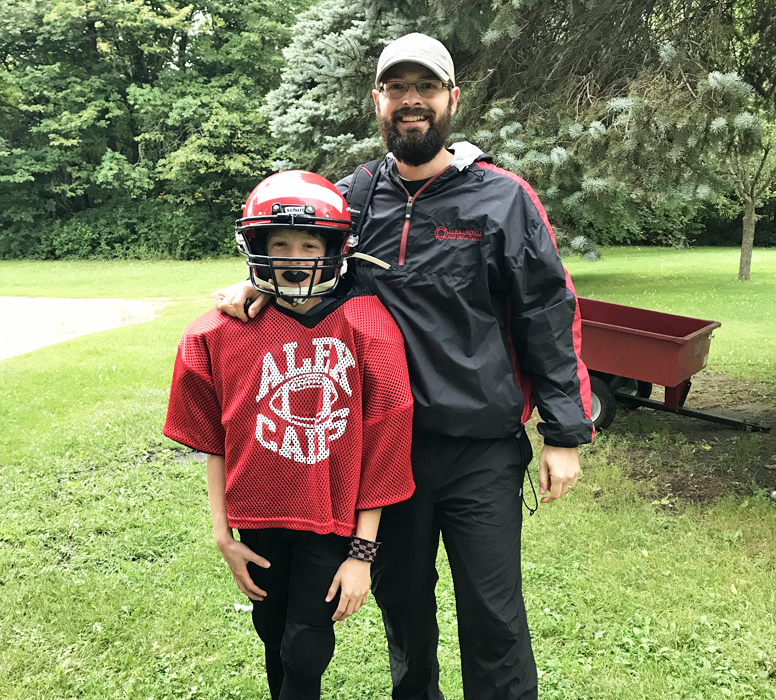
The kids are also starting their school related activities. {D} is signed up for football again this year. He is excited to have Craig as one of his coaches! They look forward to a fun season of learning together.


It has been one full year since the ‘Around Here’ feature began on the blog – take a look back at August 2017’s happenings. There are a lot of similarities this year!


This is just a glimpse at what our family has been up to. If you’d like a closer look, be sure to check out our weekly ‘mini vlogs’ on our YouTube channel ARROW HILL FAMILY. Be well everyone!


SATURDAY SKETCHBOOK: EVOLUTION OF OUR DESIGN

It’s interesting, now that I have been blogging for over a year, to look back and see some of the things that I have written – particularly as it relates to our house design process.

I am actually really thankful that I started documenting the process when I did. At the time, I had no idea that our floor plans would change as dramatically as they have.  I believe it might be encouraging to others reading this blog, who might be considering the design of their future dream home – to see that even someone who is seasoned in design can begin in one place – and end in another.

When we first started out, before our budget was completely realized, our house plans included special features such as a large vaulted living room, a small built in elevator/lift, and an endless pool in the basement.


You can see our original floor plans and my own personal thoughts about our dream home (as we believed it to be at that time) by linking to the following blog posts:

Main Level (original plan)

Upper Level (original plan)

Lower Level (original plan)

Through time, as we began to understand the true costs of what it would take to make these dreams a reality, the restrictions became more clear – and the designs began the process of fine tuning. Essentially, we had to determine which features of the design were most important to us, and which we could live without.

I wrote about how we made the decision to eliminate the large living room, and opted for a combined kitchen & dining space – to save on square footage – in this post.

And later, I documented in this post the fact that we would need to simplify even more – reducing the amount of windows, specifically in the living room, and also rotating the garage so that there would be a shorter driveway.


These changes didn’t come easily. I’ll admit it was hard for us to see some of the features we were most excited about slip away. But here’s the thing…


It’s still our dream house


With each change, the concept of the design was maintained, yet simplified. You could say that, essentially, we ‘cut the fat’.

In fact, as each modification has occurred, Craig and I have both looked back and realized that we prefer the more simple idea over it’s more complicated counterpart.


The fine tuning hasn’t been all elimination either. We have also been able to justify fun surprises, such as the rec room/ home gym in the lower level, and the nicely laid out upstairs bathroom with a large walk in shower. Both features that we know our family will greatly enjoy!

The newer floor plans, and hopefully plans that are VERY close to what will actually be built, are as follows:


Main Level (refined design)


Upper Level (refined design)


Lower Level (refined design)


The exterior has changed quite a bit too – in response to the interior changes.

This is how the exterior design looked last summer, before we began fine tuning.


And this is how it looks now. The most notable changes include the elimination of the living room ‘wing’, the reduction to one gable over the entry door, the change in orientation of the garage, the switch from a metal roof material to asphalt, and the elimination of the transom windows. The refined exterior is more simple and balanced, I think. I especially like that the entry door is centered on the gable and framed by the columns. Also, please note that the large planter box is still there. 😉


I will be taking some time this weekend or early next week to update the slideshow images on the website itself, so that it can reflect these changes.

Hopefully this post, and the overall blog – which will eventually capture our cottage from design, through building, and into interior decorating – will be a useful reference for people who are considering a new build of their own. It isn’t necessary to have it all perfect on paper starting out. The design will evolve and allow you to love it more along the way!


9 CREATIVE WAYS TO DECORATE WITH BOOKS

There is something so simple, so beautiful about a book. And although the digital age has seen a shift from the printed word to digital media, it doesn’t mean that books have gone out of style completely.

In fact, there are some really unique ways that people have found to keep the love of books alive – through home decor! Check out these nine creative ways to decorate with books.


SLEEP NEAR THE STORIES

image via Juvenile Hall Design

This headboard is so creative, and beautiful!

Forget sleeping under the stars… sleep under the stories instead!


FRAME YOUR FAVORITES

image via Danielle Sigwalt Interiors

Remove the dust jackets from your family favorites. Have them framed, then displayed as a unique gallery wall!


DRESS UP A MANTLE

image via littlevintagenest

Books make a great mantle accessory.

Grouped with other items, the pieces can together tell a story


STACK THEM AS SHELVES

image via Urban Outfitters

Talk about a floating shelf! This one has a cool factor like no other!


COLOR CODE CASES

image via sfgirl

This living room gets a happy dose of color from the rainbow collection of books – which are cleverly grouped by color.


NEUTRALIZE THE LOOK

image via Carrie Coleman Photography

Read how this image sparked a debate on apartment therapy.

Some people love this trend, and others hate it!


PAINT THE PAGES

image via Etsy

This beautiful and simple art piece can be purchased on Etsy – along with many other varieties. Get the look on your own by painting on an old book page.


HOLLOW THEM OUT

image via curbly

How creative is this re-purposing idea? Learn how to create a book planter of your own by following the link!


GIVE THEM NEW PURPOSE

image via knick of time

Something tells me that these homeowners feel the urge to read every time they hang up their coats


Which of these creative ideas is your favorite? Would you try any of them in your own home? Pin the image below for future reference.

THOUGHTS ON ENOUGH

I mentioned in a previous post that I have been reading the book ‘Enough‘ by Will Davis Jr. The author explores what it means to have more, or less than, enough – and how our perspective on this is shaped by our lives and what we deem as valuable. It is quite eye opening.

If someone asked me if my own family has more or less than enough, I can say with complete certainty that we have definitely been blessed with MORE than we need.

What though, is ENOUGH? Just right? No more than necessary?


That seems to be the more difficult question to answer. There seems to be two ends to the ‘enough’ spectrum:

One is the idea of stark/ extreme minimalism. The thought that you should clear out all of your belongings, save a few items of clothing and basic household necessities. An extreme minimalist’s home is clean and sleek – and can sometimes be seen by those who aren’t following the principles, as cold, stoic and depressing.


On the opposite end of the spectrum is something resembling the show Hoarders. The thought that everything is important and special – people who cling onto earthly goods so tightly, they find it difficult to throw even a small piece of trash away.


That isn’t to say that people have to fall in one camp or the other. In fact, There are minimalists who have very comfortable homes, and avid collectors who don’t become hoarders. I would venture to say that the majority of the American population falls somewhere between these poles. But where? And why?

I’ve been thinking about this quite a bit, and have come to my own personal conclusion that it has to do with the amount of rules and regulations we put on ourselves.

Both extremes have a tight set of rules. The minimalist has strict about what can be kept (very little), and the hoarder- rules about what can be thrown (basically, nothing).


The rest of us though?

It seems to me that most of us just go on in life, with little to no rules about ‘stuff’. Simply put, we just don’t think much about our accumulation, or disposal of it. And when we aren’t paying attention, items slowly begin to creep in.

We pick up the freebies, the items that are on clearance because they are ‘such a good deal’, and take hand me downs without hesitation. Suddenly our Tupperware drawers are overflowing and we have duplicates of things, because we had forgotten we already had one, and then brought home another.


Psychologists have long studied the relationship between humans and our possessions. It is becoming more apparent, especially in modern day America, that consumerism is a sort of mask that covers up other emotions – a way to fill a void that we may have.


In short, many of us have tied our sense of belonging to our BELONGINGS… without even realizing it.


So, perhaps it is up to each of us and our own families to determine the rules and parameters we want to follow regarding what to keep and what to pass up – to decide what is ‘enough’. Rules that can help us to be mindful of every item that enters and exits our home.


Rules though, that are not made just for the sake of making them – but are instead pointed directly to the WHY


I should get rid of this item –

WHY?

Because my family means MORE to me than these THINGS that are surrounding me.


WHY?

Because when I have fewer things, I appreciate those I do have even more.


I should keep this item –

WHY?

Because this item enriches the lives of my family.


WHY?
Because this item holds valuable, irreplaceable memories.


We’ve begun the process of determining our own family rules regarding ‘things’ recently.

Besides the project bucket list I have been tackling this summer, I have had a bit of a side gig going. De-cluttering. It’s an ongoing battle, especially in a house with five kids; But I really wanted to dig deeper into the ‘stuff’ and really think about the items we choose to keep around.


I have mentioned before that when we move into Arrow Hill Cottage, hopefully one year from now, we plan to only bring with us the items that are truly useful or bring us joy. In an effort to get a head start on making those decisions, we cleaned out one of the large hall closets in our rental house and deemed it the ‘sell room’. Items that do not have a place in our new home will be stored here, and sold at a large garage sale the end of next summer – before we make the big move.

I figured that we would have enough things to eventually fill this room, but had no idea that in just a couple of months – after only sorting through toys, clothes and a few household items, that it would be as packed as it already is! I will show you a picture of the room, but you need to promise not to gasp.


These are things that we don’t need – don’t wear, don’t read, don’t play with, don’t use. So. much. more than enough.


With every item that is added to this space, I am finding myself conflicted with emotions. On one hand, it feels freeing to cut out the extras – and on the other, I feel guilt that we have been living with this much excess for as long as we have.


This process of deciding what truly is ‘enough’ will be a journey for our family – but one we are excited to take.


What is your ‘enough’?


TRENDING IN HOME DESIGN & DECOR: ROSE GOLD ACCENTS

Brass, Silver, Bronze and Copper finishes have been commonplace in homes for many years. But there’s a new metallic in town that is taking center stage – Rose Gold.

rose gold mini planter. Rose gold decor for the home

No, it isn’t brand new. Rose Gold finishing has been around for quite some time, mainly in jewelry. However, in the recent years, it is having a moment trending in home decor and seems to be rising in popularity.


WHAT IT IS

Essentially, Rose gold is a mix of Copper and Gold. Pure gold has a natural yellow tone to it, and pure copper a reddish hue. When the two alloys are mixed together, coloring will appear more or less red – depending on the concentration of copper use. Rose gold has just a ‘touch’ of copper, and appears more on the pink side of the spectrum.

Where Blush / Millennial Pink seems to have been the ‘it’ color for the past three or so years, Rose Gold is getting in on the action – as it’s metallic cousin.


WHERE/HOW TO USE IT

The metallic is shiny enough to catch your eye and command importance, but pale enough to be almost considered a neutral – meaning that people are not afraid to mix it into a multitude of home decor applications. Rose gold accents are showing up all over the house – from furniture, to wall art and small appliances!


Office

Rose gold desk accessories. Home office with rose gold accents

Check out how the blog fox & gypsy were able to DIY this amazing rose gold + marble desk for a fraction of the store price!


Kitchen

Kitchen with rose gold accents. Rose gold home decor ideas and inspiration

The kitchen styled by @all.things.homely is all glammed up! Check out the rest of her home via Instagram. I love how she ties little bits of rose gold into just about every room in her house (including the bathroom)!


Accents

Rose gold leaf map. Decorative accents using rose gold

Art for the home has also stepped into the rose gold trend. This gorgeous world map print , available on Etsy, really makes a statement!


Hardware

Rose gold cabinet pulls

image via Styled on State

From cabinet pulls to the kitchen faucet – The detail that is added with the rose gold coloring is like jewelry to what could otherwise be considered a plain or utilitarian piece.


WHERE TO BUY

Rose gold accents and home decor items are popping up more frequently in both brick and mortar stores such as Target and Pier 1, as well as online. I found this collection of beauties on Amazon! *By clicking on the numbers below you will access affiliate linksAs an Amazon associate, I earn from qualifying purchases. See my full disclosure here *


lamp |pillow | hanging lights

tea kettle | art print | planter

clock | table | hour glass

votive | tissue box | mesh bowl


MY THOUGHTS ON THIS HOME DESIGN TREND

I have to say that although I am intrigued by this additional metallic finish choice, I do feel that the rose gold trend is one that may not stand the test of time. To me, it just does not seem as classic as other finishes such as oil rubbed bronze and silver.

I could see myself adding a few touches of rose gold here and there to my home decor – a pillow, a picture frame, maybe a lamp. I personally have no intention of changing over more permanent aspects such as the kitchen faucet or the door hardware; But, if you love the look – I say go for it!

SATURDAY SKETCHBOOK: KITCHEN CEILING FINISH

We talked with our contractor this week, and he is 95% sure that our project will not break ground until Spring of 2019. It’s a little sad to have to wait through another winter, but we are looking on the bright side and realizing that this extra time will allow us to make sure everything is just as we want it.

There are various bits and pieces that Craig and I just can’t seem to agree on, or that he claims to not have an opinion on. And since I had such a great response when I asked for upstairs bathroom layout ideas, I figured I could come to you all again for a little input.

There have been a few exterior revisions, but mostly they are interior


I have been slowly fine tuning the design of our kitchen in collaboration with Cliq Studios, as well as determining the dimensions and design of our future harvest table – which I will share about in a future post.

We changed the window sizes and style to fit more naturally with the farmhouse sink we will be restoring. The larger center window will be a fixed picture unit, and the smaller side windows will be operable casements.

We also revised the cabinets to the right of the fridge. Initially I had them going all the way down to the counter. We eventually realized that we would like to have the extra counter space for small appliances, such as the microwave and toaster.


The cabinets to the left of the fridge are going to be shallow depth (12″ instead of the standard 24″). We see this area more as a built in buffet/ hutch space – to promote a sort of dining room within the larger kitchen space – since we do not have a separate room. The shallow depth allows more space for the dining table and chairs.


These are all changes that we think will add to the functionality and feel of the space. There is one more cosmetic option that we are having a difficult time deciding on. The ceiling.

When you enter into the house, there is a straight view from the entry into the living room, and beyond to the kitchen/dining space.


The small entry/ piano area is somewhat divided from the living room with built in cabinets and columns.


I want to also have some sort of definition between the living room and kitchen, while at the same time keeping the floor space open. I started by adding a dropped soffit between the two rooms.

It helps to separate the spaces, but I still felt that there needed to be something else to define of space or the other. Since the living room already has a feature fireplace and built in book-cases, I turned my attention to the kitchen. Here is where we are having trouble deciding – the ceiling.


Part of my family prefers the smooth drywall ceiling in both the living room and kitchen, as shown here:


Others of the family, myself included, feel that some simple 2×8 or 2×10 beams (non structural) could be that last finishing detail the kitchen needs for definition. Potentially, tongue and groove boards could be used instead of drywall (layered under the beams) as a way to add more texture. I didn’t bother drawing each and every line, but you can get an idea of what that might look like from this inspiration picture (image 3).


I prefer having the entire ceiling painted one color instead of keeping it natural/stained – mostly because we have wood shelves nearby, wood floors, and also a wood table. However, I  saw this picture on Pinterest, and thought that a soft color on the entire ceiling might look great while adding a bit of color to the all white kitchen. Perhaps a light aqua or a pale grey. I’m not sure I’m brave enough to go for it though!


So, tell me. Which do you think looks best? Please comment on this post or vote via Facebook or Instagram. I’m really curious what the majority of you favors! Thanks friends!

One last look at all of the options, side by side, as seen from the front door.


SIMPLE INTERIOR UPDATES FOR THE HOME

This post contains five simple home interior updates that don’t require a ton of do-it-yourself energy. In fact, you don’t even need to lift a hammer for any of them!


simple interior updates for the home. 5 ways to easily change up your interior without breaking the bank, or a sweat!


One of the joys of home ownership is the ability to ‘make it yours.’ From room size and layout, to window and cabinet choices – everything can be customized. And though you can hire a contractor or DIY your heart out to make things just right – sometimes you want to freshen things up without breaking the bank, or a sweat.


ADD SOME PAINT

Adding paint to the interior walls of your home is one of the most simple interior updates that you can do. It can make a dramatic difference, with minimal expense

Painting is one of the most inexpensive and simple interior updates a homeowner can tackle. Not only will the paint choice affect the feel and mood of the space, but it can also add visual interest. If drama is what you are after, consider painting one accent wall a bright or bold color, or adding a patterned design.

A peaceful, neutral color can soften a space and provide a simple background to build upon with other design elements such as furniture and art.


REARRANGE THE FURNITURE

Rearranging living room furniture is a simple interior update that you can try again and again until you find the furniture combination that works best

If your interior is feeling stagnant, re-arranging your furniture can give you a whole new perspective. Just swapping a few pieces can have a big impact. Play around with different configurations and make it an adventure/challenge by shopping your own house instead of the stores. You may find that a piece you didn’t care for in one room looks great in another!

Don’t be afraid to try out an antique hutch as linen storage in the bathroom, for example. You might be surprised at where each piece finds a new home!


CHANGE CABINET / DOOR HARDWARE

It's super easy to change out cabinet hardware - making it a simple interior update for your home

Hinges, knobs and pulls are like the jewelry of cabinets and doors. They make a statement. Perhaps though, yours are making an obvious statement that they are outdated. Thankfully, there is a wide variety of replacement options available at your local home improvement store and online. Grab new hardware that you love, and a screwdriver. Within hours you can have a transformed look.


ADD A GALLERY WALL

Gallery walls are a simple interior update for the home that can add style and personality.

One of the easiest ways to personalize a home is by including artwork and photographs that have special meaning to you. Arranged in unique ways, a gallery wall can really make a statement. Creating one of your own doesn’t have to be a mystery. There are plenty of tutorials online that simplify the process step by step. I always suggest using adhesive backed hooks for gallery walls, which will allow you the flexibility of re-arranging easily without filling in any pesky nail holes.


OPEN UP A CLOSET

reclaim your overstuffed closet and make it into a space that is useful. Simple interior updates for the home

Closets often house the most undiscovered / under-utilized square footage in a home. Many are either poorly organized or crammed with rarely-used items. By simply removing the doors to a standard depth closet you can gain space on the perimeter of the room for something useful, such as a small office or reading nook. A walk in closet can be transformed into a mini-bedroom or small meditation space. Get creative!

I wrote a post about alternative storage solutions. It offers tips on where to put any displaced items that you need to move out of the closet to regain the space.


These simple interior updates can be executed in a day or two, making them perfect beginner projects. The great news is that they are also reversible. If you aren’t happy with the results, you can always revert to the way things were pre-project.


PIN THESE SIMPLE INTERIOR UPDATES

Simple interior updates for the home that don't require a hammer or a lot of money

RESTORING OLD WOOD DOORS

I have to say, I’m pretty proud of myself.  Just two weeks after my big post regarding all the projects I want to accomplish, I was able to check one of them off of the list, and start two more!

There are projects on the list that range from minor to major, and I had a bit of a tough time deciding which to tackle first. Ultimately, I chose to work on the doors for the girl’s future bedroom closet – a project that I felt pretty confident I couldn’t mess up, and that wouldn’t take too long.

These old five panel doors were found in a barn over 15 years ago, and stored in various garages and sheds ever since. They were looking pretty rough, grungy and with mismatched paint – but for the most part were still solid.


STEP 1: REMOVE PEELING PAINT

I had a hunch that the doors were covered with lead-based paint. To confirm, I purchased a 3M lead test kit from our home improvement center. Sure enough, the reddish color appeared, indicating that lead was present.


The presence of lead paint isn’t overly alarming. If the application is solid and it is left untouched, it can be harmless. However, lead poisoning can occur if flaking, peeling, or chipping paint is ingested, or through the inhalation of dust created during removal. Because of this, sanding with a power sander is not a safe removal technique.


Instead, I found an article by Family Handyman – which outlines the steps needed to properly remove lead paint. I’ll admit that it did feel a bit cumbersome, especially wearing a face mask on a 90 degree + humid afternoon, but it wasn’t overly difficult.

I started with wetting the surface down with water, and then used a scraping tool to remove the paint.


I made sure to wear my face mask and rubber gloves the entire time, and disposed of the paint chips properly. I then cleaned it all really well and let it dry. Because of the intensity of the job, I only removed the paint areas that were flaking or damaged. If I had been able to sand, I may have gone all the way down to bare wood for a completely fresh start.


STEP 2: FILL/REPAIR CRACKS

In some ways, because it was covered only partially in paint, the doors looked more rough after the first step was complete. There was a bit of repair that needed to be completed though, before the new paint could be applied.

A panel on one of the doors was broken. There wasn’t a hole, but more like a pushed-in crack. Craig and I tried to position the wood back into place, but it wasn’t possible – likely because the area had warped through the years. Instead, I attempted to fill the crack with a product called Plastic Wood.


I applied the filler to the cracked panel, allowing it to dry and sanding between applications. I also filled in the areas on the side of the doors that were cut out for the hinges. The hinges were removed earlier in the prep process, because the doors will be hung with barn hardware.

The product did an amazing job of covering up the blemishes. I was super impressed! After another round of cleaning the doors, It was finally time to paint!


STEP 3: PAINT THE DOORS

It’s no secret that I love the clean look of white paint. If you have seen the 3-D renderings I have done for the cottage, you know that we will be using quite a bit of it in our home decor. I have known all along that I want to have white trim, cabinets, and doors. I’m not sure if you’ve researched white paint at all – but, there are about a million shades to choose from. It’s a tad overwhelming!


I caught a lucky break though, when I received the kitchen cabinet samples from Cliq Studios. Their ‘Cloud White’ finish is, to me, the perfect shade of white! Not too creamy or glaring, no grey or yellow tint. Just right. And since it is looking pretty positive that we will use their company for our cabinetry, I figured it would be nice to have doors that coordinated.

Turns out, Dutch Boy ‘Ultra White’ is a nearly identical match! I bought the DuraClean paint + primer in a satin finish. It went on really smooth!


I chose to use a foam roller to apply the paint.  I like using small rollers because I can more easily get into the little corners, using the end of the roller. I also feels like I am able to cover more evenly with a roller. You can see from this side by side picture the difference that even one coat of paint makes. It’s pretty incredible.


After three coats on each side, the doors were officially finished! I am so happy with how they turned out! Once we move into the new house, we will have the doors installed on barn hardware and I will do any touch-ups that are required. I haven’t decided yet if we will keep the silver knobs or not. That’s something else that can wait a while.


As I mentioned at the beginning of this post, I have already started the next two projects from the list. One is sanding down all the wood boards that will go on the ceiling in the master bedroom, the other is sanding down one of the wood chairs in preparation for painting it black. So yes, a whole lot of sanding – which is something I actually love! Sanding gives me a lot of time to think and let my mind wander, to daydream about our future home.

If you’d like to follow along with these projects in real-time, I record short clips on Instagram stories and have them saved as ‘Projects’ under my profile. I hope you can check it out!


*This post contains affiliate links*

AROUND HERE: JULY 2018

Around here, we have been….

CELEBRATING with family. The fourth of July holiday has always been a special one for my family. Growing up, it was tradition to visit my grandparents and take in all of the small town festivities – parades with lots of candy, sparklers, and of course a ton of barbecued food. Now, going home, it’s fun to watch our kids doing some of the same things. It was wonderful to see both of my sisters and their families. I cherish these moments.

This year, my hometown was having an all school reunion the same weekend as the 4th of July festivities, and so I was able to catch up with two of my best high school friends, and meet their kids. It was a blast to wander around our old high school and bring up all of the memories (both good and bad) that were had there.


RECOVERING from surgery. As part of her arthrogryposis, some of {K}’s joints formed in unusual ways. The hand specialist she sees in the Twin Cities evaluated her left wrist and thumb and let us know that there is potential for both of them to be more functional, which could help her gain more independence. However, he also mentioned that the window of opportunity to improve these joints is limited, and that if not done in the next year or so they may be permanently stuck in the stiff and awkward position.

We did a lot of talking with {K} about what she wanted, and ultimately, though she was scared of having the surgery, she wanted to have it done so that she could have the best possible function. She also wanted the surgery for aesthetic reasons. Our little girl was very brave and although after her surgery she was in quite a bit of pain and discomfort, she is now is back to her happy self with her bright pink cast, which will be removed in August.


TRYING new things, and trying old things again. We gifted {D} a flight lesson coupon for his 11th birthday last November. He saved it, waiting until the weather was perfect to take to the sky. He had a wonderful experience and is excited to continue on his training.

Craig finally got his hands on a box of King Vitaman. It was his absolute favorite cereal when he was a kid, and he wanted to try it again to see if it was everything that he remembered. The cereal is still in production, but in very limited quantities. Buying it online is an option, but an expensive one that we were too cheap to invest in. His sister and her husband bought him a box as a birthday present, and he was pumped! See the video of his reaction to the first bite HERE.


STARTING to cross things off of the never-ending project list. Being renters for nearly 4 years, we haven’t had much to do in the home improvement realm. It’s been a nice little break, but as we are preparing to build Arrow Hill Cottage in the not too distant future, our thoughts are once again turning to DIY. I organized a list of projects that I want to tackle for our new home.

I have to admit it feels pretty good to be getting my hands dirty again, and the kids have even gotten into the action.  We will see if we can finish all of these tasks before we break ground!


This is just a glimpse at what our family has been up to. If you’d like a closer look, be sure to check out our weekly ‘mini vlogs’ on our YouTube channel ARROW HILL FAMILY. Be well everyone!