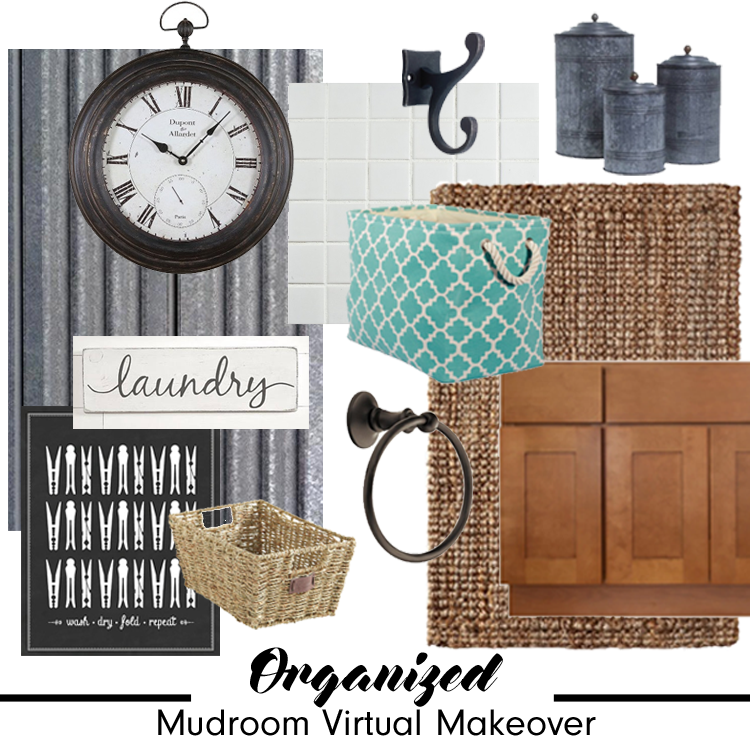
The Makeover Takeover series focuses on helping my readers – whose own homes provide challenges that they are having a bit of trouble solving. Whether it is a room that they want guidance on styling, a floor plan that needs re-configuring, or they are stumbling with choosing an exterior color palette, I am happy to help. I offer solutions through virtual design and source links.
Today’s Takeover is the first in the series to feature an exterior remodel example. I was approached by a couple who had a unique situation. They purchased their country home a few years ago. It is nestled in an absolutely stunning setting, surrounded by nature and wildlife -giving them plenty of room to roam – something that is very appealing to them as a large, young family.
The house though, has a very interesting story. Originally built as a church, it was moved to it’s country location and set atop a new full basement by previous owners. The church, turned home, offers plenty of living space for this large family, but creates a bit of a challenge from an exterior design perspective.
THE EXTERIOR TODAY
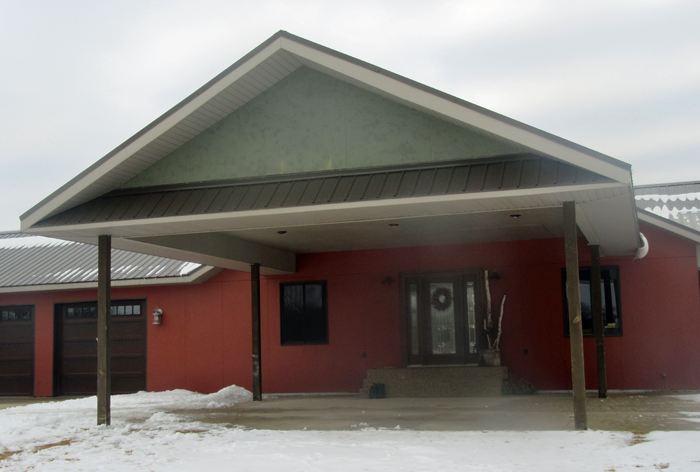
As you can see, a large drive under canopy was part of what was inherited from the house’s church days. Though it offers plenty of shade, the primary function is questionable. Because the house now has an attached garage, the homeowners do not need the extra space to park their vehicles.
Removing the canopy would prove to be more than the family wishes to take on – as it is firmly tied into the structure of the house. And the columns, which provide additional support, are embedded in concrete.
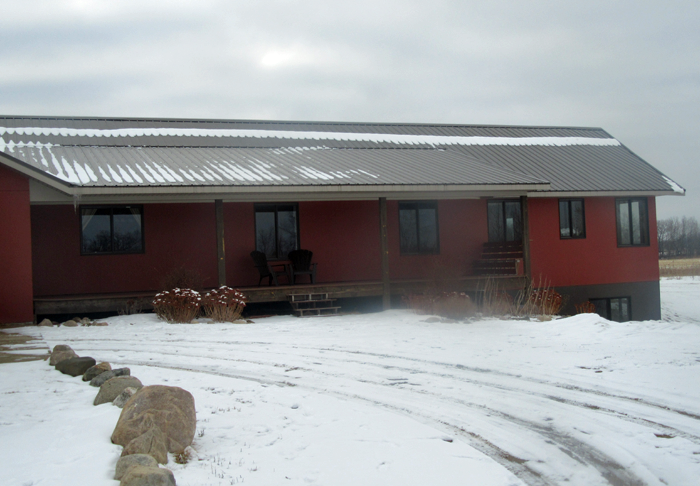
To the left of the canopy is the attached garage, and to the right is another wing of the house that features a covered porch. The family enjoys this space and how it functions. It simply needs a bit of added detail, and probably a new set of steps.
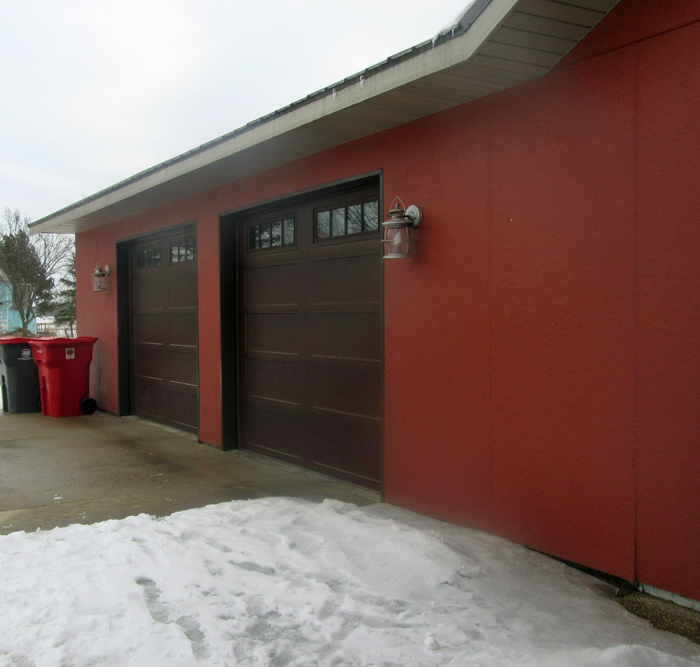
The exterior is primarily covered in faux stucco panels. Though the material is quite durable, the application is not as pleasing to the eye as it could be – with visible seams showing between each panel.
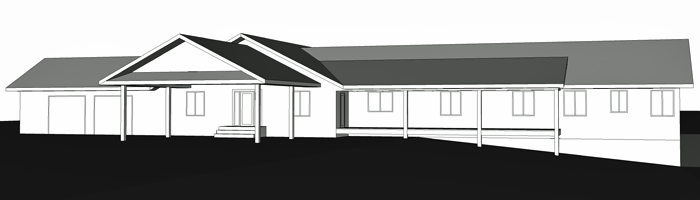
I created a non-detailed, 3D representation of the existing house. In total, the front facade is over 130 feet long. This also creates a bit of a challenge, because your eye tries to take the whole thing in at once. The canopy is a natural place for eyes to focus, but as it is at the moment – it offers little visual interest that would make you want to pause and admire.
PROPOSED CHANGES
Primarily, the homeowners asked that the visual scale of the canopy be brought to a more comfortable level, and that details be added to the exterior to give it more personality and presence.
Being of Swedish lineage, the family has a special fondness for historic Scandinavian residential design – especially it’s clean, simple lines, and the fresh contrast that often exists between the main exterior paint color and trim.
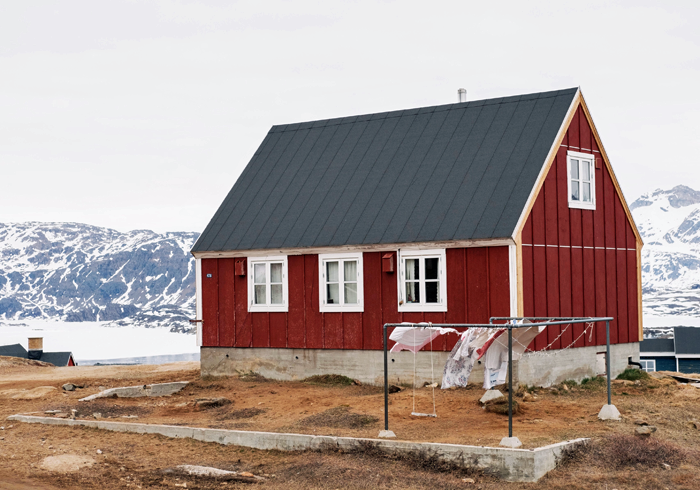
example of a simple, historic Scandinavian home
In addition, they plan to take on this exterior refresh using their own sweat equity. For that reason, they asked that all design changes presented would be simple enough for them to tackle, and not include anything that would require special structural attention.
They plan to first focus on the front facade, and eventually bring the same detailing to the other sides of the home.
FINISH INSPIRATION
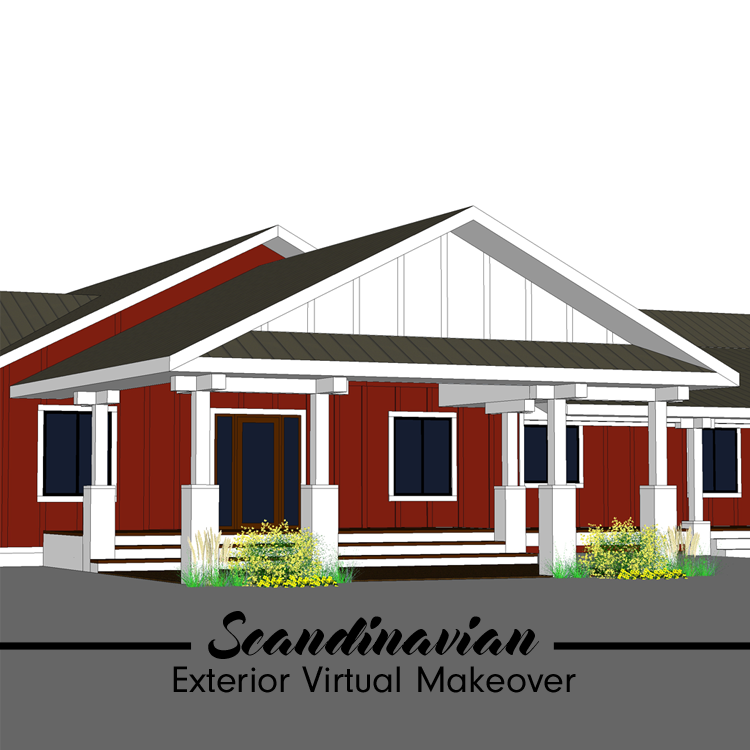
My inspiration for the exterior remodel is centered around the look of classic Scandinavian residential architecture – with classic vertical board and batten detailing, and white trim to accent the red overall color of the home. At the same time, I am proposing the use of low maintenance materials and plantings, which will help the house to look fresh for years to come.
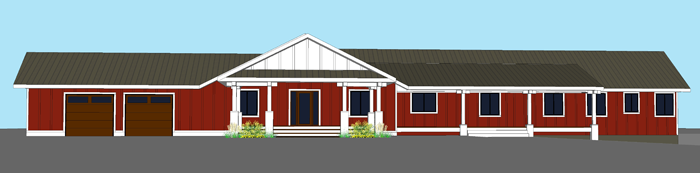
AND NOW FOR THE BIG REVEAL!

I would say that is quite a transformation! In reality, the changes that will need to be executed are not extensive. Only a few key design elements were incorporated to achieve this stunning look.
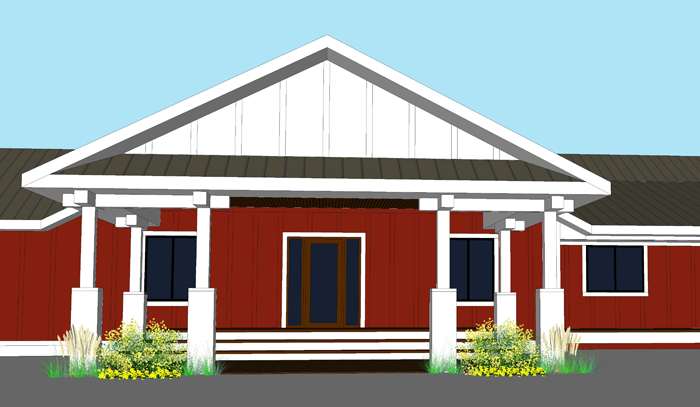
The first area of detailing that I tackled was the canopy. The visual weight of the large overhead piece, being supported by four seemingly small columns, made the entire house look unbalanced. By giving each column a wider base, and adding 8×8 timber post accents at the top, the scale of the columns appears much more sturdy.
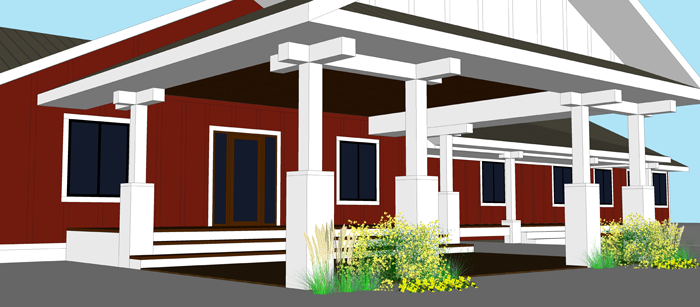
Though they will not be supporting any weight, the addition of two columns at the front face of the canopy will further add to the feeling of balance and stability. Because they line up to frame the windows on the house’s wall beyond, they will also contribute to the visual symmetry of the canopy element.
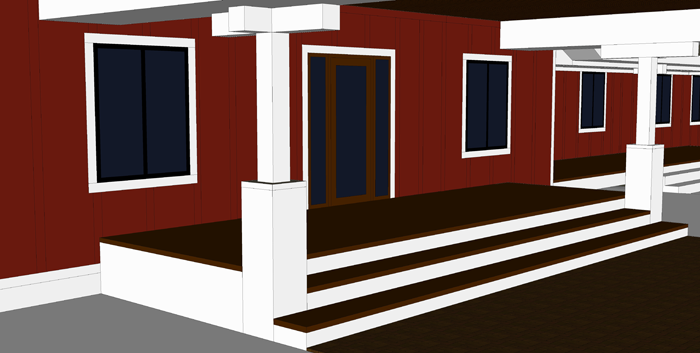
The smaller entry porch feature that currently exists is dwarfed by the size of the overhead canopy. I propose a raised deck area that extends the entire width of the canopy and projects eight feet, from the face of the house to the first set of columns. Integrating the deck with the column structure will give the sense that these elements were planned for a purpose – neither being an after-thought. The steps of this small porch extend the entire width, and lead to a ground level patio.
In order to hide the seams of the faux stucco panels, I am proposing the use of 1×2 batten pieces. These will cover the seams, and be spaced approximately 2′-0″ on center. Painted the same color as the house body, they will serve to add texture.
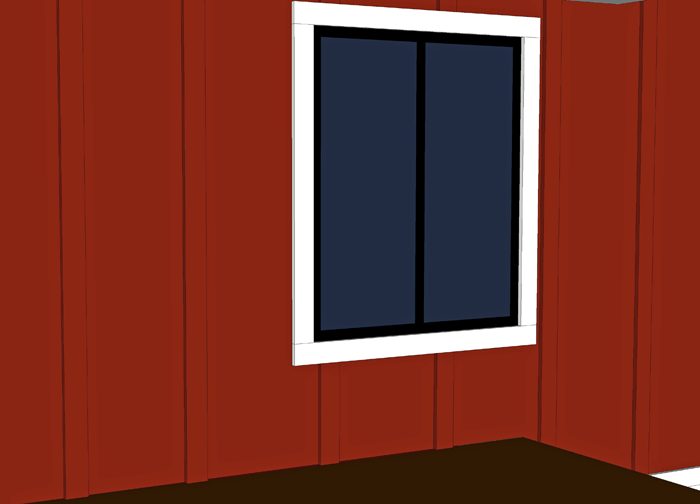
With this design, all of the windows will receive 1×4 trim. When painted white, this trim will contrast nicely with the bold house color. Framing the windows with this simple detail instantly adds visual interest to an otherwise flat facade.
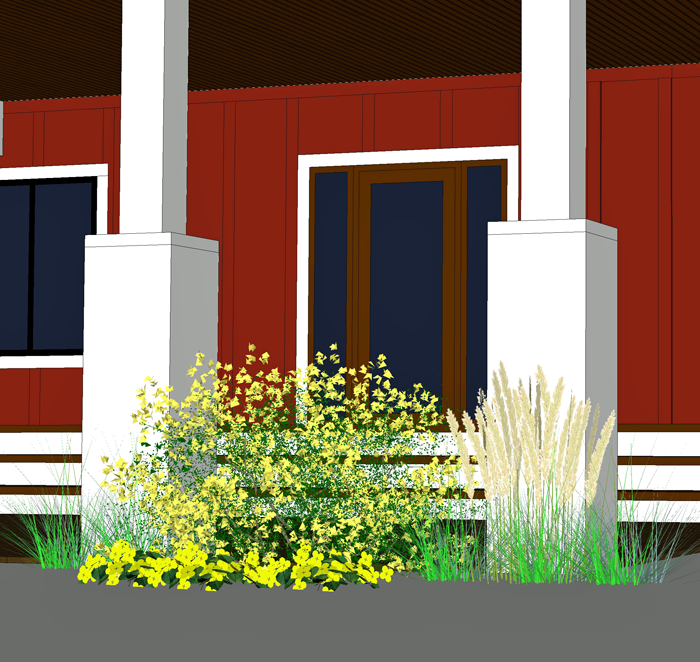
Around the perimeter of the patio, I am proposing natural grasses and low maintenance flowering bushes that can aide in softening the entire structure, as well as defining the outdoor living space.
I am very happy with how the design came together, and can’t wait to see pictures of the finished project! The family hopes to get started very soon!
If you would like a digital home design consultation for your home, please email me using the contact information provided in the main menu above. Though this service is no longer offered free of charge, my prices are very reasonable and I am able to accommodate your design needs – whether it is a one hour consultation or an entire new house design!
This post contains affiliate links to products for your convenience. If you purchase via my links, I may receive a small commission at no additional cost to you. Thanks for supporting Arrow Hill Cottage!