Antique Shopping Finds | Winter 2021

Today I want to share with you my most recently collected antique and thrift store treasures. These antique shopping finds include a variety of items that we have added to our home for both decor and functional purposes.

antique shopping finds

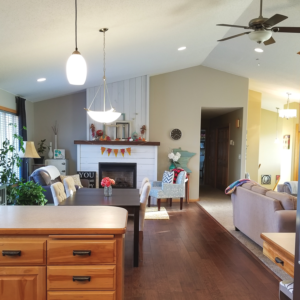
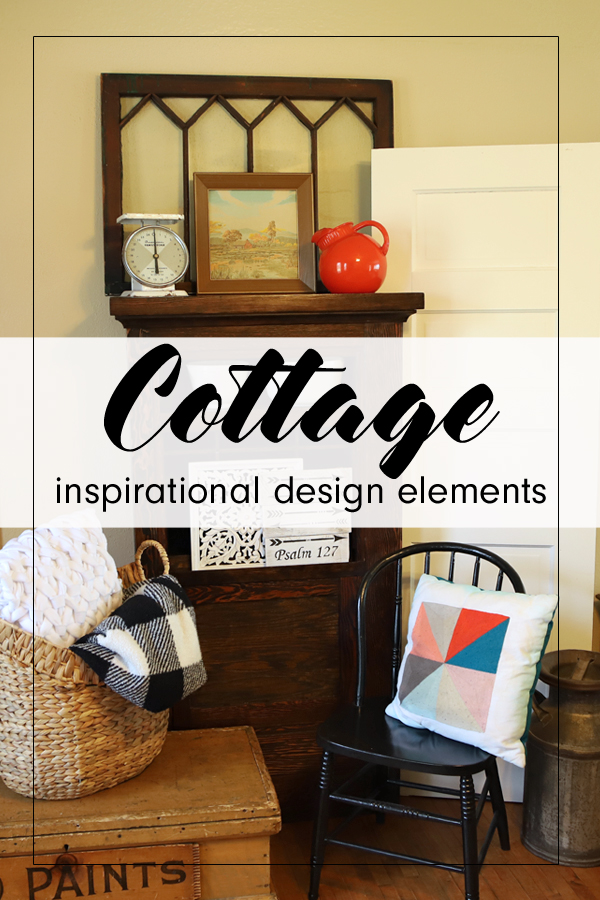
With our cottage build complete, we have moved onto a new phase. Decorating! I don’t claim to be an expert interior decorator, but I do know what I like when I see it! With Pinterest picture references, I am constantly on the lookout for unique and special items to add to our rooms. Most definitely, I prefer a ‘collected’ look when it comes to home furnishings and decor. To me, spaces just look and feel more personal when the pieces in it have a story.

Although it may take me years and years to finalize the decorating of the cottage, I am up for the challenge!


My Antique Shopping Tips

I live in a town that is known as a bit of a tourist destination. In addition to its many lakes, it boasts a vibrant downtown area, complete with multiple antique stores. With all of these beautiful shops so accessible, it would be easy to spend hours each day shopping. However, I prefer to limit my browsing to every few months.

This spaced out shopping is helpful for a variety of reasons. First, it allows plenty of time for item turnaround. The workers at these antique shops are constantly attending estate sales and picking up items to resell. That means that if I step into the stores less often, I am more likely to see many new items each time. Secondly, in order to make room for new merchandise, items that haven’t sold in a couple of months may be offered at a discount. I have seen pieces drop in price over fifty percent from one outing to the next.

It is my preference to always shop with someone else. I generally do not enjoy shopping, even casually. Having another person with is more fun, because we can visit while walking through the stores. Many times, one of us will see an item that sparks a memory, which adds to even more conversation. In addition, if I am questioning whether to buy something or not, I can talk it over with my shopping buddy.


Shopping As A Minimalist

When designing our home, we purposefully made the decision to not include a lot of storage. We saw it as a way to ensure that the items we have are used on a regular basis. In addition to that, neither my husband nor I like clutter. For these reasons, we are very intentional about the items we bring into our home.

In order for something to ‘make the cut’, so to speak, it needs to be either useful/ needed or something we love to look at.

An item that is offered at a good price but is the wrong color, size, or shape will not be a purchase of mine.

I try to make it a habit of walking through a store first, without picking anything up. If something catches my eye, I will go back to it for further inspection. Many times I have left the store, with photos and measurements of an item in hand, and thought about it for a few days. If it is a piece that I can’t get out of my mind, I will go back to purchase.


Winter 2021 Antique Shopping Finds

Are you ready to see what I decided to bring home? Great! I’m excited to show you!
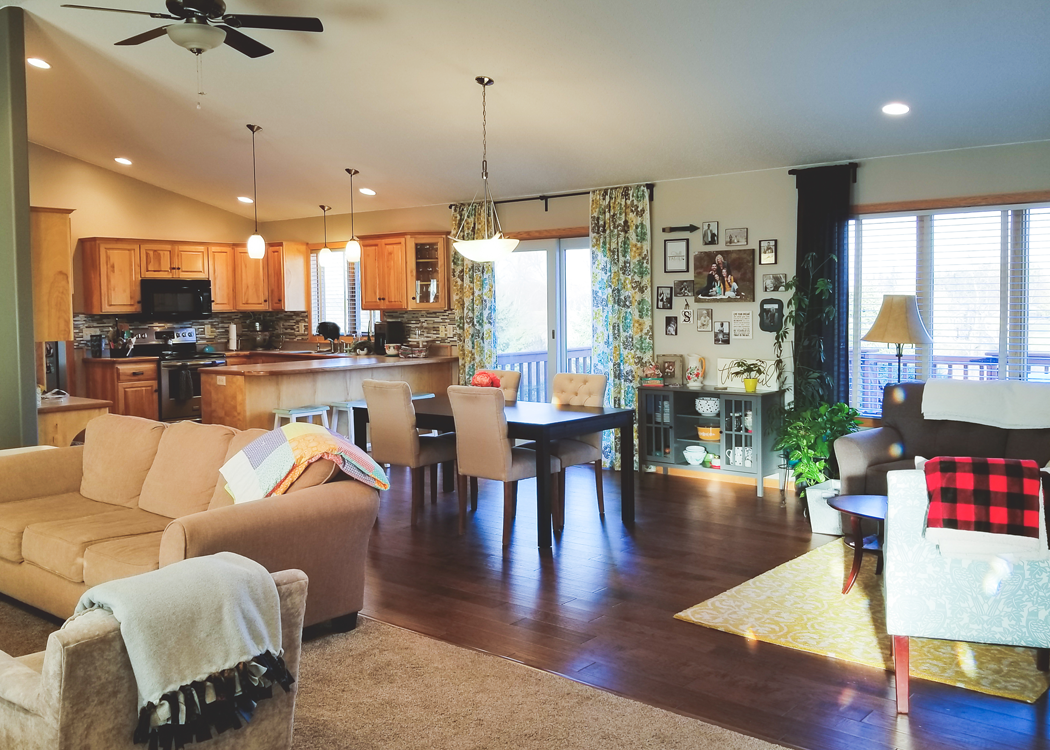
 

Enamel Top Table

First up is this white enamel topped table. Based on the construction techniques used, our best guess is that it is from the earlier part of the 20th century. Perhaps somewhere between 1910 and 1930, when having a small baking table in the kitchen was common practice.

vintage antique shopping enamel table

There is evidence suggesting that the table used to have two drawers. The drawer fronts are still present, but they have been nailed to the frame and the drawer boxes have been removed. My husband is thinking about re-creating the drawers. He also has plans to remove the paint (we think it is probably lead based) and refinish the wood legs.

enamel table

For the moment the table is being used as a surface for puzzles. In the future, I envision switching it out with the little red chippy table seen in my Christmas decorating post. Depending on the season and decor needs, both tables will come in quite handy.


Woven Basket

This little basket was found at a local thrift store for a few dollars. I’m not entirely certain that it is old, but it does appear to be hand made. I love all of the little details on this piece, including the ‘x’ shaped ties, and the teeny tiny pins around the top. At approximately 6″ x 12″ , it is the perfect size to hold a few books.

woven basket antique shopping find

We have been keeping the basket next to the fireplace. It currently holds our family Bible and devotion materials, so that they are within easy access to pick up for a quick read.
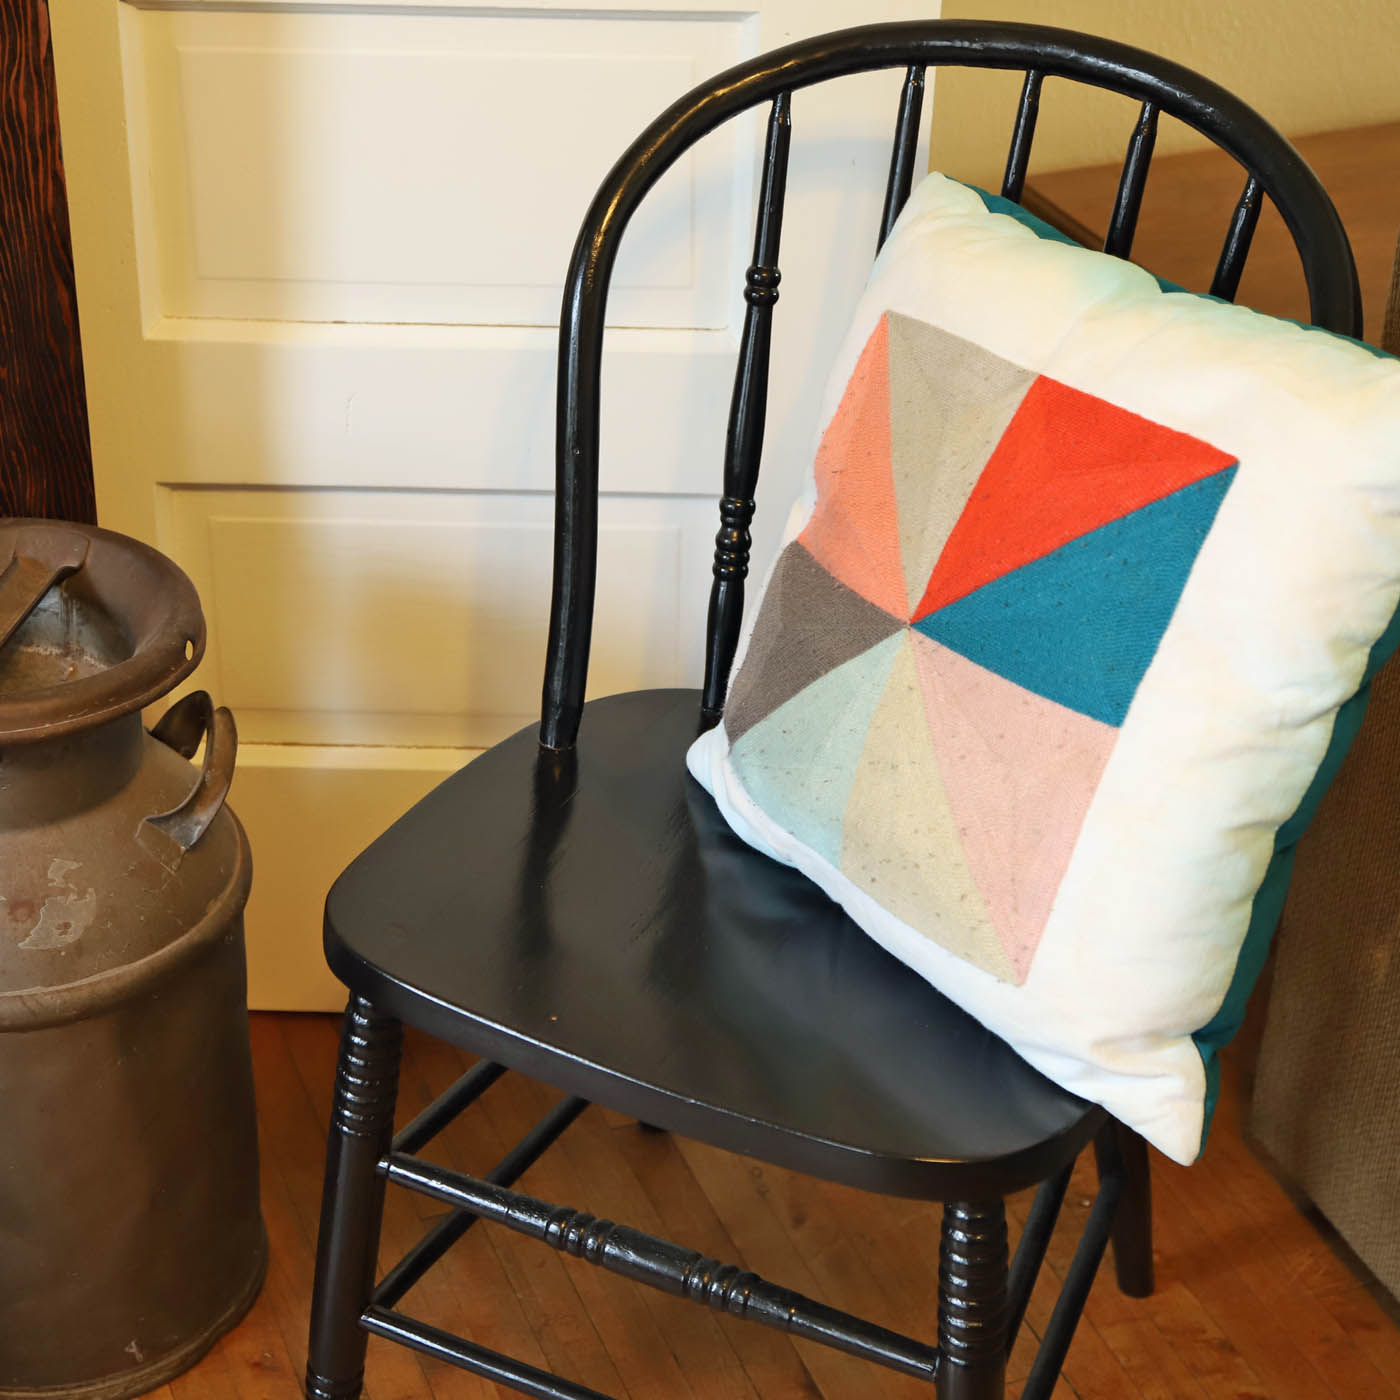
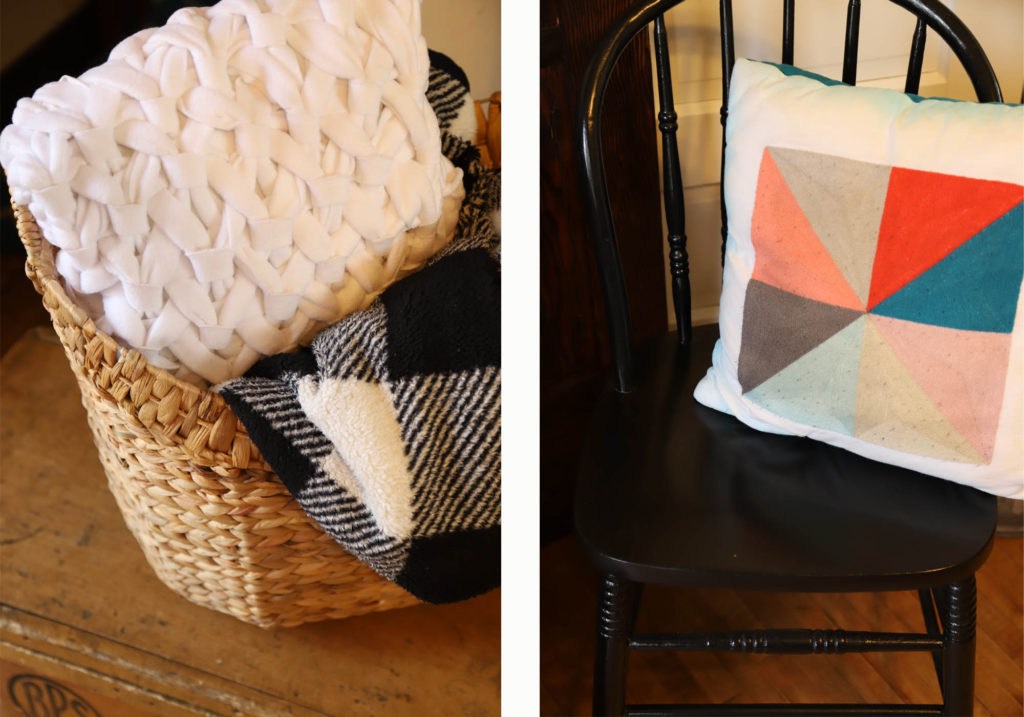
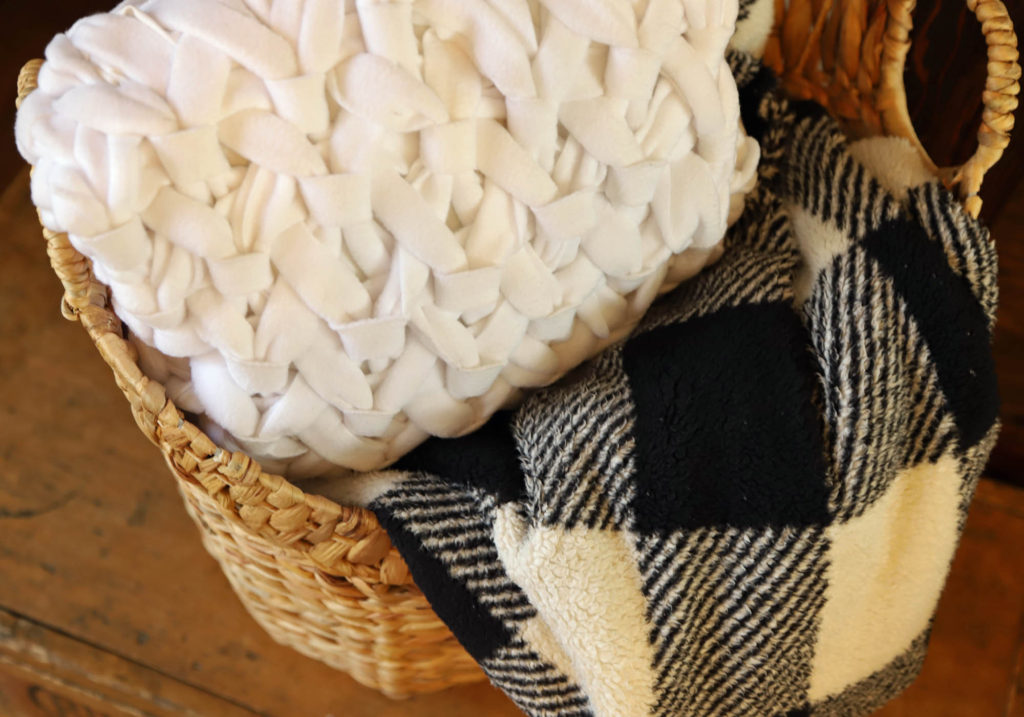
woven basket details


Knit Throw

I am drawn to cozy, neutral textures. This cream colored knit throw caught my eye with its beautiful pattern and smaller size. It is not a full blanket, but it has just enough material to wrap up in.

cozy knit throw blanket

After bringing it home and giving it a good washing, I layered it on the back of our couch. Atop another vintage blanket, the texture of the throw really pops!

knit throw texture


Metal Spice Tins

I have recently started one of my very first collections. These little vintage metal tins are so fun, and each so unique. They were found in many different shops, at various price points ranging from one to five dollars. I find the font and color choices on each individual tin so interesting.

antique shopping vintage metal spice tins

I have seen some very unique ways that vintage tins have been used as decor. My absolute favorite, and the thought that is guiding my collection, is to use them as little planters. By taking the tops off of the tins, I can fill them with soil and plant small succulents and spices of my own. Chives, cilantro, maybe a some dill? The large window ledge above our kitchen sink will be the perfect place to display them, during the spring and summer months.


Original Oil Painting

My absolute favorite recent find is this original painting. When I saw it, while shopping with my mom, it stopped me in my tracks. I loved the colors and composition immediately. The winter scene depicting children ice skating on a frozen pond reminded me so much of our own property here at Arrow Hill Cottage. However, the hefty price tag gave me pause, and I walked away. Once home, I did a bit more research on the artist because I was curious why the painting was priced so high.

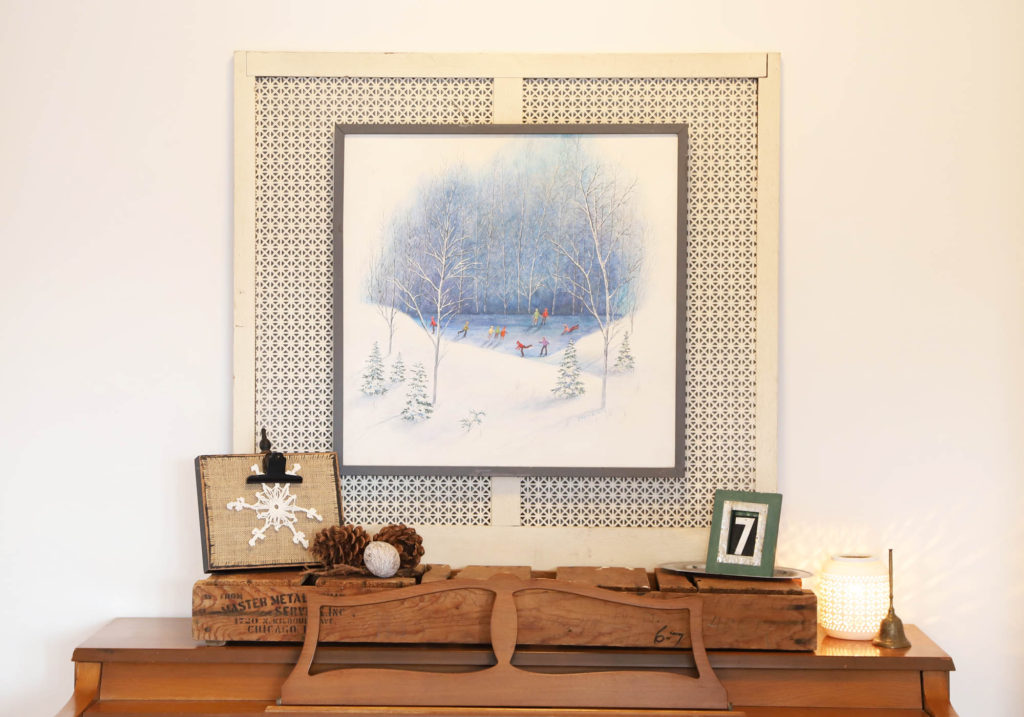
It turns out that the painting was done by a local artist named Ellen Eilers. She is best known for her ‘Calico Country’ series of artwork, which includes various stylized landscape scenes. However, she mentioned in this video that she particularly enjoyed painting winter scenes. I believe that enjoyment was transferred to the canvas when she made this piece. The details are stunning!

After thinking about it for a few days, and with encouragement (and birthday money) from my parents, I happily went back to the store to purchase it. It fits just perfectly here at the cottage, and I am excited to enjoy it for years to come.


That’s everything for now! I hope you enjoyed these antique shopping finds. I’m hoping to do a post like this every so often, when I have new purchases to share. I always think it is fun to hear the stories behind some of the items that are in a person’s home, and I hope you do too!


Antique Haul Video


More Antique Shopping Tips

If you’ve been thinking of adding some vintage charm to your home, but the thought of sifting through antique stores scares you, check out these resources! The ladies who wrote the posts are seasoned antique finders with beautiful homes filled with collected items. They each have their own personal styles, but are all very inspiring!

Farmhouse On Boone | Farmhouse Antique Shopping Tips

Emily Henderson | Thrifters Guide On What To Buy (And Skip)

Pine + Prospect Home | Antiquing For Beginners


SIMPLE LIGHT FIXTURES | Minimalist Home Lighting

In today’s post, I share the simple light fixtures we have chosen for our new home. The clean lines and basic color palette of these selections make them the perfect compliments for the minimalist home.

simple lighting collection

This post contains affiliate links. As an Amazon associate, I earn from qualifying purchases. See my full disclosure here


This has been a very exciting week at Arrow Hill Cottage. The interior framing is just about complete, the house wrap is on, the windows are going in, and the mechanical duct work has started! Now is the time to begin ordering the light fixtures for each room.

Over the past few months, I have been searching various websites and stores for simple light fixtures that would complement the overall feeling we are trying to achieve with our home. Classic, clean, and minimal, with a bit of a vintage industrial vibe.


INTERIOR LIGHT FIXTURES

We will be using quite a few canned light fixtures, especially in the open spaces – such as the dining/ living room and basement family room. However, in many of the other rooms there will be a need for various types of task lighting.

If you are interested in any of the light fixtures we have chosen for our home, be sure to click on the links below each picture!


Flush Mount Ceiling Fixture

This ceiling hugging fixture has sleek lines, and gives off a good amount of light. We will likely install in the downstairs office and possibly in the upstairs mudroom/ back entry space.

flush mount modern light fixture

Lanros Round Modern Flush Mount Fixture


Semi-Flush Mount

In rooms where we want a bit of an upgraded look, we will be placing these semi-flush mount fixtures. The master bedroom will have one, as will the main floor powder room.

semi flush schoolhouse light fixture

vintage style semi-flush mount


Dining Chandelier

We searched for a special light fixture to be used above our dining room table. This eight light pendant fixture is the perfect fit for what we were looking for. The linear design will mirror the long farmhouse style table we will be building custom, from trees felled on our property.

eight light pendant above dining table

Savoy House – Burgess – 42″ Eight light pendant


Vanity lighting

In the master, basement and upstairs bathrooms, this simple wall pendant will give just enough character. Using the same light fixtures in multiple rooms will help keep the continuity throughout the house.

industrial style vanity light

Above Vanity Light


We are also considering this fixture in a few locations around the house,  perhaps in one of the bathrooms.

single light wall sconce

Vintage Black Wall Sconce


Accent Pendant

This pendant will be perfect, hanging above our large cast iron sink in the kitchen. In such a clean and minimalist space, this accent will really shine.

industrial light pendant

Stone & Beam Vintage Ceiling Pendant


Large Room Pendant

With the vaulted ceilings upstairs, we will be using larger pendants. These farmhouse style industrial pendants have long cords, which will bring the light lower into the room – allowing for better coverage.

Three identical pendants will be set upstairs. One for each bedroom, and one for the hallway space.

simple warehouse style light fixture

Millenium Lighting Farmhouse Pendant (17 inch)


Master Bedroom Side Lamps

On either side of our master bed, we will be placing these swing arm lamps. Perfect while reading in bed!

bedside reading lamps

Globe Electric Swing Arm Lamp


Boys Sleeping Nook Lamps

In each of the boys sleeping nooks, they will have small reading lights as well. The multi-directional quality of these trumpet style lamps is really nice.

trumpet flare reading light

Trumpet Flare Wall Sconce


Closet lights

In the closets, we will be using smaller wall mounted fixtures. This is a bit of a splurge perhaps, as some of the closets really don’t need any lighting. However, the larger closets in the kid’s rooms will benefit from the extra illumination – especially in the dark storage space behind their hanging rods!

vanity wall bar light

Wall Bar Light 


EXTERIOR LIGHT FIXTURES

The light fixtures for the exterior of the house will follow the same style as the interior of the house. There are two different styles we are going to incorporate. Barn lights, which will be placed in feature positions – above the front door and above the garage doors.

industrial style outdoor barn light

Industrial Barn Light


These other simple flood lights will be placed on the side garage doors and near the walkout door.

simple outdoor flood light

Black Flood Light


MINIMALIST HOME LIGHT FIXTURES

Feel free to pin these light fixture ideas for reference!

minimalist home lighting


Design Elements | Inspiration For Our New Cottage

Today I am excited to share with you a few of the design elements we are planning for our new cottage. Hopefully, by the end of this post you will have a good sense of what our finished interior space might look like.

Home design ideas for a newly built cottage

OUR FOREVER HOUSE

To be honest, I haven’t given a ton of thought to the interiors of any of the houses we have lived in. I think, in part, it is because I knew we would only be living in them temporarily.

This house though, being our forever house, has caused me to think more critically. We want to be very intentional about what we surround ourselves with.

antiques used in a cottage style home. vintage scale

MIXING OLD WITH NEW

Though we are building a brand new home, we feel it is important to incorporate items that have seen a bit more life, and wear and tear. The reason for this is twofold. Number one, we don’t want to feel that we can never touch anything, or be worried that our kids might break something.

Number two, we feel that a new house can seem a bit bland and stark if everything is perfect and new. A mix of found items can really help to give the interiors a casual, comfortable, and lived-in and vibe.


MAIN DESIGN ELEMENTS

There are four main categories of inspiration that I will be discussing: geometry, color, texture, and specialty items. They all work together to form an overall design style that is simple and orderly while also comfortable and casual.

Geometry

As an architecture major, I am fascinated with geometry. I love how simple lines and shapes can come together to form something interesting and beautiful.

One example of how we plan to incorporate geometric design into our new cottage is the five panel doors we have chosen. They mimic the pair of wooden doors we refinished last summer. I think they have a classic look that will pair well with the simple lines of the cottage.

Design elements for a comfortable cottage feel

This window also displays basic, yet interesting geometry. I saw it out of the corner of my eye one day when I was browsing through an antique shop. Though it was priced higher than I wanted to pay, I could not get my mind off of it. Eventually came home with me, and we have loved it ever since.

Color Scheme

When it comes to color theory, I am definitely one who prefers a mostly neutral palette, with pops of interesting color. Knowing what colors to ‘pop’ with has been something I have slowly learned through the years.

In fact, the realization of the color scheme for our new house came to me a bit by accident. A few years ago I purchased this simple pillow. It kind of spoke to me, even though I couldn’t really put my finger on why. The pillow has been a mainstay in our living room since that day, and every time I look at it I smile.


Interior design ideas incorporating neutral decor with pops of color

It wasn’t until recently that I realized that the pillow brings a couple of my very favorite design elements to life. The geometric pattern is simple, and pleasing to the eye. But also, the colors themselves are those I tend to gravitate toward. With the exception of the tan color, which I would replace with a mustard yellow.

Without even knowing it, I have been accumulating items with these colors and bringing them into our home.

This rust-red pitcher, for example, adds just the right amount of color. And the small lithograph print features many of my favorites.

vintage red pitcher


Texture

I am a huge fan of texture. More specifically, neutral texture. It is one of the reasons I am a sucker for a woven basket or a macrame wall hanging.

textured home decor

This pillow is one of the ways that I added a bit of texture to our home decor. I created a blog post a while back which details the steps to make one for yourself. I will be re-doing the video link in the near future. There have been people who have tried to make the project and have commented that the video could use a few more step by step instructions.

diy textured knot pillow

Other textured items might be really subtle. This pair of white bowls, for example, have a small bit of ribbing around their rims. I think this tiny bit of detail really adds visual interest to an otherwise ordinary piece.

vintage design elements incorporated into a brand new cottage home


Special Items

A house filled with generic, store bought items will not have the same feeling as one adorned with well loved items. Displaying items that bring you joy or remind you of someone you love is the perfect way to make a new house feel like home.

We have special items of all types that we plan to utilize at our new cottage. The cabinet in this vignette, for example, is one of a set that my husband painstakingly restored this past winter. He put so much effort into them, and they are absolutely stunning!

A cream can, saved from the run down farmstead of my great-grandparents, will become a special conversation piece in the cottage.

vintage cream can


This crate has been used as a toy box for many years by our children. We plan to bring it with us when we move. Although it may eventually be filled with different items, it will forever hold the memories of a time when our kids were younger and enjoyed it as a toy box.

BPS paints crate

We are so excited to see all of these design elements come to live in our new home! If you would like to be the first to know about the construction timeline, be sure to subscribe to my email newsletter. I will be sending out house information there first. Also, consider subscribing to the Arrow Hill Cottage YouTube Channel. There, I plan to post a house building update once per week, as soon as we break ground.

Thanks for stopping by! I enjoy sharing this journey with all of you!


TAKE A CLOSER LOOK

In this video, I do a little walk-through of each piece in the vignette. I describe the design elements and talk about each piece and how they represent the elements.


PIN THESE IDEAS

cottage design elements


READER SHOWCASE: HEATHER + JEREMY’S HOME

I am so excited about today’s Reader Showcase feature! This series is where I have the opportunity to share the homes and home projects that my readers have tackled. I am constantly amazed at the talent and varied styles that each person has to offer!

I follow Heather on Instagram and am so inspired by her lovely home and how polished, yet casual, her spaces seem to look. She really has a lovely aesthetic.


Heather, please tell me a little bit about your home:

We live in a traditional builder grade brick home that is about 20 years old. We purchased it a year and a half ago and have been slowly tackling projects ever since! The house is sited in a small, historic town in Louisiana – nestled in a subdivision. The half acre parcel of land is beautifully landscaped, with a peaceful creek nearby, plenty of trees, and wildlife.


What is your personal design style?

My personal design style is a combination of modern and traditional farmhouse. I love to mix the old with new. Joanna Gaines has definitely been a primary source of inspiration. In fact, my husband often calls me ‘Little JoJo’. We live on a pretty tight budget, so the majority of our home decor is thrift-ed or DIYed. My husband and I love going to flea markets, thrift stores, trade shows, and antique stores to look for vintage pieces to add to our home. I think what I love most about vintage decor is that it is ‘one of a kind’. Each piece is unique and has so much character. There may be another item very similar, but it won’t have the same nicks, cracks, patina and history behind it.


Explain your favorite remodel projects. What was done to each space?


LIVING ROOM

My favorite remodel project has been our living room transformation. My husband and I DIYed everything in this space. When we purchased the home, all of the details were very traditional and dated. The fireplace had black marble with a fluted mantel. There were built-ins on both sides of the fireplace. The walls were painted a tan color, and a ceiling fan hung above the sofa.

The first step in our living room renovation was to tear out the built-ins. Though the storage was good, the materials they were constructed of were very cheap. My original plan was to tear out the built-ins and replace them with furniture pieces; However, once we pulled them out, we realized there were no floors underneath! The oak floors in the room have a honey color stain. Having the floors completely refinished or replaced was not in the budget. I had to come up with something that would cover the areas without flooring, and so we decided to do a built in bench seat on one side of the fireplace and I found a perfectly sized piece of furniture for the other side.

We then installed faux shiplap on the fireplace wall. This was a good option for this wall because it covered all of the sheetrock blemishes where the built-ins were.


When we set to work on the fireplace itself, we started by replacing the black marble tiles. I really wanted to add a hearth, and since we had never laid brick before, we felt it was best to contract it out. We learned an important lesson during that process – always get more than one quote! Of the two quotes to lay the hearth, one was 4 times more expensive than the other!


The mantel was very decorative with lots of moldings and fluted columns down the side. Again, this was not my style.

fireplace surround before


I wanted a simple, rustic look and found an old reclaimed pine board to use as a mantle instead. To finish off the living room space, we replaced the ceiling fan with the Edison Bulb chandelier from World Market. We also added drop cloths as window treatments to soften up the room – another in-expensive and easy DIY project!

fireplace after

FOYER

The foyer was actually the very first project we ever tackled in our house. I think it was a great starter project for us, since it was a small space. It was still a design challenge though, as the room was originally painted with purple and metallic gold stripes!

foyer before: a bold choice!


As you can imagine, it would have been incredibly difficult to paint over the bold pattern, and so we decided to cover the walls with something instead. After much research, we ultimately decided to use a faux shiplap in the space. It looks just like the real thing, but it is actually panel boards that are cut with lines every 6 inches.

We painted both the walls and trim in White Dove by Benjamin Moore – which really gave it a fresh look, and even increased it’s perceived size! The space turned out better than we ever expected and completing it gave us the motivation to tackle other, larger home improvement projects.


What would you like readers to know about designing and styling a home? Do you have any tips to share?

Most importantly, have fun! Be creative and play around with different styles without being afraid to break the rules to create a style all your own!

Another tip I have is that if you don’t have a ton of money to style your home, start with ‘shopping your space’. You don’t always need new decor – sometimes you just need new combinations in different rooms. Think of ways that you can re-purpose or up-cycle what you already have. If you use your imagination and think outside of the box, you can create some pretty amazing things. I’ve picked up many items from the Dollar Tree that I have transformed into beautiful decor just by getting a little creative.


Do you have any remodeling / decorating plans for the future?

We are slowly going room by room making this house into our dream home. So far we’ve completed the foyer, living room, and our oldest son’s bedroom. It’s been a slow process, but my husband and I both enjoy doing it. It gives you such a sense of satisfaction and accomplishment when you are able to complete a project.

The room that I am most looking forward to renovating is my kitchen! While it’s not horrible, it just isn’t the kitchen of my dreams. I can’t wait to add a farmhouse sink, subway tile, quartz counter-tops and all of the other farmhouse elements.

current kitchen: I hope they keep the paver floors!!! 

Other projects that we hope to complete soon include painting the dark red exterior brick of our house to white. I would also love to makeover our master bedroom, and freshen up the laundry room by stenciling the floor tiles, among other things. If only there were more hours in a day!


Thank you so much Heather and Jeremy for sharing your wonderful home with us! I encourage all of my readers to subscribe to Heather’s Instagram account HERE so that you can follow along while she and Jeremy continue to remodel and make their house into a home that reflects their personality and style. Heather also has an amazing blog, Beauty for Ashes, where you can find plenty of home design inspiration and instruction. Go check it out! 


Now it’s your turn! Have you been adding personal touches on your home? Maybe the entire house isn’t finished, but you are particularly proud of one room – I would love to see, and share with my readers!

If you are a blog subscriber, you are eligible! Simply email photos and a brief description to angela@arrowhillcottage.com for your chance to be featured!

DIY TODDLER BED | RE-PURPOSED CRIB

What should you do when your child outgrows his/her crib? Consider re-purposing it into an adorable DIY toddler bed, using this simple tutorial.


repurposed crib into a toddler bed. Adorable DIY toddler bed
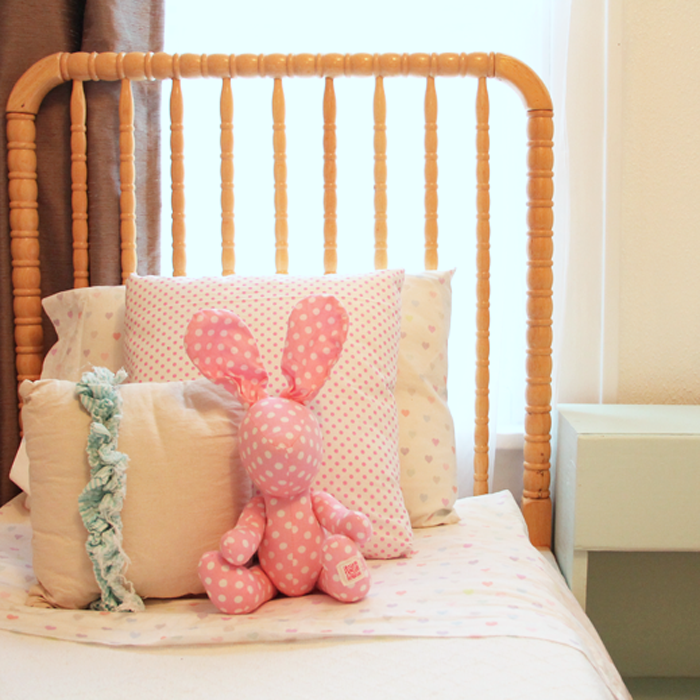
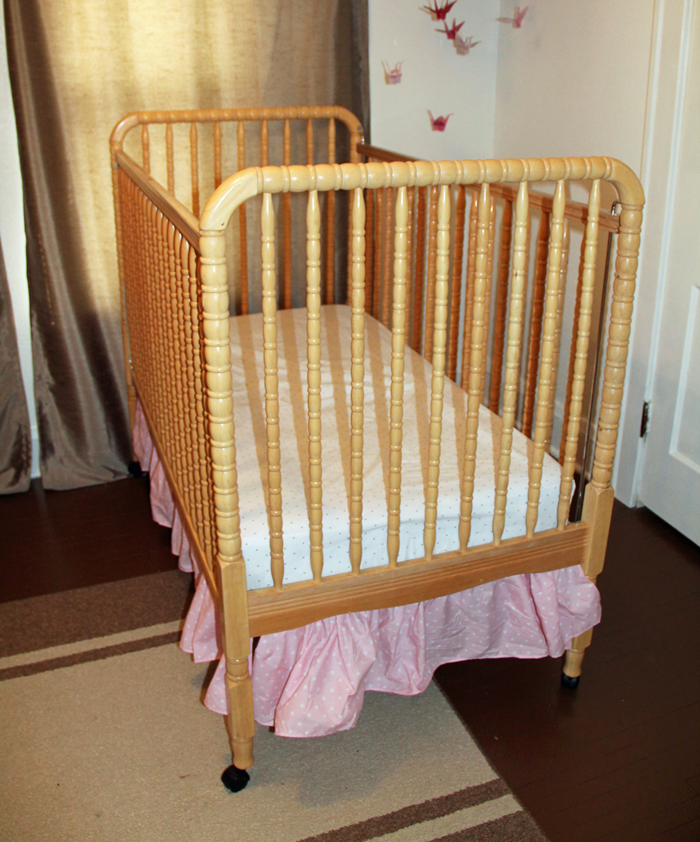
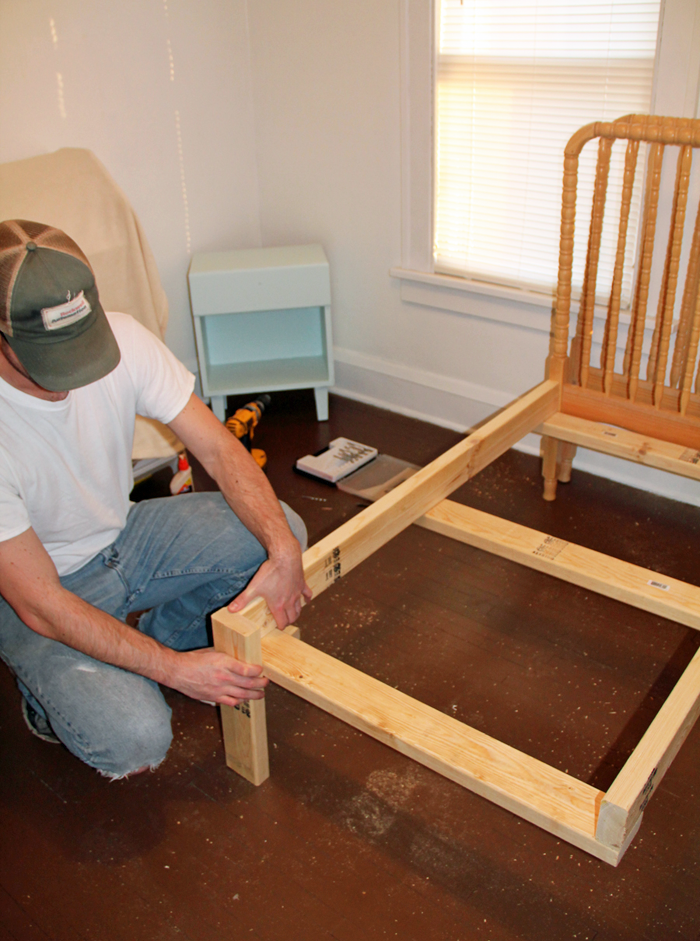
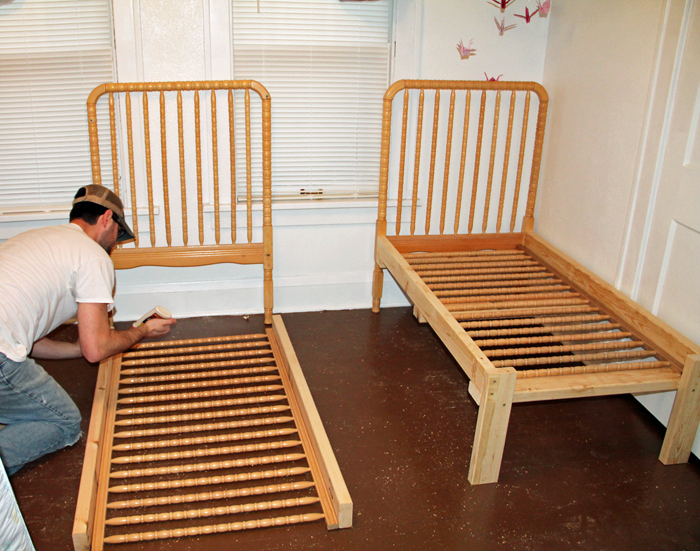
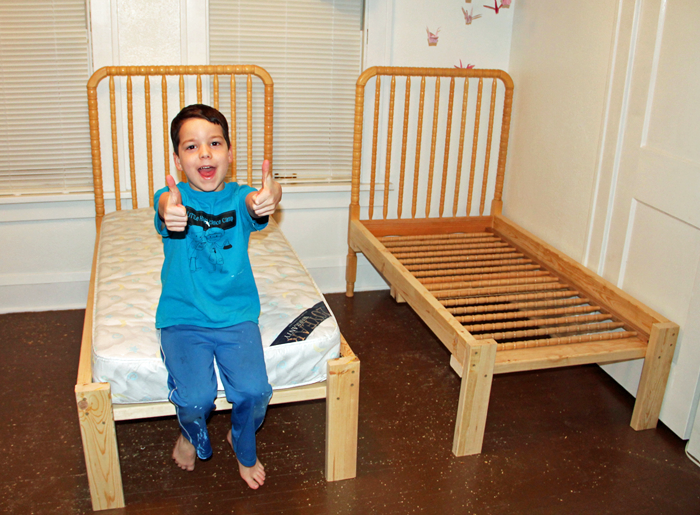
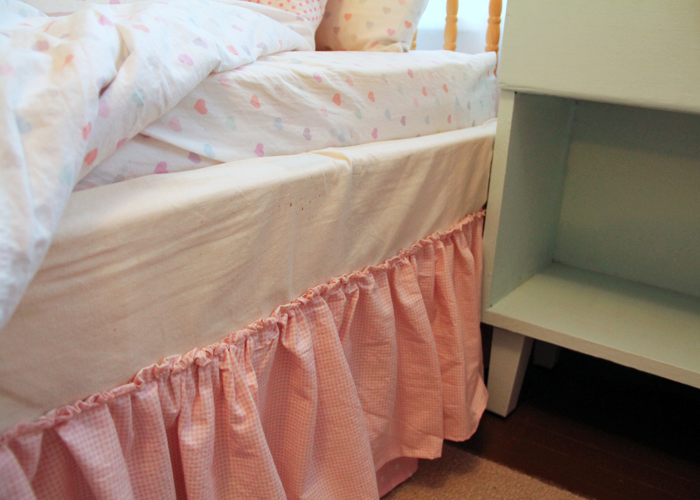
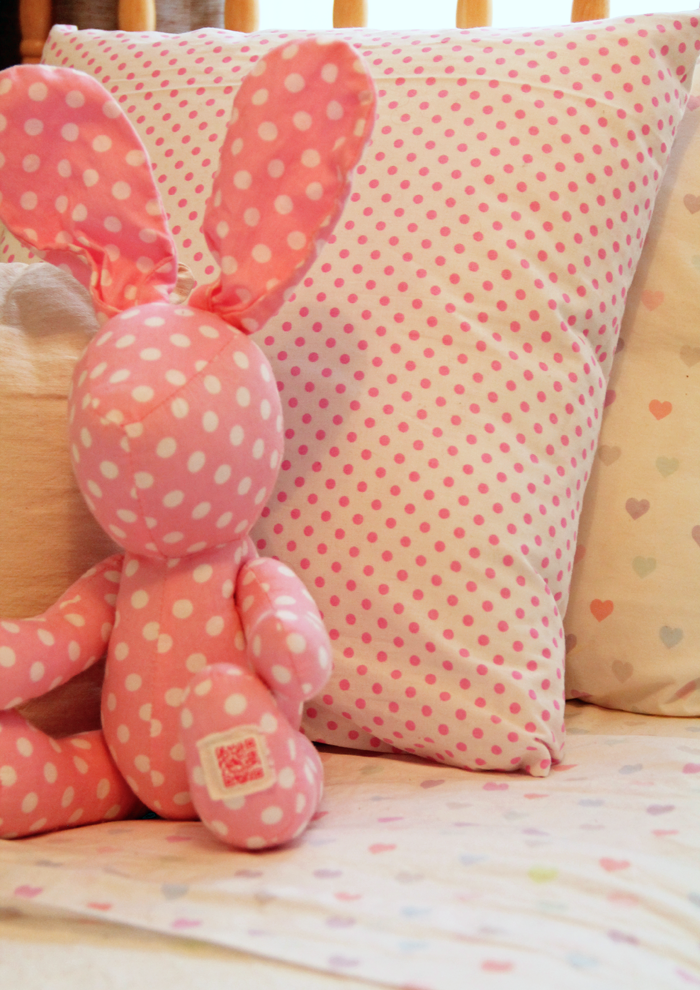
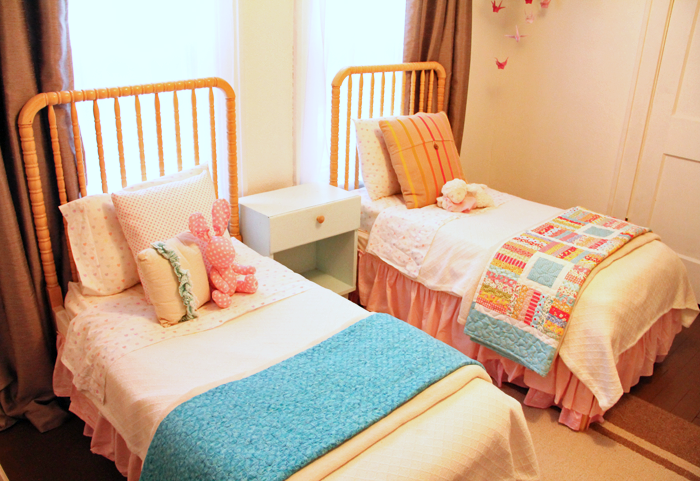
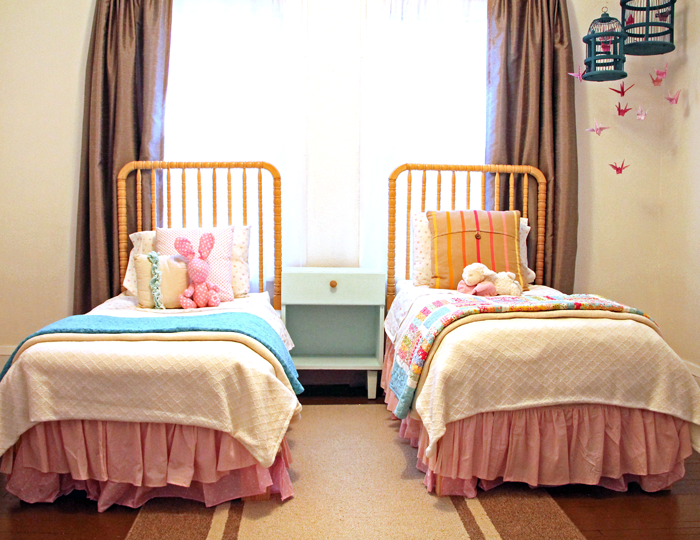
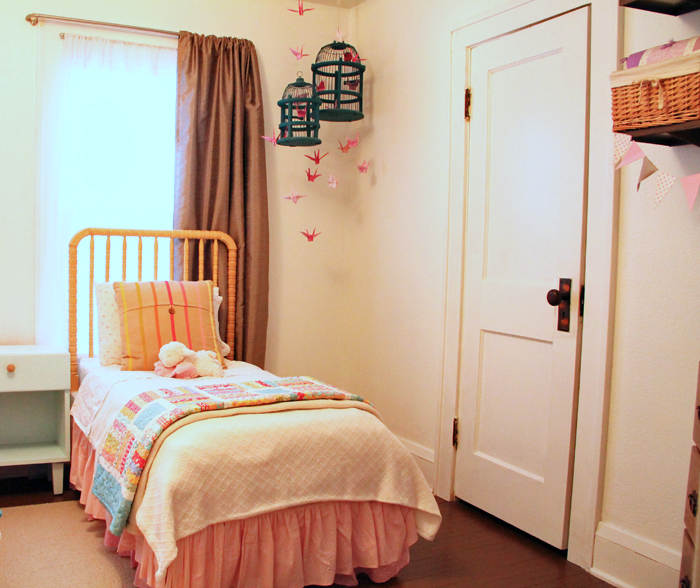
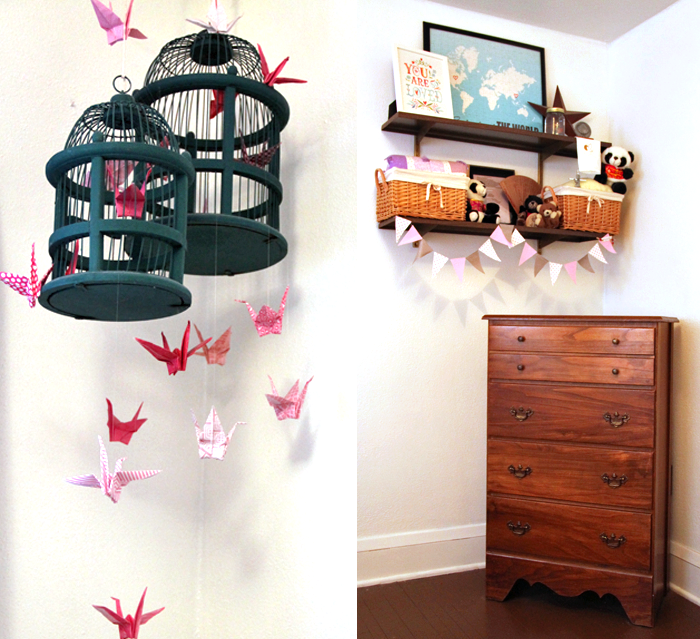
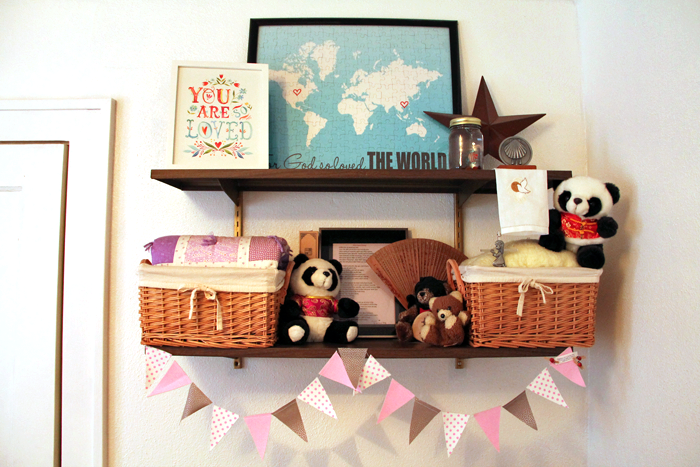
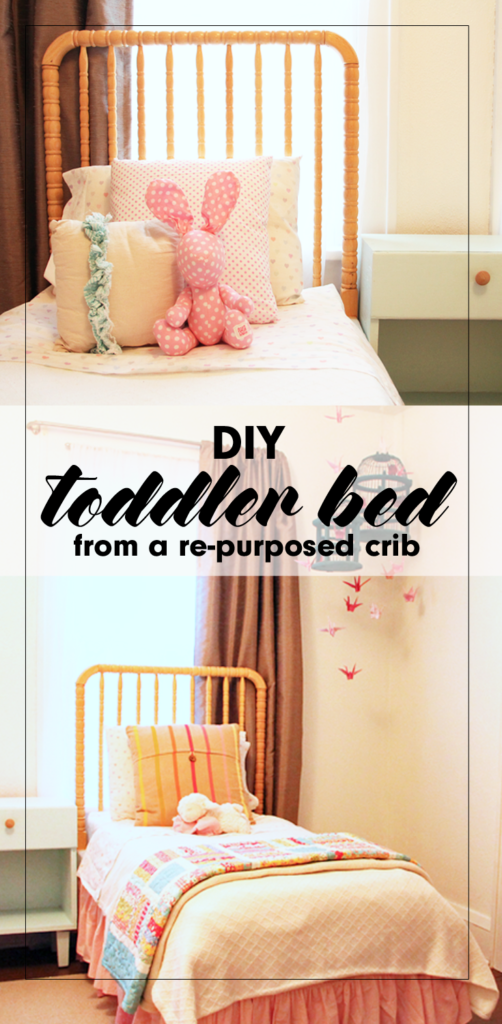
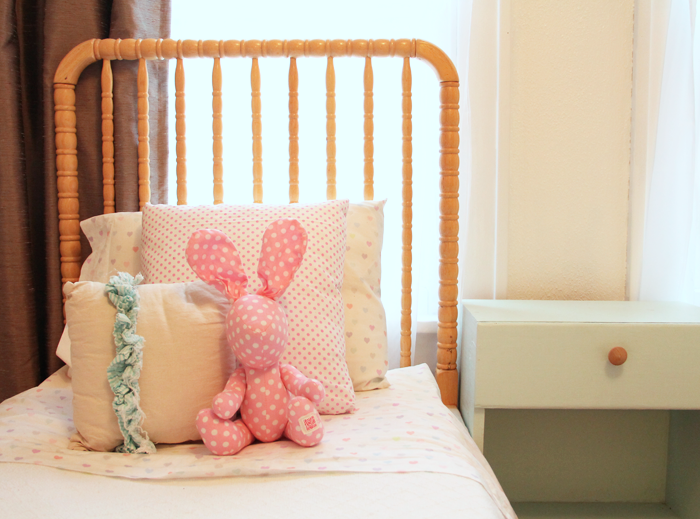
Not many moments spark the same amounts of joy and sadness as when the youngest child of the family finally outgrows the crib. With the celebratory occasion of assembling the ‘big boy/girl’ bed comes the equally emotional moment of taking the crib apart.

We were faced with this exact scenario in the months before we took the trip to China to finalize {K}’s adoption. {M} had always loved the security of her crib, the same crib that all three of our sons had also slept in, but at 3 1/2 years old, it was finally time for her to say goodbye as well.

converting an unused crib into an adorable toddler bed

It was at that moment we were faced with a difficult decision. What do we do with the crib? Maybe you are nearing this milestone and have had the same question. Today I am offering a tutorial explaining our personal crib re-purpose DIY project.


THE CRIB BEFORE

Our simple, Jenny Lind style crib was well loved but it’s natural wood finish and spindle details had a charm that we wanted to preserve.


crib transformed into toddler bed in 5 easy steps

It was given to us as a hand me down before {D} was born, over 11 years ago. Needless to say, it was equipped with the notorious ‘drop side’ – a feature now considered dangerous. We had long ago disabled the drop side, but legally the crib was no longer eligible to sell (or give away). Even still, the crib had a beautiful Jenny Lind style, and the thought of throwing it in the garbage just didn’t sit right with us.

We brainstormed a few different ideas, and eventually decided that the best option for our family was to turn this ONE crib into TWO toddler beds – one for 3 1/2 year old {M} and one for her 6 1/2 year old sister {K}, who has arthrogryposis and is small for her age. We knew they would both fit comfortably in the smaller sized bed for a while, and that the bed DIY project could save us some money as well!


CREATING THE DIY TODDLER BED

I’ll be honest that at the time of the project I wasn’t thinking in terms of getting enough pictures for a tutorial. I only have a few photos, but will try to fill in the gaps with words. If you have any questions about the process we used, feel free to comment below or send me an email!

STEP ONE

My husband Craig disassembled the crib, which actually made {M} very angry! She couldn’t see our ‘vision’ at the time and was just upset that he was breaking the comfy place where she loved to sleep. Essentially, all pieces of the crib were used to create the new beds with the exception of the hardware and the spring mat.

STEP TWO

We purchased standard 2×4 material, and Craig cut them to assemble a three sided ‘box’ that would hold the crib mattress. Because we planned to use the two tall sides of the crib as headboards, he only needed to make legs for the end of the box. He reinforced the center with a 2×4 cross base.

creating a diy toddler bed

diy toddler bed framework using crib parts as headboards


STEP THREE

Craig attached the assembled ‘box’ to the headboards, making sure everything was level. He then set one side rail into each of the ‘boxes’. The side rail piece spreads the weight from the mattress out over the 2x4s included in the ‘box’ construction.

using an old crib to make a diy toddler bed

STEP FOUR

The crib mattresses were then added. They were a perfect fit, as demonstrated by this goofy picture of {L}. Crib mattresses are a standard size, but they can vary slightly. If you try this project you will want to base your dimensions on the crib mattress you have. We happened to have two mattresses, one that was used in the crib and another that we had for a different toddler bed.

building a diy toddler bed


STEP FIVE

Dress it up! I created pink ruffle bed skirts using this easy tutorial. They really were simple to make, but a bit time consuming! I used muslin fabric to cover up the exposed 2x4s near the mattresses.

toddler bed diy ruffled bed skirt

I also found some adorable heart bedding from Pottery Barn Kids. Grandpa and Grandma purchased the bedding as a gift for the girls. A king sized texture blanket was the perfect size to cut in half, allowing me to make two matching comforters. Topped with accent pillows, and comfy colorful quilts, the beds look super cute on each DIY toddler bed!

girl bedroom bedding

repurposed crib turned into diy toddler bed


FINISHED IN THE ROOM

The finished beds look so sweet set up together in the room. I still love walking by and admiring them, over a year later!

old crib turned into two diy toddler beds

The girls really enjoy sharing a room and their little beds fit perfectly into their bright and cheery space. Although I am having fun designing their new shared space for Arrow Hill Cottage, I will be sad when we have to retire (or pass on) these special beds their daddy made them!

simple do it yourself toddler bed from an old crib


MORE SHARED BEDROOM DETAILS

Just for fun, here are a few more details of their shared bedroom.

girl bedroom reading nook

This rocker was Craig’s grandparents. We had it reupholstered before our first child was born, and have used it in the nursery ever since. It is a special piece. Next to it we have a bookshelf, making this the perfect spot for reading.

girl bedroom tour

The bookcase itself is a vintage piece from our local Carnegie Library, which is now closed. I love that the girls are able to see the fronts of the books when making their selections.

diy girl bedroom decor

Above the bookcase is a DIY piece that I put together using a mirror frame, which I spray painted white. I covered the mirror with a fabric. It is attached with temporary adhesive, because I imagine in the future the girls may opt to use the mirror itself. The heart was made by weaving strips of paper grocery bags.


girl bedroom decor ideas

Both of our girls were adopted from China – {M} at the age of two in 2015 and {K} at age six in 2017. We always want them to be aware of their beautiful birth culture. The paper crane bird cage/ mobile symbolizes peace and longevity. I folded each of the cranes by hand using a variety of pink patterned paper. The dresser was mine when I was a little girl. It was a gift to me from my grandpa, and I love that I can pass it down to daughters of my own.

shared girl bedroom ideas

Above the dresser are more symbolic and special pieces, including two panda bears from China – one from each trip.

diy toddler bed

We painted the floor in the girls room, and the entire upstairs of this rental house, a chocolate brown color. It has held up very well and is actually something I am considering for the new house.


PIN THIS DIY TODDLER BED IDEA

I hope you enjoyed this little tutorial and the impromptu room tour! I would love to see the creative ways you have re-purposed a piece into something new!

diy toddler bed from a re-purposed crib


READER SHOWCASE: MINNA + SCOT’S HOME

You’re in for a treat today friends! The Reader Showcase is where I feature the homes and home projects that my readers have tackled. I am constantly amazed at the talent and varied styles that each person has to offer!

Today’s talent is no exception. I first met Minna on Instagram. She posted photos of her absolutely stunning home, The Little Plaid Cottage, which is plump full of character. She is super creative and her husband Scot is super handy. They make quite the duo. I think you will agree!

Minna, please tell me a little bit about your home:

I would describe our home as a cottage. It is a single story 1,430 square foot house that has lots of charm, including a large front porch, built in bookcases, a floor to ceiling rock fireplace, cedar beams on 12 foot ceilings, and a brick surrounded cook-top in the kitchen.

It was built in 1991 on the outskirts of town, and sits on half an acre.

That front porch speaks to me. Looks like a great place to relax!

What is your personal design style?

If I had to define it, I would say cottage/farmhouse. I prefer to find interesting antiques to decorate with rather than just going to Target and buying the latest Magnolia pieces that are on the shelves. I love Joanna Gaines as much as the next person, but I don’t want my house to look exactly like everyone else’s house.

Antiques have history and tell a story. They have stood the test of time and have a beauty all their own. I love displaying vintage finds in my home and plan to enjoy them for years to come. I also love decorating with plaids & buffalo check, and tend to gravitate towards wreaths and white pitchers.


Explain your favorite remodel projects. What was done to each space?

We have done quite a bit of work to our current house during the 7 years we have lived here!

KITCHEN

Our kitchen has by far been my favorite remodel project to date. We started off with popcorn ceilings, a pantry cabinet that was limited to opening the full way because it would hit the oven handle, chipped tile counter-tops, original builder grade appliances, and a shallow kitchen sink with a rotted cabinet below.

Kitchen before. Charming, but very ‘vanilla’


The first thing we did was add a walk in pantry. We were able to carve a bit of space from the attached garage and include it in the kitchen. My husband did all of the framing, finishing, painting and even built custom shelving. I found some fabric from Hobby Lobby to use on the back wall in lieu of wallpaper. We installed matching tile and added a screen door, which may seem an odd choice for a kitchen – but it works for us for two reasons: 1. It adds charm + character, and 2. It forces me to keep the things inside clean and organized!

My goodness what a great idea! The pantry looks so organized.


I found a farm sink on Craigslist for $50. The price was low because it had a chip on one corner, but I knew that we would be under-mounting it and that the counter material would hide the chip. The sink literally sat in my garage covered in a blanket for two years while we saved up for the remodel.

I can’t see the chip, can you?


To save money during the remodel, we decided to keep the upper cabinets and update them with crown molding and new doors. I knew that I wanted glass for the upper cabinets, but also wanted to do an interesting design. My husband built a triple X design on the doors and we used wavy glass, which I love because it reminds me of something you might find in an old home.

Custom cabinet design. I love the look!


We also removed the middle cabinet door above the fridge so that I could add some warmth and contrast with baskets. I lined the backs of the glass front cabinets with contact paper from Dollar tree.

My husband converted all of the bottom cabinets from shelves to drawers. It is so nice not having to get on my hands and knees to find a missing Tupperware lid in the back of a dark cabinet anymore!

Let’s all just take a moment and appreciate how lovely their cook-top is. Such a happy place to create meals!


We got an amazing deal on our quartz counter-tops and my husband cut and installed them without ever having done it before. I have to say, I am married to a perfectionist – and they turned out fabulous! Since the cabinets and counters are both white, I decided to make the back splash a contrasting color and found bluish gray Arabesque tile from Home Depot.

The tile is gorgeous, and I really love all of the neutral accessories!


The final part of the remodel was installing wood planks on the ceiling, which added so much character. We have a large skylight in the kitchen that is a wonderful feature. The ceiling height in the room is only 8 feet but the skylight opening extends to 12 feet! To draw the eye up I found bird decals online, which we affixed within the skylight. They add a special unexpected touch.

How’s that for whimsy? And a chandelier in the kitchen? Yes please!


My husband Scot DIY’d so much of our kitchen and it saved us a ton of money! We would  not have been able to afford to do a full kitchen renovation had it not been for all of his hard work!


DAUGHTER’S BEDROOM

Another area in our house that I had so much fun designing and decorating is our daughter’s bedroom. For Christmas this year we gave her a whole new room. We painted the walls with Sherwin-Williams ‘agreeable gray’, and my husband installed board and batten on an accent wall for contrast.

Her armoire and nightstands were painted with Sherwin Williams ‘cityscape’. The headboard was an incredible Black Friday deal from Walmart. We got it for a steal at $59! I shopped various other stores – including Target, H&M, and Hobby Lobby – to pull the decor of the room together.

Such a soft and comfortable looking space!

I am most pleased with the A-frame bookcase that my husband built for the room. It adds so much visual interest to the space and is so fun to style!

This bookcase is a stunner! Fun looking + functional = major win!


What would you like readers to know about designing and styling a home? Do you have any tips to share?

Think about what you personally like and are drawn to, and not necessarily what’s popular in the moment that everyone else can go to the store and buy. You are a unique individual created by God to shine and share your own creative talents with others.

Scot made this cute bench for Minna as a gift years ago

Don’t get stuck in a mold with everyone else. Be your own person and display what’s important to you and that which speaks to you. I believe Edith Schaeffer says it best: “This place should be expressing something of yourself. It should be communicating something of you to your visitors, but it should also satisfy something within you. You should feel ‘at home’ here, because you have made it home with something of yourself.”


Do you have any remodeling / decorating plans for the future?

My immediate plans are to style the small guest bedroom, which used to be our son’s bedroom before he moved out. We also want to scrape the popcorn texture off of the ceiling in other rooms in the house. It’s a messy job, but it isn’t difficult and it really does make a dramatic difference!

Outside, we have plans to paint the front porch once the weather warms up and remodel our back patio – including the addition of an outdoor kitchen and fireplace.

This space is already pretty amazing. I can’t wait to see the new additions!

A few months down the road, I would love to tackle a master bathroom remodel. We tend to focus on one project at a time and at our own pace.

We are enjoying the fruits of our labor in this house and though we don’t have plans to move any time soon, I can envision us living in a smaller one or two bedroom home on a larger piece of property sometime in the future.


Thank you so much Minna and Scot for sharing your wonderful home with all of us! I encourage all of my readers to go check out Minna’s Instagram account HERE to watch the progress while she and Scot continue to remodel and make their house into a home that reflects their personality and style.


Now it’s your turn! Have you been putting your personal touches on your home? Maybe the entire house isn’t finished, but you are particularly proud of one room – I would love to see, and share with my readers!

If you are a blog subscriber, you are eligible! Simply email photos and a brief description to angela@arrowhillcottage.com for your chance to be featured!


10 SIMPLE DIY CHRISTMAS WREATHS

It’s the weekend after Thanksgiving. The turkey and mashed potatoes have been consumed and the last crumb of pumpkin pie is now gone. We had a fabulous time visiting with family and friends. This is always such a special time of year as we reflect on all we have to be thankful for.

Those of us (myself included) who have not yet put up the Christmas tree and decorations are trying to ease into the next holiday. I personally have found that if I decorate a little bit at a time I don’t feel as intimidated by all that needs to be done to get the house looking festive.

One simple way to get in the Christmas spirit is to hang a wreath on the front door. You could purchase one, sure – but making a wreath yourself is also a great option; And lucky for us, there are tutorials for so many amazing styles.

I have gathered 10 Christmas wreaths from around the web that are not only simple to DIY, but also look great!


10 SIMPLE DIY CHRISTMAS WREATHS

via Nordstrom

This succulent wreath is absolutely stunning and surprisingly simple to create! The link above will redirect you to a page that lays out step by step how to make this beauty.


via Delightfully Noted

Have a few mismatched ornaments laying around? Give them a purpose by creating this fun wreath.


via Shades of Blue Interior

Made from olive branches tied together and a few bell ornaments, this wreath makes a simple statement.


via An American In Rome

This wreath might take a while to create, but there are only a few simple steps (which need to be repeated many, many times!) The good news is that you don’t have to collect all of those wine corks yourself – you can buy them in bulk!


via Up To Date Interiors

You can’t really go wrong with a simple pine cone wreath. It will easily bridge the gap between Fall and Winter, Thanksgiving and Christmas.


via The Shabby Creek Cottage

Can you believe this gorgeous wreath was created using only Frog Tape and a pair of scissors? It looks great!


via Recaptured Charm

This wreath gives off some cozy vibes and also has a bit of a shabby chic look! The bonus is that yarn is super inexpensive!


via This Old House

This is just too creative not to share. Cuts of PVC pipe combine with small colorful ornaments to create this quirky wreath.


via Lil Luna

I love the puffy look to this wreath! The secret is coffee filters.. Lots and lots of coffee filters! It reminds me of a gentle snowfall.


via Good Housekeeping

Those red berries really add a pop of color! You can purchase winter-berry branches here.


I hope you enjoyed this roundup of festive wreaths! In a few days I will get started on the Christmas decorating around here – be looking for a Holiday Home Decor tour coming soon!


READER SHOWCASE: CILICIA + JUSTIN’S HOME

Today I am introducing a brand new feature to the blog – THE READER SHOWCASE – where I share photos and information about projects that YOU, my lovely readers, have tackled! I know there is a ton of amazing talent out there, and am excited to show everyone in blog-land what you have been working on.

For the first installment, I asked my friend and fellow creative soul Cilicia to share all of the changes she and her husband Justin have done to their cute house. I think you will all be inspired!

Cilicia, please tell me a little bit about your home.

We live in a 2000 walkout rambler, nestled at the end of a cul de sac. It’s on the outskirts of town and feels like the best of both worlds (city and country). We have a happy view out our back windows and can enjoy both the sunrise and the sunset from our dining room table.

I love the detail they added on the garage. And that yellow door is a stunner!


What is your personal design style?

This is such a loaded question! My style has evolved so much over the last 20 years. I tried to figure this out myself early on in our home transformations, but found it rather hard to pick just one style to adhere to. I decided that I would start buying pieces that I loved, rather than pieces that fit an expected style. In doing this, you will find a mix of shabby chic, modern, contemporary, mid century and items that don’t have a place in any of those categories, in our home. To me this mixed style feels warm and inviting, while maintaining a clean look.

Please explain your favorite remodel projects. What was done to each space?

We have purchased 3 homes. Each of them have had our touch put on them. My husband and I tend to do a lot of the work ourselves, and hire out only the things we know need a professional touch. I tend to be the one who comes up with the design ideas, does the bulk of the painting, and helps with small projects. My husband is the man behind the scenes. He trusts the visions in my head and brings them to life.

These photos display some of the work we have done on our current house.

LAUNDRY


Laundry room before


Laundry room after – how amazing is that chandelier? Doing laundry in style!

MASTER BEDROOM


Master bedroom before


Master bedroom after – so cheery and bright!

LOWER LEVEL GUEST ROOM


Guest room before – just a plain old storage room!


Guest room after – I think anyone could be comfortable here in this space!

GREAT ROOM

The house also has an open great room space, which is probably the largest project we have tackled. The entire space was remodeled (except for the kitchen cabinets and counter tops, which will happen sometime in the future.) Changes include all new flooring, walls painted a more neutral color, and updated lighting throughout.


living space before

View of the living space after. I love all of the different textures and colors they used! Doesn’t it look cheerful?

The fireplace was one of the biggest changes in the space. The previous fireplace was large, three sided, and was awkwardly placed in the center of the room. Removing it really opened up the space – as you can see in the pictures.

We decided that we still wanted to have a fireplace, and carved out a nook at the end of our long dining room where we built a new fireplace. It has been an amazing feature in our home and is where we read and relax.

The decision on how to finish the fireplace took over a year to decide! At first we were set on putting rock on the outside, but I never really loved any that I saw. As time went on I realized that I actually liked the wood that we had up there, but it just needed to be lighter. Ultimately, we used a fake ship lap finish, created with very cheap wood boards that were white washed. We think it finishes the space perfectly!


Fireplace before – three sided and awkwardly positioned


Fireplace after – centered on an adorable reading nook


Close up of the fireplace and reading nook. Isn’t that refrigerator box ‘cabinet’ everything?! And… I happen to know that she reupholstered that chair on her own!


What would you like readers to know about designing and styling a home? Do you have any tips to share?

I am not a professional by any means; But after remodeling and decorating three homes, I do have some thoughts:

#1. ALWAYS remember that paint is an easy fix. Walls, floors, cupboards, and furniture are all only a paint brush away from getting a completely new feel.

She’s right! Just look at the difference that painting the walls made in the lower level bathroom of their house!

#2. Don’t be afraid to try something new. Most of what we have learned has come from trial and error.

#3. Patience!! This plays a huge role in a remodel of any kind. Whether it be with your husband, wife, children, contractors, or even yourself. Try and breathe. Trust me, you need to remember this tip!

#4. Put up the pictures. So often I hear people say that they wish that they could put pictures on the wall in a nice way. The fact is that they can! There are so many different outlets to find ideas on a wall layout. Just go to Pinterest or Google to learn how to arrange pictures on a wall. No matter how you do it, just give it a try. Family pictures add such an important personal dimension to a home!

#5. My last piece of advice is to enjoy the process. If you need to take a step back every once in awhile, do it. Each space needs its own time and generally we can’t do it all at once. Find a house you love and make a dream about all the things you want to do to make it home – then just pick one thing at a time and go for it!

A cute display in the laundry room. I love how she mixed in vintage finds!

Do you have any remodeling / decorating plans for the future? 

 We still have projects and I think we always will. I love to dream of ways to make our home feel more like “us.”  Some of the projects that I hope happen sooner than later include:

  • The addition of a three season porch to the upper level connected to our dining room. We entertain a lot, and I have already envisioned the parties, laughing, and conversations happening in that space!
  • New paint for our kitchen cabinets, to brighten them up and help update them a bit. We also would like to install new counter tops, probably in marble or granite.
  • New flooring for the entire basement, and an update to the basement bathroom.

Thank you so much Cilicia and Justin for sharing your wonderful home with all of us!

Now it’s your turn! Have you been putting your personal touches on your home? Maybe the entire house isn’t finished, but you are particularly proud of one room – I would love to see, and share with my readers!

If you are a blog subscriber, you are eligible! Simply email photos and a brief description to angela@arrowhillcottage.com for your chance to be featured!

THANKSGIVING DECORATING IDEAS + FREE PRINTABLE ART

Happy November everyone!

I still can’t believe how quickly October flew by. With the start of a new month, I am finding myself trying to get in front of all the holiday busyness that happens this time of year.

Our family will be traveling for Thanksgiving, which means that the bulk of the preparations and decorations won’t fall on my shoulders. Though I’ll admit that it is a relief to not be hosting, I still want our home to look festive. As I mentioned in THIS post, I have been having a lot of fun creating fall centerpieces.

I also made this cute chalkboard sign out of a small door. I simply removed the glass and painted the frame white, then cut a piece of plywood the size to fit in the opening and painted it with black chalkboard paint. I hand lettered the words using a white paint pen, which means that the sign can be used both indoors and out!


The phrase is simple, but to the point. It is what I want my family, including myself, to remember this Thanksgiving.

BE THANKFUL for everything that you have. For your family, your possessions, and for the special talents and gifts that make each of you special and unique. Be thankful for the opportunities you have been given, and for the memories you have made.

BE HUMBLE in your life. You can be grateful and proud without being boastful. There is no need to shine a spotlight on yourself, just allow your INNER light to shine into the world.

BE KIND to others, and to yourself. As the saying goes – ‘Do onto others as you would like to have done to you.‘ This world can use a little more kindness.

The pumpkins I purchased for our Fall decor are still going strong. I used the pumpkins, some burlap, and various containers, along with the new sign – to form a vignette on our front porch.

We live out in the country, and so typically it is only our family that sees the porch decorations; But the other day a service person stopped by to do some work. He rang the doorbell and I could see him standing on the porch, reading the sign. I came to the door and he immediately said to me “These words really challenged me just now. I was having a tough morning. Things haven’t been going my way today. But this sign made me stop and think about how thankful I truly am. It was a great reminder!”

It just goes to show that you never know when something simple could make an impact on someone’s life!

I love the sentiment of these words so much that I wanted to make them available to you. I have created a printable art PDF, which is available for free in the resource library.

The print is so simple and looks great with a few decorative accessories. Pumpkins anyone?


ADDITIONAL THANKSGIVING DECORATING IDEAS

If you are hosting the Thanksgiving celebration this year and want some additional ideas of how to decorate your home, check out these other creative DIY ideas from fellow bloggers!

1. PUMPKIN CENTERPIECE: This stunning centerpiece was created on the blog A Pumpkin & A Princess. She really loves her pumpkins, and it shows!

2. THANKFUL TREE: Simply Vintage Girl created this festive tree. It is the perfect idea for Thanksgiving. Give it a try!

3. GIANT DOOR TAGS:Welcome your guests with these classy wooden tags. Jaime shows you step by step how to make them on her blog.

4. GOLDEN CORN PLACE HOLDERS: These place holders will steal the show on your table. Learn how to make them at the website Freutcake.

5. FALLING LEAVES GARLAND:Erin and Kirstin share how to create a delightful cluster of glitter leaves. They look festive on a fireplace!

6. CHALK PAINTED PUMPKINS: These colorful pumpkins are so beautiful and easy to make. Find out how on the blog Anderson + Grant.

7. CHEESE GRATER LUMINARIES: Aren’t these so clever? I saw this image in a round up Etsy had done for Fall decorating. They seem very simple to make and would look gorgeous as a centerpiece!

Happy decorating!


This post contains affiliate links.  To learn more about my website disclosures, click here.

SATURDAY SKETCHBOOK: BOYS BEDROOM

Recently, I posted about {D}’s small BEDROOM.  I also mentioned in THIS post that we will be utilizing some of these same concepts in our new house.  All three of our boys will share a room, but each will have a smaller private sleeping nook off of the larger shared ‘communal’ portion.

I wanted to jump in today with a quick sketch of how this space looks in my head at the moment.  It might be easier for some of you to visualize 3D drawings than floor plans.

You can see from this sketch that the shared space is a good size.  It is roughly 9’6″ x 12’0″and should provide plenty of space for the boys to enjoy the things that they love to do.  A corner chair and low bookcase for reading.  A pallet accent wall to house guitars when they aren’t being used (So far, two of our boys are taking guitar lessons.  You can see a recent video of {D} practicing HERE).  There is enough room in the shared area for a large dresser with a hutch, which could house clothing & toys.  Pretty sure there will be a TV in there somewhere too… they like to spend time together playing the PlayStation on occasion.

See those three little doorway openings on the outer walls of the room?  They lead into the sleeping nooks.  One for each boy.  They are each around 7’0″ x 8’6″ – with sloping ceilings that go from about 7′ high at the highest point down to the floor at it’s lowest – so, not huge at all.  But they should get the job done nicely.  Their beds will be on low platforms with the ‘head’ of the beds toward the higher sloping portion of the ceiling.  If I can figure out a way to create some sliding trundle drawers under the bed frame, that will be great.

Each nook will have shelves built into the studs of the wall and a mounted/ hard wired light for reading.  On the opposite wall from the bed, there is space for a small dresser or shelf to house some personal belongings.  The wood floors from the main part of the bedroom will flow into the sleeping nooks, to keep things somewhat consistent – but each boy will be allowed to personalize their space with bedding, rugs, posters, and their collections.

The boys will likely be ages 12, 10 and 8 when we move into the cottage – and just about at that age when they will begin to crave more privacy.  We are hopeful that this solution will give them the best of both worlds – sharing a room with each other, as they have always done, and maintaining some separation.  They were crowded around my shoulder today as I drew these sketches and as of right now they have given me the stamp of approval on this concept.  Here’s hoping they don’t change their minds in the next couple of years!

Happy Saturday everyone!