AROUND HERE: SEPTEMBER 2018

Around here, we have been…


CELEBRATING birthdays for both of the girls! {K} turned 8 and {M} turned 5! Last year we celebrated their birthdays together, but this year we decided to have small family parties for each of them separately.

{K} had a ‘magic pony’ aka unicorn party. We even bought her a a unicorn headband so that she could pretend to be one herself. She received many art supplies and creative tools, which she loved. Her biggest wish, though, was to unwrap her ‘stinky present’ – her purple arm cast. ha ha! That wish was realized about a week after her birthday, and she is now cast free!


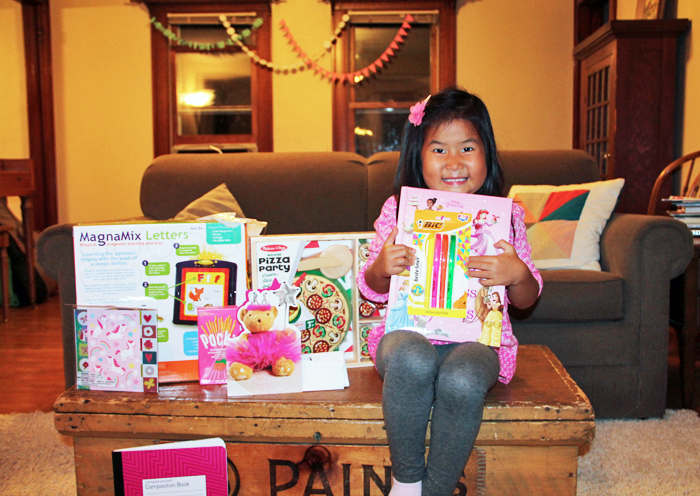
{M} had a confetti/ celebration themed party and received gifts that included a magnet learning toy, drawing book, and a wooden pizza party set to use with her play kitchen. She soaked up all the attention, especially at school with her friends – while passing out cookies and listening to them sing the ‘Happy Birthday’ song to her.


We are blessed to have these two little girls as part of our family and pray that the year ahead of them is filled with favor.


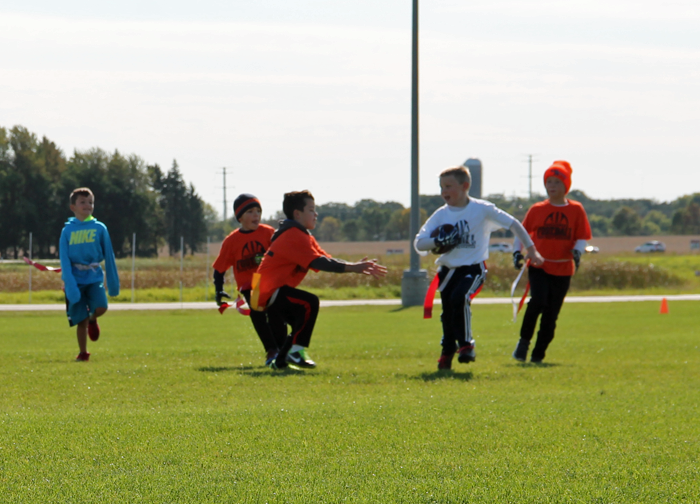
GETTING our exercise.  Before the very cold weather blows in, and the snow begins to fall, we are trying to pack in as much outdoor time as possible. Both {D} and {L} continue with their football programs.

Being the first year for {L}, he is still very much learning the rules – along with his teammates. It is sometimes funny to watch them out on the field. That being said, we are proud of {L}’s hustle and his ability to follow instruction.

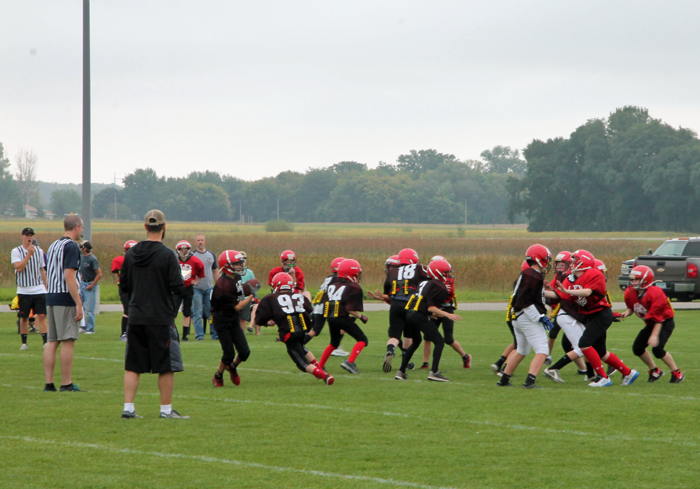
Craig is coaching {D}’s team, and reports that they are a great group of boys. As of the writing of this post, the ‘mean machine’ (team name determined by the kids) is undefeated, and have yet to have any points scored against them! In his free time, he is still living and breathing field goal kicking. Through a series of events, he was able to match up with a former college football kicker – who is willing to give {D} private kicking lessons!


This Fall has found {I} doing a lot of running, and he seems to really love it! His first experience with distance running was the elementary 1 mile fun run, which is an optional event for all 4th and 5th graders in our school district. Though he was hesitant to sign up, Angela took him on a practice run. Once he realized that it was possible for him to go the distance, he was all in! He finished his mile race with a time of 7:47! Since the race, he has run with Angela a few different times – up to the distance of 3 miles! He is always trying to beat his time for the mile, and now has a PR of 7:25. Perhaps he will have a cross country career in his future?


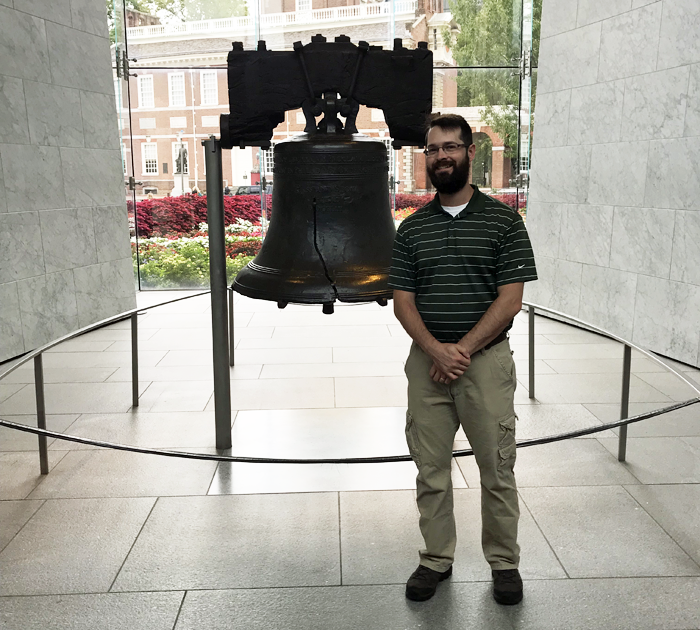
WORKING our jobs. This month, Craig took a work trip to Philadelphia where he was able to take in some of the famous city’s historic landmarks, such as the Liberty Bell and the ‘Rocky steps’. He was also able to eat a classic Philly Cheese steak sandwich.

Angela began her new part-time work venture – as a para/ aide in the Preschool room at our kid’s school. She is now with {M} for half of her school days on M/W/F. She loves the position so far. Because it is part time, she is able to run errands in the afternoons on those days and ‘recharge’ on the days between.


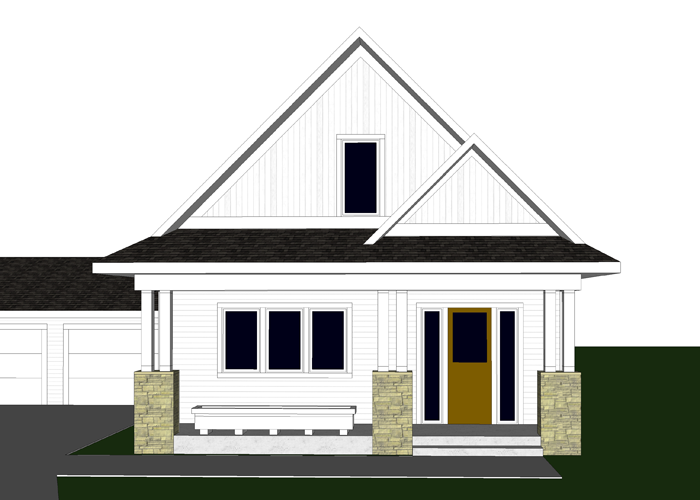
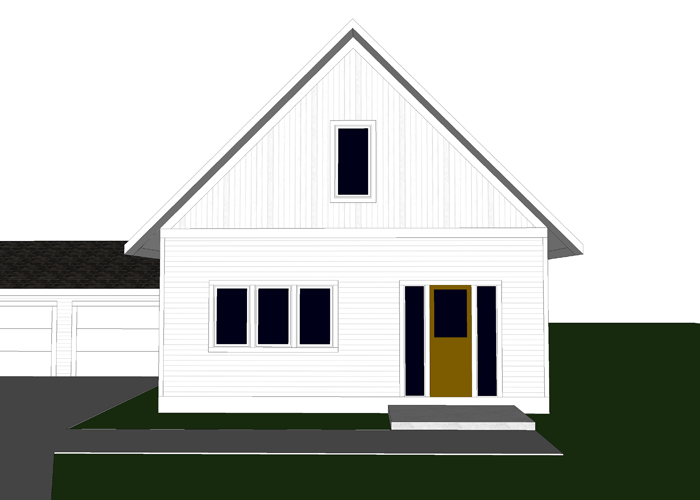
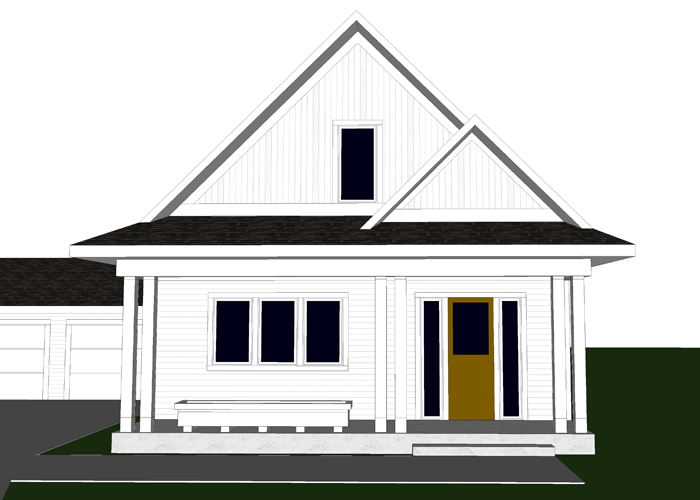
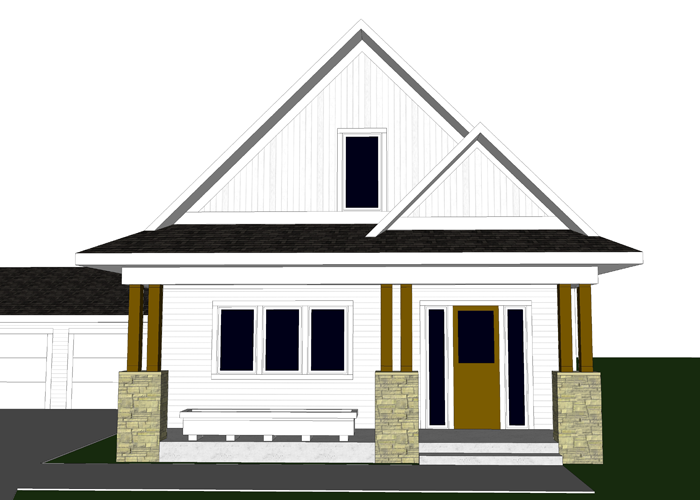
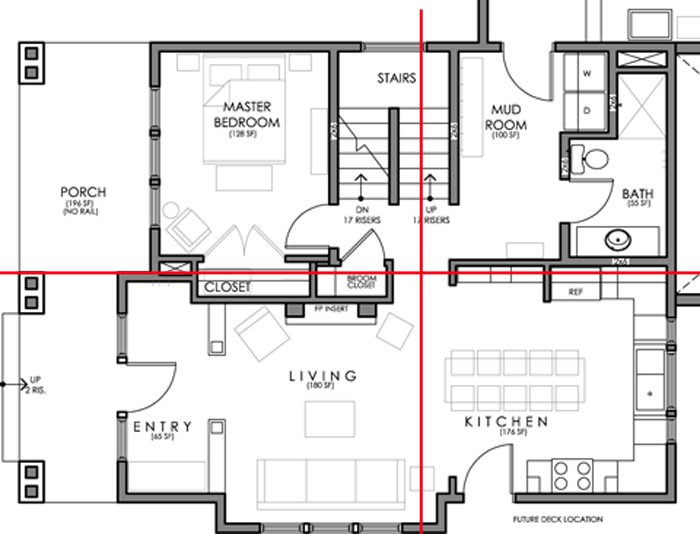
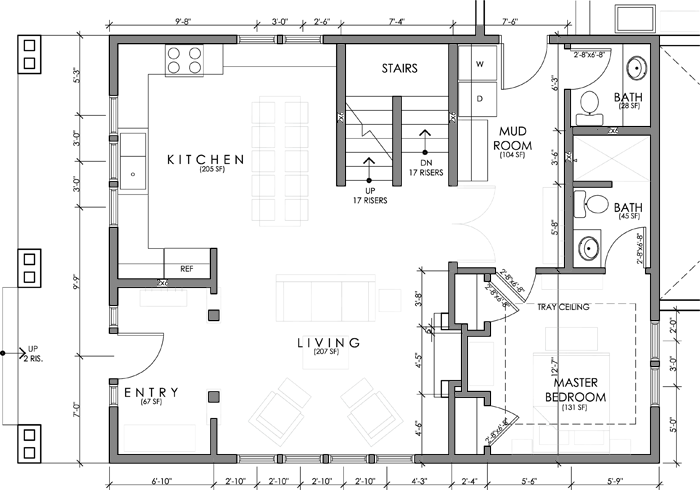
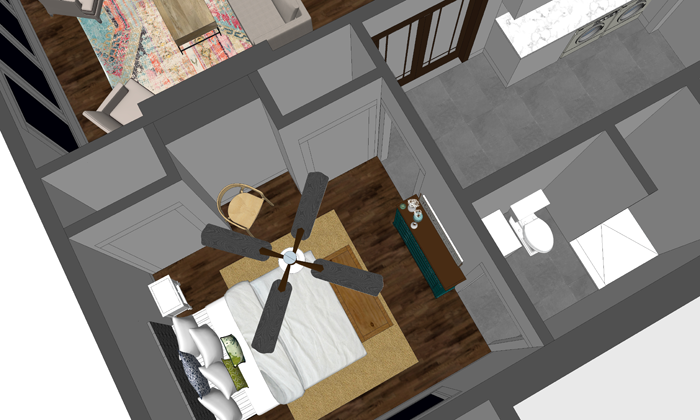
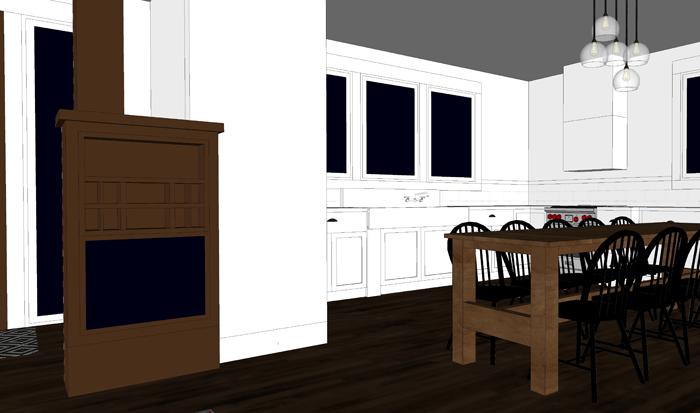
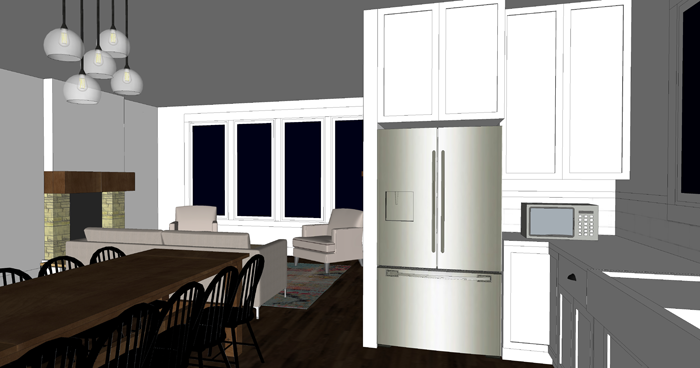
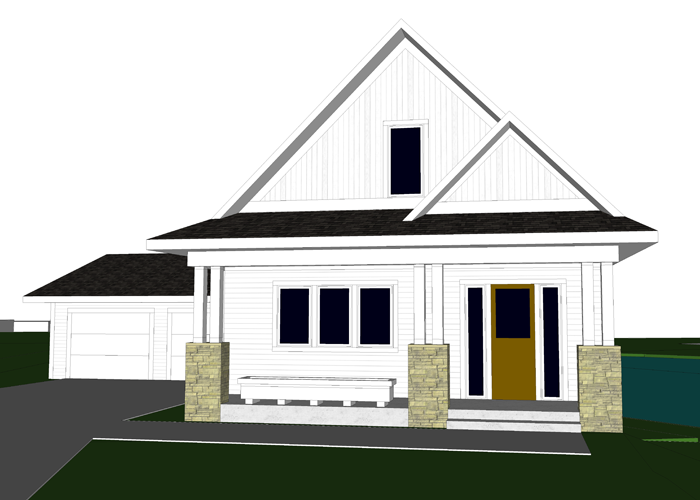
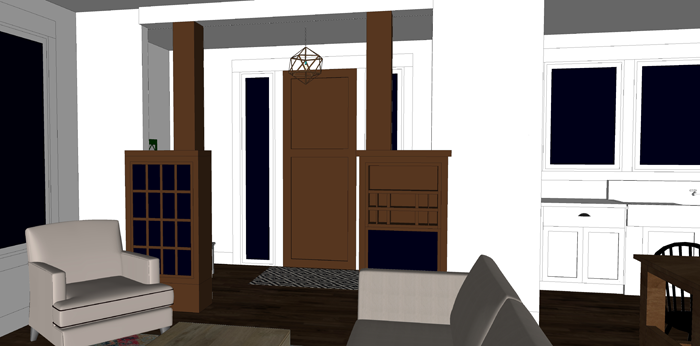
CHANGING some of the design aspects of our future house. While doing a bit of fine tuning and simplifying, Angela somewhat stumbled upon a major planning change for the new house. It adds so much value, including an attached bathroom for the main floor bedroom. We are really excited about that!

We will soon be contacting the bank and getting our preliminary estimate/appraisal done. At that point we will also work with our contractor and excavator to determine the house position, and begin to cut down some of the main trees that will need to be removed. The large trees, we hope, can be milled into boards that we can use for furniture pieces in the house.


This is just a glimpse at what our family has been up to. If you’d like a closer look, be sure to check out our weekly ‘mini vlogs’ on our YouTube channel ARROW HILL FAMILY. Be well everyone!


18 CREATIVE COLLECTION DISPLAY IDEAS

If you have a collection of items you love, but are unsure of the best way to display them, check out these 18 creative collection display ideas.

Because homes are personal spaces – and are reflective of the people who live within their walls – it only makes sense that they would be filled with the things the homeowners love.

And for many people, if they love something enough, they may just want to have more than one of that item. After awhile, a little collection may begin to take shape.

These 18 creative ways to display collections can help you showcase the items that bring you happiness. Visit the links below each image to learn more about these collections ideas.


SET THEM ON SHELVES

Probably the most basic way to display collectibles is to set them together on shelves. The similar objects play off of the beauty of one other when placed side by side. This display option allows you to easily add more shelf space as your collection size increases. The downside is that you may find yourself doing a lot of dusting to protect your collectibles!


teapot collection display

Teapot Collection


Shelves Of Lunchboxes


collection display shelving

Vintage Record Collection


FRAME THEM

For flat or uniquely shaped items, consider frames or small cubes that can act as miniature gallery podiums. If the items you collect are flat – such as vintage prints or handkerchiefs – you may be able to get UV protective glass for your frames, which can add a layer of protection.


Display of handkerchief collection

Framed Handkerchiefs


camera collection display

Vintage Camera Display


postcard collection on display

Stamp Collection


GROUP THEM IN GLASS CONTAINERS

Smaller items can find a place in clear containers such as glass mason cans or apothecary jars. These containers are easily moved and can themselves be grouped together for an additional level of display. You will not be able to see each and every angle of your small collectible items if they are displayed this way – unless you pick them out to look at them. This may be a downfall for some collectors.


vacation collection display

Vacation Memory Jars


collection of cookie cutters

Cookie Cutter Collection


glass jar collection

Items In Dome Displays


HANG THEM UP

A fun, and ‘outside the box’ way to display your collection might have you looking UP. Create a floating mobile of postcards, or a lampshade of old love letters. A hanging line might even allow you to pin up items that are heavier.


button collection

Pins on a Lampshade


hanging tin collection

Tin Collection


postcard mobile collection

Postcard Mobile


CLUSTER THEM TOGETHER

Perhaps the items you collect are large and bulky. Or perhaps you have a collection of items that are still in regular use – such as picnic baskets or tableware. These items might be displayed easily by simply clustering them together on a side table or even on the floor.


large crocks on display

Vintage Crock Collection


collection of vintage picnic baskets

Picnic Basket Group


globe collection

Globe Collection


PROTECT THEM IN A CABINET

For the more delicate items that should not be handled often, consider protecting them behind glass doors. A hutch or curio can be a safe place for items that are easily breakable. Some cabinets may even have the option of showcasing your display with light.


collection in a cabinet

Stoneware Collection


silver collection

Vintage Silver


pottery collection on display

Pottery In A Cabinet


MORE DISPLAY INSPIRATION

Aren’t these ideas so fun? If you’d like more inspiration, be sure to take a look at my Pinterest Board ‘Collection Displays‘ – I am always adding to it!

If you collect books, consider reading this post on 9 creative ways to decorate with them.

I would love to hear which of these collection ideas is your favorite and/or if you have found other unique and inspiring ways to display the things you cherish most. Please comment below!


PIN THESE IDEAS FOR LATER

collection display ideas


THE IMPACT OF FRONT PORCH DESIGN

A covered front porch is considered a major asset to a home – one that many buyers would be willing to pay more for. The indoor/outdoor and public/private qualities that a front porch provides can add to the overall enjoyment of a home.

front porch design ideas


The detailing of a porch can also greatly impact the look of a home’s exterior. The combination of the porch’s roof-line, rails, and columns are of great importance; And determining the right proportions and styles of each of these elements can be tricky, especially if you are starting from scratch.

If you have an older home that has since lost it’s porch, you may simply need to see some historical photographs of similar homes to get a good grasp of what the proper detailing should look like. You can also take cues from these historic examples if you are designing a new home – but you may have more leeway on what might be deemed appropriate. You may need to play with a few different ideas before you land on the styling you prefer.


VISUAL EXAMPLES OF FRONT PORCH DESIGN

I will use the porch of our home, Arrow Hill Cottage, as an example of how a front porch can greatly impact the look of a home’s exterior.

Obviously, I have been going more for a ‘cottage’ look while designing the exterior – But the truth of the matter is that our home is basically a simple rectangular shape. It’s the porch that helps it come to life.

simple front porch design


Because our porch is only 14″ off of grade, we will not be required to install a railing around it. Instead we will incorporate a large planter box to help define the space. I can’t wait for my husband to build it for me (wink, wink). The columns are doubled up and positioned on stone bases that match the height of the window sill.

I would like to show you some other examples of what the house might look like with different porch detailing. First, lets take a look at this same house WITHOUT it’s porch.

Home design without a front porch


THAT’S A VISUAL SHOCK!

Insert all of the sad emoji’s here. Can you see how much character was lost with the elimination of the porch? The entire facade looks flat and uninviting. The entryway is not defined and the windows seem to have little balance. I think it’s clear that this house needs it’s porch!


The use of thinner columns and the elimination of the stone bases would have created a look that has a bit more of a Colonial styling. This set up might have looked more appropriate with a railing. For us, it wasn’t the right fit.


simple home with front porch


A thicker column profile atop brick bases might have given the house more of a Craftsman/Bungalow look. I personally love craftsman detailing; But I felt that with the steep pitch of the roof, they wouldn’t complement the house correctly either.

front porch with brick columns


Color can also play a role. Stained brown columns may have given the house more of a Modern Farmhouse vibe. Lovely, but not what we were going for.

farmhouse style front porch


All of these options are unique and none would be considered ‘wrong’ in this situation. Our choice came down to a matter of a styling preference.


If you have a home that could benefit from a front porch, but aren’t sure what it might look like – please contact me about doing a MAKEOVER TAKEOVER for you! I would be happy to offer up some options that could really make your house shine!


REFINISHED DINING CHAIRS IN 6 EASY STEPS

I’m happy to report that another item from my PROJECT BUCKET LIST is well underway. The dining chairs have begun their transformation from brown to black! And I am loving them!

First, a quick recap on what my plans are for these chairs.

For our future dining space at Arrow Hill Cottage, we are hoping to create a unique harvest table – partially out of lumber harvested from large trees on the property. This will be a long and narrow table, with seating for ten people. We want to make sure that we always have room for guests to dine with us.


Our dining space will be directly off of the kitchen – in an area of about 9′-0″ x 14′-0″. Not a very large space by any means. And so, in order to include seating for ten people, I intentionally searched for chairs that had a small profile.

I found the perfect chairs at a local antique store. This set of  8 had been recently refinished with stain.


An additional 2 matching chairs were were found at a different antique store. These chairs were not in as good of shape, and were covered in quite a few layers of paint – some of which had already begun to peel off.


I’ve decided that with a stained wood dining table, and stained hardwood floors – our chairs will look best painted black. I started the transformation process with the two brown painted chairs.

Today I will share the 6 simple steps that I used to refinish the first two chairs. Hopefully this post can serve as a guide to anyone planning a similar project! 


STEP 1: REMOVE EXISTING PAINT LAYERS

These chairs were covered in many layers of paint. While you might be able to sand some furniture pieces down to the bare wood – that was not be possible with these chairs. A power sander would have changed the shape of the spindles. It also would not have been able to get into the small turned details.


Instead, I decided to use a stripping agent to remove the paint layers. I have had great results with  Citristrip Stripping Gel. It is powerful, but has a smell that isn’t overwhelming. Even still, you want to be sure to wear a face mask or respirator. Other items you will need for this step of the process is an inexpensive paintbrush, a small container to hold the gel, a scraping tool, a stiff scrub brush, a rag, and a bucket of warm soapy water (dish-washing soap works well).

Apply the gel liberally over all areas that need paint removed. Let it sit for approximately 30 minutes and you will notice the paint start to bubble and then turn white. At that time you can begin to scrape. You may want to experiment with different tools to find the right fit for your project. If using a metal scraper, be sure not to gouge into the wood with the sharp edge of the scraper.

In my experience, the paint will be stripped off one layer at a time. You will need to apply multiple applications of the gel to reach bare wood.

As the paint is coming off, I like to take a water/soap soaked rag and clean off the surface. This helps to get the more fine bits of paint that may be stuck between spindles, for example.

Repeat this process until you have reached the bare wood layer. At this point you will want to use your stiff brush to remove all extra debris.

Let the chair dry completely before beginning the next step.


STEP 2: SAND

As mentioned previously, it is not a good idea to use an electric sander on fine detailed pieces of furniture. Sanding by hand can be tedious, but it will yield the best results. Instead of using flat sandpaper, I prefer to use 3M sanding sponges. They don’t rip apart like traditional sandpaper sheets – and the beveled edges of the sponge work perfectly for the detailed sanding.

Sanding is pretty straightforward. Be checking to make sure the surfaces are feeling smooth and that the detailed areas are not still filled with paint.


STEP 3: CLEAN

Using a tack cloth, wipe all of the sanding dust off of the chair. Again, be sure to get into all of the detailed areas.

As a final cleaning measure, I like to dab a bit of mineral spirits onto a rag and wipe it over the wood that will be painted. It is a quick and easy task, but will get any last bit of gunk that may be left on the furniture piece.


STEP 4: PRIME

This step is the most often forgotten or eliminated, yet it is absolutely essential! The purpose of the primer is to give the paint the ideal surface to adhere to. Even if the paint you plan on using indicates that it is a paint + primer combo, add a coat of primer first. Wood that is primed before it is painted is much more durable and will hold up better than a piece that is covered only with paint.

Primer can be brushed on or sprayed. I personally love the ease and simplicity of spray paint. This Rust-Oleum flat black primer went on super smooth and in one coat. One can of primer was enough to cover both of the chairs I worked on. I set my chairs side by side on a set of saw-horses, which allowed me to get access to all parts of the chairs (including the underside) at one time.


Allow the primer to dry according to directions, then lightly sand with a fine grit sandpaper or sanding sponge and clean with a tack cloth before beginning the next step.


STEP 5: PAINT

Of course, this is when the real magic happens! Choose a color that suites your decor style. Again, I used a spray paint product – Rust-Oleum Black, in a Satin finish. I recommend a finish that is either satin, semi-gloss or gloss. A flat finish will showcase every imperfection your piece may have, and is generally not as durable.

Between each layer of paint, you should sand lightly with fine grit sandpaper and clean the dust off with a tack cloth to ensure that the surface is smooth.


STEP 6: SEAL

This final step is optional, but can be important – especially on furniture pieces that will be used on a daily basis. Sealing with a clear coat can give you a surface that more easy to wipe clean should the need arise. It also adds protection from nicks and dings.

If you choose not to add a sealer product, let the piece sit for a minimum of 30 days before use. This will cure the paint to it’s maximum potential. If you are sealing your piece, wait a minimum of 24 hours after the final coat of paint has dried.

I’ll admit that I have yet to complete this step on my chairs, but I will be adding the sealer. Heaven knows that dining chairs + kids = lots and lots of wiping clean!  I will be using a product similar to THIS to get the job done.

After applying the sealing coat, wait approximately 24-48 hours before using the piece.


Below are a few pictures of our newly refinished black chairs. They make my heart happy!


Two down and eight to go! I might work on one of the other items on my list first though, to give myself a little painting break.

*this post contains affiliate links*

COTTAGE STYLE FALL HOME DECOR FINDS

Looking to decorate for the season? One of these Fall home decor items might just be the perfect accessory you are looking! Read on for all the source links!

Fall home decor sunflowers


It is nearly the official start of Fall – and it is being ushered in by a cooling in air temperature and the changing leaf colors. Personally, I welcome Fall with open arms. It is likely my favorite season of all. I just wish that it lasted longer and that it didn’t precede my least favorite season – Winter.

I also love Fall decorating. And thinking about decorating Arrow Hill Cottage for this season (next year) has me really excited! I did a little web shopping and found some great Fall home decor items that are perfectly suited for the cottage style!


This post contains affiliate links to products for your convenience. If you purchase via my links, I may receive a small commission at no additional cost to you. For more information, click HERE. Thanks for supporting Arrow Hill Cottage!


COTTAGE FALL DECOR FINDS


Fall home decor garland

This Burlap garland is so sweet with it’s colorful leaf pattern. It is simple, and a bit rustic. I could see it gracing a mantle throughout the Fall season, all the way through Thanksgiving.


Thanksgiving Fall art print

You can’t go wrong with simple artwork that features an adorable pumpkin! The watercolor technique adds just the right amount of visual texture.


Fall home decor door wreath

Welcome visitors with this plush harvest wreath. The colors are bright and bold, yet warm and inviting.


Fall home decor white pumpkins

More adorable white pumpkins! And gourds! These are artificial, but sure look realistic to me! An added bonus is that they will not rot. You can store them to re-use year after year.


Table runner fall home decor

A simple table runner is a staple home decor item. This neutral buffalo check pattern would not only work with Fall decor, but other seasons as well.


Fall seed garland decoration

This berry garland could really brighten up a room. Use it as a mantle decoration or string it around a banister for a fun accent.


candle fall home decor

Who doesn’t love a great smelling candle? Don’t feel like baking a pumpkin pie? Go ahead and fake it with this great scent!


Pillow home decor for Fall

Adding a themed pillow is one of the most simple decor moves you can make. This one is neutral, but has a cute Fall message.


I would be so happy to decorate with these awesome Fall home decor items! I might need to fill up the cart and put them in storage for next year!


PIN THESE FINDS FOR LATER!

Cottage Fall home decor ideas


burlap leaf garlandpumpkin art print

harvest wreath  |  white pumpkins & gourds

buffalo check runner  |   seed mantle garland

pumpkin soy candle  |   fall themed pillow


MORE POSTS ABOUT FALL HOME DECOR

You may want to check out these additional Fall decor posts from Arrow Hill Cottage!


Fall Decorating Ideas

Natural Fall Centerpieces

Free ‘Be Thankful’ Art Print


These Fall decorating ideas from around the web are also worth a read


HOME DESIGN PLOT TWIST!

Just two weeks ago I wrote about how our home design has evolved. I saw it as a bookend to the design – a way to finish off the chapter of floor plan configuration, and usher in the next phase of material selection.

And then, well… life has a funny way of sending you twists and turns when you least expect them! Today I will be writing about some major house changes that have happened – changes we didn’t even see coming!


home design changes


I have written in previous posts how we have had to make some sacrifices for our house design – based primarily on site constraints and financial limitations. Most of the things that haven’t ‘made the cut’ have been no big deal. I can live without an extra window, or the specific roofing material I was hoping to use.

There are other house elements though, that we have been bummed about not being able to include. One of the most difficult to accept was the idea that our main floor master bedroom would not have an attached bath. An attached bathroom was high on both of our wish lists, but ultimately we decided that we could live without it. After all, we have never had a true master suite in all the years we have been married.


But after working through the design of the upstairs bathroom that our kids will share, I started to think more about the bathroom situation for the rest of the house. That led me to begin feeling sad once again that I had not been able to work in the master bathroom we had been dreaming of.


And so, since our build is on hold until Spring of 2019, I figured I had some time to tinker with the home design & floor plan layout a bit more


Much to Craig’s annoyance. The blessing and the curse of loving home design is that it is probably never fully DONE. Craig is ready for things to be set in stone now. He may not understand that even after the house is built I will be tinkering, with paint colors and accessories! Ha!

During one of these mini design sessions, I realized something about the main level plan that I hadn’t before. It is essentially split into four quadrants: Living room, Kitchen/Dining, Bedroom, Utility. Maybe it is because the plan has evolved for such a long time and my eyes have been looking at it for so long, but I had never noticed that aspect before.

I also hadn’t really given much thought to the fact that the main floor was also divided in half in terms of the public and private spaces. The kitchen/living/dining half (public) and the master bedroom/bathroom/utility spaces (private).

home design plan layout


THE BIG IDEA

Then suddenly, I had an idea. I tried to swap the kitchen/dining quadrant with the master bedroom quadrant. Things suddenly started to make sense! By making this one simple swap the front half of the house would then be public, and the back private. But best of all? You guessed it. The master bedroom could finally have that attached bathroom! And just like that, we were headed in a new home design direction. PLOT TWIST!

custom home design


OTHER HOME DESIGN BONUSES

There were other fun surprises from this room swap.

I had never been super keen on the idea of having the kitchen immediately visible to people who visit. Visitors are likely to come through the front porch entryway.  Although I do try to keep my home tidy, the kitchen is ALWAYS the messiest. I think that’s normal. With the new layout, the kitchen is easily accessible – yet in a more visually private location. It will have a very similar cabinet setup as before. The biggest change is the movement of the dining table so that it in it’s own little space.

kitchen home design


When entering the front door now, the view will be of the wall of windows to the right and the fireplace directly in front. The beautiful wood french doors that we will bring with us from Craig’s grandparents homestead farmhouse will also be visible. This prominent living room location is the perfect spot for them! Previously they had been designed in as doors to our bedroom closet. The doors will likely be open most of the time. But it is nice to have the option to close off the laundry room/ mudroom space if we want.

living room home design


Also, we will be able to reuse the antique cabinets we own as room. They will act as dividers between the living and entry spaces. These cabinets have so much character, and Craig has already begun the process of refinishing them!

home design front entry idea


The improved sight lines are possibly my favorite aspect of this plan change. The openness will allow for more natural daylight to flood the common/ public spaces in the house. From this kitchen corner, we will have views to the west, east and south!

virtual home design open concept


NEW CHALLENGES

Of course, not all things magically fell into place. I did ended up pushing part of the house out two feet, to give the kitchen/dining more space. This added about 50 square feet to the overall plan, but also simplified the exterior shape of the house. We are hoping that the changes offset each other cost-wise.

I wonder what our contractor will think of all this – He will probably be as surprised as we were!


home design 3d floor plan

What do you think friends? Do you think this change is for the better like we do?


MY FAVORITE INSTAGRAM ACCOUNTS THAT FEATURE POPS OF COLOR IN DECOR

Today I am finishing a three part series on COLOR THEORY and how it relates to home decor and design preferences. The basic belief is that people choose to use certain colors because of their own personalities as well as the mood that they want their home to convey. And, just as there are multiple preferences on how to furnish a home – there are variations on how color is used as well.

I have found there to be three main ways that people utilize color in their homes:


ONE: Neutrals Prevail

TWO: Pops of Color

THREE: Color Explosion


I have already featured interiors that showcase the idea of  COLOR EXPLOSION , as well as those where NEUTRALS PREVAIL.

Today though, is devoted to those interiors that are a combination of both. A little bit of neutral, and a little bit of color. Maybe this is the camp that people fall into when they just can’t make up their minds. They love color – but don’t want to over-do it; and yet they feel that keeping everything neutral is a bit boring and plain for their liking.

I’m especially excited about today’s feature because it happens to be the category that I would put myself in. I love how a mostly neutrally decorated space seems to come to life with a small infusion of color. The following Instagram accounts are swoon worthy, and feature this decorating technique well.

Note that each of these accounts seem to highlight specific colors or color combinations, which are most likely the owners favorites.


@happyhomeonhighbridge

Jennifer’s home is lovely and simple, yet is brought up a notch in drama by the combination of teal and coral that she tends towards. She has an amazing teal ship-lap wall in her dining room you need to check out!


@jogalbraithathome

It is apparent that Jo has a love for nature. The greens of her house plants serve as one of the main colors that she likes to ‘pop’ with. A complimentary Navy blue completes the palette. Her home seems casual and comfortable – as if anyone scrolling through could just hang out and chat.


@anettetalstad

Anette really loves color. Her amazing home features a variety of bright and pastel colors. The muted tones throughout are balanced with an even amount of sleek white. The tagline for her Instagram page is ‘happy home with a view’ – and yeah, she has a view all right. Go check it out!


These accounts are all gorgeous, right? I hope you have been inspired not only by today’s interiors, but those featured in the previous posts in this series also. After seeing examples of them all, which category would you say you fall into?