Cottage Spring Decor | Spring 2021

Today, I want to share the cottage spring decor here at Arrow Hill Cottage. I am always amazed to see how simple changes can completely transform a space for the seasons.

cottage home interior

With winter finally melted away, and the official start of spring identified on the calendar, it was time to change up the interior decor of the cottage.

There is something so special about the spring season. It has a freshness, a sense of newness about it. People generally are spending more time outdoors and enjoying the longer hours of sunshine.

As a minimalist family, the amount of decor items kept in our home is small. However, I do like to mix and match the items we do have as a way to change the look of the cottage interior.


Cottage Spring Decor

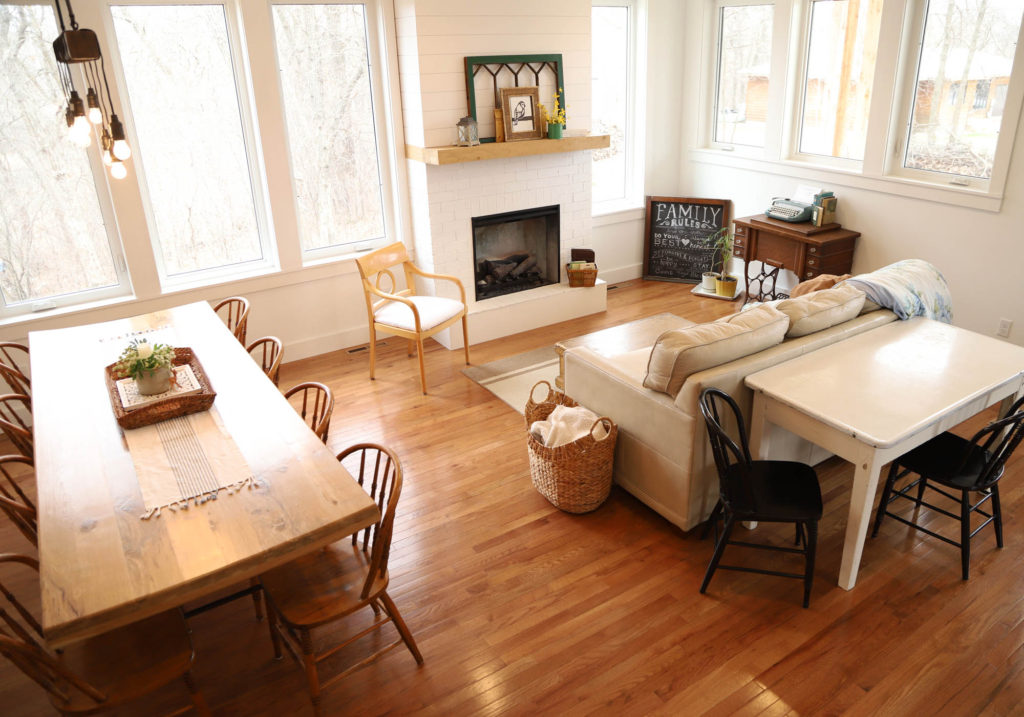
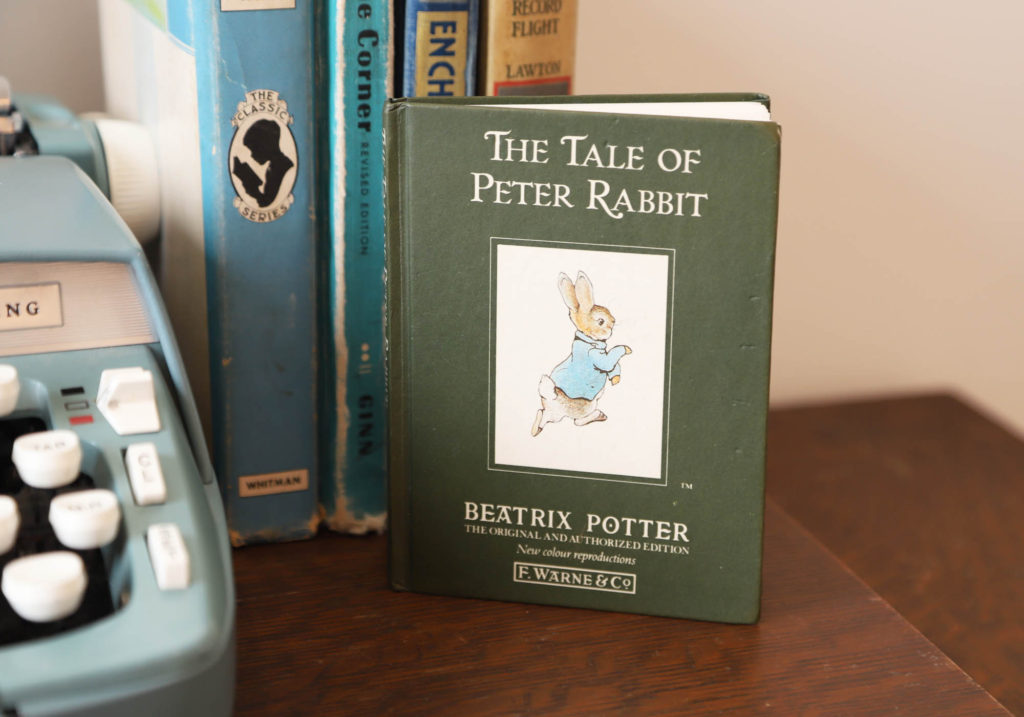
Our cottage is filled with items that have been collected slowly throughout the years. As I was gathering pieces from various rooms, a theme started to emerge. Green, pale blue, and yellow seemed to be the dominant colors I was drawn to. Natural elements, such as woven baskets and greenery also played an important role in this year’s spring decor.

cottage spring decor

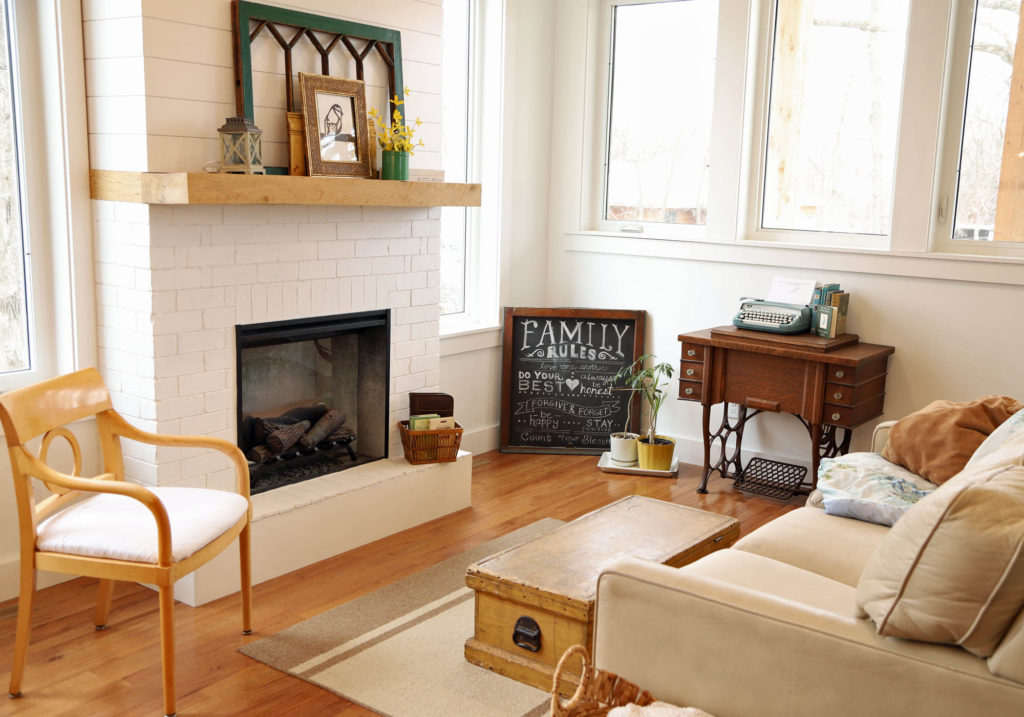
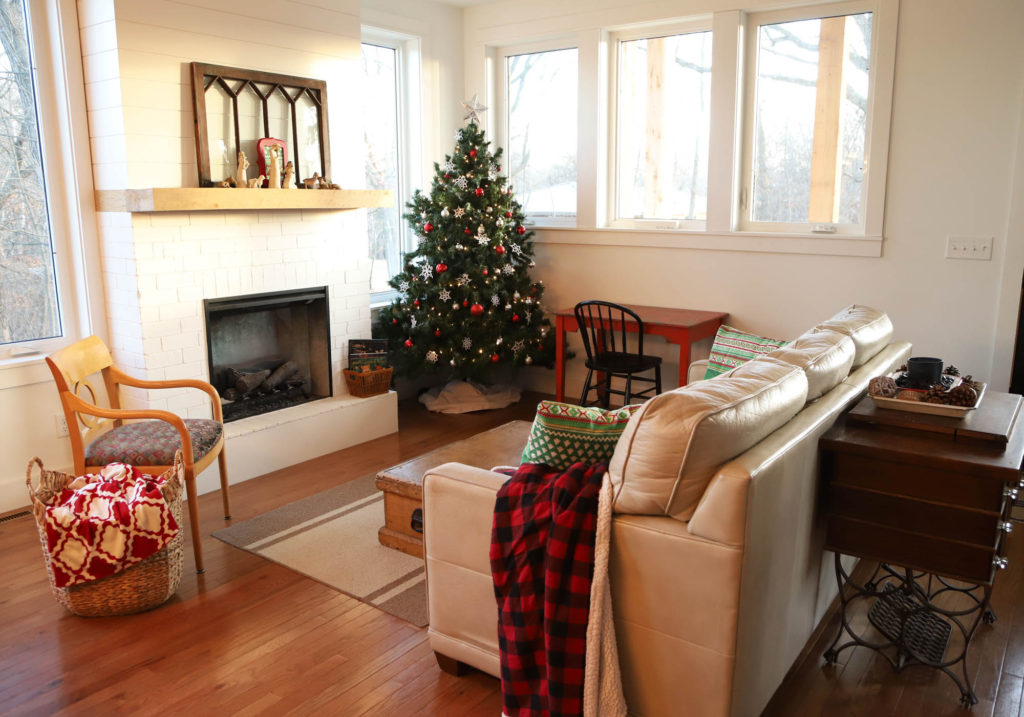
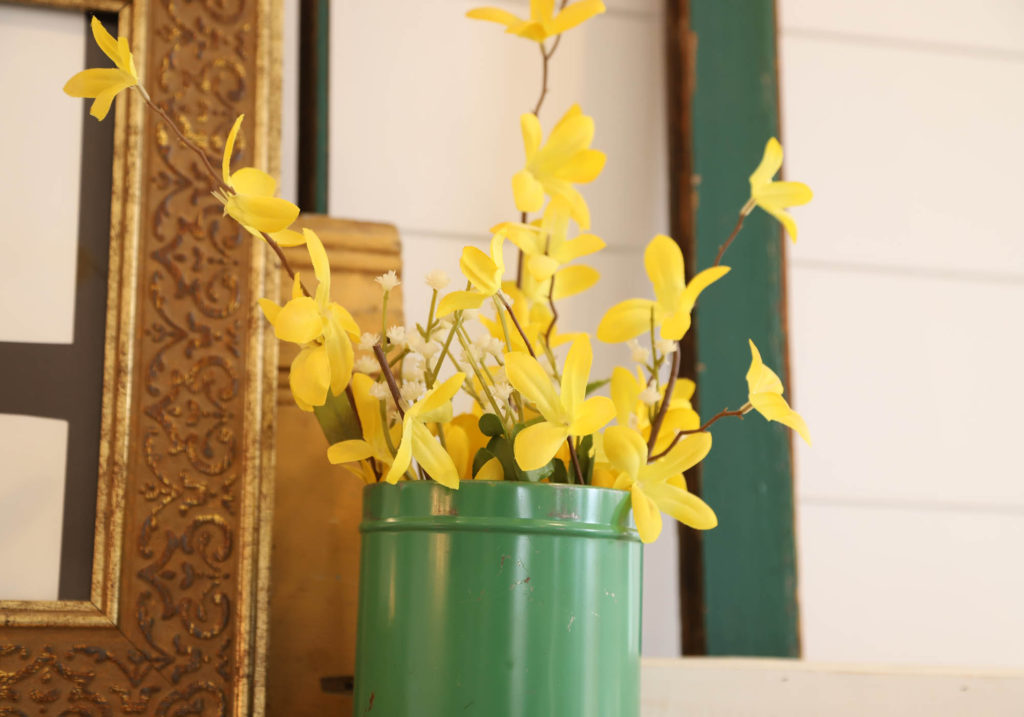
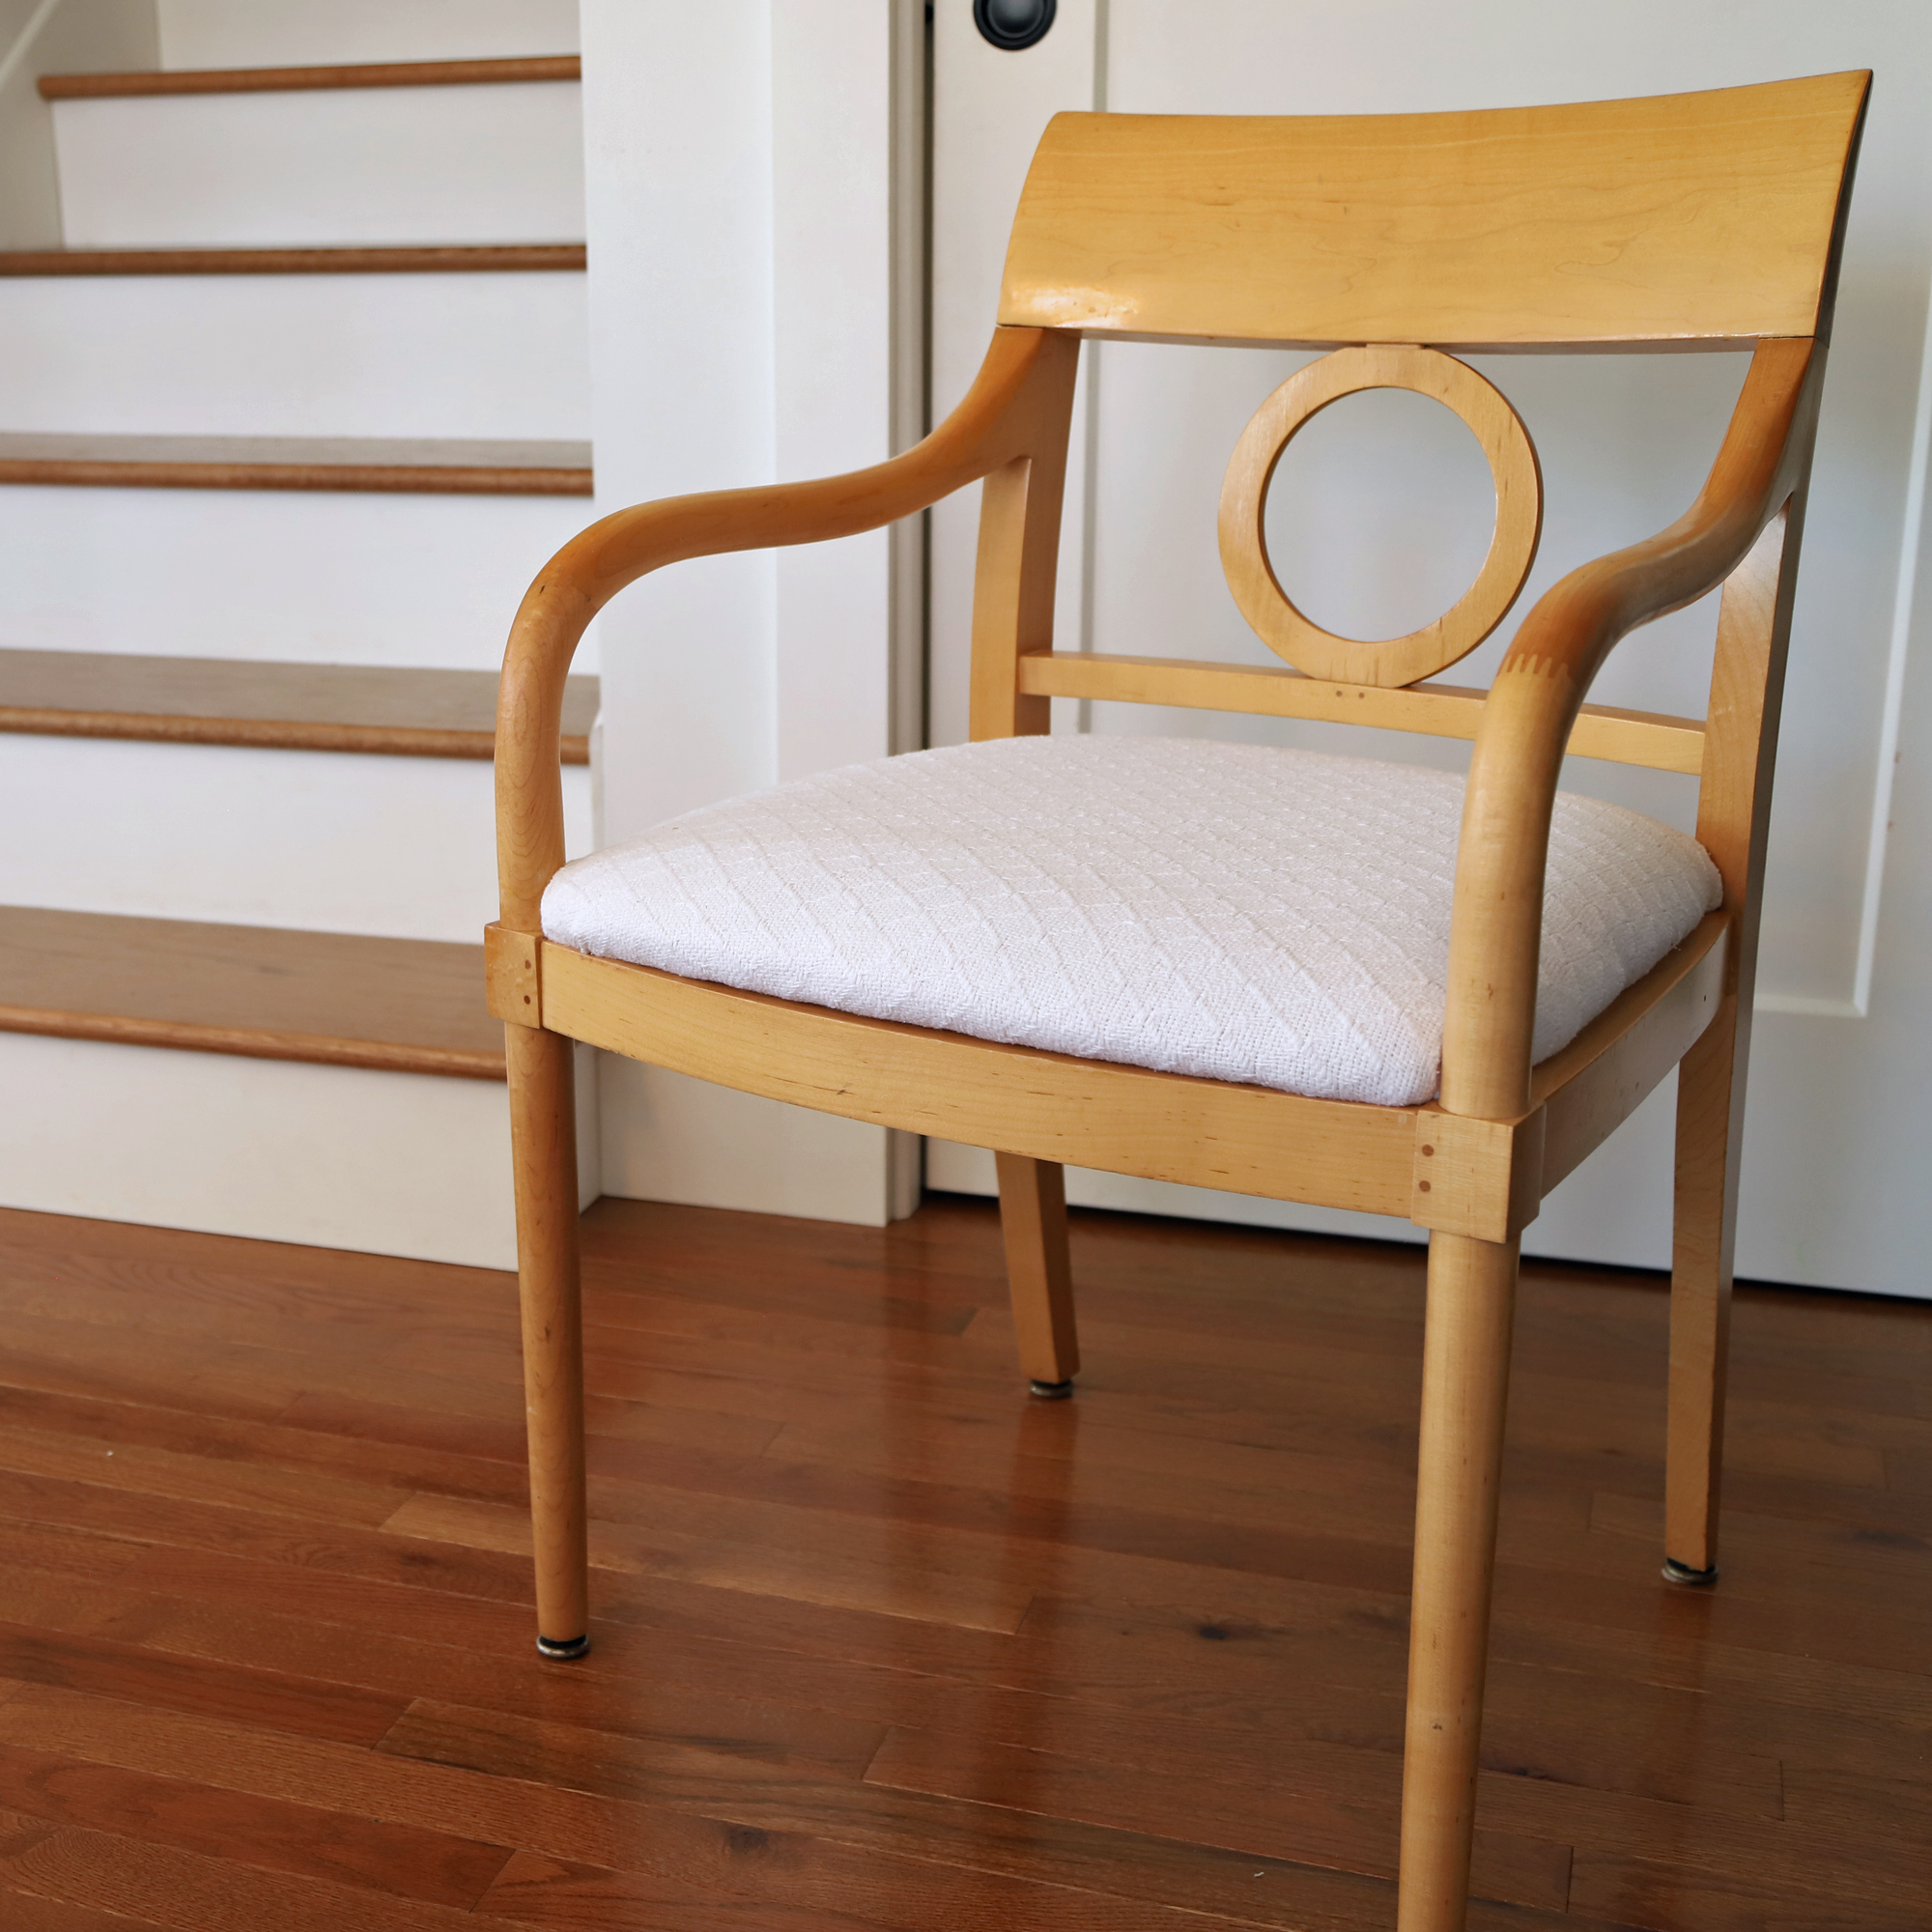
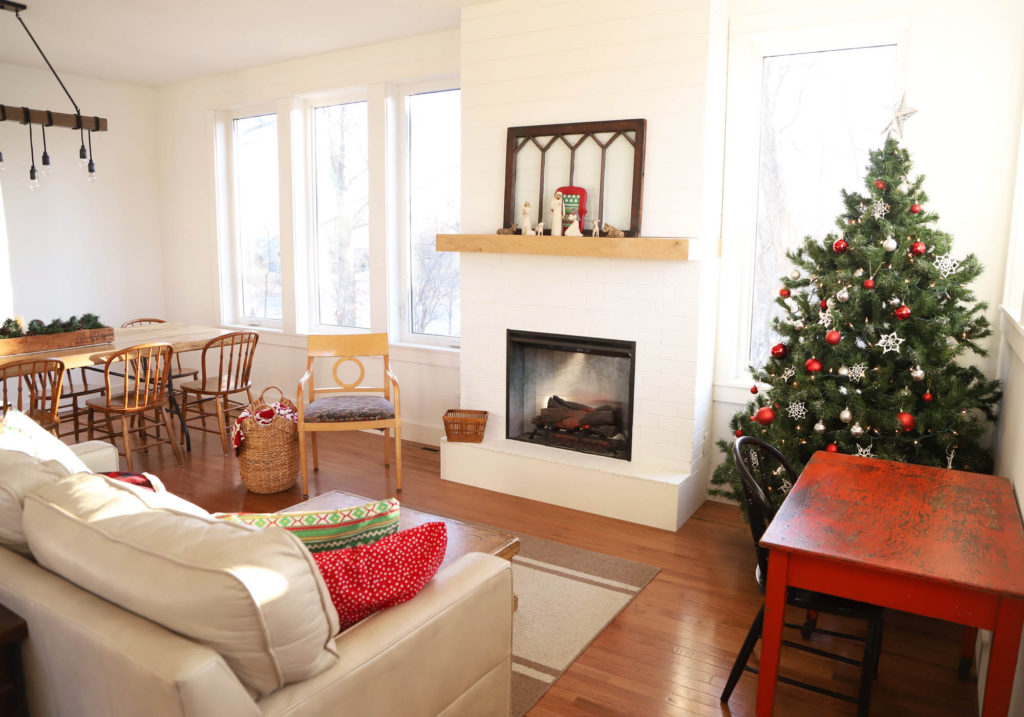
The living room, complete with the newly reupholstered side chair, holds a couple of cute displays. Above the fireplace, a vintage painted window takes center stage. Although the window recently fell, breaking the glass, my husband restored the wood pieces. I a grateful for that!

simple bird art for spring

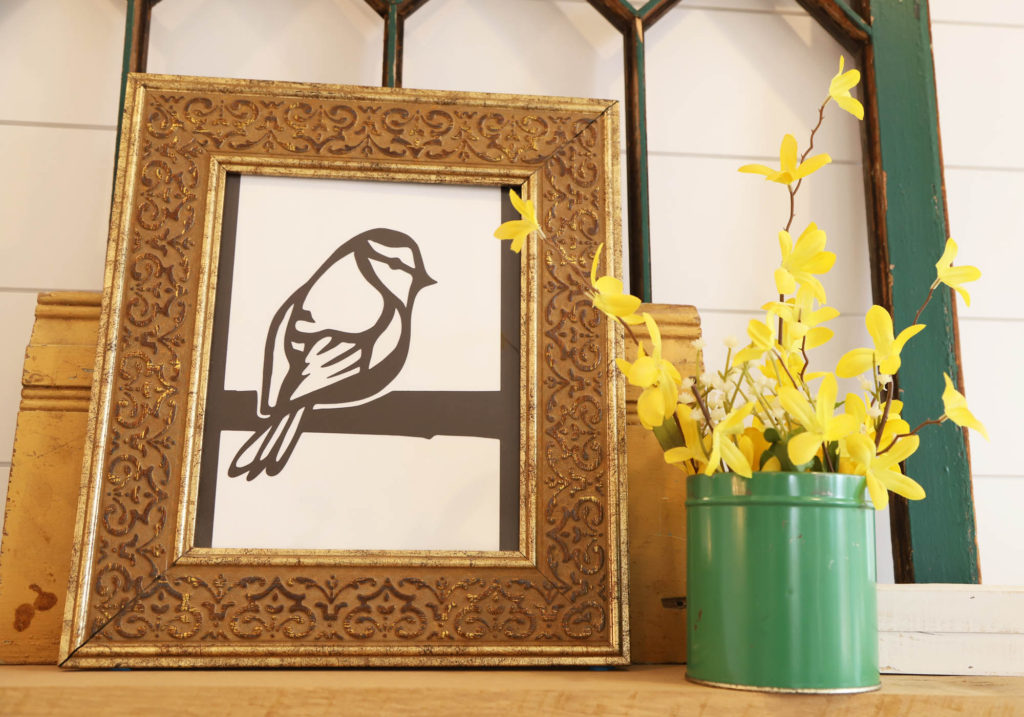
In addition to the wood window, an old piece of trim and bird paper-cut art piece are layered. To the right of the frame, a small green tin holds faux flowers. I love mixing textures. The metal of the tin, together with the patina of the trim and wood window, is complimenting.

simple spring decor


Next to the fireplace sits a large chalkboard. The black and white typography is balanced by the potted plants, which are placed atop an enameled tray.

chalkboard art spring decor

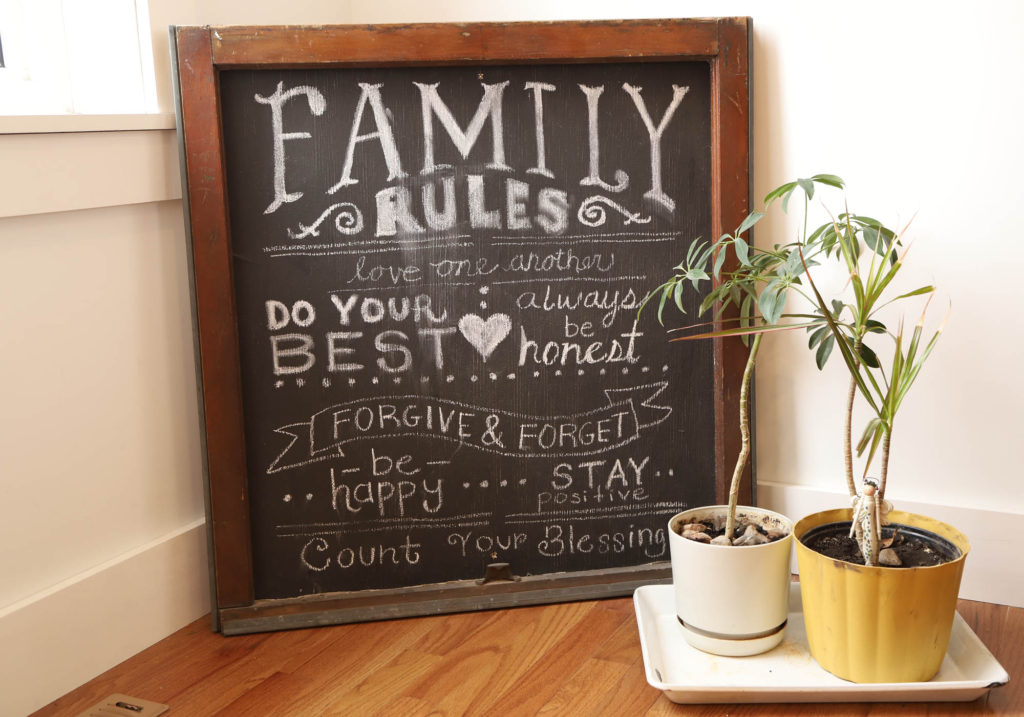
I have plans to give this chalkboard a makeover in the near future, so be on the lookout for a post or video about that!

spring blanket

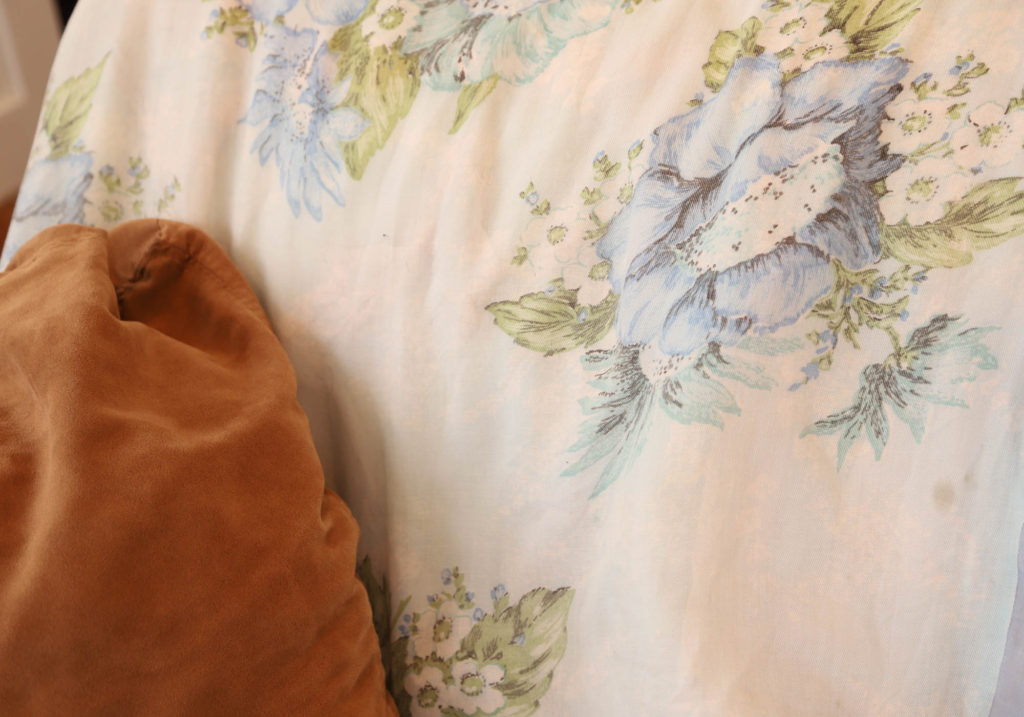
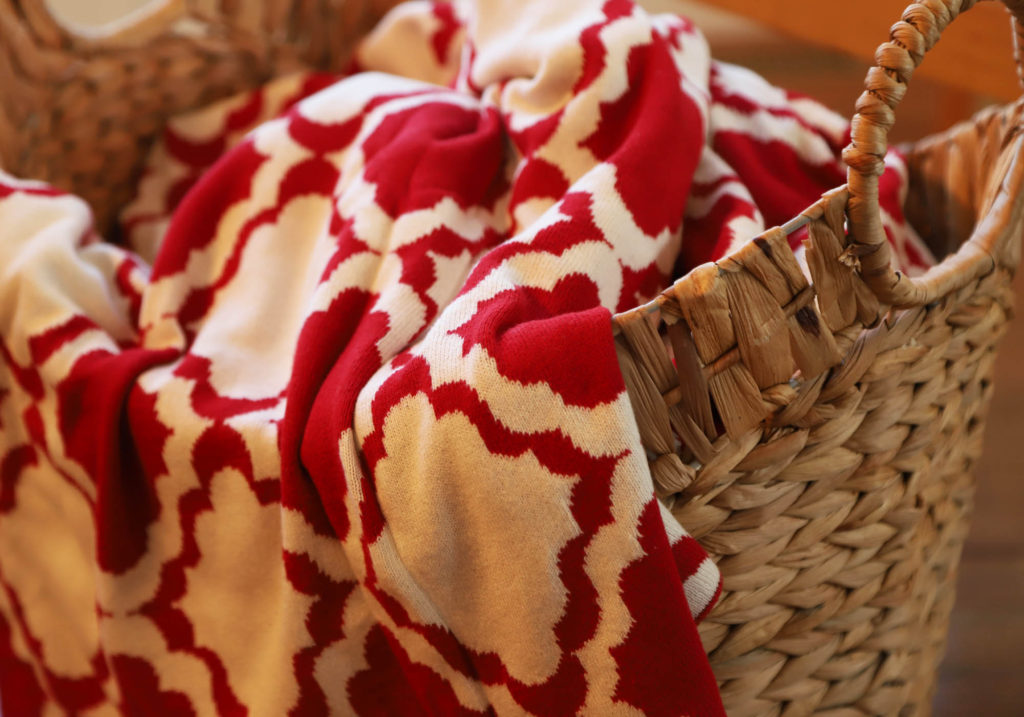
This vintage blanket adds the perfect amount of muted color to the space.


Decorating with memories

Incorporating memories into decor is one of my all time favorite tips. This little display features quite a few, including the pedal sewing machine that was my great grandmother’s.

vintage book display

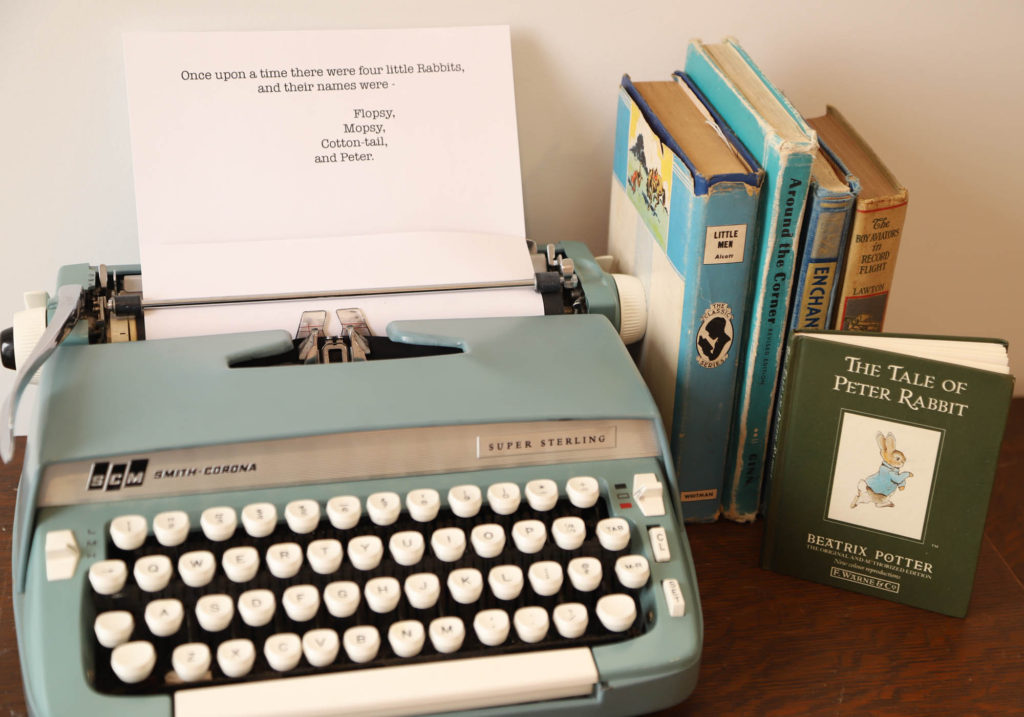
The typewriter is another cherished keepsake passed down to our family from my husband’s great grandma. Just seeing these types of items sprinkled throughout the cottage brings us a sense of connection to the past.

peter rabbit book

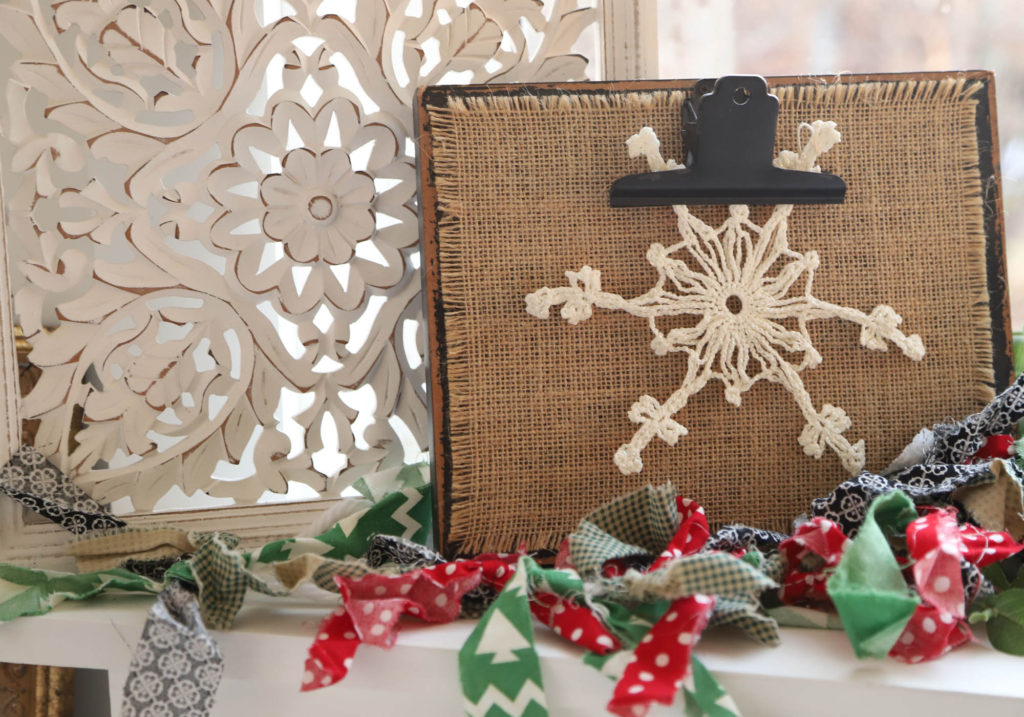
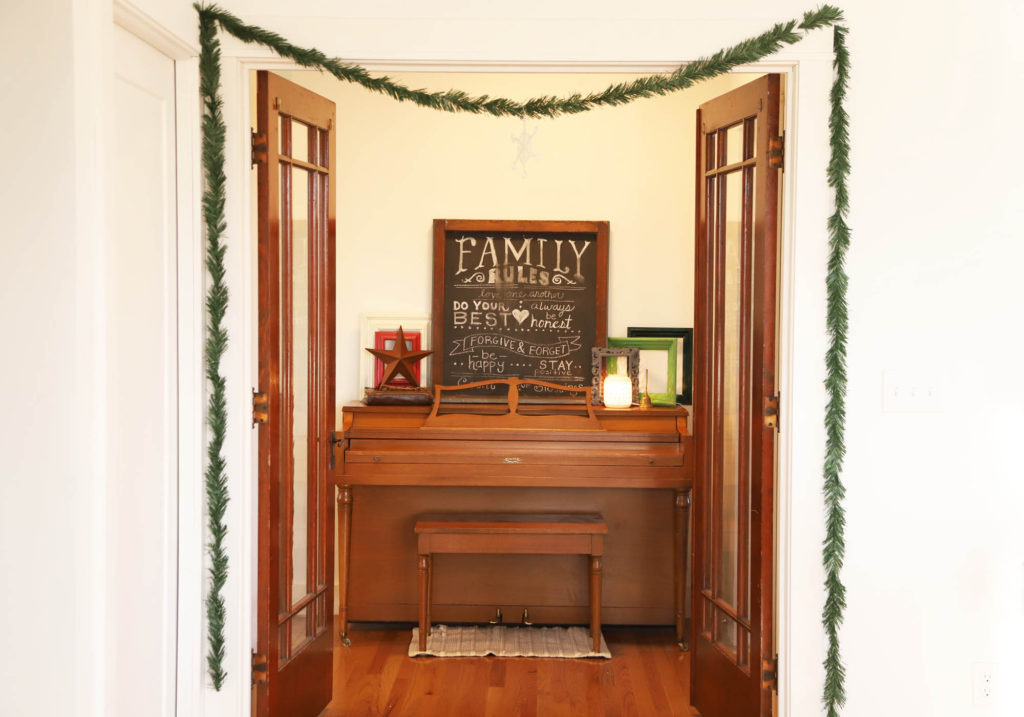
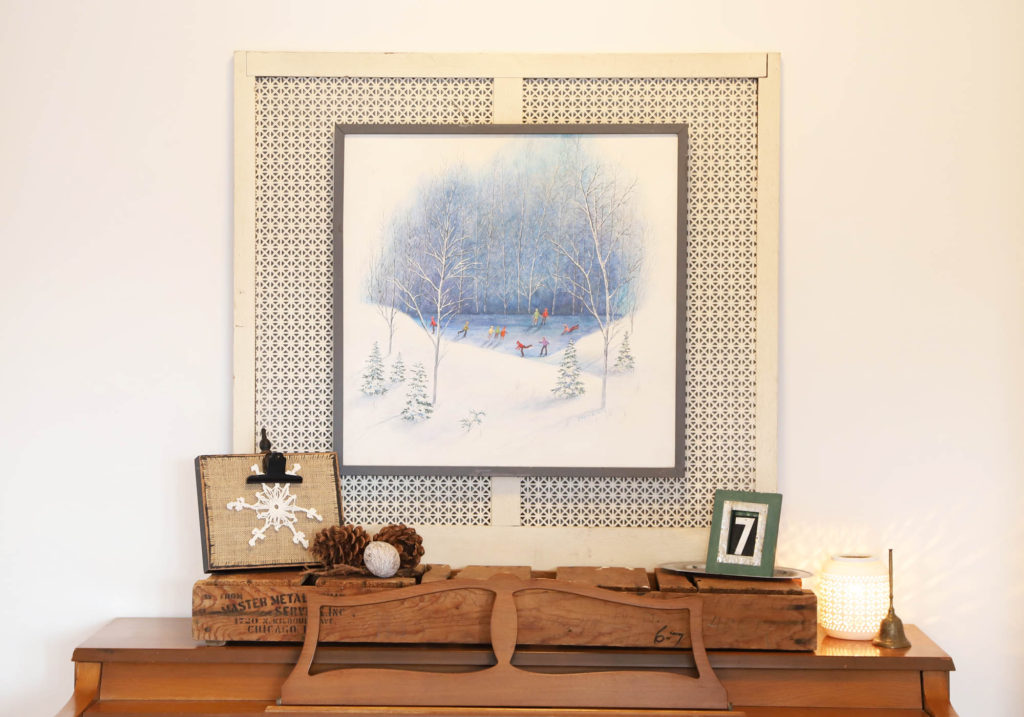
Similarly, an old window sits atop the piano. We added a chalkboard panel behind it, and attached metal clips. These clips allow me to change out photos or mementos to display.

cottage spring decor ideas

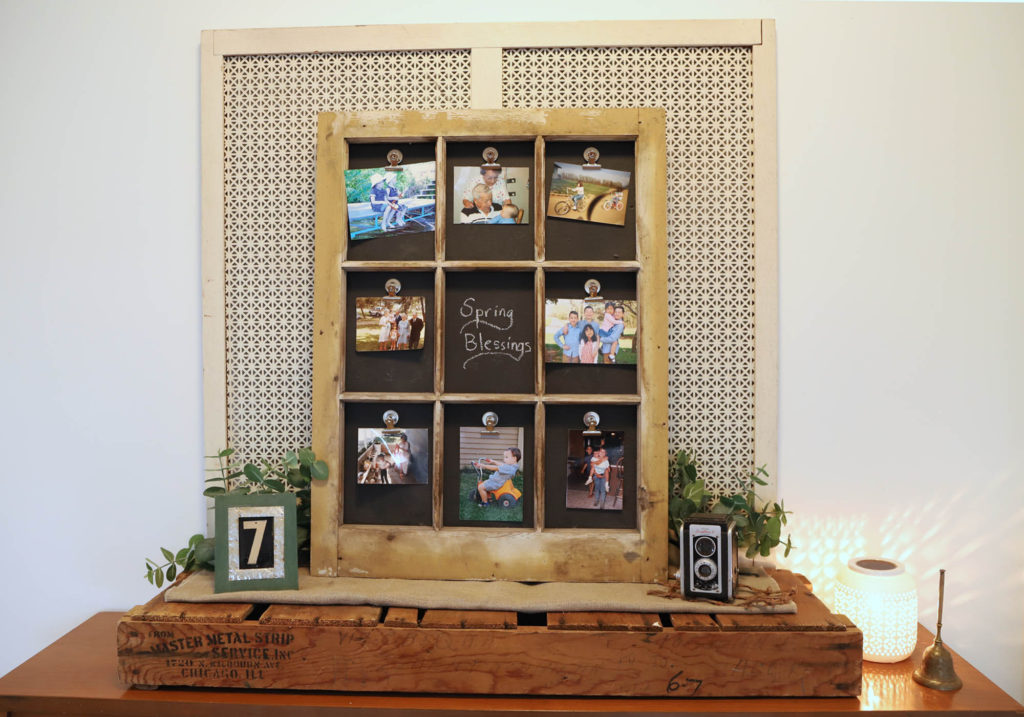
For the cottage spring decor setup this year, I chose photos that showcase special memories that our family has experienced during the spring season through the years.


Natural elements in spring decor

When it comes to spring decorating, I especially love incorporating natural elements. Since nature outdoors is showing the first signs of blooming, it only makes sense to bring the magic inside.

fresh tulips for spring

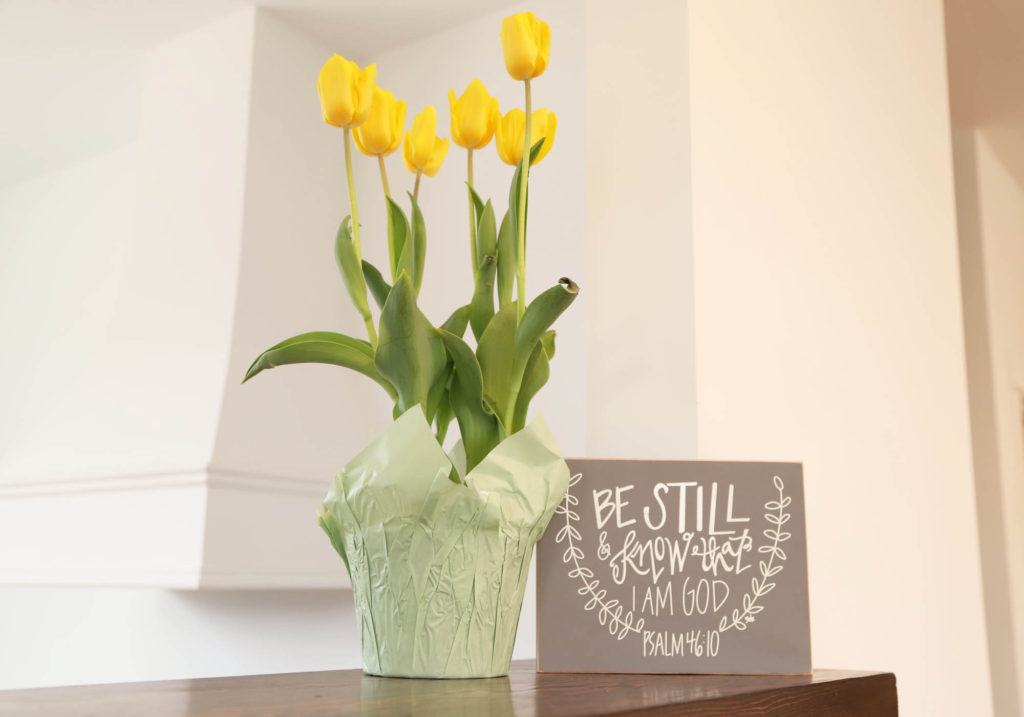
In the Midwest, tulips are a tell-tale first sign of spring. I picked these up at Aldi of all places! Because they are potted, they can be transplanted outside when it warms up a bit more!


simple spring table centerpiece

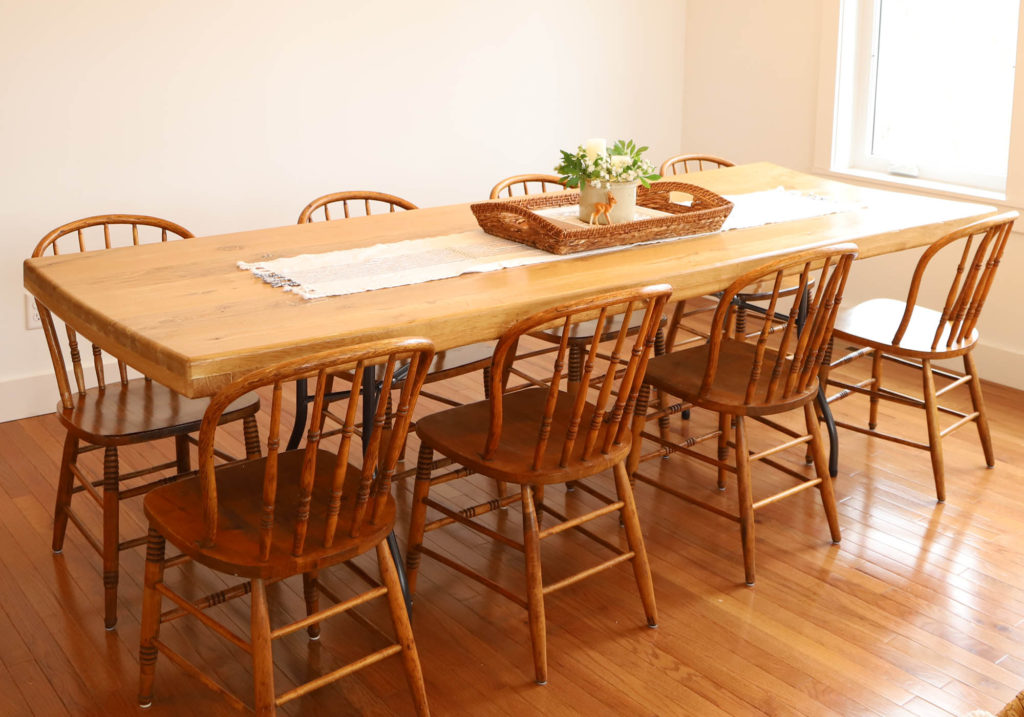
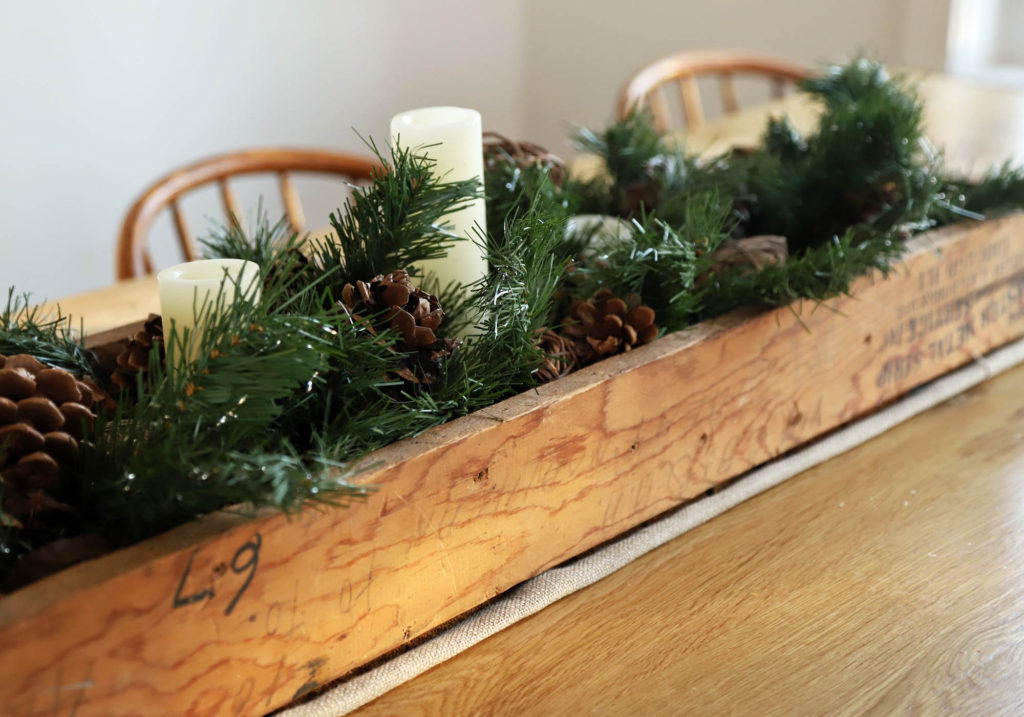
On the dining table, an arrangement of faux greenery and candles sits inside a small crock. Coupled with a textured art piece, woven basket and a sweet little deer figurine, the entire table centerpiece anchors our simple white oak table.

spring centerpiece

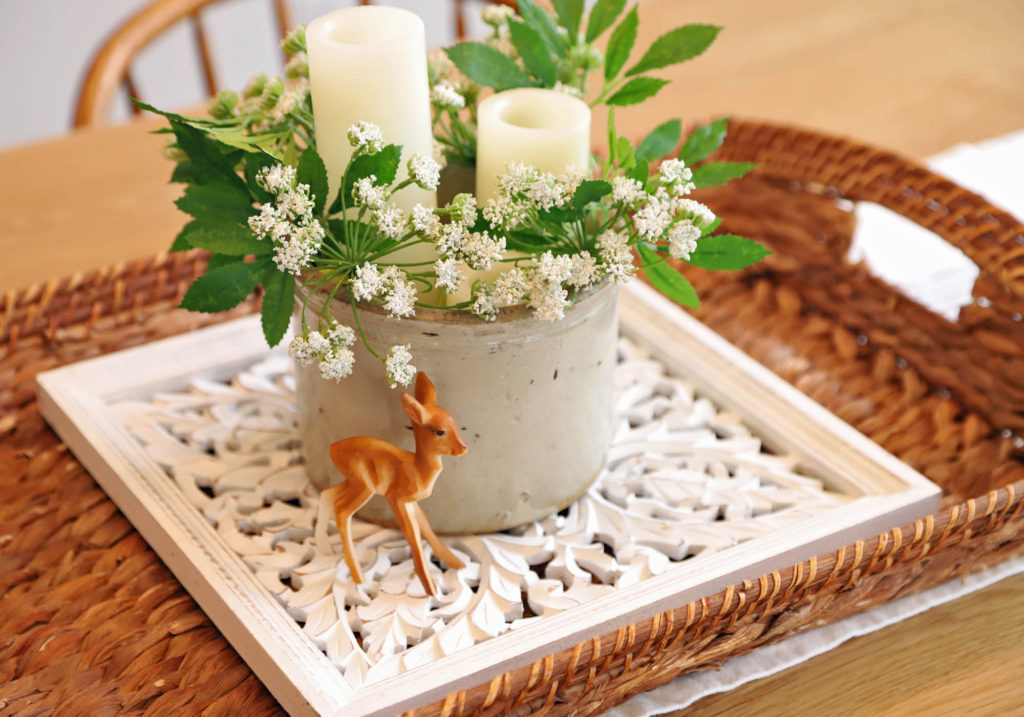
Isn’t this little guy just the cutest thing?


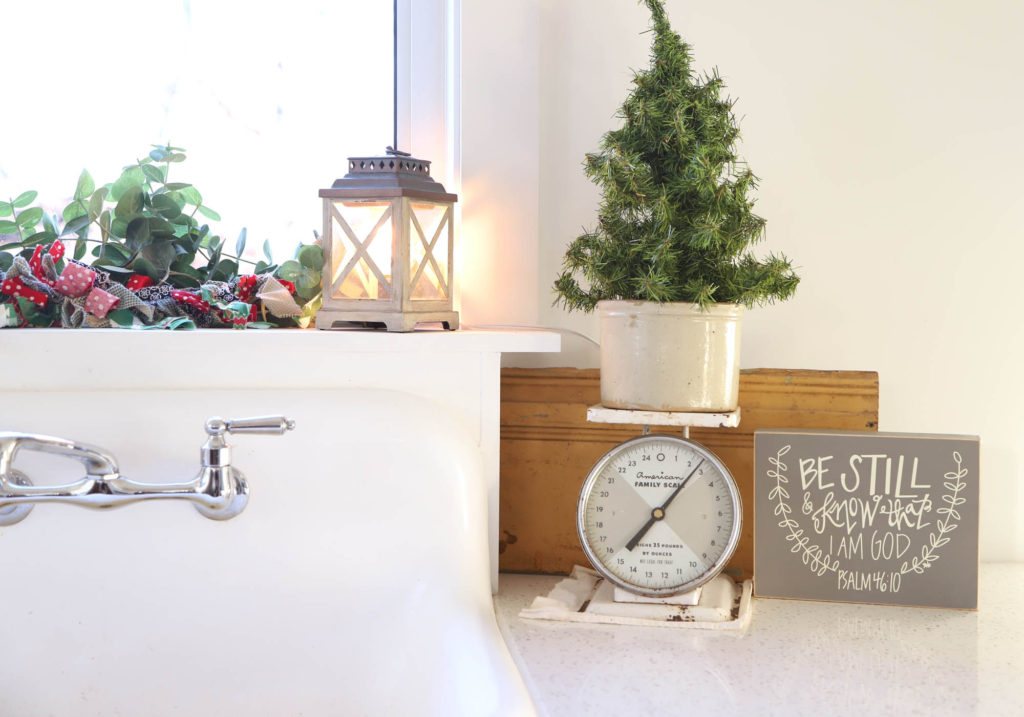
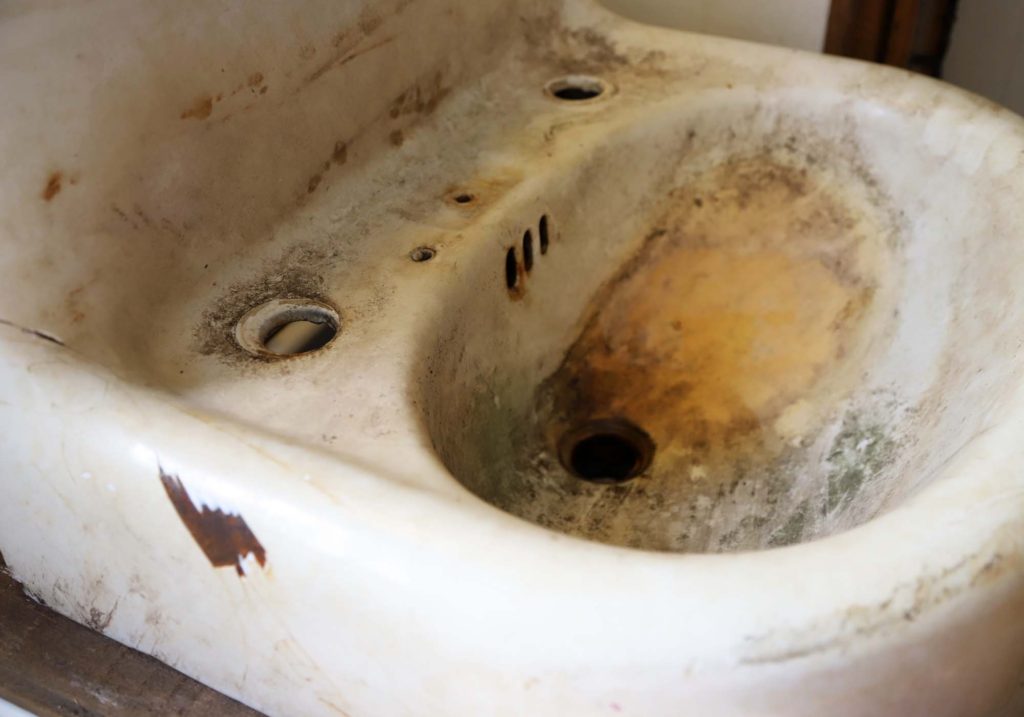
In comparison to the rest of the main level, I didn’t spend a lot of time decorating in the kitchen. I think that adding decor in this room will become easier once our floating shelves are installed. Until then, I love having the large window ledge above our sink as decorating space.

metal tin collection

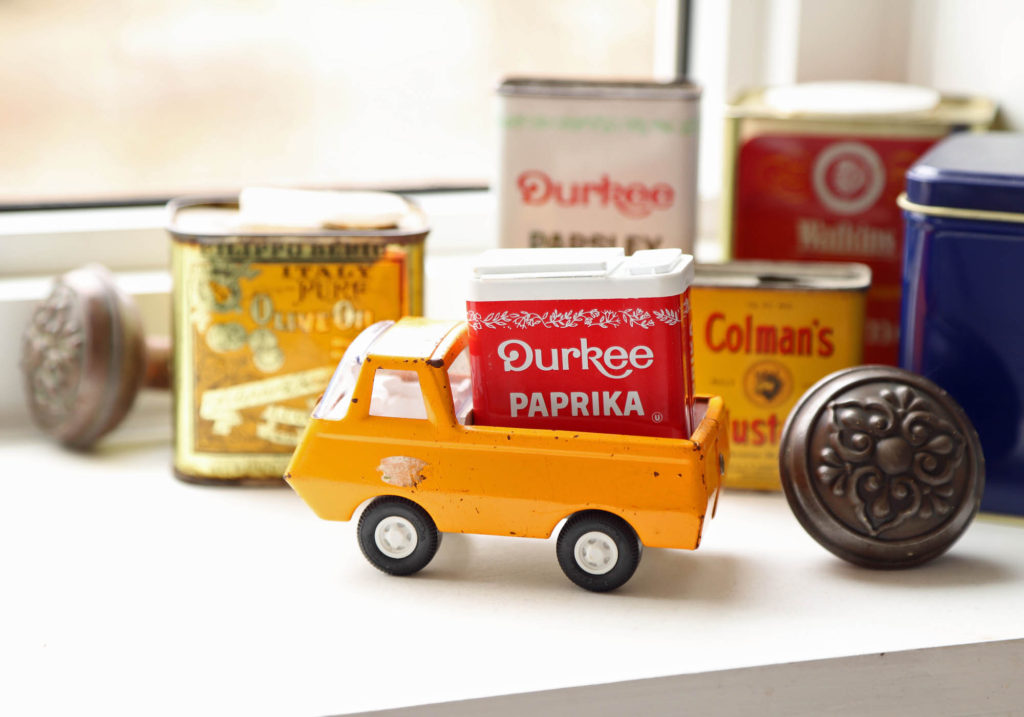
My tin collection has grown a little bit, and soon I will be planting spices and possibly a few succulents in them! These clay pots are also just waiting to be filled. I am getting particularly excited for garden season this year!

easter and spring decor


Thanks so much for stopping by our cottage. I hope your spring season is going well so far, and that you are anticipating great things ahead!


Decorating Arrow Hill Cottage

Watch as Arrow Hill Cottage is transformed for the new season.

More Spring Decor Ideas

Need more inspiration? These blog posts offer swoon worthy content!

Cottage Style Spring Decorating Ideas | The Lettered Cottage

Simple Spring Decorating | Fox Hollow Cottage

Refreshing + Minimal Spring Cottage Tour | Pine + Prospect Home


Reupholstering a chair | DIY refresh

I recently completed a little DIY refresh by reupholstering a chair. Because people love a good before and after (I know I do!), today I am sharing the process here on the blog! Scroll down to the bottom of this post for a video as well.

neutral living room decor

This is the chair, at home in our living room now. But, to totally appreciate how it looks today, it is important to understand how far it has come. Let me take you back to the very beginning.

The BEFORE

About six years ago, I saw an ad on Facebook marketplace advertising this chair. It’s unique shape and styling attracted my eye, and the $20 price tag sealed the deal.

chair reupholstery project

I’m not one who pays much attention to the era that different pieces are made. I am fine with including a wide variety of styles and period pieces throughout my home decor. What usually matters most to me is the uniqueness of the items I bring into our home, and this one had that special spark.

bernhardt chair details

As you know, it is difficult to determine the quality of an item when purchasing online. Once I brought the chair home, I was pleasantly surprised at its sturdiness and overall craftsmanship. Turns out it was manufactured by the high end furniture company Bernhardt. They have been making furniture since 1889, and are still in operation today. It wasn’t until I started ripping into the chair and saw the marking of August 2000 that I was able to confirm this chair’s exact age. Twenty one years young.

However, the reason for the low price tag was obvious. The fabric on the seat cushion was gaudy, and pretty torn up.

chair makeover

I knew from possession day one that I wanted to reupholster the cushion. Unfortunately, the project never became a priority. Mainly, I think, because the chair never held a prominent spot in our home. We had it in a bedroom, and office, and even a playroom in our previous homes. Here at the cottage though, it has taken up residence in our living room. It fits the space well, and I finally felt justified to give it a facelift.


When does DIY reupholstering a chair make sense?

Not every chair is a candidate for a DIY reupholstering project, in my opinion. If the shape of the chair is complex, or the fabric you wish to recover with has a pattern that needs to be perfectly lined up, I would recommend hiring a professional.

The only bit of upholstery on my chair was the seat cushion. This type of project is pretty straight forward and doesn’t require any specialized tools. I felt confident that, even with my limited knowledge of reupholstering, I would be able to finish the chair with good results.

Steps in reupholstering a chair

The first thing that needs to be done is removing the seat cushion from the frame. Many times, for chairs like this one, there will be screws holding the seat in place.

chair reupholstery how to

how to reupholster a chair

chair refresh

Next, you will need to remove the existing upholstery fabric from the seat cushion. This step proved to take me much longer than it should have, due to the lack of proper tools.

Ironically, our family recently did a major decluttering of our home and garage. As part of that process, I am quite certain my upholstery tools were donated. Oh well, I guess that’s what happens when you strive to have a minimalist lifestyle!

These tools listed below would have made this job easier. These are affiliate links. As an Amazon associate, I earn from qualifying purchases. See my full disclosure here

Staple Remover

Tack Lifter

Upholstery Staple Gun

I instead found myself using a mini flat head screwdriver and pliers to remove all the little staples. It took me probably twice as long as it should have, but this step was eventually finished nonetheless.

diy project reupholstery

Finally, you will be ready to add your new fabric. Look for a sturdy and easy to clean variety. This post has a good list of recommended fabrics for upholstery projects.

I was able to repurpose a bedspread as the new fabric for my chair. If it’s free, it’s for me!

Using the removed cover as a template, I cut the new fabric to the proper size. This helped me get the exact shape needed.

reupholstering

After stapling the new fabric onto the cushion, the final step is to attach the cushion back to the chair. For me, this last part of the process is the most rewarding.


The AFTER

I am so happy with the results of this simple project. I feel like the neutral seat cover allows for more of the chair’s details to be seen. Previously, the eye was drawn directly to the busy patterned fabric.

reupholstering a chair

chair reupholstery

Eventually, maybe in another six years, we will likely take the chair apart once again. At that point we will sand the frame down to the bare wood and give it a clear topcoat, and also completely redo the cushion with something more high end.

For now though, I am pleased with the fact that our living room is a nice neutral backdrop. This will allow me to decorate with various colors, textures and accessories throughout each decorating season.

cottage living room

I hope that this quick little DIY project gives you inspiration to tackle something in your own home. Perhaps something you have been putting off for a long time, like I was. Grab those tools and materials and just give it a try! It might be surprising how quickly you can get it done!

If you’d like to watch the entire process of me reupholstering my chair, be sure to watch this video. The commentary itself is worth the watch!


Shared Girls Room | Bedroom Tour

Today I am excited to give you a tour of the shared girls room at the cottage. Though far from fully decorated, we have done quite a bit in the space already and would love to show you around!

cottage bedroom | shared girls room

Our newly built cottage has a total of three bedrooms (technically four if you count the basement bonus space). The master suite is on the main level, and there are two additional bedroom upstairs. One for the boys and one for the girls. Our entire family appreciates the simplicity of this arrangement. Truthfully, our kids do not mind one bit that they share with their siblings. In fact, they prefer it!


Shared Girls Room | Basics

We covered the entire upper level ceiling of the cottage with pine tongue and groove boards, which were then painted white. My husband recently created a video which documents the long process of installing them.

As a result of our hard work, we are extremely happy with how the ceilings look. Because they are vaulted, the natural daylight that comes in through the single window bounces around and really brightens up the entire room.

shared girls room with sloped ceiling

Oak flooring creates a beautiful, neutral backdrop for furnishings and decor. In addition, the all white walls and trim have the same effect.

white walls and trim in shared girls room

When I designed the girls room, I was careful to create a space that would serve the girls for years to come.  For example, although the girls currently enjoy having their beds close together at night, they might not always prefer this set up. The dimensions of the room were worked out so that each girl could eventually claim their own ‘half’. There are two closets in the room as well.


Sleeping Space

One side of the bedroom is designated for sleeping and quiet time. The two antique metal beds found on this side were an absolute labor of love for my husband. He painstakingly restored the beds over the course of several months. Although the beds spent many years in a friend’s barn, you would never know it now!

refinished metal bed frames

My husband documented the process of restoring the beds through a series of videos. I am so impressed with how they turned out. Most importantly though, the girls love them.

A small table is positioned between the beds. It is the perfect size for a reading lamp, and a few books.

antique metal beds in girls room

I chose white comforters for the beds. They are easy to clean and provide a neutral base that can be changed up easily with accent bedding and pillows.  For now, the accents of pink, aqua, and yellow are fun and girly, while not being age specific. One thing I am still on the hunt for are matching quilts or duvet covers for the ends of each bed.

girls bedding


Play Space

The opposite side of the room is set up as a kind of pseudo mini house – every little girl’s dream! It is complete with a small play kitchen, table, and two pink chairs. In addition, a sweet doll crib – made by the girls’ great grandpa – holds special sentiment.

The girls have literally spent hours creating make believe scenarios with their stuffed animals and dolls.

play space in girls bedroom

Their play kitchen is something I posted about a couple of years ago. It was made using a vintage dresser as the primary structure. More information about the process of building the play kitchen, and links for many of the accessories, can be found in THIS POST.

small antique table

You may recognize the small red table from this past year’s Christmas decorating. I recently found an enamel top table at a local antique shop. This new table is a bit larger and more useful for our annual winter puzzle endeavors. For this reason, we moved the little red table up to the girl’s space – and kept the enamel topped one on the main level. These two tables will definitely be moved around the house throughout the years, depending on the needs of our family and my seasonal decorating desires.


Other Furniture + Decor

The only other piece of furniture the girls have in their bedroom is a dresser. It is, yet again, another special hand me down item. Purchased by my grandparents, the dresser was mine as a little girl. The perfect size, it has four drawers – two for each daughter. We have it organized so that each girl has one drawer for their shirts, and one for their pants/shorts/skirts.

girls bedroom decor

Atop the dresser are a few special and sentimental items. A beautiful watercolor print, which was purchased on Etsy, provides a bit more color to the room. The small wooden box holds the some of the girls’ cherished special items. Lastly, the pink bunny was hand sewn by the nannies at our older daughter’s orphanage. They gave it to her as a gift on her adoption day.

Though I have more decor ideas for the room, there is no rush on getting everything implemented at once. Kid spaces have a tendency to evolve and change as the occupants grow. The girls bedroom will be no different, I’m sure.


Girls Shared Room Video Walkthrough

Sometimes, it is easier to see a space in video format. I’ve created a video tour of the room for just that reason.


I hope you enjoyed this little tour! Stay tuned for more space reveals, as we continue to decorate at the cottage!

Antique Shopping Finds | Winter 2021

Today I want to share with you my most recently collected antique and thrift store treasures. These antique shopping finds include a variety of items that we have added to our home for both decor and functional purposes.

antique shopping finds

With our cottage build complete, we have moved onto a new phase. Decorating! I don’t claim to be an expert interior decorator, but I do know what I like when I see it! With Pinterest picture references, I am constantly on the lookout for unique and special items to add to our rooms. Most definitely, I prefer a ‘collected’ look when it comes to home furnishings and decor. To me, spaces just look and feel more personal when the pieces in it have a story.

Although it may take me years and years to finalize the decorating of the cottage, I am up for the challenge!


My Antique Shopping Tips

I live in a town that is known as a bit of a tourist destination. In addition to its many lakes, it boasts a vibrant downtown area, complete with multiple antique stores. With all of these beautiful shops so accessible, it would be easy to spend hours each day shopping. However, I prefer to limit my browsing to every few months.

This spaced out shopping is helpful for a variety of reasons. First, it allows plenty of time for item turnaround. The workers at these antique shops are constantly attending estate sales and picking up items to resell. That means that if I step into the stores less often, I am more likely to see many new items each time. Secondly, in order to make room for new merchandise, items that haven’t sold in a couple of months may be offered at a discount. I have seen pieces drop in price over fifty percent from one outing to the next.

It is my preference to always shop with someone else. I generally do not enjoy shopping, even casually. Having another person with is more fun, because we can visit while walking through the stores. Many times, one of us will see an item that sparks a memory, which adds to even more conversation. In addition, if I am questioning whether to buy something or not, I can talk it over with my shopping buddy.


Shopping As A Minimalist

When designing our home, we purposefully made the decision to not include a lot of storage. We saw it as a way to ensure that the items we have are used on a regular basis. In addition to that, neither my husband nor I like clutter. For these reasons, we are very intentional about the items we bring into our home.

In order for something to ‘make the cut’, so to speak, it needs to be either useful/ needed or something we love to look at.

An item that is offered at a good price but is the wrong color, size, or shape will not be a purchase of mine.

I try to make it a habit of walking through a store first, without picking anything up. If something catches my eye, I will go back to it for further inspection. Many times I have left the store, with photos and measurements of an item in hand, and thought about it for a few days. If it is a piece that I can’t get out of my mind, I will go back to purchase.


Winter 2021 Antique Shopping Finds

Are you ready to see what I decided to bring home? Great! I’m excited to show you!


Enamel Top Table

First up is this white enamel topped table. Based on the construction techniques used, our best guess is that it is from the earlier part of the 20th century. Perhaps somewhere between 1910 and 1930, when having a small baking table in the kitchen was common practice.

vintage antique shopping enamel table

There is evidence suggesting that the table used to have two drawers. The drawer fronts are still present, but they have been nailed to the frame and the drawer boxes have been removed. My husband is thinking about re-creating the drawers. He also has plans to remove the paint (we think it is probably lead based) and refinish the wood legs.

enamel table

For the moment the table is being used as a surface for puzzles. In the future, I envision switching it out with the little red chippy table seen in my Christmas decorating post. Depending on the season and decor needs, both tables will come in quite handy.


Woven Basket

This little basket was found at a local thrift store for a few dollars. I’m not entirely certain that it is old, but it does appear to be hand made. I love all of the little details on this piece, including the ‘x’ shaped ties, and the teeny tiny pins around the top. At approximately 6″ x 12″ , it is the perfect size to hold a few books.

woven basket antique shopping find

We have been keeping the basket next to the fireplace. It currently holds our family Bible and devotion materials, so that they are within easy access to pick up for a quick read.

woven basket details


Knit Throw

I am drawn to cozy, neutral textures. This cream colored knit throw caught my eye with its beautiful pattern and smaller size. It is not a full blanket, but it has just enough material to wrap up in.

cozy knit throw blanket

After bringing it home and giving it a good washing, I layered it on the back of our couch. Atop another vintage blanket, the texture of the throw really pops!

knit throw texture


Metal Spice Tins

I have recently started one of my very first collections. These little vintage metal tins are so fun, and each so unique. They were found in many different shops, at various price points ranging from one to five dollars. I find the font and color choices on each individual tin so interesting.

antique shopping vintage metal spice tins

I have seen some very unique ways that vintage tins have been used as decor. My absolute favorite, and the thought that is guiding my collection, is to use them as little planters. By taking the tops off of the tins, I can fill them with soil and plant small succulents and spices of my own. Chives, cilantro, maybe a some dill? The large window ledge above our kitchen sink will be the perfect place to display them, during the spring and summer months.


Original Oil Painting

My absolute favorite recent find is this original painting. When I saw it, while shopping with my mom, it stopped me in my tracks. I loved the colors and composition immediately. The winter scene depicting children ice skating on a frozen pond reminded me so much of our own property here at Arrow Hill Cottage. However, the hefty price tag gave me pause, and I walked away. Once home, I did a bit more research on the artist because I was curious why the painting was priced so high.

It turns out that the painting was done by a local artist named Ellen Eilers. She is best known for her ‘Calico Country’ series of artwork, which includes various stylized landscape scenes. However, she mentioned in this video that she particularly enjoyed painting winter scenes. I believe that enjoyment was transferred to the canvas when she made this piece. The details are stunning!

After thinking about it for a few days, and with encouragement (and birthday money) from my parents, I happily went back to the store to purchase it. It fits just perfectly here at the cottage, and I am excited to enjoy it for years to come.


That’s everything for now! I hope you enjoyed these antique shopping finds. I’m hoping to do a post like this every so often, when I have new purchases to share. I always think it is fun to hear the stories behind some of the items that are in a person’s home, and I hope you do too!


Antique Haul Video


More Antique Shopping Tips

If you’ve been thinking of adding some vintage charm to your home, but the thought of sifting through antique stores scares you, check out these resources! The ladies who wrote the posts are seasoned antique finders with beautiful homes filled with collected items. They each have their own personal styles, but are all very inspiring!

Farmhouse On Boone | Farmhouse Antique Shopping Tips

Emily Henderson | Thrifters Guide On What To Buy (And Skip)

Pine + Prospect Home | Antiquing For Beginners


Minimalism Game | Over 500 Items Decluttered

During the month of January, my family played the Minimalism game! Today, I want to share with you how this challenge works, and the results of our month long effort.

Minimalism Game Challenge

January seems to be the month that many people feel the urge to declutter and reset their homes. My family is no different. The calendar turned, and yet we found ourselves very much in the same spot. With quarantine restrictions, and not many entertainment venues open, we are spending a good portion of our time at home.

Don’t get me wrong. We absolutely love our home. But, even the most beautiful four walls can become mundane when they are all you see most of the time. We are ready for some changes!

I mentioned in my last post that we have big plans for this cottage. So many DIY projects are waiting to be completed!  There is no better way, in my opinion, to gain a clear perspective on things than a good old fashioned declutter! That’s exactly what we did, in the form of a game.


What Is The Minimalism Game?

Near the end of December, my mom mentioned to me that she was planning to take on a decluttering challenge in January. After talking through it with her, I discovered the challenge is technically called ‘The Minimalism Game’. It was developed by none other than the Minimalists themselves, and is quite a simple concept.

Declutter challenge | Minimalism game

Essentially, it works this way: Each day of the month you find one item per day to donate, sell or throw away. One item on the first day of the month. Eight on the eighth day, and so on. When all is said and done, at the end of the month, there will be 500+ fewer items of clutter in your home!

The idea is that the first few days of the month should be pretty easy to tackle. It seems like basically anyone can find one to five items of clutter in their home on any given day. These ‘easy’ days will give you the confidence to take on more difficult decisions. By the end of the month, you may be considering items that were off limits on day one.


Before + During Our Game

Going into the challenge, I was skeptical. Five hundred seemed like an awfully large number.  After all, we have only been living in our home for one year. We did a major amount of decluttering before our move, and even hosted a huge garage sale.

In addition to that, we tend to keep a rather close eye on the items we allow into our cottage. We have been diligent about keeping only the possessions we use and love the most. Would I be able to find enough clutter to finish?

Yet, even with this question, the game seemed like an appealing way to take on the new year. My mom and I began the challenge together on January 1st. We vowed to be cheerleaders and accountability partners for each other throughout the month.

cleaning up with the minimalism game

Games are always more fun when they aren’t played in isolation. There are other benefits too.

Having someone take on a challenge at the same time as you really does help keep a person honest! My mom and I sent each other messages and pictures nearly every day, discussing the items we had found.

Bouncing decluttering ideas off of each other was also a great benefit. For example, my mom mentioned she had cleaned out her spice cabinet and consolidated her spices into fewer jars. She was able to toss out quite a few small containers. Though I hadn’t considered checking in my own spice cabinet, you can bet I did just that after my mom told me about her success!


Watch Us Play The Minimalism Game

As an additional measure of accountability, I decided to capture my family’s experience on video. Although I didn’t pick up the camera every single day, I feel like the film compilation portrays our process quite well.


Minimalism Game Results

After an entire month of decluttering, the results are in. Much to my surprise, it was not difficult at all to find the 500 items! Mind you, there were probably only a handful of pieces that were visibly taking up space. Most everything else was packed away in tidy little spots throughout my home. Things looked neat and organized, but there was clutter lurking behind closed doors!

The biggest culprit for us? The garage!

Looking back, it makes perfect sense why so many items were found there. When we were packing to move, we put off the garage until last, thinking we would be able to throw out a bunch of things. In reality though, we ran out of time to sort. The contents of our old garage were thrown into boxes and moved to the new garage. A year passed, and organizing the garage just never seemed to become a priority project.

I’m guessing there may be a similar spot in your home. Perhaps the basement? A child’s playroom? Maybe even a closet. Go take a look! Ridding yourself of the clutter will be so freeing, I promise you!

Playing the minimalism game

The variety of items that were found during the game was also a surprise to me. I knew there would be some broken toys, ripped clothes, and paper clutter that could be thrown. However, I didn’t realize how many good, quality items we would decide to donate or sell. The kids were especially eager to go through their things. I’m so proud of them!

 Overall, I would definitely recommend this game. It is a great way to rid your home of un-needed items quickly. It’s not a difficult concept, and the pride you feel when those 500 items are out the door is worth all the effort!


More Decluttering Challenges

If the month long Minimalism Game seems like too much of a commitment, consider one of these other challenges. They can help you get into the groove of decluttering, by taking it on one bit at a time.

Create a Capsule Wardrobe

Control Magazine + Paper Clutter

Speed Clean: 60 in 60 Challenge

One Room Challenge: Deep Cleaning


Christmas Decorating at the Cottage

This was the first year of Christmas decorating at Arrow Hill Cottage! It was an exciting moment in time, that I wanted to be sure to share with all of you!

Although we were living in our new home last year at this time, it was still very much a construction zone. We had only one working bathroom, exposed subfloors, and a house covered in tyvek. With the mess of the building process, we made the decision that the Christmas tree would be our only decoration.

Christmas Decorating this year

This year, we were determined to make our space festive and cozy. There is definitely a more settled feeling overall here at the cottage, which we are thankful for.

You may remember from a couple of years ago, I did a massive Konmari Christmas decoration declutter. This process really helped us determine the decor items that were most important to us. These few remaining pieces, which fill two vintage suitcases, are what we used for our Christmas decorating this year.


Setting up the living room

The first step in the Christmas decorating process, for me, is determining where the tree should go. Last year, we had it set up in the basement. This year I wanted it moved up to the main level, where the lights could be enjoyed from inside and also seen from outside.

I had a few locations in mind. Of course, each option involved moving the living room furniture around. My older boys helped out, but were a bit frustrated with my indecision. In the end we opted to position the tree in the corner of the room, next to the fireplace. The couch was moved away from the wall, and anchored in the room by our antique sewing machine. This setup defines the living room, within our open concept main floor.

Sitting on the couch, you get a fantastic view outdoors, toward the woods and pond. When the snow is gently falling, and the fireplace and tree are both lit, it is definitely a cozy and relaxing spot.


Overall Christmas Decorating theme

If I were to characterize the ‘vibe’ we went for this year with our decorations, I would say it is a casual and comfortable. I really wanted to make this first Christmas in our new home cheerful and vibrant for the kids, especially after the year we have had! The classic red and green motif is highlighted by natural elements such as pinecones and twine.

Our Christmas tree

One fun fact about our Christmas tree is that it is the same one that my parents used in our house when I was a little girl! The tinsel found on its branches were placed by myself and my sisters many, many years ago.  I am strangely sentimental about things like that. And, although it isn’t pre-lit and sheds little pine needle pieces during setup, we love it. We have no plans to trade it in for a newer model.

Next to the tree, on the fireplace hearth, I set a small basket and filled it with family favorite Christmas books. This is the season when we most enjoy sitting together and reading through stories together.


Red table

The furniture in our living room is a hodgepodge of items collected throughout the years. We are taking our time finding the perfect items for our home, and for now are happy to use what we have. The little red writing table is a perfect example. I spotted it at an antique store a few years ago for a great price. Although I wasn’t sure where it would go, and didn’t have a specific purpose for it, I brought it home.

The color and character of the table makes me so happy. In fact, I had my husband cover it with a clear sealer to preserve all of the chippy paint and scratches. For now the table functions as a place I can set up my laptop or write Christmas letters. I can also envision it being used for family game or puzzle night.


Cozy Textiles

The holiday themed pillow covers were custom made out of vintage flour sack material. Again, I found the flour sacks at an antique store in our town and knew that the interesting and vibrant pattern would be perfect for Christmas.

The great thing about using pillow covers to change things up for the season is that they don’t take up much space in storage. I have a set of three plain square pillows that I change the coverings for depending on the holiday or occasion.

This red and black buffalo check blanket is so snuggly and soft. Perfect to curl up in when reading a book.

Next to the chair I keep a basket full of additional warm blankets. During a Minnesota winter, you can never have too many!


Mantle Decor

Of all the spaces I was most excited to decorate in our new home, the fireplace was my number one. There is something special that a fireplace brings to an interior, especially this time of year.

I used an antique window pane, and a framed piece of fabric as the backdrop to my Willow Tree Nativity Set. This is a set that I absolutely cherish. Each piece is finely detailed, yet the set has a serene simplicity about it.

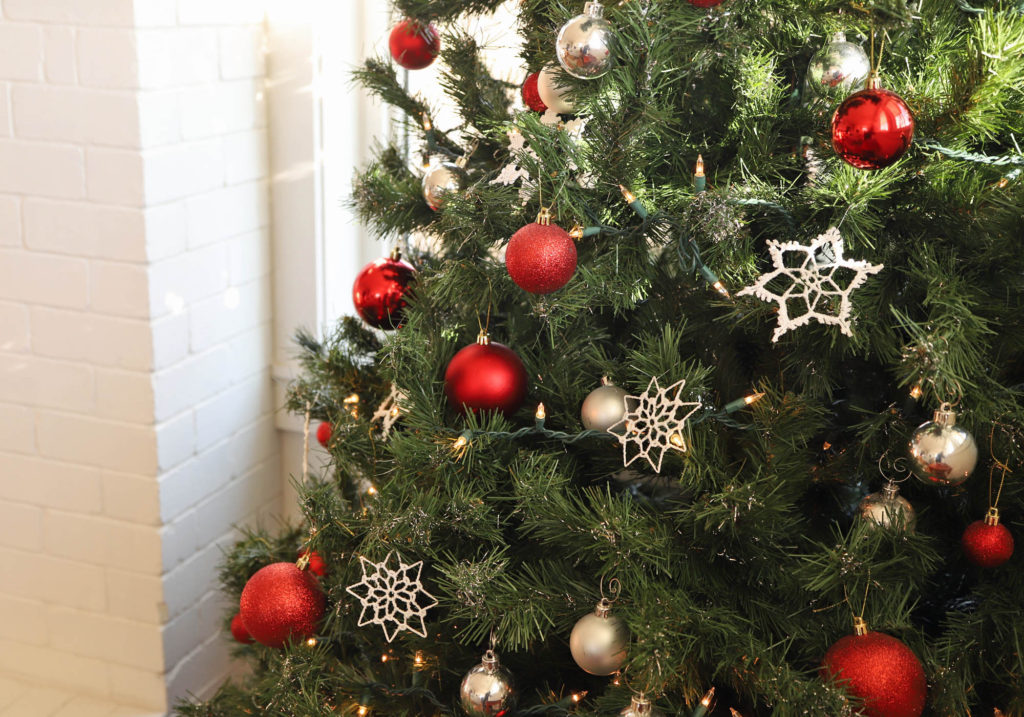
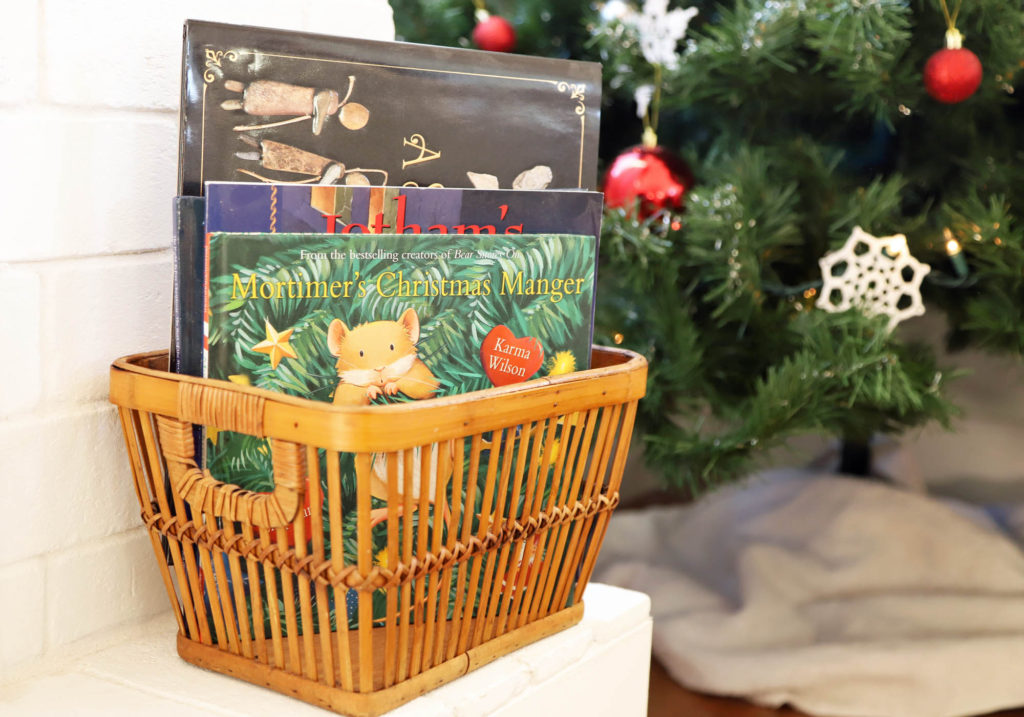
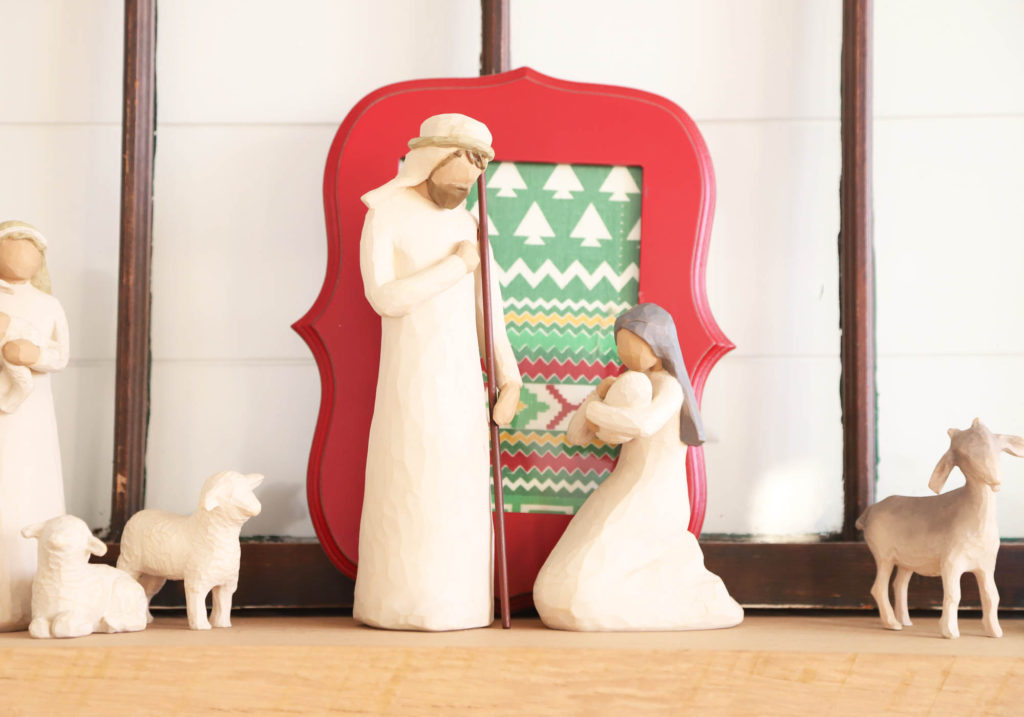
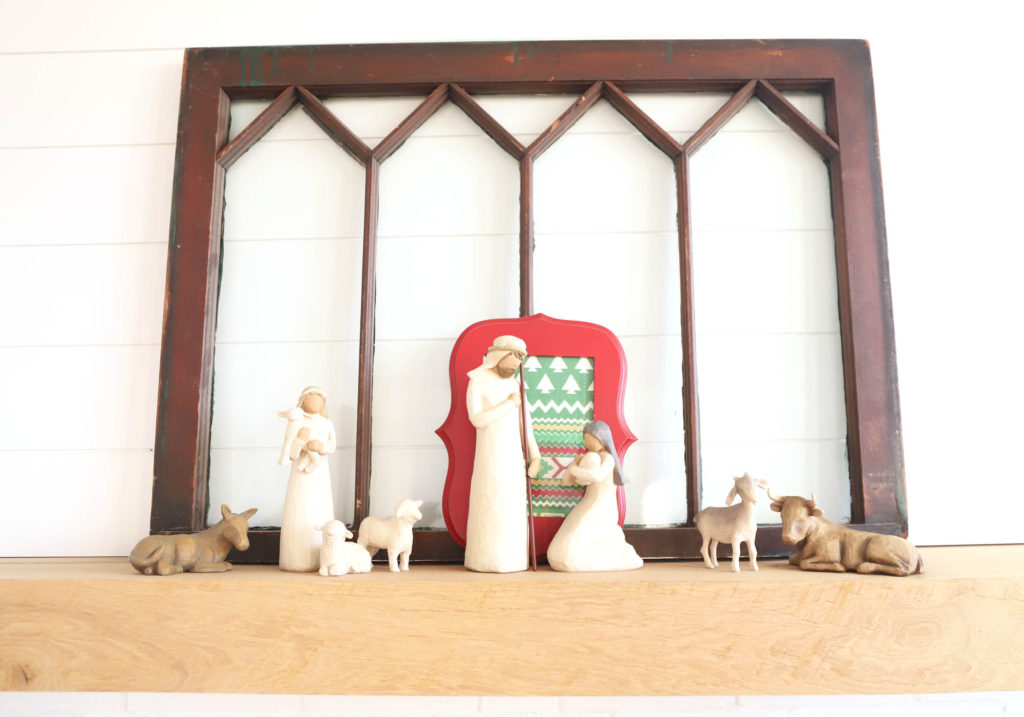
As Christians, this symbolizes what our family holds most important during the Christmas holiday. Joy to the World!


Christmas Decorating Details

Though the living room was where we focused much of our decorating efforts, I did make a point to add a little Christmas spirit to a few other spaces on the main level.

Dining Room

I made some changes to my wooden crate centerpiece, by adding leftover branches from our tree. Battery powered candles and pinecones help to pull it together.


Kitchen

Our farmhouse sink got a seasonal update with a garland made of leftover fabric bits, a lantern, a small Christmas tree, and a few other accessories.

Of course, the vintage scale had to make an appearance as well!


I love this view looking into the kitchen, peeking around the restored built in cabinets. Certainly, these cabinets add a level of vintage charm to our newly built home.

This burnt orange/red pitcher sits atop the other built in. In addition to visual interest, it also adds a pop of color to our mostly neutral kitchen decor.


Mudroom/Back Entry

A set of french doors leads to the back entryway/mudroom space. A simple garland frames the opening and highlights the decorated piano.

Next year, I will probably try to do a new chalkboard art design. Something with a bit more of a seasonal message. I didn’t quite have the courage to erase this sign just yet.

This little brass bell was part of my husband’s grandma’s collection. She passed away last year, and we cherish the memory of the impact she had on our family. She is greatly missed.


I hope you enjoyed taking a peek inside the cottage and seeing it all decorated for Christmas. It was fun trying new things, and I look forward to many more years decorating this home.


Christmas Decorating Video

Want to see the entire process of us decorating our home? Check out this video!


Pin these decorations

Keep these ideas handy for next year, by pinning them to your favorite holiday board.

SIMPLE FALL DECOR IDEAS

Gather inspiration from these simple Fall decor ideas. They will have you ready to celebrate the season!

harvest decorations

It’s officially Fall here in the Midwest! It honestly feels like there was a switch that turned the weather from warm and sunny to cold and rainy. The change just happened so suddenly!

Fall is probably my absolute favorite season of all, and I am genuinely bummed that I likely won’t be able to decorate this year. With the building of Arrow Hill Cottage nearing completion, our time is split between site visits, choosing finishes, and packing up the rental house. Add in school activities, and we essentially have no spare time anything for extra, including decorating!

But, if YOU have time to decorate, I have some ideas for you today! Though these ideas have been on the blog before, I thought they were worth another share. Click on the link below each picture to read more details about the decor.


SIMPLE FALL DECOR DIY

Looking to create something unique to decorate your home? Try one of these simple DIY ideas.


Natural Centerpieces

These natural Fall centerpieces would be the perfect accent to any tablescape, from now through Thanksgiving!

centerpieces full of fall color

read the post


Pleated Table Runner

Even though it looks like a detailed and complicated piece, this pleated table runner can be made in just minutes. And for less than five dollars in material costs it is definitely worth a try.

thanksgiving table runner

read the post


‘Be Thankful’ Printable

The start of Fall means that Thanksgiving is right around the corner. One of the most simple ways to decorate this Fall might just be printing out this sign!

printable home decor for fall

read the post


SIMPLE FALL DECOR IDEAS

The internet is an absolute wealth of ideas when it comes to simple fall decor ideas. Below are some of the favorites I have found!

Decorating Ideas From Instagram Part 1

Great ideas from fellow Instagrammers. Such inspiration!

fall entryway decor

read the post


Decorating Ideas From Instagram Part 2

More ideas from Instagram.

painted pumpkin home decor for fall

read the post


Cottage Style Fall Decor

These decorating items from Amazon can warm up your home this Fall.

home decor items

read the post


I hope you will gain some inspiration from these simple fall decor ideas, and that you will enjoy the season!

SIMPLE LIGHT FIXTURES | Minimalist Home Lighting

In today’s post, I share the simple light fixtures we have chosen for our new home. The clean lines and basic color palette of these selections make them the perfect compliments for the minimalist home.

simple lighting collection

This post contains affiliate links. As an Amazon associate, I earn from qualifying purchases. See my full disclosure here


This has been a very exciting week at Arrow Hill Cottage. The interior framing is just about complete, the house wrap is on, the windows are going in, and the mechanical duct work has started! Now is the time to begin ordering the light fixtures for each room.

Over the past few months, I have been searching various websites and stores for simple light fixtures that would complement the overall feeling we are trying to achieve with our home. Classic, clean, and minimal, with a bit of a vintage industrial vibe.


INTERIOR LIGHT FIXTURES

We will be using quite a few canned light fixtures, especially in the open spaces – such as the dining/ living room and basement family room. However, in many of the other rooms there will be a need for various types of task lighting.

If you are interested in any of the light fixtures we have chosen for our home, be sure to click on the links below each picture!


Flush Mount Ceiling Fixture

This ceiling hugging fixture has sleek lines, and gives off a good amount of light. We will likely install in the downstairs office and possibly in the upstairs mudroom/ back entry space.

flush mount modern light fixture

Lanros Round Modern Flush Mount Fixture


Semi-Flush Mount

In rooms where we want a bit of an upgraded look, we will be placing these semi-flush mount fixtures. The master bedroom will have one, as will the main floor powder room.

semi flush schoolhouse light fixture

vintage style semi-flush mount


Dining Chandelier

We searched for a special light fixture to be used above our dining room table. This eight light pendant fixture is the perfect fit for what we were looking for. The linear design will mirror the long farmhouse style table we will be building custom, from trees felled on our property.

eight light pendant above dining table

Savoy House – Burgess – 42″ Eight light pendant


Vanity lighting

In the master, basement and upstairs bathrooms, this simple wall pendant will give just enough character. Using the same light fixtures in multiple rooms will help keep the continuity throughout the house.

industrial style vanity light

Above Vanity Light


We are also considering this fixture in a few locations around the house,  perhaps in one of the bathrooms.

single light wall sconce

Vintage Black Wall Sconce


Accent Pendant

This pendant will be perfect, hanging above our large cast iron sink in the kitchen. In such a clean and minimalist space, this accent will really shine.

industrial light pendant

Stone & Beam Vintage Ceiling Pendant


Large Room Pendant

With the vaulted ceilings upstairs, we will be using larger pendants. These farmhouse style industrial pendants have long cords, which will bring the light lower into the room – allowing for better coverage.

Three identical pendants will be set upstairs. One for each bedroom, and one for the hallway space.

simple warehouse style light fixture

Millenium Lighting Farmhouse Pendant (17 inch)


Master Bedroom Side Lamps

On either side of our master bed, we will be placing these swing arm lamps. Perfect while reading in bed!

bedside reading lamps

Globe Electric Swing Arm Lamp


Boys Sleeping Nook Lamps

In each of the boys sleeping nooks, they will have small reading lights as well. The multi-directional quality of these trumpet style lamps is really nice.

trumpet flare reading light

Trumpet Flare Wall Sconce


Closet lights

In the closets, we will be using smaller wall mounted fixtures. This is a bit of a splurge perhaps, as some of the closets really don’t need any lighting. However, the larger closets in the kid’s rooms will benefit from the extra illumination – especially in the dark storage space behind their hanging rods!

vanity wall bar light

Wall Bar Light 


EXTERIOR LIGHT FIXTURES

The light fixtures for the exterior of the house will follow the same style as the interior of the house. There are two different styles we are going to incorporate. Barn lights, which will be placed in feature positions – above the front door and above the garage doors.

industrial style outdoor barn light

Industrial Barn Light


These other simple flood lights will be placed on the side garage doors and near the walkout door.

simple outdoor flood light

Black Flood Light


MINIMALIST HOME LIGHT FIXTURES

Feel free to pin these light fixture ideas for reference!

minimalist home lighting


CAST IRON SINK RESTORATION | POWDER ROOM

While the crews are hard at work on our house construction, my husband has been busy with a cast iron sink restoration. Read all about his progress and see how the sink looks now!

vintage cast iron sink


It’s been a super busy summer for the construction crews out at our house build site. They are currently finishing up the framing and sealing the exterior. Hopefully, all of that can be finished before the cold Fall weather starts up! In the meantime, We have been cleaning and preparing items that will be used in the new house. Bathroom vanities are getting painted, chairs are being refinished, and the cast iron sinks are getting restored!

We have two vintage cast iron sinks that will be installed in the new house. One is a large, single basin farmhouse sink which will be used in the kitchen. The other is this smaller model 1930’s Kohler wall hung unit, which will be the perfect compliment to our main level powder room.

dirty cast iron sink


HISTORY OF THE CAST IRON SINKS

Both sinks were recovered from the property we are currently renting, my husband’s grandparents farmstead. They remodeled their house sometime in the 1960’s, and at that time put the sinks outside. They sat for 50+ years in the woods, covered with leaves and debris. Because of this, the sinks definitely needed some TLC.

We talked about hiring a company to do a complete restore, but decided to test out a DIY version on the smaller sink. Once we knew the results, we figured we would be able to make an informed decision about what to do with the larger one.


CAST IRON SINK CLEANING

First, the sink needed some good old elbow grease. Craig started with very mild cleansers – such as a baking soda/water mixture. Eventually, he moved to harsher chemical cleaners, including ‘Iron Out’ and ‘Bar Keepers Friend.’ While they did clean the sink somewhat, none of the products were completely removing the rust stains.

cleaning the sink

Craig really wanted to remove the rust, as it could affect the sink’s future integrity if not addressed properly. He ultimately needed to use a wire wheel brush to remove the rust spots.


FIXING THE CHIP

Besides the rust, the biggest issue with this sink was a large chip in the enamel, as well as a hairline crack that ran along the side and up the back splash. They were both cosmetic issues, as they did not cause any problems with the sink being able to hold water.

fixing a chip in enamel of cast iron sink

We found an epoxy material that could help fill in the imperfections. Over the course of a day, Craig applied layer after layer, allowing the epoxy to dry between coats. Once the material was above the height of the original enamel, it was left to dry for a few days before sanding.

epoxy material

filling the sink chip with epoxy

This product requires a ‘wet sanding’ technique – to help keep the dust down, and to eliminate scratches on the sink’s surface.


PAINTING THE CAST IRON SINK

We had determined, while cleaning, that the original enamel would need to be covered to get a uniform look. We were in no way looking for perfection, as we understand that this is an old sink. However, the discoloration was pretty bad from the years the sink had sat outdoors.

Once the epoxy had been sanded down smooth, it was time for paint! Craig started by painting the back of the sink with a black ‘rust inhibitor’ paint.

Rustoleum makes a specialty paint product that can be used for bathroom fixtures such as sinks and bathtubs. We decided to give it a try for the front!It goes on about the same as a standard can of spray paint, but the drying time is much longer. This allows the paint to harden.

painted cast iron

After three coats, the sink is looking great! The finish isn’t quite as shiny as the original enamel, but it is pure white and uniform. All of the rust spots are covered, and you would need to look extremely close to see any sign of the large chip or crack.

vintage sink repair

We are quite pleased with the outcome – especially considering the money we saved by doing it DIY style! Of course, until the sink is in use, we won’t know how this paint will hold up over time. I will try to remember to write an update after we have used the sink for several months.


WATCH THE CAST IRON SINK RESTORATION

For an even closer look at the steps involved in this restoration process, check out the THREE PART SERIES of videos that my husband created for his new YouTube channel, Weirdy Beardy Workshop. He has been busy filming a lot of projects, actually. So, if you want to see some behind the scenes footage, go check out his channel!


PIN THIS POST

how to restore a cast iron sink


Kids Clothing Declutter | How much to keep

We are just weeks away from our mega garage sale in preparation for our move. I have been finishing up going through the last bit of items in our house, and the focus this week was on decluttering kids clothing.

You know the saying about how socks seem to be eaten by the washing machine? I feel that they magically reappear in the form of extra pants and shirts, in the drawers of children. And for someone who is attempting to become more minimal, this multiplication can be extremely upsetting.

This past winter, I took the leap to create a capsule wardrobe for myself. I ended up paring my entire collection down to fifty total items, excluding a few items such as outerwear and jewelry. I found it so freeing, in fact, that I eventually convinced my husband to declutter his clothing as well. Neither of us have missed a single item and we both find it super easy to make our outfit selections.


WHY KIDS CLOTHING ACCUMULATES

For a variety of reasons, it seems that kids clothing accumulates faster than adults. By understanding the reasons it is easier for these items to enter our houses, we can be more mindful in the future to stop it from happening.

Kids clothing is cheap

For a small amount of money, you can build your child’s wardrobe. A dress here, a pair of pants there. And don’t forget all those cute shoes! There are also plenty of garage sales that feature extremely inexpensive kids clothing. At fifty cents per piece, it isn’t easy to pass up those closet filling bargains!


They take up little space

Unlike large toys or furniture pieces that might get in our way and remind us we need to pare down, clothing is relatively small. We know that we can usually fit ‘one more’ shirt in a dresser or one more coat in a closet. It’s when all of these little pieces are added together that we really start to notice a problem at all.


There are never ending hand-me-downs

If you have multiple children, or generous friends and family, the accumulation game becomes even more dynamic. You may be suddenly faced with multiple storage totes full of prospective outfits, whether your child is ready to fit into them or not.


STORING KIDS CLOTHING

It’s easy enough to get rid of the items that have been outgrown or those that are riddled with holes and stains. But, what if the seasons are shifting and your child has a number of perfectly good clothing items that still fit? Or older brother has grown out of a favorite sweatshirt, and there is another brother just a couple years younger?

decluttering kids clothes

I am definitely guilty of keeping clothes around with the thought that ‘someday’ one of the other kids might need it. Though, through my nearly thirteen years of parenting, there have been only a handful of times when that has truly been the case. Styles change, body shapes are different, kid’s preferences might be particular.

Because of the sheer amount of items that can accumulate, dealing with stored clothes can be downright overwhelming.


HOW MUCH DO THEY REALLY NEED?

In the end, I am left with this very question. How much clothing do the kids really need? Probably every family’s scenario is a bit different. I can only speak for our family. And I know that our kids have way more clothing than they actually need.

how many clothes do kids need

I will admit that this is probably going to take me a series of edits before we get to the magic amount. And yes, it will most likely be left up to me to decide, since not one of my kids care much at all about clothing.

There are a variety of guides online that discuss how to create a capsule wardrobe for kids. They even go so far to indicate the number of each type of item (shirts, pants, etc) that it should include. This blog post, for example, gives some great tips on how to pare down.

Generally speaking, the rule of thumb has to do with how many days you want to go without needing to do laundry. Ideally, for our family, the kids clothing supply would last, at a bare minimum, a week to week and a half.

Potentially, our kids clothing capsule might look a little something like this:

BOYS

16 short sleeved shirts (shared)

18 long sleeved shirts (our youngest would need 6 of his own, and his brothers could share the remaining 12)

4 sweatshirts/hoodies (each)

5 pairs of shorts (each)

5 pairs of comfortable pants (each)

2 pairs of dress pants/jeans (each)


GIRLS

8 dresses (shared)

16 short sleeved shirts (shared)

16 long sleeved shirts (shared)

2 sweatshirts/hoodies (each)

2 pairs of shorts/capris (each)

7 pairs of pants (each)


After the move, I will plan to go through my kids closets and dressers again. At that time, I think I will attempt this capsule scenario. Perhaps keeping a few additional ‘backup’ items, in case the inventory seems too low.

The great thing about having a minimal wardrobe is that if something becomes stained or worn you can replace it with something new, guilt free. Another benefit to a smaller wardrobe is being able to customize it for each child’s comfort and style preferences, without breaking the bank.

And dealing with an item or two, here or there, would definitely be favored over the four hour decluttering session I just went through in their closets! If I look exhausted at the end of the video, it’s because I was!

WATCH ME DECLUTTER


PIN THIS POST

kids clothing declutter