While the crews are hard at work on our house construction, my husband has been busy with a cast iron sink restoration. Read all about his progress and see how the sink looks now!
It’s been a super busy summer for the construction crews out at our house build site. They are currently finishing up the framing and sealing the exterior. Hopefully, all of that can be finished before the cold Fall weather starts up! In the meantime, We have been cleaning and preparing items that will be used in the new house. Bathroom vanities are getting painted, chairs are being refinished, and the cast iron sinks are getting restored!
We have two vintage cast iron sinks that will be installed in the new house. One is a large, single basin farmhouse sink which will be used in the kitchen. The other is this smaller model 1930’s Kohler wall hung unit, which will be the perfect compliment to our main level powder room.
HISTORY OF THE CAST IRON SINKS
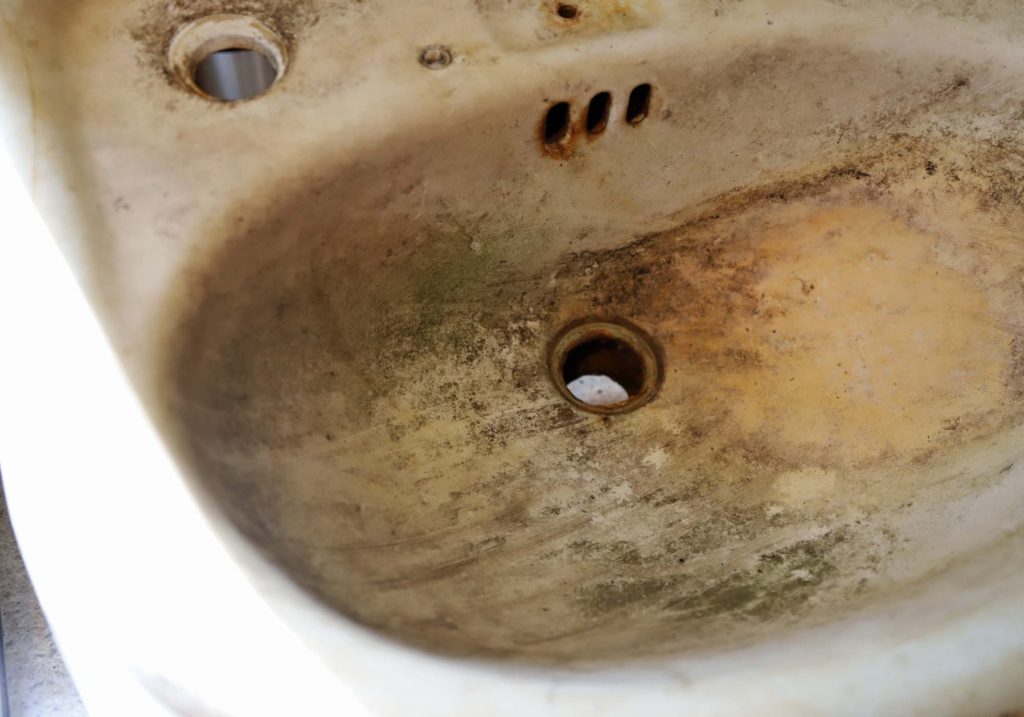
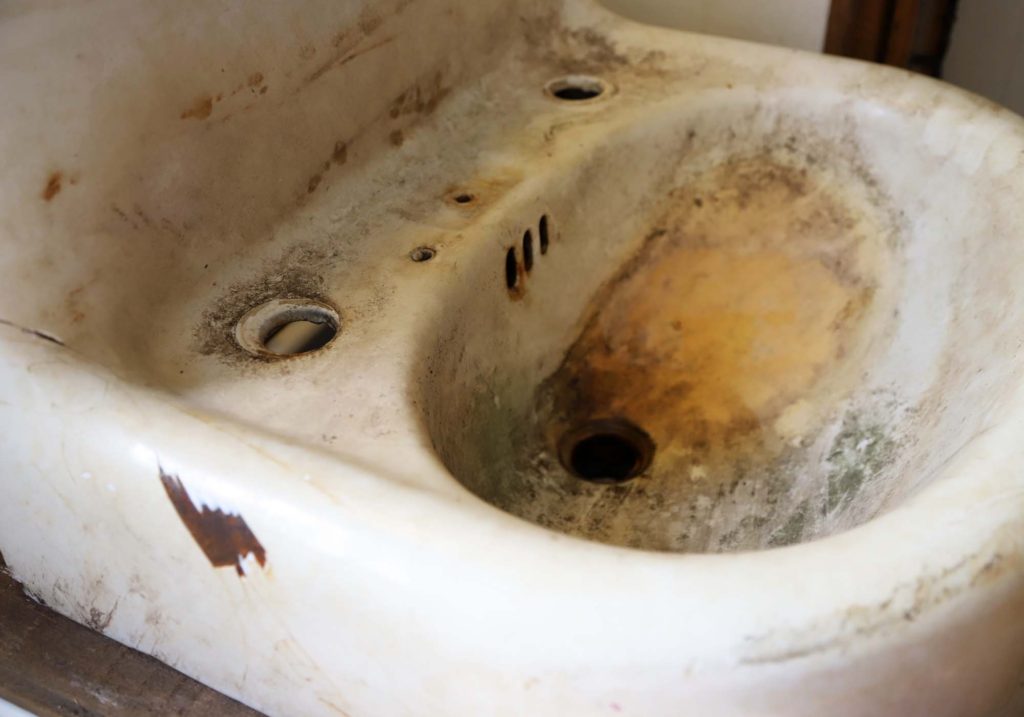
Both sinks were recovered from the property we are currently renting, my husband’s grandparents farmstead. They remodeled their house sometime in the 1960’s, and at that time put the sinks outside. They sat for 50+ years in the woods, covered with leaves and debris. Because of this, the sinks definitely needed some TLC.
We talked about hiring a company to do a complete restore, but decided to test out a DIY version on the smaller sink. Once we knew the results, we figured we would be able to make an informed decision about what to do with the larger one.
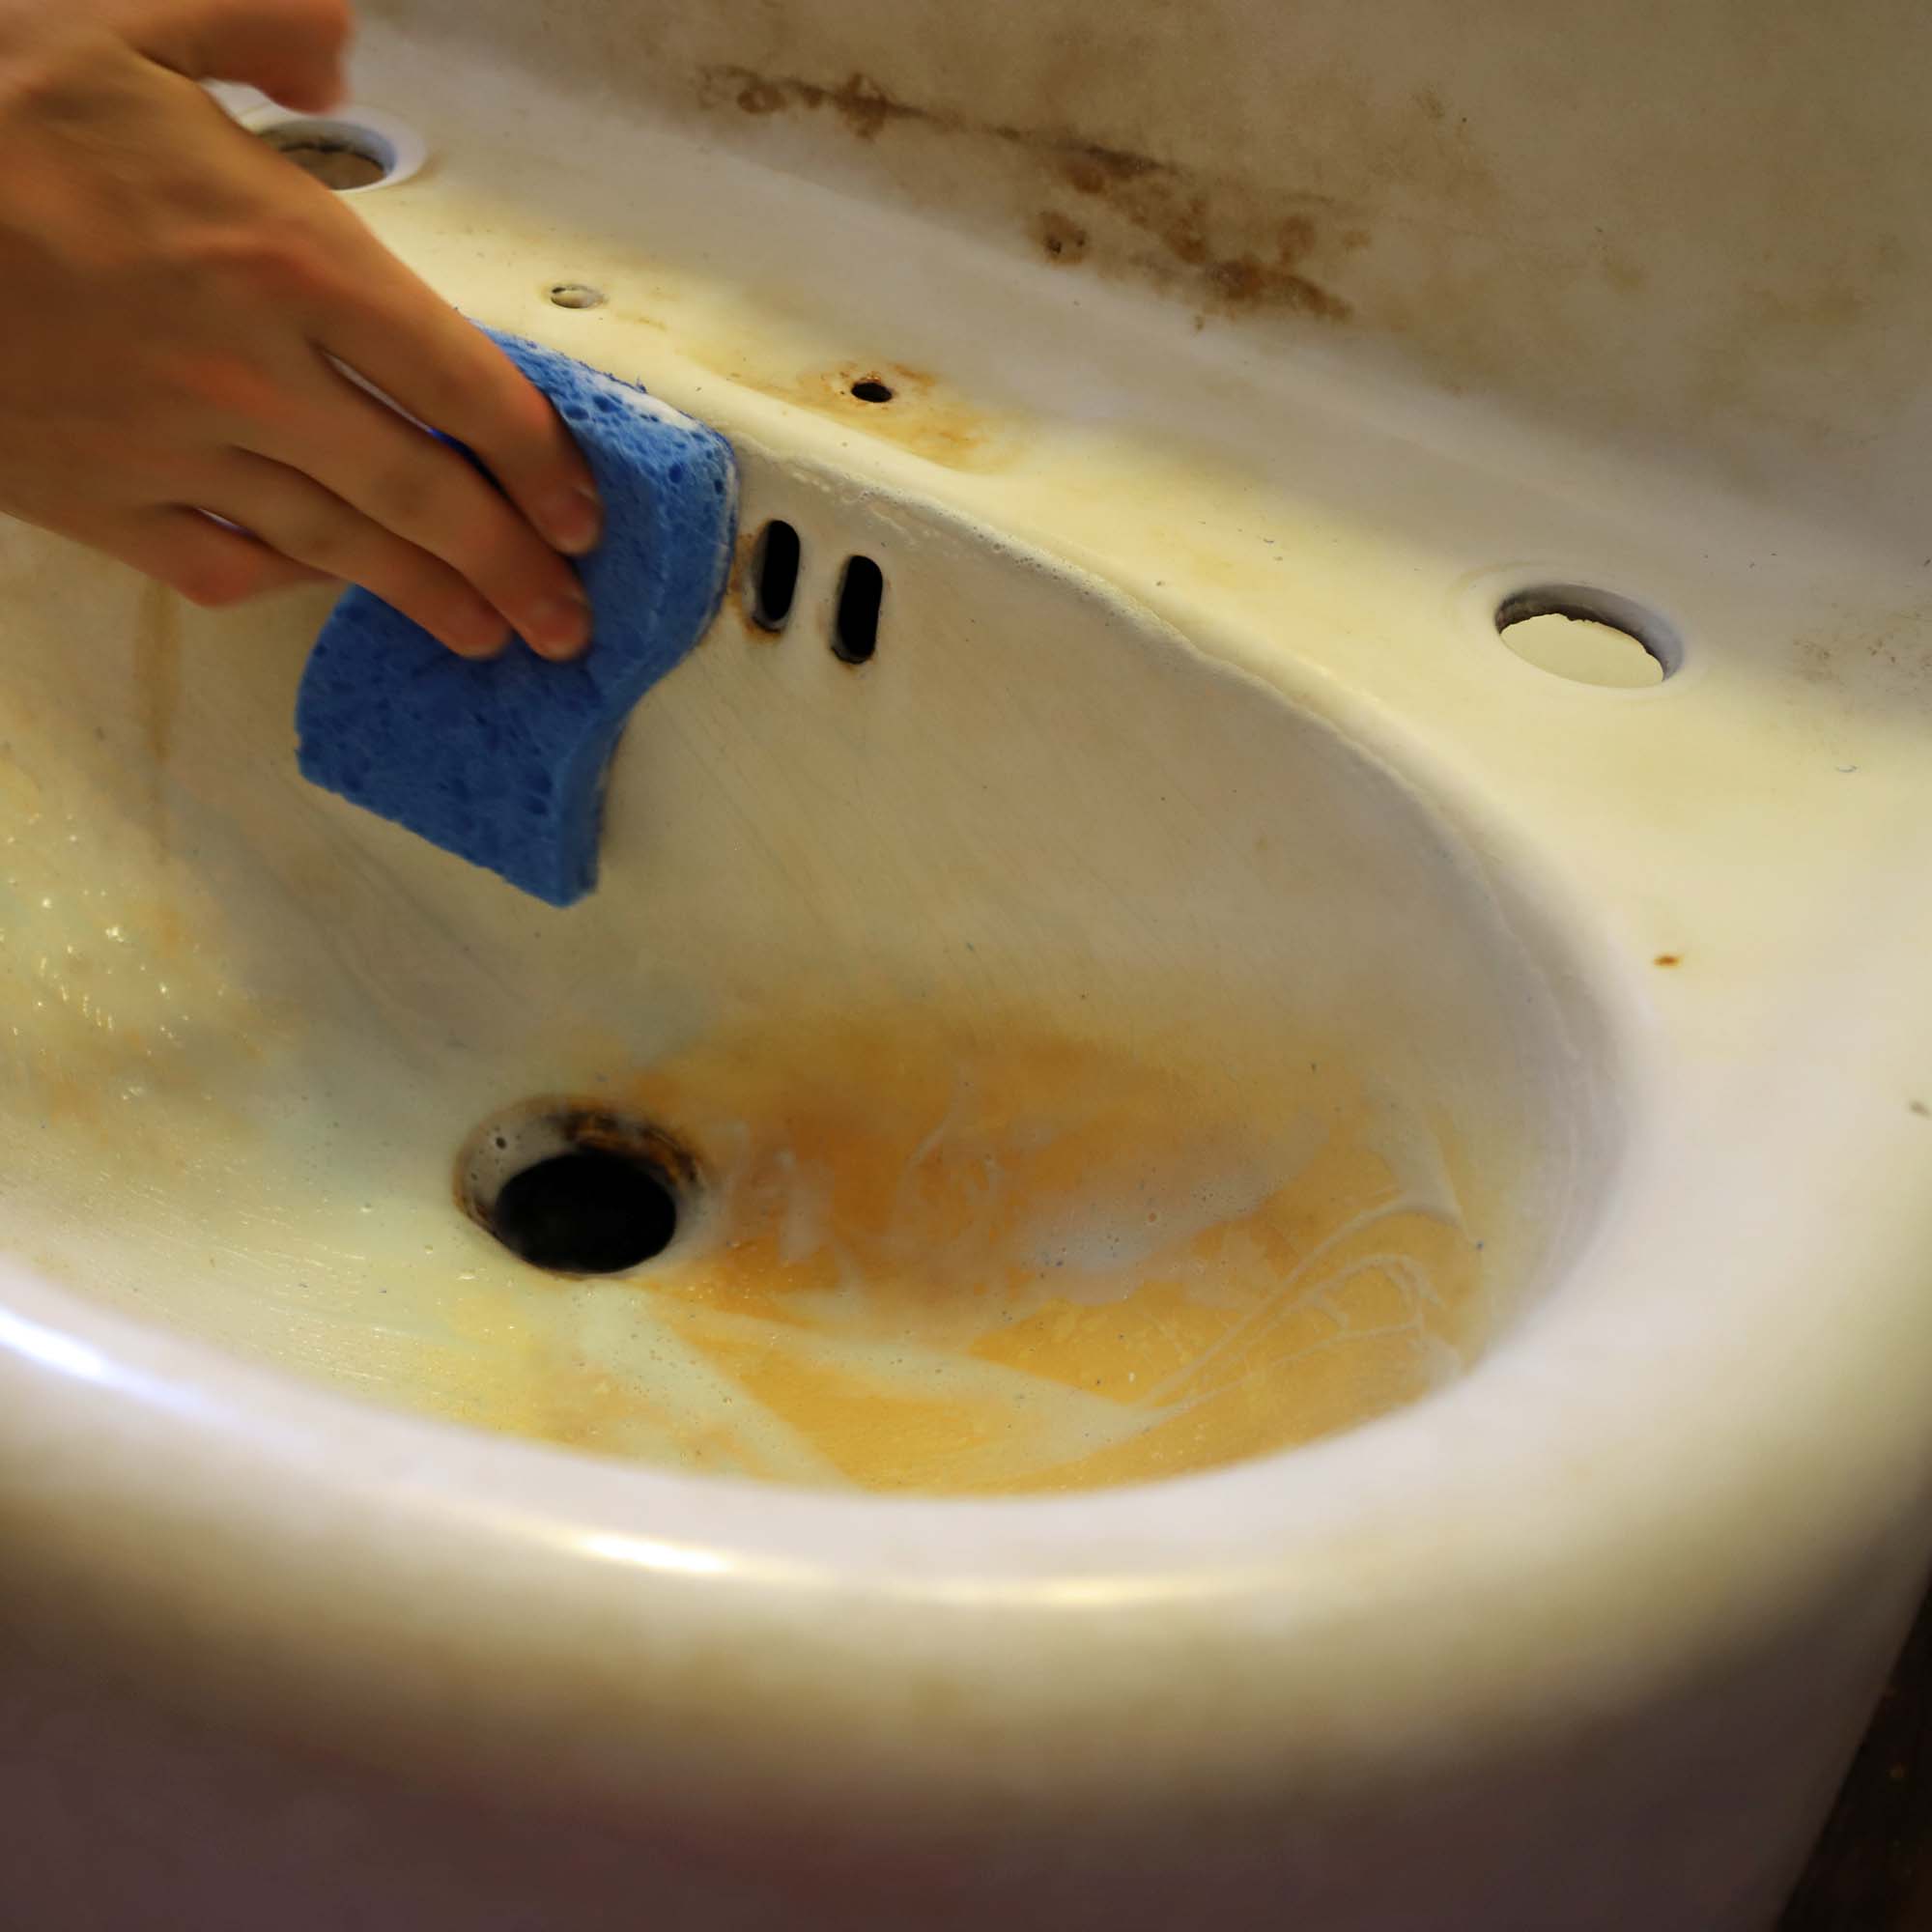
CAST IRON SINK CLEANING
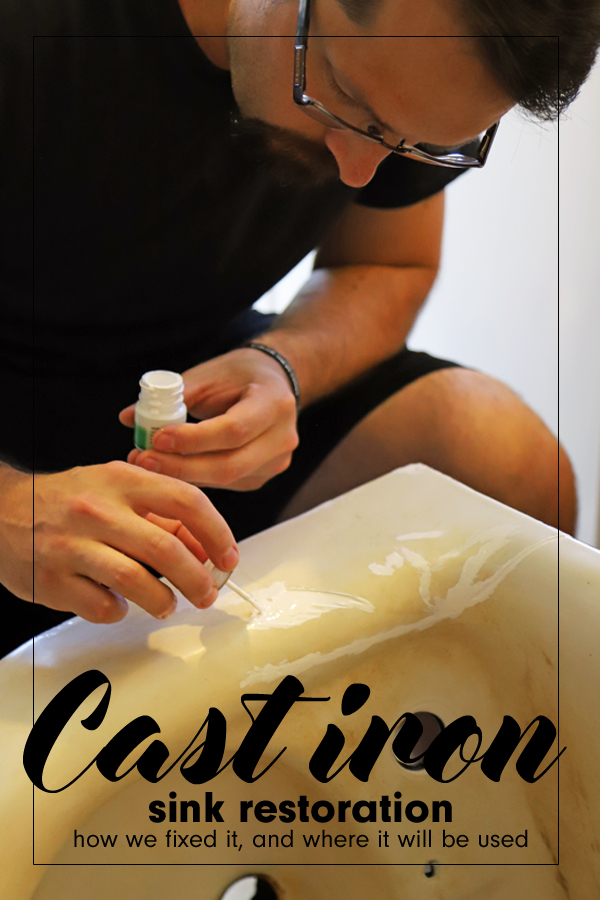
First, the sink needed some good old elbow grease. Craig started with very mild cleansers – such as a baking soda/water mixture. Eventually, he moved to harsher chemical cleaners, including ‘Iron Out’ and ‘Bar Keepers Friend.’ While they did clean the sink somewhat, none of the products were completely removing the rust stains.
Craig really wanted to remove the rust, as it could affect the sink’s future integrity if not addressed properly. He ultimately needed to use a wire wheel brush to remove the rust spots.
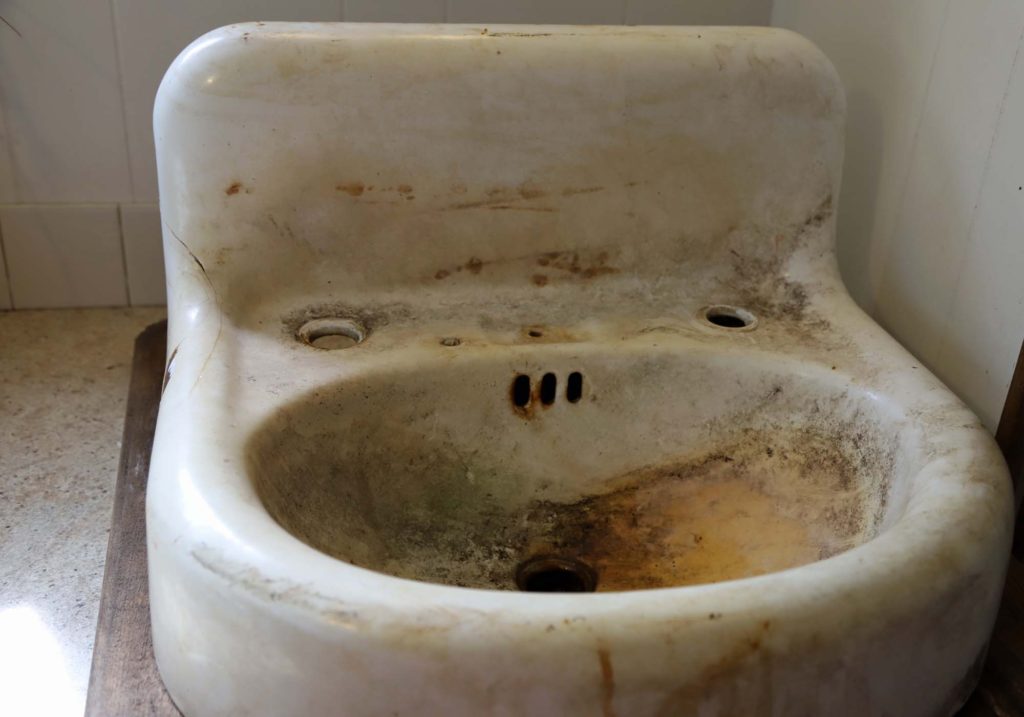
FIXING THE CHIP
Besides the rust, the biggest issue with this sink was a large chip in the enamel, as well as a hairline crack that ran along the side and up the back splash. They were both cosmetic issues, as they did not cause any problems with the sink being able to hold water.
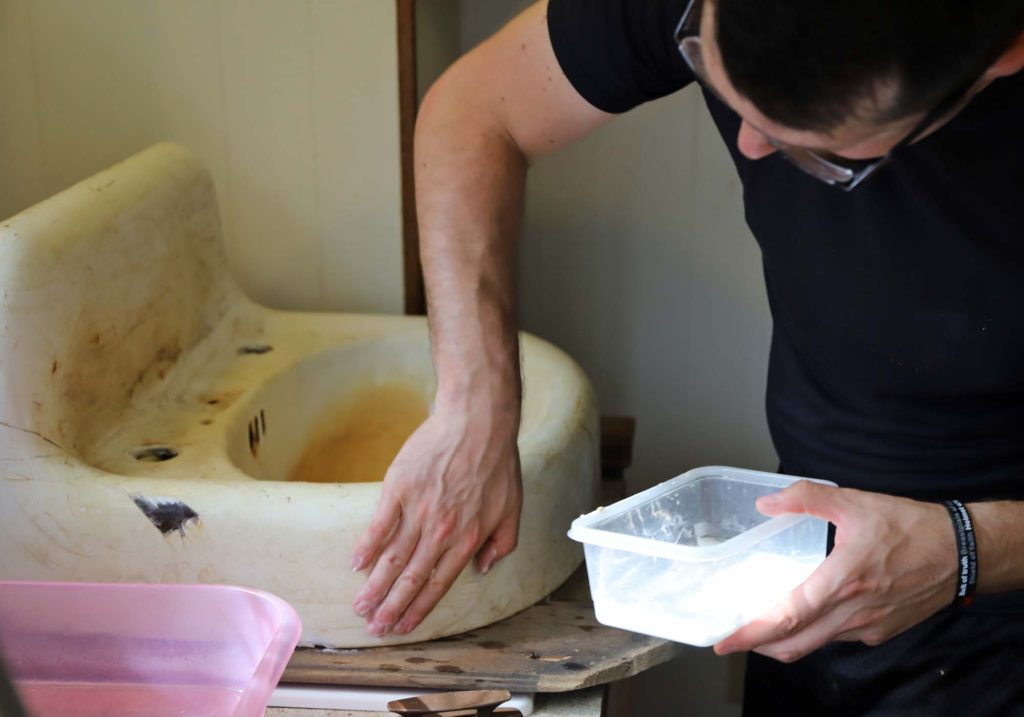
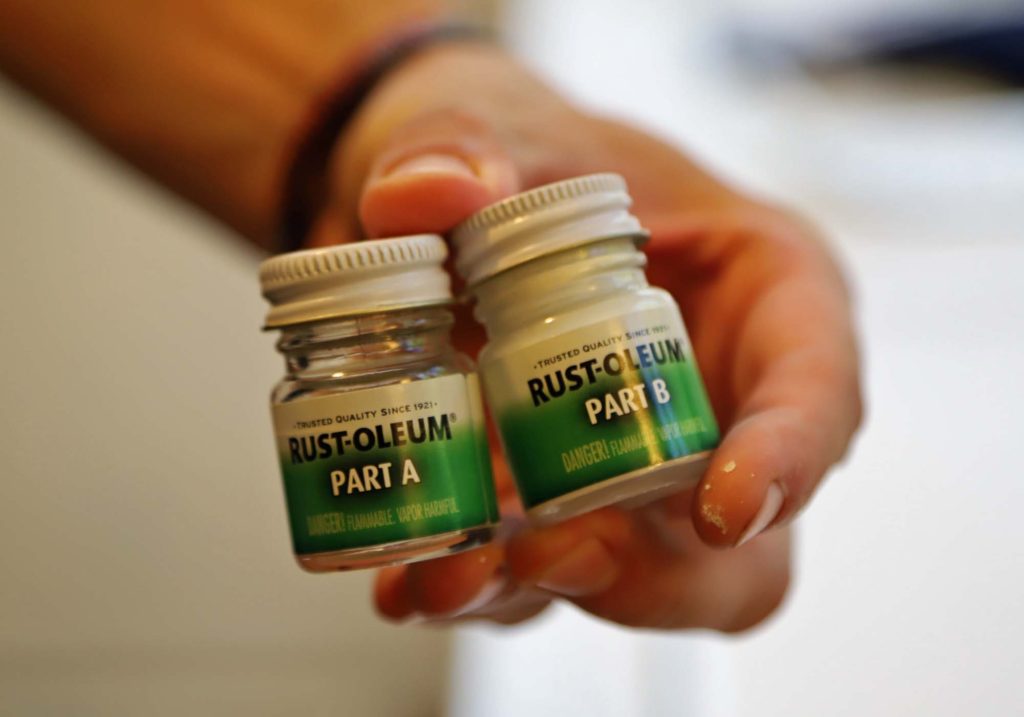
We found an epoxy material that could help fill in the imperfections. Over the course of a day, Craig applied layer after layer, allowing the epoxy to dry between coats. Once the material was above the height of the original enamel, it was left to dry for a few days before sanding.
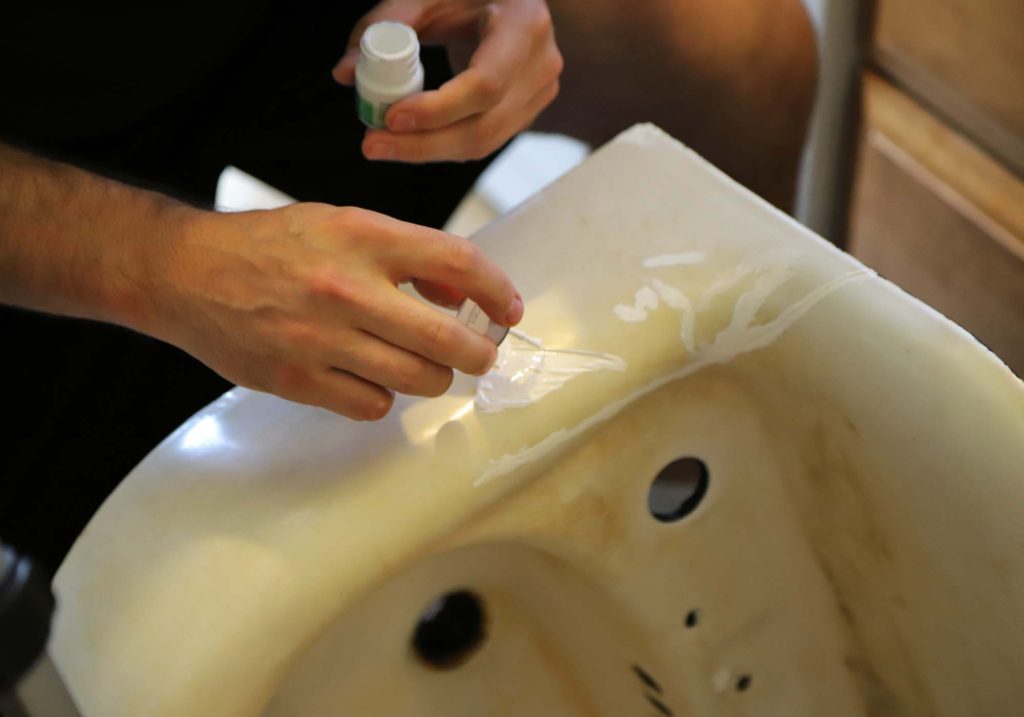
This product requires a ‘wet sanding’ technique – to help keep the dust down, and to eliminate scratches on the sink’s surface.
PAINTING THE CAST IRON SINK
We had determined, while cleaning, that the original enamel would need to be covered to get a uniform look. We were in no way looking for perfection, as we understand that this is an old sink. However, the discoloration was pretty bad from the years the sink had sat outdoors.
Once the epoxy had been sanded down smooth, it was time for paint! Craig started by painting the back of the sink with a black ‘rust inhibitor’ paint.
Rustoleum makes a specialty paint product that can be used for bathroom fixtures such as sinks and bathtubs. We decided to give it a try for the front!It goes on about the same as a standard can of spray paint, but the drying time is much longer. This allows the paint to harden.
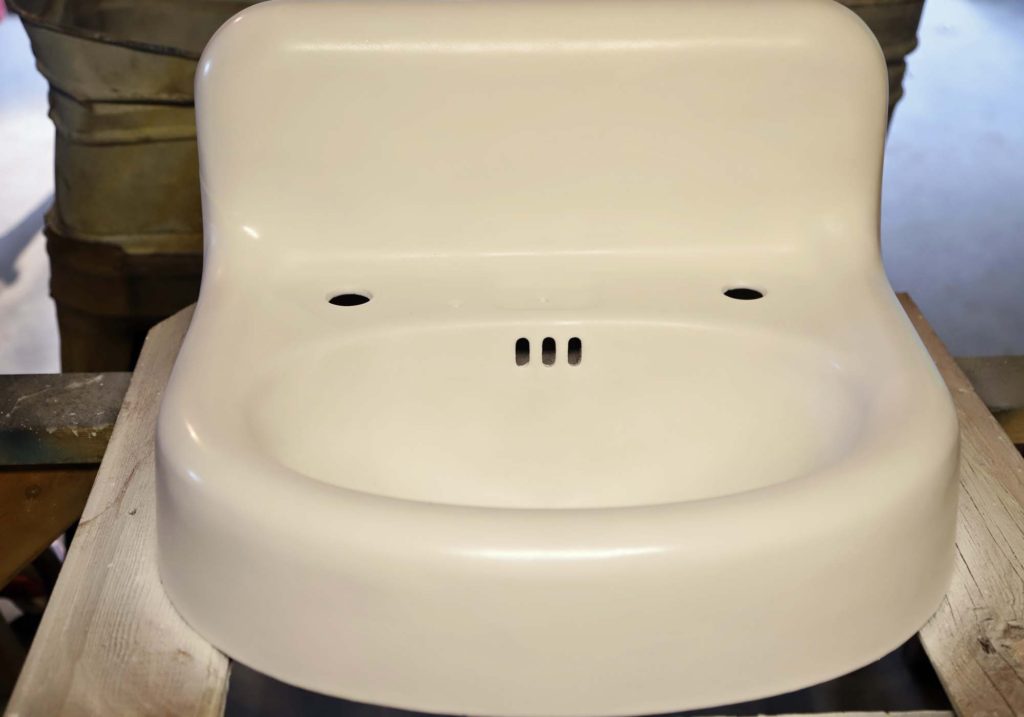
After three coats, the sink is looking great! The finish isn’t quite as shiny as the original enamel, but it is pure white and uniform. All of the rust spots are covered, and you would need to look extremely close to see any sign of the large chip or crack.

We are quite pleased with the outcome – especially considering the money we saved by doing it DIY style! Of course, until the sink is in use, we won’t know how this paint will hold up over time. I will try to remember to write an update after we have used the sink for several months.
WATCH THE CAST IRON SINK RESTORATION
For an even closer look at the steps involved in this restoration process, check out the THREE PART SERIES of videos that my husband created for his new YouTube channel, Weirdy Beardy Workshop. He has been busy filming a lot of projects, actually. So, if you want to see some behind the scenes footage, go check out his channel!
PIN THIS POST
only problem i had when i removed mine (still have it). is the separate hot and cold faucet, i hated that as a kid… so i put in a pedestal. How can you handle the separate hot and cold?
Where did you find a faucet to fit the sink that was reasonably priced?
Here is a link to the exact faucet that we purchased. It has held up great and I think it looks wonderful with our antique sink.
https://www.signaturehardware.com/wall-mount-faucet-with-variable-centers-chrome.html?pids=81344&g_acctid=7220359250&g_campaignid=2015485831&g_adgroupid=70429801814&g_adid=353987766192&g_keyword=&g_keywordid=pla-609684369318&g_adtype=pla&g_merchantid=387294&g_productchannel=online&g_productid=329625&g_partition=609684369318&g_network=g&g_ifproduct=product&g_ifcreative=&gclsrc=aw.ds&gclid=Cj0KCQjwjo2JBhCRARIsAFG667UXY84w0ZykWFd-oyJ55YpCIacPJcNC9PDx8cdlxnKBANTUePbPf6waAn0jEALw_wcB
If you do a google search for other options, just type in ‘wall mount kitchen faucet’ and it should yield plenty of results. Best of luck!
How did you modify the wall mount faucet to fit your sink? I’m assuming you used the two original tap holes that the sink had. Thank you!
We purchased a faucet that was adjustable to fit the existing tap holes.
I have a 6’ cast iron schoolhouse sink. It’s going in to a new build for a (mostly kids) bathroom. It has been outside for a little while, but nothing like your sinks. The underneath side has some rust and is rough so sanding it doesn’t seem to be the right option. Did you do the bottom side of your sinks? I’m thinking power wash, dry and then use Rustoleum spray paint will cover it. Any thoughts?
Hi Becky,
My husband did a series of 4 videos regarding one of our cast iron sinks. You might find these videos helpful when it comes to specifics of the restoration project:https://www.youtube.com/playlist?list=PL5azisqOX6Wr1_0Ltan_kg9H75F9srP8M
Generally though, I do know that he did a lot of wire wheel work on the underside of the sink, and then did paint it with a rust inhibiting spray. So far, the paint has held up very well!
I have a cast iron vanity sink finished in an “Old World Bronze” finish, not enameled. Do you know how I can remove the white hard water stains, and then what I should use to refinish it that is easy to clean?
Hi Ivy,
I will be honest – I’m not a professional when it comes to knowing everything there is to know about cast iron sinks. The only advice I can offer is based off of what my husband and I have experienced with our own vintage sink(s). My husband worked tirelessly on our powder room sink to remove hard water stains. I am including a link to the playlist for the sink restoration videos. Be sure to check out the comments others have left too, for other ideas! Best of luck! https://www.youtube.com/watch?v=XZ6LfryQzFg&list=PL5azisqOX6Wr1_0Ltan_kg9H75F9srP8M
Has the repair held up?
It has! We have lived in this house ‘full time’ for about 7 months now, and the sink still looks great. I post more day to day pictures on my Instagram account, if you’d like to see how it looks now. I should plan to do an update post here on the blog sometime too.
What a great project! I never knew there was a paint for this. Thanks for sharing!
We didn’t either! Hopeful that it holds up!
Can you please tell us how many cans of paint were needed for 3 coats on this smaller sink?
This particular sink took 2 cans of top coat paint.
Wow the transformation is AMAZING!!! how neat to bring it back to life
Thank you! I can’t wait to see it put into place!
This is amazing! I love that you’re restoring an old cast iron sink rather than just buying a new one! Fantastic resource!!
It means even more to us that it was used by our ancestors!
This looks great! I have considered trying this for a bathtub. I will love to hear how it holds up!
I’ll be sure to post an update!
Wow! This turned out great!! We have an old since you were using in our new home. I never even thought about trying to repair it myself. I’m saving this for later because you never know if you want a vented sink somewhere else in the house ha!
It took quite a bit of elbow grease, but really wasn’t all that difficult!
Wow! The sink restoration looks Great , Kudos ?? & to have a touch of generations ( grandparents) farm house items is really heart warming . For Craig to put in the time not only saves money but shows his ❤️ to ‘family ties’
So thankful for my handy husband!!!