AROUND HERE: OCTOBER 2017

Around here we have been…

WATCHING the change of the seasons. The weather the last few weeks has been absolutely gorgeous. Fall in the Midwest is one of the most beautiful scenes to behold. The leaves slowly turned bright colors, then fell to the ground. The temps are now dipping and we experienced our first bit of snowfall, although it melted quickly.

LEARNING new things. The older two boys and Craig have started taking Greek lessons, and are enjoying the challenge. Even though they need to wake up early on Wednesday mornings for their class, they are not deterred.

{K} and {L} are both working on their reading skills. It has been fun to see their grasp of vocabulary blossom. {L} has even taken to writing books of his own!

{M} is getting into the groove of preschool, and has been bringing home plenty of art projects that showcase the fun she has been having! She has made some new little friends, which has been wonderful.


PLAYING outside. As the weather cools down we are taking advantage of every spare moment we can before the deep freeze sets in. The girls really got a kick out of the fallen leaves, and labored over making them into piles that they could jump into.

There is also plenty of dune buggy riding going on. Craig even gets in on that action!

Even though the football season is now officially over, {D} continues to show his dedication to kicking and can be seen in our yard most days practice his form.


DRESSING up for Halloween! We went with a minion theme this year, which was pretty fitting. Many times Craig and I feel over-run by the chaos these little people exude, but we are so blessed by them!

DECORATING for the season. Angela has had a lot of fun this season getting the house festive. She has been pulling bits from nature to make decorative table centerpieces.

This is just a glimpse of what our family has been up to.  If you’d like a closer look, be sure to check out our weekly ‘mini vlogs’ on our YouTube channel ARROW HILL FAMILY.

Be well everyone!

HOW TO MAKE A PLAY KITCHEN USING AN OLD DRESSER

For over 4 years, my husband and I were ‘boy only’ parents. With 3 young boys, we had plenty of trucks and action figures, and a giant stash of Legos. We knew all about Thomas the Train and how to allow the boys to rough house without getting injured. So when we prepared to adopt our daughter {M} in 2015, we realized we were lacking a bit in the ‘girl’ department. We added a few dolls, a tea set, sparkly dress up clothes, and other fun girl toys – not sure what her preference would be. Once home, it became clear pretty quickly that her favorite thing to do was spend time in the kitchen with me, pretending to cook.


THE IDEA

A couple of years later, in the spring of 2017, while in the adoption process for {K}, I had the idea that pretending to cook might be something the girls could do together – and that maybe the imaginative play would be a good bonding experience for them. I went on a hunt for toy play kitchens, but sadly found that the store varieties I liked were either out of our price range or constructed with flimsy materials. I then turned to Pinterest, where I was faced with an absolute treasure trove of DIY ideas!

Seriously, check THIS out! So many creative people!

I made the decision that I would go the DIY route for the play kitchen project. Not only would it allow me to create a unique piece, it would cost much less! A few weeks later, my father in law asked if we wanted an old dresser that was his as a child. He offered it with the thought that we might need more space to store clothes with a new little person joining our family; But when I saw it I knew. It was meant to be a kitchen!

This is the story of how I turned an old dresser into a beautiful farmhouse style DIY play kitchen.


THE INSPIRATION PIECE

The dresser was low – 2′-1″ high to be exact, and had two large drawers. It had simple sculpted feet, a bit of a decorative top, and really good bones. It was a sturdy little thing! I really wish that I would have taken a photo of the dresser before I started to modify it, but at the time, I had no idea I would be starting a blog!

I searched online and found a photo of a similar dresser. Minus the paint, the dresser I transformed looked a lot like this one. The listing says it is from the 1890’s. I’m not sure the age of ours, but it had a musty smell that makes me think it had been around for quite a while.


(image source) 

Again, I wasn’t really thinking about documenting the process so much at the time – But here is one photo of the kitchen ‘in progress’.


And after a bunch of work, this is the finished product!


WHAT I DID

Step 1: The first thing I did was make a trip to our local Habitat for Humanity Restore to find some bits that I could use. The Restore is my go to place for DIY projects. I can usually find unique items at a low cost, and the bonus is that the sales go back to support the building of houses for people in our community. Double win!

At the Restore I scored the sink basin for $10, a small cabinet door for $3, a towel bar for $1, and a couple of hinges for 50 cents each. When I told them what I was working on, they generously gave me some old burners, oven knobs, and a sink faucet (which apparently they are not allowed to sell). I totally felt like I hit the jackpot!

For the items I couldn’t find at Restore, I searched the home improvement store in our town. There I purchased a large metal handle for $8, a sink strainer for $4, and 10 feet of white particle board shelving at a cost of $20.

I had the rest of supplies I needed on hand – black and white paint, miscellaneous lumber, nails and screws. My grand total project budget was $47!


Step 2: Next, I removed the dresser drawers. I decided to use one as a hutch/upper shelves for the kitchen, and the other as a side ‘pantry’.  For the hutch, I removed the back of one of the drawers – then moved it up so that it would serve a as a shelf. I cut it with a bit of a curve,  to add some visual interest. The second drawer was turned on it’s side and fitted with inexpensive white particle board shelves.

Step 3: Using the ReStore cabinet door as a guide, I closed off a portion on the left of the dresser to create an oven space. A 2×4 was secured along the front of the dresser, and is where I attached the oven knobs with screws. The oven interior was fitted with 1/2″ square trim pieces, spaced apart to simulate an oven rack. The entire interior was painted black. I also painted the center portion of the cabinet door black, to give the appearance that you were looking through to the inside. The cabinet door was hinged on the bottom, allowing it to swing down. The finishing touch for the oven was the metal handle. It was the single most expensive piece of the project, but the added charm and realism was worth it I think.

Step 4: I then turned my attention to the dresser top. I traced the outline of the burners and sink in the locations that seemed visually balanced, and used a reciprocating saw to cut out the holes. I placed the burners and the sink into the holes and used lock tite to secure them in place. The addition of the faucet and sink strainer really dressed up the piece.


Step 5: Next I added in the remaining shelving material that I had purchased, to make two open shelves under the sink. This space is absolutely perfect for baskets of pretend food, plastic dishes, and pots and pans.

Step 6: For the final step, I grabbed a paintbrush and gave the dresser a nice coat of bright white! I chose to leave the dresser top in a wood tone, to add interest and dimension. I think it looks a bit like a butcher block counter top – very farmhouse friendly!


ACCESSORIZE!

As you can see from the pictures above, after the project was complete I had a blast purchasing accessories! I love the quality of Melissa & Doug items, and our girls have hours of imaginative play with these fun toys. We also have a couple of other brand toys that the girls like to use when playing with the kitchen. If you are interested in purchasing any of the items from the above photos for your own children, I have linked them below.


1|2|3|4|5|6|7|8|9|10|11|12|13

PLAY AND ENJOY!

I have been so happy with how the play kitchen turned out , and the girls love it just as much as I imagined they might. It is so special that it is a new piece, created from something that has family history. I believe it is built well enough to last for a long time. Maybe in the future we will be watching our grand kids playing with this creation!

Does the idea of creating a play kitchen for your kids or grand-kids have you intrigued? Take a look at these cute DIY ideas for even more inspiration to get you motivated! I love how they are each so unique, and made with all sorts of different materials!


1|2|3|4|5|6|7|8


Cute, right? Go ahead… give it a try! The beauty of DIY is that your creation will be unlike any other, and there is no right or wrong way to approach it. Just have fun, and make it your own!

This post contains affiliate links.  To learn more about my website disclosures, click here.

HOW TO DECIDE WHAT SIZE HOUSE YOU SHOULD BUILD OR BUY

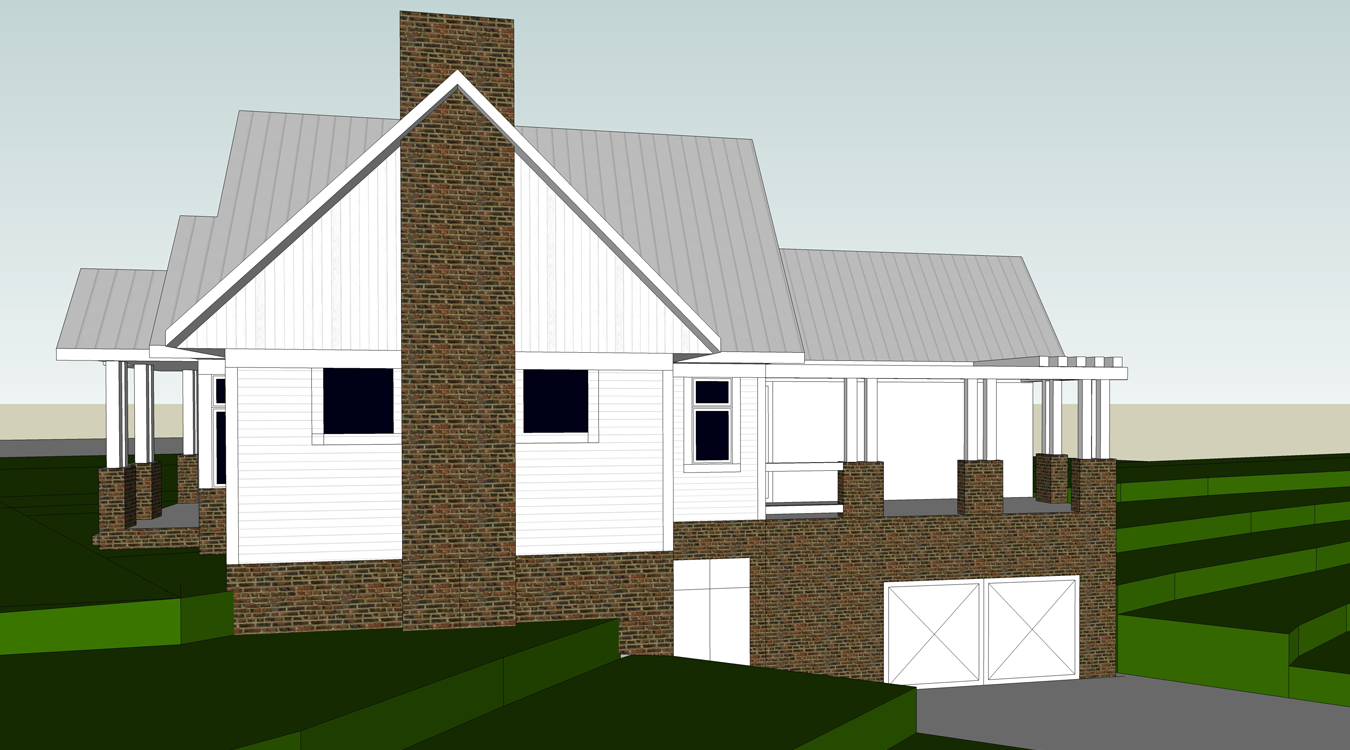
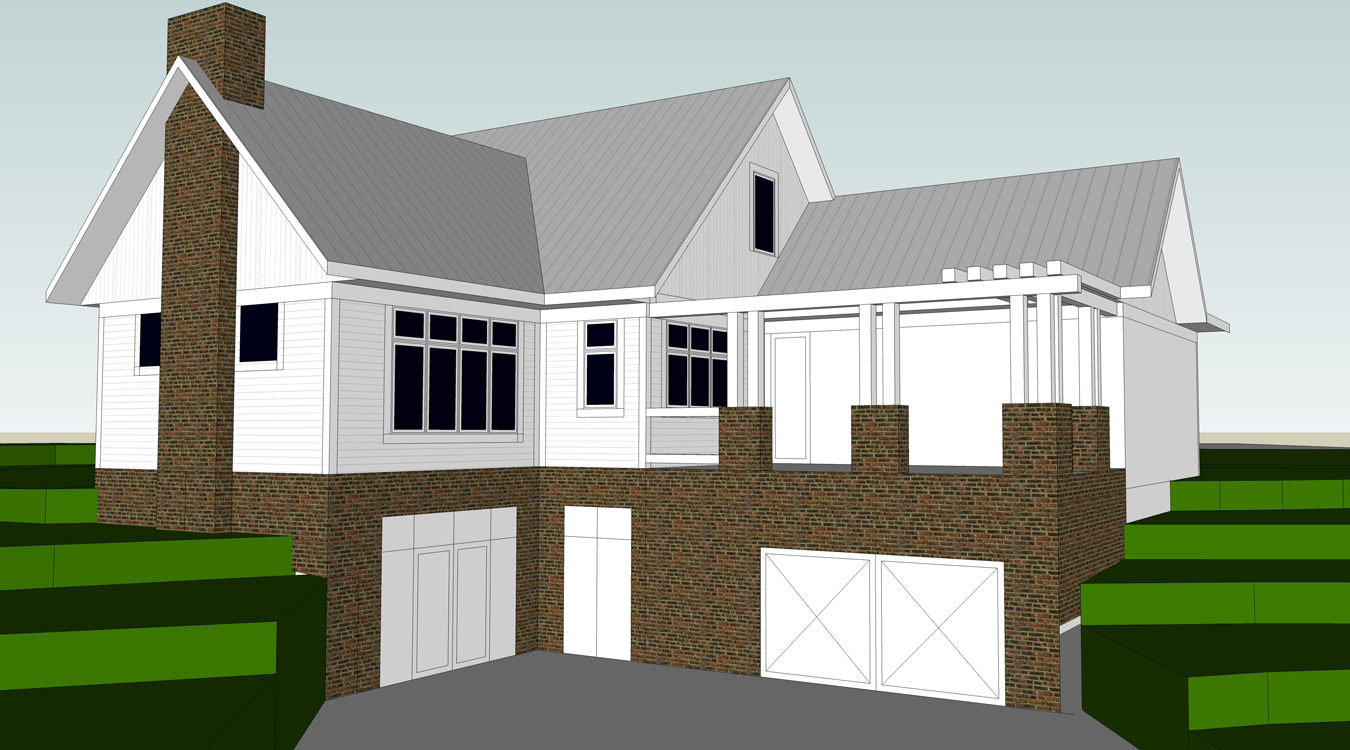
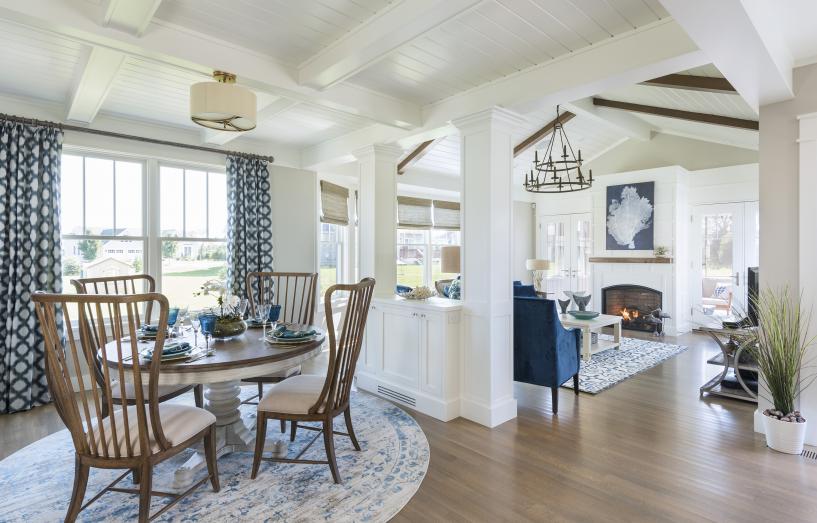
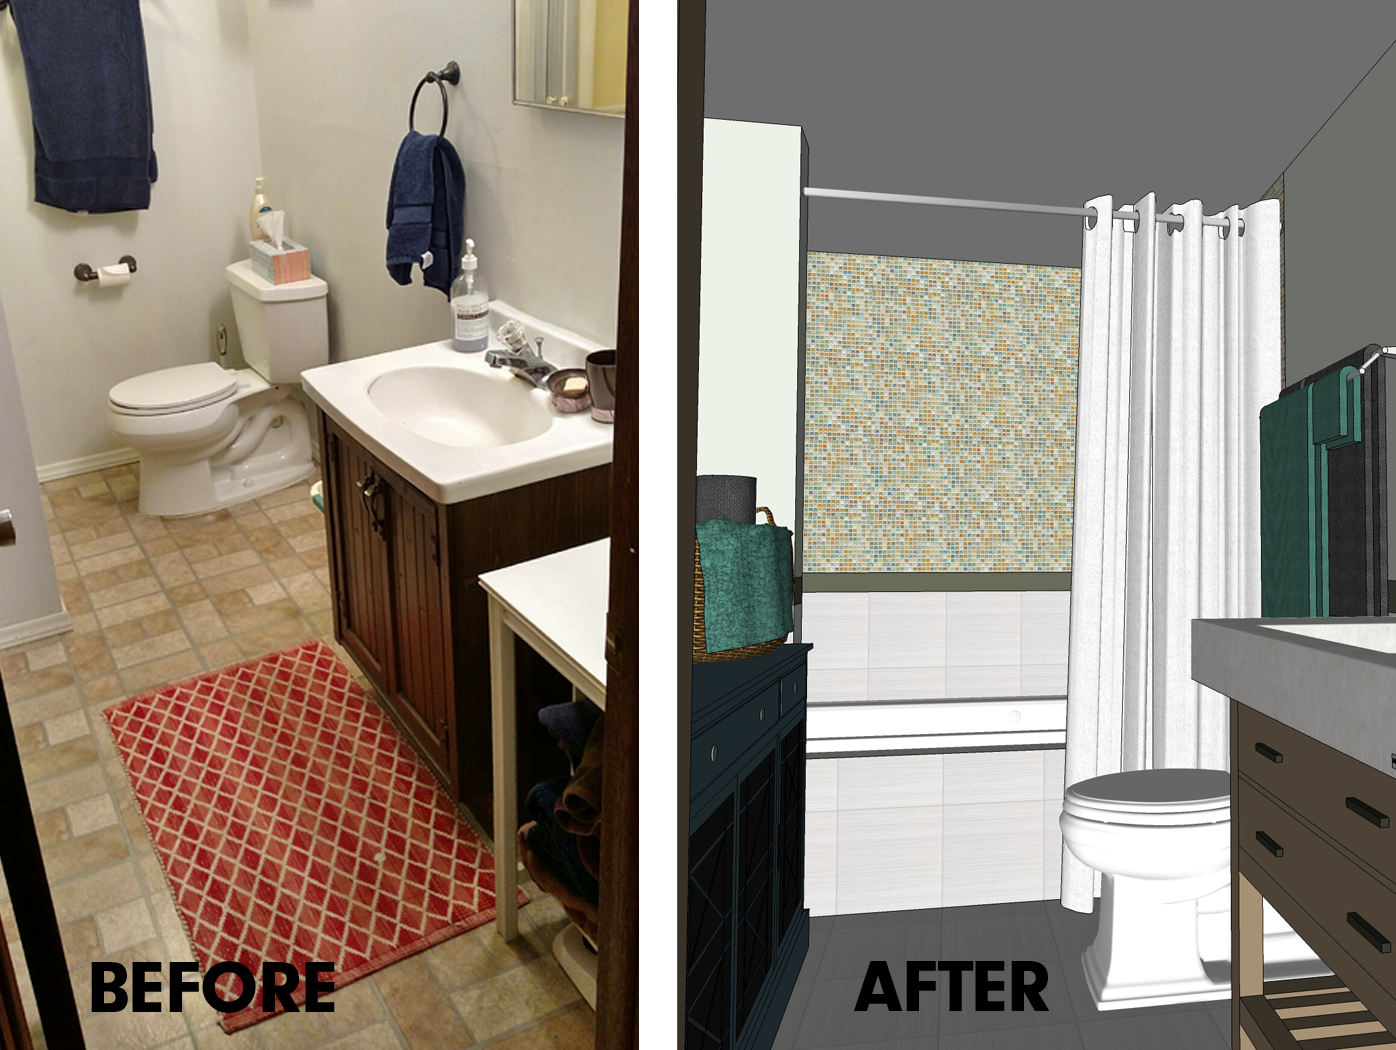
It’s no secret that houses come in all shapes and sizes. From mansions to tiny houses, and everything in between – there is a house that’s perfect for everyone. You may be wondering WHY there is such a discrepancy in size. Are all rooms in a mansion even used? How can people who live in tiny houses manage with such little square footage?

Generally speaking, the answer boils down to what the owners of each home feel they need + want in their property. Whereas the owners of the mansion may feel justified to include a large home gym, 15 bedrooms, and an Olympic style swimming pool in their floor plan, the tiny house owners may decide that they prefer to live with only the basics to be comfortable. The size of your home is truly a matter of preference.

Whether building a new home or buying, it is important to decide early on in the process what your needs + wants are in a home. And those decisions are made by conducting a home needs analysis. In this article I will explain how to conduct this analysis, which will help you determine not only what size of home you should buy or build, but also the quality and function you wish your home to provide.


Before we get started on the steps, a couple of notes:

Keep in mind that you are creating a ‘best case scenario’ list. It should be compiled without too much thought about the costs involved, at least for now. Use common sense though, this isn’t a fairy tale! You should also be thoughtful about knowing what is a true need, and which items are wants. This list will be a guide for you when house hunting or drawing up the plans for your new home, and you need to be willing to let go of some of the ‘wants’ should money or selection of suitable properties become an issue. It is very possible that you may not even be able to get everything in the ‘need’ category.
The goal here is to be mindful of how your family functions and translating that information into spatial needs.


STEP 1: WRITE A LIST OF THE PEOPLE WHO WILL BE USING THE HOME

Using the template provided below, make a list of each person or group of people who will be using the home. Think primarily about those family members who live in the house full time. Also consider family members who are part time residents, whether that is half of the year or for a week or two at a time.

In addition to family members, also include extended family that visits for holidays, frequent guests, co-workers (if you have a home business), and even friends if you do a fair bit of entertaining. It’s okay if you group the larger categories of people, such as friends, instead of listing them individually.

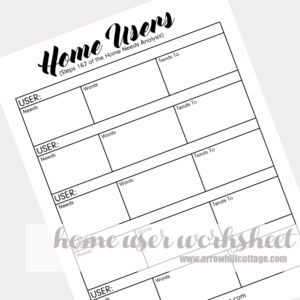
STEP 2: FILL THE PAGES WITH NEEDS + WANTS OF EACH PERSON/GROUP

Go through the list one by one. Under each ‘user’ title, you will see three categories: Needs, Wants, and Tends To.  Fill in these sections with information about each user, and be sure to add at least a couple of items in each column. Think thoughtfully and thoroughly. Ask each person that will be living in the home full time to provide input.

For example:

CHILD #1 (NAME)

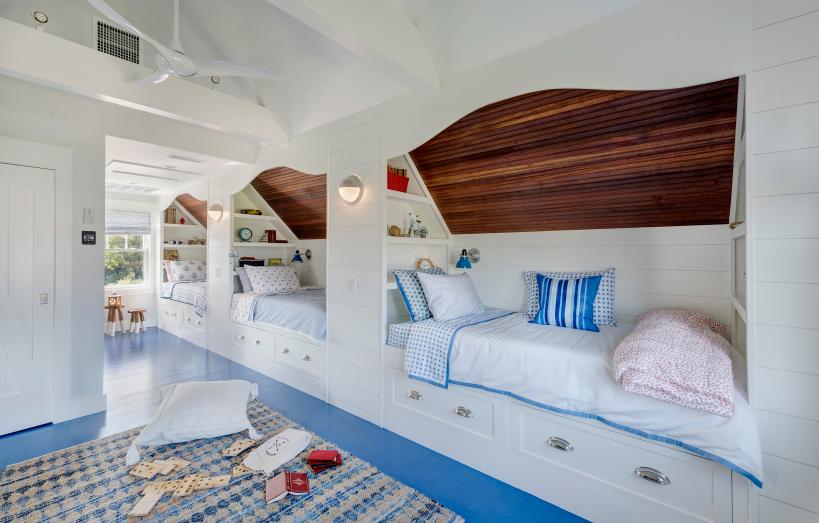
NEEDS: quiet place to sleep, bathtub in the bathroom.

WANTS: separate playroom, own bedroom, close proximity to mom & dad’s bedroom.

TENDS TO: wake up early, play loudly, get messy, love the outdoors.

For people/ groups who are in the home only part time, some of the wants may be dictated by the homeowners preferences.

GRANDPA & GRANDMA

NEEDS: place to sleep when they visit that is not accessed by stairs, clearance for wheelchair movement.

WANTS: private guest bedroom with attached bathroom for easy access.

TENDS TO: have a hard time hearing, be cold, sleep in late, use the bathroom frequently.


STEP 3: MAKE A LIST OF ROOMS

Time to do some brainstorming. List all of the typical rooms and spaces you can imagine that at least ONE of the previously listed people/groups would use.

To help you complete this step, I have compiled a chart of the most common rooms in the American home and the average size/ square footage of each. This chart is available for free in the resource library.

Next to each room name, write down which people/group of people from the list of home users would utilize each space. Once you have completed this exercise, read back through the list and place a star next to those who would use the room on a DAILY basis, as shown below.

HOME OFFICE: Bob*, Nancy, Joshua* (co-worker)

STEP 4: DETERMINE THE MOST IMPORTANT ROOMS IN THE HOUSE

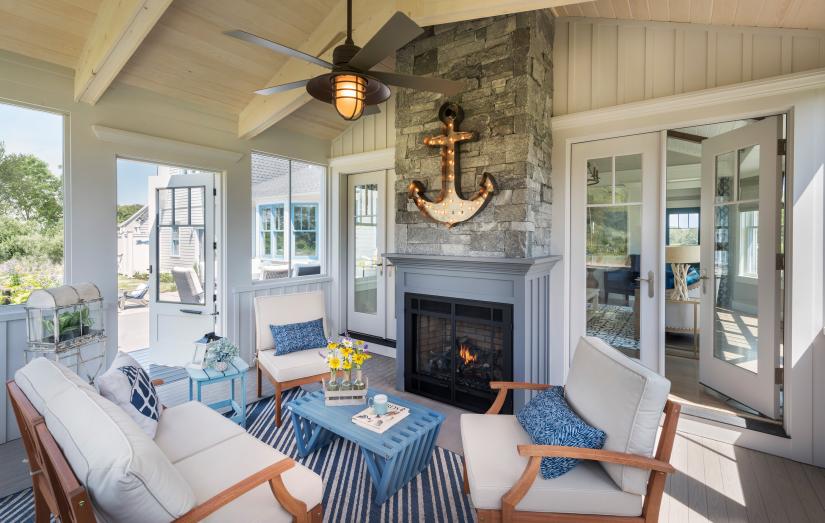
Read through the room name list one more time and count the number of stars attributed to each space. Write that number in the left margin next to the room name. The rooms with the most stars are going to be the most important MUST HAVE rooms in your home. I’m willing to guess that at least one of those with the most stars will be the kitchen. The rooms with the fewest stars are much less important. Perhaps two or three of these lesser important rooms/spaces could be combined into a multi-purpose room. (ex: a play room + family room combo)


STEP 5: THINK AGAIN ABOUT THE QUALITIES OF SPACE

To keep things organized, we are going to list these rooms once more – in chronological order. Use the ‘qualities of space’ worksheet linked below. Rooms with the most stars (as determined by the previous step) should be on the top of the list and rooms with the least on the bottom.

Begin thinking about comforts of the spaces themselves. On the line next to each room/space, write any important characteristics you imagine it should posses. You may find it helpful to reference the information gathered in Step 2.

Be thinking about light levels, proximity to other rooms, the noisiness or quietness of the space, and potential connection to the outdoors. Question whether the room should have designated storage, if views from the room are important, if it should be open or cozy, have a high or low ceiling.

You can be as detailed or general in this step as you would like. Remember that although we are not designing a floor plan during the home needs analysis, thinking about these qualities of space can help you determine the amount of emphasis that each room should have, and will serve as a guide when you eventually do begin the planning process or start your home search.

STEP 6: CONVERT ROOMS/SPACES TO SQUARE FOOTAGE NUMBERS

Now it is time to get out the calculator and determine the amount of square footage that should be allocated to each room.  It is important to note that the star count from the previous step will not necessarily dictate room size. Square footage is determined by multiplying the room’s width by it’s length. (ex: 10′-0″ long x 5′-0″ wide = 50 square feet).

Reference the chart from the resource library for average room sizes. Then get out a tape measure and think about these averages. Do they seem too large to you? Too small? If you currently live in a home or apartment, measure your existing rooms and jot down their sizes. Make note if those rooms feel comfortable to be in, cramped, or too expansive.

Once you have determined a room size that seems right for the way you live, write it on the worksheet in the box labeled SF (square footage).

STEP 7: COMBINE FOR THE FINAL NUMBER

This step will give you a basic idea of how large of a home you are looking to build or purchase. Simply add up all of the room square footage numbers that you calculated in step 6. Then add 10% for circulation (stairs, hallways, etc). The circulation square footage may be less or quite a bit more in the actual built house, but 10% is a good rule of thumb average to use when planning.

Example: For a cumulative 1,200 square feet (once the spaces are added) : Multiply 1,200 x .10 = 120.  Add 120 sf to 1,200 sf, for a final TOTAL of 1,320sf.

This final number will give you a general idea to the size that your family would feel comfortable living in. It is not a perfect science – the home you find or design may end up being slightly larger or smaller – but this square footage number gives you a great starting point.

I hope that with this information you will have a better idea of what size house you should build or buy. In future posts we will discuss how these spaces can connect in a thoughtful way, so be sure to keep your completed worksheets for reference!

BUFFALO CHECK HOME DECOR

This bold yet simple pattern is making a major comeback. Buffalo check home decor items can be found in abundance. Read on to learn what makes this pattern special, and why you may want to incorporate it as an accent in your home.


You may have noticed a bold check pattern showing up more and more. It has been featured on social media, as well as on popular TV shows. From upholstered pieces to tile work, it seems like this pattern is showcased just about everywhere! First considered a HOT design trend in mid 2016, it is still going strong a couple of years later.

This trend is Buffalo Check and, although the pattern may seem familiar, it is important to note that this isn’t your grandmas gingham or your uncle’s flannel shirt.


Buffalo check is created when two colors of stripe intersect, which adds a third ‘mixed’ color. The intersections create large squares of even size in all directions. Nowadays, bold + classic black and white is most popular, but Buffalo Check is available in a large variety of colors.

(image source)

If this photo appeals to you, then scroll on for more inspiration on this home design & decor trend!


WHAT IS BUFFALO CHECK

First of all, a bit of history. Or mystery. There is a fair amount of debate on where the original pattern came from. But many sources agree that it’s introduction to America came in the mid 1800’s. A designer at a Woolrich Pennsylvania wool mill, who was inspired by Scottish tartans, is said to have developed the style. He owned a herd of bison, and thought that the ruggedness of the patterned fabric matched the characteristics of the animal. It was an instant hit with workers and outdoors-men alike.


INCORPORATING BUFFALO CHECK IN YOUR HOME

Besides being a fashionable fabric choice, designers and homeowners are finding all sorts of creative applications to use this pattern in a modern way. Check out the fun ways that buffalo check home decor is being used.


Painted Furniture (image source)


Flooring 
(image source)

Curtains  (image source)


Throw Pillows (image source)


Painted Accent Wall (image source)


Tile Backsplash (image source)


And more!

Check out even more fun ways to use this versatile pattern HERE. And if you REALLY want to feel inspired, discover the Instagram hashtag #BuffaloCheckThisOut


GET THE LOOK!

This pattern is also readily available in stores and online, for very reasonable prices! Take a look at this collection of Buffalo Check Home Decor goodies. Certainly there is a piece (or two) that would look great in your home.

1 | 2 | 3 | 4 | 5 | 6 |

MY THOUGHTS ON THIS HOME DESIGN TREND

Personally, I love the simplicity of the black and white pattern. Because of it’s classic lines, the pattern works with a variety of house styles and interior design preferences. However, I do have a word of warning. Don’t go overboard with Buffalo Check Home Decor. Too much of a good thing isn’t a good thing.

For that reason, showcasing a single item in this pattern might be the best bet, allowing it to stand out as a statement piece. For example, paint an accent wall with the pattern, instead of an entire room.

Here’s hoping this home design & decor trend stays around for a long time. With it’s lengthy history and universal love, I’m betting it will!


This post contains affiliate links.  To learn more about my website disclosures, click here.

LOVE BUFFALO CHECK HOME DECOR? PIN THIS!


NATURAL FALL CENTERPIECES

I created these natural fall centerpieces as a fun and simple DIY project. They would be the perfect accent to a Thanksgiving table!

This season in the Midwest has me enjoying the last bits of warm weather. While I’ve been basking in a splendor of colorful falling leaves, I am also preparing for the long indoor hibernation that is to come.

I found myself wanting to bring the outdoors in. Autumn decorations can help to savor the beautiful ambiance of Fall just a bit longer. The great thing about decorating this time of year is that you can easily find inspiration (and supplies) in nature itself! By using items from nature, you can decorate inexpensively as well.

Fall Centerpiece Ideas

FIND A CONTAINER

The first step for a this centerpiece project is finding a container. It can be as small or large as you would like. Be sure to consider where the centerpiece will be placed when searching for the perfect container.

I found a vintage wooden drawer, likely one that was used in a sewing cabinet at some point. I’m not exactly sure when I acquired it, but it has been taking up space in our storage closet for a while now just waiting for it’s moment to shine.

If you plan to use fresh flowers in your centerpiece, as I did, you will need to make sure your container is appropriate to hold water. Obviously, filling a vintage wooden box with water wouldn’t be the best idea. Because of this, I searched for waterproof vessels that could fit inside the box. Luckily I tend to be a glassware hoarder, and had a nice collection of small glass jars to choose from.


CHOOSE ITEMS TO PLACE INSIDE CONTAINER

With your container(s) ready, it is time to go on a hunt for items that can fit inside. Think about layering and how the colors of each element can complement each other.

Search in a variety of places – your backyard, the holiday decor stash, even the garage! Once you find a good selection of items, begin placing them in the container. Rearrange, and add/ take things out until you get an arrangement that is pleasing to your eye.

Take a look at the three Fall centerpieces I came up with!


CENTERPIECE 1: FLORAL + PRAIRIE GRASS

floral fall centerpiece

The first centerpiece design features autumn colored fresh flowers. I wish I could say that I grew these beauties in my own backyard, but alas I did not. They were purchased from a local grocery store and cost just a few dollars for the entire bouquet. The rust hues scream ‘Fall’ to me.

fall flower arrangement

The stems were cut down to sizes that would fit well in the short glass jars. I arranged the flowers so that the colors and types were evenly distributed. Prairie grass, which was found growing near our driveway, was then layered into the mix.

I love how the colors of the flowers bring out the golden tone of the wooden box!

fall table decoration


CENTERPIECE 2: PINE CONES + HOSTA +DOORKNOBS

Fall table centerpiece

The second centerpiece includes a bit of whimsy. When searching for items to use in my arrangements, I came across a couple of old doorknobs and thought it would be fun to include them. The knobs were originally installed in a 1900’s outbuilding on my in-law’s property, which they recently tore down. The motif seems to be inspired by nature.

antique doorknob centerpiece

I placed the knobs in two of the glass jars, so that they would stay upright. I then layered pine cones (found from our Christmas decoration stash) around the glass jars. A few sprigs of hostas, cut from our landscaping, were feathered in.

Though they are contrasting elements, I am very pleased with how well they compliment each other!

Nature inspired fall decoration


CENTERPIECE 3: PUMPKINS + FALL FOLIAGE

Pumpkin table centerpiece

Pumpkins are super easy to find this time of year, and are ultra inexpensive. I picked up a package of 6 mini pumpkins for $3.99 at a local nursery, and only needed half of them for this centerpiece.

If I had set the pumpkins into the wooden drawer/box they would have been too low. Because of this, I placed a few pine cones in the box first. They helped give the pumpkins a little lift. I then cut small branches off of trees in our yard, which contained leaves that were turning colors but not quite ready to fall.

Fall Centerpiece ideas

I also layered in a few sprigs from a shrub that is in our landscaping. I’m not completely positive of it’s technical name, but I think it might be a Goldmound Spirea.

The delicate flowers are in the process of drying up. Even so, I was able to catch a few of them when they were in all their bright pink glory. Absolutely stunning. The colors of this arrangement really pop!

Natural Fall Centerpiece


ADDITIONAL FALL DECOR INSPIRATION

I had so much fun pulling these centerpieces together, and searched Instagram for other creative goodies. Check out this amazing trio of images I found! Click on the name links for source info and to see more of their beautiful Instagram feeds!

Fall Centerpiece ideas

1.  @sarahlynnbrennan also used a wooden box. The painted monogram decoration adds a personal touch that is quite charming. She used preserved flowers and greens – meaning that it will look beautiful for years to come!

2. @housebyhoff cleverly utilized a copper pitcher as her container. Inside she placed a few hydrangea branches. Set beside a single white pumpkin, the pair makes a simple statement for Fall. Just lovely!

3. @thehomehour went 100% natural with a large pumpkin layered with smaller pumpkins, moss, and succulents. Gorgeous and colorful!


I hope this post has inspired you to go searching in nature around you, to see what type of decorations you can create.

Be sure to check out the FREE art print available from Arrow Hill Cottage!

Be Thankful Art Print


PIN THESE CENTERPIECE IDEAS FOR LATER

Fall Centerpieces

SATURDAY SKETCHBOOK: EXTERIOR SPACES

I thought it might be fun to get the Saturday Sketchbook feature up and running again, as a way to show all of the readers of this blog the progress I am making on the design of our family’s home – Arrow Hill Cottage. The drawings, plans, and 3d models are still pretty rough – but through time more detail will be added, and I’m excited to share that progress with all of you!


OUTDOOR SPACE DESIGN

Lately the weather has been absolutely glorious in the Midwest.  The leaves are turning beautiful colors, and falling to the ground, but the temps have remained steady. It really has been an enjoyable Fall season.  And it has me thinking about the outdoor spaces at our cottage – where we will be able to appreciate the weather even more-so in the future.

I’ve been fine tuning these outdoor spaces; and even though I have a ways to go on developing the character and coziness of each, I feel that I am headed in the right direction!

As you can see from this aerial image of the 3D model, there will be 3 main outdoor spaces. The first is the covered front porch.  I am still debating if I will add a rail or not – chances are it won’t be necessary since the height of the porch from the ground will be minimal, but I might add one anyway, just for looks.

The second space is off the back of the house – a large raised deck that I am hoping I can add a pergola to. You can see that I have only started modeling the rail (this deck will definitely need one) and the pergola.

The third outdoor area is the ground level paver patio, which will be accessible from the doors in both the family room and the pool room. There will also likely be some sort of stairs or walkway from the upper deck to the patio. I’m thinking something natural, such as stone slabs, might be the best fit here – to keep the natural landscape in tact as much as possible.

I am also playing around with the idea of creating a shed or storage space underneath the back deck area.  In the image below you can see two X’s, which symbolize doors. This shed could house items such as lawn furniture, gardening tools, and mowers – and also might be a handy spot to put a kayak or paddle boards, which we would really love to buy eventually in order to get great use of the pond on the property. Refer back to the first image in this post to see the proximity of the pond to the patio.

It is so exciting to our family to think that two years from now we may be anticipating moving into our forever home! A dream 10+ years in the making is starting to feel more and more real with each passing day!

Tell me what you think – which of these 3 spaces could you imagine spending the most time relaxing in?


10 HOME DESIGN TIPS FROM THE 2017 TOH ‘IDEA HOUSE’

You probably know ‘This Old House’ as the PBS TV show focused on bringing dilapidated old homes back from the brink of despair. They make it look easy. So easy. The show has been airing since 1979, and is still going strong. I was introduced to its glory by watching episodes every Sunday with my dad in our living room. The show really helped to harbor my love for residential design and appreciation of fine craftsmanship.

In 2015 the show branched out from renovations and built the very first IDEA HOUSE, a bright blue storybook cottage.


I remember being drawn in to the charm of the home when I saw the feature in the magazine (yes, I have a subscription!), and I was really blown away at how well it had been executed. This Old House had gone NEW! They released the 2016 IDEA HOUSE the following year, a modern farmhouse styled home which was jam packed with energy efficiency.


I anticipated the 2017 IDEA HOUSE, and was excited to see a 14 page spread of the design in the October issue of the magazine! It is a Rhode Island beach house in the classic coastal style. Isn’t it stunning?

***all photos are property of This Old House***

After reading the article, and snooping around on the TOH website a bit, I’m ready to share with all of you my list of 10 home design tips to take away from the 2017 This Old House Idea House.


1. DESIGN FOR MULTIPLE GENERATIONS
: Though multi-generational housing is quite common in most areas of the world, it has only recently become a trending concept in America. Perhaps it is an increased need to care for aging parents or a desire for families to cut down on housing costs driving this shift. Whatever the reason, it makes sense to plan for multiple future scenarios, even if it isn’t necessarily something that is needed for you right now. To accomplish this, the Idea Home cleverly situated bedroom and living spaces on multiple levels -allowing for privacy and connection at the same time. The bonus space above the garage, currently set up as a game room, could easily be converted to a studio apartment for a young adult not quite ready to fly the nest, or for aging parents who need some extra day to day help.

2. ALLOW THE CHARACTER OF THE REGION TO INFLUENCE YOUR HOMES EXTERIOR: A quaint log cabin would look out of place in a metropolitan setting, but graceful on a wooded lot. Natural and built elements in the immediate surroundings should be considered when designing your home. The designers of the Idea House hit the nail on the head by choosing a classic seaside shingle style for the home’s location near the ocean. 


3. INCORPORATE TRADITIONAL INFLUENCES INTO NEW HOME CONSTRUCTION
: Classic homes offer visual interest and unique angles that aren’t typically adopted in new builds. It is worth the effort to find builders who can incorporate detail, and the This Old House team did just that. The use of a wrap around porch, intricate gambrel roofs, shake siding, curving walls, and a unique eyebrow window add up to create a home that is not only beautiful, but personable. 

4. CREATE DEFINITION FOR INTERIOR SPACES: Although open concept floor plans are popular in today’s new homes, often times they make for an expansive space that feels lifeless and lacks intimacy. The Idea House cleverly uses ceiling design, partial walls, and columns to create defined spaces within the larger open plan. Sight lines remain open from one room to the next, but there is a coziness that is added by this extra layer of detail.


5. DESIGN FOR ONE LEVEL LIVING / AGING IN PLACE
: Going a bit further with the idea of designing for multiple generations under one roof, the Idea House team was also mindful that the family who eventually lives in this house may desire to stay there long term (who wouldn’t?).  Concepts such as using minimal stairs from the garage to the house and from the house to outdoor spaces, plus the addition of a first floor bedroom suite, drive this practice. Smaller details to make everyday life a bit easier for the older generation, such as lever style handles and a curbless walk in shower, were also incorporated.


6. CUSTOMIZE YOUR HOME TO FIT YOUR LIFESTYLE
: Again, this house was designed for a typical family – but not with one particular family in mind. That being said, the space is far from generic. There are details throughout the house that suggest how customizing could benefit. One such example is the dog washing station in the mudroom. A feature such as this can really bring a standard house into ‘home’ status, by allowing it to function in the way the family who lives there needs it to.

7. USE A COHESIVE COLOR PALETTE: Color helps to tie things together, and this house utilizes coordinating color palettes and decorating motifs seamlessly. There is definitely a ‘beachy’ vibe going on with a variety of blue hues and drift wood accents. The kitchen is sleek but playful with its seaside glass tile back-splash; and the master bathroom gets in on the theme with fanciful sea creature wallpaper!


8. PROVIDE AN INDOOR/OUTDOOR CONNECTION
: Nobody wants to feel like they are living in a box. With the advancement of glazing and insulation, larger windows are now a reality of home construction – and providing stunning views from inside the home to the natural world is a desirable attribute. The Idea House takes the concept of connection a step further by locating a gorgeous screened in porch directly off of the living room. With its vaulted ceiling and cozy fireplace, it is sure to be a family favorite nearly year-round!


9. UTILIZE MODERN TECHNOLOGY:
 The advances that have been made in technology recently are incredible, and the housing market is also seeing benefits from this development. The Idea House takes technology to the next level by incorporating a thermostat in each individual room with a VRF system, which provides room by room comfort and offers an estimated cost savings of 40% over conventional heating systems. The thermostats are controlled by a smartphone app. The security system is also top notch, with plenty of smart features that will ensure that the family who eventually lives in the home will feel safe and secure.


10. MAKE THE MOST OF EVERY SQUARE INCH
: Though the house is a generous size, the designers made sure that every bit of the 3,000+ square feet is functional. In the bunk room, built in beds were crafted in the space under the eaves, providing a cozy and charming spot for children or visitors to sleep. Personally, I’m pretty sure the bunk room would be my fave spot to hang out. Just take a look!


There you have it, 10 amazing house design ideas! As always, This Old House did not disappoint! The level of innovation, detail and character of this home are in line with that standard of excellence we have come to expect from the TOH team.

Want a closer look at the house? I encourage you to visit the This Old House Website to see the floor plans and check out a virtual tour, which allows you to look 360 degrees around each room. Very cool! They also documented each step of the construction and design process, including the installation of shingle siding, the building of the intricate chippendale railing, and discussion of what elements influenced the home’s overall color palette.

Stay tuned, the next project they are tackling looks to be just as intriguing! Get a sneak peek here. Spoiler alert! Mike Rowe makes an appearance!


EVERYTHING YOU NEED TO KNOW ABOUT RAIN GUTTERS

It’s that time of year again. The leaves are turning beautiful shades of yellow, orange and red. Before you know it, the temps will drop; And sadly, so will the leaves. It is a beautiful, magical sight; But if you own a house that has rain gutters, you need to know that those small, colorful leaves could turn into big problems if left unattended too long.

Everything you need to know about rain gutters. This post discusses the reasons why rain gutters are important, the various styles that are available, how to install and maintain them, and what you can use as alternative if rain gutters just aren't your thing. Useful home maintenance tips are included.
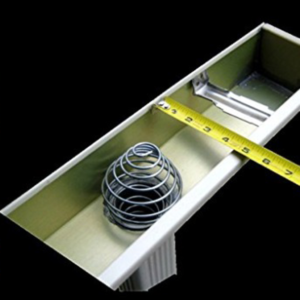
Though the topic can be a bit dull, the importance is well worth a talk. And so, to help you maintain your home, I give you this post – which includes everything you need to know about rain gutters.

I’m going to start off by saying that rain gutters are not an absolute must have. If your house has an appropriate amount of slope away from the foundation, and the level of rainfall in your region is minimal, your house will likely be just fine without them. Not every house has rain gutters or needs them, but many do. Let’s talk about why.


WHY DOES MY HOUSE NEED RAIN GUTTERS?

It is no secret that rain gutters are set in place to handle precipitation. Insurance adjusters have reported that approximately 10% of all home claims can be linked to damage from rainfall. You may also be interested to know that only 1 inch of rainfall equals 600 gallons of water flowing off of the roof of a typical residential home. That’s a whole lot of water that needs to find a place to go! There are 4 main reasons rain gutters are recommended:

  1. Prevent basement flooding.  This may be the most familiar homeowner complaint related to rainfall. Whether you’ve been woken from a deep sleep to the sound of a sump pump alarm, or your socks have been soaked by a standing water surprise, the feeling is the same. Headache. If you find water in your basement not only will the cleanup be a massive chore, you will also need to keep a close eye on the drying out process to ensure that mold doesn’t develop.
  2. Protect the foundation. The foundation holds up your house. It’s kind of a big deal. And while some settling of a foundation is natural, if it settles too quickly you may notice warped floors, and cracks in your walls and ceilings. Foundation reconstruction is arguably the most costly repair a homeowner can face, and finding a way to avoid expensive repairs is just plain common sense.
  3. Avoid erosion.  Though houses are supposed to be built on a slight slope that guides rainfall away from the foundation, sadly this isn’t always the case.  Without rain gutters, the water will drop from the roof edge in a forceful way, and wash a little more soil away each time there is rainfall. Eventually the ground will slope toward the foundation which, as we just covered, is a giant no no. Too much water can also wreak havoc on planting beds and landscaping, by flooding the flowers and shrubs.
  4. Slow the deterioration of the vertical elements of your home, such as siding and windows. When gutters aren’t used, the rainfall will drip onto the siding. The water can then easily pool at the tops of door and window frames and on window sills, which over time will cause deterioration and rot. Mildew and mold are likely to develop on wet siding, which means even more cleaning and maintenance.

As you can see, gutters can be mighty important.  But even the best tool won’t work well if it isn’t installed properly. That brings us to the next point.  Installation.


WHERE AND HOW ARE RAIN GUTTERS INSTALLED?

There is a wide variety of gutter styles, shapes and colors on the market today – which means you should be able to find a type that fits seamlessly with the design of your home.  Houselogic has an extensive article about the various looks and price points of gutters you have to choose from.

Once the choice is made, you will need to review the basics about where and how to install the rain gutters so that they function properly.

Simply speaking, the gutters should be positioned at the roofs lowest point, just below the eaves, as demonstrated in the photo below. This arrangement allows for gravity to do its job – with the collection happening just before the rainwater would leave the roof had the gutters not been in place.

Beautiful copper rain gutters. Installing rain gutters to fit the style of your home. Rain gutter maintenance. Rain gutters on a house. Gutter and downspout maintenance.

(photo credit)

A properly built rain gutter system includes the horizontal gutters, which are connected together with ‘joiner pieces’. The horizontal gutter pieces then connect, via a drop outlet, to a vertical downspout, which carries the rainfall safely toward the ground. The final portion of downspout should slope with the grade of the land, away from the foundation.  Many times a splash block will be placed where the water exits the downspout, to allow for an even more smooth distribution.

Each type of gutter will require slightly different installation techniques, so it is important that you read the manufacturer’s instructions if installing on your own, or hire a professional to get the job done.

So, great.  You’ve realized the importance of gutters and have had them installed properly.  Now you can just sit back and not worry at all when those downpours come, right? Wrong! One of the biggest complaints homeowners have about rain gutters is that they have a tendency to get clogged with leaves, and debris from the roof. The good news is that as long as you keep on top of inspecting and cleaning your rain gutters they should be able to provide you all the previously listed benefits for many years.

WHAT IS THE TECHNIQUE FOR INSPECTING & CLEANING RAIN GUTTERS?

At a bare minimum your rain gutters should get a thorough look over once per year. If your yard has many overhanging trees or if you live in an area that receives a higher level of rainfall, you should check them twice per year – once in the early Spring and once in late Fall. It is also a good idea to make sure the gutters are all clear after large storms.


(photo credit)

Put on a long sleeved shirt, work gloves and goggles, and a pair of non slip shoes.  Grab a good tall step ladder and place it on level ground. Remember to never stand on the top of the ladder, as you could easily lose your balance. Working in sections, use a plastic gutter scoop or garden trowel to remove the gunk and leaves. Place the debris in a bucket or allow it to fall on a drop cloth you previously positioned on the ground below.

Once the bulk of the debris and leaves have been removed, use a pressure washer or a garden hose with a high pressure hose nozzle , and spray the gutter – working toward the downspout. Use a stiff brush to remove any debris that has hardened, then spray again. At this point the water should be flowing freely out of the downspout.  If not, it is likely that a clog still exists in the vertical portion of the downspout.  You may need to use a plumbing auger to dislodge the material.

If you would like more detailed instructions on how to clean your rain gutters, check out this in depth article from HomeTips.com

Nice work! Now that your gutters are cleaned out, you can check that off of your seasonal To-Do list! Are you now looking at your house wondering what other chores you should tackle before winter?  I have that list already prepared, as a free resource in the library.  Click HERE for access.

HOW CAN I GET OUT OF CLEANING MY RAIN GUTTERS?

Ok. I get it.  Time is precious and those moments spent on the ladder could be allocated in a variety of other ways. Marketers realize this and have come up with quite a few solutions to help you out. Click below for more detailed information on each product.


Gutter Covers


Foam Gutter Filter Inserts


Gutter Strainers

If these tools don’t do the trick, you can always hire a professional. Yes, there are people out there who have the desire and expertise to tackle this chore for you. Check your local Angie’s List to get quotes from professionals in your area.  The average expense will be between $50 and $200, depending on the size of your house.

It’s important to note that even with these additional measures, sediment will still develop in your gutters over time – albeit much more slowly.


IS THERE A  RAIN GUTTER ALTERNATIVE?

If you really don’t want to deal with rain gutter maintenance or if you are concerned that the look of gutters will distract from the overall style and curb appeal of your house, there is a way you can avoid them all-together. Fine Homebuilding has written an interesting article on in-ground gutters that is worth a read.


I hope this post has given you insight into the usefulness of rain gutters, how to properly maintain and clean them, and what you can use as an alternative if they are not an option for your house. With this information, you are taking a big step in protecting your largest asset – your home.


This post contains affiliate links.  To learn more about my website disclosures, click here.

SMALL BATHROOM REMODEL IDEAS: MAKEOVER TAKEOVER FOR BILL & VAL

As I mentioned in THIS POST – some fun new features were added during the website re-design, including the member only benefit that I am calling MAKEOVER TAKEOVER. Simply put, it is a FREE digital home design consultation, available to anyone who subscribes to this website.  Give me a few photos of a trouble space in your home, or an exterior that could use a little help, and I will offer a solution + inspiration through 3d images and sourced items.

FREE virtual design consultations. See what your home improvement project might look like before you even lift a hammer.

This post contains affiliate links to products for your convenience.  If you purchase via my links, I may receive a small commission at no additional cost to you.  Thanks for supporting Arrow Hill Cottage!

For the very first Makeover Takeover installation, the pilot project if you will, my own parents offered up their basement bathroom. Located in the same home I grew up in, this bathroom is obviously a room that I am familiar with. I know its strengths (linen storage + great ventilation) and weaknesses (lack of counter space and cramped shower stall). As teenagers, my two sisters and I would fight for our turn at the sink and use of the tiny mirror that hung over it.

My parents are no strangers to DIY projects – they aren’t afraid to get their hands dirty. There have been some minor updates to the room over the years. New paint. Different flooring. But a major bathroom remodel, which has been discussed and daydreamed about for quite a while, has taken the back seat to other more important home improvement items.

This is how the room looks today – (photo taken from the door looking in)

It is actually quite a spacious room, at 9′-0″ long by 6′-4″ wide; But the awkward layout of fixtures and the inclusion of the large linen closet (which is ‘mostly’empty) visually squeezes the space, making it seem smaller. On their wish list, my parents requested a larger vanity, jetted tub, and convenient storage.


PROPOSED PLAN CHANGES

Step 1: Demo the closet – opening up the floor plan. Step 2: Move the position of the toilet. Though this will require some extra plumbing work, it should not be too costly and would greatly improve the function of the room. Step 3: Remove the shower stall to make way for a large jetted tub. Step 4: Replace the existing small vanity with a larger, more up to date model.

FINISH INSPIRATION

I sourced some really amazing finds to create an inspiration board for the space. My goal was to make the bathroom feel like a relaxing retreat – a place to go to unwind at the end of a busy day. You can learn more about each product by clicking on the titles below.

Modern + Beachy Bathroom makeover. This small bathroom virtual makeover will give you plenty of ideas for your own small bath remodel. Links to each and every product in the inspiration board!

1. JETTED TUB : Who wouldn’t love to soak at the end of the day in one of these?

2. VANITY: By re-arranging fixtures, I was able to place a 3 foot vanity – a full foot longer than the previous one. I think the open bottomed vanity, which looks like a piece of furniture, helps to keep the room feeling open and uncluttered.

3. LINEN CABINET: Ok, really – how cute is this?  I love the style, the shape, the color.  Love, love, love! Includes plenty of storage space, both in drawers and shelving. It’s technically an entertainment cabinet – shhhh!

4. VANITY LIGHT FIXTURE: Simple, sleek, and polished.

5. FLOOR & WALL TILES: I chose to keep the field tile a light neutral color because it covers such a large area. It provides a nice basic backdrop to all the other fun pieces in the room.

7. ACCENT TILES: Pretty with a bit of iridescence. This blend is called ‘Lake Illumini’ – quite fitting!

8. BORDER TILES: This bronze border pulls colors out of each of the main tiles, and is really complimentary.

9. WALL ART: Just looking at this art can transform your mind to a more relaxing place.

10. RUG: The colors of this rug are beautifully muted, adding the perfect accent without stealing the show.

11. LARGE BASKET: The generous size of this basket serves as a great place to store rolled towels.

12: BATHROOM ACCESSORIES:With a bamboo finish, these accessories really fit the theme, and the price is great too!

13. TOWEL BAR: Another chrome accessory to tie with the light fixture.

14: SHOWER CURTAIN: A simple grey color helps to pull the wall color throughout the room. The fabric adds some much needed texture to the space.

15. WALL PAINT COLOR: The color name says it all.  Sea Salt.


AND NOW FOR THE BIG REVEAL!

Looking at the Before and After side by side you can easily see the changes.

A few more images of the proposed space:

I also put together a fun little video, which I think probably shows the room better than still images can – like a virtual tour!

I’m happy to report that my parents are excited about the ideas I laid out for their bathroom. If they decide to go ahead with the project, I will get to enjoy this space in real life – super pumped about that prospect!

NOW IT’S YOUR TURN

Do you have a home project you are struggling with? Do you want an extra set of eyes to take a look? I’m here to help. Simply subscribe to this blog – then email me at angela@arrowhillcottage.com with a few pictures and a description of the problem you are having, and your wish list of how you would like it to function and/or look.  If your project is chosen for a digital makeover, I will contact you via email and ask for additional information such as dimensions and more insight into your personal design preferences.  My goal is to have at least one Makeover Takeover per month.

Go ahead and use the share buttons below to show others this amazing bathroom transformation.  Or if you know someone else who could use this free service, make sure you get them the information on how to sign up!


FALL DECORATING IDEAS : DESIGN INSPIRATION FROM INSTAGRAM

Happy October everyone!  Here in the Midwest, the air is quickly turning colder and Fall is starting to show its true colors. Literally. Multi colored leaves are falling from the trees. Pumpkins, gourds and corn stalks are being harvested from the fields to be displayed in cute little farmers market stands.

While preparing to decorate our home, I headed to Instagram for some Fall decorating inspiration, and boy did I find it! Today I want to share with you a handful of gorgeous displays that perfectly reflect the change of seasons, each in their own unique way.


@greensprucedesigns

This entry setup is just so beautiful!  I am absolutely in love with the wooden front door. And that barrel vault?  Swoon!  The simple addition of fall foliage, corn stalks and white pumpkins really make this a festive spot without too much added fuss or clutter. Who wouldn’t want to be welcomed home to this view?


@cottonwoodacres

This picture has me wanting to scour all of the local antique shops and estate sales for an old wine barrel – because seriously, isn’t it just perfect? The inclusion of apples in the display is a unique decorating decision that totally works!  I love the large lettered sign – a fitting sentiment for Fall and Thanksgiving.

@frenchcountrycottage

If I had to use one word to describe this photo it would be COZY.  I love how Courtney layered the accent pieces to complement her fireplace. The warm glow of the candles and lantern add a very nice ambiance. Get me a book and a cup of hot cocoa, and I could be happy to stay in this exact spot for hours.


@therusticlife

I’m a huge fan of white decor, and although it isn’t what we typically think of when we envision the Fall season, it just works perfectly here.  This photo reminds me that even the most simple display can turn festive by just trading out a few pieces. My eyes are especially drawn to the wire metal basket full of Fall goodness!


@missmirandarose

An often overlooked decorating spot, this photo proves that the bedroom is just as worthy of being gussied up as any other space in the house. This room is absolutely exploding with texture! The rusted hues are spot on, and using hats as wall decorations? Genius!


@whitehouseon19th

This photo is so simply stated, that I just had to include it.  I believe it serves as a lesson that sometimes less is more. I love the inclusion of pheasant feathers; And that white bench couldn’t be any more charming if it tried!


A big thank you to each of the lovely people who gave me permission to share their creations on the blog. I encourage you to click on the links above to browse their IG feeds and blogs for even more awesome inspiration. You won’t be disappointed!

Which photo is your favorite? What is your seasonal decorating go-to? Comment below. Let’s chat!

I hope that you are enjoying the colors of the season, and all the bounty that it offers!