AROUND HERE: OCTOBER 2018

Around here, we have been…


EXPERIMENTING with different things. Apparently {M} wanted to try to see what it might be like to be a hairdresser. She grabbed a scissor and cut a big chunk right out of the front of her hair!

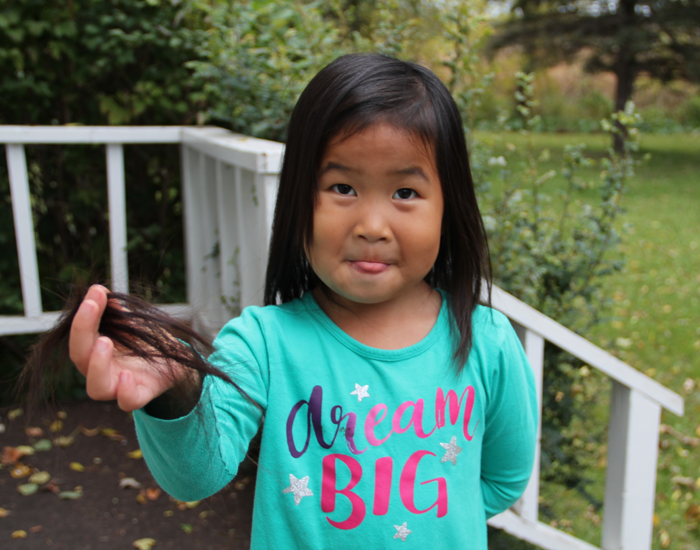
It’s crazy to think that even though we have 5 children and have been parents for nearly 12 years, this is the FIRST time we have had this issue. One of the boys went through a phase where he would cut small holes in his shirts and pants, but never his hair! Luckily, we can easily cover {M}’s little whoopsie with a strategically placed bow or hair clip!


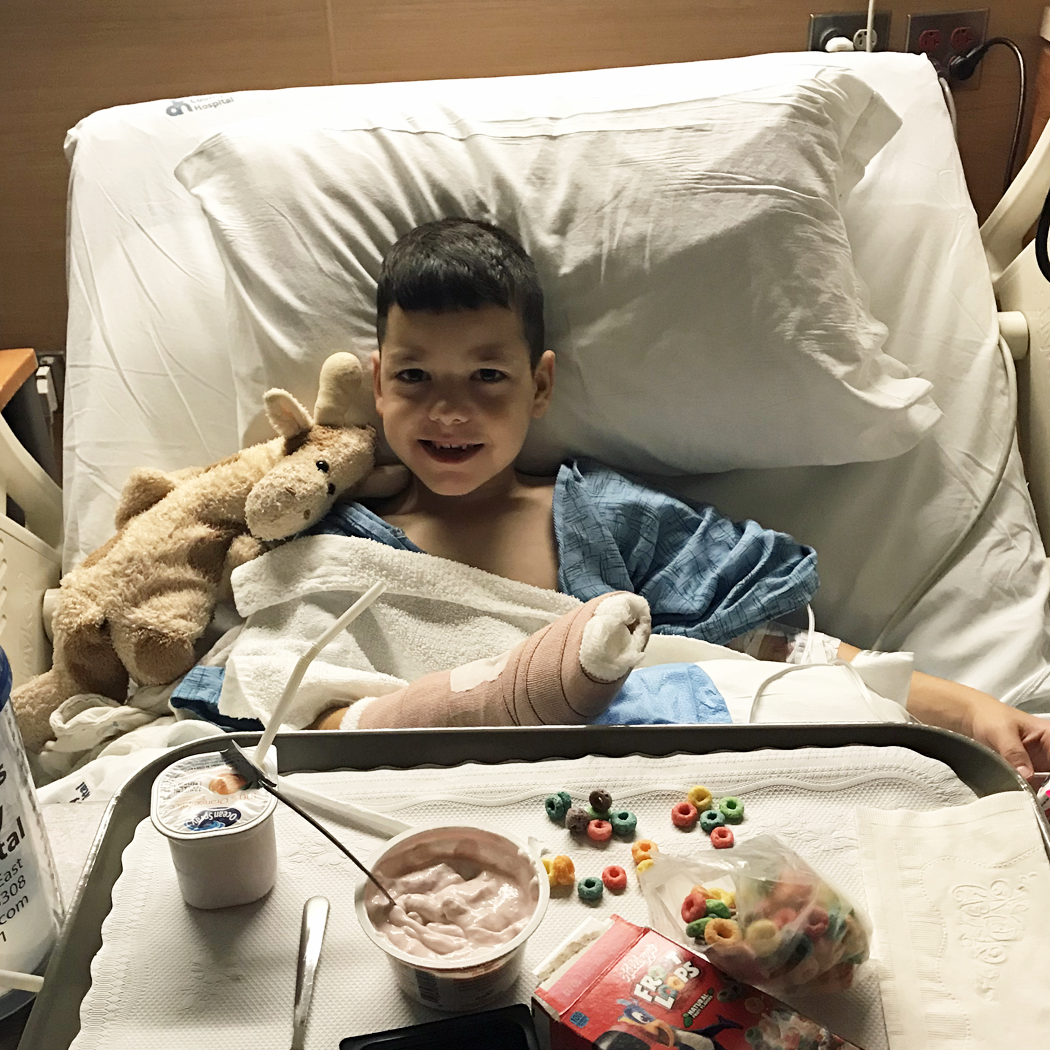
RECOVERING from a scary accident. Unfortunately, {L} got hurt. It was a strange twist of events that caused him to break the pinky finger on his right hand and sever one of the tendons in the finger. Craig took him directly to the ER, where they needed to do emergency surgery. The tendon was stitched back together, as was the skin. All told, he was given over 10 stitches. Because the bone in his finger was exposed, he needed to spend one night in the hospital to receive antibiotics through an IV.

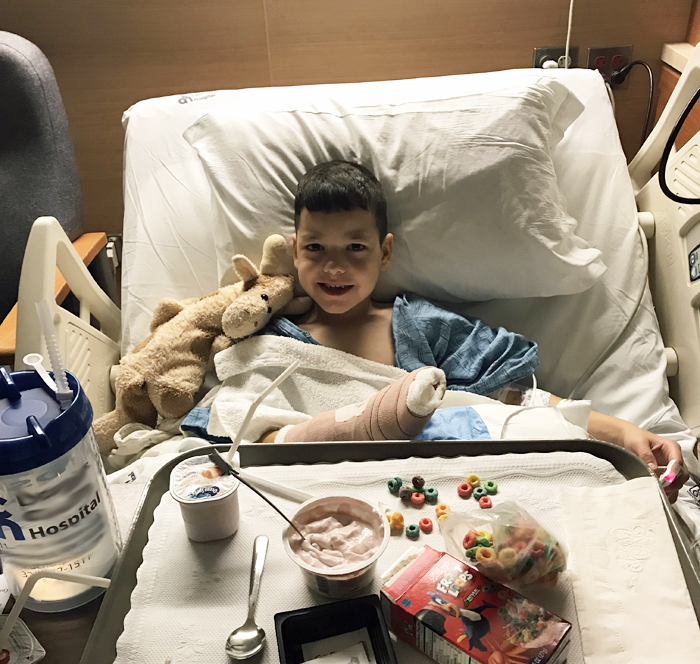
A few days later he was put in a cast to protect his finger. He chose purple, for the Vikings of course. They were able to cast him so that his pointer and thumb where left out. This allowed him to be able to use his right hand as a ‘helper’ and to write! The cast was on for two weeks, during which time {L} learned to do many things left handed, including throwing a football.

New X-rays were then taken which showed that the finger is healing nicely. He was given the option of a new cast for 2 weeks, or a removable sling. He chose the sling.

This has all been a lot for a seven year old to take in, and honestly, he still has a little bit of post traumatic stress from the incident. He doesn’t like to talk about it much at all, and refuses to look at his finger when the wound is exposed. We don’t blame him. He has been so brave though, and we are all happy that he is on the road to a full recovery.


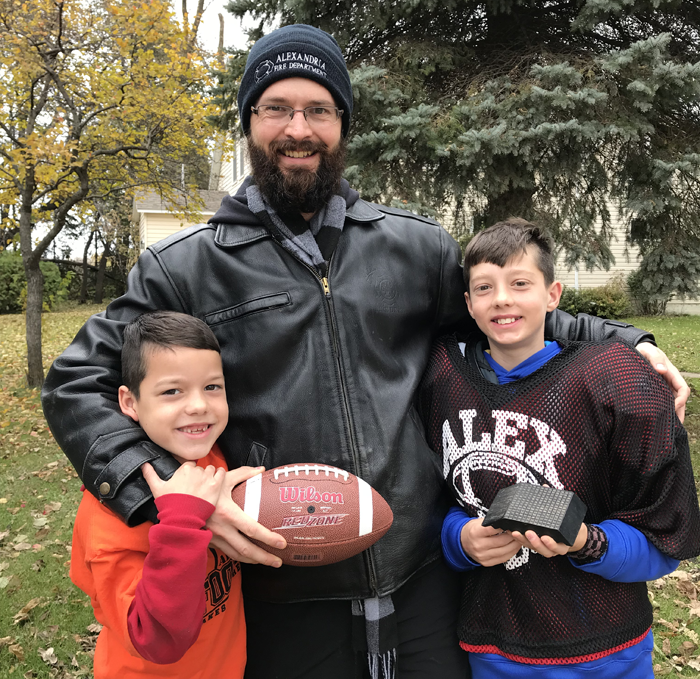
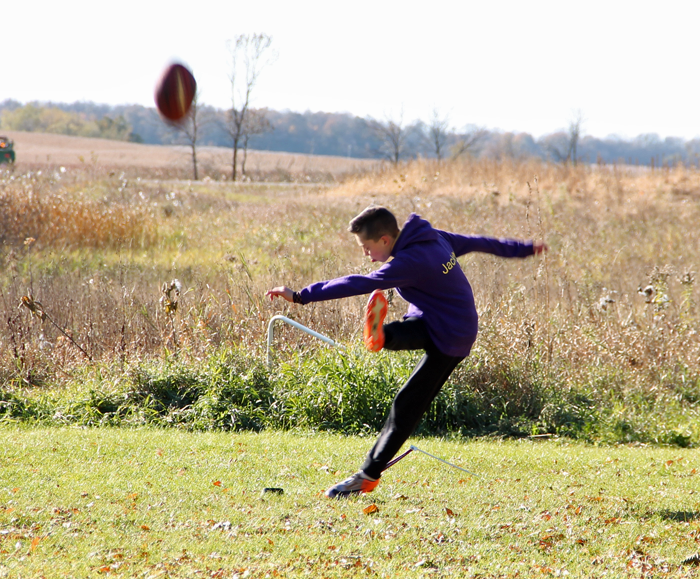
PRACTICING with the big boys. After finishing the season completely undefeated AND without any points being scored against them, Craig and {D}s team was pumped. In the final game of the season, they felt confident enough to kick field goals during the game itself.

From what we understand, it is the first time that a field goal has been attempted in 6th grade football history in our community. The first kick {D} tried was blocked, but the second, from 25 yards, soared straight through the uprights! It was such an exciting moment and the perfect cap for a great season. Though coaching definitely took Craig out of his comfort zone, he gained hours of special boding time with our oldest son, which is something he will cherish forever.

{D}’s kicking practice caught the eye of the high school football coach, who was able to put him in touch with a former college kicking athlete from the U of M. He has been training {D}, as well as the high school kicker, on proper form techniques.

This is such a great opportunity for him and his form has already improved! We don’t see his love for this sport going away anytime soon. In fact, he has been mentioning summer camps that are available and can be seen in our backyard for at least an hour every day, kicking.


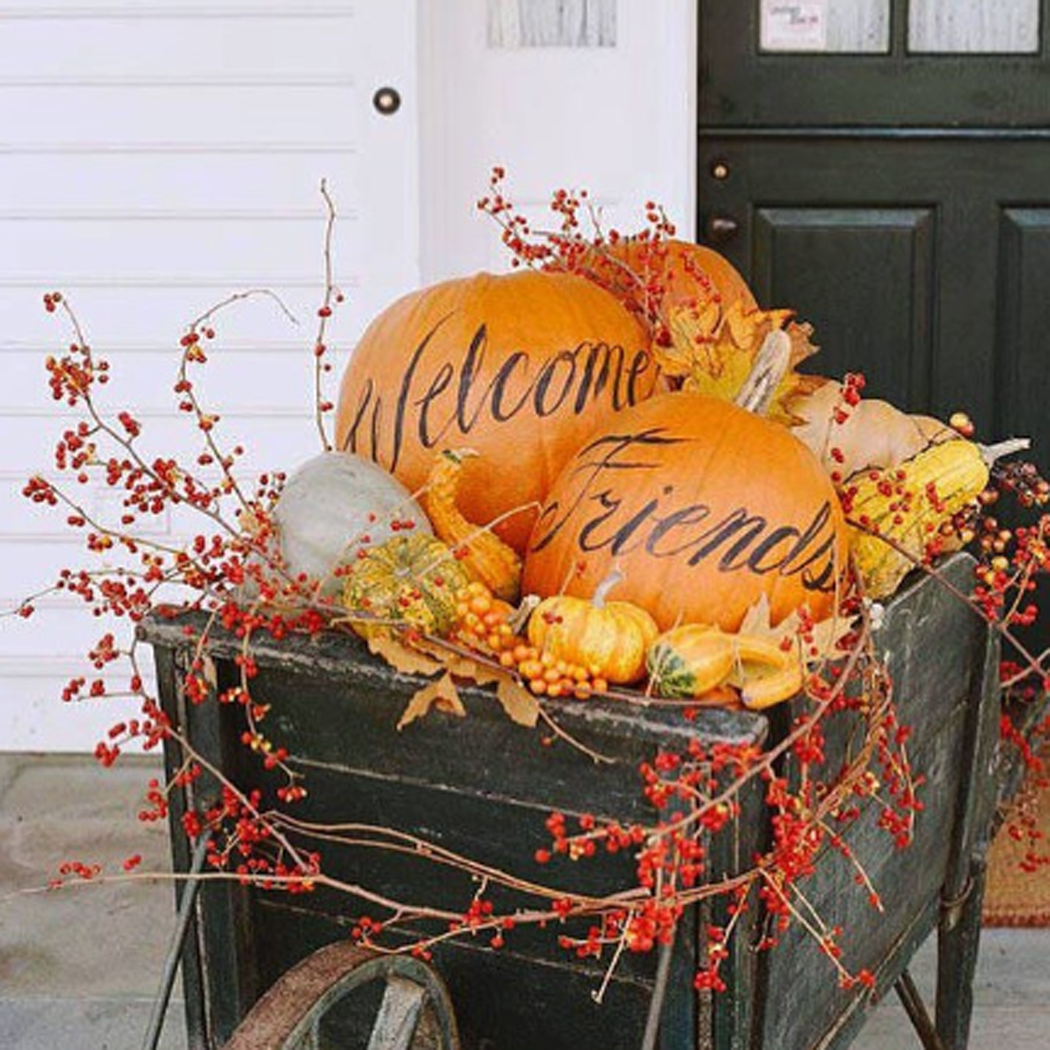
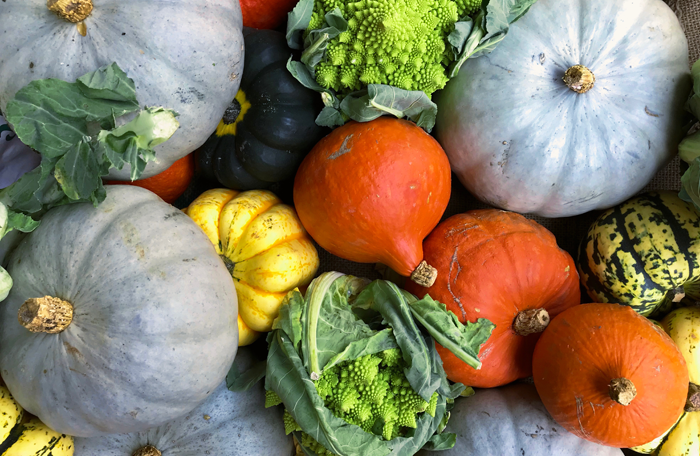
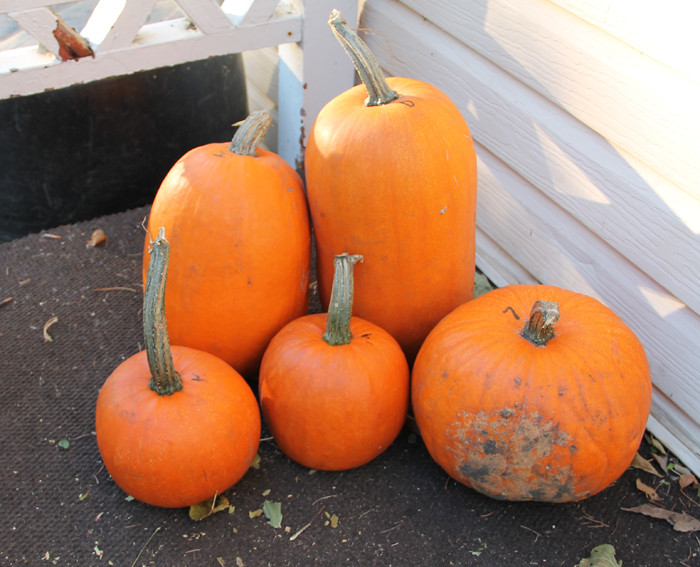
PREPARING for Halloween. We have decided to take this year off from trick or treating, and will instead hang out at home with our favorite candy and a movie. Carving pumpkins and roasting the seeds is also on the agenda.

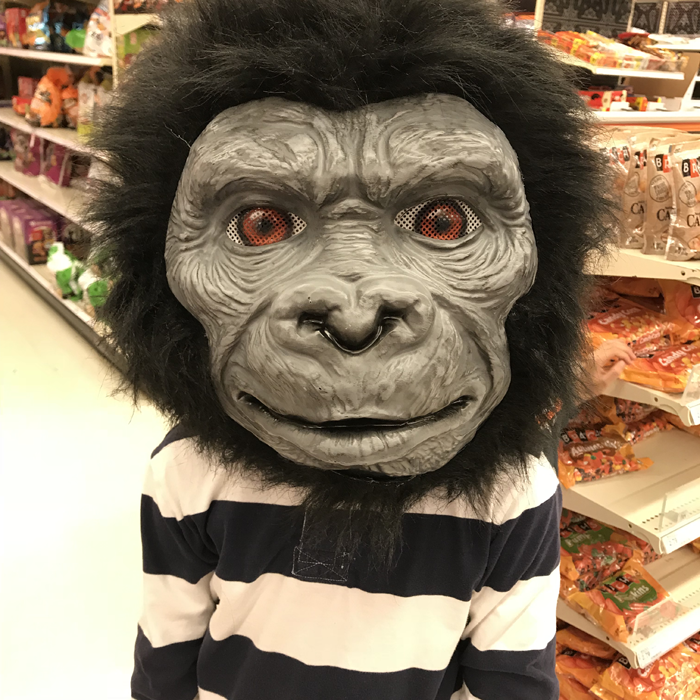
Though we aren’t dressing up, the boys still wanted to try on some things at the store. This ape mask was a hit.


We are considering this a bit of a ‘transition’ year. By this time next year, we will hopefully be in our new house. Those who don’t want to go out trick or treating can stay home and pass out candy, while the others will be able to walk around our new neighborhood. Having lived in the country for over 4 years now, we are looking forward to that!


This is just a glimpse at what our family has been up to. If you’d like a closer look, be sure to check out our weekly ‘mini vlogs’ on our YouTube channel ARROW HILL FAMILY. Be well everyone!

TRENDING IN HOME DESIGN & DECOR: BOLD WALLPAPER

There is a saying ‘What goes around comes around’. It’s true in fashion, entertainment, and even home decor. Wallpaper is in the middle of a revival moment that doesn’t appear to be going away any time soon.


WHAT IT IS

Machine printed wallpaper was introduced in the late 1700’s, as a means to decorate interior walls of domestic and public buildings. It is most commonly sold in rolls, with graphics in repeating patterns. These patterns overlap so that they look continuous when installed.

Unlike the wallpaper of years gone by, the newer versions are much more simple to install and don’t require the paste to be awkwardly applied to the back of each piece before being hung. Some types are even removable, meaning that if your style changes, you can switch it out easily.

The patterns and colors available today are so diverse that there is sure to be something that matches your style.


OVERSIZED FLORALS

source


TEXTURED/3D

source


GEOMETRIC

source


WHERE/HOW TO USE IT

Wallpaper is most typically used, well, on walls of course! From the bathroom to the kitchen, homeowners are finding a pattern they love and making a major statement!


FULL ROOMS

Mix & Match Design Company


ACCENT WALLS

Claire Brody Designs


Creative people have proved that wallpaper is useful for other purposes as well! These are some interesting applications:

ACCENT THE BACK OF CABINETS

Practically Functional Blog


LINING DRAWERS

Duece Cities Henhouse


FURNITURE

Salvaged Inspirations Blog


STAIRS

Bower Power Blog


If the thought of installing wallpaper is what is holding you back, read this article from dwell titled ’12 Pro Tips For Installing Wallpaper In Your Home’. It is well written, and the step by step guide proves that this DIY project can be done easily.


WHERE TO BUY

Wallpaper can be purchased in home improvement stores, as well as Interior Design shops. The most common place to find the widest variety of options though, is online.


This a collection of my favorite finds from Amazon

From top, left to right

1 | 2 | 3 | 4 | 5 | 6 | 7 | 8


MY THOUGHTS ON THIS HOME DESIGN TREND

Wallpaper has notoriously had a bad reputation of creating a ‘dated’ look to a home, and is typically one of the first things removed when new owners move into a house, along with popcorn ceilings and shag carpeting. That fact has more to do with the personal nature of wallpaper than anything else. Though one homeowner may find a print that they love enough to make a statement on a wall, or in an entire room, that print might not be a favorite of someone else.

With that being said, I think that wallpaper is a great way to personalize. If you are living in your ‘forever home’ then by all means, go with what you love. But, if you will be selling your home in the near future, you might want to consider something in a neutral tone or with a simple pattern, or better yet with a peel + stick backing so that it can be removed before the house is listed.

If you would like more wallpaper inspiration, check out my Pinterest Board on the topic!


***This post contains affiliate links***


FALL DECORATING IDEAS

Today I share some of my favorite Fall decorating ideas. The natural elements and rusty hues are sure to make an impression!


Rainbow leaves Fall decorating

We are officially in the heart of the Fall season. Most of the leaves have already changed colors and fallen off of the trees in our area. A bit of snow has even been seen, though thankfully melted away.

This is our last Fall living in our rental home. We are hopeful that by this time next year we will be in Arrow Hill Cottage. It is likely we will be cozy by the fireplace and decorating with pumpkins and foliage. Decorating our new home for the holidays is something I am very excited for!

Until then, I will be collecting decor ideas to use as inspiration for when I do get the chance.

Fall decorating ideas with pumpkins

Today, I want to share some of the unique and beautiful Fall Vignettes that are inspiring me! Click on the links below each photo to learn more about the creative people behind these beautiful decorating ideas!


Fall decorating front porch ideas

gina.marie.home


painted acorns fall decor

homestoriesatoz


Thanksgiving table decorating ideas

our1880sfarmhouse


Front porch Fall decor

beckmanhomes


Thanksgiving interior decorating ideas

the_canary_cottage


Painted pumpkins fall decorating ideas

justaboutnoon


Thanksgiving themed mantle

ourfigtreecottage


Thanksgiving door wreath

jordang106


FALL DECOR IDEAS FROM ARROW HILL COTTAGE

Nature Inspired Fall Centerpieces

Printable ‘Thankful’ Art


Enjoy Fall everyone!

HARVEST DINING TABLE DESIGN

I’ve got the basics of the kitchen plan figured out, and have begun the transformation of the dining chairs. Now is a good time to work on the design of the harvest dining table that our family will use at Arrow Hill Cottage.

This will be a custom piece, and hopefully an heirloom that will be passed down for generations. As such, I want to think through every detail to be sure it will stand the test of time.


OUR DINING PHILOSOPHY

Our family enjoys eating our meals together as a group. It is something we strive to maintain as a top priority, even while the kids grow and become more involved in other activities.

The space where the dining table will reside is directly to the right of the kitchen. In fact, I would consider our kitchen to be a kitchen/dining combination. The dining area is pulled off to the side a bit. This helps to maintain the kitchen work triangle as well as define the eating area as a place of importance.


HARVEST TABLE DESIGN BASICS

The harvest dining table design is heavily influenced by a few factors:

First, we are a family of seven. While we only need seven chairs around the table, we want to be sure to always have a few extras for guests. The set of 10 vintage chairs we are refinishing will surround the table, leaving 3 seats always ready for company. I specifically looked for chairs that had a smaller profile, knowing that we would have many set up at all times.

Second, The space where the table and chairs will sit is a bit narrow, and because of that I know that the table will need to be narrow as well.

Lastly, The table top will be made of solid wood boards – hopefully harvested from our property. We do not want to complicate the design by making a table that has extendable leaves. Whatever size the table is, it will be one hundred percent of the time.


Considering all of these factors, I knew from the start that I would be designing a long and narrow table.


HARVEST DINING TABLE INSPIRATION

I found inspiration in the form of a ‘dry sink’ turned table that I spotted at a local antique store last year.

It apparently had been used in a one room schoolhouse in the early 1900’s. When I spotted it, I kind of wanted to just take it home with me right then and there.  Unfortunately, I couldn’t justify the price tag or the fact that it would need to sit in storage for over a year before it could be utilized.

Instead, I kept my eyes open for table legs that looked similar to those used on the dry sink. I finally found them in Kansas, on the surprise anniversary road trip Craig took me on in June.

They were just the shape I had been looking for, and I love that they will hold memories of the special trip that we had together.

After measuring the chairs and determining how much space is needed between them, I came to the conclusion that the size of the table top will be 3′-0″ wide x 8′-6″ long.


DESIGNING IN THE THIRD DIMENSION

With all of this information in mind, I set to work with my favorite 3D designing tool – Sketchup. I’ve written before why 3D modeling is important during home design process. Many of the same reasons ring true for other design endeavors as well. The third dimension is just so helpful in visualizing what the end product might look like.

In this case, it also helped me to determine what sizes and lengths of lumber might be needed to get the job done. The below image lays out the 2×4 material. This configuration will be used for the framing and stability of the table. Higher quality wood will be added to the face. If we have enough, it may even be wood harvested from our land.

table framing


The legs of the table are positioned at the very ends, allowing enough space for 5 chairs on either side.


For added support, I am anticipating that there will need to be a center brace that runs from one end of the table to the other.


I have yet to determine the finish of the legs. I go back and forth with either stained wood or painted black. We may not be able to make a full decision until we begin finishing the legs. If we can’t get the stain to blend well with the lumber from our land they may need to be painted.


I think the piece will fit beautifully in the space! It will add just the right amount of simple charm. You’d better believe I am looking forward to eating many home-cooked meals with my family in this very spot!


THOUGHTS ON REST

The past few weeks have been a rough go for our family. First, my uncle passed away suddenly at the age of 59. We gathered for his funeral to celebrate the life of a man who loved people and music, and tearfully said our goodbyes.  Only a few days later, my cousin had an unexpected medical emergency that eventually required a liver transplant.

And, just this past Saturday, our own little {L} was in a freak accident that slashed one of his tendons and broke his pinky finger. After an ER visit and a night in the hospital, he is now the proud owner of a purple cast and is expected to make a full recovery.

Scary stuff – Life changing events


I display many ‘type -A’ personality characteristics. I’m a perfectionist who likes to accomplish tasks and keep busy, a hard worker who sees things through. I’ll be the first to admit, though, that I am not good about taking time to rest.

I will make to-do lists and check the items off as I go. Subconsciously, I think to myself ‘once the to-do list is finished, I will rest.’

But then another item comes up that needs to be added, and then another. The list is seemingly unending, and, while I am generally good at multi-tasking, there inevitably comes a point when it all builds up and becomes too much. I call those moments ‘spinning’ – when there is so much to be done and coordinated, that I bounce from one task to the next, without making any real progress on anything. My brain simply can’t catch up.

If a thought bubble was visible above my head during a ‘spinning’ moment, you would probably see a throbber.


Just like a computer, my ‘spinning’ is an indication that I need a good re-start or refresh. The events of these past weeks have made this go-getter realize something very important.


Rest is needed, even when you’re not overwhelmed


Life is precious, and finite. It can change course in a matter of seconds. It shouldn’t take an overload to make a person slow down and reset. We tend to find time for all sorts of things: work, exercise, eating, even social media – yet forget to rest. In reality, rest is something that should be worked into the everyday, so that life can be enjoyed, not endured.


Sure, with five young kids it isn’t like I can trade in all of my responsibilities for relaxation, but I can make an effort to truly rest a bit each day. To take a step back and smell the crisp Fall air, read a good book, or snuggle with my kids and my husband.

If you’re like me and need to make a conscious effort to rest, I encourage you to take on this daily approach with me. I’m convinced that only good can come of it.


ANTIQUE CABINET RESTORATION

In this post, I describe the steps we took during our antique cabinet restoration – taking a beat up old cabinet and making it look new again!

antique cabinet restoration


Last winter, I happened to be driving through a nearby town and noticed an antique store I had never been in. I decided to stop and have a look around.

It was packed with all sorts of treasures, which made it a bit hard to see individual items. I get a little claustrophobic when I am surrounded by things. And so, if i’m honest being honest, I was walking through the shop quickly. Just as I was getting ready to head out, I spotted a pair of antique cabinets in the corner.

They were so wedged in that it was hard for me to determine their condition. I asked the store owner to pull them out a bit so that I could take a look. She did the best she could. However, it was impossible to see all sides of the cabinets without rearranging a ton of items.

She told me about the cabinets history, mentioning they had been salvaged from an old house during a recent remodel. The notches on their sides indicate where they had been built into walls. She also informed me that she would only sell the cabinets as a pair. And that the one in back wasn’t in great shape.


THE CABINETS

Undeterred, I texted Craig this photo and asked for his consent to purchase. This is the cabinet that was more visible. I loved the glass door, and the size of the cabinet seemed to be good for a variety of purposes

vintage cabinet in an antique store


Though he was skeptical on what we would do with them, he has known me long enough to realize that once I fall for an item, it is pretty hard to shake it from my mind. He agreed that the cabinets could become ours. A couple of weeks later, he went to retrieve them.

Upon arriving home, Craig announced that the second cabinet was basically falling apart, and that it probably wasn’t worth salvaging.

The ‘nice’ cabinet was given a spot in our rental home. The ‘ugly duckling’ cabinet was left in the garage.

vintage cabinet with glass door

the nicer cabinet,  in our dining room


THOUGHTS OF RESTORATION

Sitting in the garage, the cabinet was something we saw every day. Perhaps Craig became annoyed seeing an unfinished project, or perhaps he began to see it’s merit. Either way, he eventually decided to take it on as his personal restoration project.

I was all for it! If he was going to do the work, I certainly wasn’t going to get in his way!

antique cabinet with many scratches and dings


Unfortunately, I didn’t take many good pictures before he started the antique cabinet restoration. I can tell you though, it was in really rough shape. The door was barely hanging on by it’s hinges, the glass was broken, and some of the wooden grilles were missing. There was a large crack on the top, and a broken piece on the side.


ANTIQUE CABINET RESTORATION

Craig spent many long hours in the garage sanding, gluing, and sanding some more.

antique cabinet restoration steps

making old new again. steps to restoring an antique cabinet

repairing an antique cabinet

There sure was a lot of sanding and gluing to be done! He mostly used an orbital sander with varying grits of paper. For the finest details, he used a sanding block.


broken piece on an antique cabinet

sanding the corners of an antique cabinet so that it can be restored


Craig took pieces of the cabinet apart…

antique cabinet pieces to be repaired


… then put them back together

sanding an antique cabinet


REFINISHING THE ANTIQUE CABINET

After literal months of very hard work, the cabinet was once again standing tall and ready for it’s finishing. Once the sanding was complete, it was much easier to see all of the beautiful wood grain details.


repairing an old cabinet during an antique cabinet restoration

The lighter wood pieces are replacements. Although they are the same wood species, they are not aged in the way that the rest of the cabinet pieces are.


how to restore an antique cabinet


CHOOSING THE STAIN COLOR

It was a difficult decision on what type and color of stain to use. The cabinet is made of 100% red oak – but some of it has a tighter grain, while other parts a more loose and wavy grain.

We had some samples made up at a local Sherwin Williams, then brought them back to the house to look at for a while.

stain color options for an antique cabinet


Ultimately, we agreed upon a Minwax stain called ‘Dark Walnut’. We felt that it gave us a nice deep color, which would help to neutralize the grain a bit. The Sherwin Williams associate suggested a Minwax water based urethane in a semi-gloss finish. Popular Woodworking has a great post about how to properly apply stain.

finish for an antique cabinet


The cabinet absolutely soaked up the stain. The wood looked amazing, but wasn’t quite as dark as I had wanted after the first coating.

Antique cabinet restoration. Applying stain to an antique cabinet


front and back of the restored antique cabinet after one coat of stain

Cabinet after one coat of stain (sitting in the garage)

As you can see in the photos above, the newer wood pieces were still pretty obvious after the first coat. We waited a couple of days, and then applied another stain coating. This time we had success with the color. We brought it indoors to dry for another two days, and then added two coats of the clear semi-gloss finish. The spar urethane really made the cabinet shine, and darkened the color a bit more.

antique cabinet restored. Amazing old cabinet with storage and mail sorting

Finished cabinet with lower door open


vintage cabinet with mail cubbies - antique cabinet restoration

Detail of cubbies. Might be perfect for sorting mail!


vintage cabinet detail - antique cabinet restoration

Detail of the molding and repaired cabinet top


antique built in cabinet with writing showcasing their original location

The original writing on the side of the cabinet – which indicates the part number, and the early 1900’s homeowner. 


restored antique cabinet with new stain and urethane


FUTURE FOR THE ANTIQUE CABINETS

Now that the antique cabinet restoration is complete, we are dreaming about it’s future. We love that this historic piece will be given a prominent spot in Arrow Hill Cottage – to define our entryway from the living room! You can read more about our first floor layout in THIS POST.

antique cabinet restoration - pair of cabinets restored and ready for their spot in a new house


We are also very excited to see how the ‘nicer’ cabinet turns out. And to see BOTH of the cabinets, together once again in the new house, will be such a thrill!


PIN THIS ANTIQUE CABINET RESTORATION

If you enjoyed seeing this old cabinet become new again, be sure to follow this blog to see the other restored!

antique cabinet restoration - steps to move from trash to treasure


THE MAIN ELEMENTS OF THE BUNGALOW HOME STYLE

Welcome to another installment in the ELEMENTS OF HOME series. Each month, I showcase a different residential style here on the blog. It is my hope that this information will not only teach you a little something about the various styles; but also equip you if are designing or searching for a new house – by allowing you to determine which style(s) suit your lifestyle and preferences the most.

Today I will be over-viewing the bungalow home – including the history of the style and what makes it unique.


HISTORY OF THE BUNGALOW STYLE

The very term ‘bungalow’ has roots from the Indian/ Hindi word ‘bangala’ – which describes a one story house with a low, extended roof. During the British occupation in India, troops created bangalas in higher elevation ‘hill stations’. The home’s wide, covered verandas, provided shade in the hot climate as well as a comfortable cross ventilation in the hot stuffy months.

Bangalas were later built in the UK, presumably by the British colonials who had finished their tour of duty in India. Coined as ‘bungalows’, they were adapted once again for America in the early 1900’s, popping up first in the temperate climate of California. From that time until the early 1930’s, the bungalow style’s popularity reached nearly every state in the union.


When Bungalows were introduced in America, they were seen as a progressive ideal – and in many ways an opposite way of life to that of the Victorian era. The straight-forward use of materials, informal plan layout and accessibility to the outdoors that bungalow homes provided were attractive to middle-class families in particular – those who felt secure enough about their social standing that they didn’t need their home to be a status symbol or showcase their worth.

Similar to the American Foursquare home, the Bungalow style were widely available through mail-order catalogs. For those with limited means – the bungalow provided more than just the need for shelter, they provided fulfillment of the American dream.

There are also examples of architecturally designed bungalow homes. The most notable architects of this style were the Greene brothers, who practiced in California in the early 1900’s – focusing their work on the Arts & Crafts movement.


MAIN ELEMENTS OF THE BUNGALOW STYLE

LOCATION

Bungalows first began to make their U.S appearance in Southern California – that is where the most iconic examples still stand today. However, there are bungalow examples scattered throughout North America.

This housing style fills neighborhoods that are near the city center, which is an attractive asset to homeowners looking for close proximity to schools, work, and shopping districts. Generally these neighborhoods are pedestrian friendly. It is not uncommon to see multiple Bungalows situated next to one another long the street – something that creates a strong sense of community for the people who call the neighborhoods home.


SIZE

These homes are often small, with efficient, yet flexible, floor plans. Their economical use of space is especially appealing to first time homeowners and young families.

Though relatively compact, Bungalows make efficient use of every available square foot – with built in cabinets and cupboards for organization.


EXTERIOR TRADEMARKS


  • LOW PROFILE: Because they are meant to be unassuming, bungalows keep a low profile to the street. Generally they are one story in height. If a second floor is included, the living space is typically built into the roof structure. Exterior detailing of bungalows accentuate the horizontal lines, further grounding their facades.


  • PORCH: most Bungalow homes feature large front porches. Not only do porches give the homeowners a direct connection to the outdoors, they also promote neighborhood interaction – both important Bungalow ideals.


  • DOMINATING ROOF WITH DORMERS: Bungalow generally have roofs that slope toward the street – aiding in their one story appearance. Those with second floor living space may have dormers that accentuate the roof line.
  • USE OF REGIONAL MATERIALS: Builders of the original bungalows favored the use of regional materials for their lower cost and reduced maintenance. Those built on the west coast tend to employ stucco as a primary exterior material, where those in the Midwest – such as Chicago and Milwaukee – feature brick. Northeast bungalows were, at least partially, clad in shingles.


INTERIOR SPACES

Interior layouts lack redundant walls and useless space. Hallways are not common. Compared to their Victorian ancestors, the Bungalow features an open first floor plan – with rooms that have overlapping functions.

Continuing the function of space, many Bungalows feature built in cabinetry as room dividers – as opposed to full height walls. These built ins allowed rooms to flow into one another, while at the same time maintaining some separation of space.

image source

COLOR SCHEME

The original bungalow owners would often strive to use warm colors and textures that would make their homes feel welcoming and cozy. Earth tones such as tan, brown and harvest gold were, and still are common both on the exterior detailing and interior finishes and furnishings

traditional bungalow colors 

from the book Bungalow Colors: Exterior, by Robert Schweitzer


NOTABLE BUNGALOW HOUSES


‘Bungalow City’ | Boise, Idaho | Houses built between 1910-1930

This neighborhood was nicknamed ‘Bungalow City’ because of the vast amount of Bungalows that were built there in the early 1900’s. There are many prime examples of the style that are well maintained.


INSPIRING BUNGALOWS FROM AROUND THE WEB

These classic homes showcase the Bungalow style well. Take a closer look!


1916 Bungalow


Itty Bitty Bungalow


I hope you have enjoyed learning a bit more about the Bungalow style. Curious which residential style will be featured next month? Stay tuned!

And be sure to check out the previously showcased styles HERE.


SATURDAY SKETCHBOOK: LOWER LEVEL

The lower level of the cottage is really starting to take shape! I think it is pretty close to what the final revision will be, and thought it might be a good time to share it with all of you.

I have to say that one of the things we have missed the most while living in our rental farmhouse is a finished basement. We used the basement in our last house as a place for the kids to be rowdy during the day, and a quiet retreat for the grownups at night. I wanted to design in those same functions for the new house – also keeping in mind that our kids will be teenagers in not too many years, and we would love it if they had friends over to our house to hang out.

The layout of the lower level is quite simple, with one very exciting bonus space

lower level plan

The lower level in 3D plan form


To the right of the stairs is a large mechanical room, which will probably have a little space within it for storage of items such as Christmas decorations.

When you first step down the stairs you enter an open family room. I have always envisioned a large, comfy sectional sofa and a couple of overstuffed chairs. On the wall – a giant tv – one of the things that Craig and the boys are most excited for. I imagine this area will be used for family movie night, as well as Playstation tournaments with friends!


Off to the other side of the room is a small space for a table and chairs. This is the table we are currently using in our dining space – and is a hand me down from Craig’s grandparents. It’s an antique piece and will serve as the perfect spot to play games as a family, or set up snacks.


After much debate, we decided to add a walkout door from the family room. This door will provide access to a future outdoor patio / fire pit area. We love that the large windows in this room will let in a lot of natural light and the visual connection to the outdoors will ensure that the space won’t feel like a basement.


From the family room, there is a small hallway space that has access to a 3/4 bathroom on one side and the den on the other. Though the room will have both an egress window and closet, so that it can be considered another legal ‘bedroom’ for the house, the den is technically going to be Craig’s space – or ‘man land’ as he calls it. He has been dreaming of a little room of his own for years! In each of the places we have lived, I have had my own office or craft room/ creative space. It’s about time that he has a chance. I imagine he will spend many hours here working on computer projects and watching sports on tv, maybe reading a book in the recliner with a cup of coffee in hand.

The couch contains a pull out queen size bed that can be used for guests when they visit.


The final space in the lower level is quite possibly going to be the most used room in the entire house. The Rec Room. A 16′ x 25′ open space for large motor activities – running, jumping, kicking, etc – it will serve as a small indoor gym.  A portion of the ceiling will be 16′ high, so that we can set up a basketball hoop and shoot free throws.


This room was on the drawing board, then off, then back on again. Once we got word from our contractor that the extra space won’t be terribly expensive (because of how our site slopes and how deep the footings will need to go for other portions of the house), we figured we would not regret adding it. It will be unfinished at the beginning of the build, until we can afford to finish it the way we’d like.


The room is large enough to shoot free throws in!

A pair of windows provide some natural lighting


If you ask the kids which room they are most excited for – I think they would collectively say that the Rec Room is the most anticipated. And, Craig and I might be right there with them on that sentiment! This indoor space will allow us to stay active even in the cold winter months, and will be especially handy now that we have discontinued our local gym membership. We have been talking about getting a treadmill, some free weights, a kicking net, pull up bar, and possibly incorporating a small rock climbing area. It will also, of course, be the perfect spot to play ping pong! All sport equipment will be stored in a large walk in closet located in the back of the room – keeping the rec room as open and uncluttered as possible.

View from rec room into family room space. Closet door is to the right in this image.

Notice the ceiling height change from 8′ to 16′


As we approach the cold winter months here in the Midwest, we are bracing ourselves while at the same time thinking that we should be in our new house next year at this time. When the snow melts in the spring, we want to be ready to break ground as soon as possible! So exciting!

HOME MAINTENANCE BUDGET TIPS

Anyone who owns a home knows for certain one fact: THINGS WILL BREAK. And unlike renters, homeowners need to be able to pay for the repairs out of their own pockets. Because of this, it is wise to have a home maintenance budget in place.

home maintenance budget ideas

Issues may be a minor patch jobs that can be done over a weekend. Or there may be extensive damage that requires the expertise of a seasoned professional. The tricky thing is, you never know which kind will pop up, and/or how much these fixes may cost.

It is very wise to be prepared upfront, but starting a home maintenance budget. The following tips can help you determine how much to save, and where to keep the funds for the inevitable ‘rainy day’ when they will be needed.


TIP #1: THE ONE PERCENT RULE

budgeting for home maintenance

If you have just moved into your home, and have yet to repair anything, you may want to start with this rule. Use the purchase price of your home as a guide, and save 1% of that figure for repairs. If you purchased your home for $250,000, for example, expect to save $2,500 per year for maintenance.


TIP #2: THE SQUARE FOOTAGE RULE

home maintenance

Another easy calculation is to save $1 per square foot per year. If your home is 1,500 square feet – that would equate to $1,500 available for repairs each year.


TIP #3: CONSIDER THE AGE OF THE HOUSE

home maintenance budget amounts

Obviously, a newer home should need less maintenance than one that is older. In the first 5-10 years after a home is built, there should be only minor repair needs. Between 10 and 20 years, common maintenance includes re-painting, window replacement, and flooring removal/replacement. Homes that are over 30 years are more of a challenge. Major systems such as the roofing, electrical, and plumbing-  may begin to fail.

A graduated savings plan might be a good idea. Save a smaller amount of money each year for the first 10 years and increasing the amount put into the account as the house ages. Any money that isn’t used in the early years can be applied to the more costly repair items that inflict a home in it’s later years.


TIP #4: CONSIDER THE CLIMATE THE HOUSE RESIDES IN

amount to save for home maintenance budget

Houses located in areas of the country that receive freezing temperatures, large amounts of snowfall, and ice storms are more susceptible to exterior damage.

Houses located in areas that receive heavy annual rainfall and humid summer months can be subject to termite damage, which can weaken the wooden structure.

If you live in one of these areas, it is a good idea to pad your savings a bit.


TIP #5: CONSIDER PRIOR  + FUTURE MAINTENANCE

maintenance and repair budgeting

Small problems will become larger ones if left unattended. It is important to keep on top of the small issues as soon as they are discovered.  If you aren’t the first owner of your house, you may have inherited unresolved issues that are beginning to turn into big problems. A house that has had poor past maintenance is going to require a heftier savings for repairs.

On the flip side, the previous owners may have done a great job keeping the house maintained. If this is the case, you will be able to primarily focus on future repairs.

Not all repair and maintenance items are surprises. Be sure to consider what ELECTIVE projects you plan to tackle in the future. Do you dream of a brand new kitchen or hardwood floors throughout? Go ahead and beef up your fund to reflect these improvements.


TIP #6: KEEP THE MONEY LIQUID

home maintenance budget tips

Once you determine the amount you will be saving for your home maintenance and repair, you need to decide where to put the funds.

The primary thought is that this money should be available, yet forgotten about. For example, keeping the funds in the standard checking account might not be the best idea. They will be more susceptible to being used for not house-related items.  Converting the cash into savings bonds is also not ideal, as they can be more difficult to access when the need arises.

A money market account may be able to get you a bit of interest over time, but also has the disadvantage of losing value if the money needs to be pulled out at a low point in the market.

The best approach is to set up a separate savings or checking account that can be linked to your primary checking. When maintenance costs are incurred, you can easily move funds from savings to checking in order to pay the bills.


Use these tips to determine how much money to save, then be diligent to do just that! Having a home maintenance + repair budget isn’t the most glamorous thing you can imagine doing with your money, but it will give your family a sense of peace knowing that if a problem arises it can be easily taken care of, without a financial burden.


PIN THESE IDEAS FOR LATER

home maintenance budgeting tips