READER SHOWCASE: MINNA + SCOT’S HOME

You’re in for a treat today friends! The Reader Showcase is where I feature the homes and home projects that my readers have tackled. I am constantly amazed at the talent and varied styles that each person has to offer!

Today’s talent is no exception. I first met Minna on Instagram. She posted photos of her absolutely stunning home, The Little Plaid Cottage, which is plump full of character. She is super creative and her husband Scot is super handy. They make quite the duo. I think you will agree!

Minna, please tell me a little bit about your home:

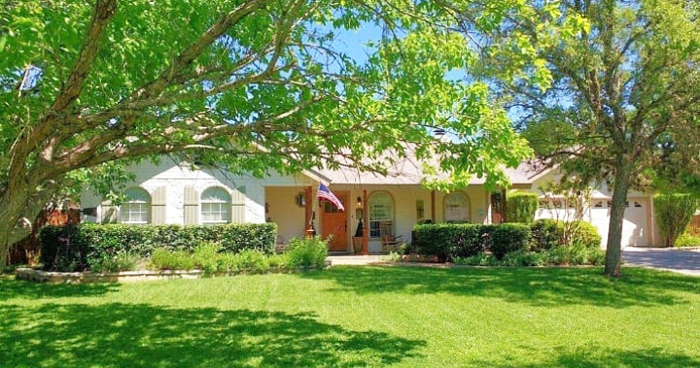
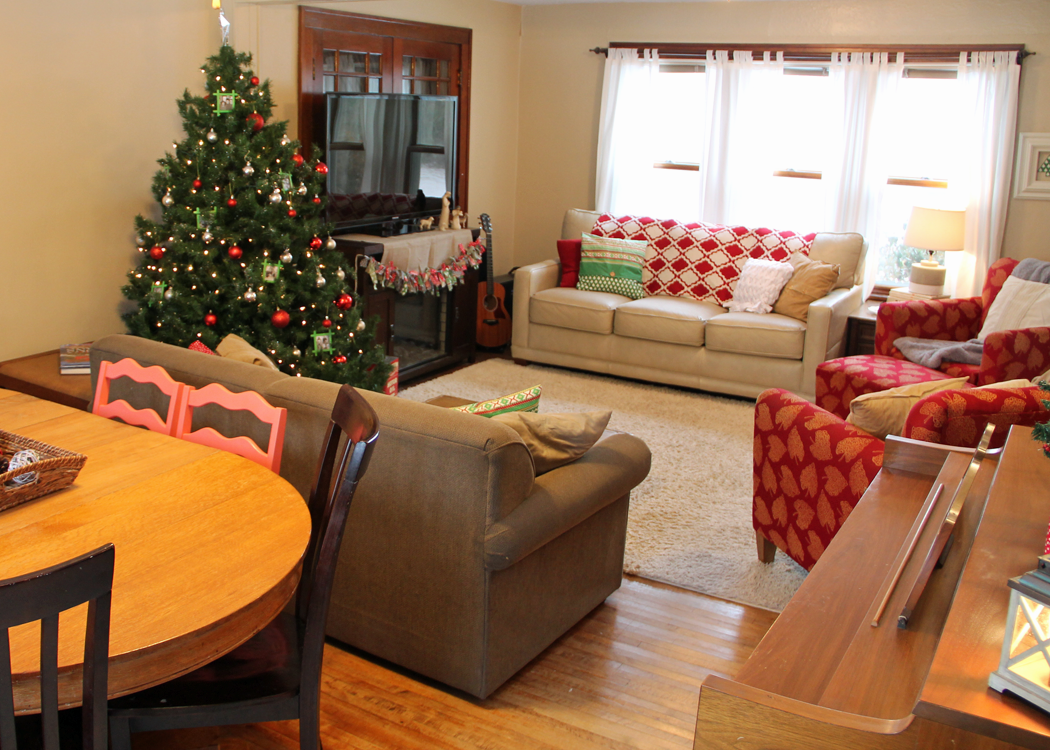
I would describe our home as a cottage. It is a single story 1,430 square foot house that has lots of charm, including a large front porch, built in bookcases, a floor to ceiling rock fireplace, cedar beams on 12 foot ceilings, and a brick surrounded cook-top in the kitchen.

It was built in 1991 on the outskirts of town, and sits on half an acre.

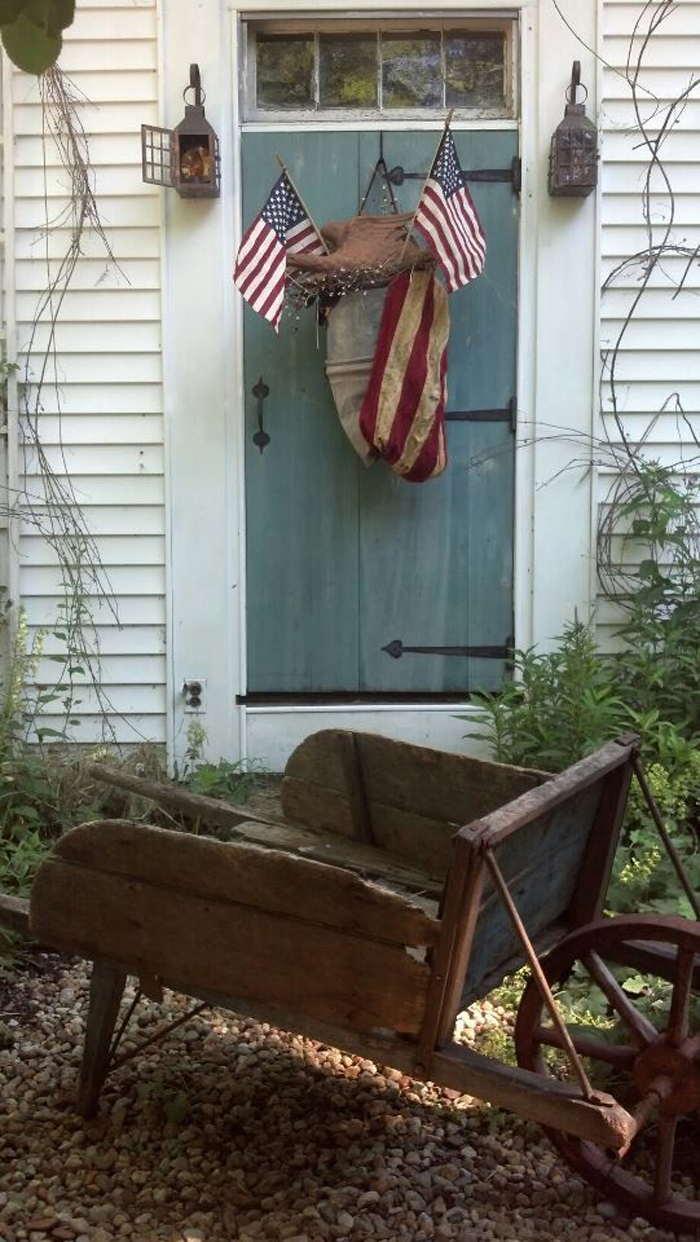
That front porch speaks to me. Looks like a great place to relax!

What is your personal design style?

If I had to define it, I would say cottage/farmhouse. I prefer to find interesting antiques to decorate with rather than just going to Target and buying the latest Magnolia pieces that are on the shelves. I love Joanna Gaines as much as the next person, but I don’t want my house to look exactly like everyone else’s house.

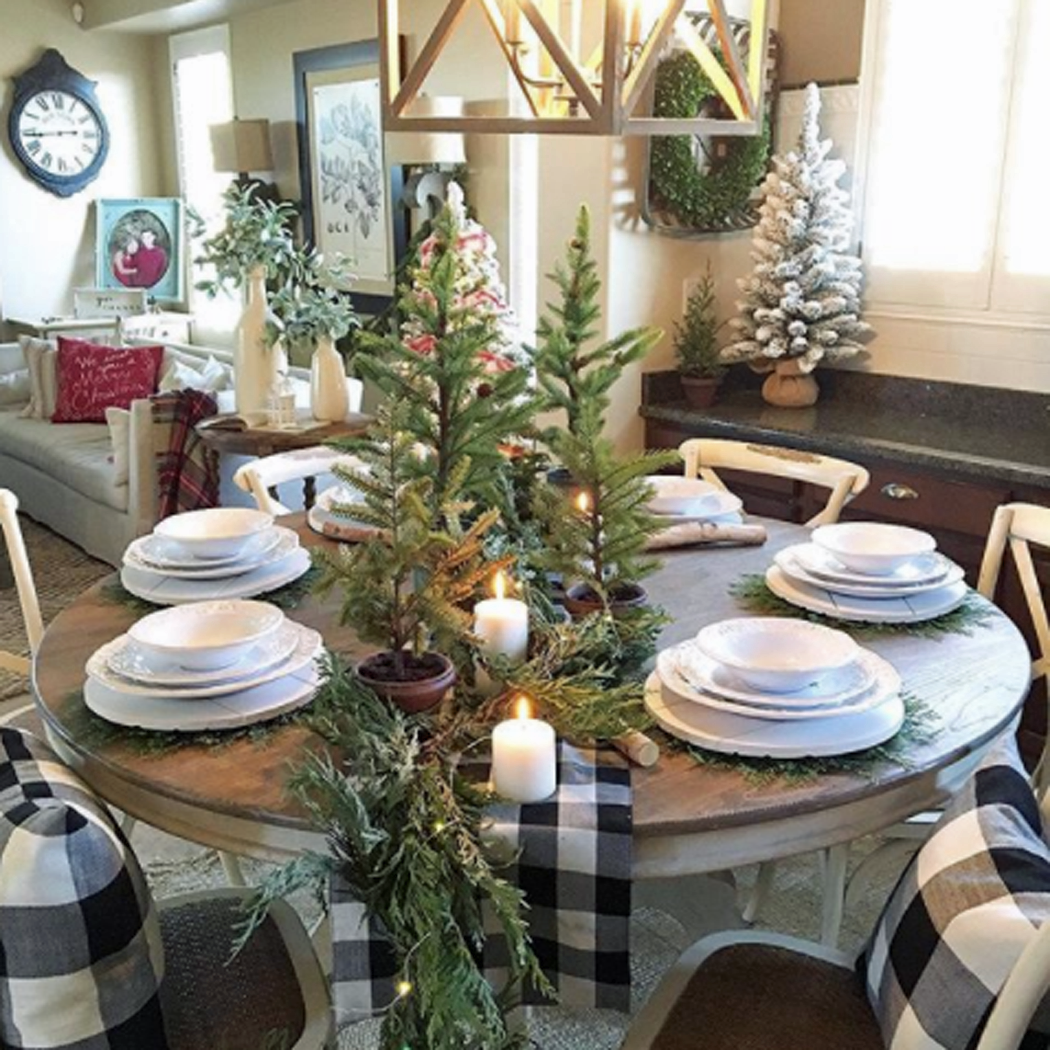
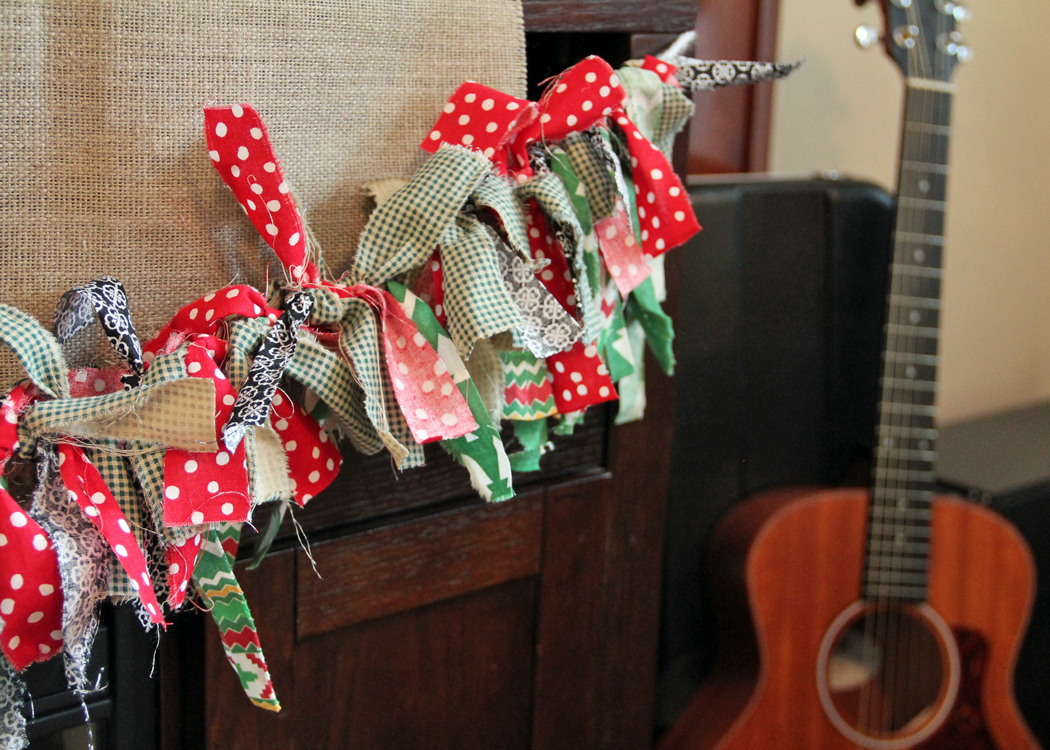
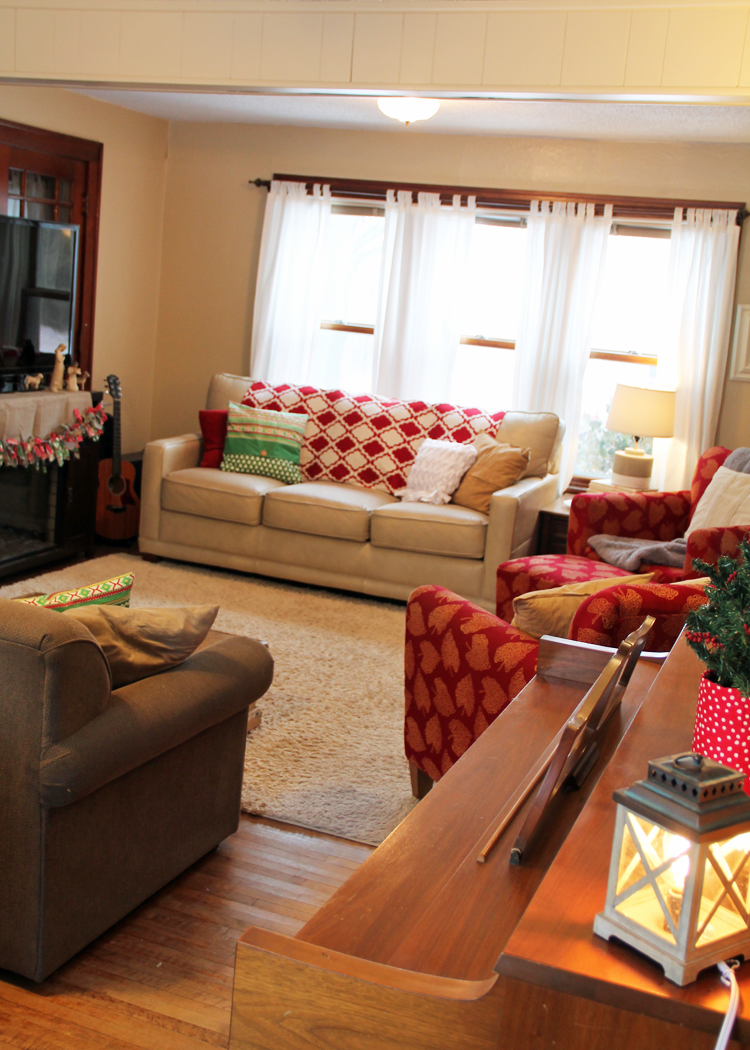
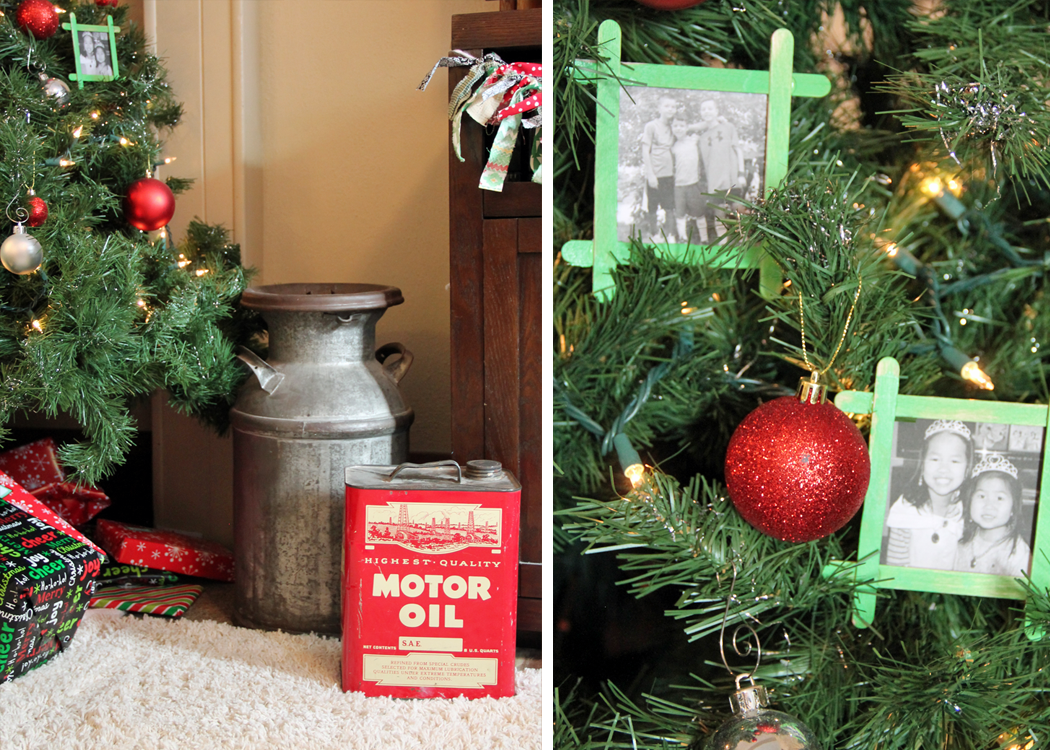
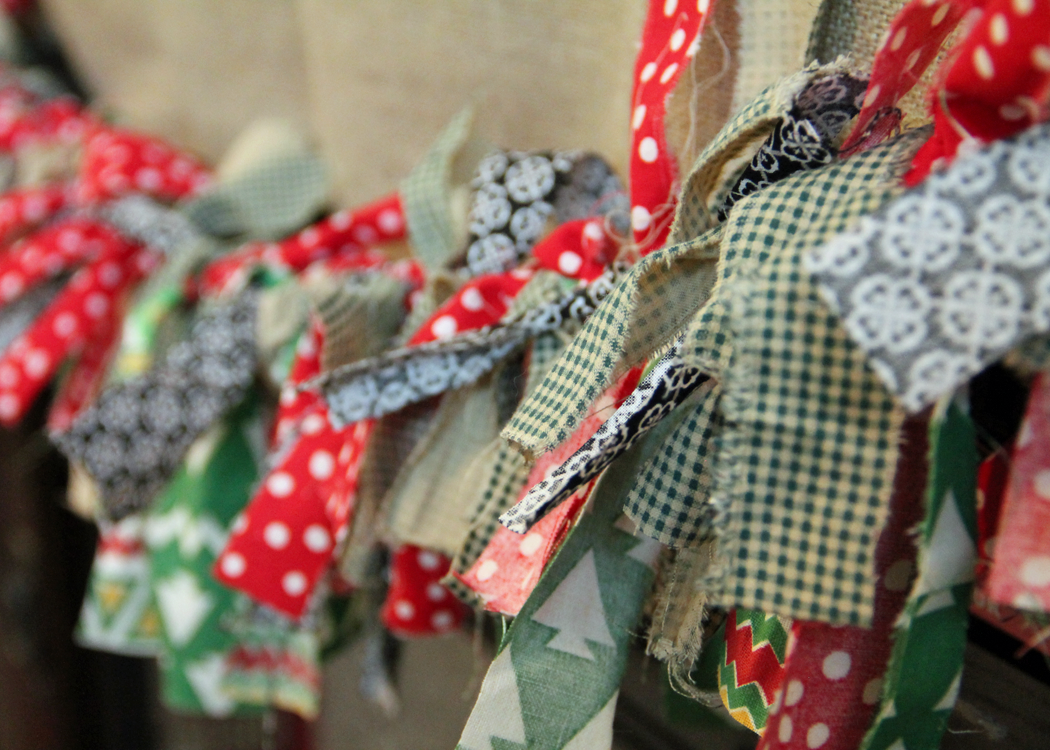
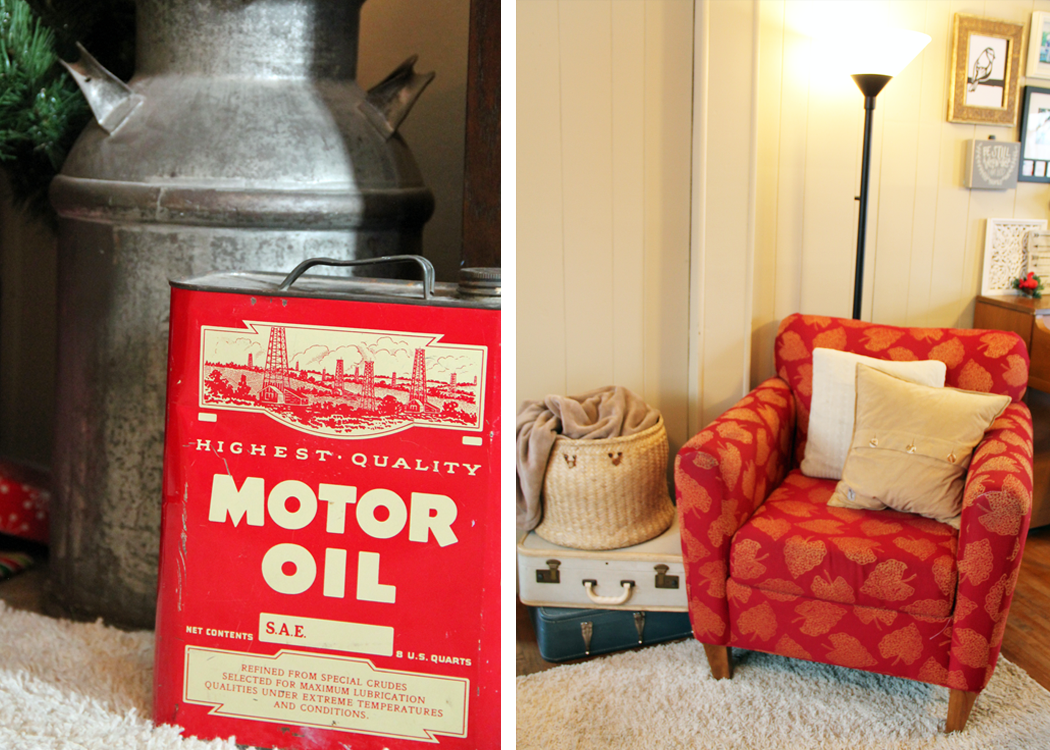
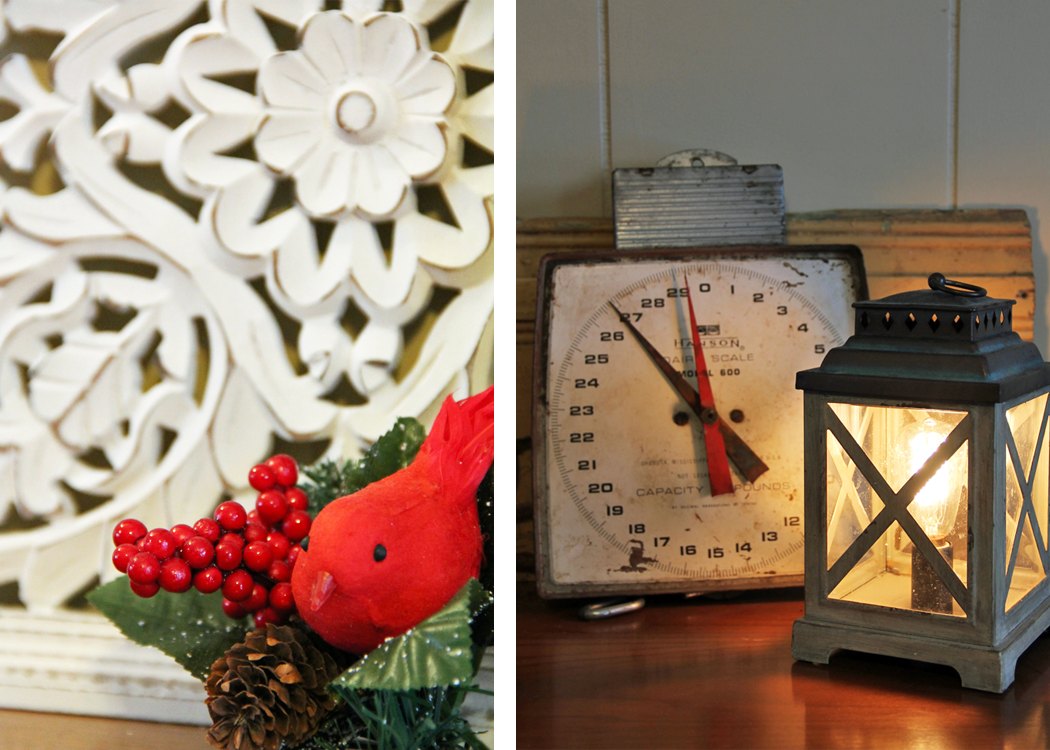
Antiques have history and tell a story. They have stood the test of time and have a beauty all their own. I love displaying vintage finds in my home and plan to enjoy them for years to come. I also love decorating with plaids & buffalo check, and tend to gravitate towards wreaths and white pitchers.


Explain your favorite remodel projects. What was done to each space?

We have done quite a bit of work to our current house during the 7 years we have lived here!

KITCHEN

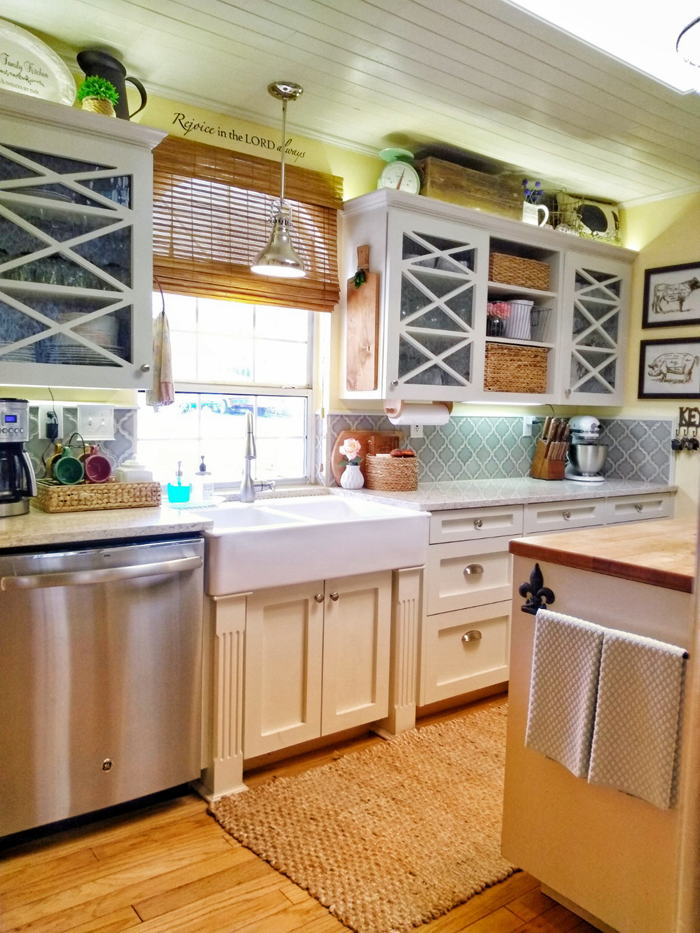
Our kitchen has by far been my favorite remodel project to date. We started off with popcorn ceilings, a pantry cabinet that was limited to opening the full way because it would hit the oven handle, chipped tile counter-tops, original builder grade appliances, and a shallow kitchen sink with a rotted cabinet below.

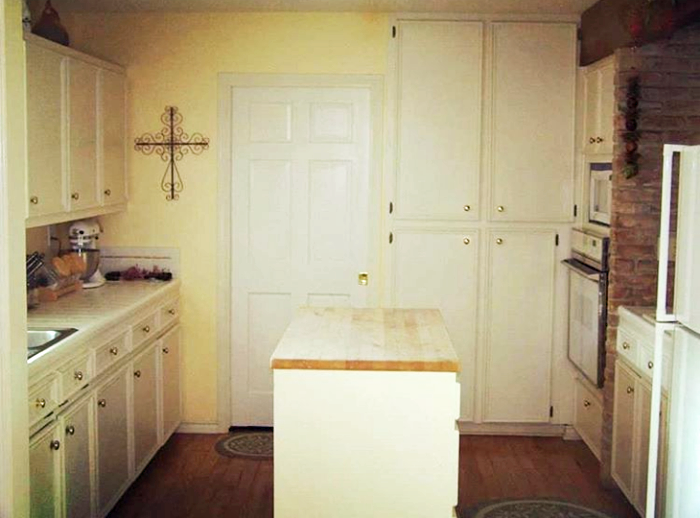
Kitchen before. Charming, but very ‘vanilla’


The first thing we did was add a walk in pantry. We were able to carve a bit of space from the attached garage and include it in the kitchen. My husband did all of the framing, finishing, painting and even built custom shelving. I found some fabric from Hobby Lobby to use on the back wall in lieu of wallpaper. We installed matching tile and added a screen door, which may seem an odd choice for a kitchen – but it works for us for two reasons: 1. It adds charm + character, and 2. It forces me to keep the things inside clean and organized!

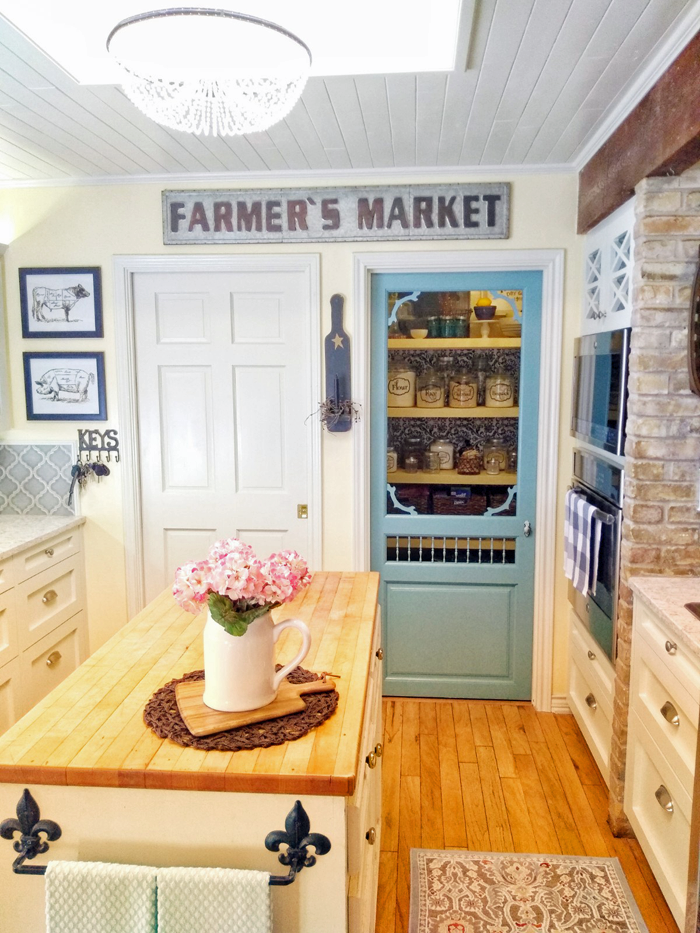
My goodness what a great idea! The pantry looks so organized.


I found a farm sink on Craigslist for $50. The price was low because it had a chip on one corner, but I knew that we would be under-mounting it and that the counter material would hide the chip. The sink literally sat in my garage covered in a blanket for two years while we saved up for the remodel.

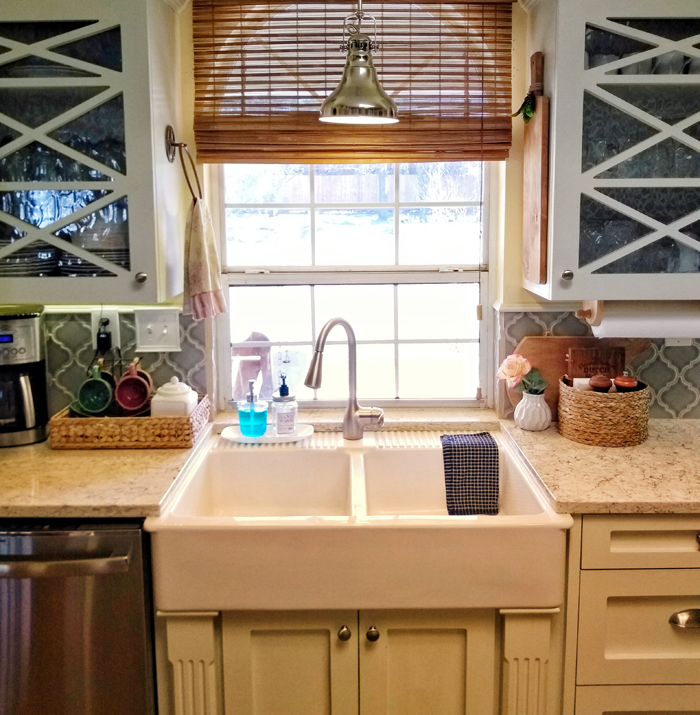
I can’t see the chip, can you?


To save money during the remodel, we decided to keep the upper cabinets and update them with crown molding and new doors. I knew that I wanted glass for the upper cabinets, but also wanted to do an interesting design. My husband built a triple X design on the doors and we used wavy glass, which I love because it reminds me of something you might find in an old home.

Custom cabinet design. I love the look!


We also removed the middle cabinet door above the fridge so that I could add some warmth and contrast with baskets. I lined the backs of the glass front cabinets with contact paper from Dollar tree.

My husband converted all of the bottom cabinets from shelves to drawers. It is so nice not having to get on my hands and knees to find a missing Tupperware lid in the back of a dark cabinet anymore!

Let’s all just take a moment and appreciate how lovely their cook-top is. Such a happy place to create meals!


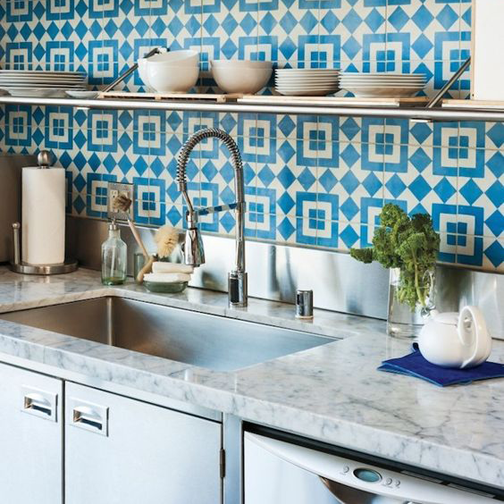
We got an amazing deal on our quartz counter-tops and my husband cut and installed them without ever having done it before. I have to say, I am married to a perfectionist – and they turned out fabulous! Since the cabinets and counters are both white, I decided to make the back splash a contrasting color and found bluish gray Arabesque tile from Home Depot.

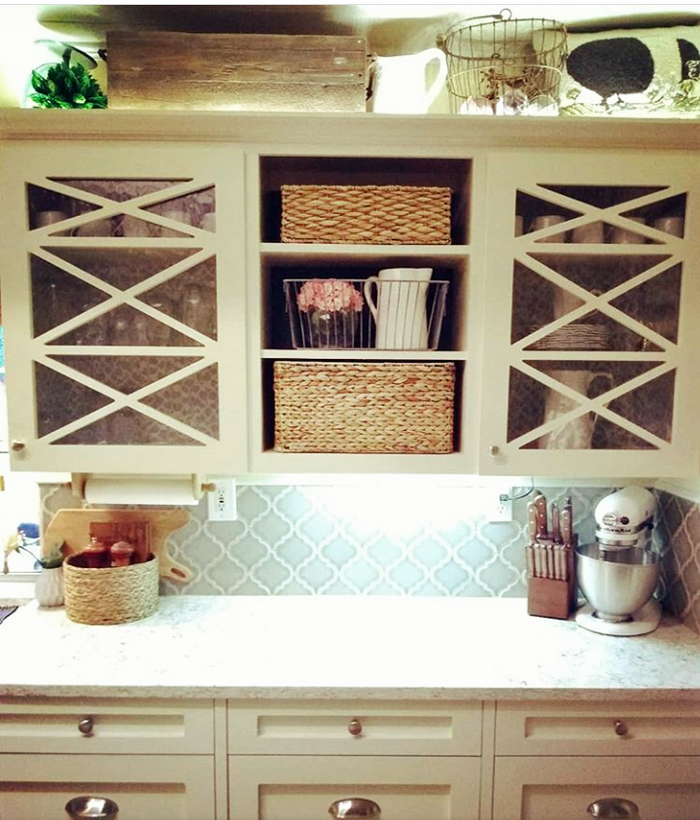
The tile is gorgeous, and I really love all of the neutral accessories!


The final part of the remodel was installing wood planks on the ceiling, which added so much character. We have a large skylight in the kitchen that is a wonderful feature. The ceiling height in the room is only 8 feet but the skylight opening extends to 12 feet! To draw the eye up I found bird decals online, which we affixed within the skylight. They add a special unexpected touch.

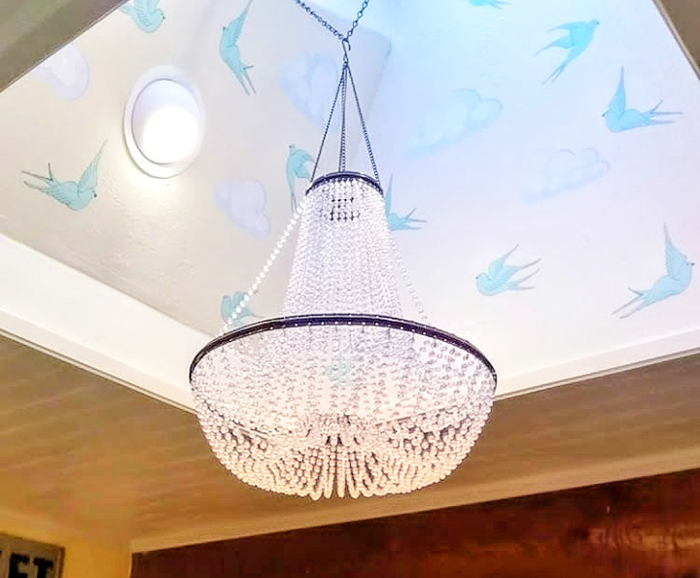
How’s that for whimsy? And a chandelier in the kitchen? Yes please!


My husband Scot DIY’d so much of our kitchen and it saved us a ton of money! We would  not have been able to afford to do a full kitchen renovation had it not been for all of his hard work!
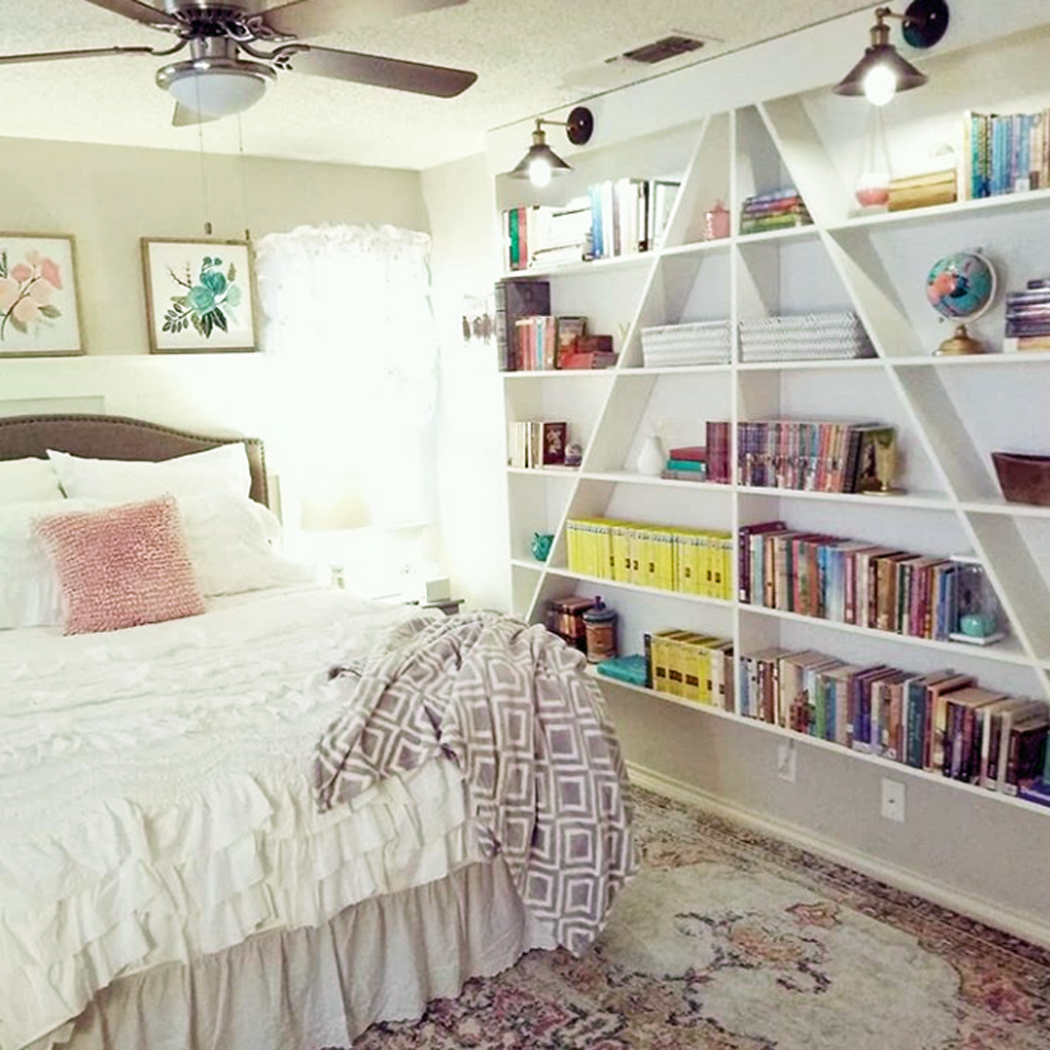
 

DAUGHTER’S BEDROOM

Another area in our house that I had so much fun designing and decorating is our daughter’s bedroom. For Christmas this year we gave her a whole new room. We painted the walls with Sherwin-Williams ‘agreeable gray’, and my husband installed board and batten on an accent wall for contrast.

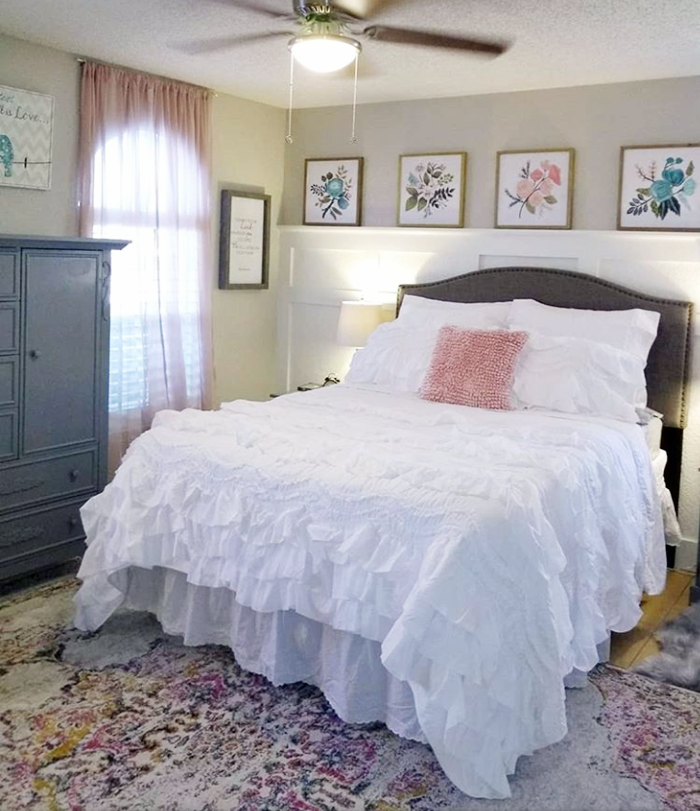
Her armoire and nightstands were painted with Sherwin Williams ‘cityscape’. The headboard was an incredible Black Friday deal from Walmart. We got it for a steal at $59! I shopped various other stores – including Target, H&M, and Hobby Lobby – to pull the decor of the room together.

Such a soft and comfortable looking space!

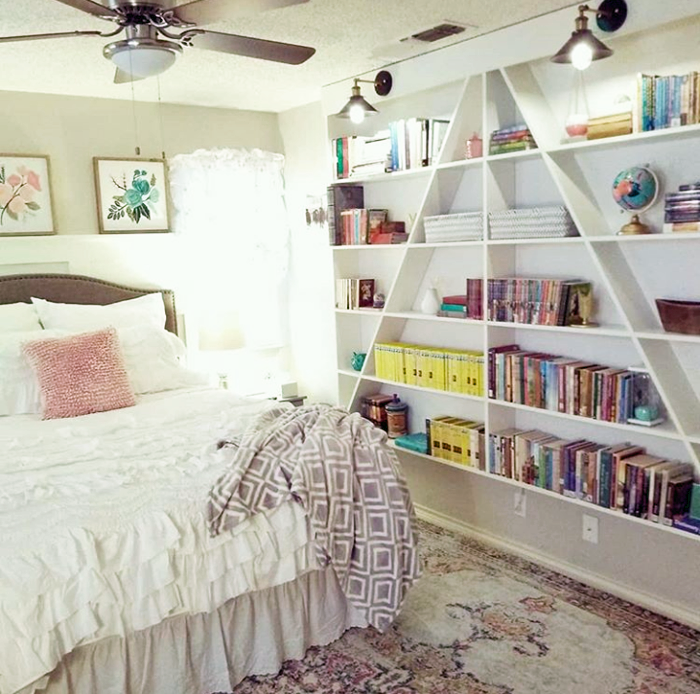
I am most pleased with the A-frame bookcase that my husband built for the room. It adds so much visual interest to the space and is so fun to style!

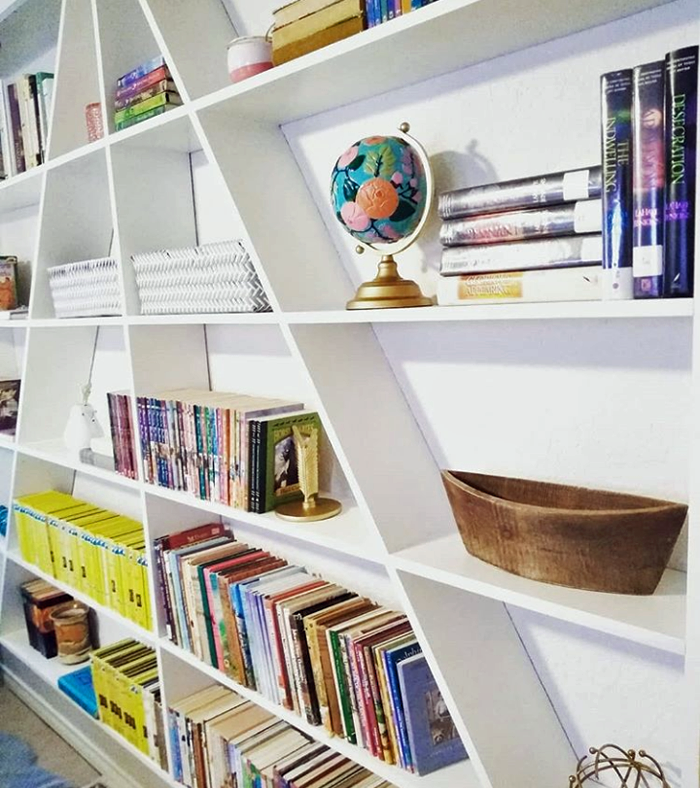
This bookcase is a stunner! Fun looking + functional = major win!


What would you like readers to know about designing and styling a home? Do you have any tips to share?

Think about what you personally like and are drawn to, and not necessarily what’s popular in the moment that everyone else can go to the store and buy. You are a unique individual created by God to shine and share your own creative talents with others.

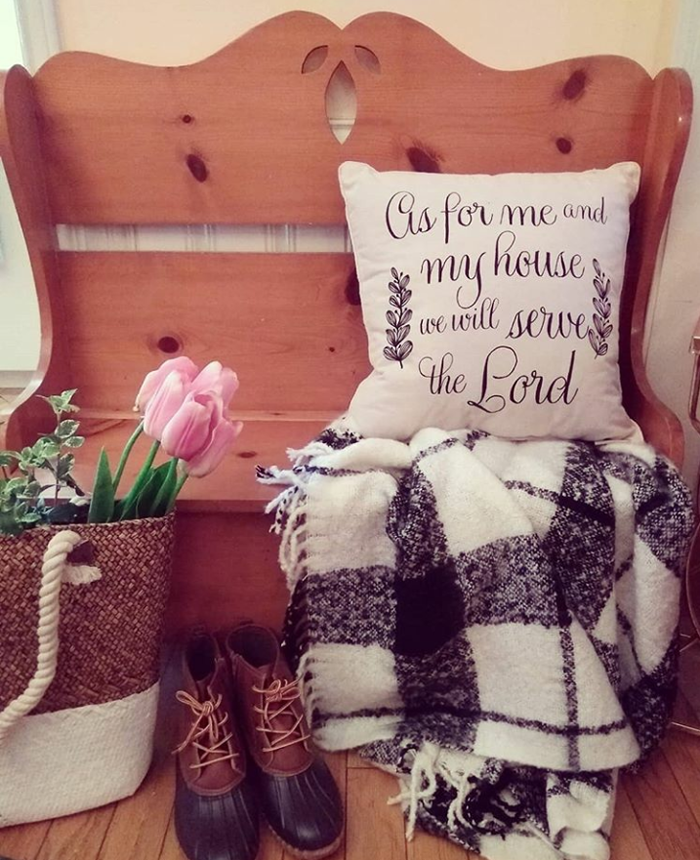
Scot made this cute bench for Minna as a gift years ago

Don’t get stuck in a mold with everyone else. Be your own person and display what’s important to you and that which speaks to you. I believe Edith Schaeffer says it best: “This place should be expressing something of yourself. It should be communicating something of you to your visitors, but it should also satisfy something within you. You should feel ‘at home’ here, because you have made it home with something of yourself.”


Do you have any remodeling / decorating plans for the future?

My immediate plans are to style the small guest bedroom, which used to be our son’s bedroom before he moved out. We also want to scrape the popcorn texture off of the ceiling in other rooms in the house. It’s a messy job, but it isn’t difficult and it really does make a dramatic difference!

Outside, we have plans to paint the front porch once the weather warms up and remodel our back patio – including the addition of an outdoor kitchen and fireplace.

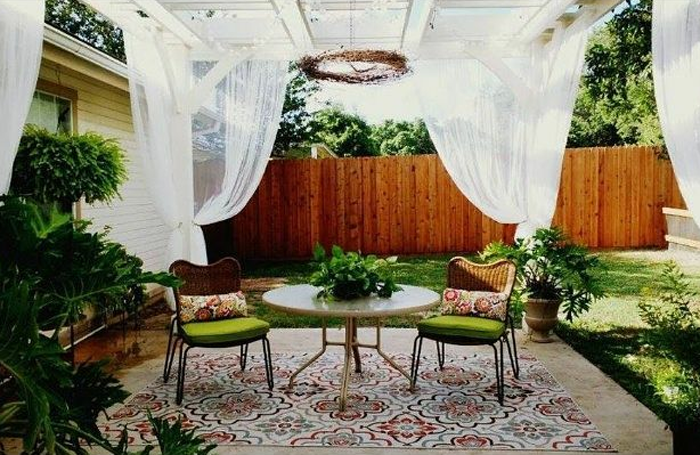
This space is already pretty amazing. I can’t wait to see the new additions!

A few months down the road, I would love to tackle a master bathroom remodel. We tend to focus on one project at a time and at our own pace.

We are enjoying the fruits of our labor in this house and though we don’t have plans to move any time soon, I can envision us living in a smaller one or two bedroom home on a larger piece of property sometime in the future.


Thank you so much Minna and Scot for sharing your wonderful home with all of us! I encourage all of my readers to go check out Minna’s Instagram account HERE to watch the progress while she and Scot continue to remodel and make their house into a home that reflects their personality and style.


Now it’s your turn! Have you been putting your personal touches on your home? Maybe the entire house isn’t finished, but you are particularly proud of one room – I would love to see, and share with my readers!

If you are a blog subscriber, you are eligible! Simply email photos and a brief description to angela@arrowhillcottage.com for your chance to be featured!


18 CREATIVE WAYS TO DISPLAY KID ARTWORK

If you share your home with children, you know that they are little art making machines. There is something so precious about your child’s creativity and imagination that you just want to bottle it up and save it for all time. Even still, it can be quite overwhelming trying to figure out what to do with each of these masterpieces.

In my search for unique and stylish solutions to this very problem, I have discovered 18 creative ways to display kid artwork. I think you will enjoy what I found.


raw art wall

This setup requires little to no prep work. When a child creates something that they want displayed, use a bit of tape or another removable adhesive such as poster putty, and add to the wall. Personally, I feel that this technique is best suited for a kid friendly space, such as a toy room, as it has a tendency to look a bit more cluttered than other display options.


clothesline

This highly adaptable hanging technique is accommodating for various sizes and shapes of projects.  All you need for this simple DIY is a thin twine rope, a few clothes pins, and your child’s creativity. The great thing about this option is that the kids can clip up and take down the art all on their own!


cork board

Positioning an extra large cork board against the wall and adding a desk can create an instant art station. Though similar to a raw art wall, the chaos is a bit more consolidated. Learn how this set up was created using cork squares, on the blog Young House Love.


clipboard display

These clipboard displays may tidy things up a bit more, but will mainly accommodate similar sized pieces of artwork. I love the added touch of the nameplate, which can be changed up as often as the artwork is.


framed art

If your child  is a master at one type of artwork – flowers, glitter, abstract – this may be the option for you. Grouping similar styles of art pieces lends itself to a beautiful gallery style display. I imagine the frames used in this setup are either poster size or custom created to fit the artwork.


ledge display

A simple shelf ledge arrangement may be the perfect option may be preferable if you tend to change out your child’s artwork frequently. Anna White has a wonderful tutorial on how to build these ledges out of standard materials – for only $10!


matching frames

Another way to tie varied art pieces together is by removing glass from old frames and painting them all the same color. This also gives the display a gallery look. These sunny yellow frames are really helping the art shine!


hinged frame

Perhaps you love the idea of framing your child’s art pieces but imagine that changing them out would be too much of a hassle. This hinged frame product may be the option you are looking for. They are said to be able to hold up to 50 sheets of paper! Click on the link above to purchase, or make them yourself!


washi tape borders

This is an inexpensive craft – and it looks cute too! You can create various sizes and change up the patterns and colors of the tape. The wonderful thing about washi tape is that it is easily removable and doesn’t leave residue – meaning you can have a traveling gallery that moves from room to room.


painted frames

For a more permanent look, painting frame patterns on the wall could be another simple fix. This display sets the mood for a creative art station where the littles can be inspired.


digital collage

If you have access to basic computer software, you can easily create this stunning look. Simply take photos of or scan each art piece, then crop and scale the images and arrange them in a grid pattern. Hang photos of the little artists nearby for an added personalized touch.


mini masterpieces

Another miniaturization of artwork, this display is created by scaling and printing the images and gluing them to bits of foam board. The individual mini art pieces are then arranged in a single frame.


binders

Displaying of artwork doesn’t always need to happen on the walls or shelves of your home. A binder filled with projects may be the perfect low-tech option to keep things clean and organized. This is such an easy technique that you might be tempted to save every last artistic scrap. Try to be selective or your child may end up with a storage room full of filled binders when they are ready to move out!


photo books

Photo books are very popular and may be just the thing you are looking for to display (and keep) your child’s artwork. Add photos of your child and short write ups about their projects to create a wonderful keepsake. Popular photo book companies include Snapfish and Shutterfly.


magnets

Is your fridge the place where most of the artwork migrates? Reclaim space by resizing each masterpiece digitally and creating fun, kid-friendly magnets! The kids will love rearranging their art pieces and making their own small exhibits.


blocks

Custom blocks are another fun option to transform artwork into useful play things. Imagine the colorful castles and roads the kids could build!


puzzles

Artwork can also easily be turned into puzzles! Websites such as Collage.com and PuzzleYou.com allow you to upload scanned images and create these custom, fun keepsakes.


bring it to life

If you really want to up the wow factor there are various artists, such as Custom Plush Art , who will bring your child’s artwork to life with a hand made stuffie! Just look at the details!


Each of these 18 ideas for displaying kid’s artwork is so creative and fun! I hope you will give some of them a try.

If you want to save this information for later, remember to pin!


10 THINGS TO CONSIDER WHEN HIRING A CONTRACTOR

Nobody loves your house like you do. Nobody. Even if that house is still lines on a page – it will never bear the same emotional connection to anyone other than you and those who will reside under it’s roof.

Whether you are looking for someone to build your dream house or need an extra hand with a tricky remodel project, there are 10 things you need to know before hiring someone to work on your house.


1. IT’S OKAY TO ASK FOR HELP

It might be tough for you to hand over the reigns. Maybe you have tackled a variety of projects in the past all on your own and have come out successful. You have pride in your work, no doubt. But it is also okay to realize that maybe you can’t do everything on your own.

Whether it is a time constraint issue or just the fact that you do not have the skills to complete the task at hand, don’t feel ashamed. There are people who are specialized in this work, who are just waiting for your phone call.


2. DETERMINE IF YOU NEED A CONTRACTOR


Do you need a full blown general contractor, or someone who specializes in one specific area. Are you looking for a ‘jack of all trades’ handyman or a license professional? The size of the project will likely be a deciding factor in this decision.

If a small area of your existing home needs new flooring, for example, hiring a handyman may be perfectly fine. The large and complicated projects – and whole house builds – should be left to the seasoned contractors.


3. ASK TRUSTED FRIENDS FOR RECOMMENDATIONS


Who better to get referrals from than the people you know and trust? This is simple, and free word of mouth marketing. It is why contractors are looking to do their best work. They know that their reputation will precede them.

You may also get good results from others living in your same community – by posting on an online message board. You might be surprised to learn that the neighbor next door had the same type of work done on their home recently. If you approach the subject carefully, you may be able to find out what they paid their contractor for their similar project, something that may come in handy when considering the bids you are given.

4. PREPARE A LIST OF QUESTIONS

Call a minimum of two different contractors. Ask them the same questions, and write down their responses. Their answers may give you peace or give you pause. Some of the more common questions to ask include:

How long have you been in business? Obviously, a contractor who has been in the business locally for many years will have the experience and references to back up their work. That doesn’t mean you need to count out the new guy though. They may be hungry to build their business and put forth their best effort.

How many projects like mine have you completed in the last year? It won’t hurt to also ask to see examples of their work.

Do you have a license? The requirement varies from state to state, and also between trades. Check this site for details on state specific licensing requirements.

Can I see your certificate of insurance? Contractors should have both liability insurance and workers’ compensation for the specific job they are doing. Seeing the physical certificates is important.

Who are your main suppliers? Contractors will generally work with supply companies time and time again. Consider them additional references. Go ahead and call the suppliers (tile stores, lumberyards, home improvement stores) and find out if the contractor does reliable work or if they have left a path of unhappy customers. If a contractor is unwilling to offer suppliers names, you can consider he or she has something to hide.

What is the size of your crew? How many people will be working on my project? It is unlikely that the contractor themselves will be doing much, if any of the work on your project. They generally will have a crew, whether that is 2 or 20+ employees. Ask to meet with the foreman who would potentially be heading your project – preferably visiting with him or her on a current job site. You will be working closely with this person, and it is important to determine early in the game if your personalities mesh. Visiting on the job will provide an added bonus of allowing you to witness if their work is running smoothly.

Do you bid estimates or offer fixed prices? If possible, ask the contractor to provide you with a breakdown of how much each portion of the project will cost, including the breakdown of how much will be applied toward materials and labor expenses.

Will you be pulling the permits and scheduling inspections? The answer to this question should be yes. Not only should the contractor be aware of which pieces of the project will require permits and inspections and how to get them, he should also be willing to do the leg work.

What is your timeline for completing my project? Determine when they would be able to start the job. If they are booked up and you have a project that is time sensitive, you may need to move on. Ask the contractor to estimate how long the job may take, and also what factors may delay progress (weather? other jobs they are working on, etc).

What is your typical working day schedule? Determining the core hours your contractor and his crew plan to operate will help you know what to expect. Do they start early in the morning? When are the tools packed up for the night? Also ask what type of noise level can be expected and if they want you to be present at any point during the day.

How will you care for my home during your time there? Find out what the protocol is for storing supplies and tools for projects that span multiple days and learn if you can expect a daily site clean-up. Also be sure to ask what measures will be taken to protect the portion of your home that is not included in the project (if a remodel). For example – will they be sealing off the work zone?

The communication between contractor and homeowner is an important one – and it shouldn’t be a one sided conversation. Before the project is handed to them a good contractor should have some questions for you as well!


5. DETERMINE A PAYMENT PLAN

The Better Business Bureau advises against paying in full upfront for a job that has yet to be completed – but you may have to make an early payment for supplies. From there you will need to discuss how much will need to be paid at what point during the project. Your chosen contractor should be able to give you a reasonable payment schedule.


6. OBTAIN A WRITTEN CONTRACT

Make sure that all the bases are covered and written down. Even if your state does not require a written contract, ask for one. Before signing, make sure it includes all of the following information:

The contractor’s name, address, phone and license number (if required)

Details on the estimated start and completion date

Payment schedule

The contractor’s agreement to obtain necessary permits

Information about how change orders will be handled

A list of materials that will be used – the more detailed the better. Determine who is responsible for choosing the products that will be purchased at a later date, and who is responsible for paying for them (If it is in the budget, know what ‘allowance’ will be given to each item)

A list of what the contractor is or is not responsible for


7. KEEP RECORDS OF COMMUNICATION

Change orders are quite common during construction. They can be as small as moving the location of a light switch or as large as eliminating an entire portion of the project. Whenever a homeowner and contractor or builder agree on a change, it needs to be documented. Keep notes of these changes in a file, including the date they were made, who discussed the changes with you, and if the monetary impact was discussed.


8. BE PRESENT

Very rare is the situation where the homeowner shakes hands with their contractor and walks away until the construction is finished. It is understandable that you will want to know what is going on with the project, but it is important to note that a construction zone is a dangerous place to be.

You should discuss with your contractor early in the process how often you plan to drop in to check on things. It is always best that when walking on the construction site you do so with the job foreman – who can give you a tour of what has been completed and point out what is to come. For job site safety tips, check out this post from Construction Dive – which highlights 5 ways to keep the homeowner safe when they visit the job site.


9. FINISH THE JOB WITH A CHECKLIST

Before that final payment is made, check to make sure these things have been done and/or collected:

The work has been completed to the specifications outlined in the contract. As the homeowner, you should inspect the final product to be sure it meets your satisfaction.

Written warranties on products and services, including who will honor them and the expiration date of each

Written proof that all subcontractors and suppliers have been paid in full

The job site has been cleaned of debris and extra construction material


10. BEWARE OF SCAMS

If you have done your research and walked through steps one through nine, chances are number 10 won’t be a problem; But be aware that there are contractor scams out there. You should be wary of any contractor who:

Knocks on your door asking for work and offering you money for the referrals you make

Pressures you to make a decision more quickly than you are ready

Only accepts cash or asks you to pay upfront for the job

Asks you to obtain the building permits

Offers a ‘lifetime warranty’ or long term guarantee

Doesn’t list a telephone number in the local business directory


I hope that this list of 10 things to consider when hiring a contractor is helpful as you prepare for your next house project.


SIMPLE NO SEW TEXTURED PILLOW TUTORIAL

This no sew textured pillow is extremely simple to make and looks great! If you can braid and tie a knot, you can make it. I’ll show you how!


I mentioned this textured pillow in a recent post about our home’s Christmas decorations. The pillow went perfectly with the rest of the festive green and red decorations. I love it so much that it is still gracing our couch this winter.

These cold months are the perfect time to experiment with cozy, chunky textures for the home. I’m excited to share how you can add some to your home easily and affordably, with this do it yourself project!

Though the finished product may appear complicated, I guarantee it isn’t! There is NO sewing NO knitting and NO complicated movements involved. Basically, if you can braid and tie knots, you can do this!


simple no sew pillow


SUPPLIES YOU WILL NEED

Fleece Fabric: 1 1/2 yards of fleece in any solid color. I used a 60″ wide variety, but they come in varying yard widths. Any width over 60 inches will work for this tutorial. My overall fabric size was 54 inches long x 60 inches wide. Fleece is perfect for this project because it does not fray when cut.

Pillow Form: This tutorial uses a 13″ pillow form (13 inches wide x 13 inches tall)

Scissors: Make sure they are sharp!

Ruler: Measure twice and cut once. I share a simple technique for cutting the fabric that will save time.

(2) Rubber Bands: Or some other temporary tying device – I used hair ties!

A clear, flat area, such as a table or the floor will make the initial steps of this project easier. Let’s get started!


STEP 1 : LAY OUT THE FABRIC

I recommend that you lay the fabric out so that the longest width is laying horizontally in front of you. In my case, the fabric was set out so that there were 60 inches from left to right when I was looking at the table. Fold the left side of the fabric over 8 inches.

textured pillow tutorial


STEP 2: CUT THE FABRIC INTO STRIPS

Here is where I introduce my handy little tip for cutting fleece fabric. Instead of marking on the fabric itself, I like to fold the fabric over  – then cut on the ‘looped’ side. First we will cut the loop of the 8″ measured fabric.

simple pillow diy project

While the 8 inch strip is still laying on the large piece of fabric, use it as a guide to cut another 8 inch strip. Continue this process of laying an 8 inch strip above the larger piece of fabric until you have used up the rest of the fabric. For the 60 inch long variety of fleece, that will yield you (7) 8 inch strips + an extra 4 inch strip.

These 8 inch strips will further be folded in half and cut on the ‘loop’. Each 8 inch strip will give you (2) 4 inch strips – by folding and cutting using the same technique.

no sew textured pillow project

And each 4 inch strip will give you (2) 2 inch strips.

textured pillow tutorial for beginners

All told, you will be left with (30) 2 inch strips – which is what you will be using for the next step. If there is a little wobble in the straight line cuts, that is no problem at all!


STEP 3: BRAID THE STRIPS

Lay (3) of the 2 inch strips on top of one another. Tie them together with a large knot on top.

textured pillow diy project for beginners

simple textured pillow

You will be creating 7 braids in total, using (21) of the 2 inch strips.

textured pillow tutorial project

They will be flat/ large braids. One tip that I found to allow them to lay flat is to make sure the top fabric strip becomes the center of the braid.

simple diy pillow project

Braid each section. I created a little video of a few portions of this project – linked at the end of this post – if you need a refresher on braiding.

braided textured pillow

textured knot pillow

pillow diy project

Tie each braid at the end with a knot. It is okay if the end portions of the braid aren’t perfectly flat – as these knots will be removed later in the process. Set the braids side by side so that the knots are at the top and bottom when laid in front of you on the flat surface.

simple diy tutorial

At this point in the process you might want to just double check that your pillow form fits on top of the braids. If you decided to use a pillow form size other than 13″ x 13″ you will need more or less braids, accordingly.

simple textured pillow project

Just make sure there is a little bit of the braid showing on either side of the pillow form, as the following step will tighten things up a bit.


STEP 4: COMBINE THE BRAIDS

I’m going to prep you now by saying that this next step is probably the most tricky. However, once you get the hang of it you will just repeat the process over and over. Pay careful attention to the next photos, and watch the video if you need a bit of extra guidance.

diy pillow instructions

Set two braids side by side and match up the second folds together. I didn’t start at the very top because the knots tend to get in the way a bit. It will be easier to get the hang of this technique when you are a little lower down the braid.

textured pillow diy instructions

There should be (9) remaining strips of 2 inch wide fabric remaining. These strips will be used to weave together the braids, giving the pillow its signature ‘knot’ look. Lace the fabric under the loops of the folds you are holding.

textured pillow step by step guide

Tie the weave fabric in a knot, allowing at least 3 to 4 inches on the right side of the knot. The remaining length of the fabric strip will be used to create the ‘knots’ through the rest of the braids.

simple no sew pillow instructions

Gather the next lined up ‘fold’ pieces, and repeat the process – only this time instead of applying a knot, wrap the fabric strip over the folds. (this is easily seen in the video)

textured pillow progress

textured pillow diy project

Continue this process until all seven braids are connected. Then move to the next row down and repeat the process. In all, you will use 9 strips of fabric to do the weaving.

Your finished product will look something like this.

simple diy textured pillow

At this point you should flip the braided/woven fabric piece over so that the best looking side is facing out. This may vary from person to person – depending on your preference – just make sure that whichever side you want to be seen for your finished project is laying face DOWN. Then place the pillow form on top – on one end.

textured diy project

Fold the rest of the woven braids over the top of the pillow form, so that the knots are lined up on top of one another – and you are ready for the final step!

no sew fleece textured pillow


STEP 5: FINISH THE TEXTURED PILLOW

Get ready for more tying! Start with the non-knotted fabric strips. Match the top and bottom strips and tie them into knots.

fleece tie pillow diy

To finish the sides, simply tuck the remaining fabric in – or, if you prefer, cut the ends of the strips a bit and leave them exposed for a fringed look.

simple diy fleece pillow

At this stage, it is safe to remove the knots from the bottom of the braids. Once the knots have been untied, lay the strips flat. Cut the extra length of the fabric from the strips so that there are between 6 and 9 inches of fabric loose below the faux ‘knots’ that remain.

textured fleece pillow

You are left with a lot of strips hanging down. Feel free to get creative with how you finish the bottom of the pillow. I initially decided to tie the strips together and leave a bit of a fringe hanging on the bottom; But eventually I decided to give the pillow a bit of a more finished look, and developed the following technique.

textured fleece pillow instructions

Flip the top ‘knotted’ strips up, gather them and tie temporarily. Turn the pillow over and repeat these steps. This will leave exposed strips in the center.

diy fleece pillow

Flip your pillow so that the skinny edge is up and oriented up and down in front of you. Working top to bottom, match up the fabric strips and tie/ loop them together. The extra fabric should be tucked in, the same way you tucked in the sides.

simple textured pillow project

The finished center bottom of the pillow will look something like this. Don’t worry too much about perfection, as this will all be covered soon.

simple fleece pillow

Lay the pillow flat again and untie the bundled portions now. There should be (7) sets of two on the top, and (7) on the bottom. Find the center sets, and position the strips as shown here.

textured pillow diy project

Tie the overlapping pieces together, then once again tuck the remaining fabric into the pillow.

simple textured pillow

You will continue this process working from the middle to the side edges. With the remaining portions, plan to make ‘loops’ instead of knots – as you did in the weaving portion of this project – and continue to tuck in the remaining fabric.

As promised, here is a link to the video showing little clips of the process – including the technique I used to finish the bottom.

Now you have a gorgeous textured pillow ready to cozy up to! It is sure to add style to any space in your home.

diy pillow tutorial

diy cozy textured pillow

I hope you will give this fun project a try! If you do, I would love for you to share with me your finished product! Don’t forget to save the pin below for reference!  Happy Crafting!

simple textured pillow tutorial


COLONIAL HOME STYLE ELEMENTS

Learn about the main elements of the Colonial home style in this article. The history of the Colonial Home is important to the fabric of America.


Colonial Home exterior

image source

Welcome to another installment in the ELEMENTS OF HOME series. Each month I showcase a different residential home style here on the blog.

It is my hope that this information teaches you a little something about each style. In addition, I believe that these guides can be useful if you are designing or searching for a new home.

Today I overview the Colonial home style. I include the history of the style and what makes it unique.


HISTORY OF THE COLONIAL HOME STYLE

The Colonial home style is traced back to England, where most of the U.S colonists emigrated from. A large portion of London burned in the year 1666. After the disaster, several architects influenced the city’s reconstruction.

British architects Christopher Wren, James Gibbs and Robert Adam were at the forefront. Their combined architecture was based partly on Roman and Greek ruins. Therefore, influences such as geometric proportions and large columns are seen in Colonial home design.


Colonial Home Style

image source

Most of the original Colonial homes built in the early years have been remodeled. Others are used as historic examples, as museums for example.

It is far more likely that the Colonial homes you see today are Colonial Revival. In other words, they were made to resemble their ancestral counterparts.

Between the late 1800’s and 1950, there was an increased interest in the architecture of early colonists. Because of this, many Colonial Revival homes were built – using more modern materials and amenities.

In this article, I discuss the elements of both the original Colonial homes and their more newly constructed counterparts.

White Colonial Home with black door

image source

LOCATION OF COLONIAL HOMES

There are examples of the Colonial style dotted throughout the country.  Slight variations were developed to withstand environmental elements. These variations were each given their own names.

Most Colonial homes are concentrated in two main regions, the Northeast and the South.  For the purposes of this installment, I focus on the New England Colonial style found in the Northeast region.

Historic Colonial Home

image source


SIZE OF A COLONIAL HOME

The original New England Colonial homes were built primarily during the years 1630 to 1700. They were modest in size and began as one story structures.

As more family members immigrated to the area, a second story was typically added. The two rooms on the main level (kitchen and living space) were then complemented by two upstairs bedrooms. A central stairway and large fireplace divide the rooms on each level.

One story Colonial home

image source

Although the size of the Colonial home increased as construction techniques improved, they continued to retain a compact rectangular form.

Colonial Home floor plans

image source

EXTERIOR TRADEMARKS OF A COLONIAL HOME

TWO STORY DESIGN: Typically, the living spaces are located on the main level and the second level is reserved for bedrooms.

Colonial homes feature steeply pitched roofs. The pitch is essential for shedding heavy snowfall. Dormers are  included in the more contemporary Colonial Revival homes.

Colonial Home with dormers

image source

SYMMETRY: The facades of Colonial homes are almost exclusively symmetrical in nature. For example, if you were to draw a line down the center of the house, the left side would be a mirror image of the right side.

Typically the door of a Colonial Home is located in the center. Two windows are evenly placed on either side of the door on the main level.

The second level generally features five windows. Each window is positioned above it’s main floor counterpart. A central window is immediately above the door. In addition, the fireplace is also commonly found in the center, dividing line, of the house.

Colonial Home with simple front door

image source


WOOD CLAPBOARD SIDING: Wattle and daub cladding was the common practice in England at the time. The American colonists made use of readily available local timber. This meant that their homes were typically clad in white pine instead.

The clapboards offer the functional aspect of shedding rainwater.

Colonial Home front porch

image source


CENTRAL ENTRY DOOR: Colonial homes almost always feature a central entrance point.

The door is generally flanked by a window on either side and/or a transom window above. The original Colonial style homes did not include a porch or portico. In contrast, both were commonly added for Colonial Revival homes.

Colonial Home front door

image source


INTERIOR SPACES OF A COLONIAL HOME

The interiors of a traditional Colonial home had small windows and low ceiling heights. Because of this, most of the interiors were rather dark.

In contrast, Colonial Revival homes many times feature bay windows or a larger window groups to allow more natural light.

Colonial Home living room interior

image source


Colonial homes are often filled with simple furnishings in muted earthy colors. The Windsor chair is a common symbol of this home style. They can be found in more modernly renovated homes as well.

Colonial home dining room with fireplace

image source

COLOR SCHEMES FOR COLONIAL HOMES

Paint colors essential to early Americans were mostly those derived from iron oxide. Colors such as Yellow Ochre, Red Ochre, Raw Sienna, Black, Burnt Umber, and Terre Verde were common.

These earthy tones were somewhat bold, though faded rather quickly.

Colonial Home paint colors

image source


Colonial home entry foyer

image source


Colonial Revival exteriors are very commonly clothed in white. This crisp look is accented by contrasting black on many occasions.

Simple white colonial home style

image source


COMMON FEATURES OF A COLONIAL HOME

Of course, no two houses are exactly alike.  But there are design elements that are seen again and again in Colonial homes, such as these statement features:


LARGE FIREPLACES & CHIMNEYS: The most efficient way to heat the homes during the cold Northeastern winters was with a large, central fireplace.

In addition, fireplaces were also used for cooking purposes. These fireplaces were very important in the early days and remain useful and fashionable in Colonial homes of a later era.

Colonial home fireplace

image source


Colonial home exterior

image source


SMALL PANED GLASS WINDOWS: Glass was expensive and difficult to find. Because of this, and the primitive glass-working techniques, the glass was set in smaller panes.

As a result, windows were later flanked with operable shutters, which would be closed when bad weather arose.

Newly constructed Colonials today will many times include stationary shutters, which serve an exclusive decorative purpose.

Colonial home divided light windows

image source


INTERIOR DECOR FOR COLONIAL HOMES

The early colonists believed in a simple lifestyle. Because of this, the pieces they did include inside their homes had a purpose for everyday living. They added little to nor adorning decorations to their interiors.

Colonial home interior

image source


Traditional colonial home dining room

image source


Traditional furnishings work well in Colonial Revival homes, as do items that are simple in nature. Interior wainscot paneling is used as a simple decorating technique, for example.

Colonial style chair

image source


FAMOUS COLONIAL HOMES

red Colonial home

The Home of Rebecca Nurse | 1678 | Salem Witch-trial accused


Colonial Home with central fireplace

Orchard House | 1690 | Home of ‘Little Women’ author Louisa May Alcott


Original Colonial home

Jethro Coffin House | 1686 | Oldest surviving house on Nantucket


INSPIRING COLONIAL HOMES FROM AROUND THE WEB

These classic homes showcase the Colonial home style well. Take a closer look!

Colonial Home Interiors

Left to Right: 12 | 3

I hope you have enjoyed learning a bit more about the Colonial home style. If you are curious which residential style will be featured next month, stay tuned!

And be sure to check out the previously showcased styles here.


PIN THIS FOR LATER

Colonial Home Style

9 CREATIVE CLOSET ALTERNATIVES

Is your home lacking closet space? Find ways to store your belongings practically with the creative closet alternatives outlined in this post.

basket storage. creative closet alternatives for your home

It is the time of year when most people are feeling the urge to purge. The cold weather has driven us indoors and we find ourselves surrounded by all of our belongings. It doesn’t take long for it to feel like the walls are closing in with too much.

Too many toys, too many books, too many pairs of shoes. In addition to the ‘stuff’ we had – we just brought more into our homes in the form of Christmas gifts or extra decorations for the season. It can be overwhelming.

curbing clutter with closet alternatives

My family is no exception. Although neither my husband or myself tend to be collectors of things – the accumulation just happens over time. The amount of clutter that naturally enters our lives is one of the main reasons our family is on a journey toward minimalism. The New Year is the perfect time to get a clean slate, to look at things from a new perspective.

I strive to keep only items that we use on a regular basis and/or truly cherish. And I’ve noticed that I am better at accomplishing this goal if I have FEWER closets. In fact, when we moved into our rental home one of the first things we tackled was the removal of most of the closet doors. One of the closets even became a bedroom for our oldest son!

I can almost hear you asking the question: ‘If you don’t have closets, where do you put all of your things?’  I’m going to answer that today with a list of 9 creative closet alternatives for your home.

Creative closet alternatives for your home. Find ways to store your things, even if you don't have a lot of closet space!


HANGING RODS

I’m going to be honest in saying that the storage of clothes is something which I personally prefer to happen behind closed doors. I have designed for each of the bedrooms in Arrow Hill Cottage to have a small closet for clothes, and the mudroom to have a small closet as well, to store seasonal items such as winter coats and boots.

If you don’t mind having your clothes on display, there are plenty of creative alternative ways to hang them.

hanging rod closet to store clothes outside of a closet. closet alternatives for your home

simple hanging rod with shelf above


two ladders used as a way to hang clothing

ladder wardrobe


branch used as clothing rod as a creative closet alternative

branch wardrobe


BASKETS

It’s no secret that I love baskets. Of all the closet alternatives in this post, this is possibly the one I utilize the most in my own home. I showed you some of my favorite baskets in this post about organization containers. They are so versatile and come in a wide variety of sizes, styles and colors. You can utilize freestanding baskets to store items such as blankets and towels, or use a series of baskets to organize smaller items on shelves.

basket storage as a closet alternative

blanket storage


storage in the kitchen. On counter basket to hold utensils

kitchen storage


shelf in playroom with baskets full of toys. Storage alternatives

basket storage for toys


OPEN SHELVES

Whether a freestanding shelf or a wall hung shelving unit, there’s no doubt that shelves are considered a powerhouse of home organization. Basically, anything that can be set flat can be stored on a shelf. One of my favorite spaces to see open shelving in is a kitchen. The display of beautiful (and useful) dishes and other items adds much interest to a room that would otherwise be full of closed cabinetry.

Kitchen open shelving to store pantry goods

open kitchen shelving


playroom closet alternatives. Storing toys on open shelves with baskets

shelving in a playroom


living room shelving


UNDER BED STORAGE

There may be some items you own that are only used during one season of the year. You may not want to have them stored in a prominent place. Under bed storage is one of the most versatile closet alternatives. The space is perfect for items such as winter gear, holiday decor, and kid clothing that you may be saving as hand-me-downs for a younger sibling. If you build a platform bed, you can create even more customized storage underneath.

massive under bed rolling drawers offering tons of additional storage

elevated bed with storage underneath


small under bed storage closet alternative

re-purposed dresser drawers


storage under the bed

platform bed with basket storage


LOCKERS/CUBBIES

The divided spaces of lockers really help to keep things organized. They are perfect for kids, making it easy for them to remember where to place their backpacks, coats and shoes instead of throwing them in any random spot.

mudroom lockers with shoe cubbies underneath. Entry closet alternative

lockers with shoe storage below


vintage metal lockers


beautiful mudroom cubbies as an alternative to a closet

large open lockers


FURNITURE

This is another of my favorite storage options. A coffee table that blends with the room’s home decor can hide (ahem… store) obnoxiously colored toys when not in use. An ottoman with a storage compartment can house books or extra bedding.

storage in furniture pieces. Creative closet alternatives for your home

coffee table storage


storage side tables

stacked trunk end table


storage trunk side coffee table

DIY storage ottoman


HOOKS + BENCH

Similar to the locker set-up, a simple bench with a series of hooks above can accomplish the hard-working job of keeping everyone’s outdoor gear in line at a minimal cost. The bench may have an interior compartment, or perhaps space below for basket storage.

mudroom bench with hooks

simple built in bench with hooks and shelf above


storage entry bench as an alternative to a closet

bench with baskets below


simple entry storage for shoes

simple DIY entry bench


ARMOIRE

One major downside of closets is that they eat up valuable square footage. The framing itself takes up space, and the door swing creates it’s own series of issues. If you really want to keep items behind closed doors, consider an armoire instead. Made of cabinetry materials, the construction is more slim. They can also be moved – meaning you can experiment with it’s best placement.

kitchen storage armoire as an alternative to a walk in pantry

freestanding pantry


antique cabinet linen storage

bathroom toiletry storage


linen storage in a white vintage cabinet

storage for linens


DRAWERS

Drawers are another way to keep items organized and a bit more hidden. Of course, cabinetry is one option – but it can get expensive to create custom built in pieces. A simple stand-alone dresser can many times do the job just as well. A desk with side drawers may be the perfect solution for smaller items, such as office supplies.

dinner plate storage in the kitchen

dinner plate storage


open shelving storage in the kitchen

coffee bar


small office nook. Drawer storage

desk made from two drawer units


The bonus of utilizing these closet alternatives is that your items are bound to stay more organized and you will be less likely to add extra, unnecessary items into your home!


ALTERNATE USES FOR CLOSET SPACE

Another giant plus? By removing closet doors (or the entire closet itself!) you will free up a ton of floor space! Just think of the possibilities this extra square footage could become!

READING NOOK

Reading nook in an unused closet space

This reading nook is so completely cozy! Can’t you imagine getting lost in a good book here?


SMALL OFFICE SPACE

small office in a converted closet space

The detail of this small office would really make working enjoyable. It provides plenty of storage and looks beautiful at the same time.


NURSERY NOOK

space opened up in a nursery using a closet as a nook for the crib

This bright and colorful nook is just the right size for a crib- freeing up space in the rest of the room.


ARTS & CRAFTS CENTER

craft room nook in an unused closet space

I can imagine a lot of creativity happens here! Click here to see a photo of the closet before!


I hope this post will inspire you to clear out the clutter and possibly reclaim the space that the closet occupies! New Year, new possibilities!


PIN THESE CLOSET ALTERNATIVES

Save these ideas for your home, and get organized for the New Year!

closet alternatives. storage solutions when your home has a lack of closet space, or you want to use your closets for something else!

TRENDING IN HOME DESIGN & DECOR: BOLD PATTERNED TILES

Are you looking to add a statement feature to your home – maybe something a bit more than a fresh coat of paint can provide? The bold pattern tile look is very popular right now, and homeowners have really shown their creativity on where to utilize this medium. Tiles aren’t just for floors anymore!


From straight line geometric to floral patterns, there is sure to be a tile to match just about any home style and design preference. In fact, I incorporated some fun patterned tile into a recent bathroom Makeover Takeover!


WHAT ARE THEY

These tiles feature bold, graphic patterns. Typically, they will have patterns that when positioned next to one another, and sometimes rotated, form an even larger, repeating design.

The origins of this type of tile style can be traced back as far as Medieval times. During that era they were called ‘inlaid tiles’, and later – in Victorian times – Encaustic tiles. Essentially, Encaustic tiles are created by using two to six different colors of clay. The clay is arranged in a pattern before firing. Because the pattern is not simply painted on the surface of the tile, it will continue to be present even as the tile wears.

Today’s patterned tiles are made primarily from cement, but there are less expensive varieties in both ceramic and vinyl.


WHERE/HOW TO USE THEM

There are plenty of unique applications for these stunning tiles.

Bathrooms

Tiles are a wonderful flooring option for bathroom applications because they are resistant to moisture/water. In small rooms, such as bathrooms, these bold tiles generally will not be competing with other design elements.


image source


image source


Laundry Rooms

Who doesn’t need a little excitement and style when tackling the laundry?


image source


image source


Kitchen

Tiles make a wonderful backdrop on kitchen walls or floors. They might also be fun to use on counter-tops, perhaps on a center island.


image source


image source


Entry/Foyer/Mudroom

Set an inviting tone to your entryway and let guests see a sneak peek of the fun and style they can expect to see in the rest of the house.


image source

Patterned tile is wonderful at camouflaging dirt and grime.


image source


Hallway

Hallways get a bad reputation of being boring and lifeless. With the addition of a sea of pattern, this hallway could not be any more interesting!


image source


Stair Landing

Add a bit of pizzazz to those boring stairways. Doesn’t this landing just seem to come to life with the tile work?


image source


Focal Point

Let eyes focus on a featured item in your home, such as a special alcove, the fireplace, or even a piece of furniture!


image source


image source


image source


WHERE TO BUY

A large variety of retailers are now selling these tiles at reasonable prices. Click on the links below for access to some of my favorites!


1 | 2 | 3 | 4 | 5 | 6 | 7 | 8 | 9 | 10 | 11 | 12


Be sure to also click on over to this post for a comprehensive shopping guide!


MY THOUGHTS ON THIS HOME DESIGN TREND

As a lover of simple geometric patterns, this is a trend that I can totally get on board with! My caution to anyone wanting to incorporate these unique tiles is this: use them sparingly. I personally feel that the boldness of the tiles can make a large space covered in them seem too busy, even dizzying.

I also would advise that colors are pulled from the tiles to use in the rest of the space. This will help to provide balance between elements.

Finally, be sure that you choose a color and pattern of tile that you love – they surely aren’t the easiest things to replace!

CHRISTMAS DECORATING INSPIRATION FROM INSTAGRAM

I joined Instagram right around the same time that I started this blog, only a few short months ago. I mainly follow home decor sites there, and have been absolutely wowed by the amount of creativity that is shared!

This has been my first Christmas season as part of the IG community and it is plum full of amazing feeds. With Christmas right around the corner, I wanted to capture some of my favorite photos and share them with all of you.

@laureltracehome

Not one, not two, but three gorgeous Christmas trees! I am loving all of the red and white in this room, and the high windows add a touch of elegance to the space. Did you notice the amazing scroll above the mantle?


@sweetroseandwren

How adorable are these gingerbread decorations? Just SO sweet! I would have never thought to use edible items as decor, but this display is perfectly creative! And although I lack skills in the kitchen, this photo is tempting me to try my hand at a gingerbread creation of my own.


@nest.of.neff

That is one festive bed! I love the simple stripes combined with the chunky metal bed frame. The bedroom is one room that I tend to not put any effort into decorating. I think in the future I might try harder!


@ourweatherednest

I’m dreaming of a white Christmas…. in one of those amazing metal houses! This display is such a simple and perfect depiction of Christmas. Peaceful, calm, and celebrating the Savior’s birth.


@dreamywhitelifestyle

This picture just warms my heart. The room is absolutely filled with natural light (one of my love languages), and though the tree has no ornamentation, the little boy is cuddled in a warm blanket sitting amazed looking in it’s direction. The wonder of Christmas. Magical.


@desertdecor

Bringing the outdoors in, this table setting is rustic and modernly stylish with the buffalo check accents. I imagine a warm bowl of soup in those pretty white bowls.


@ripeonthevine

I am pretty sure I could curl up with a good book and just hang in this corner for an entire day! I love how the standard house plants seem to fit right into this scene. The plaid checkered pot cover helped to tie it all together.


@sweetparishplace

Ending this roundup with another gorgeous tree all decked out in red and white. Doesn’t it look magical next to that grandfather clock?


Isn’t it fun to see how different people decorate their homes for the season? If you missed the post detailing how I decorated our house for Christmas this year, you can find it here. I also invite you to visit these amazing Instagram accounts for even more inspiration by clicking on the links below each photo. Merry Christmas friends!

HOLIDAY HOME TOUR BLOG HOP

Can you believe we have less than two weeks until Christmas? This time of year is always full of beautiful things; And in honor of that, I’ve teamed up with some amazing fellow bloggers. We’re inviting you into our homes to share our Christmas decor and hopefully give some inspiration!  At the end of this post, I’ve linked to everyone’s posts so you can ‘hop’ on over and check out their homes. We hope you have fun!

Want to see how I have decorated our home for Christmas this year? I’m excited to share!

First, a bit of a disclaimer: We are living in a rental home as we prepare to build Arrow Hill Cottage. Though our rental is a pretty good fit for our family, it is difficult for this design oriented lady to accept some of the finishes. Yes, we have painted paneling. Yes, we have popcorn ceilings. No, the furniture isn’t optimally positioned. No, we can not remove walls. Ha Ha!

I worked with what I had. This is our family’s moment in time. Christmas 2017  – in the rental house.

We have five young children. They range in age from four to eleven. Old enough to understand the true meaning of Christmas, and young enough to still be excited about festive decorations and wrapped presents under the tree.

This is our daughter {K}’s first Christmas home (you can read about her adoption journey here). I really wanted her first experience of Christmas to be one of happiness, anticipation, and fun – and full of family togetherness. As such, I was sure to include the kids in the decorating festivities. I chose to keep the bulk of the decorating in the main living space, which you will see today.

I started with an amazing feed/flour sack that I found at a local antique store. Isn’t this just the most perfect fabric for the season? The bright colors and bold, fun patterns on this fabric were just right for what I was trying to achieve. I turned that one feed sack into two amazing throw pillow covers, complete with wooden buttons.

I layered in more texture on the furniture with cozy throw blankets, home made sweater pillows and a sweet DIY fleece knot pillow. Be looking for a tutorial on that coming soon!

I scored some comfy club chairs + ottomans recently for an absolute steal of a price. The bad news is that they will need to be reupholstered with something a bit less boisterous. The good news is that the fabric is red and I was able to blend it into the Christmas decor. Ha!

We don’t have a beautiful fireplace or mantle here. I chose instead to decorate our entertainment center. I covered the electronics, besides our massive TV, with burlap linen. I then put together a super colorful rag garland and draped it in front. For this craft, our boys got in on the action of ripping fabric and pretending they were the Incredible Hulk. Ha!

Perched on top of the cabinet are my Willow Tree figurines. I love the simple sentiment of this Nativity display.

Another simple garland that I created includes DIY pom poms. I had never made them before; but found this well written tutorial that showed me step by step how easy they are to create! The kids joined in the fun of creating these fluffy ‘snowballs’.

Our Christmas tree is the ultimate of hand-me-downs. Though I love the look (and smell) of a freshly cut evergreen, it is special to me that the tree which now sits in our living room is the same that my Christmas presents were placed under as a child. That’s right. This tree is as old as I am! I’d say she has aged pretty well!

The ornament and light positions were decided by the kids. I had thought of maybe moving them around to balance things a bit, but decided to embrace the quirkiness. They are so proud of their masterpiece.

I love taking photos of day to day life – sometimes though, those pictures tend to be stuffed into yet another computer file. Lately, I have been putting forth more of an effort to showcase the pictures I take. In fact, I started a YouTube channel just for that purpose! Our weekly photo vlogs have been so fun to create. At the end of the year, we plan to sit down with a big batch of popcorn and watch them together.

I decided to take one photo from each month and showcase them as part of the Christmas decor. A bit of a yearly time capsule. Each black and white photo is accented by a Popsicle stick frame. The kids helped to paint the sticks a whimsical shade of green and I assembled them.

It is a treat to be able to glance at the tree and be instantly transported back to that moment in time. We really have been through a lot this year! From traveling to China in April, as part of {K}’s adoption trip, to Craig’s knee surgery in August. What a year!

I’m not sure how I did it – but I somehow have managed to finish this year’s Christmas shopping already! I have wrapped the gifts in patterned paper that matches the colors in the rest of the room.

A little red birdie lives on top of the piano – nestled near a small painted wood sign of one of my favorite Bible passages, Psalm 127. I purchased the sign during a friend’s adoption fundraiser. It is a very special piece.

The red and green color scheme continues on the piano top, where a trio of ‘mini trees’ reside. This was another DIY project. The containers were covered in fabric and the trees were made out of a wired garland I had laying around.

Other whimsical items are spread throughout the room. This gallery of vintage frames adorned with fabric, pom poms and a pine cone was a favorite when I first put it up.

There’s that amazing fabric inspiration again. I was sure to use every last scrap. I love it so much!

I threw in a few more vintage finds for good measure.

I hope that you will gain a bit of inspiration from the decor our family is enjoying on these cold wintry days. I invite you now to visit these other amazing blogs to be further inspired!

HOLIDAY HOME TOUR

Bless Mama

Slice of Style

Babb Farm Life


THE MAIN ELEMENTS OF THE MID CENTURY MODERN HOME STYLE

Welcome to another installment in the ELEMENTS OF HOME series. Each month I showcase a different residential style here on the blog. It is my hope that this information will not only teach you a little something about the various styles; but also equip you if are designing or searching for a new house – by allowing you to determine which style(s) suit your lifestyle and preferences the most.

Today I will be over-viewing the Mid-Century Modern home – including the history of the style and what makes it unique.


HISTORY OF THE MID-CENTURY MODERN STYLE

This style received it’s name partly because of the time period in which the homes were being built. Mid-Century. Mid 20th century to be exact. There is a bit of discrepancy on which years are included; But generally speaking, the Mid-Century Modern style comprises houses built from the years 1935 to 1965.

This was a tumultuous time in history. In the mid 1930’s, the threat of the second World War was looming and various architects, including the pioneers of the Bauhaus Movement – Walter Gropius, Marcel Breuer, and later Meis van der Rohe, fled Germany for America. These men were aiming to unite art and industrial design.

At the same time, American designers were highly influenced by the simplicity and integration with nature that was prevalent in Brazilian and Scandinavian architecture.

image source

At the end of the war, as Veterans were returning to America, the need for affordable and quickly constructed houses arouse. These soldiers were looking to settle down and start their families. While architects designed stunning homes in the Mid-Century Modern style, it was real estate developer Joseph Eichler who is credited with bringing it to the masses – through his tract home development.

image source

MAIN ELEMENTS OF THE MID-CENTURY MODERN STYLE

LOCATION

Typically, these homes were constructed in suburban settings. The first Mid-Century Modern homes started to take root on the West Coast. They became popular in California and then on the East coast. Slowly, the style began to spread sporadically throughout the country.

image source

SIZE

During the Baby Boom, Americans were looking for spacious, open homes that they could entertain in. The Mid-Century style lent itself well to the desires of suburban families. Homes were designed to be between 1,500 and 2,500 square feet – only slightly smaller than 2017’s home average square footage (2,687).

image source

EXTERIOR TRADEMARKS

  • VARYING ROOF LINES: Creative roofs were popular at mid-century. Among those utilized most frequently were flat roofs with deep overhangs, saw tooth roofs, and the most beloved ‘butterfly roof’ – which got it’s name from the shape the gables take on as they connect at midpoint and extend upward.

image source

image source

  • ONE LEVEL DESIGN: Generally, Mid-Century Modern homes are one story structures.

image source

  • SPACE FOR AUTOS: This era of design was the first to begin offering shelter for automobiles. Many homes include attached garages or carports.

image source


image source

  • CONNECTION: Connection to nature was of utmost importance to the designers of the Mid-Century Modern style. As such, these homes feature a wonderful collection of indoor/outdoor spaces – such as large covered patios, enclosed courtyards, and entire walls that open up to allow access to the yard.

image source


INTERIOR SPACES

Whereas homes built before this time period were composed of smaller compartmentalized rooms, the Mid-Century modern home employed the ‘open floor plan’ approach. This was accomplished, for the first time, partly because of improved construction techniques. Heavy/solid bearing walls were replaced by posts and beams.

Typically these open spaces had a fireplace focal point.

image source

These homes were also the first to employ bi-level floor plans – including sunken living rooms, for example.

image source

COLOR SCHEME

The colors used in the Mid-Century Modern style are warm and earthy. The tones are derived from the materials used, such as stone grey and rich auburn wood. There is also a generous use of graphic black and white that accompanies this style.

Other popular colors during the period when these homes were constructed include muted jewel tones – turquoise, emerald and mustard yellow, for example.

image source

image source

COMMON FEATURES

Of course, no two houses are exactly alike; But there are design elements that are seen again and again in Mid-Century Modern styled homes – such as these statement features:

  • PRIVATE FRONT FACADES: The entrance to a Mid-Century home is generally understated and private. These homes are typically oriented so that the backyard entertaining areas receive the mid-day sun.

image source

  • CLEAN LINES: One of the primary goals of this design style is honesty of materials – where the sole ornamentation comes from the materials themselves. The creative and streamlined use of stone, block, glass and wood is prevalent.

image source


image source


  • FLOOR TO CEILING PANES OF GLASS: Continuing with the desire to create a connection with the outdoors, many Mid-Century Modern homes employ large panes of glass – offering stunning views and an abundance of daylight.

image source


INTERIOR DECOR

Generally, the Mid-Century Modern decorating style could be considered sparse. The simple lines of the architecture are mirrored in the furniture pieces; and the furniture market during the Mid-Century era had a life all it’s own. The new materials of the day including plastics, resins, composites, laminate and fiberglass opened up an entire new range of possibilities.

image source

The furnishings best suited in these homes are clean and sleek, with minimal ornamentation.

Walls, ceilings and floors also showcase simple materials. The juxtaposition of different, and sometimes contrasting, materials is common.


image source

image source

FAMOUS MID-CENTURY MODERN HOUSES

You may already be familiar with these stunning examples of residential Mid-Century Architecture. They are classic,  and adored by many.

The Philip Johnson Glass House | Architect: Mies van der Rohe | 1949


The Stahl House |Architect: Pierre Koenig | 1960


Neutra VDL Studio + Residence | Architect: Richard Neutra|1932/ rebuilt 1964


INSPIRING MID-CENTURY MODERN STYLE HOMES FROM AROUND THE WEB

These homes showcase the Mid-Century Modern style well. Take a closer look!

Left to Right: 12 | 3

I hope you enjoyed learning a bit more about the Mid-Century Modern style. Curious which residential style will be featured next month? Stay tuned!

And be sure to check out the previously showcased styles here.