SPRING DECORATING IDEAS: DESIGN INSPIRATION FROM INSTAGRAM

The calendar says that Spring has officially begun. The weather, however, is painting an entirely different picture. My area of the country is expected to experience record breaking snowfall this coming weekend – we’re talking FEET of snow. I don’t like that idea. Not even a little bit.

As a way to distract my mind, I took to Instagram to find the signs of Spring via home decor. I just love all the creativity I found, and I have to admit that looking at all the Spring pictures did the trick. Now, if I could just walk into one of these scenes over the next couple of weeks and not have to live the reality – that would be great!

Enjoy the decorating inspiration, friends!


@tracey_hiebert

Bunnies! And vintage suitcases! And chippy paint! So many lovely things in one little corner – and the textures are the icing on the decor’ cake!


@thelesliestyle

Have you ever seen a more ‘springy’ room? I’m pretty sure I haven’t! You guys seriously have to check out Leslie’s IG feed and blog. This house is pure magic – every square inch of it. The transformation of this room in particular was enough to make me a follower!


@grayapplemarket

The trellis pattern of these rustic window frames remind me of garden gates. They are for sale, and I can guarantee that if I lived closer I would be visiting the shop and taking a few of these beauties home with me!


@hollyshobby

Tulips are one of the first signs of Spring, and this decor set up has me dreaming of the new life that the season is sure to bring.


@the_pleaseant_farmhouse

Oh, how I could use a moment on this amazing porch. So in love with all of the greenery. And that swing? Yes please!


@onethousandoaks

Guess what guys? This beautiful print is available for free on One Thousand Oak’s blog. Click HERE to grab one – I’m going to! Thanks for the little reminder, Jaclyn!

5 REASONS THE HOME DESIGN PROCESS SHOULD INCLUDE 3D MODELING

I have written before that I wholeheartedly believe that homes should be designed in both plan (2D) form and in the third dimension. Years ago architects and designers – in order to understand all aspects of space- would make physical 3d models. Physical models involve a considerable amount of time and attention to detail, and any little change to the design can add hours to the process. For that reason, designers would create rough models while working on concepts and save the detailed models for the very end stages of design.


Designers today have the benefit of technology on their side. Specialized software allows us to work in the third dimension through the entire design process. There are many 3D programs available for use, each with their own set of advantages. I personally use Sketchup, which I find to be extremely user friendly and powerful at the same time. One of the major bonuses of this program is that it is available FREE for personal use! In the future, I plan to offer tutorials here on the website – teaching easy steps to get started using Sketchup! In the meantime, I am offering the top five benefits of implementing 3D modeling during the home design process.


1: UNDERSTANDING THE FLOOR PLAN

Many people struggle to make sense of floor plans. Because we naturally don’t see walls cut through, or view furniture from above, a floor plan is difficult for the mind to process. It literally feels like a second language to some. Designers are trained to read these documents – but because their clients are not, frustration can arise when using a floor plan as a point of discussion.

standard floor plan view of Arrow Hill Cottage


By adding the third dimension, we are able to more fully understand how walls relate to one another, and also determine sight lines from one room to the next.  This is not only helpful for the designer, but also for the client that they may be sharing the information with.

three dimensional floor plan


2: ADDITION OF DEPTH + DIMENSION 

Construction documents are very useful for the crew who will ultimately build the house – these people are used to reading and understanding a plan set, and know how to transfer the information into a three dimensional built form. But the average person who sees a two dimensional drawing can not bring their mind to see beyond the flat image.

This is the front of Arrow Hill Cottage, as seen in a flat elevation drawing. From this view, it appears that the cottage is very long, and without depth.


Seeing the same design in three dimensional form gives you additional information – and as you can see, the garage is actually pulled back from the face of the porch by nearly 30′, giving it much less importance and prominence than what the elevation drawing would have you believe.


In this instance, the 3D model combined the information from BOTH the floor plan and the elevation into one image, making it easier to understand.


3: SCALE COMPARISON

Have you ever been in a space and found it to be either uncomfortably large or so small that it was not functional? The scale of a space is an important element that can be overlooked easily when working only in 2D.

Volume can only fully be understood with the addition of the third dimension. When designing in 3D you can easily determine the differences of how a room would look and feel with a flat ceiling versus a ceiling with a vault. In rooms with sloped ceilings, it is considerably easier to understand the amount of headroom available. Consider our boy’s bedroom design. This is a very unique space with a ceiling that slopes from 11 feet in the center, all the way down to the floor. In order to determine where to place the boy’s beds so that they wouldn’t knock their heads on the ceiling in the middle of the night, I turned to 3D modeling.


Once the Sketchup model of their room was complete, I was able to show these images to the boys – and they could literally imagine themselves IN the room. Huge smiles all around! It is really comforting to know that after all the work, they will enjoy the final product.


4: PRECISION IN PROBLEM SOLVING

There are many little details that can be missed when working only with two dimensional drawings. I find that adding the third dimension is especially helpful when I am fine tuning the design. For example, When I was looking at the cubbies in our future mudroom, I wasn’t sure which height would work best for the individual shelves and hooks. I measured items in our existing home to get a general idea of what would be most functional, but when I put those dimensions into the 3D model, I realized that the heights of the shelves competed with the height of the nearby trim, creating an awkward look.

With a bit of tweaking to the dimensions, the design is now visually appealing.


5: VISUALIZING THE FINISH PRODUCT SELECTIONS

Many of today’s 3D modeling programs, including Sketchup, have the capability to render in a semi-realistic way. Designers can add material selections, such as wood floors or a subway tile back splash. They also offer the ability to add furnishings and accessories.  These extra capabilities allow designers to create views of what the final product may look like, before the builder ever lifts a hammer.

When designing the living room of the cottage, I could tell that the space would benefit from the use of a sectional sofa. I was able to use Sketchup to find an amazing couch that fit perfectly. When the time comes to furnish the room, I can simply purchase the exact piece that I used in the design, or find an item with similar dimensions. Retailers are beginning to see this as a benefit, and have begun offering their furniture in three dimensional form, for designers to use in their mock ups – with the hope that their clients will purchase the exact pieces once they visualize how they could look in the room.


If these five reasons have convinced you that adding 3D modeling to your home design process is beneficial, I hope you will join me in the future as I share tutorials on how YOU can get started.  And, as always, if you need help in visualizing the space you can ask for a Makeover Takeover!


READER SHOWCASE: HEATHER + JEREMY’S HOME

I am so excited about today’s Reader Showcase feature! This series is where I have the opportunity to share the homes and home projects that my readers have tackled. I am constantly amazed at the talent and varied styles that each person has to offer!

I follow Heather on Instagram and am so inspired by her lovely home and how polished, yet casual, her spaces seem to look. She really has a lovely aesthetic.


Heather, please tell me a little bit about your home:

We live in a traditional builder grade brick home that is about 20 years old. We purchased it a year and a half ago and have been slowly tackling projects ever since! The house is sited in a small, historic town in Louisiana – nestled in a subdivision. The half acre parcel of land is beautifully landscaped, with a peaceful creek nearby, plenty of trees, and wildlife.


What is your personal design style?

My personal design style is a combination of modern and traditional farmhouse. I love to mix the old with new. Joanna Gaines has definitely been a primary source of inspiration. In fact, my husband often calls me ‘Little JoJo’. We live on a pretty tight budget, so the majority of our home decor is thrift-ed or DIYed. My husband and I love going to flea markets, thrift stores, trade shows, and antique stores to look for vintage pieces to add to our home. I think what I love most about vintage decor is that it is ‘one of a kind’. Each piece is unique and has so much character. There may be another item very similar, but it won’t have the same nicks, cracks, patina and history behind it.


Explain your favorite remodel projects. What was done to each space?


LIVING ROOM

My favorite remodel project has been our living room transformation. My husband and I DIYed everything in this space. When we purchased the home, all of the details were very traditional and dated. The fireplace had black marble with a fluted mantel. There were built-ins on both sides of the fireplace. The walls were painted a tan color, and a ceiling fan hung above the sofa.

The first step in our living room renovation was to tear out the built-ins. Though the storage was good, the materials they were constructed of were very cheap. My original plan was to tear out the built-ins and replace them with furniture pieces; However, once we pulled them out, we realized there were no floors underneath! The oak floors in the room have a honey color stain. Having the floors completely refinished or replaced was not in the budget. I had to come up with something that would cover the areas without flooring, and so we decided to do a built in bench seat on one side of the fireplace and I found a perfectly sized piece of furniture for the other side.

We then installed faux shiplap on the fireplace wall. This was a good option for this wall because it covered all of the sheetrock blemishes where the built-ins were.


When we set to work on the fireplace itself, we started by replacing the black marble tiles. I really wanted to add a hearth, and since we had never laid brick before, we felt it was best to contract it out. We learned an important lesson during that process – always get more than one quote! Of the two quotes to lay the hearth, one was 4 times more expensive than the other!


The mantel was very decorative with lots of moldings and fluted columns down the side. Again, this was not my style.

fireplace surround before


I wanted a simple, rustic look and found an old reclaimed pine board to use as a mantle instead. To finish off the living room space, we replaced the ceiling fan with the Edison Bulb chandelier from World Market. We also added drop cloths as window treatments to soften up the room – another in-expensive and easy DIY project!

fireplace after

FOYER

The foyer was actually the very first project we ever tackled in our house. I think it was a great starter project for us, since it was a small space. It was still a design challenge though, as the room was originally painted with purple and metallic gold stripes!

foyer before: a bold choice!


As you can imagine, it would have been incredibly difficult to paint over the bold pattern, and so we decided to cover the walls with something instead. After much research, we ultimately decided to use a faux shiplap in the space. It looks just like the real thing, but it is actually panel boards that are cut with lines every 6 inches.

We painted both the walls and trim in White Dove by Benjamin Moore – which really gave it a fresh look, and even increased it’s perceived size! The space turned out better than we ever expected and completing it gave us the motivation to tackle other, larger home improvement projects.


What would you like readers to know about designing and styling a home? Do you have any tips to share?

Most importantly, have fun! Be creative and play around with different styles without being afraid to break the rules to create a style all your own!

Another tip I have is that if you don’t have a ton of money to style your home, start with ‘shopping your space’. You don’t always need new decor – sometimes you just need new combinations in different rooms. Think of ways that you can re-purpose or up-cycle what you already have. If you use your imagination and think outside of the box, you can create some pretty amazing things. I’ve picked up many items from the Dollar Tree that I have transformed into beautiful decor just by getting a little creative.


Do you have any remodeling / decorating plans for the future?

We are slowly going room by room making this house into our dream home. So far we’ve completed the foyer, living room, and our oldest son’s bedroom. It’s been a slow process, but my husband and I both enjoy doing it. It gives you such a sense of satisfaction and accomplishment when you are able to complete a project.

The room that I am most looking forward to renovating is my kitchen! While it’s not horrible, it just isn’t the kitchen of my dreams. I can’t wait to add a farmhouse sink, subway tile, quartz counter-tops and all of the other farmhouse elements.

current kitchen: I hope they keep the paver floors!!! 

Other projects that we hope to complete soon include painting the dark red exterior brick of our house to white. I would also love to makeover our master bedroom, and freshen up the laundry room by stenciling the floor tiles, among other things. If only there were more hours in a day!


Thank you so much Heather and Jeremy for sharing your wonderful home with us! I encourage all of my readers to subscribe to Heather’s Instagram account HERE so that you can follow along while she and Jeremy continue to remodel and make their house into a home that reflects their personality and style. Heather also has an amazing blog, Beauty for Ashes, where you can find plenty of home design inspiration and instruction. Go check it out! 


Now it’s your turn! Have you been adding personal touches on your home? Maybe the entire house isn’t finished, but you are particularly proud of one room – I would love to see, and share with my readers!

If you are a blog subscriber, you are eligible! Simply email photos and a brief description to angela@arrowhillcottage.com for your chance to be featured!

A MINI GUIDE TO INTERIOR DOORS

Each home interior has it’s own personality. When it comes to decorating inside our homes – paint colors, furniture, and throw pillows are usually the first things that come to mind. During a more extensive decor remodel – the floors, walls and ceilings will typically get special attention. But many times an important element is overlooked.

Interior doors.

Choosing the interior doors for your home can be a challenge, but finding a type and style that flows with the rest of your interior can add an extra detail that will really make your home feel pulled together and unified. The great news is that there are many interior door choices available (both for purchase and as DIY endeavors) – and finding the right match for your home should not only be possible, but fun.

I have put together a little guide, complete with inspiring images, to help take the guess work out of your decision making.


DOOR OPERATION TYPES

Choose which will work best for the function and space you are trying to serve. Each has it’s own benefits. Listed below are the most popular types available in today’s market.


HINGED/CONVENTIONAL SWING

image source

This door type is the most common used for home interiors. They can be hinged on either the right or left side of the frame, and swing into or out of the room – depending on how you want them to function. These doors are readily available in a large variety of sizes. The most common residential size is a standard 2′-8″ wide by 6′-8″ high.


BI-FOLD

image source

Bi-fold doors are also called folding doors, and are most commonly used for closets in homes. The door, when closed, fills the entire cased opening – but, as the name would suggest, fold in half (outward) when opened. The benefit of the bi-fold door is that you do not need as much space in front of the door to be clear when opening.


FRENCH

image source

A pair of doors that swing either into our out of a room, hinged on the outer edge of the opening. When both doors are open a large opening is created. This door type is very popular to use between rooms – for privacy when needed, or the feeling of an open floor plan when privacy is not a concern. Generally french doors utilize some sort of glass panel configuration.


POCKET

image source

Pocket doors are considered the ultimate space savers. The door travels on rollers that are suspended in an overhead track. When fully open, the door is completely hidden in a cavity created in the adjacent wall. This type of door is becoming more common as the function has improved over the years. Pocket doors have the ability to lock, making them useful in a variety of applications – from closets to bathrooms.


BYPASS

image source

Bypass doors also come in pairs, or in a three door configuration (as shown). They are set on a track that fills the opening, with one door mounted slightly in front of the other – so that when they open they will slide past one another. These doors are almost exclusively used for closet applications. The benefit of this door type is that it does not take up extra floor space with a swing; But, you will only have access to those things behind the door that is open – making them a bit inconvenient.


SLIDING BARN

image source

This type of door has been made very popular recently by the tv show ‘Fixer Upper’. Barn doors hang from a track outside the room/closet that will be accessed. Because of this, the doors themselves need to be wider than the opening – and the track needs to be long enough so that the door can slide completely out of the way. Essentially, the track needs to be at least double the width of the opening you want to access. Be sure that the hardware used to mount and operate the door is high quality – so that you don’t end up with clunky (or squeaky) operation.


INTERIOR DOOR STYLES

You can find the above door operation types in a variety of styles to match the preferences for your home design. Listed here are the most common styles.


FLAT

image source

This style of door is also called ‘flush’. Essentially these are doors that have no extra ornamentation, and have a smooth simple finish. They are most commonly used in modern styled homes. They can be made of a solid piece of wood, but more commonly are composed of thinner veneer pieces of wood – which creates a door that is more lightweight.


SHAKER

image source

A shaker (or craftsman) style door is composed of a flat center panel and square edge raised panels. These doors have a clean, simple look and are one of the most popular varieties used today.


RAISED PANEL

image source

This type of door is a bit more ornamental in that the panels themselves are created with more detail – sometimes with arched top panels.


PLANK

image source

Plank doors are composed of a series of boards, or planks – either in a vertical or horizontal application. They are popular for homes with country styled decor.


CROSS BUCK

image source

When you see this type of door, you will most likely have visions of barns going through your mind. That classic ‘x’ pattern is called a cross buck. These doors are also becoming very popular with homes designed in the ‘farmhouse style’.


LOUVERED

image source

This style features a door that has slats, or louvers. They are a perfect choice for areas that need ventilation but also require a bit of privacy or screening, such as a laundry space or electrical closet. The filtered light that the louvers allow can be a benefit for some design applications.


Again, there are so many choices when it comes to interior doors! I hope that this mini-guide can help you determine the differences between the doors, and allow you to choose the perfect version to accent your home!


THE FIVE PHASES OF NEW HOME DESIGN

In the course of designing your new home, you will walk through a variety of phases – each a bit different in nature. Though they tend to flow into each other slightly, there are five general categories of progression: analysis, preliminary design, development, documents, and construction review.

Understanding what to expect in each phase can be a helpful guide for your home design process. If you are considering designing your home solo – or working with an architect or designer – you can prepare early by knowing what is to come.


PROGRAM ANALYSIS

In this phase you will determine what your needs and wants are for your future home. You will be looking at potential building sites and thinking about the number of bedrooms, bathrooms and common spaces your home will have. You will also begin to think about your project budget. To help you answer these program analysis related questions, visit this blog post and complete a series of worksheets.


PRELIMINARY DESIGN

Through this phase you will be determining the desired spacial relationships within your home and also the connections that will be made from indoors to outdoors. The spaces will begin to resemble a floor plan in it’s very basic sense. Drawings will be created in the form of quick basic sketches.

You will also be thinking about the house styles that appeal to you most, and likely searching Pinterest for inspiration photos.


DESIGN DEVELOPMENT

Just as it’s name implies, this phase of home design refines the spaces and their relationships. You will begin thinking about your home in three dimensions – focusing not only on the floor plan but also how the home will feel on the inside and look from the outside.

Near the end of this phase, you will want to get a better idea of what it would cost to build your home project. By obtaining estimates at this point, you will still be in the position to make major changes to the design if needed for budgetary reasons.


CONSTRUCTION DOCUMENTS / BIDDING

This is the phase when things begin to feel very real. Your drawings will include measurements and notes for the construction crew. Specifics on window and door sizes and styles will need to be made, as will finish material selections. Legal and technical information will be gathered and compiled to form the final ‘blueprints’ of your home.

During this step, you will be obtaining solid construction bids and determine who you will be hiring to build your home.


CONSTRUCTION ADMINISTRATION/ REVIEW

Homeowners vary greatly on the amount of involvement they have in this final phase of the process. While some choose to be on site every day to monitor progress, others pass the responsibilities onto their contractors (or architects) completely. I would advise that it is best to have at least some involvement – to build a great relationship with your contractor and design staff. The truth is that no matter how detailed you are able to get on your construction documents, there will inevitably be questions that will arise during construction; And if you put forth all the effort to be involved in the design of your home, you will want to follow through completely and ensure it is built the way you envisioned.


These five phases should work together seamlessly so that your ideas about home function and comfort can be brought to life. Each phase can be demanding, but the hard work will pay off in dividends when you are enjoying your brand new custom designed home.

FIVE INSPIRING SMALL HOME BLOGS

Thank you all so much for your kind thoughts after my most recent post. Some of you reached out to offer the benefits of living in a smaller home, and many more commented that they actually prefer our revised/simplified design over the original.

I have to say that after a few days of simmering with the thoughts of the smaller design, Craig and I are in agreement that we too prefer it! In fact, I called the contractor last night to tell him to hold off on getting bids on the larger floor plan – and instead to focus his attention on the new configuration.

In turn, I have been focusing my design efforts as well. Here is a view of the revised living room, as seen from the far corner of the kitchen. Do you spy the vaulted wall of windows? The view out of them will be stunning!

interior view from kitchen


interior view from entry

I am very grateful that my husband and I are on the same page when it comes to ‘stuff’. We are both of the mindset that if something doesn’t bring us joy or serve a purpose – it isn’t needed. The same goes for square footage. Once we realized that the smaller living space would suit us just fine, the more elaborate design was no longer appealing.

We never set out to design a large house – in fact, we have said on many occasions that living in a tiny house would be comfortable if it were just the two of us. Our family now includes seven – and so our sights are on a small house instead – one with just enough room for our needs.

It is a joy to search the web and see others living in the same way. I thought it might be inspirational to share with you some of these people, and their amazing SMALL homes.


intentionally small | 1,150 sf | owner: Nicole

Nicole has an entire blog devoted to the small spaces of her readers


mockingbird hill cottage | 950sf | owner: Claudia

Claudia offers a series of posts dedicated to small house living


smoky mountain farmhouse | 1,000 sf | owners: Alex & Susan

This charming farmhouse can be rented via VRBO!


living large in a small house | 1,300 sf | owner: Lynn

Check out Lynn’s amazing home office!


the prairie homestead | 1,100 sf | owner: Jill

Wyoming homesteading + homeschooling family of five


Continuing on with the revised/ smaller design, things seem to be falling into place. All three levels are being re-worked slightly to match the needs of our family. For now, we sit and wait for those numbers -hopeful that construction can begin this spring, but maintaining patience if we need to wait a little longer.


THE 4 QUESTIONS YOU SHOULD ASK YOURSELF BEFORE DESIGNING A NEW HOUSE

Designing a new house is an exciting and exhausting time for homeowners. It seems there are no less than a thousand decisions that will need to be made to create a house that is ‘just right’ for your family. And while each and every decision during the design process is an important one, there are four important questions you should ask yourself BEFORE you ever sit down at the drawing table by yourself or with a design professional.


1. WHICH HOME STYLES DO WE PREFER?

While it isn’t necessary to pick only one home style that your design MUST be based on -it is valuable to understand, at least generally, which types of homes you are drawn to. Are simple, clean lines your thing? Perhaps a modern home will be a good design guide. Do you love the charm of cozy houses? Consider the characteristics of the cottage or bungalow style. You can ask yourself if you prefer an open floor plan or one with more defined spaces, and if your family would benefit from one level living or multiple stories.

Each month I work through a series here on the blog entitled ‘Elements of Home’. I dive deep into what makes each home style unique, with the hope that the information can benefit you in determining which style would be best suited to your family’s lifestyle and preferences. You can access the series HERE.


2. WHERE WILL OUR HOUSE BE SITED?

Location, location, location. It is the mantra of real-estate. You can change a house in many ways, or in this case – build nearly anything you want – but you will not be able to change your home’s location once it is tied to the foundation; That is, unless you are willing to spend major money to do so.

You may be tempted to look at home plan books or online for floor plan ideas. And while these tools can be extremely helpful, you should at the very least have an idea of where your proposed home will be located before considering floor plans. Will you be building a new home in an established historic neighborhood? In that case, the sleek modern home with floor to ceiling panes of glass that you spied online may not be the best choice. Do you love the option of having a home with a basement level that you can walk out of? If so, you will want to make sure that you have a site in mind that will accommodate that type of setup – preferably somewhere with sloped land.

There are more detailed site related questions that you will need to answer, such as how the natural daylight will affect the interior spaces of the home – but these are questions for further in the design process.

3. WHAT DO WE NEED IN A HOME?

Generally speaking, we more easily identify our wants over our needs. Sometimes the two get mixed together, in fact. When designing a home it is very important to establish the difference. The needs are absolute must haves, whereas the wants are not as important – and can possibly be added at a later date.

Size is one of the most troubling aspects to determine. When considering home square footage, a variety of questions may arise. How many bedrooms should the house have? Will 1 bathroom be sufficient, or will we need more? What is a comfortable living room size? These questions about size can leave your head spinning – but they are some of the most important decisions regarding home design. A too small home can leave you feeling cramped; While a home too large will not be comfortable or cozy – perhaps leaving you with the feeling that you are living in a museum or office building.

As a guide to determine how much space you should design for your family, I have created a variety of worksheets – which can be accessed in THIS POST.


4. HOW MUCH CAN WE AFFORD?

It’s the age old question: How much is this going to cost me? It is best to consider the financial aspects of home construction well before you fall too in love with a design. If you speak with a loan professional about what a realistic budget for your project is, you will be able to make better informed decisions as the design process progresses. If you know you will be working with a fairly strict budget, you likely won’t be looking at the granite selection for your counter tops. Better to know what you can afford than to choose those expensive finishes only to be told you will need to downgrade the quality to something cheaper.

Another benefit to determining building budget early is that you can plan your project in phases. Perhaps the entire shell can be built straight away, with the main living spaces finished – and the basement or upper level left to be finished when the budget allows, in the future.

I lay out tips on ways you can save money on your new build in THIS POST.


If you have worked through each of the four above questions, you are well on your way to laying the groundwork for the design of your future home.

For your convenience, I have laid out these questions in a simple, one sheet print out – available in the RESOURCE LIBRARY. Search for the Preliminary Home Design Worksheet – and keep it handy for when you are ready to start thinking about designing your dream home.


7 CHARMING OLD HOUSE DETAILS MAKING A COMEBACK

Charming old house details, such as intricate woodwork and elaborate staircases, are making a major comeback!

When you think of an old house – you may envision rotting siding, squeaky floor boards, and bats in the attic. While these may very well be a reality, there are plenty of merits that old homes have to offer.

The seven charming old house details I’m about to share may have you rethinking your preconceptions. Who knows – you may decide to incorporate some of them in your home as well.

These seven old house details are finding their place in newly built homes

BUILT IN FURNITURE

These showstopping pieces add dramatic character. Because they are designed and built to fit with the house, in a specific space, they are becoming more and more popular with homeowners as storage pieces and as a custom way to add elegance and charm.

buffet


window seat


bookcase


INTRICATE WOODWORK

It’s true that slow growth timber was more readily available when the houses of yesteryear were being built. Craftsmen showcased their skills on detailed woodwork – from stair railings and wainscoting to window molding. Though it may never return to the intricacies of the Queen Anne Victorian era, an increased level of detail in woodwork is being re-introduced in today’s homes.

built in room dividers are one of the old house details that is making a comeback

craftsman woodwork


intricate stairwell woodwork


window trim


HARDWARE

There has been a huge resurgence in adding smaller vintage details to new homes, to give them an extra dose of character. One of the easiest ways to accomplish this is by utilizing decorative hardware, such as door knobs and cabinet pulls. They are generally inexpensive and readily available. Reproductions of these classic styles are also being made.

brass knobs


glass knobs


cup handle reproduction


WOOD FLOORS

Old houses have the best floors. The patina found on aged pine, maple, and oak flooring is hard to match – but even a newer wood floor is a beautiful addition to a modern built home. Wood floors are wonderfully adaptive, lending themselves to be laid in a variety of patterns.

diamond wood floor


charming character floors are more popular than ever

herringbone pattern


aged pine plank flooring


FEATURE FIREPLACES

Before the television became the center of attention, the fireplace was the focal point in most homes. Now, as a way to escape the constant bombardment of electronics, families are opting to gather together in a quiet space more often. In turn, homeowners are opting to give their fireplaces more detail and prominence.

Many new build houses are incorporating feature fireplaces, one of the old house details that is making a comeback

fireplace with shiplap above


arts and crafts fireplace


primitive fireplace


DECORATIVE CEILINGS

Gone are the years of popcorn textured ceilings and flimsy drop ceiling tiles. Homeowners are instead embracing a variety of decorative options, and looking to historic examples for inspiration.

a bright white kitchen with a bead board ceiling is a wonderful example of old house details that are making a comeback

beadboard ceiling


coffered ceiling


pressed tin ceiling


exposed structure


COZY NOOKS

Old houses are full of nooks and crannies – just think about grandma’s attic. The cocooning nature of small, set apart spaces is comforting to many homeowners. From built in dining tables to relaxing inglenooks, these interesting and intimate spaces are becoming more and more popular once again.

reading nook


inglenook


breakfast nook

Which of these seven details is your favorite? Let me know which you would love to try (or have incorporated in your home already) in the comments below.


THE MAIN ELEMENTS OF THE QUEEN ANNE VICTORIAN HOME STYLE

Queen Anne Victorian

Welcome to another installment in the ELEMENTS OF HOME series. Each month I showcase a different residential style here on the blog. It is my hope that this information will not only teach you a little something about the various styles; but also equip you if are designing or searching for a new house – by allowing you to determine which style(s) suit your lifestyle and preferences the most.

Today I will be over-viewing the Queen Anne Victorian home – including the history of the style and what makes it unique.


HISTORY OF THE QUEEN ANNE STYLE

The Victorian style in general spreads over the years 1860-1900 primarily, during the last decades of the reign of Britian’s Queen Victoria. There are six distinct variations of the style occurring during that time period – based, at least loosely, on their Medieval prototypes.

This time period saw rapid industrialization in the American built landscape. The art of balloon framing was rapidly replacing heavy timber framing as the standard building technique. Because of the flexibility of this type of construction, homes were no longer restrained to simple box-like shapes. In addition, house components such as doors, windows, siding and decorative details were beginning to be mass produced, and could easily be distributed throughout the country by use of the expanded railway lines.
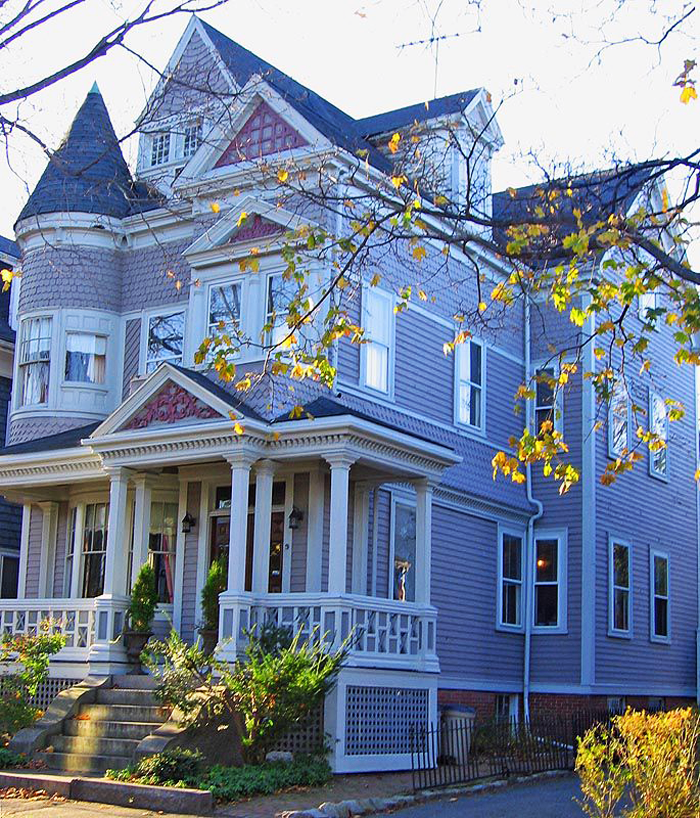
image source

When most people think about the Victorian style, they generally imagine a Queen Anne – the most elaborate and eccentric of the the six variations. I will highlight the remaining five variations (Second Empire, Stick, Shingle, Richardsonian Romanesque, and Folk Victorian) in later posts.

The ‘Queen Anne’ name is actually a bit deceiving – as it bears almost no similarities to the architecture produced during the reign of Queen Anne (from 1702-1714). The term ‘Queen Anne Style’ was used by Scottish architect Richard Norman Shaw to describe his work, and it stuck.
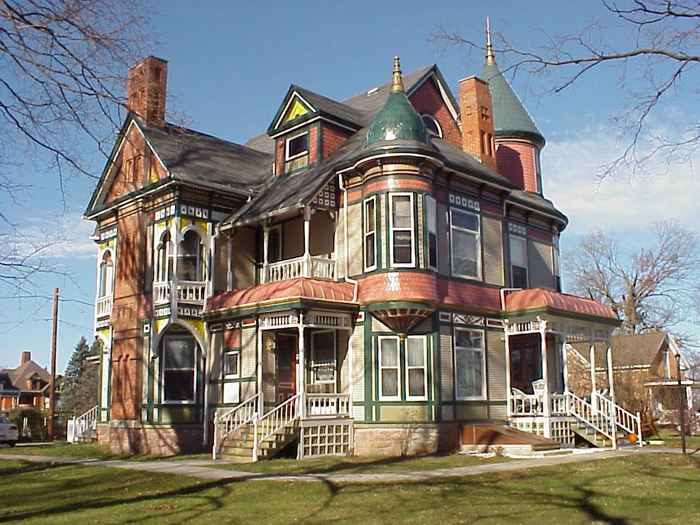
brick Queen Anne

MAIN ELEMENTS OF THE QUEEN ANNE STYLE

LOCATION

Queen Anne Victorian homes can be found throughout North America, thanks mostly to the expanding railway of the late 19th century. Pattern books made it simple for prospective homeowners and builders to choose manufactured pieces and decorative details to dress their home in the Queen Anne style. This home style is least likely to be found in the heavily populated northeastern states.

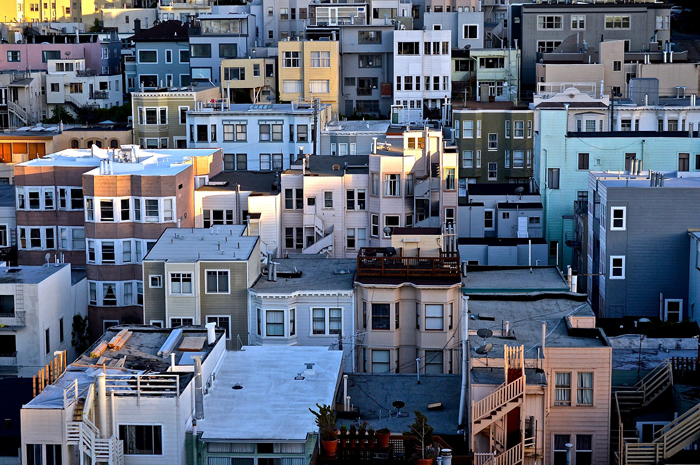
There are also distinct concentrations of the style. Seattle’s neighborhood, Queen Anne Hill, derived it’s name from the architecture used on many of the affluent homes built there. You can take a little mini video tour of the neighborhood here. And of course, San Francisco features a beautiful collection of Queen Anne row houses.

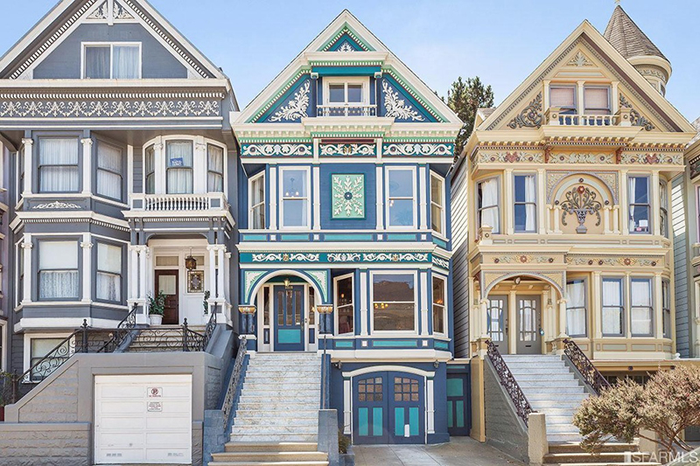
Queen Anne Victorian row-houses

SIZE

Queen Anne Victorians vary in size from modest dwellings with a few special details to elaborate multi-story mansions.

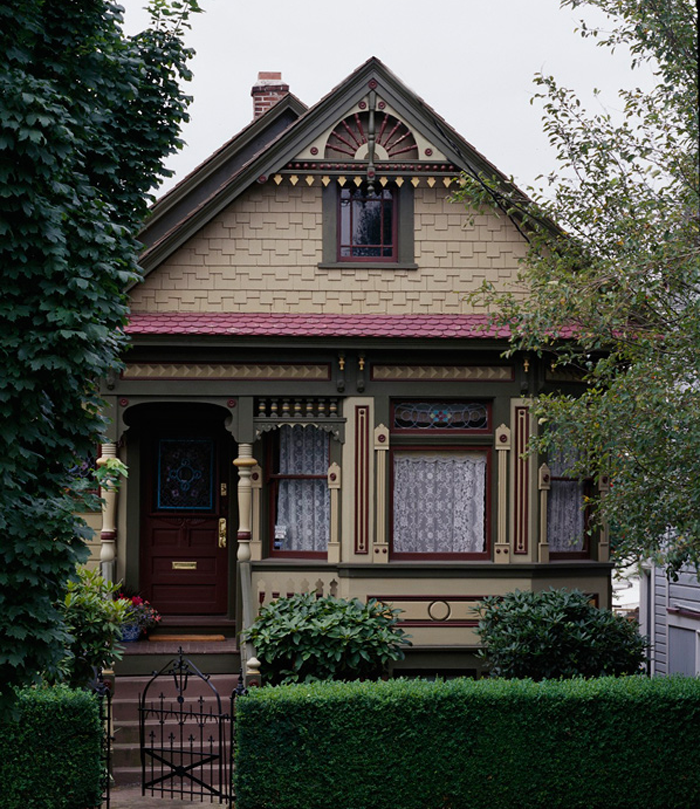
modest Queen Anne home

Queen Anne mansion

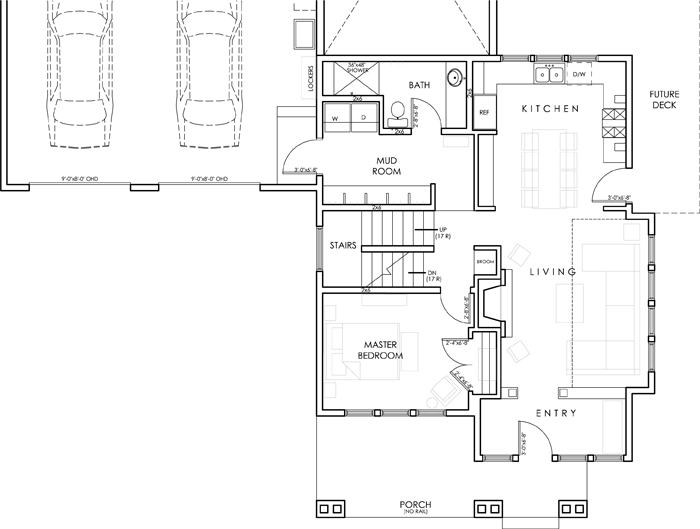
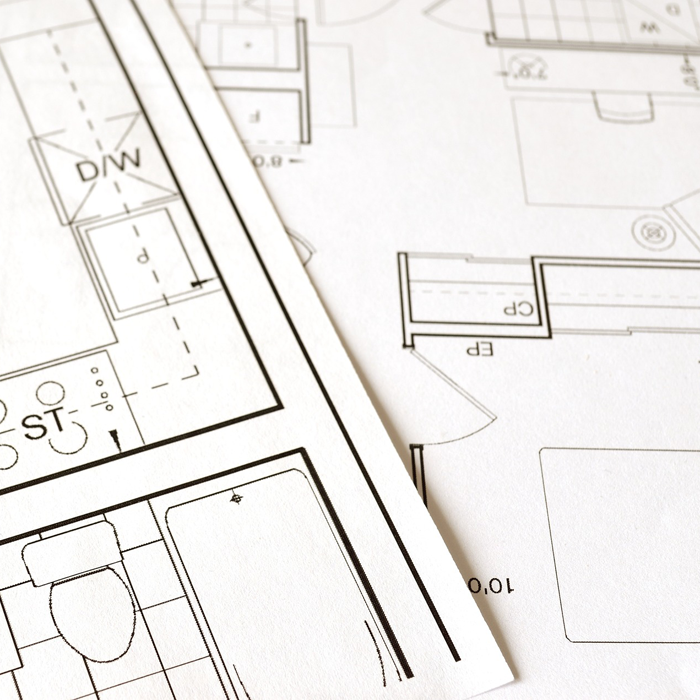
As mentioned previously, one of the major shifts that happened with the introduction of balloon framing was the flexibility of the floor plan. It allowed more interesting shapes of houses and in turn many homeowners opted for bay windows, bump outs, and cantilevered second story spaces.

historic floorplan

EXTERIOR TRADEMARKS

To spot a Queen Anne Victorian home, look for these style specific exterior elements.

IRREGULAR SHAPES: Builders and architects of the Victorian era took full advantage of the flexibility that balloon framing provided – by avoiding rectilinear building footprints and instead opting for homes with varied shapes.

irregular shaped Queen Anne Victorian home

SPINDLE-WORK: Nearly 50 percent of all Queen Anne houses have spindle-work, which is also commonly referred to as gingerbread ornamentation or Eastlake detailing. This detail came in the form of turned porch balustrades, lace-like porch brackets, and as gable ornamentation.

spindle-work detail

WALL TEXTURE VARIATIONS: The use of a variety of wall textures is hallmark to the Queen Anne house style. Patterned wood shingles, bricks of different colors and terracotta panels were used to create the illusion of depth and texture on exterior walls.

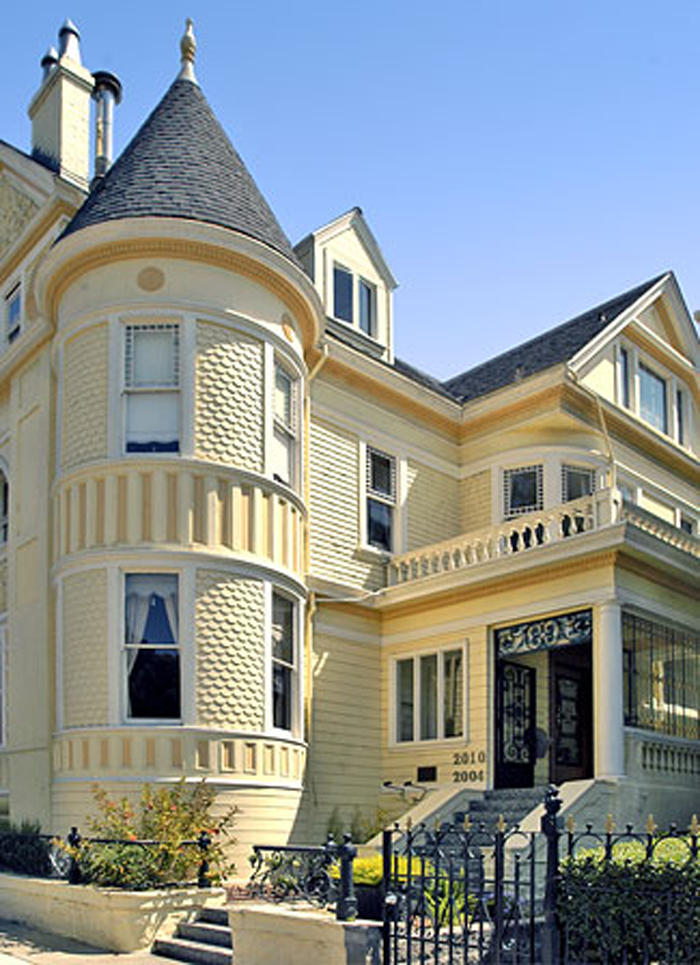
varied exterior wall texture

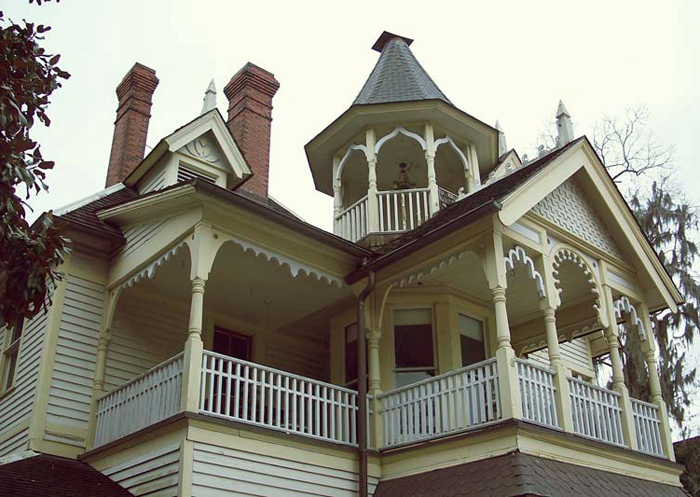
PORCHES: Covering the front entrance area, and also commonly extending along one or both sides of the house, these porches were used to highlight the asymmetry of the facade. Some examples of Queen Anne homes include second story porches.

wrap around porch

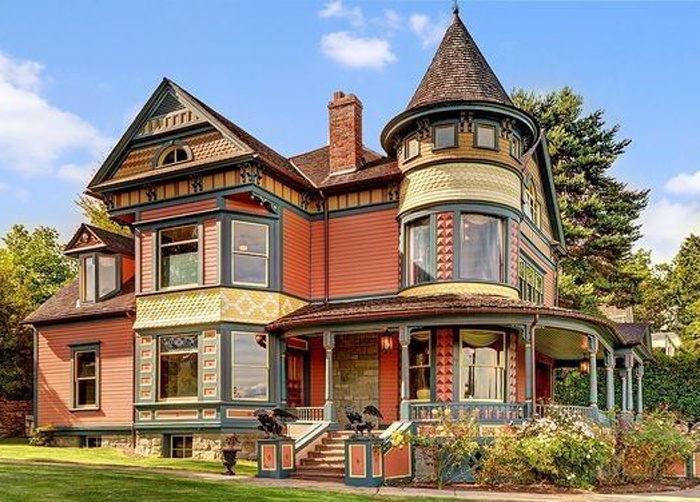
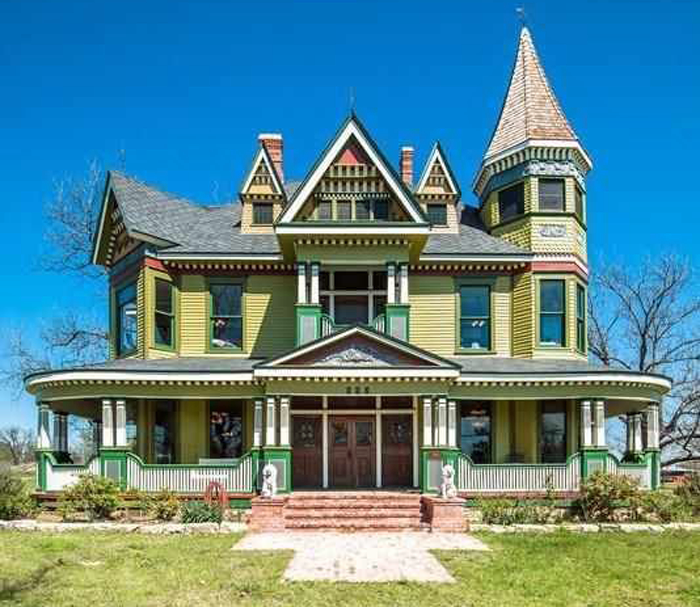
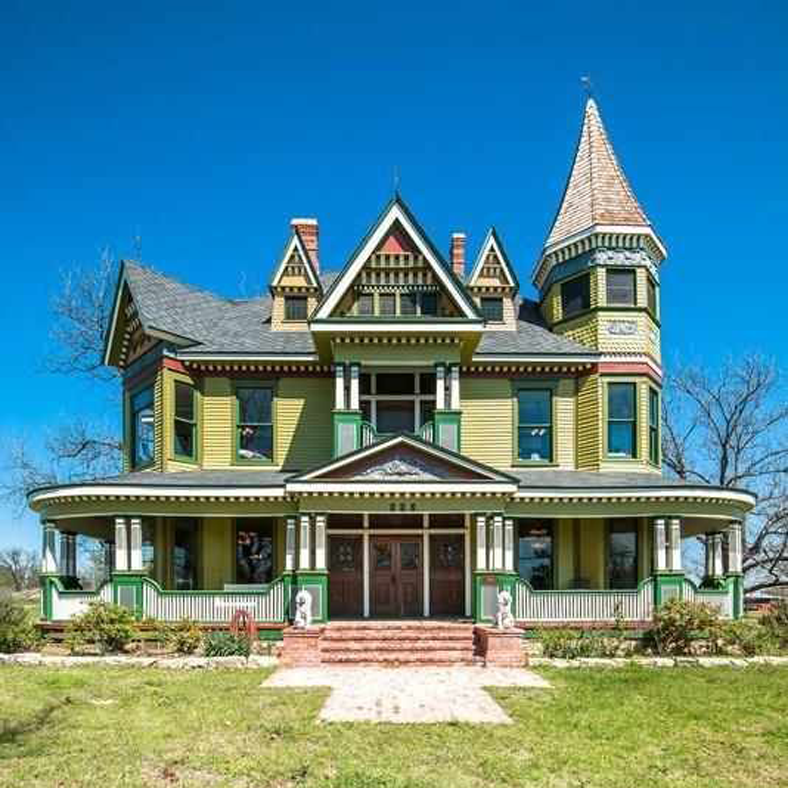
TOWERS: Also common with Queen Anne homes is the use of towers. They may present in round, square or polygonal form. They were built at varying heights from the ground up or even cantilevered from the second story only. The most popular position for a tower on a Queen Anne home is the front corner.

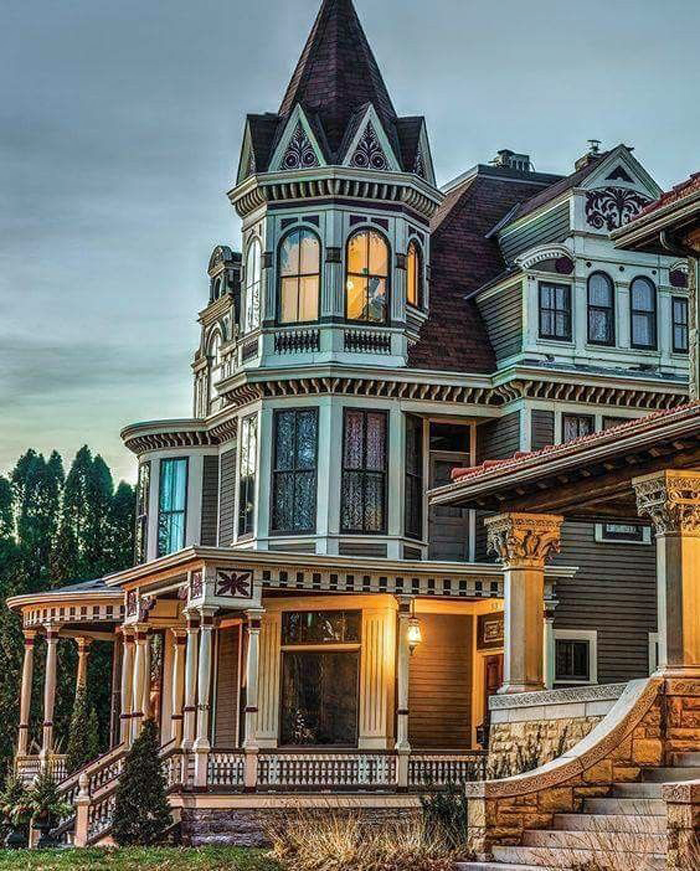
elaborate Queen Anne home with tower element

INTERIOR SPACES & DECOR

The interiors of Victorian era homes were known for their orderliness and ornamentation. The layout of the interior was formal and spaces were arranged in a manner that promoted entertaining of guests.

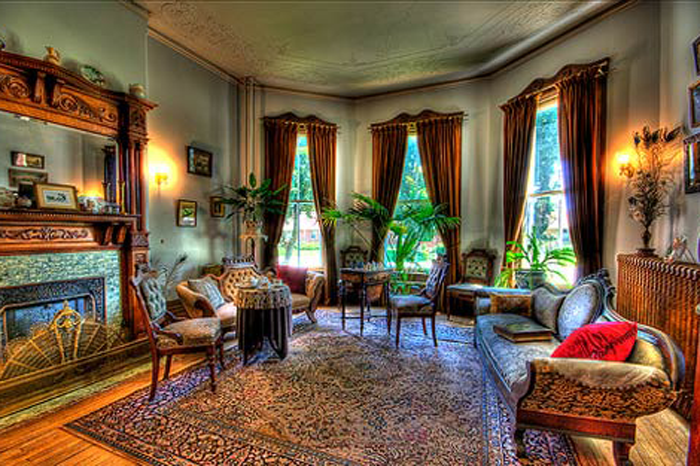
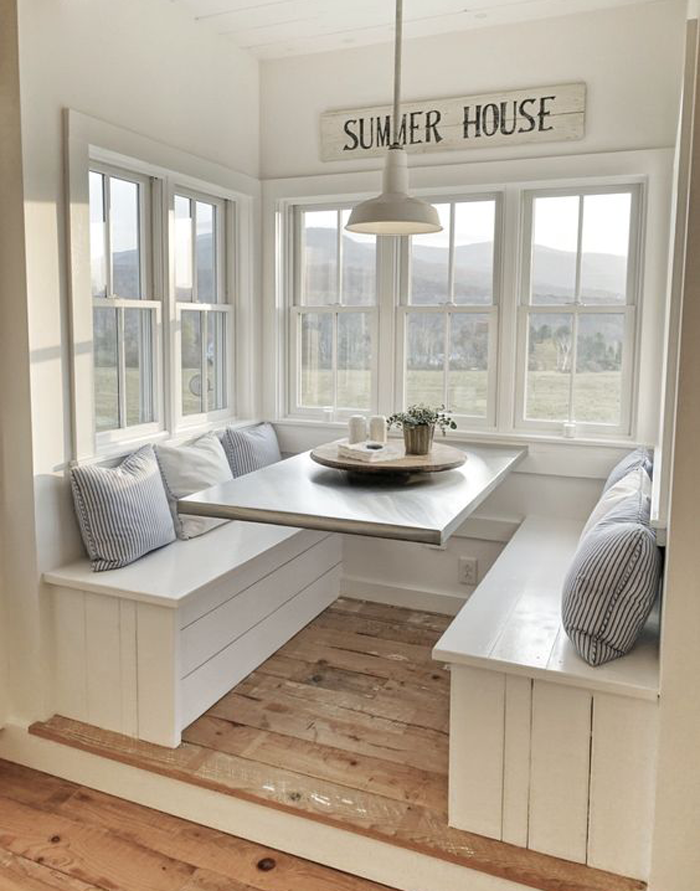
LAYOUT: The rooms were often small spaces, and were carefully separated between public and private uses. The parlor was considered the most important room in the home, as it was the first that guests would see when entering the home. The dining room was second in importance, with both the parlor and dining room would be used often for entertaining purposes.
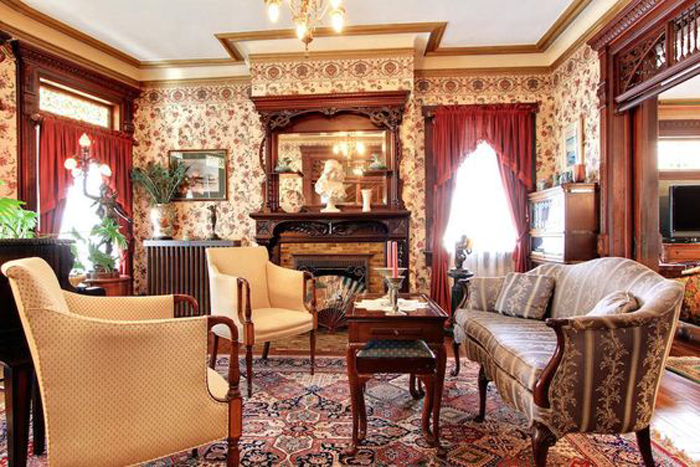
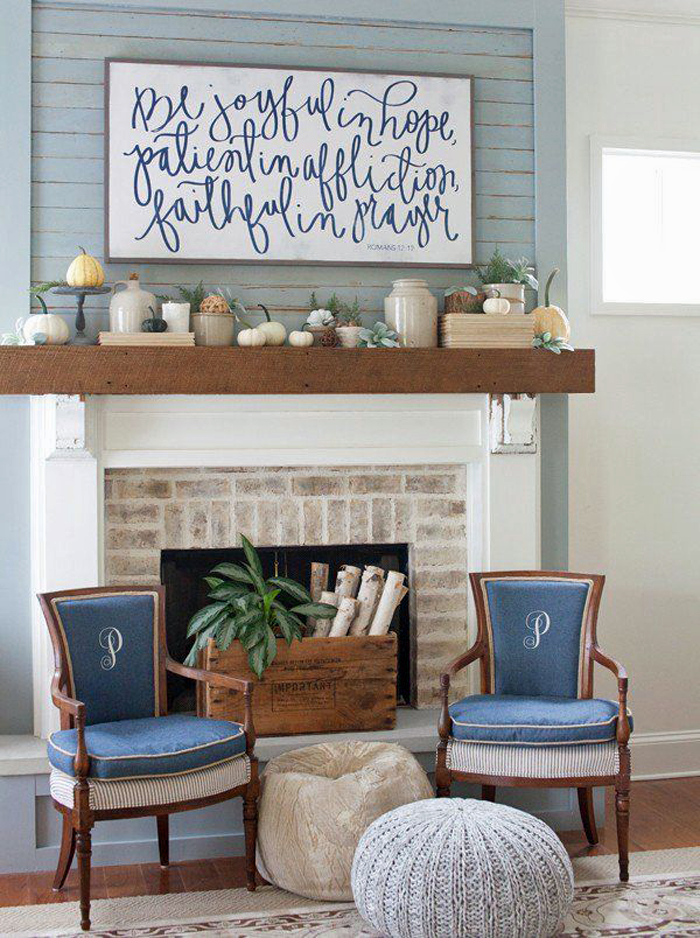
Victorian parlor

FURNISHING: Historically, Victorian homeowners would fill their rooms with art, furniture and objects that reflected their own interests and aspirations. It was thought that a bare or simply decorated room was in poor taste.

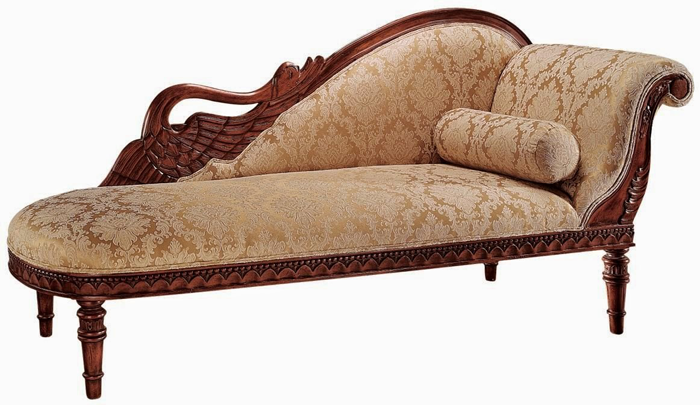
Victorian style couch

Furniture was beginning to be mass produced in factories instead of being custom created for the homeowner. In an effort to give a custom look, many pieces featured carved details. Furniture generally were of heavy proportions and featured woods such as walnut, mahogany and rosewood in dark finishes.

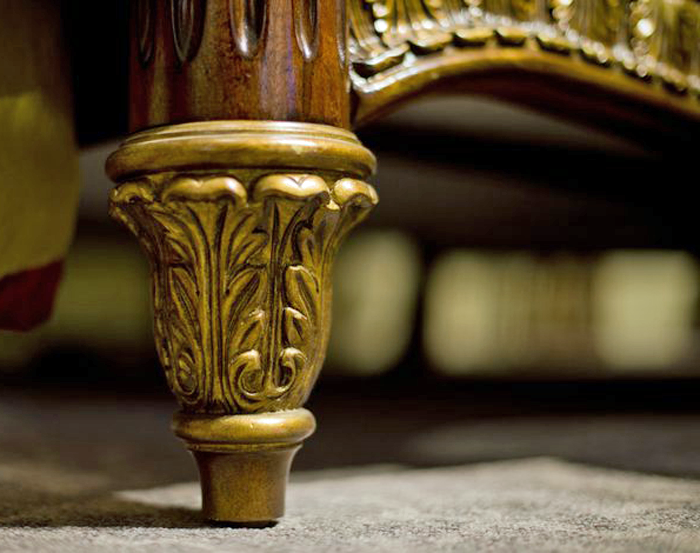
carved furniture detail

FINISHES: Botanical wallpaper was popular, as was the employment of embossing techniques. Walls were often embossed with a grain pattern – which was meant to imitate woods of higher quality. Heavy draperies in velvet or needlepoint were favored.

Victorian wallpaper

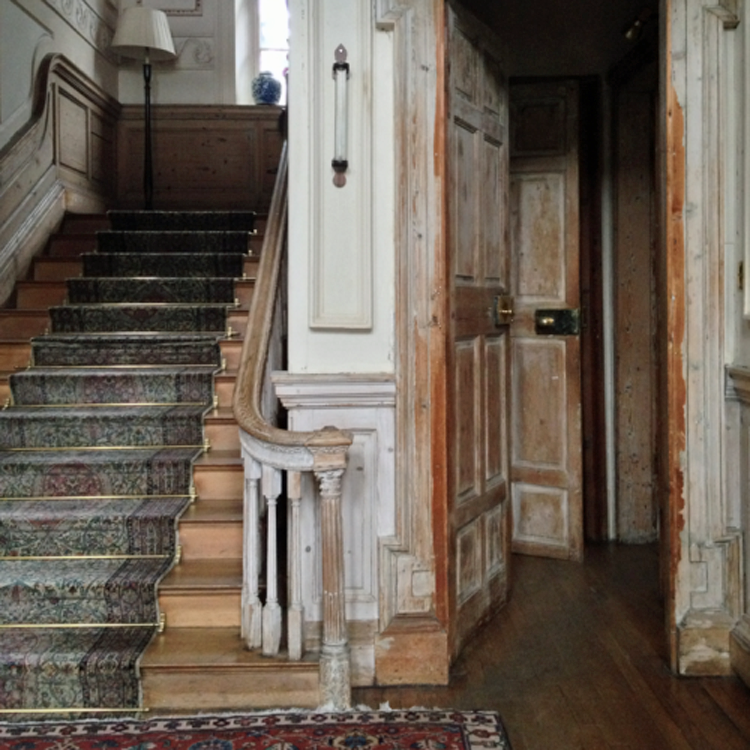
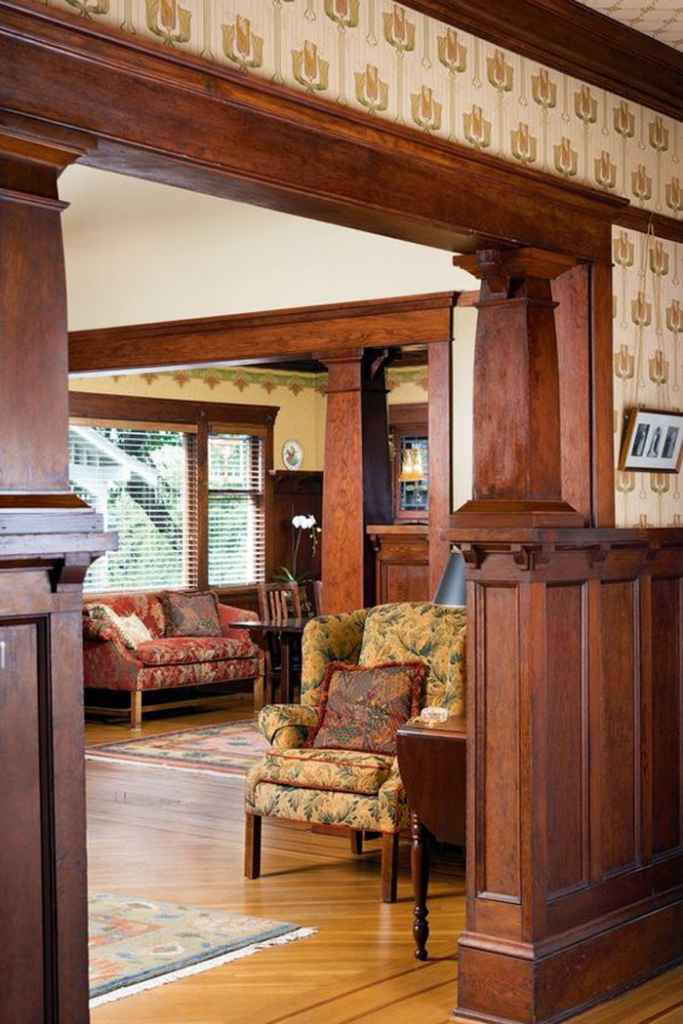
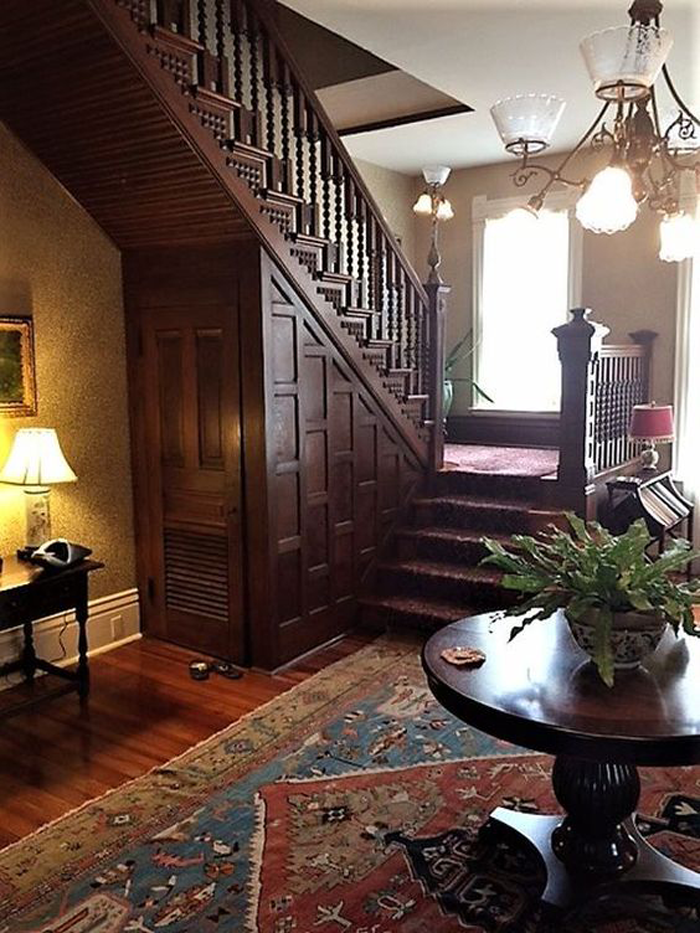
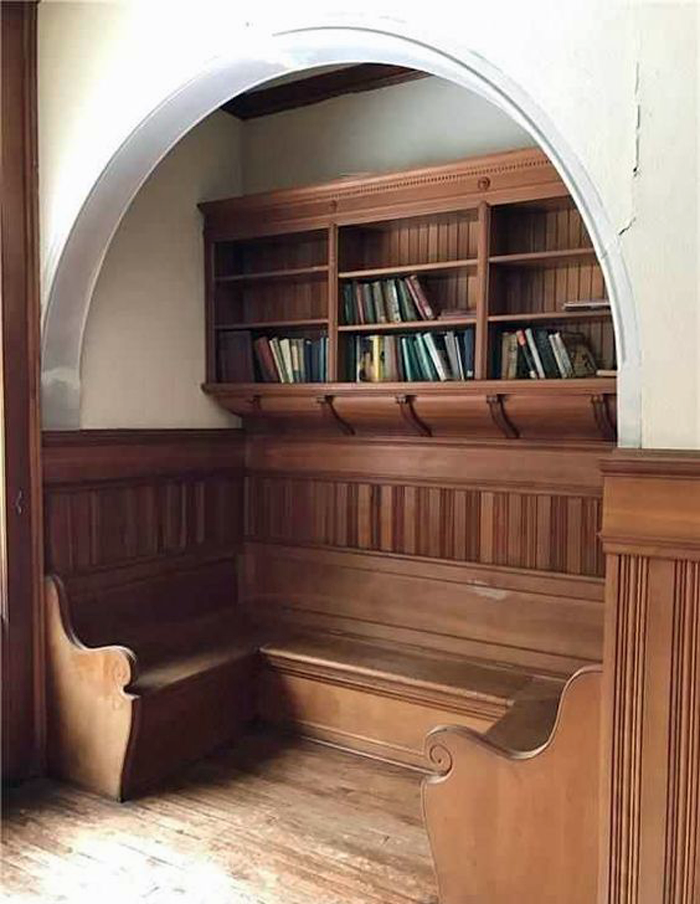
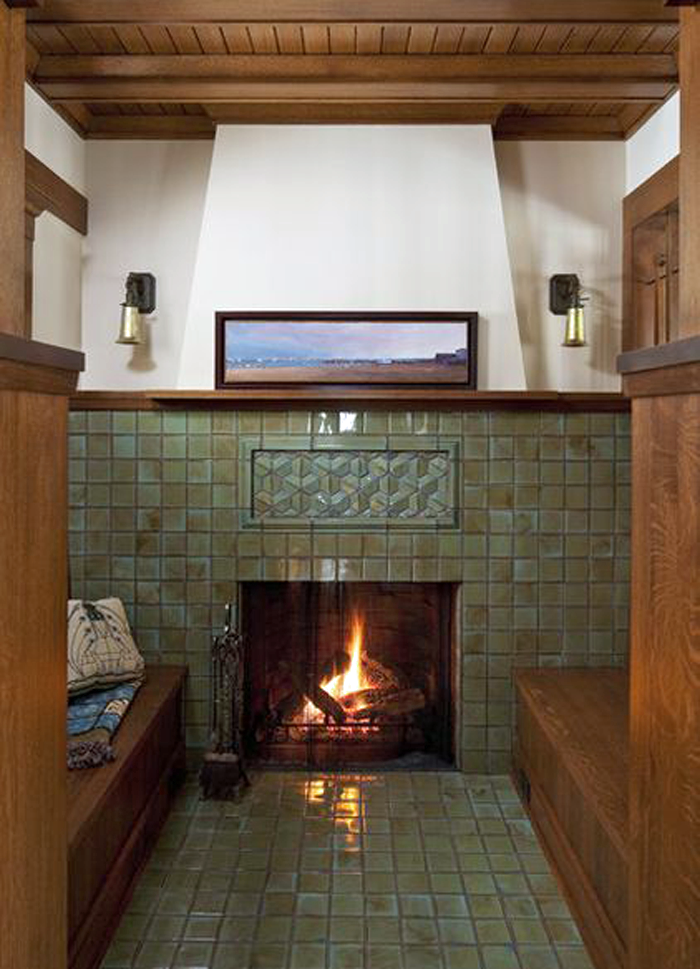
Elaborate woodwork was in abundance, as was the use of stained glass windows.

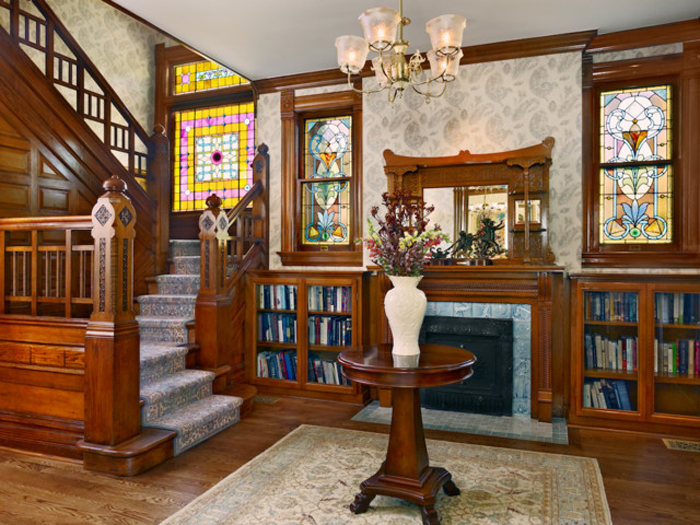
woodwork and stained glass in a Queen Anne foyer

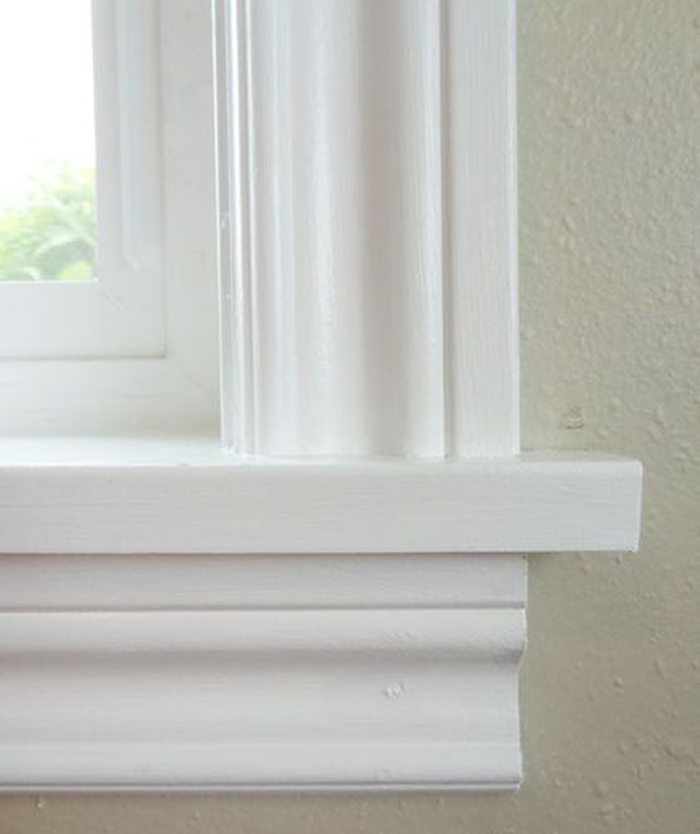
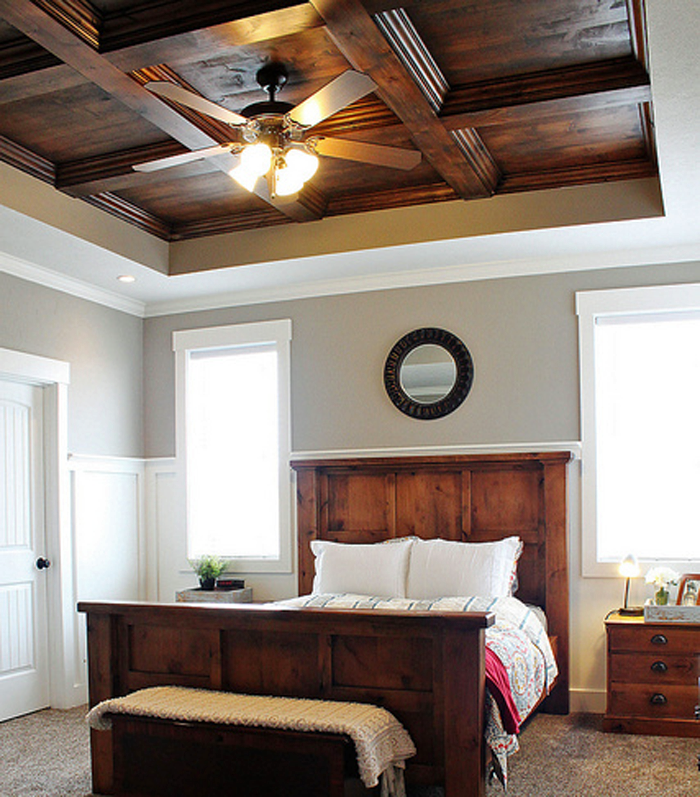
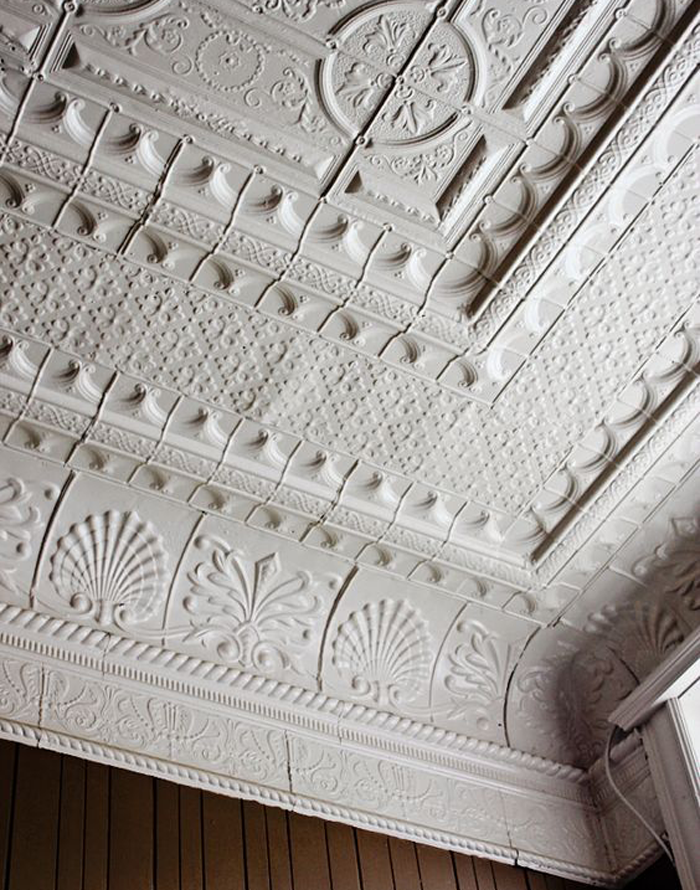
There was effort made to emphasize the height of important public rooms in the home – which was accomplished by drawing the eye up with decorative cove molding, lighting medallions and intricate patterns painted on the ceilings.

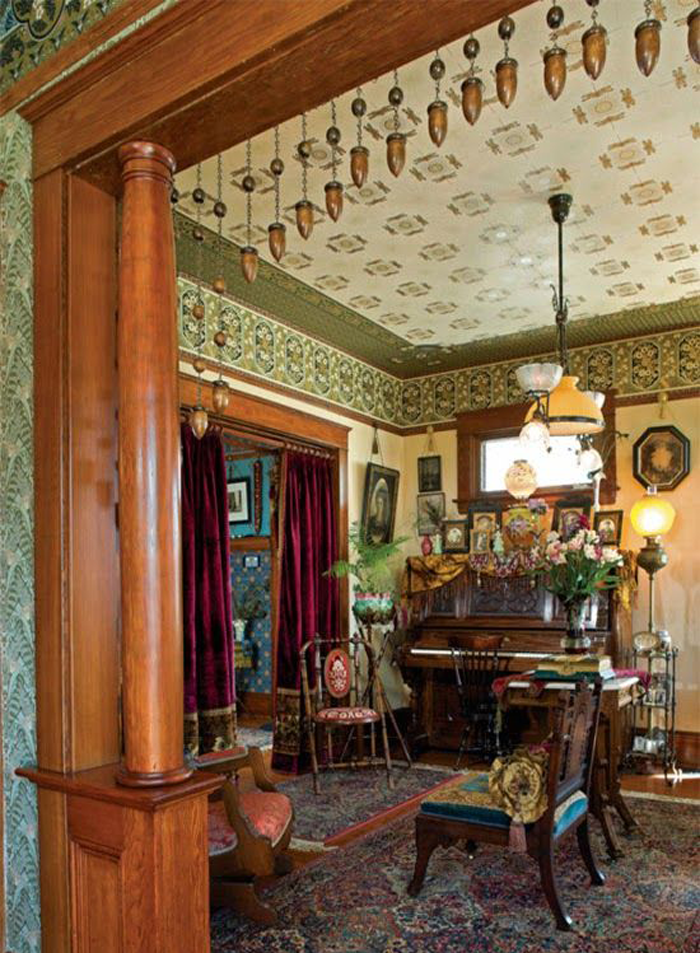
ornate ceiling in a Queen Anne Victorian parlor

COLOR SCHEME

Soft and muted colors were favored over bright and vivid color schemes. It has been said that people of that era would have been upset by the flamboyant color schemes that some of their homes are being painted during restoration. They preferred delicate rose pinks, grays, lavender and sage – as well as warmer colors such as mustard yellow, burgundy or teal.

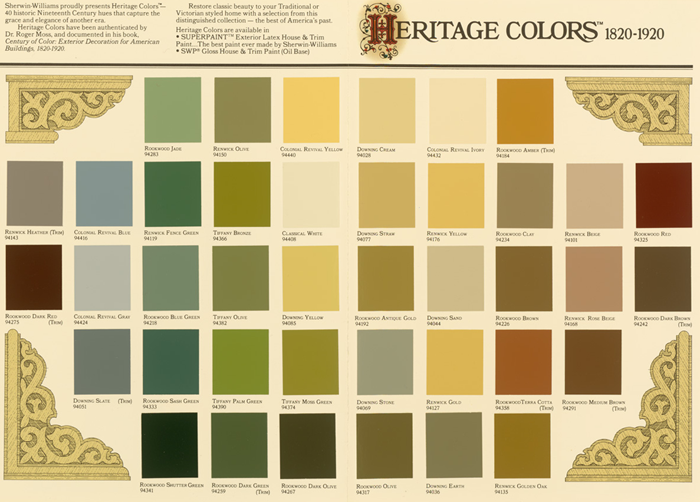
Historic color palette 

There were two schools of thought when it came to color selections. The first, “harmony by analogy” favored a palette that utilized two colors next to each other on the color wheel, such as greens and yellows. Another, “harmony by contrast” was geared toward high contrasting colors, or opposites on the color wheel- such as creams and blues.


exterior colors

interior colors


FAMOUS QUEEN ANNE HOUSES

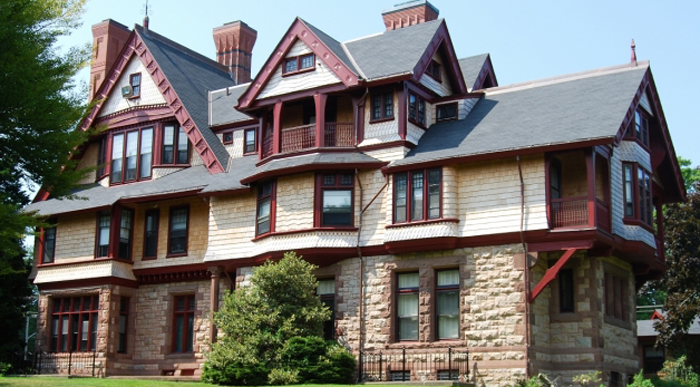
William Watts Sherman House | 1875 | Architect: Henry Hobson Richardson

One of the earliest examples of American Queen Anne residential architecture


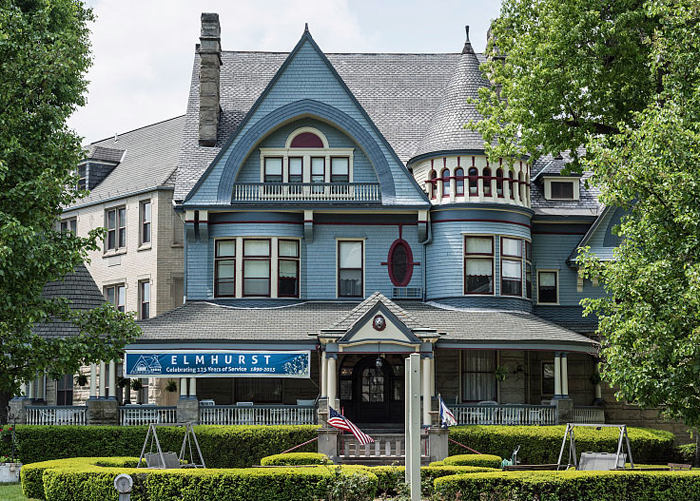
Elmhurst Mansion | 1891 | Also called the ‘House of Friendship’


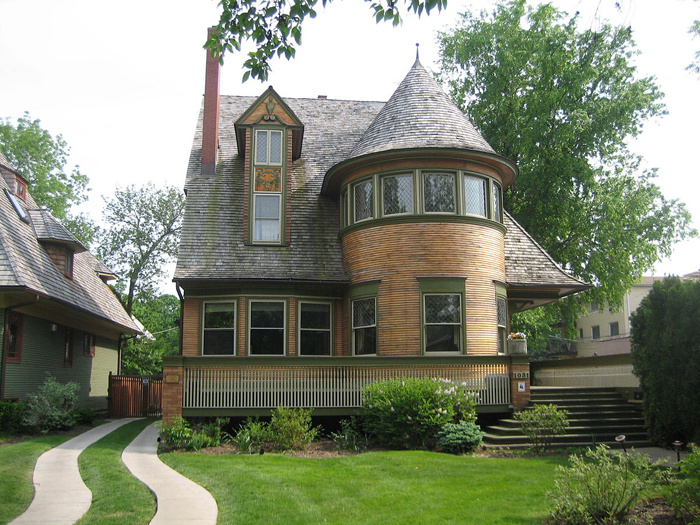
Walter Gale Home | 1893 | Frank Lloyd Wright

Simple Queen Anne Style, designed by Frank Lloyd Wright in his early years


INSPIRING QUEEN ANNE HOMES FROM AROUND THE WEB

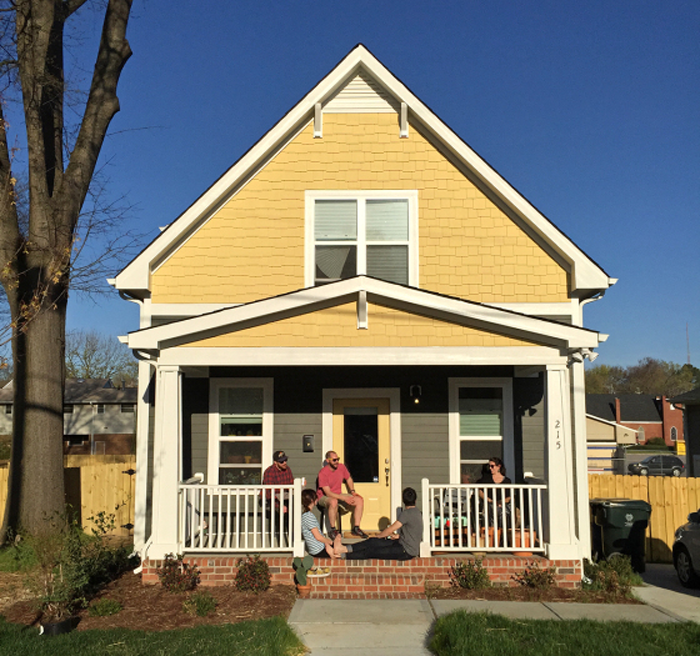
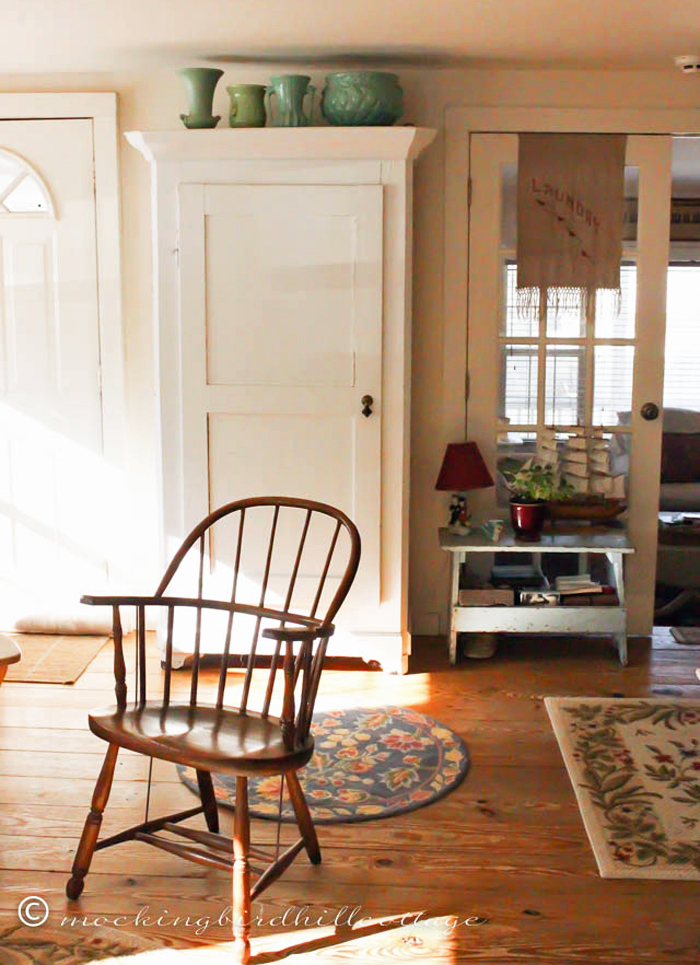
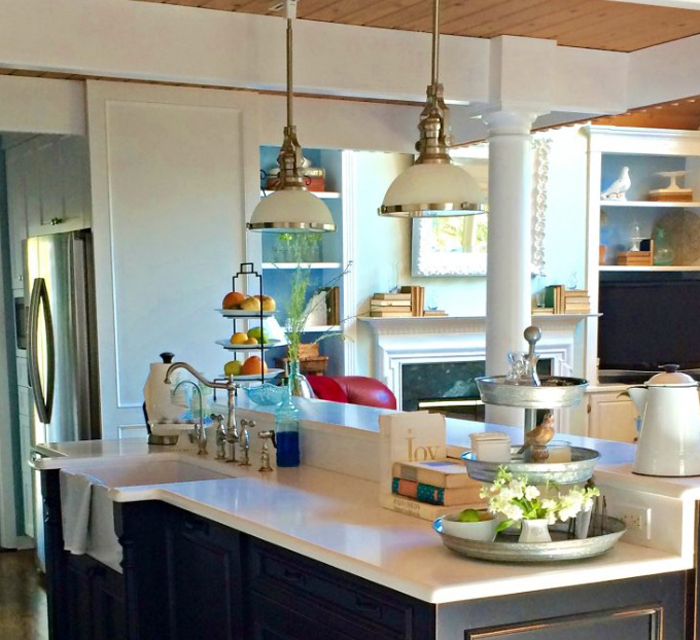
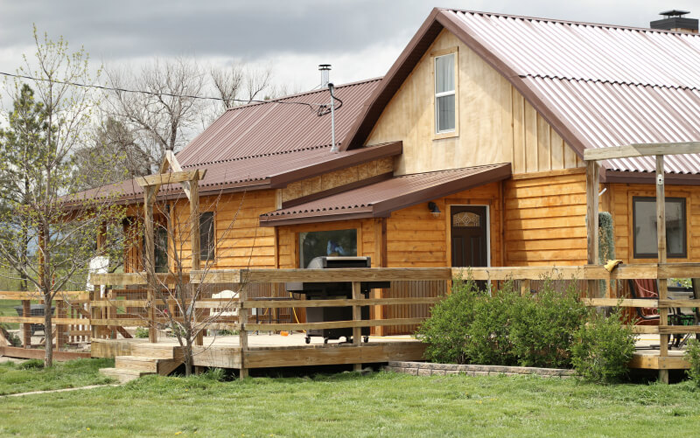
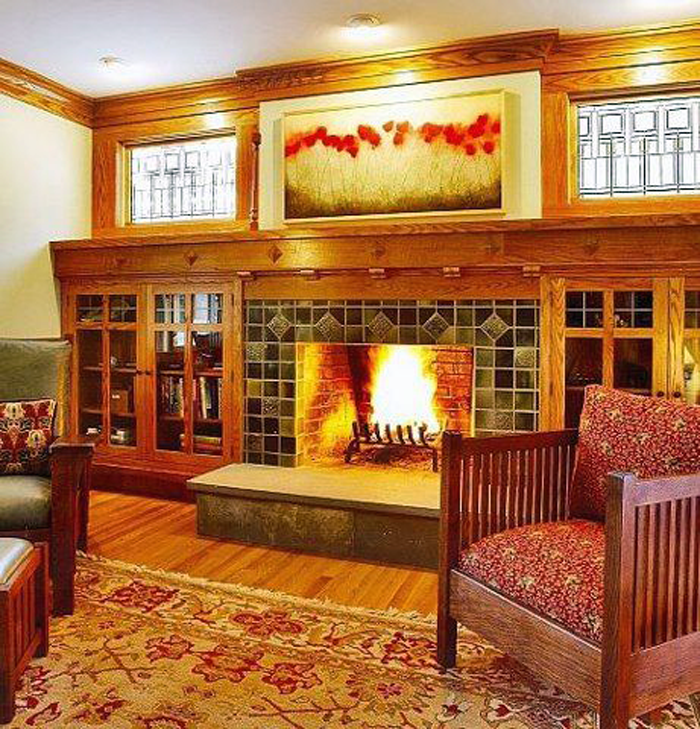
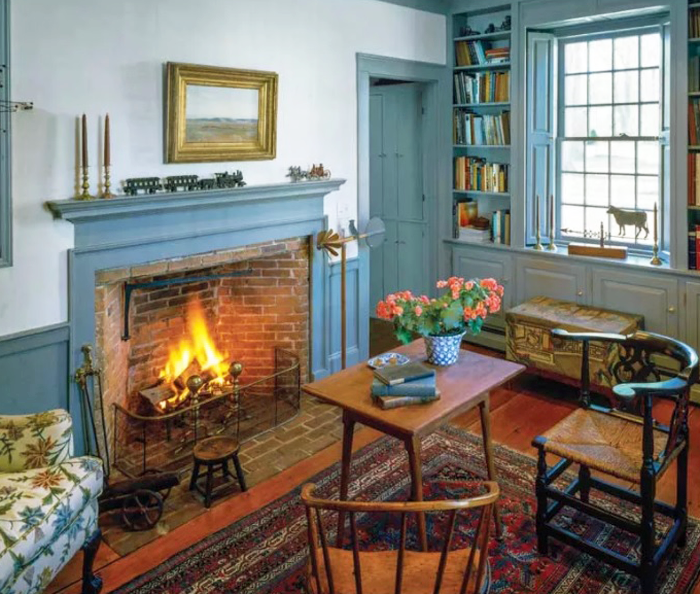
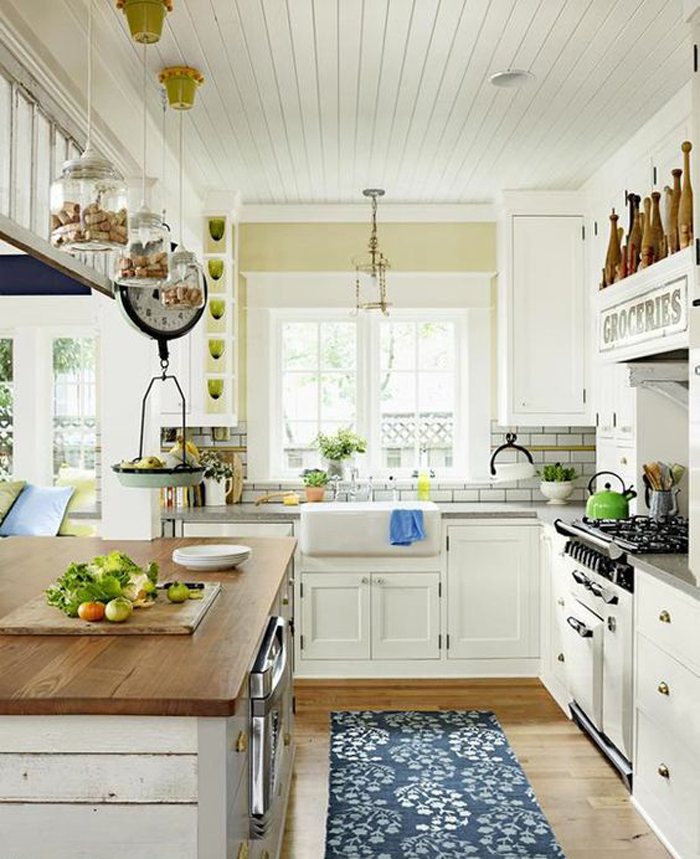
These classic homes showcase the Victorian Queen Anne style well. Read along as these homeowners restore their beautiful homes!
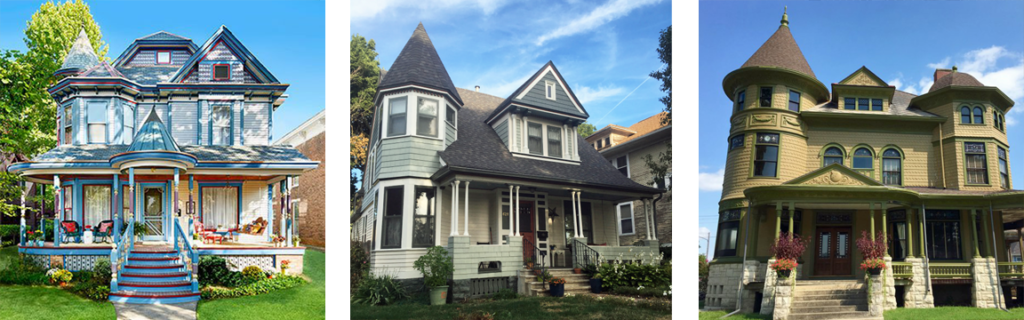
Left to Right: 12 | 3

I hope you have enjoyed learning a bit more about the Queen Anne Victorian style. Curious which residential style will be featured next month? Stay tuned!

And be sure to check out the previously showcased styles here.

DIY TODDLER BED | RE-PURPOSED CRIB

What should you do when your child outgrows his/her crib? Consider re-purposing it into an adorable DIY toddler bed, using this simple tutorial.


repurposed crib into a toddler bed. Adorable DIY toddler bed
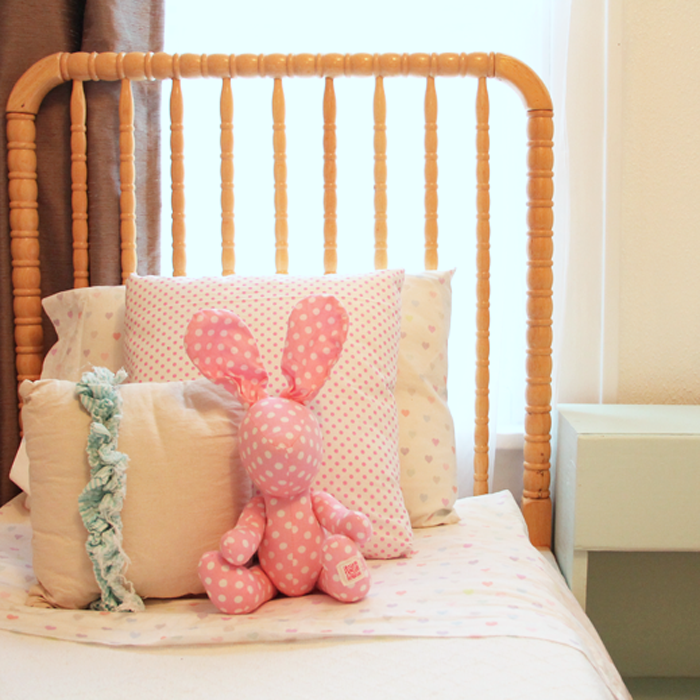
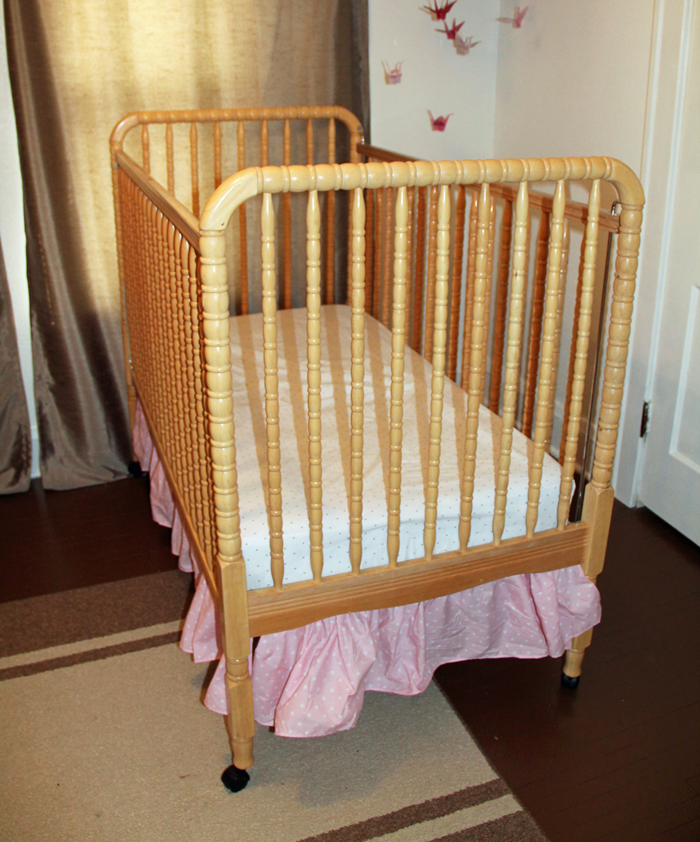
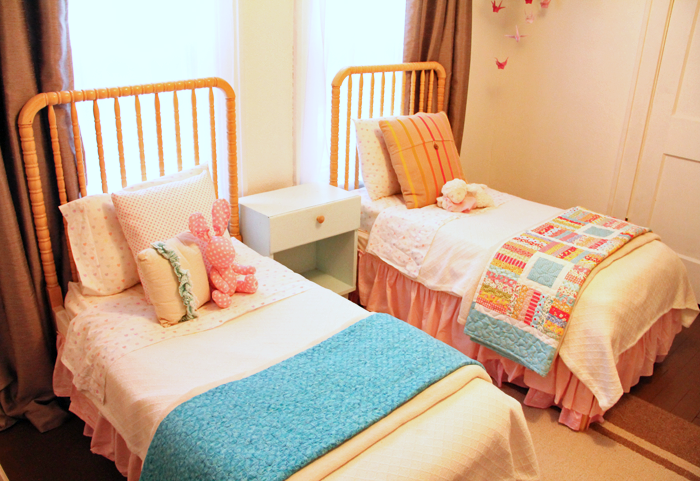
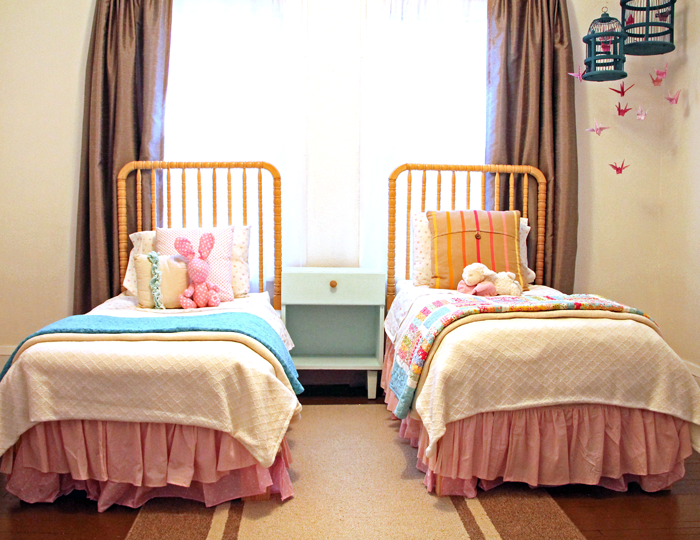
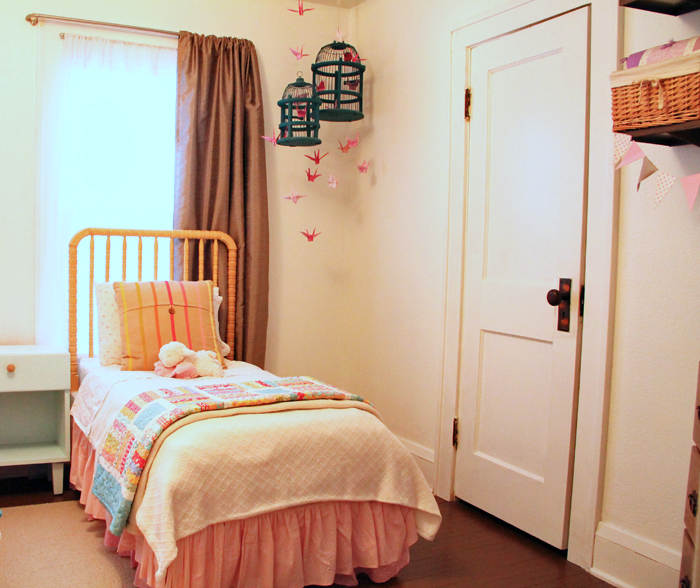
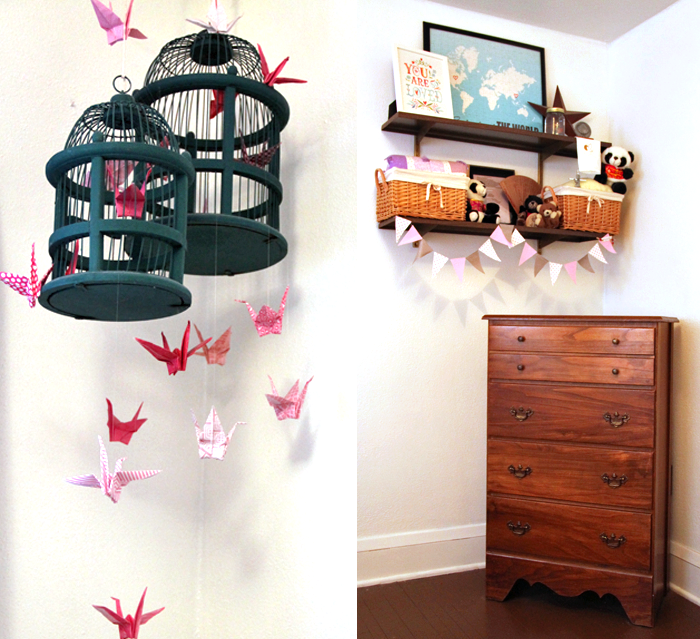
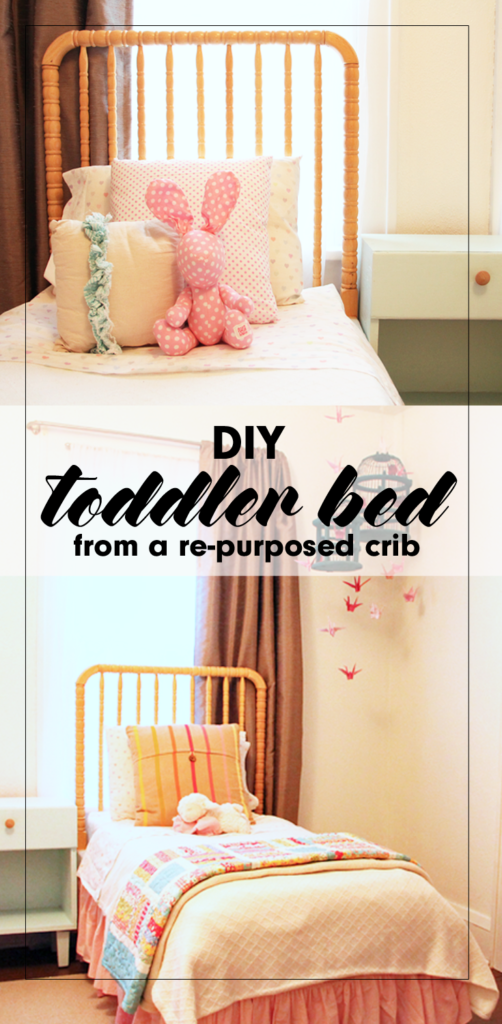
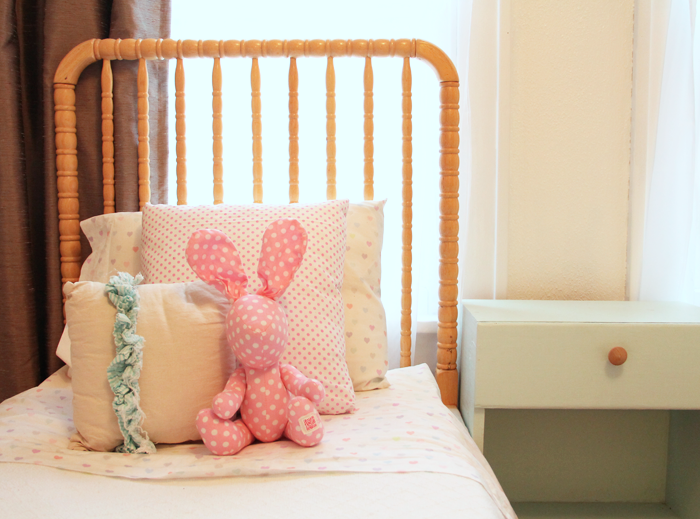
Not many moments spark the same amounts of joy and sadness as when the youngest child of the family finally outgrows the crib. With the celebratory occasion of assembling the ‘big boy/girl’ bed comes the equally emotional moment of taking the crib apart.

We were faced with this exact scenario in the months before we took the trip to China to finalize {K}’s adoption. {M} had always loved the security of her crib, the same crib that all three of our sons had also slept in, but at 3 1/2 years old, it was finally time for her to say goodbye as well.

converting an unused crib into an adorable toddler bed

It was at that moment we were faced with a difficult decision. What do we do with the crib? Maybe you are nearing this milestone and have had the same question. Today I am offering a tutorial explaining our personal crib re-purpose DIY project.


THE CRIB BEFORE

Our simple, Jenny Lind style crib was well loved but it’s natural wood finish and spindle details had a charm that we wanted to preserve.


crib transformed into toddler bed in 5 easy steps

It was given to us as a hand me down before {D} was born, over 11 years ago. Needless to say, it was equipped with the notorious ‘drop side’ – a feature now considered dangerous. We had long ago disabled the drop side, but legally the crib was no longer eligible to sell (or give away). Even still, the crib had a beautiful Jenny Lind style, and the thought of throwing it in the garbage just didn’t sit right with us.

We brainstormed a few different ideas, and eventually decided that the best option for our family was to turn this ONE crib into TWO toddler beds – one for 3 1/2 year old {M} and one for her 6 1/2 year old sister {K}, who has arthrogryposis and is small for her age. We knew they would both fit comfortably in the smaller sized bed for a while, and that the bed DIY project could save us some money as well!


CREATING THE DIY TODDLER BED

I’ll be honest that at the time of the project I wasn’t thinking in terms of getting enough pictures for a tutorial. I only have a few photos, but will try to fill in the gaps with words. If you have any questions about the process we used, feel free to comment below or send me an email!

STEP ONE

My husband Craig disassembled the crib, which actually made {M} very angry! She couldn’t see our ‘vision’ at the time and was just upset that he was breaking the comfy place where she loved to sleep. Essentially, all pieces of the crib were used to create the new beds with the exception of the hardware and the spring mat.

STEP TWO

We purchased standard 2×4 material, and Craig cut them to assemble a three sided ‘box’ that would hold the crib mattress. Because we planned to use the two tall sides of the crib as headboards, he only needed to make legs for the end of the box. He reinforced the center with a 2×4 cross base.

creating a diy toddler bed

diy toddler bed framework using crib parts as headboards


STEP THREE

Craig attached the assembled ‘box’ to the headboards, making sure everything was level. He then set one side rail into each of the ‘boxes’. The side rail piece spreads the weight from the mattress out over the 2x4s included in the ‘box’ construction.

using an old crib to make a diy toddler bed

STEP FOUR

The crib mattresses were then added. They were a perfect fit, as demonstrated by this goofy picture of {L}. Crib mattresses are a standard size, but they can vary slightly. If you try this project you will want to base your dimensions on the crib mattress you have. We happened to have two mattresses, one that was used in the crib and another that we had for a different toddler bed.

building a diy toddler bed


STEP FIVE

Dress it up! I created pink ruffle bed skirts using this easy tutorial. They really were simple to make, but a bit time consuming! I used muslin fabric to cover up the exposed 2x4s near the mattresses.

toddler bed diy ruffled bed skirt

I also found some adorable heart bedding from Pottery Barn Kids. Grandpa and Grandma purchased the bedding as a gift for the girls. A king sized texture blanket was the perfect size to cut in half, allowing me to make two matching comforters. Topped with accent pillows, and comfy colorful quilts, the beds look super cute on each DIY toddler bed!

girl bedroom bedding

repurposed crib turned into diy toddler bed


FINISHED IN THE ROOM

The finished beds look so sweet set up together in the room. I still love walking by and admiring them, over a year later!

old crib turned into two diy toddler beds

The girls really enjoy sharing a room and their little beds fit perfectly into their bright and cheery space. Although I am having fun designing their new shared space for Arrow Hill Cottage, I will be sad when we have to retire (or pass on) these special beds their daddy made them!

simple do it yourself toddler bed from an old crib


MORE SHARED BEDROOM DETAILS

Just for fun, here are a few more details of their shared bedroom.

girl bedroom reading nook

This rocker was Craig’s grandparents. We had it reupholstered before our first child was born, and have used it in the nursery ever since. It is a special piece. Next to it we have a bookshelf, making this the perfect spot for reading.

girl bedroom tour

The bookcase itself is a vintage piece from our local Carnegie Library, which is now closed. I love that the girls are able to see the fronts of the books when making their selections.

diy girl bedroom decor

Above the bookcase is a DIY piece that I put together using a mirror frame, which I spray painted white. I covered the mirror with a fabric. It is attached with temporary adhesive, because I imagine in the future the girls may opt to use the mirror itself. The heart was made by weaving strips of paper grocery bags.


girl bedroom decor ideas

Both of our girls were adopted from China – {M} at the age of two in 2015 and {K} at age six in 2017. We always want them to be aware of their beautiful birth culture. The paper crane bird cage/ mobile symbolizes peace and longevity. I folded each of the cranes by hand using a variety of pink patterned paper. The dresser was mine when I was a little girl. It was a gift to me from my grandpa, and I love that I can pass it down to daughters of my own.

shared girl bedroom ideas

Above the dresser are more symbolic and special pieces, including two panda bears from China – one from each trip.

diy toddler bed

We painted the floor in the girls room, and the entire upstairs of this rental house, a chocolate brown color. It has held up very well and is actually something I am considering for the new house.


PIN THIS DIY TODDLER BED IDEA

I hope you enjoyed this little tutorial and the impromptu room tour! I would love to see the creative ways you have re-purposed a piece into something new!

diy toddler bed from a re-purposed crib