SIMPLE LIGHT FIXTURES | Minimalist Home Lighting

In today’s post, I share the simple light fixtures we have chosen for our new home. The clean lines and basic color palette of these selections make them the perfect compliments for the minimalist home.

simple lighting collection

This post contains affiliate links. As an Amazon associate, I earn from qualifying purchases. See my full disclosure here


This has been a very exciting week at Arrow Hill Cottage. The interior framing is just about complete, the house wrap is on, the windows are going in, and the mechanical duct work has started! Now is the time to begin ordering the light fixtures for each room.

Over the past few months, I have been searching various websites and stores for simple light fixtures that would complement the overall feeling we are trying to achieve with our home. Classic, clean, and minimal, with a bit of a vintage industrial vibe.


INTERIOR LIGHT FIXTURES

We will be using quite a few canned light fixtures, especially in the open spaces – such as the dining/ living room and basement family room. However, in many of the other rooms there will be a need for various types of task lighting.

If you are interested in any of the light fixtures we have chosen for our home, be sure to click on the links below each picture!


Flush Mount Ceiling Fixture

This ceiling hugging fixture has sleek lines, and gives off a good amount of light. We will likely install in the downstairs office and possibly in the upstairs mudroom/ back entry space.

flush mount modern light fixture

Lanros Round Modern Flush Mount Fixture


Semi-Flush Mount

In rooms where we want a bit of an upgraded look, we will be placing these semi-flush mount fixtures. The master bedroom will have one, as will the main floor powder room.

semi flush schoolhouse light fixture

vintage style semi-flush mount


Dining Chandelier

We searched for a special light fixture to be used above our dining room table. This eight light pendant fixture is the perfect fit for what we were looking for. The linear design will mirror the long farmhouse style table we will be building custom, from trees felled on our property.

eight light pendant above dining table

Savoy House – Burgess – 42″ Eight light pendant


Vanity lighting

In the master, basement and upstairs bathrooms, this simple wall pendant will give just enough character. Using the same light fixtures in multiple rooms will help keep the continuity throughout the house.

industrial style vanity light

Above Vanity Light


We are also considering this fixture in a few locations around the house,  perhaps in one of the bathrooms.

single light wall sconce

Vintage Black Wall Sconce


Accent Pendant

This pendant will be perfect, hanging above our large cast iron sink in the kitchen. In such a clean and minimalist space, this accent will really shine.

industrial light pendant

Stone & Beam Vintage Ceiling Pendant


Large Room Pendant

With the vaulted ceilings upstairs, we will be using larger pendants. These farmhouse style industrial pendants have long cords, which will bring the light lower into the room – allowing for better coverage.

Three identical pendants will be set upstairs. One for each bedroom, and one for the hallway space.

simple warehouse style light fixture

Millenium Lighting Farmhouse Pendant (17 inch)


Master Bedroom Side Lamps

On either side of our master bed, we will be placing these swing arm lamps. Perfect while reading in bed!

bedside reading lamps

Globe Electric Swing Arm Lamp


Boys Sleeping Nook Lamps

In each of the boys sleeping nooks, they will have small reading lights as well. The multi-directional quality of these trumpet style lamps is really nice.

trumpet flare reading light

Trumpet Flare Wall Sconce


Closet lights

In the closets, we will be using smaller wall mounted fixtures. This is a bit of a splurge perhaps, as some of the closets really don’t need any lighting. However, the larger closets in the kid’s rooms will benefit from the extra illumination – especially in the dark storage space behind their hanging rods!

vanity wall bar light

Wall Bar Light 


EXTERIOR LIGHT FIXTURES

The light fixtures for the exterior of the house will follow the same style as the interior of the house. There are two different styles we are going to incorporate. Barn lights, which will be placed in feature positions – above the front door and above the garage doors.

industrial style outdoor barn light

Industrial Barn Light


These other simple flood lights will be placed on the side garage doors and near the walkout door.

simple outdoor flood light

Black Flood Light


MINIMALIST HOME LIGHT FIXTURES

Feel free to pin these light fixture ideas for reference!

minimalist home lighting


WOOD FRAMING | HOUSE BUILD UPDATE NO. 5

Time for another building update! In this week’s update I share all about the wood framing of our custom home build! Though I was hoping to share the entire framing process, things aren’t moving quite as quickly as we had hoped. This post will discuss the portion of framing that has been completed. And I will be sure to update again once the rest is finished.

finished foundation

At the end of Update No. 4 the foundation had just been completed. Essentially we had a very pretty looking hole in the ground, and were ready to begin the wood framing. I mentioned how excited we were for this step, when the building will start to take shape and begin to actually look like the house we had envisioned!


WOOD FRAMING STEP 1 | FLOOR TRUSSES

The first step in the wood framing process is to attach a wooden sill plate to the foundation. The sill plate is anchored to the concrete with large bolts and creates a base for the floor trusses to be tied to.

Floor trusses work essentially the same way as standard 1x member construction, with a few advantages. They allow for longer clear spans, as well as offering space for mechanical duct-work and plumbing. For these reasons, as well as the ease of installation, trusses are favored over traditional hand framing in residential construction today.

floor trusses

To install the floor trusses for our main level, the framers had to do some fancy footwork. The younger of the two was set with the task of almost ‘tightrope’ walking across the walk-out side wall. With a drop of over eight feet, it was a dangerous mission. He admitted to me later that it was a bit un-nerving! They did eventually get all the trusses in place.

wood framing floor trusses

For our family, it was fun to go into the basement and look up at all of the installed trusses since this was the first time that we had a mostly enclosed space to go into. Sensing the personal/ human scale of the project is very important and was something that we hadn’t yet been able to experience, having the spaces open to the great outdoors.

floor trusses from basement


ADDING THE SHEATHING

The next step in the wood framing process was to add the sheathing on top of the installed trusses. Once installed, the sheathing plus trusses work as a monolithic system, providing superior stability.

wood framing supplies

We were sure to take advantage of walking on our main level for the very first time. In fact, we made an evening excursion of it by picking up food from Dairy Queen and having a picnic on the site of our future dining space. The night was ideal, and the first moments we spent at our house together is a memory I will cherish forever.

night at the house site


WOOD FRAMING THE WALLS

Up next came the main floor wall framing. With the window locations set up, it was exciting for us to finally be able to see what the views from each of the rooms will be.

view from living room

It came as no big surprise that the most awesome view of all is from the open living/dining space, overlooking the woods and pond. The western facing kitchen window though displays a great sunset view, which we weren’t expecting.

standing in doorway of wood framed house

How cute is she, standing in the location of our future front door!

Walking through the shells of each room on the main level, I couldn’t help but imagine all of the memories that are about to be made here. We feel so blessed that we will soon be calling this place home.

wood framing update

Though I have given a bit of a mini walk through over on Instagram, I do plan to also film an entire ‘under construction’ house tour – once the wood framing is complete. Be watching for it!

view inside the house


CONSTRUCTION SITE VISITS

During the wood framing portion of the construction process, my husband and I settled into a nice site visit routine. I will typically stop by in the early afternoon, while out and about with the kiddos running errands. This is a chance for me to touch base with the crew, and answer any questions they may have. Craig will also swing by after he is done with work for the day. Typically the crew has left the site by that time, which allows him to take in the progress a bit more slowly. He generally takes a bunch of photos, then shares them with me.

wood framing in progress

These site visits help us to take in the day-to-day changes, as well as quickly catch any mistakes in the framing. One day Craig texted me a series of images and I discovered that the back three square windows weren’t centered properly. It’s something I hadn’t noticed earlier in the day, but from his pictures it was very obvious! The middle window should line up with a centered second story window, and it would have looked very goofy if the windows weren’t in alignment.

construction site visit

The center window should be centered on the back wall

And, though we are non-confrontational people, I contacted the framers right away to inform them of the mistake. Thankfully they acknowledged the problem and corrected it right away.


WALL SHEATHING + GARAGE

Next came the exterior wall sheathing. Covering the skeleton of wood studs really made the house shape come to life!

view from living room

The garage framing was also put into place. During the construction of the garage we did make a couple of minor modifications. We raised the sidewall approximately six inches, which in turn created enough space for eight foot tall overhead garage doors. Previously we had seven foot tall doors, but figured the extra foot will come in handy if we ever decide to get a larger vehicle for our large family.

garage wood framing

I am over the moon excited for my husband to finally have a fully functional garage, complete with good lighting, plenty of open floor space, and a proper tool bench. He has waited a very long time for this!

We are also anticipating that we will love having an attached garage during the bitterly cold Minnesota winters! Our oldest daughter, who has mobility issues, will be especially appreciative. The icy winter morning walks to our current detached garage have been full of anxiety and frustration!

house exterior


The wood framing continued with the setting of the second floor trusses plus sheathing. Because we were so anxious to see the view from upstairs, one night we took a ladder and climbed up. Without any walls for protection, it felt like we were standing on top of a mountain! It was a mighty sight!

view from second floor

Of course, the view won’t be quite as expansive once the walls are up. There are only two windows upstairs. One in the boys bedroom, which faces the street. And one for the girls, with a spectacular view of the woods.


WOOD FRAMING | NEXT STEPS

This week we had a bit of a standstill on the site. The concrete guy was supposed to be back to form up the porch stoop and have it poured – so that the roof trusses for the house and porch could be set at the same time. Unfortunately, the roof trusses were delivered a day too early. This meant that there wasn’t enough space on the site for a concrete mixer truck to come in and pour.

The new game plan is to install the roof trusses for the house and garage first, starting early next week, then come back to finish the porch and get the roof on that portion.

front porch pour

I am beyond giddy for the roof to go up, and to see the house shape in it’s completion! However, that will have to wait for the next update.

Be sure to stick around to see this little house of ours come to life! Thanks for checking in today!


HOUSE BUILD UPDATE NO. 5 VIDEO


PIN THE PROGRESS

framing our custom home


THE MAIN ELEMENTS OF THE A-FRAME HOME STYLE

image source

Welcome to another installment in the ELEMENTS OF HOME series. Each month, I showcase a different residential style here on the blog. It is my hope that this information will not only teach you a little something about the various styles; but also equip you if are designing or searching for a new house – by allowing you to determine which style(s) suit your lifestyle and preferences the most.

Today I will be over-viewing the A-frame home – including the history of the style and what makes it unique.


HISTORY OF THE A-FRAME STYLE

The ‘hut like’ dwelling shape of what we now know as the A-frame style has been in existence for many years, and in many countries – Europe, China, and the South Pacific Islands – primarily as accessory buildings. In 1934, Austrian-born architect Rudolph Schindler built a simple A-frame vacation house in a California resort community, overlooking Lake Arrowhead – bringing the design style to the United States.  It had an open floor plan with exposed rafters and glass-walled gables.

Americans took note, and with the rise in disposable income after WWII, families were able to afford vacation homes. Because the A-frame style was relatively simple and inexpensive to build, they became a popular choice. Eventually, as the style’s popularity increased, companies started offering kit houses. In fact, the popularity of the style rose, not from the architecturally designed examples that were built, but instead by the grass roots movement formed by DIY homeowners.

The peak of A-frame building was between the years 1950 and 1965, coinciding with the Mid-Century Modern movement; Both design styles have been making a resurgence in recent years. There are even modern day kit houses available in this style!


MAIN ELEMENTS OF THE A-FRAME STYLE

LOCATION

A-frames are in their element when positioned in the midst of nature – the forest, the mountains, and lakeside. Very rarely is this style found in neighborhoods, or lining city streets.

The A-frame’s tent like form blends perfectly in nature. Image Source: A-FrameHaus 

SIZE

The majority of A-frame homes are used as vacation properties and, as such, do not require all of the common day to day comforts/extras of a standard home. They are generally pared down to the most basic form, which means that they are quite a bit smaller than the average American home.

The tiny house movement has brought the A-frame to a whole new level of simplicity, offering a model as small as 300 sf!


EXTERIOR TRADEMARKS


  • STEEP ROOF THAT FORMS THE WALLS: The roof of an A-frame extends to the ground on both sides, leaving two gabled ends.
  • TRIANGULAR SHAPE: These homes shaped like an equilateral triangle. Its distinctive peak is formed by rafters or trusses that are joined at the top and bolted to plates or floor joists down below. The cross-piece of the ‘A’ is created by horizontal collar beams. These beams are used to stabilize the structure and many times are used as the floor support for a sleeping loft.

image source

  • MANY WINDOWS: The gabled ends of these homes are typically filled with windows, in various sizes and shapes – flooding the interior with natural light and spectacular views to the outdoors.
  • DEEP SET EAVES: Many of these homes have deep eaves – which allow protection of the gabled ends, and provide shading to the windows.

image source


INTERIOR SPACES

Many interiors feature exposed ceiling beams and structure. Coupled with the natural light that is filtered in from the gabled ends, a ‘cabin’ like atmosphere is created.  The floor space is typically left open, with a combined living/dining/ kitchen space, and only the more private bedrooms and bathrooms positioned behind walls.

Due to the shape of the structure, dead space is created on the outside corners of the floor plan – making it a somewhat difficult layout to furnish and decorate.

image source

COLOR SCHEME

Following along with their ‘one with nature’ feeling – the exterior coloring of A-frames are typically composed of materials that will blend well with their surroundings – natural wood shakes, green wood siding, dark roofing materials, etc.


NOTABLE A-FRAME HOUSES

image source

Reese House | Andrew Geller | 1957


Photo credit: Russ Carmack, courtesy Metro Parks Tacoma

Hellyer House | David Hellyer |1957


INSPIRING A-FRAME HOMES FROM AROUND THE WEB

These classic homes showcase the A-Frame style well. Take a closer look!


1 | 2 | 3


I hope you have enjoyed learning a bit more about the A-frame style. Curious which residential style will be featured next month? Stay tuned!

And be sure to check out the previously showcased styles here.


VIDEO TOUR OF ARROW HILL

As we continue to wait for contractor bid numbers to come through – we’re getting close! – our excitement level is rising at the prospect of building our little dream house.

We purchased our piece of land nearly 10 years ago; But because it is located a 20 minute drive from our current rental home, we don’t make the trek out to visit very often. I wanted to do a bit of site verification this week, and just generally check on things there – so I loaded up the kids and off we went.


As you can see, the property hasn’t been mowed or tended to in quite a long time. I wonder if the neighbors have complained at all? Not only was the grass, trees, and weeds overgrown – the mosquitoes were absolutely awful! I guess that is what happens when there is a lot of humidity, heat and rainfall. We should expect that by now from Minnesota summers. First order of business when we do move into the new house is figure out pest control!


After a thorough spray in bug repellent, I decided to take a short video tour of the property to share with all of you. I apologize for my shaky camera skills and heavy breathing – I was literally swatting the mosquitoes away while filming. The video gives you a basic lay of the land anyway. I am considering this the ‘pre-construction’ walk through.


I also had a fun little Photoshop experiment This is the approximate location where the house will sit. Beautiful, isn’t it? I imagine the views out of the windows will help keep us connected to nature.


I’m pretty sure that this Fall will have us back here again, with mowers, chainsaws, and clippers in hand – ready to give the property a much needed manicure and dream some more. Anyone care to join us for a work party?

If you’d like to learn more about about our site – THIS POST goes into a lot more detail!

SCANDINAVIAN STYLED EXTERIOR: MAKEOVER TAKEOVER

The Makeover Takeover series focuses on helping my readers – whose own homes provide challenges that they are having a bit of trouble solving. Whether it is a room that they want guidance on styling, a floor plan that needs re-configuring, or they are stumbling with choosing an exterior color palette, I am happy to help. I offer solutions through virtual design and source links.

Today’s Takeover is the first in the series to feature an exterior remodel example. I was approached by a couple who had a unique situation. They purchased their country home a few years ago. It is nestled in an absolutely stunning setting, surrounded by nature and wildlife -giving them plenty of room to roam – something that is very appealing to them as a large, young family.

The house though, has a very interesting story. Originally built as a church, it was moved to it’s country location and set atop a new full basement by previous owners. The church, turned home, offers plenty of living space for this large family, but creates a bit of a challenge from an exterior design perspective.


THE EXTERIOR TODAY


As you can see, a large drive under canopy was part of what was inherited from the house’s church days. Though it offers plenty of shade, the primary function is questionable. Because the house now has an attached garage, the homeowners do not need the extra space to park their vehicles.

Removing the canopy would prove to be more than the family wishes to take on – as it is firmly tied into the structure of the house. And the columns, which provide additional support, are embedded in concrete.


To the left of the canopy is the attached garage, and to the right is another wing of the house that features a covered porch. The family enjoys this space and how it functions. It simply needs a bit of added detail, and probably a new set of steps.


The exterior is primarily covered in faux stucco panels. Though the material is quite durable, the application is not as pleasing to the eye as it could be – with visible seams showing between each panel.


I created a non-detailed, 3D representation of the existing house. In total, the front facade is over 130 feet long. This also creates a bit of a challenge, because your eye tries to take the whole thing in at once. The canopy is a natural place for eyes to focus, but as it is at the moment – it offers little visual interest that would make you want to pause and admire.


PROPOSED CHANGES

Primarily, the homeowners asked that the visual scale of the canopy be brought to a more comfortable level, and that details be added to the exterior to give it more personality and presence.

Being of Swedish lineage, the family has a special fondness for historic Scandinavian residential design – especially it’s clean, simple lines, and the fresh contrast that often exists between the main exterior paint color and trim.

example of a simple, historic Scandinavian home


In addition, they plan to take on this exterior refresh using their own sweat equity. For that reason, they asked that all design changes presented would be simple enough for them to tackle, and not include anything that would require special structural attention.

They plan to first focus on the front facade, and eventually bring the same detailing to the other sides of the home.


FINISH INSPIRATION

My inspiration for the exterior remodel is centered around the look of classic Scandinavian residential architecture – with classic vertical board and batten detailing, and white trim to accent the red overall color of the home. At the same time, I am proposing the use of low maintenance materials and plantings, which will help the house to look fresh for years to come.


AND NOW FOR THE BIG REVEAL!

I would say that is quite a transformation! In reality, the changes that will need to be executed are not extensive. Only a few key design elements were incorporated to achieve this stunning look.


The first area of detailing that I tackled was the canopy. The visual weight of the large overhead piece, being supported by four seemingly small columns, made the entire house look unbalanced. By giving each column a wider base, and adding 8×8 timber post accents at the top, the scale of the columns appears much more sturdy.


Though they will not be supporting any weight, the addition of two columns at the front face of the canopy will further add to the feeling of balance and stability. Because they line up to frame the windows on the house’s wall beyond, they will also contribute to the visual symmetry of the canopy element.


The smaller entry porch feature that currently exists is dwarfed by the size of the overhead canopy. I propose a raised deck area that extends the entire width of the canopy and projects eight feet, from the face of the house to the first set of columns. Integrating the deck with the column structure will give the sense that these elements were planned for a purpose – neither being an after-thought. The steps of this small porch extend the entire width, and lead to a ground level patio.


In order to hide the seams of the faux stucco panels, I am proposing the use of 1×2 batten pieces. These will cover the seams, and be spaced approximately 2′-0″ on center. Painted the same color as the house body, they will serve to add texture.

With this design, all of the windows will receive 1×4 trim. When painted white, this trim will contrast nicely with the bold house color. Framing the windows with this simple detail instantly adds visual interest to an otherwise flat facade.


Around the perimeter of the patio, I am proposing natural grasses and low maintenance flowering bushes that can aide in softening the entire structure, as well as defining the outdoor living space.


I am very happy with how the design came together, and can’t wait to see pictures of the finished project! The family hopes to get started very soon!


If you would like a digital home design consultation for your home, please email me using the contact information provided in the main menu above. Though this service is no longer offered free of charge, my prices are very reasonable and I am able to accommodate your design needs – whether it is a one hour consultation or an entire new house design!


This post contains affiliate links to products for your convenience. If you purchase via my links, I may receive a small commission at no additional cost to you. Thanks for supporting Arrow Hill Cottage!


THE MAIN ELEMENTS OF THE TUDOR HOME STYLE

Welcome to another installment in the ELEMENTS OF HOME series. Each month, I showcase a different residential style here on the blog. It is my hope that this information will not only teach you a little something about the various styles; but also equip you if are designing or searching for a new house – by allowing you to determine which style(s) suit your lifestyle and preferences the most.

Today I will be over-viewing the Tudor home – including the history of the style and what makes it unique.


HISTORY OF THE TUDOR STYLE

The style was born in American after the height of the Queen Anne Victorian home reign. The fancy, elaborate Queen Anne’s, with all of their mass produced detailing, was falling out of favor – And, in turn, homeowners were beginning to search for handmade, craftsman touches. An interest in Medieval and early Renaissance architecture, common in early 1600’s England, brought the eclectic Tudor style to America in the early 1890s.

Many of the first homes built in this style were commissioned by European trained architects – for wealthy American families. As the popularity of Tudors grew, they became known as ‘Stockbroker Tudors’  – a nod to the many homeowners who had earned their wealth in the stock market boom of the 20’s. Eventually, the Tudor style became popular with middle class American families as well, and in the 1920’s and 30’s it was one of the most frequently built home types.


During World War II, with a resurgence of patriotism, a majority of the country’s homeowners preferred to build using the more ‘American’ architecture of the Colonial Style. That notion, partnered with the fact that Tudor style homes tended to be expensive to build and maintain, saw the style falling out of favor.  The height of it’s popularity ended in 1940.


MAIN ELEMENTS OF THE TUDOR STYLE

LOCATION

Though examples of the classic Tudor style can be found across the country, there are quite a few prime examples that exist in the Eastern states, especially in the Washington D.C. area.

Most commonly, this home style can be found in residential city neighborhoods and not in country settings, save a handful of large country estate mansions.


SIZE

The size varies widely for this home style. The first examples were built as very large homes and even mansions; But through time, as the style became more popular, modest Tudors began dotting neighborhoods. These smaller Tudor homes now make up the great majority of examples that exist in America.


EXTERIOR TRADEMARKS


  • STEEPLY PITCHED ROOF: Usually in a gable configuration, the roofs generally display little to no overhang. Though rare, some roofs are covered in a false thatching, in an attempt to mimic the picturesque thatched roofs of rural England.

an example of a false thatched roof


  • DECORATIVE HALF-TIMBERING: This non-structural technique is employed on approximately half of all Tudor style homes. This again is a nod to medieval infilled timber framing. The infill material is most commonly stucco, though brick and stone can also be found.


  • TALL, NARROW WINDOWS: Traditionally constructed of either wood or metal, in the casement style. They are frequently seen in groupings of three or more, the most prominent grouping centered below the main gable. Leaded glass paneled windows, set in a diamond pattern, are also common.


  • MASSIVE CHIMNEYS: One of the most popular detail of the Tudor style is a large, elaborate chimney. They are commonly placed in prominent locations on either the front or side of the house.

image source


INTERIOR SPACES

The interiors of Tudor homes are rich with detail and interest. The living rooms almost always feature a large focal fireplace. Heavy wood timber beams, similar to those used on the exterior detailing, commonly accent interior spaces. Arched openings between rooms is also a popular detail.

image source


The website traditionalhome.com has a wonderful slideshow featuring the Tudor style and how a home can be detailed- on both the interior and exterior – to reflect the historic nature of the home, while at the same time remaining relevant in the 21st century.


COLOR SCHEME

The exterior of classic Tudor homes are nearly all composed with a combination of four basic materials: stucco, brick, stone and wood half-timbering. Because of the use of these natural materials, the homes have a very ‘earthy’ exterior appearance. Most feature a darker base of stone or brick, and a lighter upper half with a cream or white stucco accented with dark wood beams.


NOTABLE TUDOR HOUSES


Ishpiming Mansion | Lindley Johnson & Leon Dessez | completed 1894


Agecroft Hall | Henry G. Morse | built in England in the late 1500’s and transported to America


INSPIRING TUDOR STYLE HOMES FROM AROUND THE WEB

These classic homes showcase the Tudor style well. Take a closer look!


The Happy Tudor


Tone on Tone


I hope you have enjoyed learning a bit more about the Tudor style. Curious which residential style will be featured next month? Stay tuned!

And be sure to check out the previously showcased styles here.


SATURDAY SKETCHBOOK: MASTER BEDROOM

I hesitate to call this room the ‘Master Bedroom’, since it lacks some of what would be considered standard features. There will be no on-suite bathroom or walk-in closet. But it is the bedroom that Craig and I will use – and since we are the ‘masters’ of the property, per se’, I guess the phrase will work. Ha!

As I mentioned in this recent post – the room is not at all large. When dividing up square footage in the floor plan, we made the decision to give more to the shared/ public spaces in the house (such as the living room and kitchen) and to make the private spaces (such as bathrooms and bedrooms) a bit smaller. This is a decision that we are 100% okay with, as the members of our family tend to rarely spend time in the bedrooms.

The location of the bedroom itself was something I thought about for a very long time. Because we intend to live in Arrow Hill Cottage for as long as life allows, I wanted to be sure and include at least one bedroom on the main level. Our kids are old enough now that it works for our family to have their bedrooms upstairs – giving them (and us) a bit of separation and privacy. Besides the bedroom, the rest of the main level is shared/ public space – In order to make the room feel as private as possible, I used the stairway as a ‘buffer’ and also located the closets, fireplace, and built-ins between the living room and bedroom – which should help to reduce noise transfer.

The Master Bedroom is 10′-4″ wide by 12′-5″ long, 128 square feet. But even with it’s small size, it should be able to pack a good design punch – with a few key features.


NATURAL LIGHT

I have said before that I love natural daylight. The Master Bedroom will have three large South facing windows that overlook the front porch. They are sure to let in some great light, which I am very excited about! And because they are across from the bedroom door, the view out of these large windows is likely to be the first thing you notice when you walk in. For privacy and light filtration, these windows will likely have some sort of covering.

I like the look of a simple natural roman shade.


TRAY CEILING

We have a large amount of tongue and groove barn-wood, which was removed from an old summer kitchen on Craig’s parent’s property. I am hoping to re-purpose some of the wood in the trayed portion of the Master Bedroom ceiling. I think it will add a bit of warmth to the room, as well as sentimental/ personal appeal.

I also love sleeping with the white noise of a fan, and want to find a pretty ceiling fan to replace the chunky box fan that we are currently using.


FRENCH DOORS

The closet, though not the walk-in variety, is a decent size. We plan to use a set of vintage french doors (from the farmhouse we are currently living in) to access the closet space. Of course, the glass on the doors will need to be frosted in some way so that our clothes and shoes aren’t on display!

The doors have such a great patina, but I may need to sand and stain them to mix a bit better with the other wood tones.


TUFTED HEADBOARD

We have a queen size bed with the world’s most comfortable mattress. Although it has probably outlasted it’s life expectancy at this point, we are not ready to part with it.  I have wanted a diamond tufted headboard for a very long time. The thought of aqua velvet keeps popping up in my mind, but I think a more neutral fabric choice would better suit the room – without overpowering it.

There are a ton of great DIY tutorials for tufting, such as this one from Homeade by Carmona. It looks pretty straightforward and the directions are detailed enough that I may just get brave enough to tackle this project, and save a few dollars.

A nightstand and reading lamp with an operable arm will be situated on either side of the bed – giving the bed wall a very balanced and symmetrical look.


At the foot of the bed, I plan to position a special pine chest that my uncle built for me as a seventh birthday present. It is full of memories and keepsake items – and I cherish it!


READING NOOK

A few years ago I found this cute chair through a local online ad. It’s in a bit of rough condition currently, but it has a great shape and I can see a lot of potential! I am thinking of reupholstering it and maybe painting the frame, or staining it a different color.

There will be a series of shallow shelves behind the door, where I plan to house our book collection, as well as a few mementos and collectibles.

And of course, there will be baskets. No room is complete without baskets.


The rest of the accessories and art for the room are a bit sketchy in my mind at the moment – but I know that I want the vibe to be calm and relaxing, yet not too stuffy or formal. I am envisioning pops of color to add interest, and lots of visual texture. I love textiles such as rugs, pillows and bedding – and will surely have plenty of fun making each of those choices. Here are a few that have already caught my eye.

These pretty embroidered floral accent pillows are simply gorgeous. From Say It With Pillows on Etsy


Fun navy blue and white patterned pillow from Hayneedle


Grey and white striped sheet set from Target


This jute rug from Overstock would be a perfect natural accent to the room.


There may be enough room to have a tall and shallow dresser on the long wall.


Shallow dressers can be somewhat difficult to come by, but I did find some nice options from Wayfair, including this gorgeous piece.


On top of the dresser, I will layer art and possibly a mirror and other accessories. I love this sign from Rooted & Grounded Home (on Etsy)


I’m excited for this beautiful, clean and relaxing bedroom!


THE FIVE PHASES OF NEW HOME DESIGN

In the course of designing your new home, you will walk through a variety of phases – each a bit different in nature. Though they tend to flow into each other slightly, there are five general categories of progression: analysis, preliminary design, development, documents, and construction review.

Understanding what to expect in each phase can be a helpful guide for your home design process. If you are considering designing your home solo – or working with an architect or designer – you can prepare early by knowing what is to come.


PROGRAM ANALYSIS

In this phase you will determine what your needs and wants are for your future home. You will be looking at potential building sites and thinking about the number of bedrooms, bathrooms and common spaces your home will have. You will also begin to think about your project budget. To help you answer these program analysis related questions, visit this blog post and complete a series of worksheets.


PRELIMINARY DESIGN

Through this phase you will be determining the desired spacial relationships within your home and also the connections that will be made from indoors to outdoors. The spaces will begin to resemble a floor plan in it’s very basic sense. Drawings will be created in the form of quick basic sketches.

You will also be thinking about the house styles that appeal to you most, and likely searching Pinterest for inspiration photos.


DESIGN DEVELOPMENT

Just as it’s name implies, this phase of home design refines the spaces and their relationships. You will begin thinking about your home in three dimensions – focusing not only on the floor plan but also how the home will feel on the inside and look from the outside.

Near the end of this phase, you will want to get a better idea of what it would cost to build your home project. By obtaining estimates at this point, you will still be in the position to make major changes to the design if needed for budgetary reasons.


CONSTRUCTION DOCUMENTS / BIDDING

This is the phase when things begin to feel very real. Your drawings will include measurements and notes for the construction crew. Specifics on window and door sizes and styles will need to be made, as will finish material selections. Legal and technical information will be gathered and compiled to form the final ‘blueprints’ of your home.

During this step, you will be obtaining solid construction bids and determine who you will be hiring to build your home.


CONSTRUCTION ADMINISTRATION/ REVIEW

Homeowners vary greatly on the amount of involvement they have in this final phase of the process. While some choose to be on site every day to monitor progress, others pass the responsibilities onto their contractors (or architects) completely. I would advise that it is best to have at least some involvement – to build a great relationship with your contractor and design staff. The truth is that no matter how detailed you are able to get on your construction documents, there will inevitably be questions that will arise during construction; And if you put forth all the effort to be involved in the design of your home, you will want to follow through completely and ensure it is built the way you envisioned.


These five phases should work together seamlessly so that your ideas about home function and comfort can be brought to life. Each phase can be demanding, but the hard work will pay off in dividends when you are enjoying your brand new custom designed home.

THE MAIN ELEMENTS OF THE MID CENTURY MODERN HOME STYLE

Welcome to another installment in the ELEMENTS OF HOME series. Each month I showcase a different residential style here on the blog. It is my hope that this information will not only teach you a little something about the various styles; but also equip you if are designing or searching for a new house – by allowing you to determine which style(s) suit your lifestyle and preferences the most.

Today I will be over-viewing the Mid-Century Modern home – including the history of the style and what makes it unique.


HISTORY OF THE MID-CENTURY MODERN STYLE

This style received it’s name partly because of the time period in which the homes were being built. Mid-Century. Mid 20th century to be exact. There is a bit of discrepancy on which years are included; But generally speaking, the Mid-Century Modern style comprises houses built from the years 1935 to 1965.

This was a tumultuous time in history. In the mid 1930’s, the threat of the second World War was looming and various architects, including the pioneers of the Bauhaus Movement – Walter Gropius, Marcel Breuer, and later Meis van der Rohe, fled Germany for America. These men were aiming to unite art and industrial design.

At the same time, American designers were highly influenced by the simplicity and integration with nature that was prevalent in Brazilian and Scandinavian architecture.

image source

At the end of the war, as Veterans were returning to America, the need for affordable and quickly constructed houses arouse. These soldiers were looking to settle down and start their families. While architects designed stunning homes in the Mid-Century Modern style, it was real estate developer Joseph Eichler who is credited with bringing it to the masses – through his tract home development.

image source

MAIN ELEMENTS OF THE MID-CENTURY MODERN STYLE

LOCATION

Typically, these homes were constructed in suburban settings. The first Mid-Century Modern homes started to take root on the West Coast. They became popular in California and then on the East coast. Slowly, the style began to spread sporadically throughout the country.

image source

SIZE

During the Baby Boom, Americans were looking for spacious, open homes that they could entertain in. The Mid-Century style lent itself well to the desires of suburban families. Homes were designed to be between 1,500 and 2,500 square feet – only slightly smaller than 2017’s home average square footage (2,687).

image source

EXTERIOR TRADEMARKS

  • VARYING ROOF LINES: Creative roofs were popular at mid-century. Among those utilized most frequently were flat roofs with deep overhangs, saw tooth roofs, and the most beloved ‘butterfly roof’ – which got it’s name from the shape the gables take on as they connect at midpoint and extend upward.

image source

image source

  • ONE LEVEL DESIGN: Generally, Mid-Century Modern homes are one story structures.

image source

  • SPACE FOR AUTOS: This era of design was the first to begin offering shelter for automobiles. Many homes include attached garages or carports.

image source


image source

  • CONNECTION: Connection to nature was of utmost importance to the designers of the Mid-Century Modern style. As such, these homes feature a wonderful collection of indoor/outdoor spaces – such as large covered patios, enclosed courtyards, and entire walls that open up to allow access to the yard.

image source


INTERIOR SPACES

Whereas homes built before this time period were composed of smaller compartmentalized rooms, the Mid-Century modern home employed the ‘open floor plan’ approach. This was accomplished, for the first time, partly because of improved construction techniques. Heavy/solid bearing walls were replaced by posts and beams.

Typically these open spaces had a fireplace focal point.

image source

These homes were also the first to employ bi-level floor plans – including sunken living rooms, for example.

image source

COLOR SCHEME

The colors used in the Mid-Century Modern style are warm and earthy. The tones are derived from the materials used, such as stone grey and rich auburn wood. There is also a generous use of graphic black and white that accompanies this style.

Other popular colors during the period when these homes were constructed include muted jewel tones – turquoise, emerald and mustard yellow, for example.

image source

image source

COMMON FEATURES

Of course, no two houses are exactly alike; But there are design elements that are seen again and again in Mid-Century Modern styled homes – such as these statement features:

  • PRIVATE FRONT FACADES: The entrance to a Mid-Century home is generally understated and private. These homes are typically oriented so that the backyard entertaining areas receive the mid-day sun.

image source

  • CLEAN LINES: One of the primary goals of this design style is honesty of materials – where the sole ornamentation comes from the materials themselves. The creative and streamlined use of stone, block, glass and wood is prevalent.

image source


image source


  • FLOOR TO CEILING PANES OF GLASS: Continuing with the desire to create a connection with the outdoors, many Mid-Century Modern homes employ large panes of glass – offering stunning views and an abundance of daylight.

image source


INTERIOR DECOR

Generally, the Mid-Century Modern decorating style could be considered sparse. The simple lines of the architecture are mirrored in the furniture pieces; and the furniture market during the Mid-Century era had a life all it’s own. The new materials of the day including plastics, resins, composites, laminate and fiberglass opened up an entire new range of possibilities.

image source

The furnishings best suited in these homes are clean and sleek, with minimal ornamentation.

Walls, ceilings and floors also showcase simple materials. The juxtaposition of different, and sometimes contrasting, materials is common.


image source

image source

FAMOUS MID-CENTURY MODERN HOUSES

You may already be familiar with these stunning examples of residential Mid-Century Architecture. They are classic,  and adored by many.

The Philip Johnson Glass House | Architect: Mies van der Rohe | 1949


The Stahl House |Architect: Pierre Koenig | 1960


Neutra VDL Studio + Residence | Architect: Richard Neutra|1932/ rebuilt 1964


INSPIRING MID-CENTURY MODERN STYLE HOMES FROM AROUND THE WEB

These homes showcase the Mid-Century Modern style well. Take a closer look!

Left to Right: 12 | 3

I hope you enjoyed learning a bit more about the Mid-Century Modern style. Curious which residential style will be featured next month? Stay tuned!

And be sure to check out the previously showcased styles here.

25 HOME DESIGN BOOKS TO READ FOR INSPIRATION


Designing a home can be a pretty overwhelming thought, especially considering there is no right or wrong way to do it.  How do you narrow down the decisions when there seem to be endless possibilities of size, style and function?

Sometimes, you know what you like when you see it.  You realize which direction to take when you see that someone else has been successful following a similar path.  These days, technology gives us inspiration at our fingertips through venues such as Houzz, Pinterest and Instagram.  You can search the internet for ideas and tips, but there is just something so comforting and personal about using a book for inspiration.

I have amassed a large collection of Home & Garden + DIY books through my years working in the architecture field, and they are literally referenced ALL.THE.TIME both for personal enjoyment and professional development. The amazing thing is that even with all of this use, each time I flip through their pages, I seem to notice something new. A solution to a problem we have been having at our own home, a simple plan change that might benefit a client, or an inspiring use of materials.

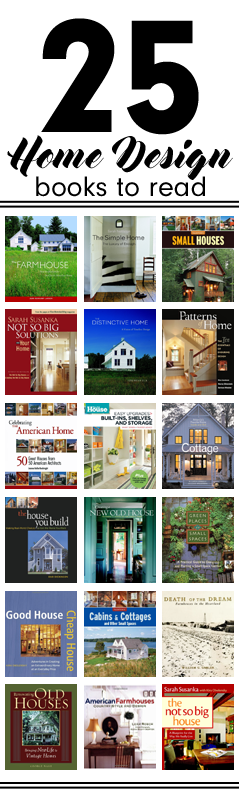
From my personal library, I have curated a collection of 25 Home Design books that are MUST READS – the cream of the crop.  The words I use to describe each book in the reviews below are my own thoughts and insights.  You can click on the images to learn more about each book, read reviews from other customers, or purchase for yourself.

Happy Reading!


This post contains affiliate links to products for your convenience.  If you purchase via my links, I may receive a small commission at no additional cost to you.  Thanks for supporting Arrow Hill Cottage!


1. THE NOT SO BIG HOUSE: A BLUEPRINT FOR THE WAY WE REALLY LIVE by Sarah Susanka

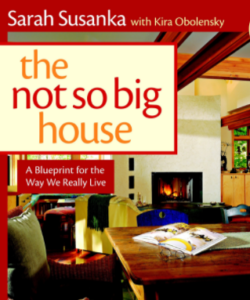
I am starting out the list with one of the classics. Originally released in 1998, this ground-breaker was re-written in 2009 to include 16 additional pages of high class information.

The author, Sarah Susanka, is a renowned architect and leader in the small house movement, giving her readers a simple message – that quality should come before quantity.  The book gives homeowners plenty to think about in regards to what is really necessary in a home.

The Not So Big House encourages house design that means more than the total square footage.

  
2. CREATING THE NOT SO BIG HOUSE: INSIGHT AND IDEAS FOR THE NEW AMERICAN HOME by Sarah Susanka

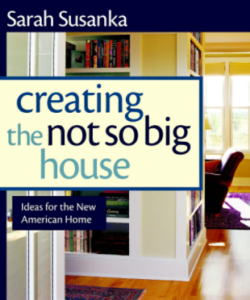
The Not So Big House started a movement to change they way people think about the American home, and this book calls those ideas to action by presenting key design strategies.

As in book one, Sarah gives plenty of examples of how these strategies can help make a smaller home live large.

With plenty of inspiring images to describe the topics presented, this book is easy to follow, and the techniques presented are useful whether you are building new or remodeling your existing home.

 
3. NOT SO BIG SOLUTIONS FOR YOUR HOME by Sarah Susanka

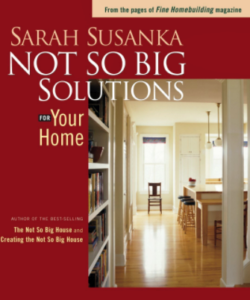
Whereas the first two books in the Not So Big series focused on overall concepts, Not So Big Solutions for Your Home tunes into the small details that can improve how people use their homes.  Simple tips are offered to homeowners looking to make their spaces more functional. From positioning a tv in a family room, to designating a mail sorting station, there are ideas to solve all sorts of the common problems that homeowners face.

The concepts in this book are complemented almost entirely with hand drawn sketches, which adds a personal and fun touch.


4. INSIDE THE NOT SO BIG HOUSE: THE DETAILS THAT BRING A HOME TO LIFE by Sarah Susanka and Marc Vassallo

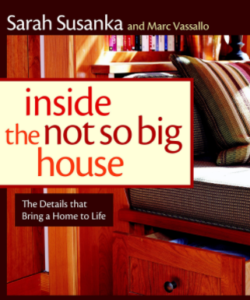
This book is not as much of a ‘How To’ as the others books in the series are. I would describe it more as a collection of homes, each designed with the Not So Big principles, that are presented as case studies of a well designed home.

The pretty pictures serve as evidence that by following the ideas in the previous books you can attain a personalized home to fit your family’s lifestyle.

Home styles from the modest ranch to a Tuscan villa are represented. In that respect, I feel that this book has a little inspiration for everyone’s style.


5. OUTSIDE THE NOT SO BIG HOUSE: CREATING THE LANDSCAPE OF HOME by Julie Moir Messervy & Sarah Susanka

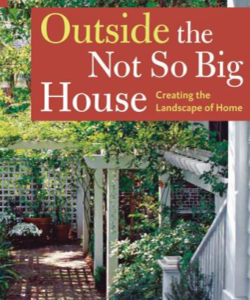
Extend your home beyond its four walls by using the concepts of landscape design presented in this book. Learn how to embrace the site that your home occupies by not only appreciating the elements that nature provides, but finding a link to connect the home’s interior to it’s surroundings.

Concepts discussed include discovering privacy in your yard, using variety in plantings, and living lightly on the land. The twenty homes/landscapes presented in this book each utilize these concepts in an interesting and thoughtful way.


6. NOT SO BIG REMODELING: TAILORING YOUR HOME FOR THE WAY YOU REALLY LIVE by Sarah Susanka and Marc Vassallo

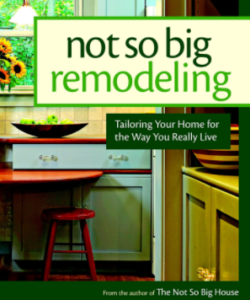
Through the pages, authors Sarah Susanka and Marc Vassallo provide simple but clever ideas that can have a big impact on how the space in your home is used. Many of their ideas work within the existing footprint of the home, though they also show examples that involve adding on just a little.  No major home overhauls are tackled.

Not So Big Remodeling does a wonderful job of showcasing basic remodeling solutions for virtually any room your home may have – from bathrooms to home offices, even basements!


7. SMALL HOUSES by the Editors of Fine Homebuilding

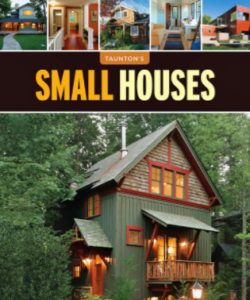
One of my favorite things about this book is the way it is laid out.  It is broken into sections based on house size, from those under 1,200 square feet all the way up to homes as large as 2,250 square feet.  This varied range of scale proves that ‘small’ is a relative term.

If building new, Small Houses provides a list of ten techniques to keep the size down, including the use of multipurpose space and using varying scale to elongate the feeling of expanse.  The book also provides examples of homes that were improved with small additions over time.


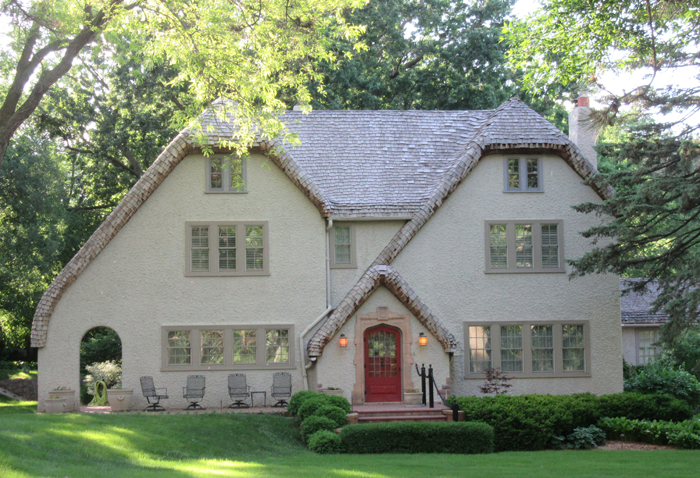
8. COTTAGE: AMERICA’S FAVORITE HOME INSIDE & OUT by M. Caren Connolly & Louis Wasserman

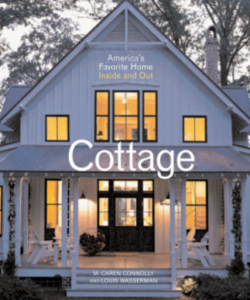
You can probably guess from the name of our future property (and this website) Arrow Hill Cottage, that I have a fondness for this particular home style.  What appeals to me about cottages is their personally scaled size, cozy intimate interiors and deep connection to their surroundings.

The authors of this book feature 24 unique cottages through beautiful photography and amazing watercolor drawings – including mini floor plans of each. The text is also well thought out and informative – providing insight into site planning, the use of vernacular building materials, and current and future trends in cottage design.


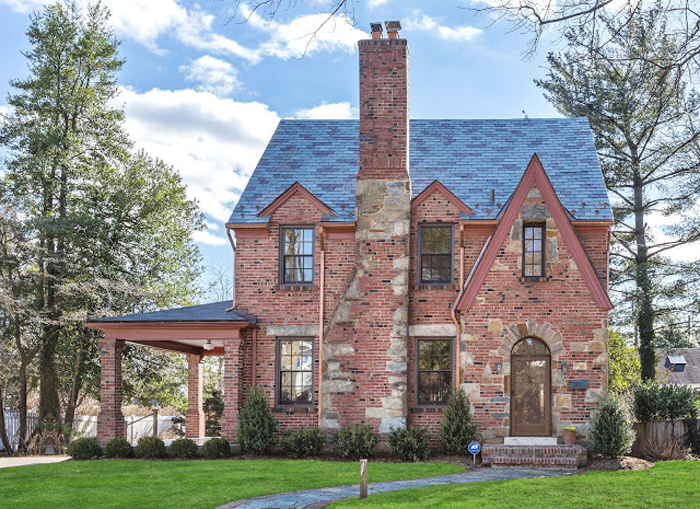
9. THE FARMHOUSE: NEW INSPIRATION FOR THE CLASSIC AMERICAN HOME by Jean Renkamp Larson

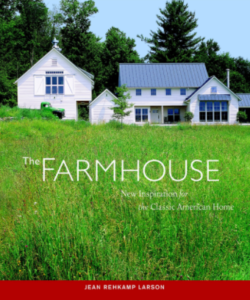
There is just something about a farmhouse.  It is an iconic symbol of a more simple era. Farmhouses aren’t pretentious or showy, yet they are timeless and well loved by many.

This book presents a collection of newly built and remodeled homes, each that use the classic farmhouse as a model for design.  The examples of homes throughout its pages prove that the hearty form and basic shapes of the style is highly adaptable for modern day living. Jean Renkamp Larson did a wonderful job showcasing the simplistic beauty of today’s interpretation of this classic home style.


10. PATTERNS OF HOME: THE TEN ESSENTIALS OF ENDURING DESIGN by Max Jacobson, Murray Silverstein & Barbara Winslow

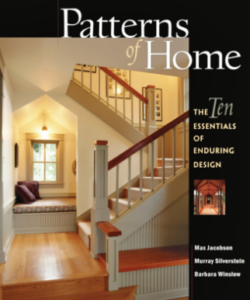
The three architects who authored this book present what they consider to be the ten essential elements that make a home timeless.

The book is clearly written, with wonderful photographs of houses from all over the country used to showcase the patterns – including the composition of building materials, the way light is captured, and the flow between rooms. The concepts laid out in this book, if executed properly, can really make a difference between a purely functional home and one that inspires it’s inhabitants.


11. DEATH OF THE DREAM: FARMHOUSES IN THE HEARTLAND by William G. Gabler

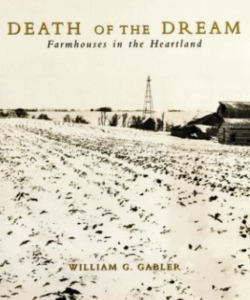
This book is unlike any other on this list, in that it is more of a history lesson than a tutorial of design.  It is also regional specific, focusing the attention on farmhouses built in the Minnesota prairie.

The author is an amazing story teller and photographer and he beautifully illustrates how pioneer farm families, mainly immigrants from Europe, settled on government provided free land with the dream of starting a new life. He explains how these homes were designed in an evolutionary way, by the people who inhabited them, based primarily on the immediate environmental conditions that presented.


12. THE SIMPLE HOME: THE LUXURY OF ENOUGH by Sarah Nettleton

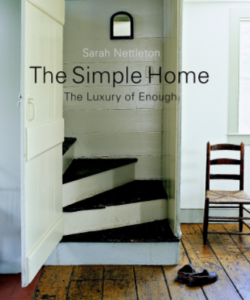
The Simple Home encourages you to think about the sounds, feelings, and movement that allow you connect to life itself – thinking less about what you want in a home and more about who you are and what you need to be fulfilled – then translating them into elements of your home.

The author of this book contends that less is more, and that by eliminating non-essentials, you can design a simple home that will help you and your family appreciate the simple pleasures of living. The book is laid out with six main concepts to keep in mind.  Simple is: Enough, Flexible, Thrifty, Timeless, Sustainable, and Resolved Complexity.


13. THE HOUSE YOU BUILD: MAKING REAL WORLD CHOICES TO GET THE HOME YOU WANT by Duo Dickinson

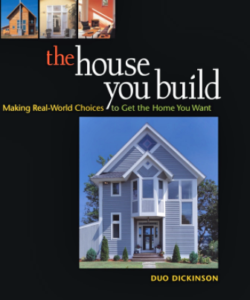
The house is the largest purchase most Americans will ever make.  Why then, the author questions, aren’t more people living in the home of their dreams? The budget seems to be a stumbling block for many, and Duo Dickinson sets out in this book to encourage the readers that it doesn’t have to be.

20 homes are presented and the cost to build each is listed, which I believe was a wonderful decision on the author’s part.  By adding this little bit of information, left out of nearly every other home design book I have read, Mr. Dickinson immediately brings the homes to a relate-able level to his readers. They are real world examples, homes built by people of all walks of life.


14. GREEN PLACES IN SMALL SPACES: A PRACTICAL GUIDE TO DESIGNING & PLANTING A SMALL SPACE GARDEN by Kerwin Fischer

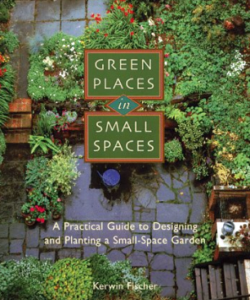
This book does a wonderful job explaining gardening in simple layman terms so that even people like me, who don’t posses a green thumb, can feel confident trying their hand at growing their own plants and flowers.

Kerwin Fischer, the author, starts at the basics of how to select a spot to make ‘green’, by evaluating aspects such as light levels, protection from wind, and access to water.

Further in the book, he thoroughly describes which flowers bloom during which seasons, and also explains how to prep flower beds or pots for their dormant seasons.


15. YOUNG HOUSE LOVE: 243 WAYS TO PAINT, CRAFT, UPDATE AND SHOW YOUR HOME SOME LOVE by Sherry & John Petersik

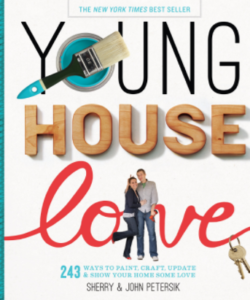
I have been following the Young House Love blog for years, so when they released their first book – with the same title – I was super pumped! The book does not disappoint and is written in the same personable voice that John and Sherry Petersik are known for.  And just like the blog, the book is a treasure trove of creative ideas.  From learning how to style a bed, to creating coasters – there is a project for every skill level, and by tackling them, you are sure to add some whimsy and personality to your home.

I consider this book to be more of a home DECOR book, but included it in this list because sometimes a simple spruce up is all the inspiration you need.


16. CREATING A NEW OLD HOUSE: YESTERDAYS CHARACTER FOR TODAY’S HOME by Russell Versaci

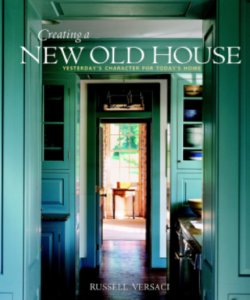
Perhaps you love the charm of historic houses, but don’t feel like signing up for all of the upkeep that they require.  This book shows that it is possible to craft a new home with the familiar forms and harmonious proportions of these traditional structures, while providing the amenities necessary for modern day living.

Mr. Versaci lays out what he calls the Eight Pillars of Traditional Design, which are techniques that should be used to create new houses with traditional qualities. They include using authentic details, crafting with natural materials, and respecting the character of place by complementing the lay of the land.


17. THE DISTINCTIVE HOME: A VISION OF TIMELESS DESIGN by Jeremiah Eck

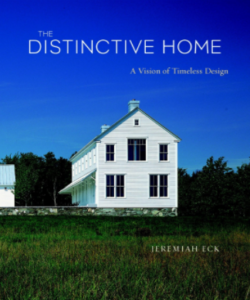
The author of this book has a theory that for a home to be distinctive, or timeless, it needs to have a balance of site, floorplan, and exterior and interior detailing.  He provides multiple house examples, and lays out how each of them excels in each of these four categories.

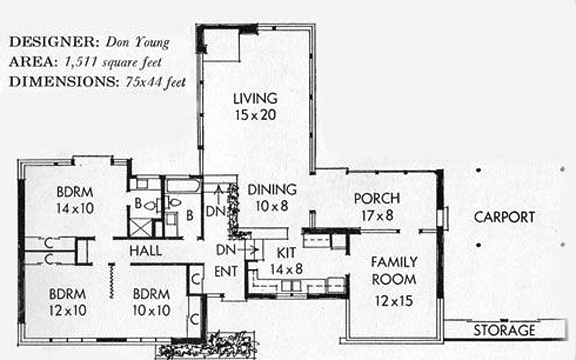
The book is well organized and easy to understand and also includes small reference floor plans for many of the homes, which is personally one of my favorite things about home design books! The Distinctive Home will probably be most useful for people who are looking to design a brand new home, and not those that are remodeling a historic one.


18. CELEBRATING THE AMERICAN HOME: 50 GREAT HOUSES FROM 50 AMERICAN ARCHITECTS by Joanne Kellar Bouknight

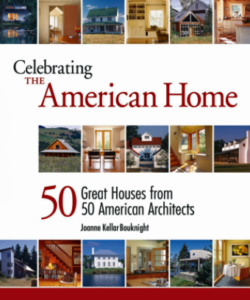
The title of this book really describes what it is all about! All 50 homes were selected by a panel of distinguished residential architects, who chose them based on how well they illustrate great residential design – including five important qualities: a great response to the site they occupy, a comfortable scale both inside and out, livability that accommodates both everyday life and special occasions, a deep respect for craft, and a distinctiveness that transcends the ordinary.

A wide variety of home styles are represented in the selection, from a humble cabin by the lake to a modern townhouse in the heart of the city.


19. GOOD HOUSE CHEAP HOUSE: ADVENTURES IN CREATING AN EXTRAORDINARY HOME AT AN EVERYDAY PRICE by Kira Obolensky

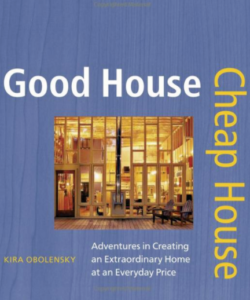
Want to design and build your own home, but fear that finances won’t allow it? This book seeks to prove that a good house does not need to cost a fortune.

The author presents three main aspects that can help you save money when designing and building your own home.

There are 27 homes featured in the book, and each of them brings something unique to the table.  A house on stilts.  An owner who poured concrete counter tops for his kitchen. A structure inspired by music.  Each home perfect for its owners.


20. FLEA MARKET STYLE: DECORATING.DISPLAYING.COLLECTING by Better Homes and Gardens

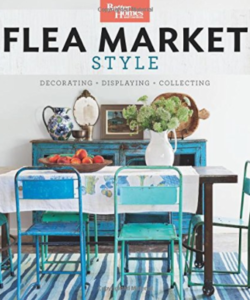
Another home decorating book to make my list, Flea Market Style has such amazing images that portray a variety of house interiors – including bohemian, cottage and country styles – proof that style is personal.

Decorating with found treasures, whether collected by thrifting, rummaging or antique shopping, is a favorite of homeowners.  This book shares practical tips and advice for shopping and lays out concepts on how to display your finds without giving your house a cluttered look.

The last section of the book reveals ideas on how to re-purpose your finds into unique home decor items.


21. CABINS & COTTAGES AND OTHER SMALL SPACES by the Editors of Fine Homebuilding

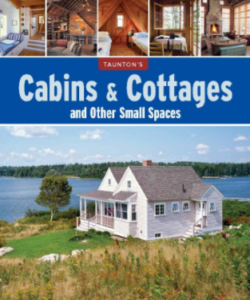
I’m just going to go ahead and say it.  I love this book!

As a big fan of houses that are scaled to fit its occupants, I was impressed to see such a wide variety of examples presented – even a house boat example is included!  The photos and sketches are beautiful to look at. Truly inspiring.

Readers will also appreciate that most designs list the total square footage and the general cost per square foot. This information is helpful in understanding what a new home might cost to build in the real world.  These examples seem attainable, without being bland and boring.


22. AMERICAN FARMHOUSES: COUNTRY STYLE & DESIGN by Leah Rosch

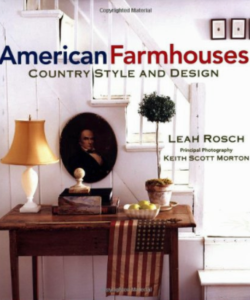
This book explores the individualism and heritage of the charming farmhouse look, which is still one of the most popular decorating styles in America today.

Leah Rosch chose to use photographs by Keith Scott Morton to illustrate the beauty and charm of the homes presented in the book, rather than using much written word. The last pages include a detailed list of manufacturers, craftsmen, and architectural antiques dealers nationwide – which, although potentially somewhat dated, can serve as an amazing resource to those looking to bring the classic look and detailing of these country homes to their interiors.


23. EASY UPGRADES: BUILT-INS, SHELVES, AND STORAGE by This Old House

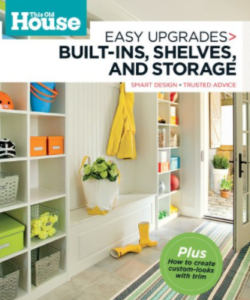
Get the most out of your home by making each square inch useful.  One of the best ways to do this is through the use of  built-ins. This book offers built-in solutions for every room and many situations, including window seats and under the stair storage.

This book is a great idea generator and in true This Old House fashion, it contains colorful and clear inspiration images and encourages its readers to tackle a few of the projects on their own – with detailed instructions and steps.


24. A FIELD GUIDE TO AMERICAN HOUSES: THE DEFINITIVE GUIDE TO IDENTIFYING AND UNDERSTANDING AMERICA’S DOMESTIC ARCHITECTURE by Virginia Savage McAlester

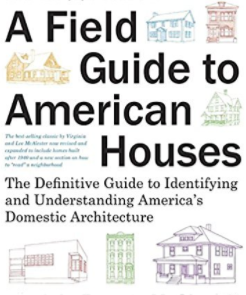
I would definitely recommend that you pick up this book. It is filled with incredible vignette sketches that clearly describe all of the hallmarks of each style of American domestic architecture – from the early Native American dwellings, to historic folk houses, all the way to the modern day home.

It is truly an essential guide to understanding the beauty and diversity of houses built for American families.


25. RENOVATING OLD HOUSES: BRINGING NEW LIFE TO VINTAGE HOMES by George Nash

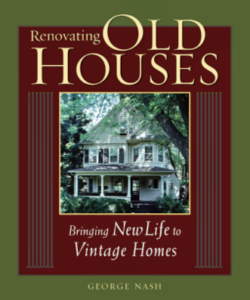
This book is a must have if you own a historic home. These homes were built to last, but they can surely throw curve balls when it comes to maintaining and renovating them!

The author, who is also a seasoned contractor, obviously loves homes of an older generation and wants to see them cared for properly.  In his writing, he clearly lays out how to do so in a professional way.  He walks through every step, including how to evaluate if a house is a candidate for renovation, and provides tips on adding modern conveniences without stepping on the character of the home.


I hope you feel inspired to pick up a book or two from this list, I promise you won’t regret it! Which are you going to read first?

Do you know someone else who could use this information? Share it with them by clicking on the icons below!