Speed Cleaning | Mudroom Spring Refresh

Today I want to share how I tackled the spring cleaning of our back entryway / mudroom space. With speed. This Spring speed cleaning means that we are now set up for the warmer weather ahead. Bring it on!

Speed cleaning tips to get your room clean fast


SPRING SPEED CLEANING

It’s that time of year. When transitioning from one season to the next, you are never quite sure which items to keep out. Will snow boots be necessary, or will flip flops suffice? How heavy of a coat will be needed? This questioning creates a major clutter problem, at least at our house. Essentially, everything is left out, ‘just in case’ it might be needed.

How to quickly declutter your space using the speed cleaning technique

I finally got tired of tripping over all the excess left out by our five children, and set to work on cleaning up our back entryway / mudroom space.

This is quite possibly the most awkward space I have ever been tasked to organize. It is small, and filled with stairs. The one little bit of flat floor space that it has just happens to be in the path of the door swing. Not a great setup for a functional mudroom; But we are renting this house, and there isn’t much we can do about it.


Thankfully, this should be the last season change we make here, and come next winter we will be able to utilize the mudroom at Arrow Hill Cottage!


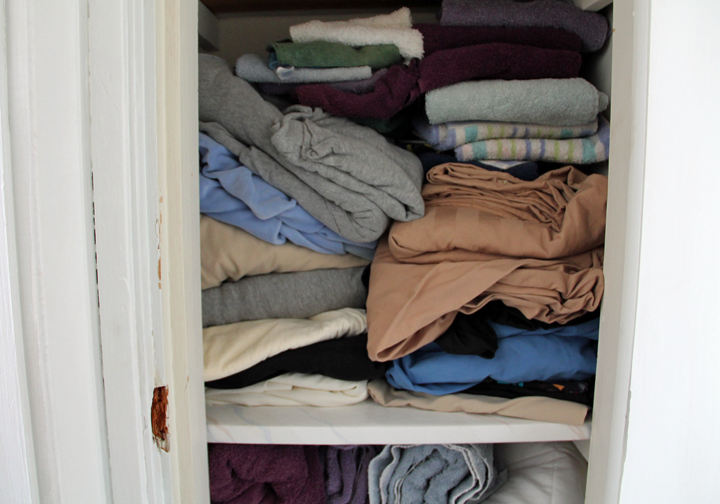
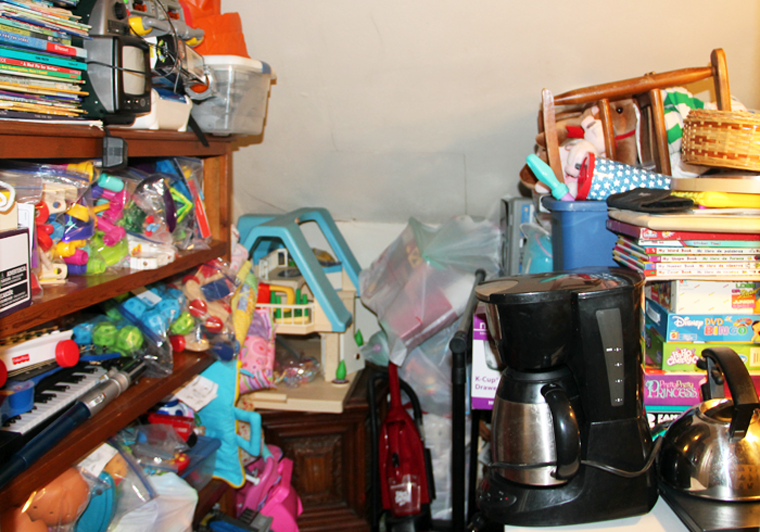
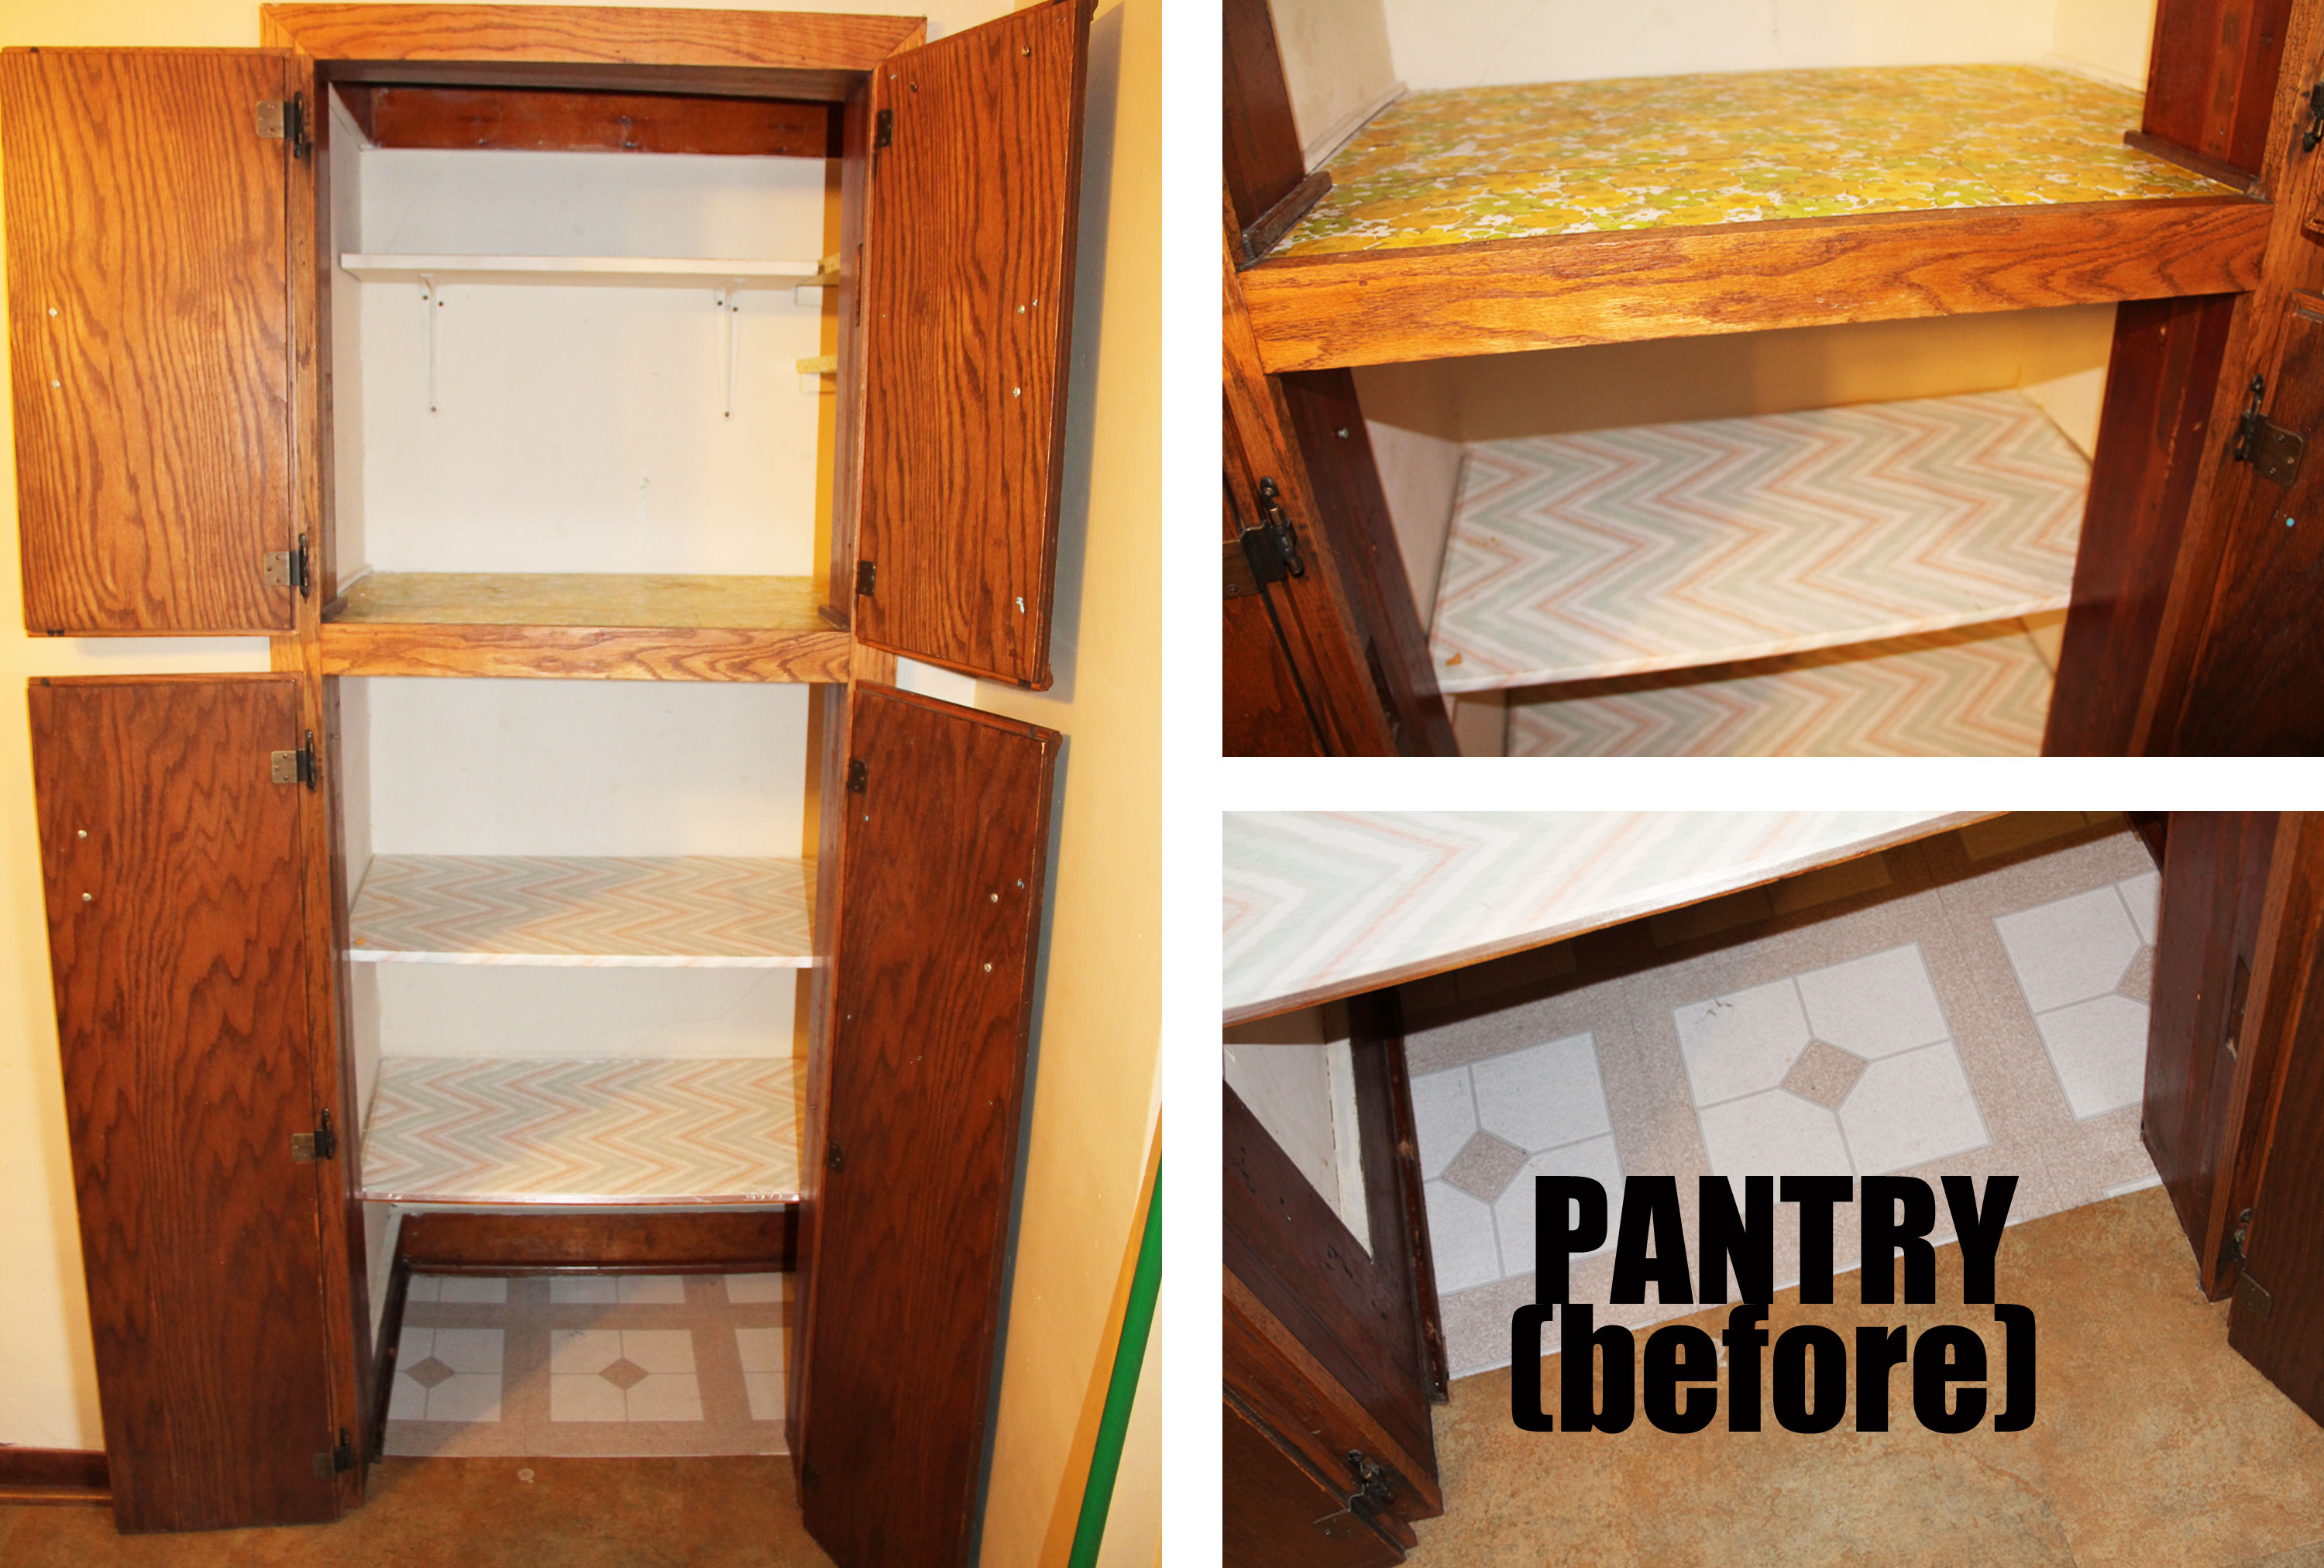
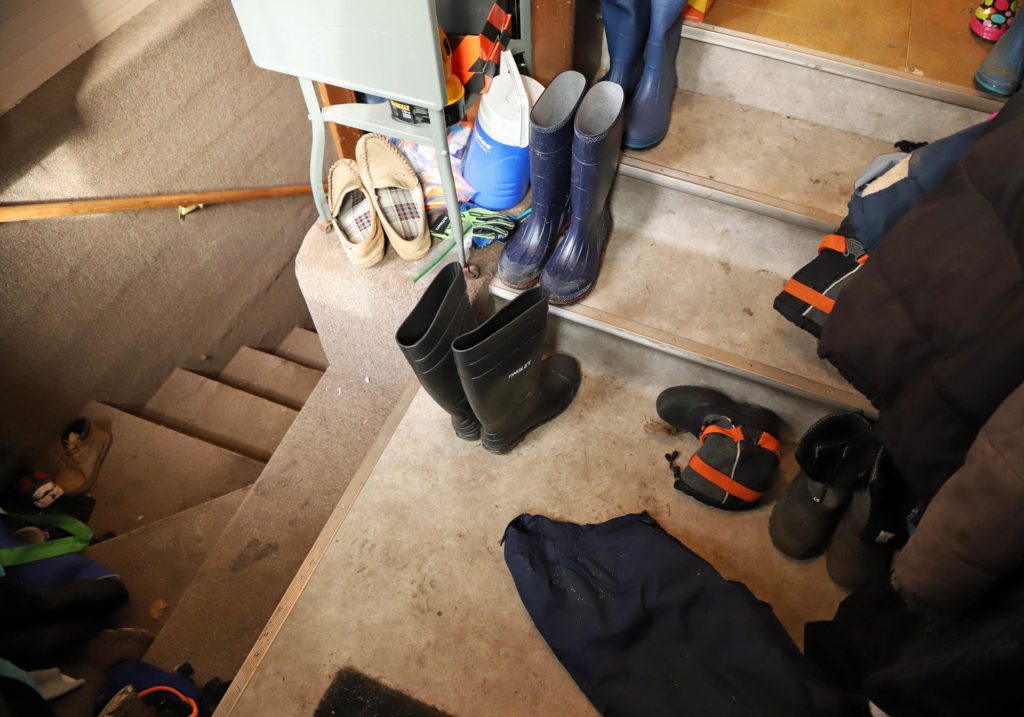
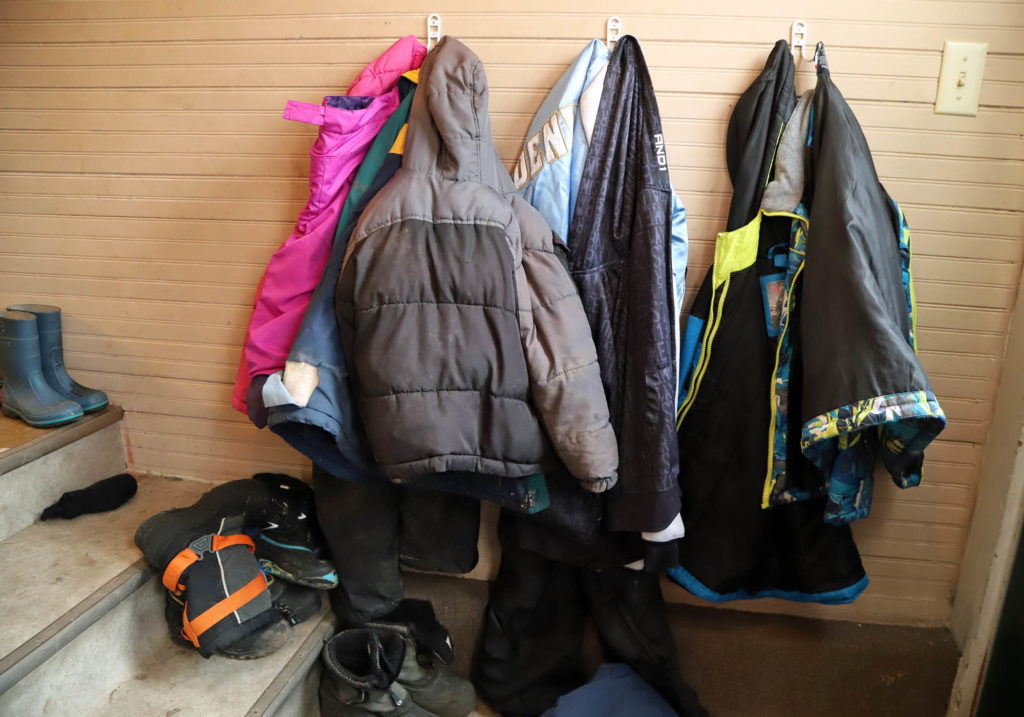
MUDROOM SPACE BEFORE THE SPEED CLEANING

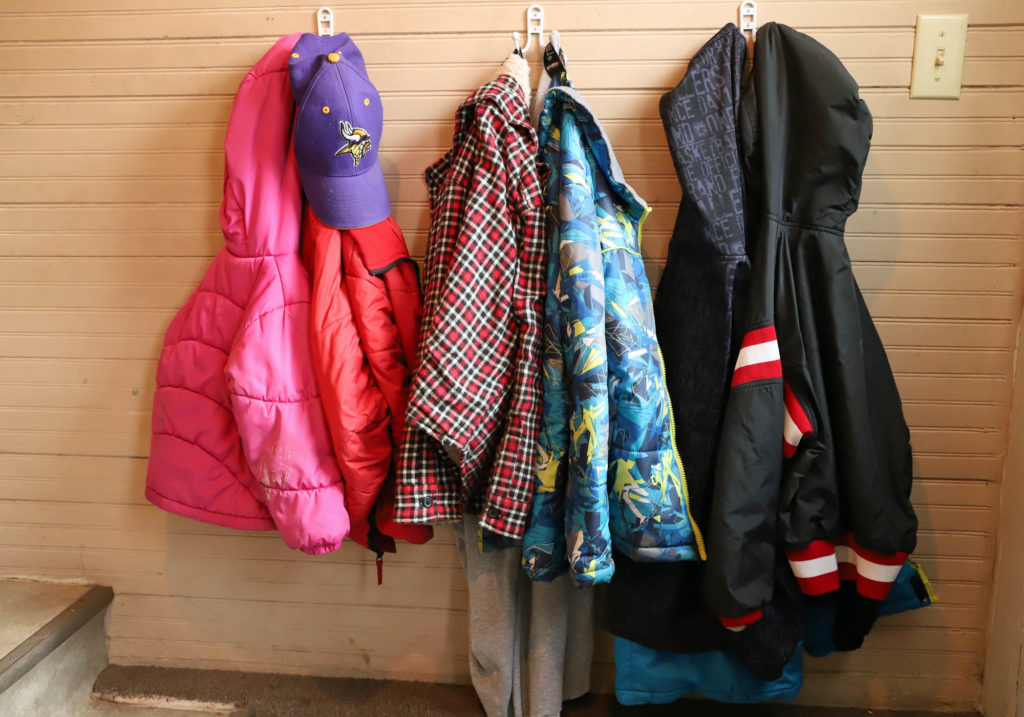
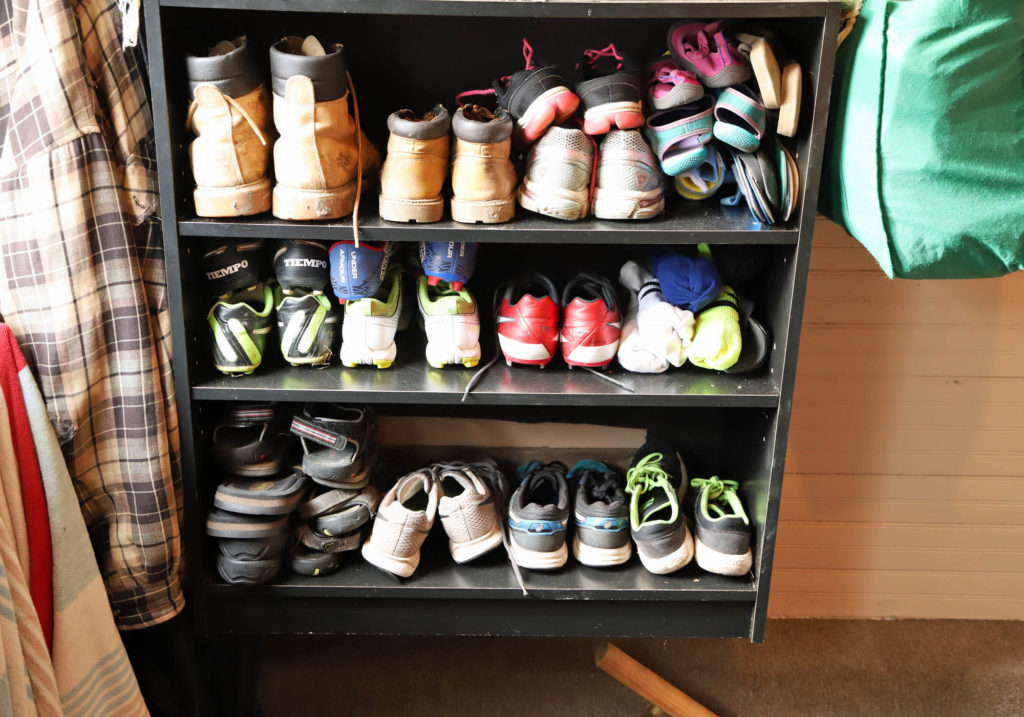
We have done our best to maximize what little space the mudroom has to offer, by putting up coat hooks and using a shelf as a shoe organizer. It seems to never fail though, after a few weeks, this space needs to be organized yet again.

How to speed clean your space

Because have five small children who use this mudroom on a daily basis, I know full well that my efforts to clean and organize it will only last a limited amount of time. That is simply the nature of this type of space. Thankfully, it isn’t an area that guests typically see.

organizing and speed cleaning in time for Spring

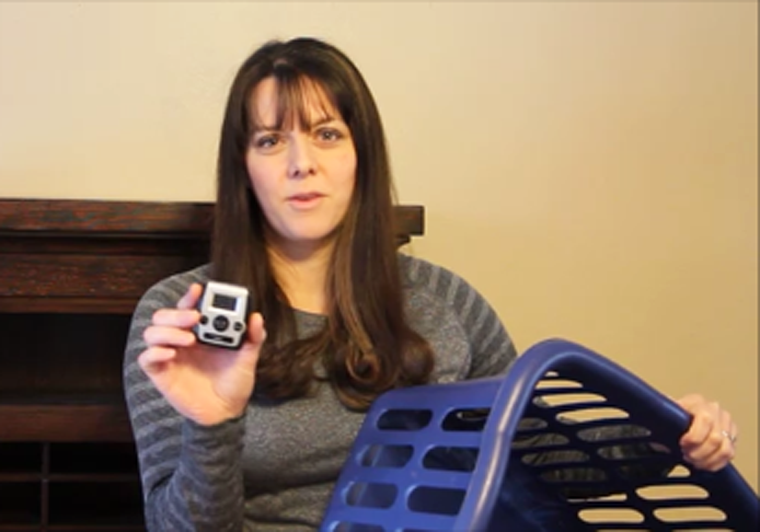
Instead of using an entire day to deep clean, as I have done in other rooms, I opted to practice speed cleaning. I set my timer for sixty minutes, and got to work.


SPEED CLEANING TIPS

For a successful speed cleaning in your own house, consider these valuable tips.


KNOW WHAT YOU ARE WALKING INTO

Survey the space you want to clean, and think about all of the tasks needed to get the job done. It might be helpful to write out a list, which you can reference while cleaning.

Understand that during a speed cleaning session, you may not be able to cross off every item that is on your list. Prioritize which are most important, and start with those first.


SET A TIME LIMIT

More importantly, be sure to stick to it! I recommend no more than one hour of efforts in any one space. It is quite motivating to know that once the timer rings, you can put away the cleaning supplies and be done. Having a time limit is also likely to keep you moving at a good pace. You may subconsciously try to ‘beat the clock’, so to speak.


STAY FOCUSED

Speed cleaning should aim to improve the overall appearance of the space, without fussing over minor issues and unnecessary details. For example, organizing shoes in a mudroom might be a good use of time. Removing dirt from the bottom of shoes, on the other hand, could stall your progress.


DON’T BE A PERFECTIONIST

Just as you can’t buy everything you might desire when you are living on a tight budget, you won’t be able to perfect a space that is cleaned in a short amount of time. Again, the point of speed cleaning is to do something, not everything. Even small improvements matter when it comes to cleaning, decluttering and organizing a space.


WATCH ME SPEED CLEANING

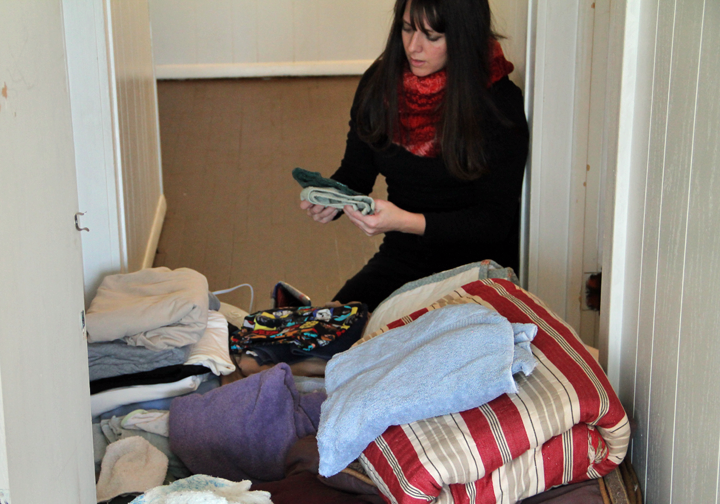
I recorded the process of changing our mudroom over for the season. Notice how important it is to make quick decisions. While cleaning and organizing the mudroom, I was also thinking about decluttering. There were plenty of items that I was able to toss or donate!

I came across rain boots with giant holes, gloves that looked like they had gone through a shredder, and outgrown snow pants.


Following my own advice, I stopped after my pre-determined hour had expired. That meant that I wasn’t able to get to everything I had hoped. The items that are left-over can be tackled easily on another day.
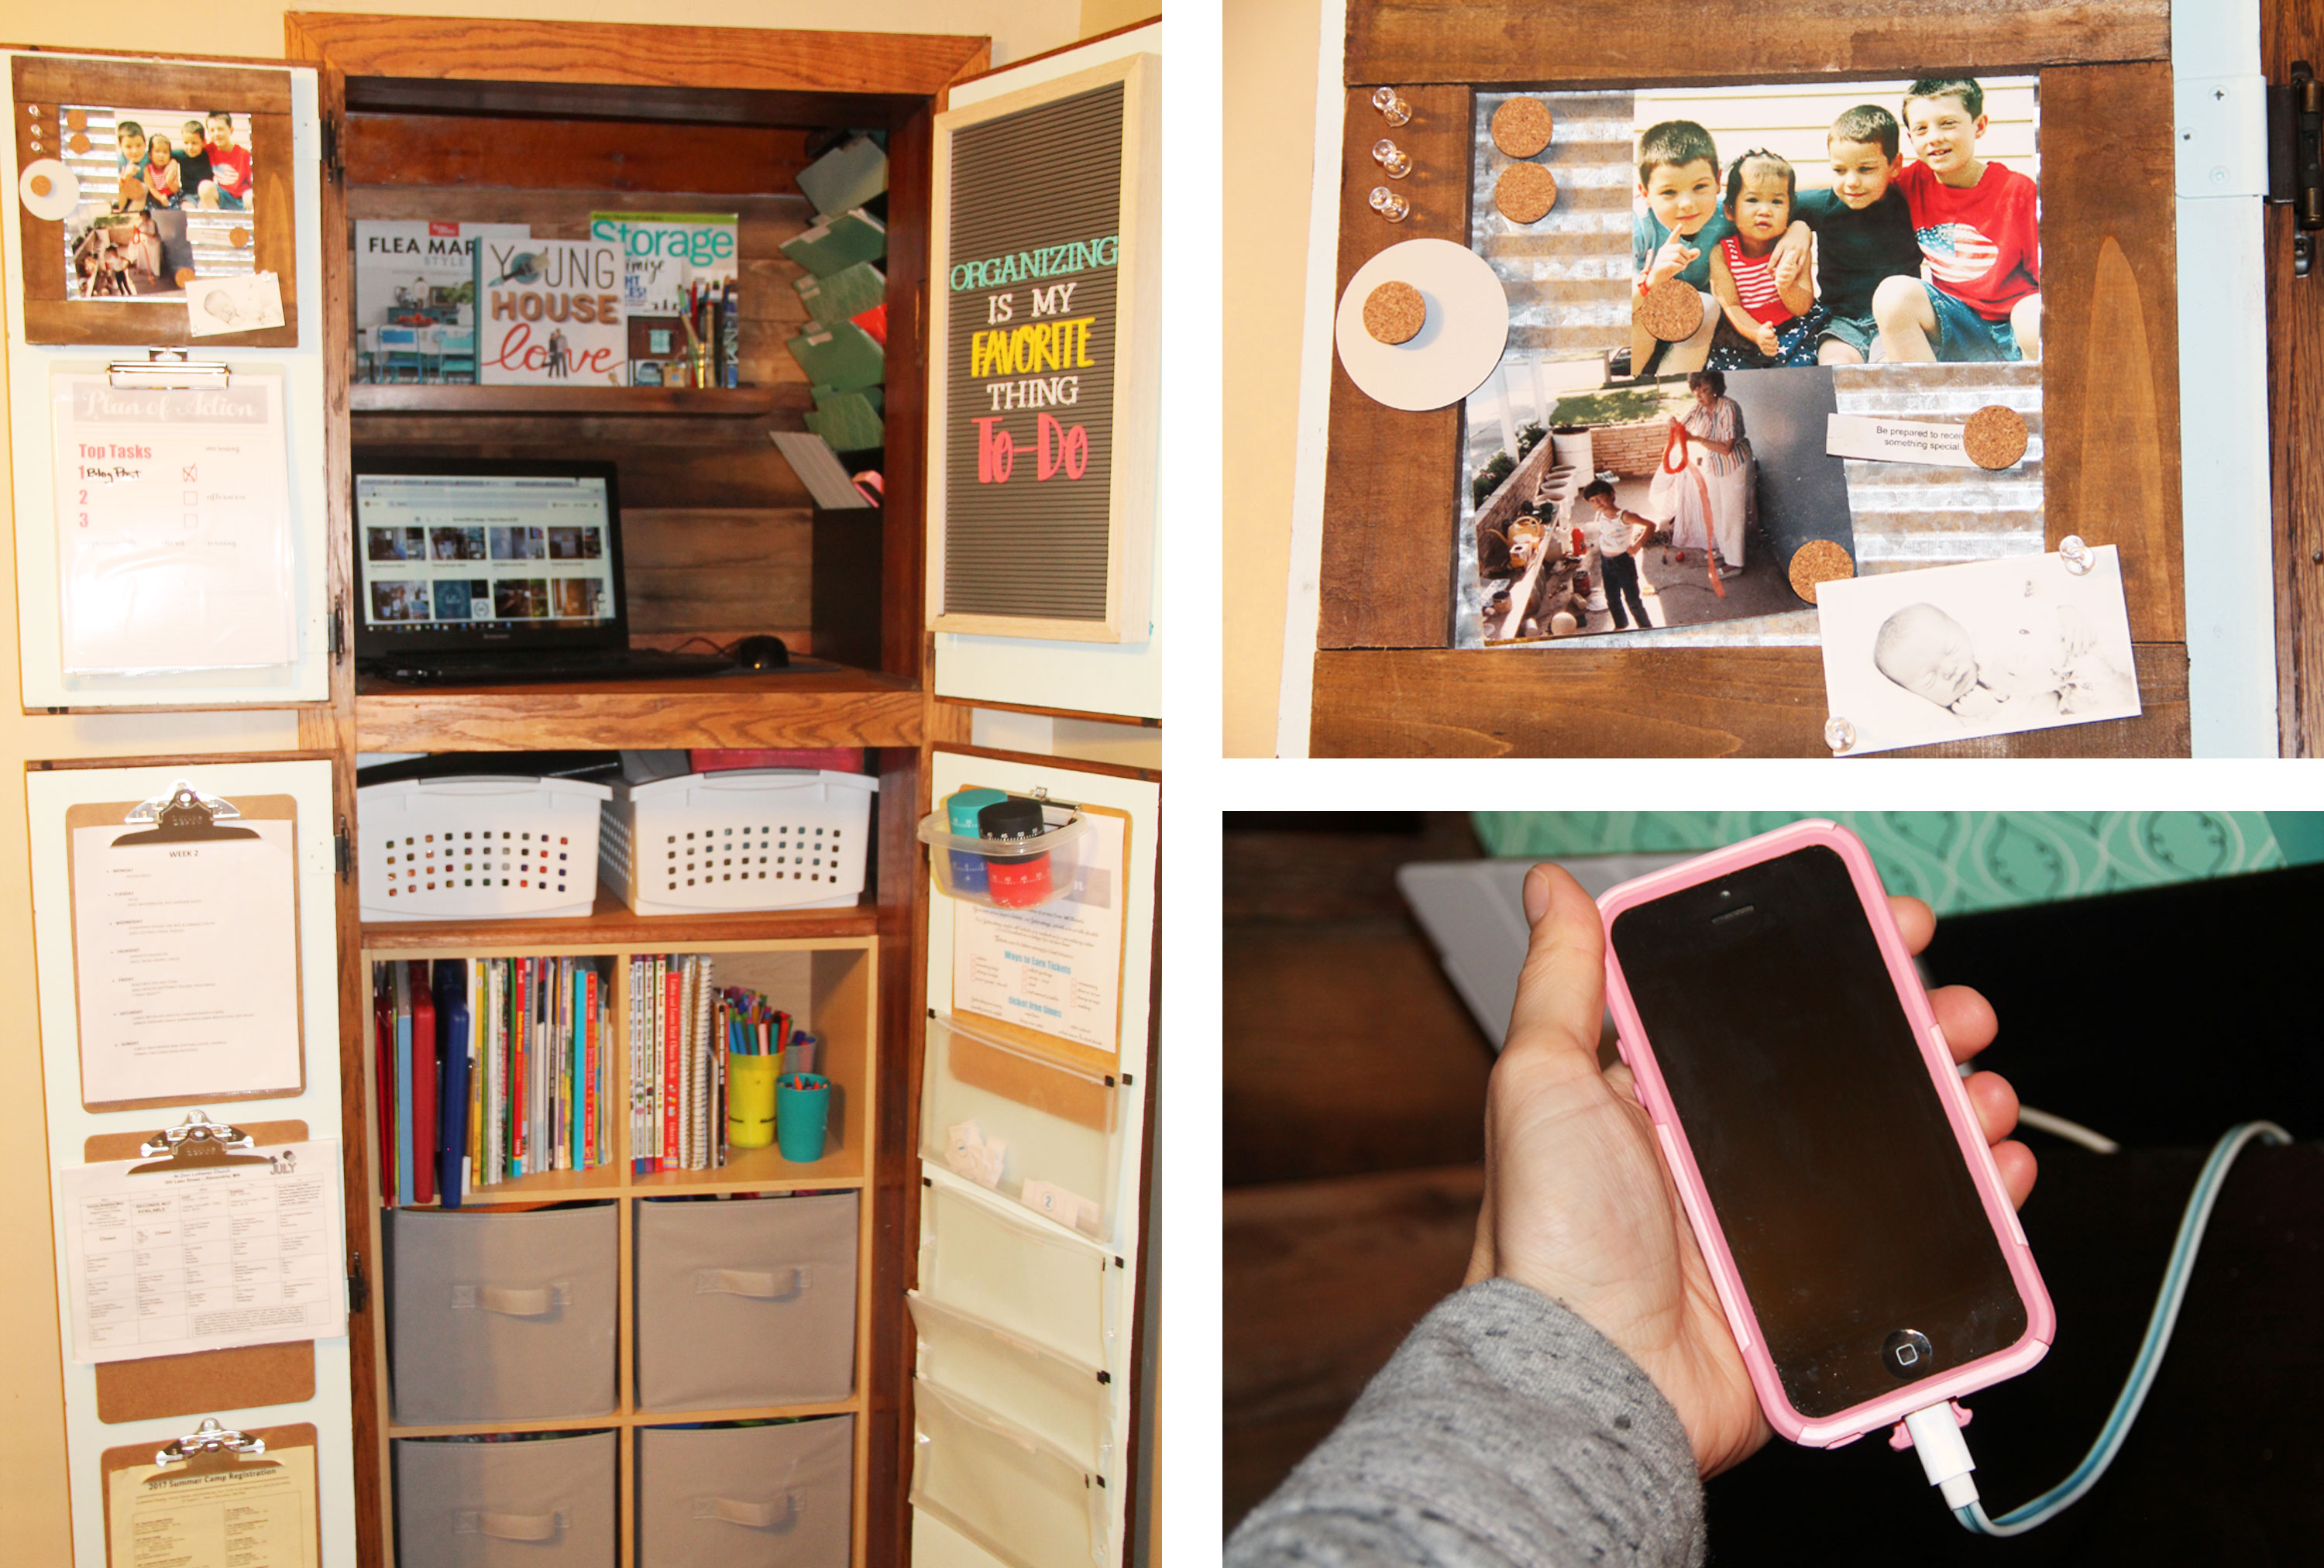
 

THE RESULTS (AFTER)

Considering only sixty minutes were invested in this space, I am quite pleased with the end results. My main objective was to free the steps of clutter. Gone are the boots that we constantly tripped on, as well as the box of snacks. Success!

Cleared out mudroom space after


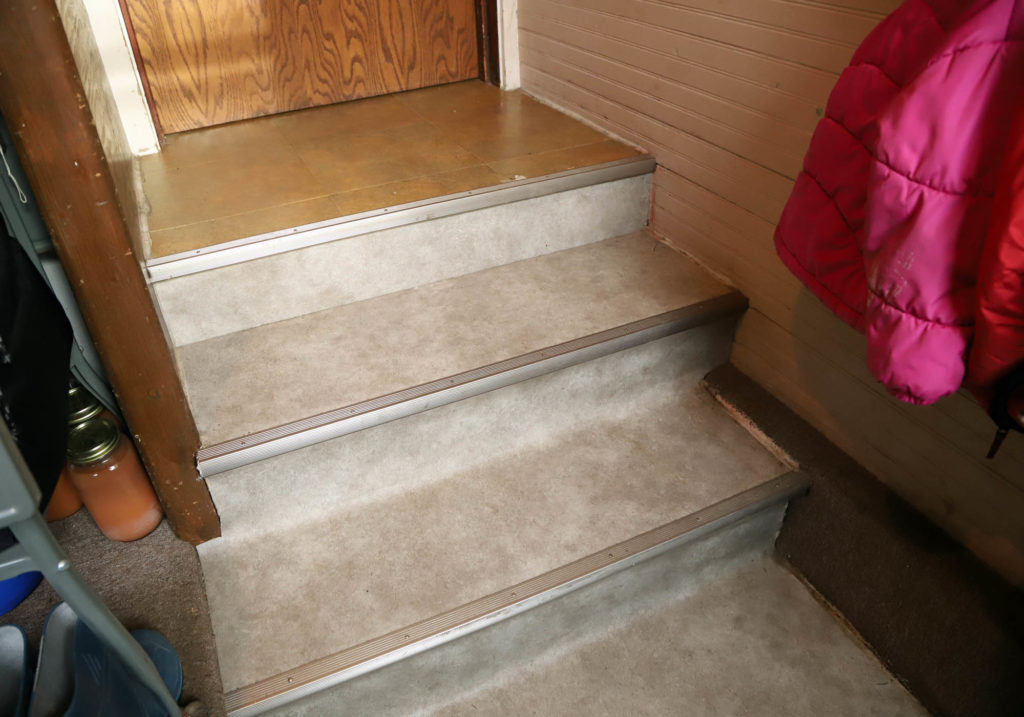
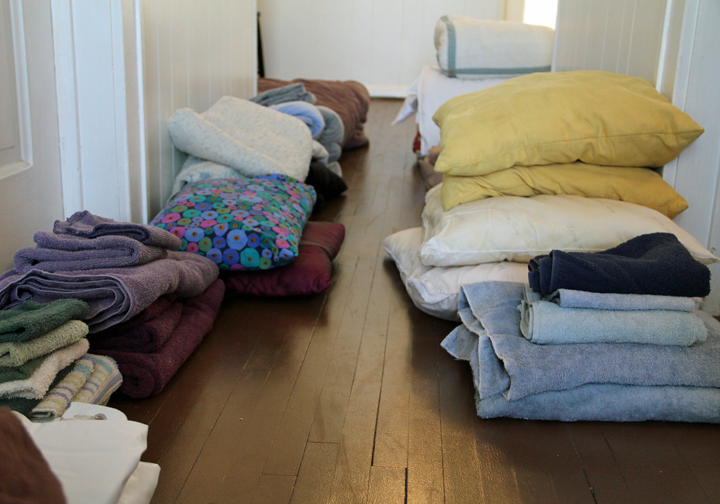
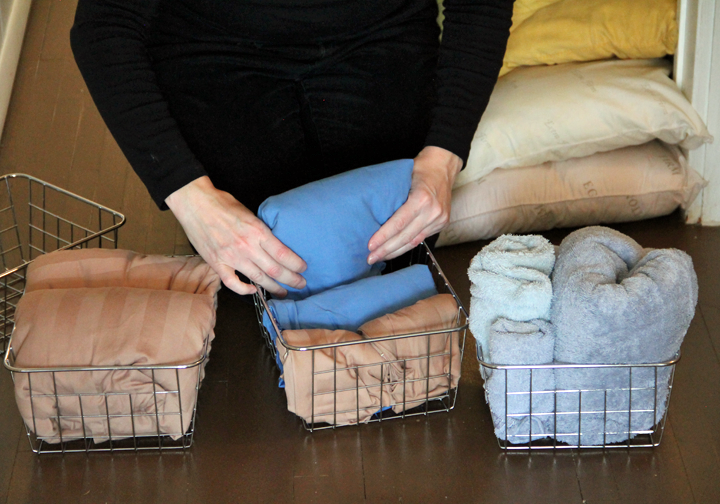
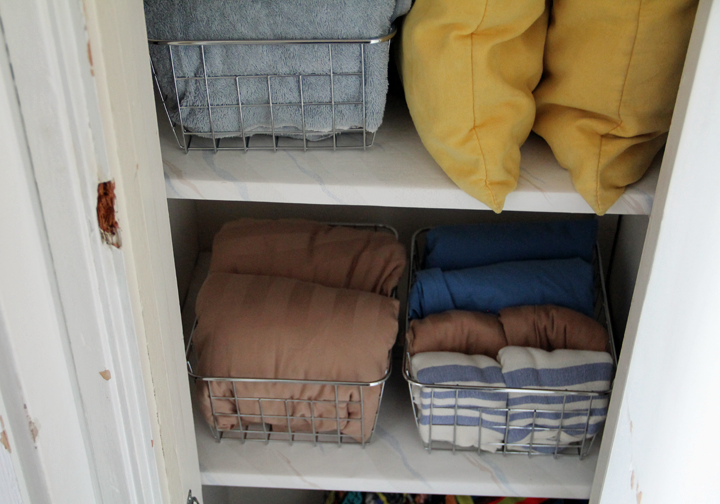
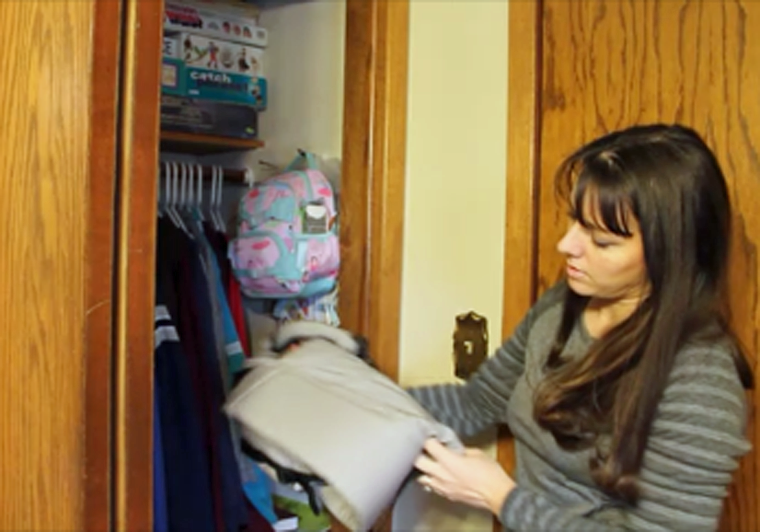
The second priority I had was to switch out seasonal items. Winter snow pants, boots, hats, gloves, and ice skates were all cleaned quickly and packed away. The summer towels and swimming suits were brought out of storage, and each child’s rain boots were given a specific spot.

Changing seasons in the mudroom


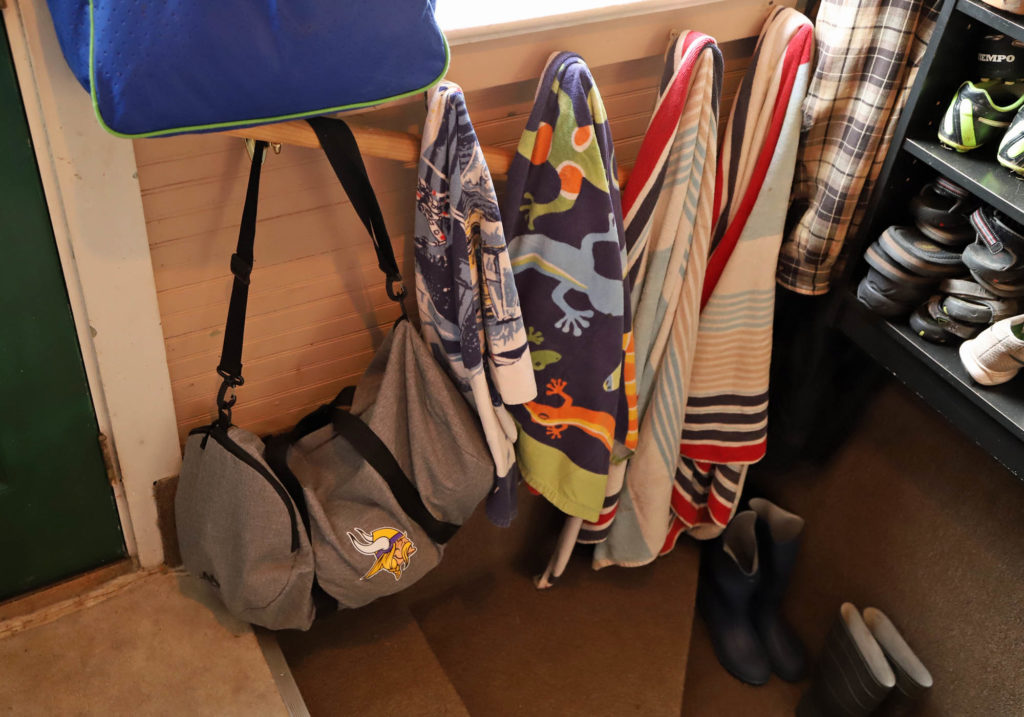
Shoes are now neatly placed on the shelf. As mentioned before, I am not fooled into thinking it will stay looking like this for long. I will, however, surely enjoy the clutter free space while I can!

Lightweight coats are hung on hooks for easy access

organized shoe cubby

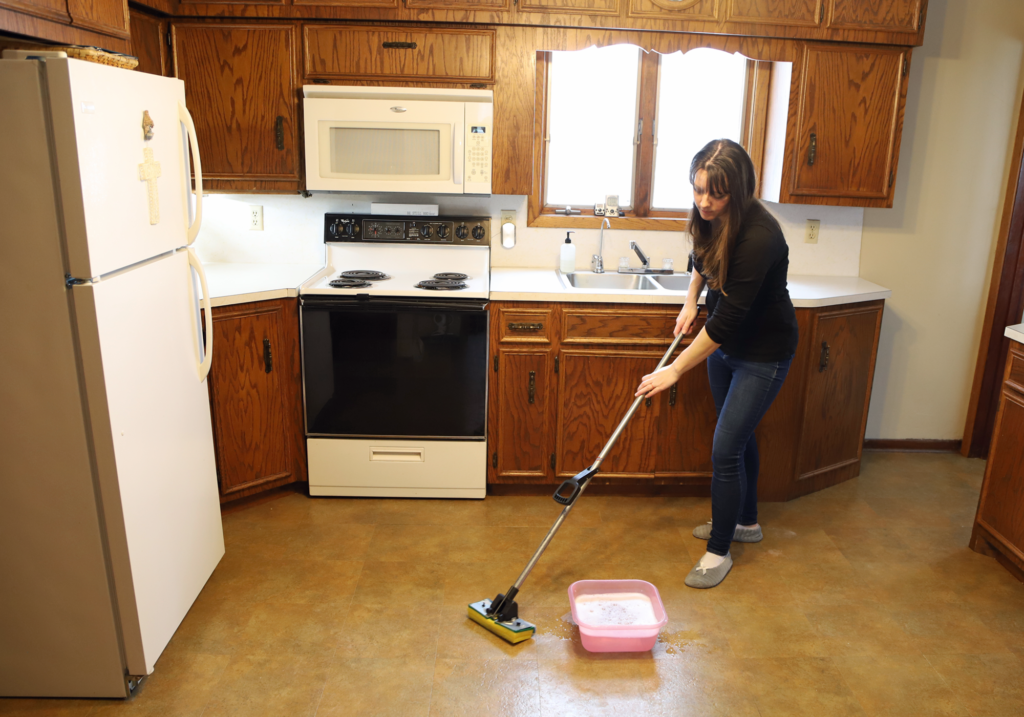
Of course, I also did a quick sweep, and mopped the entire floor. In addition, the muddy parts of the walls got a spray down. The room has a nice, bright feeling to it now.

There was not enough time to tackle the shelf closest to the door. This shelf houses many partially used cans of paint. I have a feeling that most of them will need to be disposed of, when we move. And so, I feel comfortable leaving the task for later.


ADDITIONAL CLEANING RESOURCES

Do you need more motivation to get started on your own speed cleaning? These resources might be helpful.


11 speed cleaning tools for epic results | show me suburban

How to spring clean your home | shannon torrens

7 daily habits for a tidy house | arrow hill cottage

Speed cleaning checklist | living well spending less

The secret to speed cleaning like a pro | practically perfect meg


PIN THIS POST

Speed Cleaning Tips to clean the clutter, quick


JEWELRY DECLUTTER | HOW ORGANIZING SMALL THINGS CAN HAVE A BIG IMPACT

This week I spent some time doing a jewelry declutter. I thought that it would be a quick process, and in a lot of ways it was. But, it also got me thinking – even the small things can make a big impact when it comes to decluttering and organizing.

jewelry declutter ideas

I’ve never been much of a jewelry wearer. Though I like the idea of wearing jewelry, and I think that it looks nice on other people, wearing it myself is uncomfortable. It might be because I have sensitive skin and the metals make me itch. Or it might have more to do with the fact that for many years any necklaces or earrings I wore ended up being tugged on by my kids. These days, I tend to only wear my wedding ring on a regular basis.


While going through all of our belongings in an effort to only bring our favorites to Arrow Hill Cottage, I knew I wanted to leave no stone un-turned. And that meant I would need to take a close look at everything we owned. Even the smallest of items that seemingly take up little space.


STARTING THE JEWELRY DECLUTTER

And so, I opened up my little cabinet and started my jewelry declutter. Funny story about this little jewelry cabinet. It was one of the first gifts my husband gave me when we were married nearly seventeen years ago. I’ll admit that I was less than thrilled when I opened it. Why? Well, because what I had suggested to him as a ‘gift hint’ when he asked was a stand up furniture piece jewelry cabinet, not some small little table top storage piece.

How to declutter your jewelry collection

I remember thinking that there was no way all of my jewelry would fit inside it. I wanted bigger, I wanted better. But was it necessary? Not even close. Looking back, I think my husband knew me better than I knew myself. He had seen that I didn’t wear jewelry often. He had noticed that when I did wear something, I always grabbed for the same one or two items.

This cabinet has moved with us into each home we have shared together. And, if I’m being completely honest, I don’t think I have opened it once since we moved into our current rental farmhouse four years ago. Are the items it contains precious and useful to me? I think we all know the answer to that question.


LAYING THE JEWELRY OUT

Opening up the cabinet and laying every piece of jewelry out on the table was like a blast from the past. Necklaces from junior high. Sparkly hair combs from high school prom.

How small items can make a major impact when it comes to decluttering

A handful of keys that unlock… who knows what!

decluttering

There were also a few sweet surprises. My wedding jewelry that, although I don’t intend to wear ever again, I could never part with. And, my husband’s high school class ring, which I distinctly remember him wearing the first time we met. When we started dating he put it on a chain and I wore it around my neck.


WATCH MY JEWELRY DECLUTTER


THOUGHTS ABOUT THIS PROCESS

As I was sorting through everything, I realized that, on a very small scale, jewelry can serve as a metaphor for all types of clutter.

Stop and think about it. A bracelet is a small item. So small, in fact, that we find no harm in holding onto it, even if it isn’t something we use or really love. Add to it a few more bracelets, a necklace or two, and a pack of earrings. Suddenly we are finding ourselves needing a place to store these items. It’s like a snowball that keeps getting bigger.

Compare jewelry to other item types in your home. Those dresses you are holding onto, hoping that the next time you slip them on they will fit perfectly. The camping gear your family used once, then stored away. The space that these unused items are taking up is more valuable than you may currently realize. And the more items that are accumulated, the more space that is needed to store them.

This is why it is important to be honest with yourself regarding each and every item in your home. There is no reason to keep anything that is not special or useful.


NEW JEWELRY STORAGE SOLUTION

After my jewelry declutter, I was left with a handful of special items. Will they go back into my jewelry box? In a word, no. Just as you a person doesn’t need an entire walk in closet for a few pairs of jeans, I do not need a storage box for my favorite jewelry.

Instead, I will be storing my special items in a set of silk and velvet bags. These small bags have special meaning to me. They were given to me when I purchased a set of pearls during our adoption trips to China.  Twice we watched skilled women string the pearls of my choosing, add the clasp, and delicately place them into a bag. Two adoptions, two bags.

The bags will be placed in my sock drawer, where they will be kept safe and easily accessible. And you can bet that every time I look at them I will have a smile on my face.

jewelry storage idea

I also will be keeping a small, velvet lined, silver jewelry box that was my grandma’s. It will surely find a place of importance in the new house decor.

small antique jewelry box storage


Don’t worry though. My husband has given me his full blessing to donate or sell the jewelry box he gifted me all those years ago. I hope it falls into the hands of someone who will cherish it.


FINAL THOUGHTS

I’m extremely happy to admit, once and for all, that I’m not a jewelry wearer. And that is okay! The pieces I have kept reflect my personality and style, and have strong memories attached to them. That is what is more important to me. If you are considering a jewelry declutter, I definitely recommend it! Don’t let the little things get in the way of the big picture you envision for your life!


PIN FOR INSPIRATION

jewelry declutter | how small items can make a big impact

KITCHEN CLEANING CHECKLIST + TIPS

Kitchen cleaning can really be a chore. Though keeping the kitchen clean is something that is ongoing, a deep clean session is required every so often. This article provides a kitchen cleaning checklist, plus tips on how to get the job done well. Be sure to read until the end to see a video of my own personal kitchen cleaning and declutter!

Ultimate kitchen cleaning checklist plus tips on how to get the job done right!


BEFORE YOU BEGIN

If you plan to do a major kitchen cleaning in one day, be sure to get plenty of rest and to drink enough water during the process. It can be tiring work! Gather your favorite music, or download a few of your favorite podcasts to listen to. This really will help the time be more enjoyable! Be sure to think about what your ultimate goals are for your kitchen. If you want to cook more, every decision should be driven by that. If it is a calming space you’re after, keep that in mind while you work.


DECLUTTER THE DISHES/ CUPS AND COOKING ITEMS

In order to truly see how many of any given type of item you own, Marie Kondo suggests to lay them all out in one place. When it comes to dishes and cooking items, it is really easy to collect more than we actually need or use.

Think carefully about which items you use often. Are there small appliances or serving dishes that can do double duty? Which is the one coffee cup you tend to gravitate toward? Are the others in the cabinet really serving you well just sitting there taking up space? Trust that the items you decide to part with will likely be useful for someone else.

when kitchen cleaning, keep only the items that bring you joy and donate the rest!

Once you have sorted through the items and begin to put things back, don’t automatically assume that the place it was before is the best option. Really think about where the items will be most useful.


RETHINK THE ‘EVERYTHING’ DRAWER

If you are like me, you have a drawer in your kitchen that is dedicated to cutlery – knives, forks and spoons. Then you have a drawer that is for everything else. I’m embarrassed to show you what mine looked like before my deep clean declutter. It was basically a tangled mess of serving spoons, spatulas and other random items. In my mind, I justified this scenario saying that at least everything was in one spot. However, because the drawer was so full, it was still overly difficult to find items when I needed them.

eliminate the everything drawer when cleaning your kitchen. Find a solution that keeps your most used items close by and easily found

I emptied out the entire drawer and eliminated all of the items that we rarely used. I decided to place the most regularly used items in a large ceramic container I had purchased on sale a few months ago. Items were positioned standing up for easy accessibility. A few odd things, such as a potato masher and apple slicer, did not fit comfortably. They were given a spot in the cutlery drawer instead.

This solution looks nice and is functional!

Kitchen cleaning utensil holder for frequently used items


SORT THROUGH THE PANTRY / FOOD STORAGE PLACES

Go through all the areas where food is stored. That may be in a large walk in pantry, or in simple cabinets and drawers. While kitchen cleaning, remove any expired canned or boxed goods. Remember that you can not donate expired items. Though it will seem like a waste to dump all of this food into the trashcan, it may serve as a good reminder to only purchase items that you can use quickly.

When cleaning your kitchen, be sure to throw out any expired products that might be hiding!

I will admit that our Lazy Susan cabinet, which holds most of our dry and canned goods, was filled with expired product. Most of these items had been gifted to us by someone who didn’t want to throw them out herself. We thought we might eat the food, but never did. And now, it has made it’s way to the trash anyway. Lesson learned.


TAKE CARE OF THE WORK HORSES

The appliances and sink are the work horses of the kitchen. They work hard so that, in some cases, you don’t have to. You can respect their help by cleaning them regularly.

FRIDGE

A fridge is likely the most overlooked appliance in the entire kitchen. It silently does it’s job, acting much like a storage cabinet. But, the fridge has a step up on the standard cupboard in that it keeps our food fresh. If it were to break down, we really would miss it’s function!

Fridges can benefit from a regular cleaning. Remove any sauces that are basically empty, throw out any questionable food, and wash the crisper drawers and shelves.

Give the fridge a quick clean during a deep clean declutter of the kitchen

OVEN

The oven has to be one of the most dreaded items to clean in the entire house. It is large, grimy, and downright awkward to sanitize. That may be the reason why many of us put off the task until the grossness has gotten well out of control.

baking soda and vinegar are the perfect pair for natural home cleaning

There are plenty of techniques people swear by when it comes to oven cleanliness. Bren, from the blog Bren Did, has a wonderful post that compares all of the homemade and natural oven cleaning methods. And she found a clear winner! One tip I have found to be helpful is to place aluminum foil on the bottom of the oven. It will catch splatters and spills, making cleaning up a lot faster!

MICROWAVE

If your microwave is set above your oven/stove, as ours is, it is likely to see it’s fair share of grease. A simple spray of white vinegar and a hot rag rinse can do wonders. Make sure to remove the turntable and give it a thorough washing as well.

DISHWASHER

I personally have very little experience with a dishwasher, since we don’t own one and don’t plan on installing one in the new house. However, I do know that even this little cleaning machine needs a good clean of it’s own on occasion. 101 Days of Organizing has a great post on how to keep your dishwasher running smoothly and grime free.

SINK

Give your sink a good scrub with a natural scouring product, such as baking soda. Spraying a stainless steel sink with vinegar and rubbing with a damp rag can help to remove any pesky water spots. Be sure to clean the faucet handles and nozzle with natural products.

spotless stainless steel sink


CLEAN ALL THE FLAT SURFACES

Kitchens have likely the largest amount of surface area that needs cleaning. Where you can get by in a bedroom without needing to clean the walls for many years, for example, the same is not true for a kitchen. Look at each and every surface as an opportunity to really make the room shine.


FLOORS

If your kitchen has any area rugs, now is a good time to shake them out or throw them in the washing machine. Sweep the entire floor, then mop with warm soapy water.

cleaning floors during a kitchen declutter and deep clean


COUNTERS

It is important to keep counters as clear as possible. After all, they are intended to be working space! By keeping them clear and clean, your kitchen will be more efficient, and look a lot less cluttered. This is one of the seven daily habits I believe to be most important for a tidy house, and a clear mind.


WALLS AND CABINET DOORS

When deep cleaning, be sure to spray down walls and cabinets doors. Pay special attention to the cabinets that are near the oven, as they are most likely to have grease build up.

clean the inside of your cabinet doors and drawers

Walls should be painted in a satin or semi gloss finish, to ensure a wipe-able surface and easy clean up.

Give the back splash extra care, checking grout lines for signs of mildew and wear.


CABINET INTERIORS + TOPS

While you are sorting through your dishware, remove everything from your cabinets and drawers and give them a quick wash. Add shelf and drawer liners for an easy clean surface. They come in many fun styles and are relatively inexpensive. This post from Salvaged Inspiration has great tips on how to fit the liners perfectly.

Don’t forget to clean on top of any cabinets that don’t reach the ceiling. This soffit space can collect plenty of dust, especially if you use it for decor display!


MY KITCHEN CLEANING VIDEO

I recently went through this exact same process with the kitchen in our rental home. And though it was an exhausting long day of hard work, the reward was worth the effort!


SAVE THESE KITCHEN CLEANING TIPS

Not ready to start your major kitchen cleaning and declutter yet? Save this checklist and tips for later!

clean your kitchen with this thorough checklist and tips


Organized Linen Closet | Quick Declutter

Today I am going to share how I tackled a seriously stuffed hall closet and turned it into a simple and organized linen closet – in less than 30 minutes!

How to organize a small linen closet

*This post contains affiliate links. As an Amazon associate, I earn from qualifying purchases. See my full disclosure here**

In this decluttering journey, I have to admit that this space was one I was not looking forward to. Our linen closet had become one of those places in our house that was just out of sight, and out of mind. I knew what was lurking behind those doors – and knew it wasn’t pretty. But I didn’t really want to acknowledge the task at hand.

Faced with the lofty New Year’s goal of finishing our rental house declutter before we break ground on Arrow Hill Cottage in the spring, I knew that there was no more holding back. It was time.


LINEN CLOSET BEFORE

We moved into this rental house four years ago. In our previous home we did not have a linen closet, and so we saw this as a bit of a luxury upgrade. We piled all of our bedding, towels, and extra pillows into the closet and called it good. Except, it wasn’t good.

Organized linen closet. How to go from stuffed to simple

Here’s the situation. I wash laundry only once per week. I like this system, especially since it gives me a sense of finalization, at least for one day. The towels we use daily are stored in our bathrooms. They make their way into the laundry baskets throughout the week, and on Sunday get a thorough washing. That means that every towel behind this closed linen closet door are ‘extras’, and are rarely used. They are brought out primarily when we have guests stay in our home.

Bedding is similar. After I wash the sheets, they go right back on the beds. Again, as the above photo illustrates, we had saved plenty of extras.


DECLUTTERING THE LINEN CLOSET

Starting this declutter was by far the most difficult part. I think I was a bit overcome by just how MUCH we had stored away in this small closet. Once I began to take it all out though, a weight started to lift.

Our linen closet is located at the end of a long hallway upstairs. As I removed the items from the closet, I grouped like category items together. This made it easy to see the quantity of each type of item. Noticing the amount of duplicates made it easier to make decisions regarding what should stay and what should go.


linen closet declutter. creating a simple linen closet

Sorting through the piles, I placed items that I thought we should keep on the right side of the hallway, and those that we could donate or sell on the left.

sorting through linens


FINDING TREASURES

One of the biggest surprises during this declutter project was finding a special quilt I had made years ago. It was presented to my husband at the groom’s supper, the night before our wedding. I clearly remember the months leading up to our marriage. Craig was doing a mechanical engineering internship near Chicago, and I was in North Dakota, at college. Those months apart were long and difficult, and I spent many hours working on the quilt and dreaming about married life.

decluttering our hall linen closet, and finding treasures

Honestly, this quilt means more to me than my wedding dress. So why was it stuffed in the bottom of the closet, completely forgotten? When I first saw it, I felt really sad that it had been so neglected. Now I am ever more committed to this process, and discovering which items bring us joy.

This quilt will serve as a reminder of how easily items you cherish can be crowded out by other, less important, belongings. It will be going to the dry cleaners, and a more prominent spot will be found for it in our new home.


THINGS TO CONSIDER

When decluttering and creating an organized linen closet, there are a few important questions you should ask yourself:

Is this a convenient location for these items? Linen closets were very popular in older homes, but have fallen out of favor somewhat in recent years. I believe the reason is that more people now place items closer to where they will be used, instead of grouped together in a central location. For example, the bed sheets may be stored in the bedroom closets, and the extra toilet paper in the bathroom.

Really think about what works best for you and your family. Where some might find a central linen closet the prime location to store towels and bedding, others may find that a hall linen closet in their home is better suited to store cleaning supplies, small appliances, or even toys.


How many of _____ do we need? In our household, whenever a new set of towels was purchased we continued to hold onto the old set. Just in case, we said. If we have company, we thought. The truth of the matter is that if we chose to buy new towels, our old ones had more than likely finished their purposeful life for our family.

I encourage you to determine how many towels, bed linens, etc. your family really needs. Any more than those items used on a weekly basis will likely be stored. Don’t let them multiply behind closed doors like we did!


ORGANIZED LINEN CLOSET

Like a lot of people, I have been watching ‘Tidying up’ on Netflix. One of the tips I have learned from watching the show is the idea of placing like items into smaller baskets for storage. I have mentioned before that I have a love for baskets. In fact, I have a stash of them in our storage closet, just waiting to be used.

Organizing a linen closet the simple way

These chrome wire baskets were the perfect size to hold the items I had chosen to keep.

Though I don’t have quite the ‘magic’ of Marie Kondo, I did try her method of folding into thirds and storing them upright. I have to say that it really did save space! An entire set of towels (two bath towels, one hand towel and one wash cloth), was able to fit into a single basket, for example.

When putting the linens back into the closet, I made sure to put the items that will be used more frequently on the eye level shelves. The large blankets were placed on the highest shelf, since it is likely they will be accessed by the adults only. The extra pillows are now within reach for the kids to use for camp-outs and movie nights.

tidy small linen closet using wire baskets to hold like items

It is important to note that we are living in a rental house. Because of this, we aren’t able to modify the spacing between shelves. If you have a closet with adjustable shelves, customizing your storage should be much more efficient!


BENEFITS OF AN ORGANIZED LINEN CLOSET

Now that our linen closet is organized, I definitely want it to stay that way! The following benefits will help me keep the clutter from coming back.

Items are easily found. One glance in, and you can see how things are organized, by category. This makes it much faster to find that towel when you need to clean up a spill, or retrieve a clean set of bedsheets for a child who had a middle of the night accident.

Linens have room to breathe. With the linen closet stuffed to the max, there was little air circulation. Stored in this way for too long, and you could be dealing with musty towels and bedding. That’s just not pleasant. In your organized linen closet, you may consider adding an open box of baking soda. It will help cut down on moisture and will keep things smelling fresh and clean.


WATCH ME ORGANIZE MY LINEN CLOSET

See the process of of decluttering my personal linen closet. I am still shocked to see the drastic change!


ORGANIZED LINEN CLOSET INSPIRATION

Inspired by this post? Share it!

Organized linen closet. How to take yours from stuffed to simple

Control magazine clutter | Simple organizing tip

Do you love getting a new glossy magazine filled with inspiration in the mail, but are not sure what to do with them after you’re finished reading? Today, I will be offering a quick organizing tip on how to control magazine clutter.


control magazine clutter with this simple organizing tip

Long before the steady reliable stream of digital images, print inspiration was king. Magazine subscriptions were sold door to door as a form of entertainment and inspiration, and it was big business. I too have had a few longstanding subscriptions. And I can genuinely say that I look forward to each month’s new copy.

However, there is a major downside to this seemingly harmless consumption. Clutter.


HOW MAGAZINE CLUTTER HAPPENS

Perhaps you already have a system in place to stay on top of paper pile up. Many businesses now offer a paperless billing option that you might be taking advantage of. Or maybe you are great about sending junk promotions directly to the recycle bin as soon as they exit your mailbox.

However, there is something a bit more special about that shiny new magazine that shows up once a month. Whether because they arrive with less frequency or the fact that they are full of colorful images and inspiring information, magazines are hard to let go of.

magazine declutter organizing tip

One thin magazine laid on the coffee table turns into five, and then into a stack in the corner of the room. Before you know it, magazines are taking up more of your precious space than you would like. If this has become a problem for you, I have a tip that can help you control magazine clutter.


SIMPLE STORAGE TIP

Because I work in the home design industry, I find home decor and building magazines very inspiring. For years I held onto stacks of my favorite issues. Eventually they got overwhelming, and I had to come up with a solution. I realized that of an entire magazine, I was interested in about 5% of the articles and images.

Because of this, I determined that it didn’t make much sense to keep the entire magazine. Instead, I opt to rip out only the pages that are most inspiring. I then curate them in plastic sheet covers, in white three ring binders. This is an ultra simple and inexpensive way to control magazine clutter, and it has been working well for me.

simple way to control magazine clutter

One important word of advice. This method will work best when you get in the habit of practicing the ‘tear out’ method immediately after reading through a magazine. Not only will your favorite ideas and images be fresh in your mind, you will also be more likely to get the job done. If a magazine is allowed to stay whole for too long, it becomes a more permanent house resident that sadly won’t be noticed until a few of it’s buddies join.

My binders are stored on a shelf in my home office. The contents are used as inspiration not only for the decorating of my own home, but also also but when designing homes and spaces for clients. They are plump full of images I love. And they certainly were helpful to look back on during the design process of our family’s home, Arrow Hill Cottage.


WATCH ME DECLUTTER MY MAGAZINE STASH

With this storage system, it is important to go through the binders on a regular basis. Doing so will allow you to be sure they contain contain content you wish to save.

Recently, when looking through my collection, I noticed that there were articles and images that were outdated or no longer my style. Trending home products from 2006? Probably not relevant any longer. Just this week I decided to further pare down my collection by eliminating the pages that no longer inspired me.


The beauty of the binder system is that you can easily switch out items that are no longer giving you inspiration for those that are.

Before this most recent declutter, I had a total of six binders filled with plastic sleeves. Through the declutter process, I was able to reduce my binders from six down to three. It feels good to know that inspiration on each and every page awaits me, whenever I choose to open the binders up.


IS STORING MAGAZINES MINIMAL?

You might be wondering – wouldn’t it just be easier, and more minimal, to throw out all the magazines? Is keeping magazine clippings even necessary when there is Pinerest?

There is no short answer to either of those questions. The truth is that the more we walk down this minimalism path, the more realize that it is a highly personal journey. There are no hard and fast rules about what can be deemed appropriate to save, and what for sure needs to be tossed. Those decisions lie solely with the person who owns the possession, and nobody else.

magazine decluttering tip. How to store magazines in a simple and effective way

Minimalism does not mean we need to rid our lives of all the things we love. Instead, it asks us to be mindful of the intentions behind each of our belongings. To decide, for ourselves, what things and quantity of things are appropriate for this moment in time.

The beauty of this mindset is that I don’t need to justify my decision to save three binders full of magazine clippings any more than someone else needs to justify their personal collection. Whatever that may be. My magazine binders bring me joy, and serve a purpose at this point in my life. So they stay. In the future, if I decide to scan all of the pages and keep only a digital copy, that is fine too.

I would encourage you to follow the same process of thinking while you declutter or attempt to simplify.


PIN THIS SIMPLE WAY TO CONTROL MAGAZINE CLUTTER

If you are a magazine lover like I am, I encourage you to try out this method. It’s inexpensive – maybe $3 per binder and $5 for a large pack of plastic sheets. It is also simple enough to be maintained as a long term solution to control magazine clutter.

Great tip on how to control magazine clutter. Simple organization


OTHER MAGAZINE ORGANIZING TIPS

These articles offer additional ways to control magazine clutter:

Simple Magazine Filing System

Determine what magazines mean to you


SPEED DECLUTTER: 60 IN 60 CHALLENGE

It’s Week TWO of my December Declutter Challenge! Follow along as I attempt to speed declutter my house using the 60 in 60 technique!

declutter challenge

Last week, I decluttered our entire Christmas decoration collection, using the KonMari method. That was an effective technique, and we were left with only our favorites, which made decorating a breeze! This week I am trying a brand new method of decluttering, one that involves quick decisions. It is called the 60 in 60 challenge.


60 IN 60 BASIC PRINCIPLE

Essentially, this is a speed declutter challenge. The idea is to set a timer for 60 minutes, then use that time to find 60 (or more) items to donate or sell. While doing this challenge, do not look for items that could be thrown. That would be too easy! Instead, find items that you are no longer using, but might have value to somebody else.


WHAT YOU NEED

There are only two things you will need to complete this speed declutter challenge. A timer, or a clock, and a basket or box to put your found items in. I personally chose an egg timer to count down my minutes. This allowed me to pause the task if I was interrupted, which I was. Several times.

speed declutter


SPEED DECLUTTER TECHNIQUE

While the KonMari method suggests that you pull similar items out of their storage spots before you begin sorting, this challenge is almost the opposite. Drawers are to be opened, closets rummaged through. Honestly, it feels like a bit of a scavenger hunt! Decisions are to be made quickly and on the spot.

speed declutter technique

My speed declutter challenge found me digging through bins in our storage closet, drawers in my kitchen, and our shoe rack, among other spots.


WATCH ME SPEED DECLUTTER

It’s amazing how quickly a person can make decluttering decisions when a time limit is involved! Check out all the items that made it into my basket!


ITEMS THAT WILL BE DONATED

The basket filled up pretty quickly. As a result, I eventually needed to start setting items on my bed. Though I didn’t count as I went through the process, I was surprised to find that I had set aside exactly 60 items! That could not have been planned any better if I tried! Here are a few of the items that will be sold or donated.

decluttering challenge 60 in 60

This high quality Pottery Barn bedding has been taking up space in our linen closet since we moved into the rental farmhouse. Because we do not currently have a guest bedroom, and do not have plans for one at Arrow Hill Cottage, it is time this bedding becomes useful for someone else.


60 in 60 decluttering challenge

We are a large family of seven, and this smaller crock pot just doesn’t get much use. To make meals for our crew, we need the jumbo sized version, which we already own.

whole house speed declutter

As our youngest child grows, I am steadily going through the clothing that no longer fits her. These shoes, for example, still have a lot of life in them. For another little girl.


WHAT I LEARNED FROM THIS CHALLENGE

I will admit that I was a bit nervous starting this challenge. We have been decluttering our home over the past few months. We even have an entire storage closet dedicated to items for our upcoming summer garage sale. Because of this, I was worried that it would be difficult to find 60 items that we could easily part with.

minimalist family home

I was wrong! Once I started to open cabinet doors and drawers, I was finding items that I didn’t even remember existed. If they had been hiding for months, or in some cases even years, it was obvious that they were not necessary to keep. Into the basket they went!

Perhaps the greatest obstacle to this challenge was that I couldn’t finish what I started. Because this is a speed declutter, there was not time for me to thoroughly sort through each space I looked. In some ways, that aspect was hard on my brain. For example, it is a bit of mental burden knowing that my kitchen is still filled with many items that we don’t need.

Certainly though, this feeling will help me remember to go back and finish, which is a good thing!


In conclusion, I feel that this speed declutter challenge was a quick win toward my overall simplifying goals. I would definitely recommend that you give it a try!

Join me next week, when I take on a new challenge for the December Declutter!


PIN THIS CHALLENGE FOR LATER

Try it for yourself!

speed declutter

18 CREATIVE WAYS TO DISPLAY KID ARTWORK

If you share your home with children, you know that they are little art making machines. There is something so precious about your child’s creativity and imagination that you just want to bottle it up and save it for all time. Even still, it can be quite overwhelming trying to figure out what to do with each of these masterpieces.

In my search for unique and stylish solutions to this very problem, I have discovered 18 creative ways to display kid artwork. I think you will enjoy what I found.


raw art wall

This setup requires little to no prep work. When a child creates something that they want displayed, use a bit of tape or another removable adhesive such as poster putty, and add to the wall. Personally, I feel that this technique is best suited for a kid friendly space, such as a toy room, as it has a tendency to look a bit more cluttered than other display options.


clothesline

This highly adaptable hanging technique is accommodating for various sizes and shapes of projects.  All you need for this simple DIY is a thin twine rope, a few clothes pins, and your child’s creativity. The great thing about this option is that the kids can clip up and take down the art all on their own!


cork board

Positioning an extra large cork board against the wall and adding a desk can create an instant art station. Though similar to a raw art wall, the chaos is a bit more consolidated. Learn how this set up was created using cork squares, on the blog Young House Love.


clipboard display

These clipboard displays may tidy things up a bit more, but will mainly accommodate similar sized pieces of artwork. I love the added touch of the nameplate, which can be changed up as often as the artwork is.


framed art

If your child  is a master at one type of artwork – flowers, glitter, abstract – this may be the option for you. Grouping similar styles of art pieces lends itself to a beautiful gallery style display. I imagine the frames used in this setup are either poster size or custom created to fit the artwork.


ledge display

A simple shelf ledge arrangement may be the perfect option may be preferable if you tend to change out your child’s artwork frequently. Anna White has a wonderful tutorial on how to build these ledges out of standard materials – for only $10!


matching frames

Another way to tie varied art pieces together is by removing glass from old frames and painting them all the same color. This also gives the display a gallery look. These sunny yellow frames are really helping the art shine!


hinged frame

Perhaps you love the idea of framing your child’s art pieces but imagine that changing them out would be too much of a hassle. This hinged frame product may be the option you are looking for. They are said to be able to hold up to 50 sheets of paper! Click on the link above to purchase, or make them yourself!


washi tape borders

This is an inexpensive craft – and it looks cute too! You can create various sizes and change up the patterns and colors of the tape. The wonderful thing about washi tape is that it is easily removable and doesn’t leave residue – meaning you can have a traveling gallery that moves from room to room.


painted frames

For a more permanent look, painting frame patterns on the wall could be another simple fix. This display sets the mood for a creative art station where the littles can be inspired.


digital collage

If you have access to basic computer software, you can easily create this stunning look. Simply take photos of or scan each art piece, then crop and scale the images and arrange them in a grid pattern. Hang photos of the little artists nearby for an added personalized touch.


mini masterpieces

Another miniaturization of artwork, this display is created by scaling and printing the images and gluing them to bits of foam board. The individual mini art pieces are then arranged in a single frame.


binders

Displaying of artwork doesn’t always need to happen on the walls or shelves of your home. A binder filled with projects may be the perfect low-tech option to keep things clean and organized. This is such an easy technique that you might be tempted to save every last artistic scrap. Try to be selective or your child may end up with a storage room full of filled binders when they are ready to move out!


photo books

Photo books are very popular and may be just the thing you are looking for to display (and keep) your child’s artwork. Add photos of your child and short write ups about their projects to create a wonderful keepsake. Popular photo book companies include Snapfish and Shutterfly.


magnets

Is your fridge the place where most of the artwork migrates? Reclaim space by resizing each masterpiece digitally and creating fun, kid-friendly magnets! The kids will love rearranging their art pieces and making their own small exhibits.


blocks

Custom blocks are another fun option to transform artwork into useful play things. Imagine the colorful castles and roads the kids could build!


puzzles

Artwork can also easily be turned into puzzles! Websites such as Collage.com and PuzzleYou.com allow you to upload scanned images and create these custom, fun keepsakes.


bring it to life

If you really want to up the wow factor there are various artists, such as Custom Plush Art , who will bring your child’s artwork to life with a hand made stuffie! Just look at the details!


Each of these 18 ideas for displaying kid’s artwork is so creative and fun! I hope you will give some of them a try.

If you want to save this information for later, remember to pin!


HOME ORGANIZATION IDEAS

Keeping your home organized is one of the best ways to add simplicity to your life. Check out these home organization ideas to get a kick start on your simplifying journey.

home organization tips

The cold is setting in, which in the Midwest means plenty of time will be spent indoors over the next few months. I’m not sure about you, but cabin fever causes me to re-evaluate my belongings and sets me into full out organization mode sometime around mid-January.

In an attempt to get a jump start on the de-cluttering and organizing this year, I scoured Amazon for organization gear that can help me reach my goals. I found a TON of handy (and totally affordable) items that I would love to purchase. I thought you might find them useful as well. Click on the images below to be taken to the product page.

This post contains affiliate links to products for your convenience.  If you purchase via my links, I may receive a small commission at no additional cost to you.  Thanks for supporting Arrow Hill Cottage!

_________________

BASKETS

You really can’t go wrong with a basket. My husband is pretty sure that I have an addiction to them, and he might be right. There is a perfect basket size and shape for just about any occasion. They can hold blankets, toys, books, you name it.

home organization tips

image source

[ess_grid alias=”grid-1″]


Uh oh… the basket addiction is rearing it’s head again. My first choice? The large sea-grass basket. I can totally envision it filled with cozy blankets, sitting next to a fire place.


_________________

BINS / BOXES

Similar to baskets, bins and boxes are highly useful in home organization. The awesome thing about them is that they are typically rectangle or square in shape, meaning that they can be easily stacked. Many also have a lid or cover. Those visually cluttering items can be stored neatly and out of sight. Legos anyone?

home organization tips

image source

[ess_grid alias=”grid-2″]


The grey boxes are fold-able, and come with lids! I think I may need to buy some to organize all of the building sets my boys have.

_________________

CLOSET SYSTEMS

A closet is probably the most likely space in any house to become cluttered. What happens behind closed doors stays there, right? Wrong! You will need to open that door at some point, and wouldn’t you rather see a well organized space than a war zone of items falling on top of you?

Closet organization tips

image source

[ess_grid alias=”grid-3″]


How genius is that rack for pants? No more annoying crease marks from folding and stuffing the khaki’s in the drawers!


_________________

SHELVING

Shelving units are an absolute staple in home organization. There are so many stylish options for shelving these days –  from bookcases to display shelves. Take a look at the goodies I found!

home organization built in cabinets

image source

[ess_grid alias=”grid-4″]


Pretty sure that little red number is calling my name. It has glass doors, which means it is the perfect place to store keepsakes and books, protecting them from little hands… and dust!

_________________

CONSOLES

I would venture to say that just about every home in the United States has at least one television. And with that television comes all of the ‘extra’s’. The dvr, the blue ray player, the video streaming device, and video games for the kids. All of these items need a home, and a console / entertainment center is the perfect place to put them.

home storage organization ideas

image source

[ess_grid alias=”grid-5″]


I love the style of the aqua fretwork cabinet. I could see it being useful for a variety of items beyond the living room. Linens in the bathroom. Hat and glove storage in the entry. The possibilities are endless!


___________________________

KITCHEN ORGANIZATION

The kitchen is notorious for being a room that needs a lot of organizing attention. Forget about it for a short amount of time, and the space can easily be over-run with pots and pans and mix matched Tupperware. Thankfully the market is huge for kitchen organization items, such as these awesome finds.

Pantry organization ideas

image source

[ess_grid alias=”grid-6″]


That spice rack. Come on. I mean, I’m not sure I would have the patience to fill all those little jars – but this may just tempt me to try! It is almost a work of art. You guys also have to check out the rolling kitchen cart/ island. It FOLDS!

_________________

MISC. STORAGE/ ORGANIZING

 I had to throw in one more grid including random storage items. The truth is, from the bathroom counter to under the bed, just about any space in the house can benefit from organizing!

Bathroom organization ideas

image source

[ess_grid alias=”grid-7″]


The wire wall hanger could be so useful for keeping all the paper items in line! No more piles of bills on the counter!


Let’s do this organizing thing! I’m thinking that if I tackle the clutter before the Christmas tree goes up, I won’t be as overwhelmed when it comes down.

What are your favorites from this list? I would love you to leave a comment and let me know!


MORE HOME ORGANIZATION IDEAS

For more inspiration on how to keep your home organized, check out my post titled 7 daily habits for a tidy house


PIN THESE HOME ORGANIZATION IDEAS FOR LATER

home organization ideas and products


FAMILY COMMAND CENTER

Let’s just take a moment and acknowledge (or stand in wonder/confusion) that I have been a mom for over 10 years and just recently put together our very first family command center.  When it was finished, I stood back and thought ‘WHY did it take me so long to do this?!’ It just makes good plain sense! As an organization junkie, I’m totally geeking out about it – and maybe sharing our space can give you some tips to help keep your own family organized!

Again, I’d like to mention that we are renting our current house from family members.  Though they have given us quite a bit of liberty to make design choices, Craig has drawn the line on a few things he will absolutely not allow me/us to tackle no matter how many times I ask.  One of them is the painting of the kitchen cabinets.  This kitchen was remodeled in the 1960’s and I believe the cabinets are primarily constructed of oak hardwood, which are stained a very dark color.  The only natural light source in the space is a small window above the sink, and so those cabinets really make the room seem very dark.  I’ve lobbied to paint them all white, and add some fresh new hardware – but he’s not budging and I would like to stay married, so it’s a no go.

But… what happens behinds closed doors stays behind closed doors, right?!  😉

In the kitchen there is a tall cabinet in one corner of the room.  We have used it for pantry storage since we moved in nearly 3 years ago; But it’s depth meant that a lot of items were inaccessible or were forgotten about – helllooooo stale cheerios!  Through time, the bottom portion even became a space where footballs were stored.  I cringe at the memory.

Here is a BEFORE picture.  The cleaned out pantry space.  Note the lovely contact paper on the shelves and the unfinished flooring below.

Let me tell you…. they don’t make contact paper like they did in the 1960’s.  That stuff was made to last!  I was eventually able to peel it all off, but woah.  Just woah.  I also managed to finally finish the flooring by using the more high quality peel and stick tiles over the existing chee-po peel and stick tiles.  It’s an upgrade. (Note to self: In the new house… REAL thickness tile only.  Please!)

I then used some barn wood that we had on hand to line the back wall.  I found a floating shelf at Target that matched the texture and color perfectly and though it gave him quite a struggle, Craig was eventually able to attach it to the barn wood wall.  The inside of the cabinet doors were painted the same mint blue color as the decorative ‘niches’ we have in our kitchen.  From there it was a matter of adding the functional pieces and making it pretty!  I thought it might be easier (and more fun!) to do a video of the space pointing out all of the little details instead of typing them.  Behold the first ever YouTube video that includes my face talking.  Be gentle on me people, it can only get better from here.

And there you have it!  Our family is now on track to be ultra organized! Though we have only had it functional for about a week, I’m happy to report that the kitchen counters aren’t littered with papers, and the kids have been having fun playing with all the activities that are right at their fingertips. And can I just say that pointing them in the command center’s direction when they ask, yet again, ‘what’s for dinner?!?’ has been a treat.

Everything can be tucked away behind closed doors – great for when company comes over!  There is a sweet space for photos, and a charging station for the phones/ipads.

There is space in this command center for both adults (top half) and kids (bottom half).  I get a sleek barn wood wall to look at when I am writing a blog post or browsing on Pinterest.  The kids have access to all sorts of fun activities down below – coloring books, play doh, etc – as well as a spot for their Ticket System (chores/ commission)

The Meal Rotation clipboard is in easy viewing distance for the kiddos, so they don’t need to ask mom what’s for dinner.  Stylish file folders make organizing bills and paperwork more tolerable.

My favorite piece?  Probably the three ‘Plan of Action’ calendars!  I’m a list maker… remember?  I love sitting down at the end of the day and writing down my top 3 goals for the following day.  I think that seeing what is to come helps prepare me, and makes me less anxious.  I have made each of these calendars (monthly, weekly and daily) available in pdf form.  By clicking on the images below you can print your own to use.  As mentioned in the video, I print off one of each sheet and then make them into DIY dry erase boards by placing them in a clear plastic binder protector (then folding back the binder portion or cutting it off).  That way, I waste less paper and spend less time printing.

Maybe these calendars can be your first step toward making a command center for your own family.


Enjoy and happy organizing!