CHRISTMAS DECORATING INSPIRATION FROM INSTAGRAM

I joined Instagram right around the same time that I started this blog, only a few short months ago. I mainly follow home decor sites there, and have been absolutely wowed by the amount of creativity that is shared!

This has been my first Christmas season as part of the IG community and it is plum full of amazing feeds. With Christmas right around the corner, I wanted to capture some of my favorite photos and share them with all of you.

@laureltracehome

Not one, not two, but three gorgeous Christmas trees! I am loving all of the red and white in this room, and the high windows add a touch of elegance to the space. Did you notice the amazing scroll above the mantle?


@sweetroseandwren

How adorable are these gingerbread decorations? Just SO sweet! I would have never thought to use edible items as decor, but this display is perfectly creative! And although I lack skills in the kitchen, this photo is tempting me to try my hand at a gingerbread creation of my own.


@nest.of.neff

That is one festive bed! I love the simple stripes combined with the chunky metal bed frame. The bedroom is one room that I tend to not put any effort into decorating. I think in the future I might try harder!


@ourweatherednest

I’m dreaming of a white Christmas…. in one of those amazing metal houses! This display is such a simple and perfect depiction of Christmas. Peaceful, calm, and celebrating the Savior’s birth.


@dreamywhitelifestyle

This picture just warms my heart. The room is absolutely filled with natural light (one of my love languages), and though the tree has no ornamentation, the little boy is cuddled in a warm blanket sitting amazed looking in it’s direction. The wonder of Christmas. Magical.


@desertdecor

Bringing the outdoors in, this table setting is rustic and modernly stylish with the buffalo check accents. I imagine a warm bowl of soup in those pretty white bowls.


@ripeonthevine

I am pretty sure I could curl up with a good book and just hang in this corner for an entire day! I love how the standard house plants seem to fit right into this scene. The plaid checkered pot cover helped to tie it all together.


@sweetparishplace

Ending this roundup with another gorgeous tree all decked out in red and white. Doesn’t it look magical next to that grandfather clock?


Isn’t it fun to see how different people decorate their homes for the season? If you missed the post detailing how I decorated our house for Christmas this year, you can find it here. I also invite you to visit these amazing Instagram accounts for even more inspiration by clicking on the links below each photo. Merry Christmas friends!

HOLIDAY HOME TOUR BLOG HOP

Can you believe we have less than two weeks until Christmas? This time of year is always full of beautiful things; And in honor of that, I’ve teamed up with some amazing fellow bloggers. We’re inviting you into our homes to share our Christmas decor and hopefully give some inspiration!  At the end of this post, I’ve linked to everyone’s posts so you can ‘hop’ on over and check out their homes. We hope you have fun!

Want to see how I have decorated our home for Christmas this year? I’m excited to share!

First, a bit of a disclaimer: We are living in a rental home as we prepare to build Arrow Hill Cottage. Though our rental is a pretty good fit for our family, it is difficult for this design oriented lady to accept some of the finishes. Yes, we have painted paneling. Yes, we have popcorn ceilings. No, the furniture isn’t optimally positioned. No, we can not remove walls. Ha Ha!

I worked with what I had. This is our family’s moment in time. Christmas 2017  – in the rental house.

We have five young children. They range in age from four to eleven. Old enough to understand the true meaning of Christmas, and young enough to still be excited about festive decorations and wrapped presents under the tree.

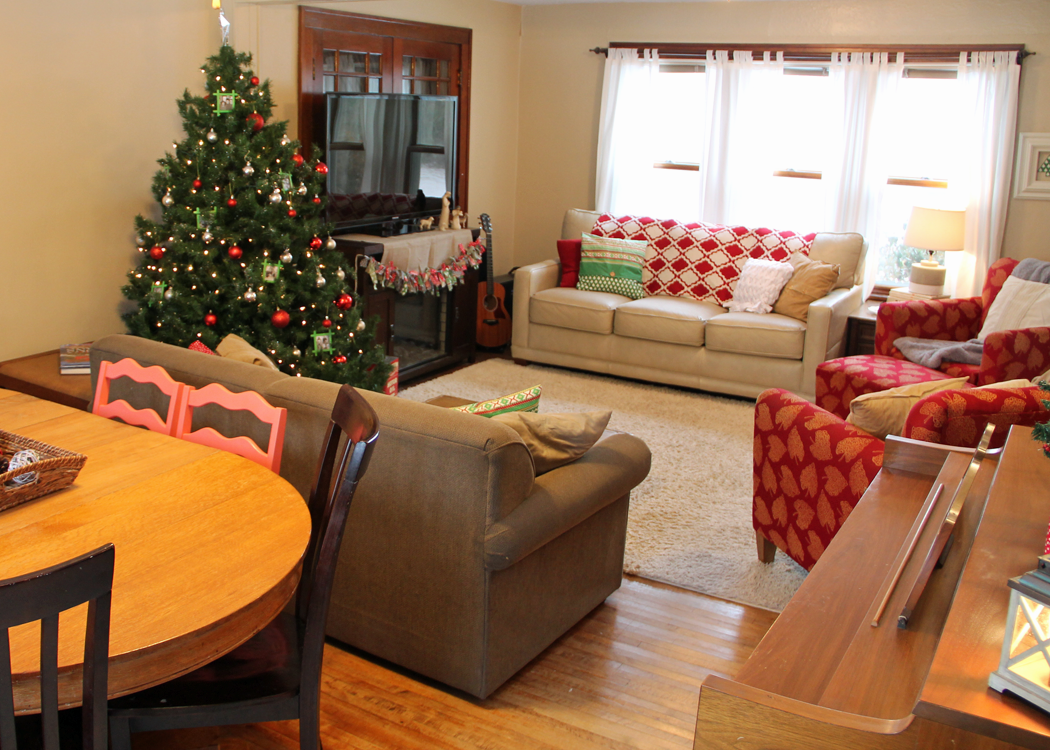
This is our daughter {K}’s first Christmas home (you can read about her adoption journey here). I really wanted her first experience of Christmas to be one of happiness, anticipation, and fun – and full of family togetherness. As such, I was sure to include the kids in the decorating festivities. I chose to keep the bulk of the decorating in the main living space, which you will see today.

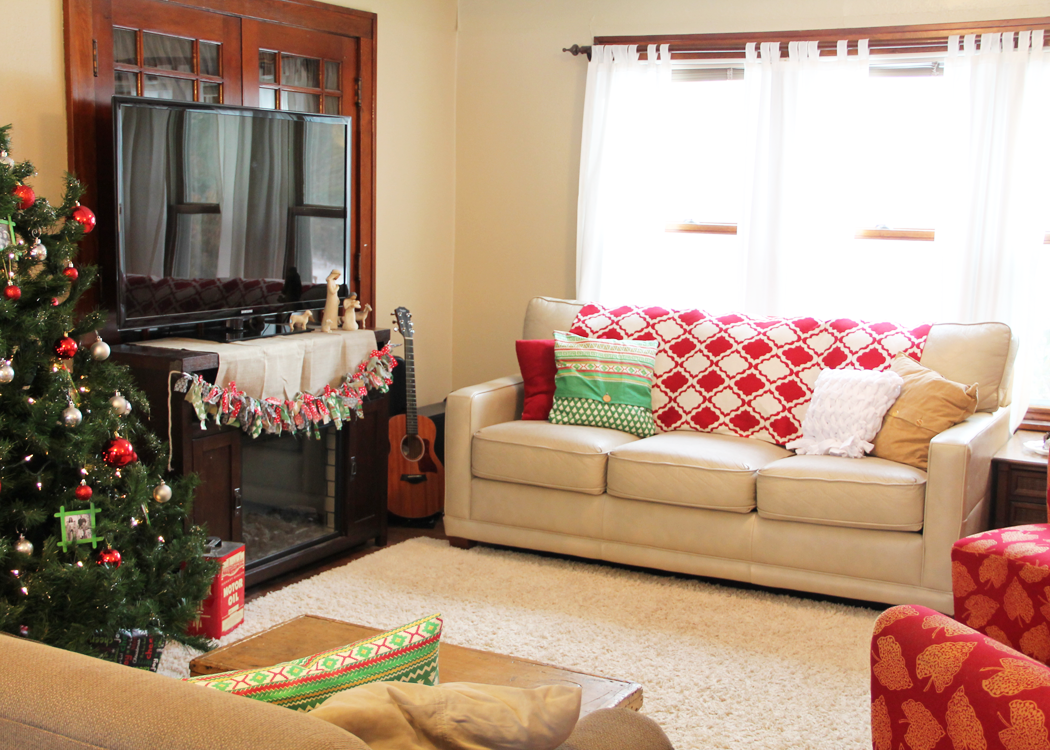
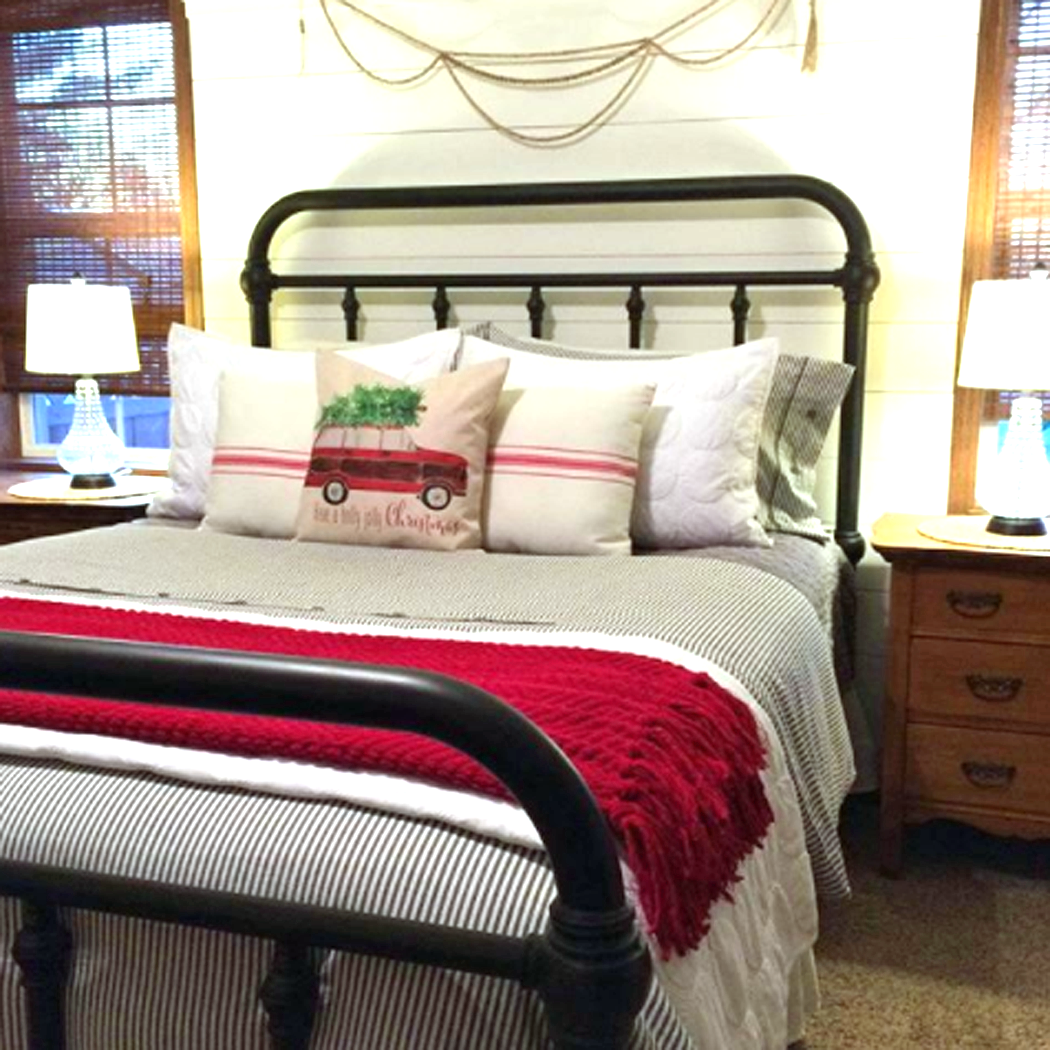
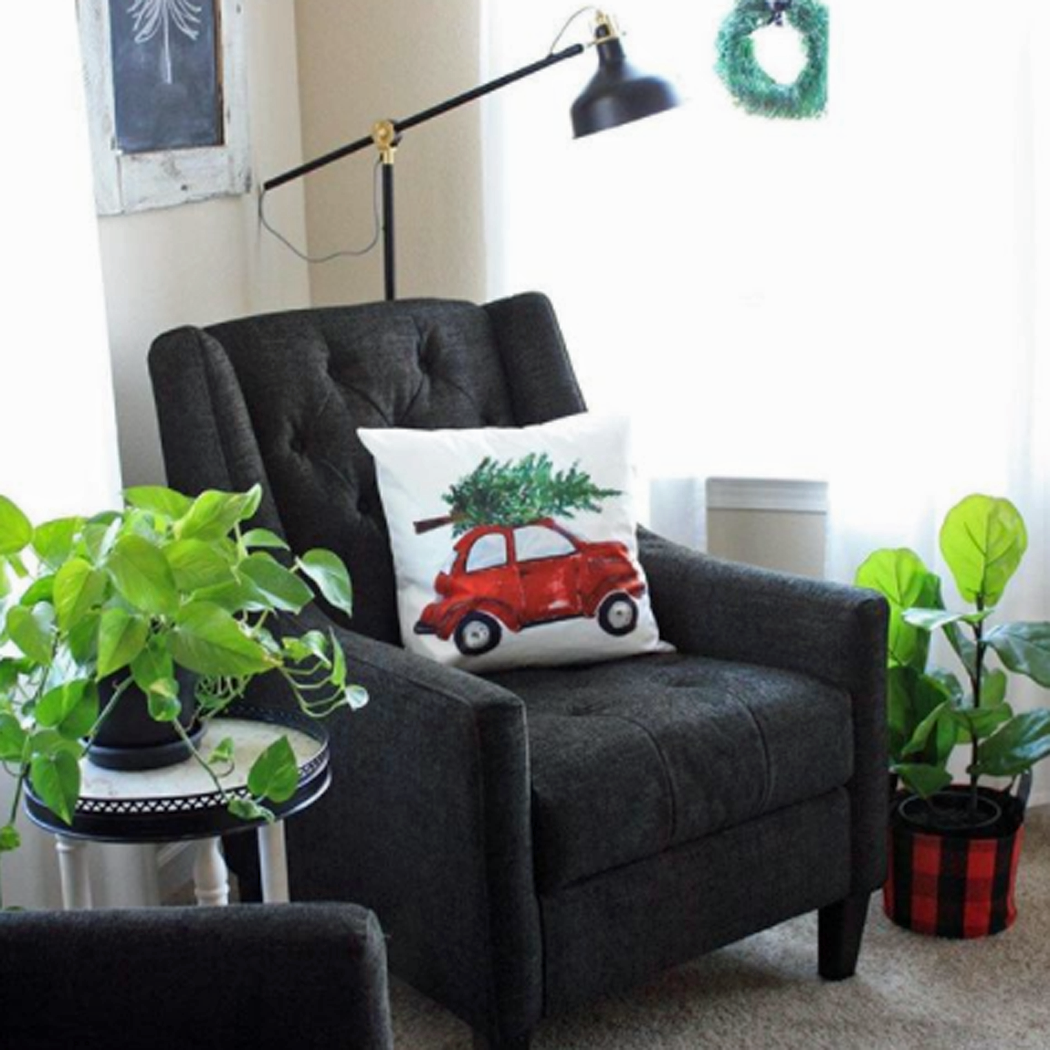
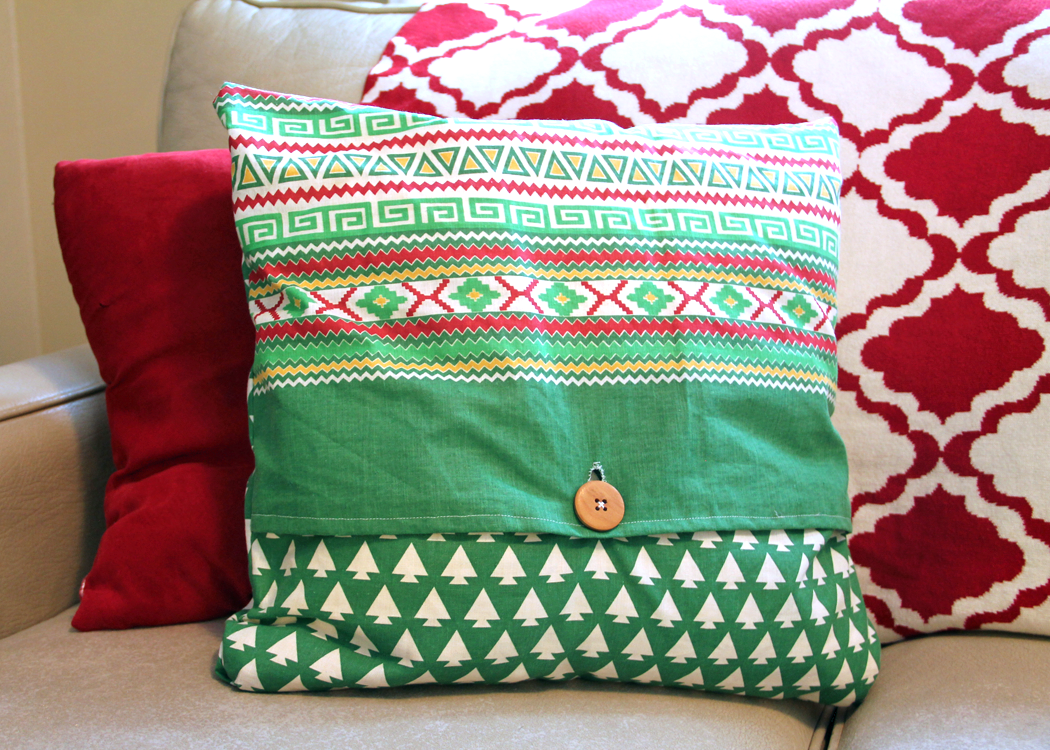
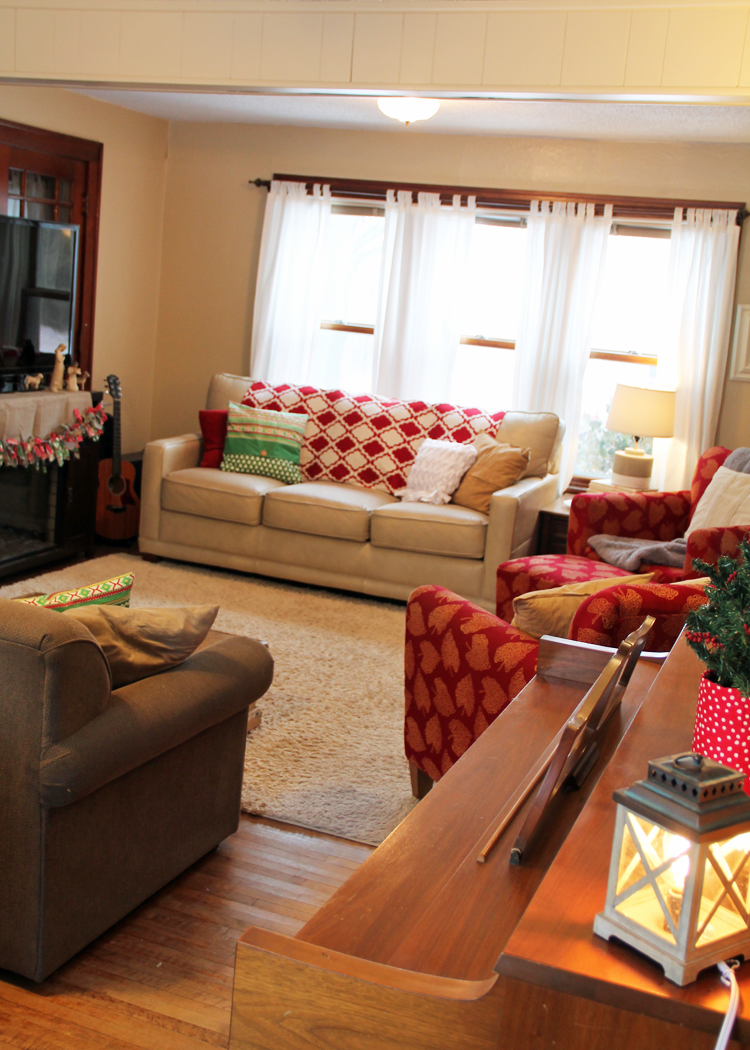
I started with an amazing feed/flour sack that I found at a local antique store. Isn’t this just the most perfect fabric for the season? The bright colors and bold, fun patterns on this fabric were just right for what I was trying to achieve. I turned that one feed sack into two amazing throw pillow covers, complete with wooden buttons.

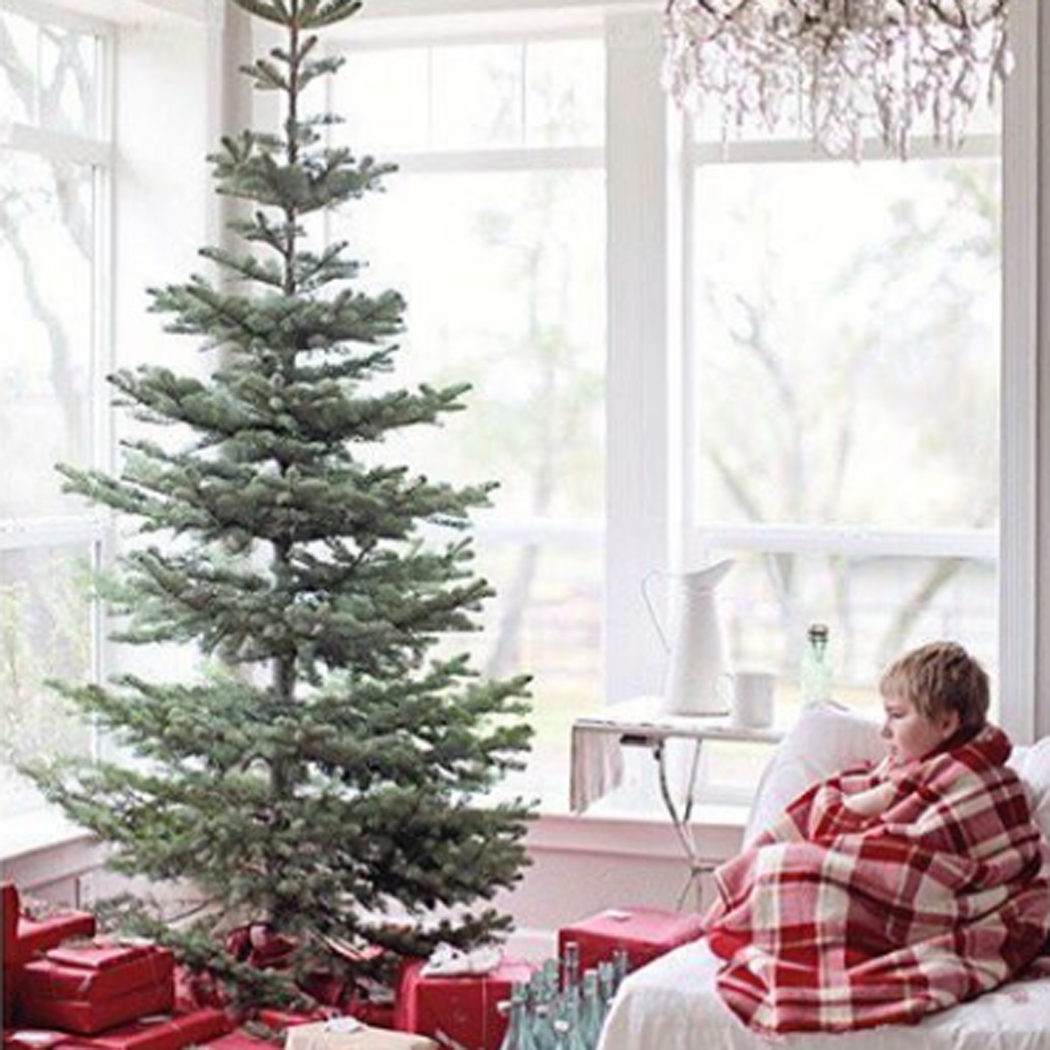
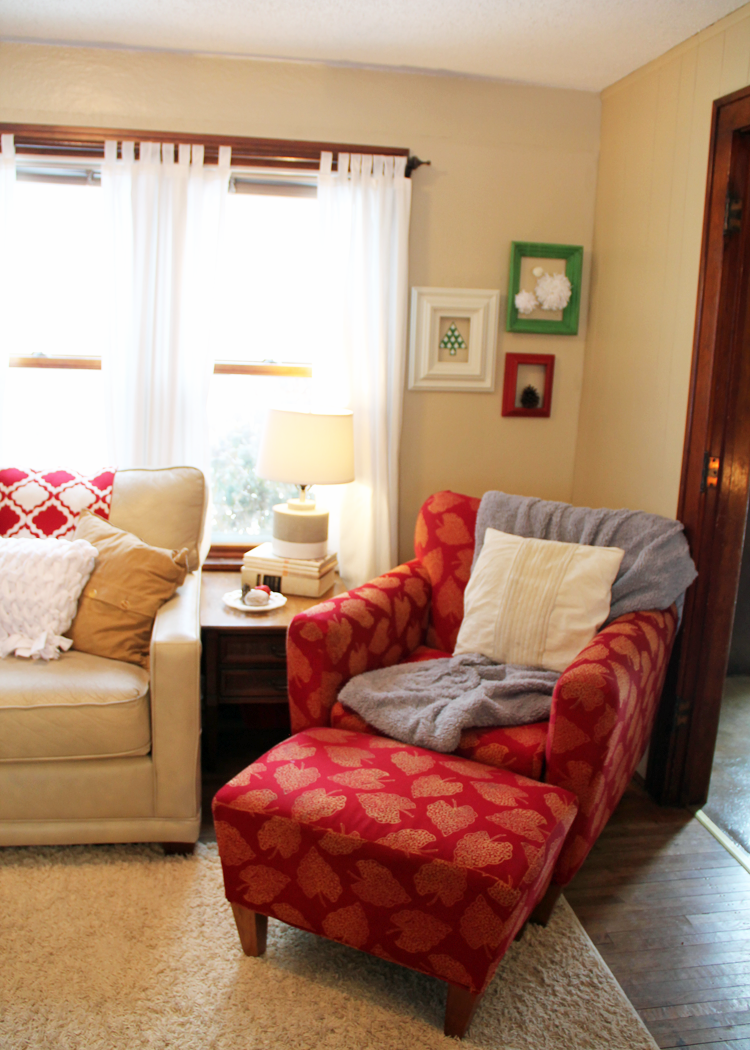
I layered in more texture on the furniture with cozy throw blankets, home made sweater pillows and a sweet DIY fleece knot pillow. Be looking for a tutorial on that coming soon!

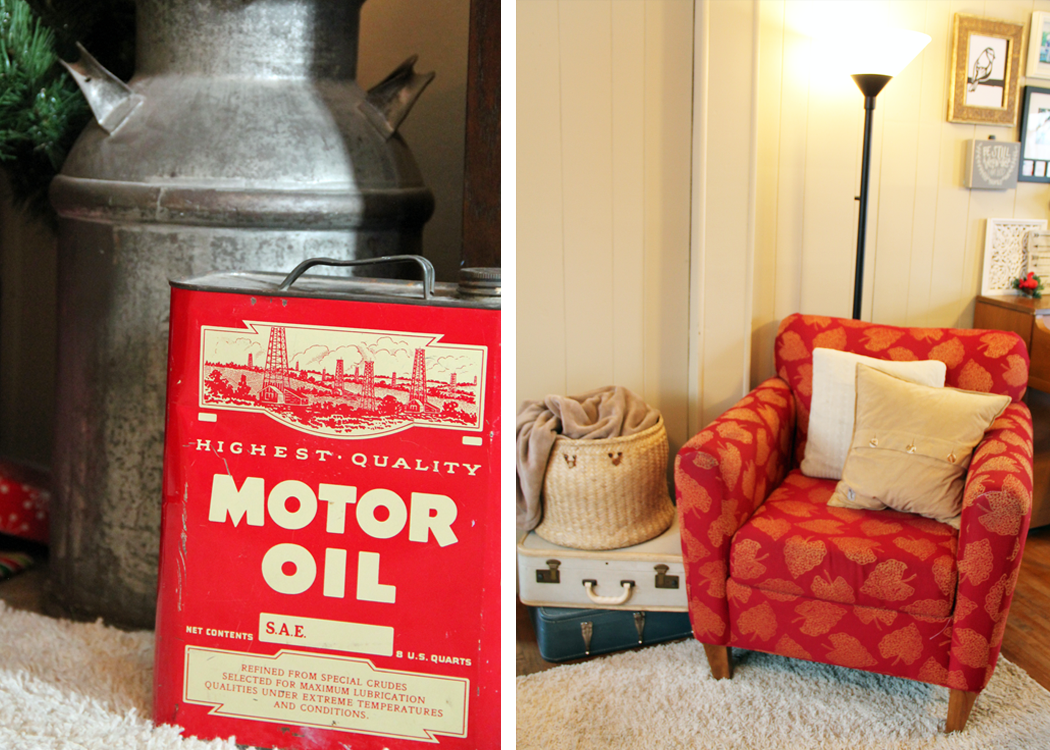
I scored some comfy club chairs + ottomans recently for an absolute steal of a price. The bad news is that they will need to be reupholstered with something a bit less boisterous. The good news is that the fabric is red and I was able to blend it into the Christmas decor. Ha!

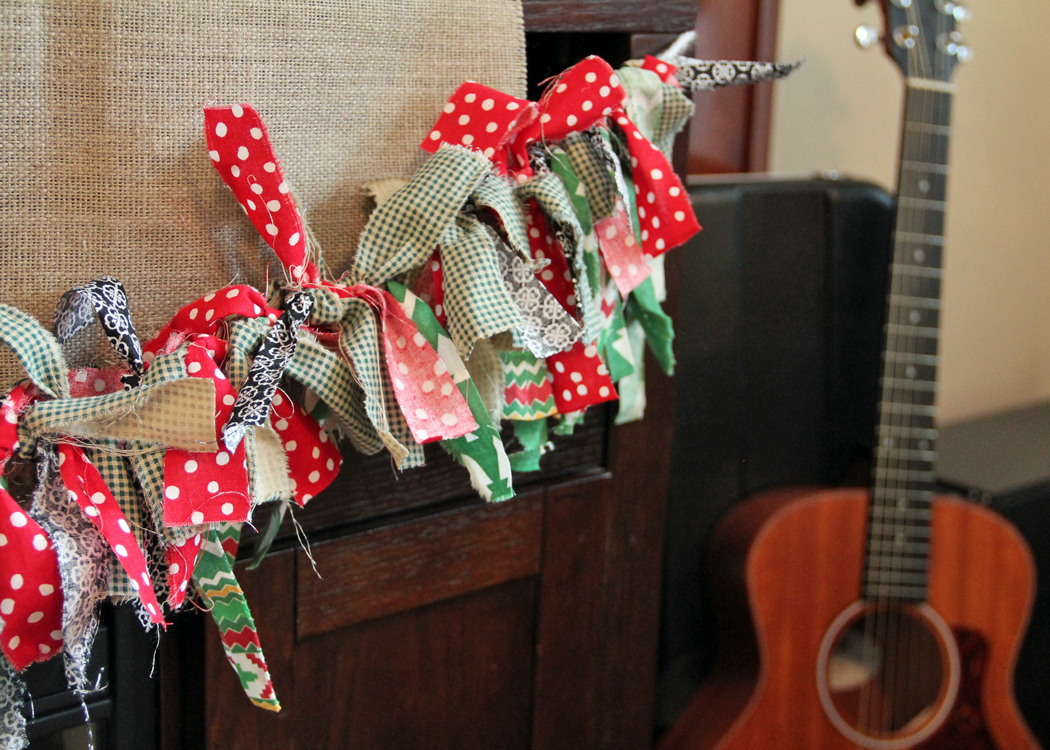
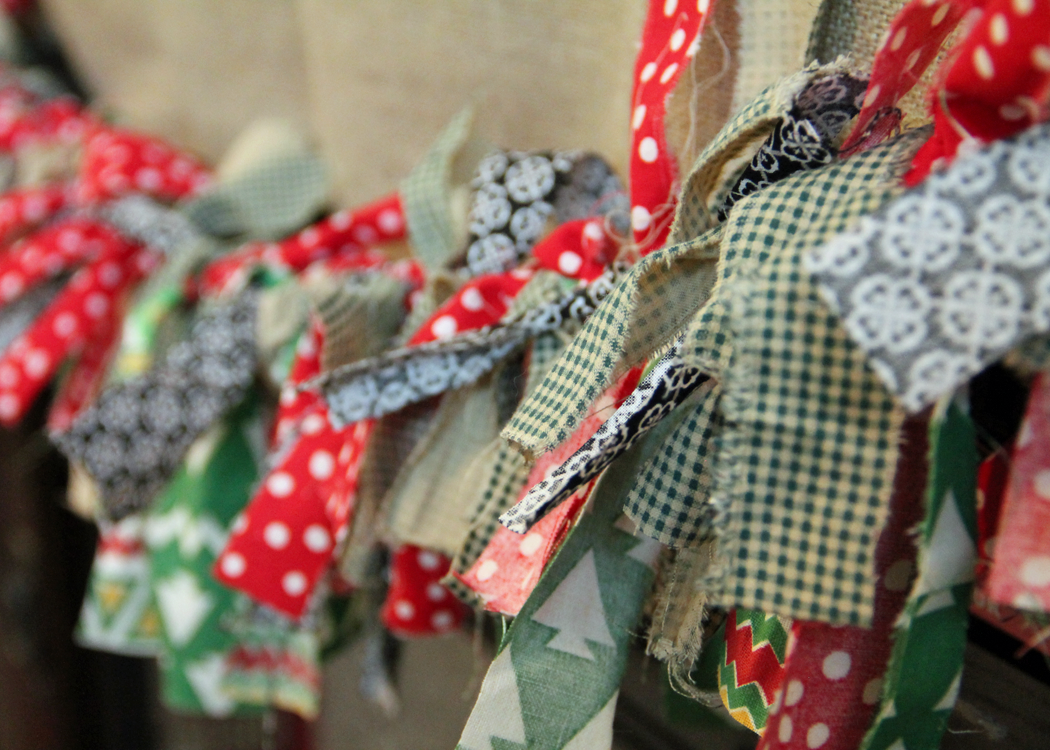
We don’t have a beautiful fireplace or mantle here. I chose instead to decorate our entertainment center. I covered the electronics, besides our massive TV, with burlap linen. I then put together a super colorful rag garland and draped it in front. For this craft, our boys got in on the action of ripping fabric and pretending they were the Incredible Hulk. Ha!

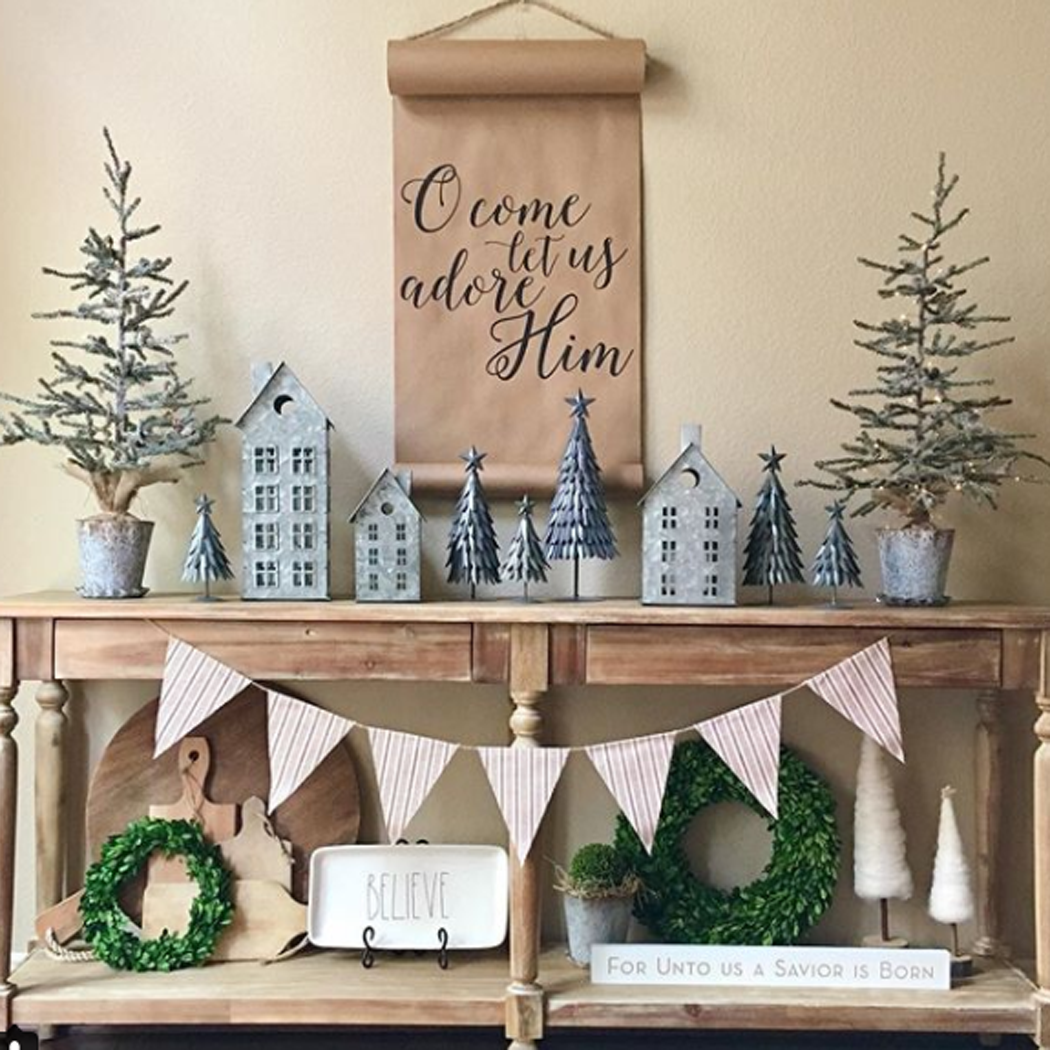
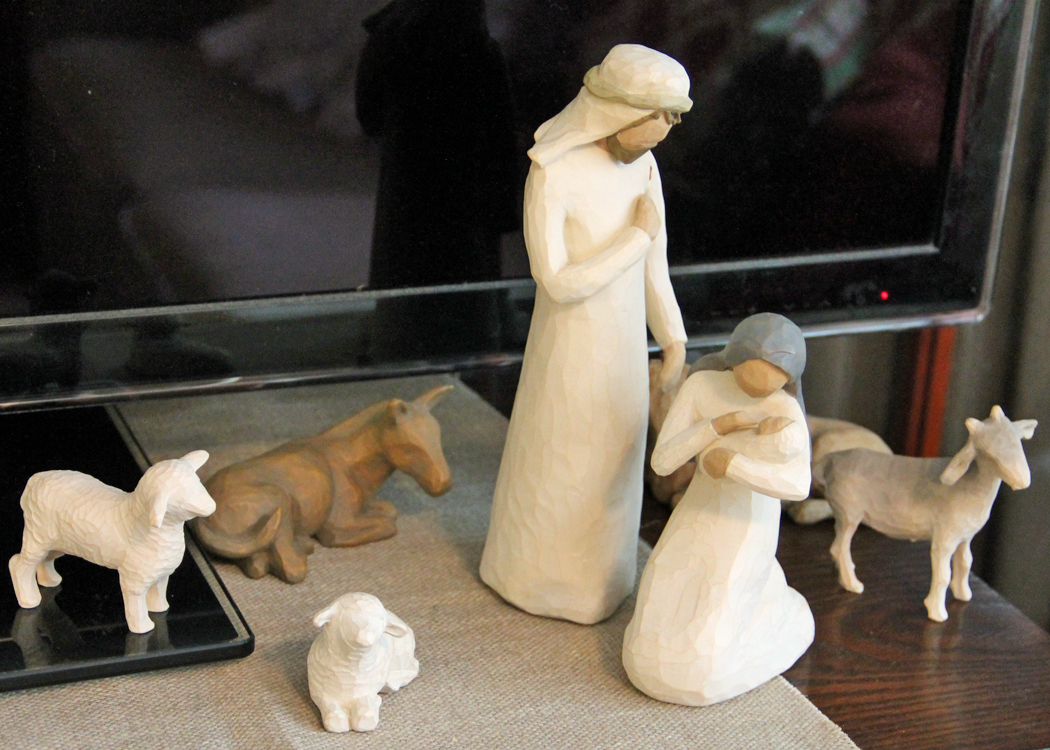
Perched on top of the cabinet are my Willow Tree figurines. I love the simple sentiment of this Nativity display.

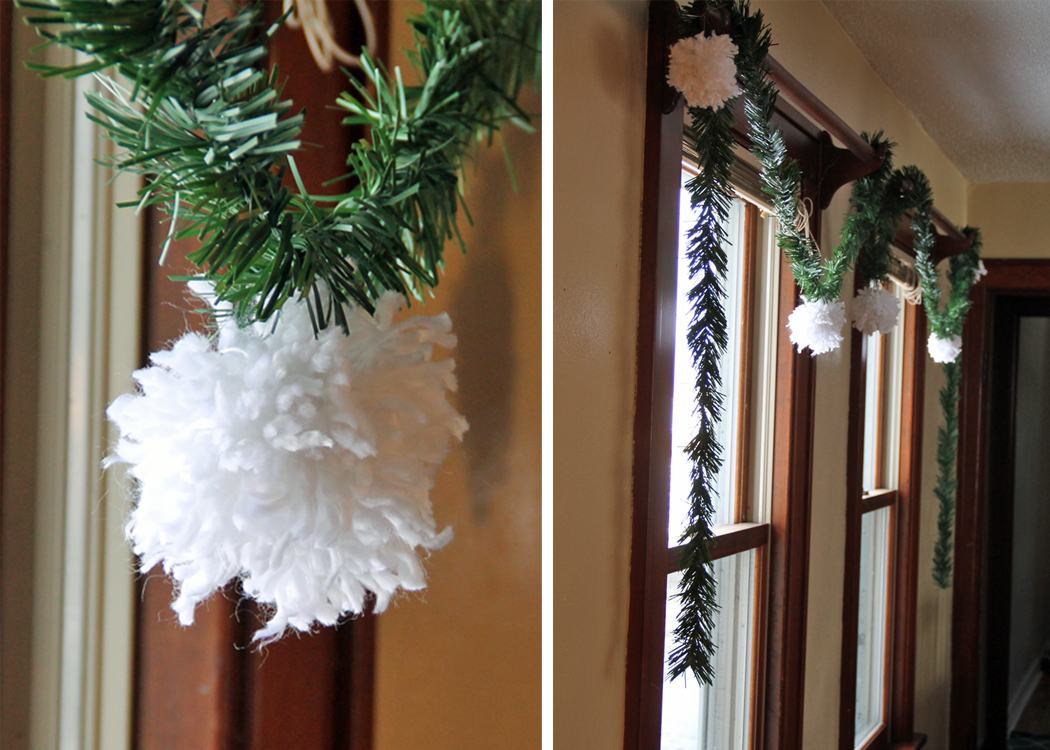
Another simple garland that I created includes DIY pom poms. I had never made them before; but found this well written tutorial that showed me step by step how easy they are to create! The kids joined in the fun of creating these fluffy ‘snowballs’.

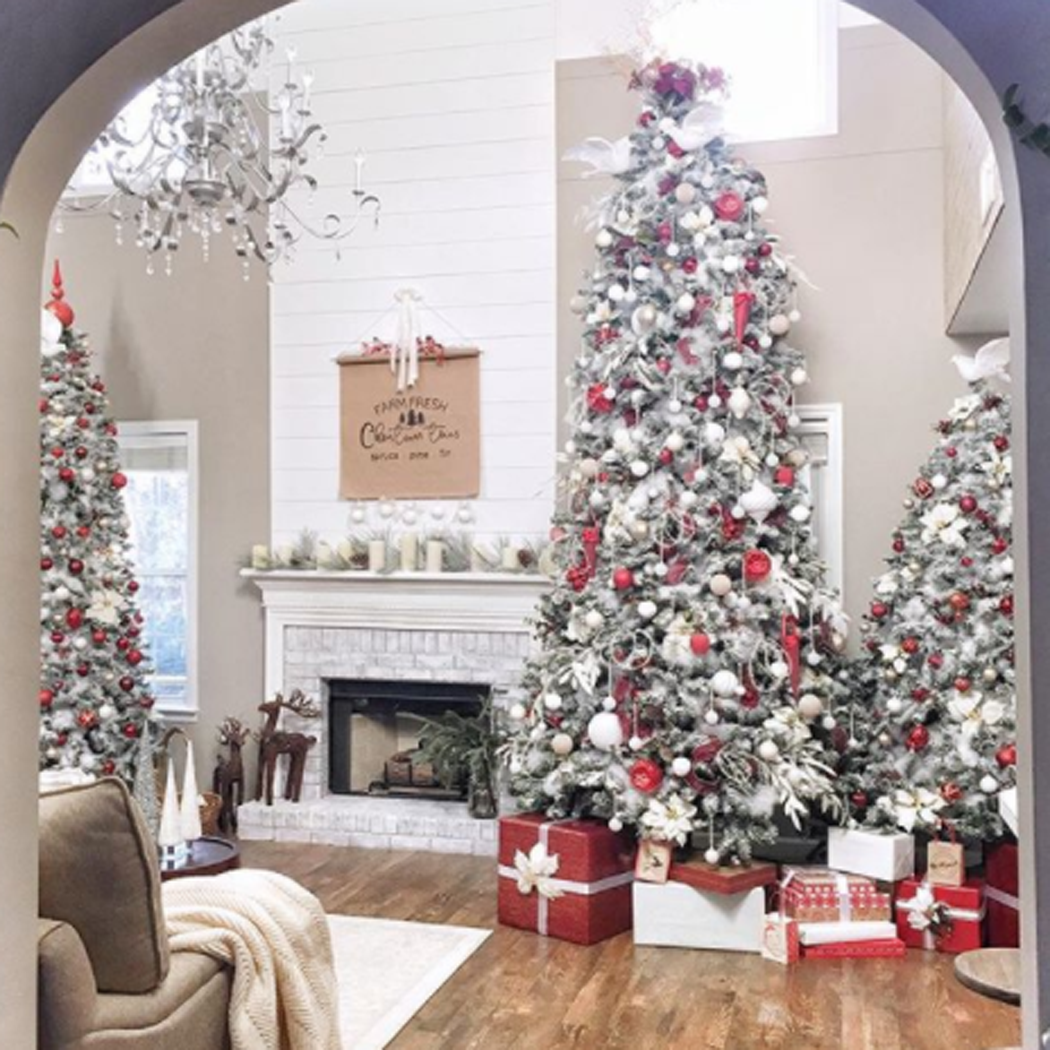
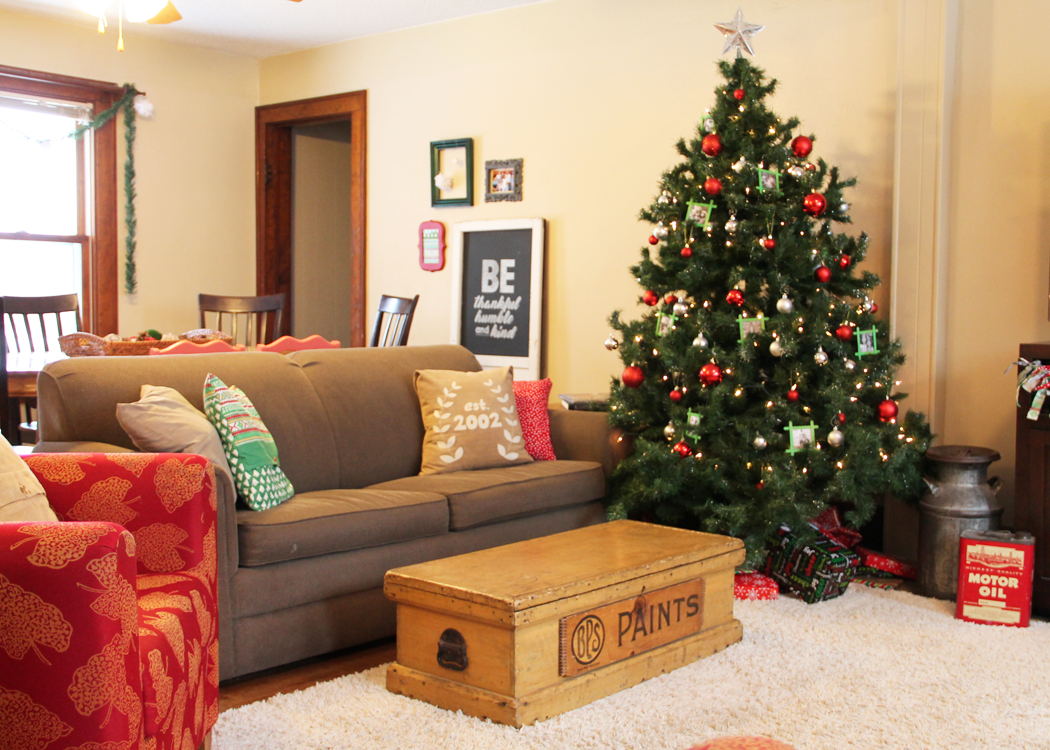
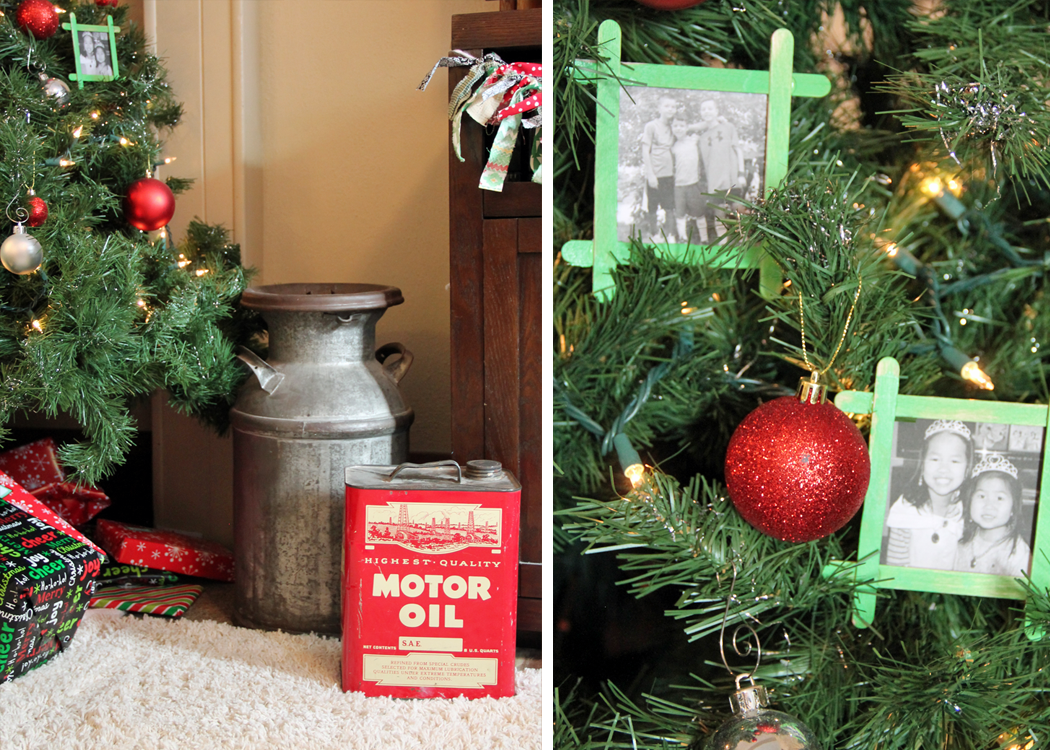
Our Christmas tree is the ultimate of hand-me-downs. Though I love the look (and smell) of a freshly cut evergreen, it is special to me that the tree which now sits in our living room is the same that my Christmas presents were placed under as a child. That’s right. This tree is as old as I am! I’d say she has aged pretty well!

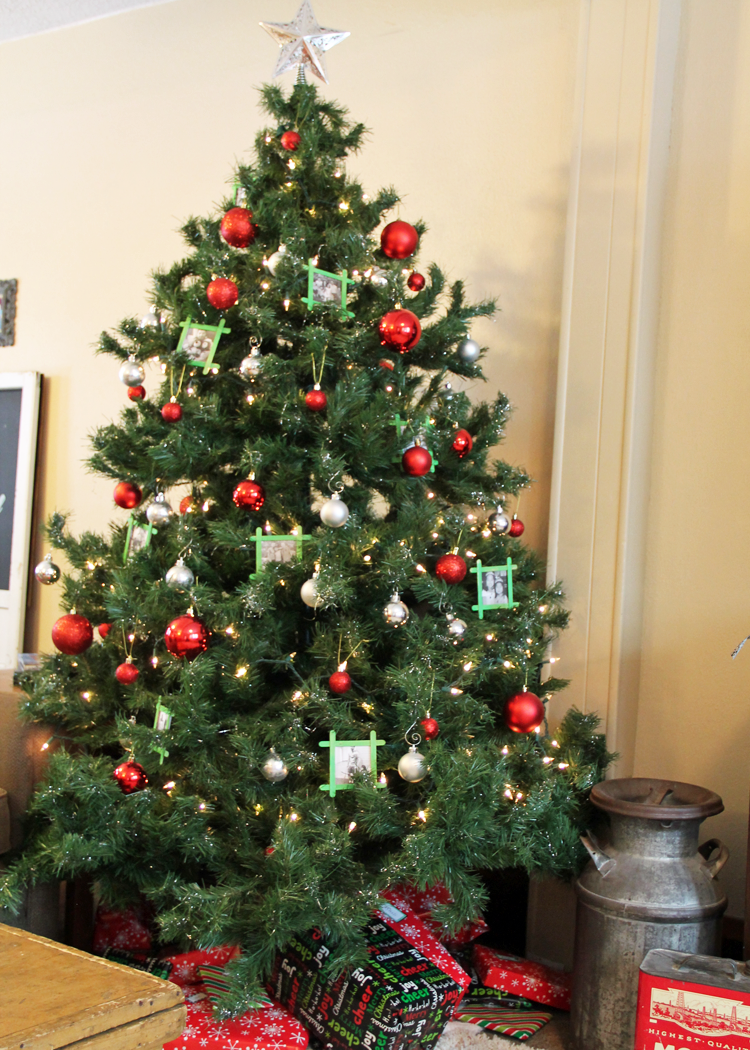
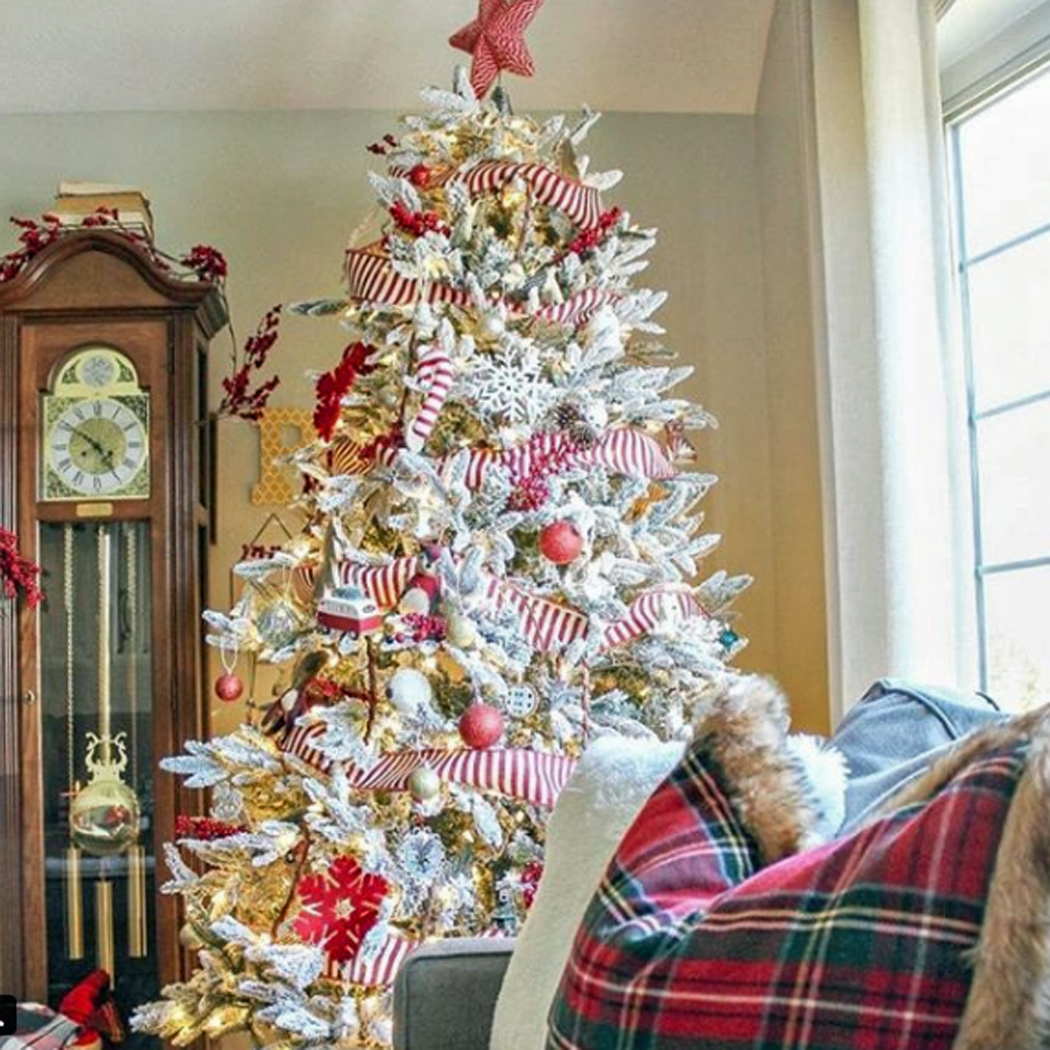
The ornament and light positions were decided by the kids. I had thought of maybe moving them around to balance things a bit, but decided to embrace the quirkiness. They are so proud of their masterpiece.

I love taking photos of day to day life – sometimes though, those pictures tend to be stuffed into yet another computer file. Lately, I have been putting forth more of an effort to showcase the pictures I take. In fact, I started a YouTube channel just for that purpose! Our weekly photo vlogs have been so fun to create. At the end of the year, we plan to sit down with a big batch of popcorn and watch them together.

I decided to take one photo from each month and showcase them as part of the Christmas decor. A bit of a yearly time capsule. Each black and white photo is accented by a Popsicle stick frame. The kids helped to paint the sticks a whimsical shade of green and I assembled them.

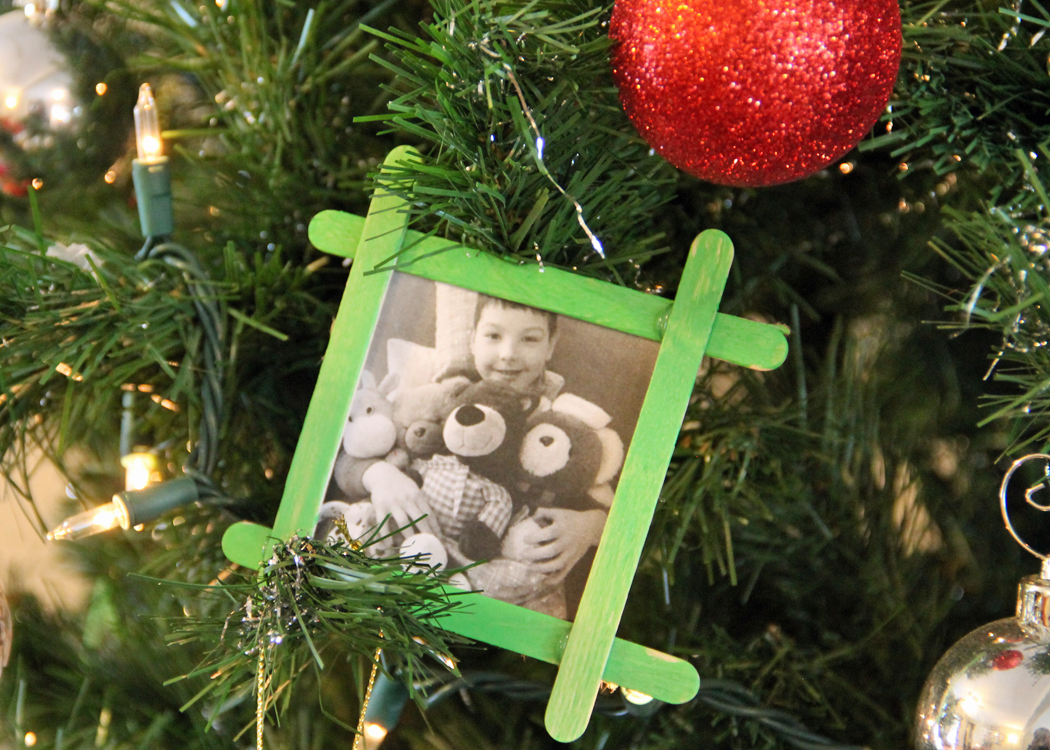
It is a treat to be able to glance at the tree and be instantly transported back to that moment in time. We really have been through a lot this year! From traveling to China in April, as part of {K}’s adoption trip, to Craig’s knee surgery in August. What a year!

I’m not sure how I did it – but I somehow have managed to finish this year’s Christmas shopping already! I have wrapped the gifts in patterned paper that matches the colors in the rest of the room.

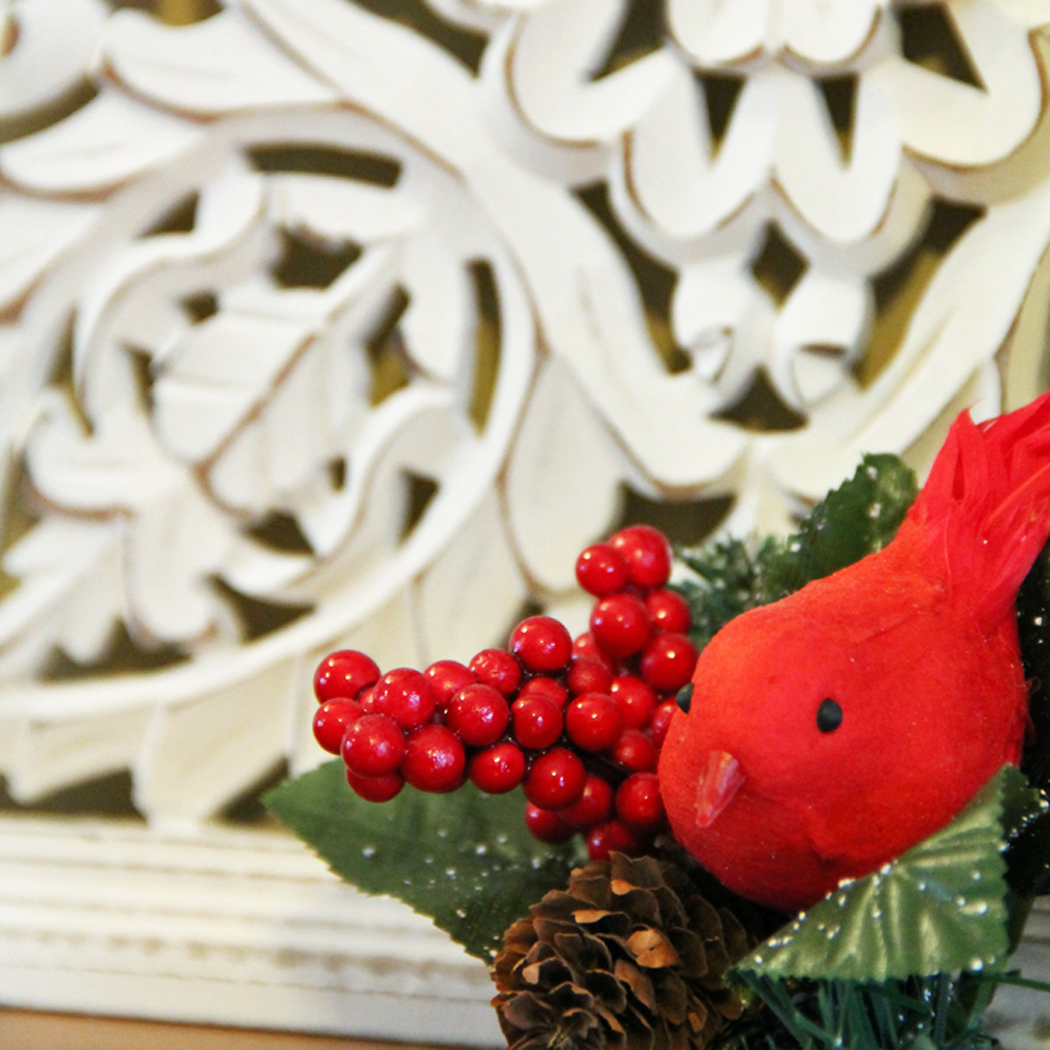
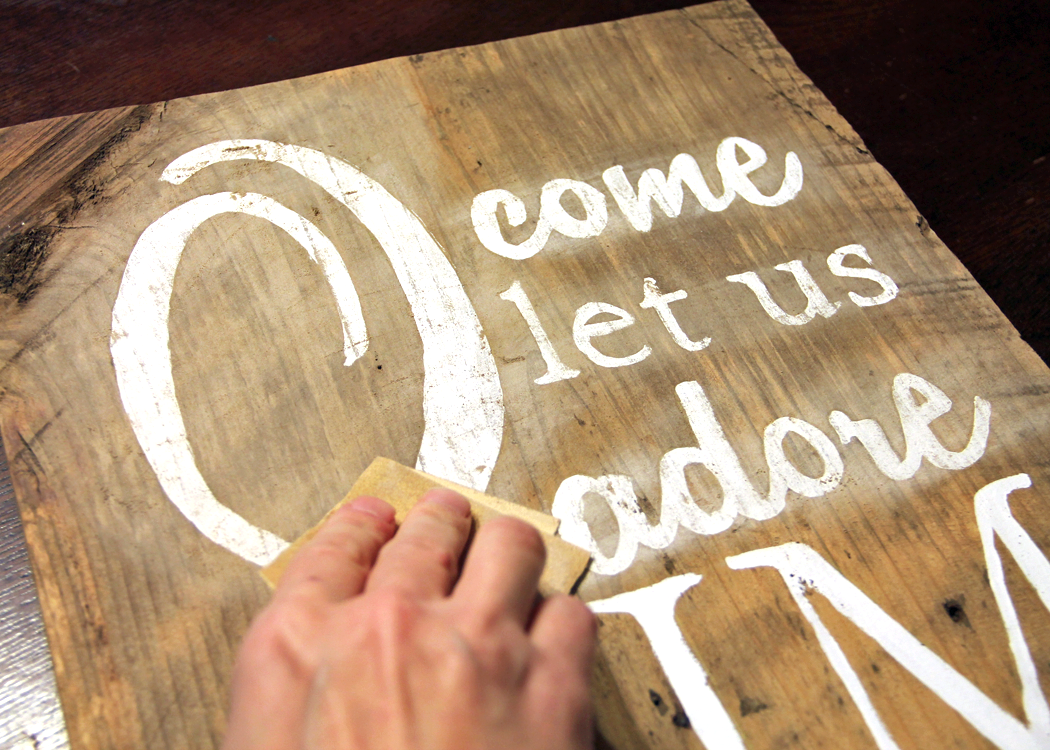
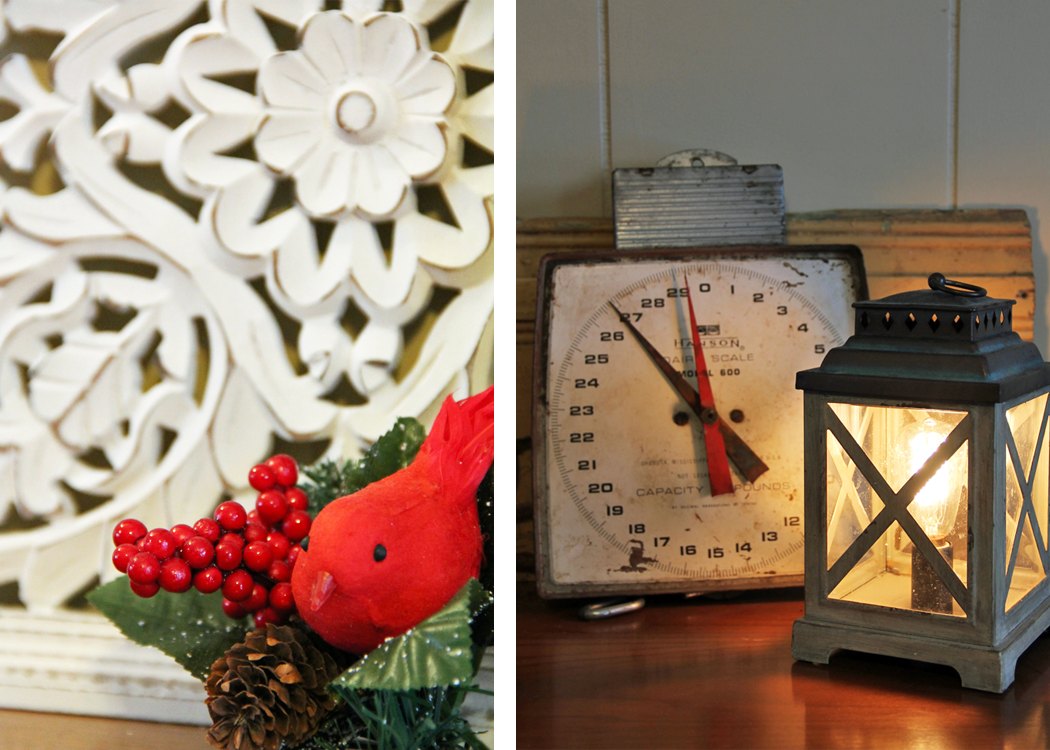
A little red birdie lives on top of the piano – nestled near a small painted wood sign of one of my favorite Bible passages, Psalm 127. I purchased the sign during a friend’s adoption fundraiser. It is a very special piece.

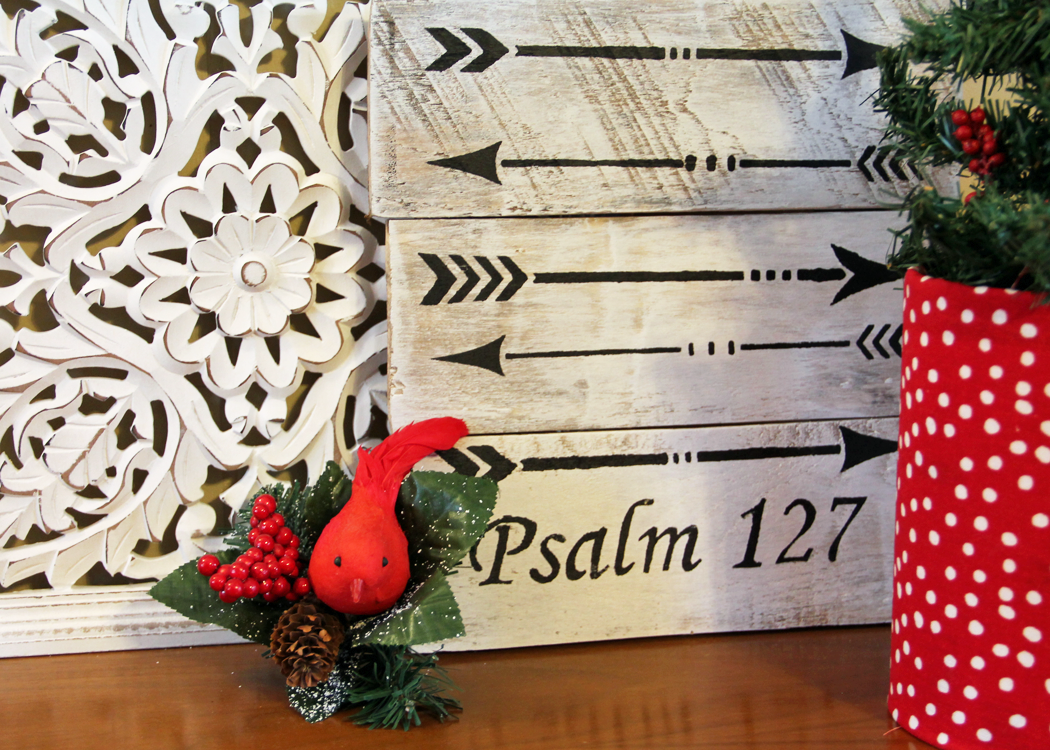
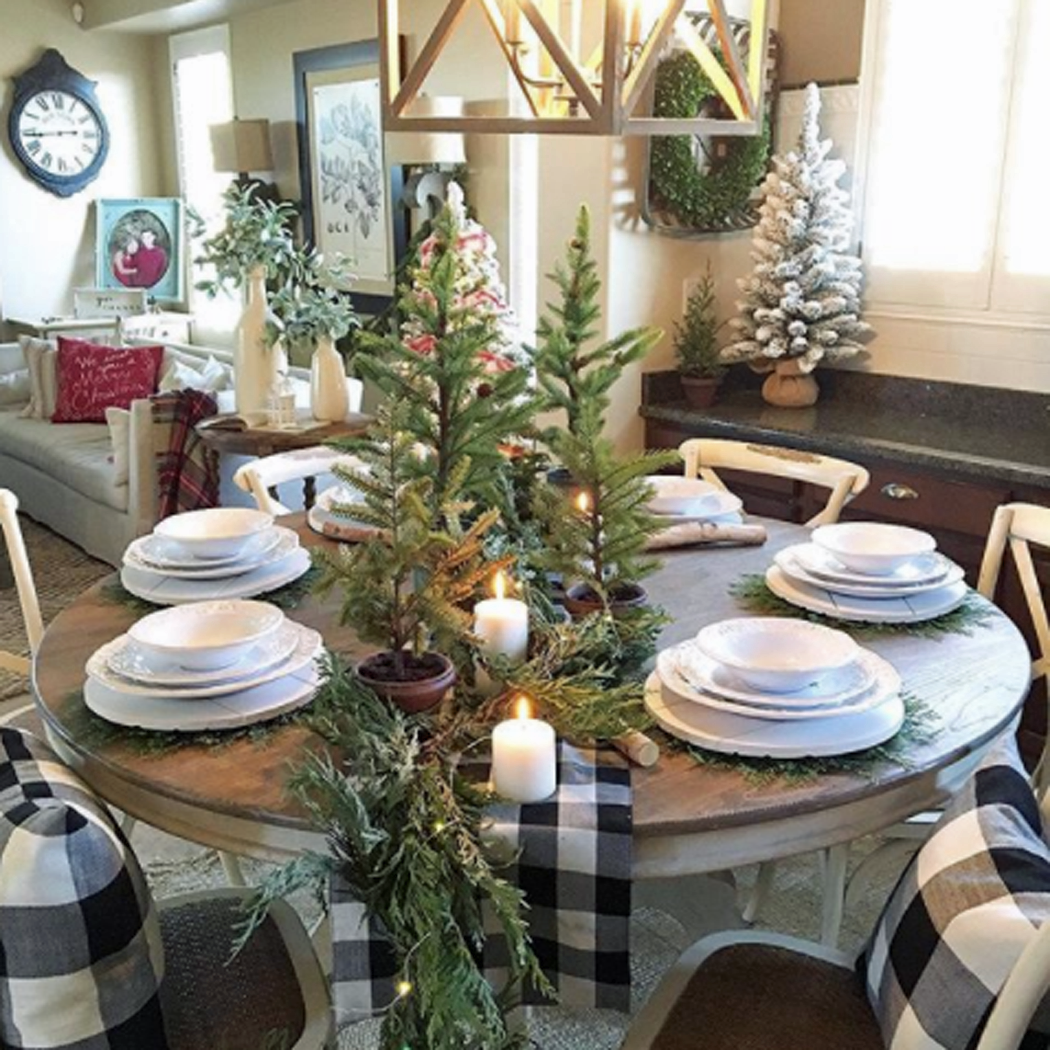
The red and green color scheme continues on the piano top, where a trio of ‘mini trees’ reside. This was another DIY project. The containers were covered in fabric and the trees were made out of a wired garland I had laying around.

Other whimsical items are spread throughout the room. This gallery of vintage frames adorned with fabric, pom poms and a pine cone was a favorite when I first put it up.

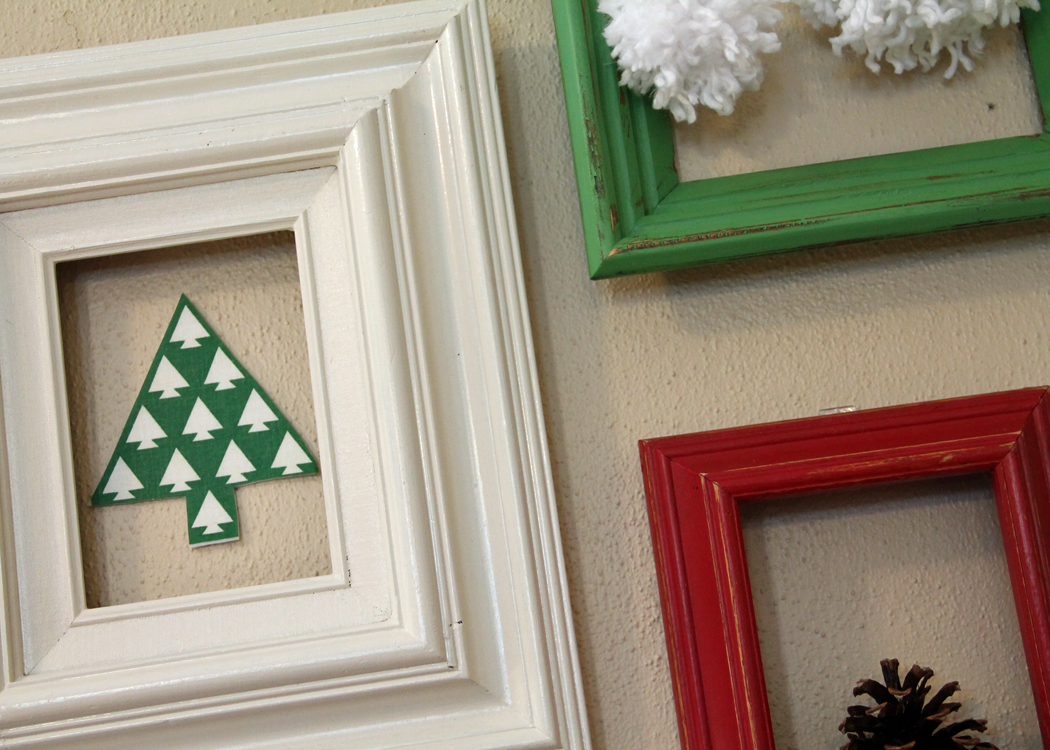
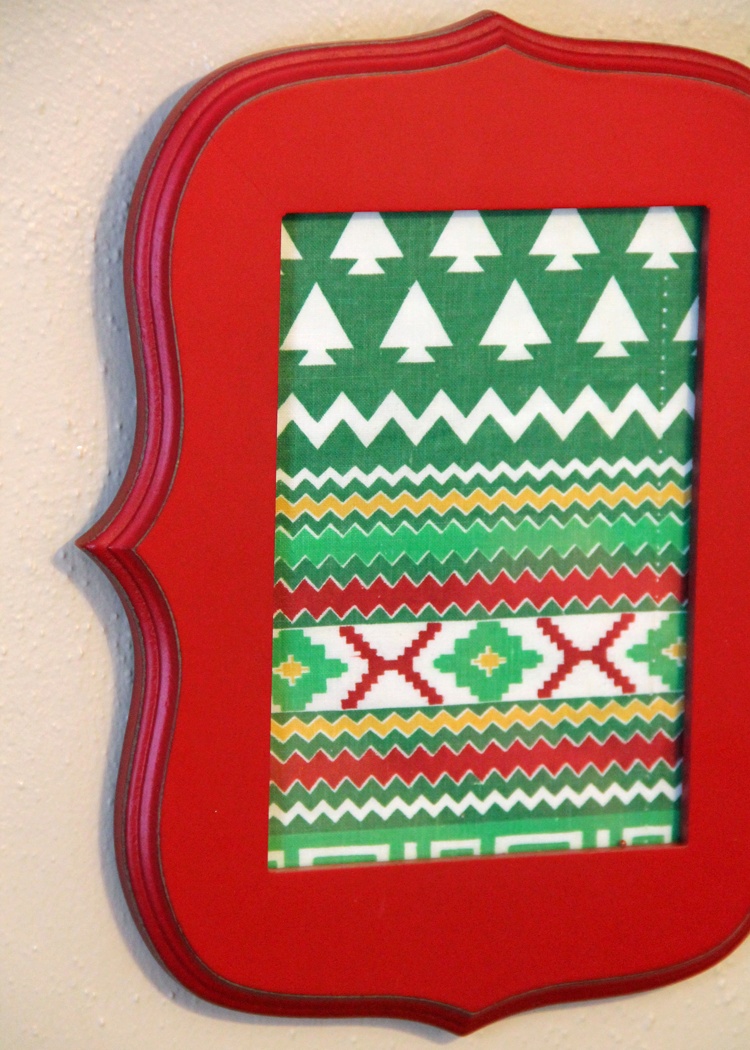
There’s that amazing fabric inspiration again. I was sure to use every last scrap. I love it so much!

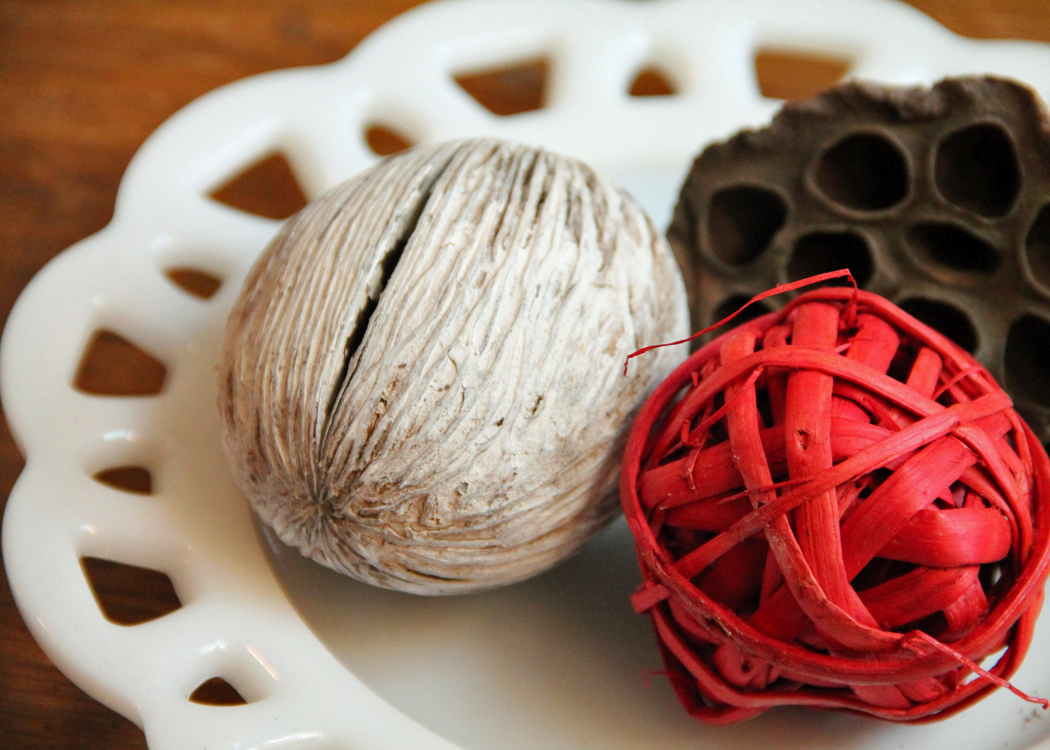
I threw in a few more vintage finds for good measure.

I hope that you will gain a bit of inspiration from the decor our family is enjoying on these cold wintry days. I invite you now to visit these other amazing blogs to be further inspired!

HOLIDAY HOME TOUR

Bless Mama

Slice of Style

Babb Farm Life


CREATE A PAINTED WOOD SIGN IN 6 EASY STEPS

Painted wood signs are very popular right now. They are classic, and their neutral colors look great with a variety of home decor styles. They can be purchased at craft fairs or on Etsy. Many retail stores now sell mass produced varieties; but if you create a DIY version – a whole new world of possibilities opens up!

The great news is that creating a painted wood sign is easier than you might think. It can be accomplished in six simple steps!

SUPPLIES YOU WILL NEED

Wood ‘canvas’: A single slab of wood will work great, as will wood strips connected together. The wood can be newly purchased from a home improvement store or salvaged from an old building! Be sure to inspect it for knots or splintered pieces.

Paper/Printer: You can use computer design software to create and print your design or make a hand-drawn ‘rough draft’ on plain paper.

Transfer Paper: There is the standard carbon paper, or the colored version – which I prefer.

Pencil/Pen: Used to trace the design.

Acrylic Paint: I prefer to use Apple Barrel Paints. They are available in a wide variety of colors!

Paintbrushes: Start with a diverse selection of brushes to find your preferred size.

Sandpaper: The grit of sandpaper needed will depend on how thickly the paint is applied. Opt for a multi-pack and you will have plenty of options.

Rag: For the final cleaning.

Once you’ve gathered all the supplies listed above, you are ready to begin! Take a deep breath and let’s have fun!


STEP 1: PREPARE THE CANVAS

Sand rough edges and clean off any dirt and grime in preparation. This large piece of barn-wood I used is full of character – including holes, knots and sawed off nails!

When choosing your wood canvas, be sure to think ahead to what size your design will be.


STEP 2: PRINT OUT A DESIGN

Decide what you would like to create! This is where the DIY route comes in very handy. You can create a sign full of words or one that includes graphics. The sky is the limit, so get creative! I have been in the Holiday spirit lately and decided on a Christmas themed design. Because I had a larger wood board to paint on, I enlarged the pattern in Photoshop Elements and printed it on two pieces of standard 8.5 x 11 paper.

If you like the design I created, check out the RESOURCE TAB for a letter sized printable PDF that you can use for this project!


STEP 3: TRACE THE PATTERN

Lay the trace paper carbon/color side down onto your wood canvas. Place your printed design on top and position it to your liking. Tape the printed design onto the wood so that it stays in place. Beginning in the upper left corner of the design, trace over the pattern with a pen or pencil – applying a medium amount of pressure. You can see from the photo above that I have used this particular pattern multiple times.

When the trace paper and printed design are removed you will be left with a light outline of the pattern. This is erasable and sand-able – making it easy to revise parts that aren’t to your liking.


STEP 4: PAINT THE PATTERN

Using acrylic paint in your color of choice, fill in the pattern. If you are worried about the steadiness of your hand you can opt for an acrylic paint pen.

Allow the painted design to dry for a minimum of 12 hours.


STEP 5: SAND

Gently rub sandpaper over the painted design. This will remove some of the paint and will give the piece a softer, more vintage look. To me it seems that the sanding really helps the paint  to become ‘one’ with the wood. I love being able to see the wood grain through the paint.

I recommend you begin sanding with a finer grit of sandpaper and increase the grit depending on the amount of paint you would like to remove.


STEP 6: CLEAN

Use a damp cloth to clean the paint that has been removed by the sandpaper.

Once the water dries you can choose, as an additional step, to seal your piece with a clear poly spray. Personally, since most of my art pieces are kept indoors, I typically skip the poly.


ENJOY YOUR ART PIECE

These look great on a mantle, hanging on a gallery wall, or in a variety of different places. I am willing to bet that plenty of people on your Christmas gift list would love a painted wood sign!

And now, you can make them one!

After you try the techniques in this tutorial, please share your creations in the comments below. I would love to see them!


This post contains affiliate links. You can learn more about my policies here.

21 HOLIDAY CARD DISPLAY IDEAS

Have the holiday cards from friends and family started to arrive? Give them a place of importance with one of these 21 creative holiday card display ideas.

It is the most wonderful mail season of the year! Soon the holiday cards are going to come pouring in. Seeing the beautiful smiling faces of friends and family and reading about how things are going in their lives is one of the highlights of Christmas for me. I love it so much that I give these cards a prominent place in the home – right in the front entry!

Christmas card garland display

This is the set-up we have used to display our Holiday cards for the past few years. It consists of a simple artificial garland with wire branches. The cards are held in place by pinching the branches around them. The beauty of this system is that any size or shape of card is easy to display.

When your holiday cards arrive, I encourage you to resist the urge to stack them in a pile and instead display them. They will bring you joy throughout the entire holiday season! Not sure how to display them? I’ve got you covered! I have collected a variety of creative ideas that are both functional and beautiful. Enjoy!


DIY HOLIDAY CARD DISPLAY IDEAS

With a few supplies and a little elbow grease you can create a beautiful and unique holder/ display for your holiday cards. Each photo below comes with a detailed step by step tutorial, just a click away!

TWINE TREE | via Design Improvised

holiday card display clothes pins


VINTAGE WINDOW DISPLAY | via The Lily Pad Cottage

holiday cards displayed on old windows


CLOTHES PIN WREATH | via Gwenny Penny

clothes pin wreath holiday card display


RUSTIC LOG | via Anything & Everything

diy holiday card display


WOOD BOARD DISPLAY | via Shanty 2 Chic

holiday card display diy project


CHICKEN WIRE | via Lolly Jane

christmas card display diy project


TASSEL GARLAND | via The Glitter Guide

unique christmas card display ideas


WINDOW SHUTTER DISPLAY | via Pretty Handy Girl

holiday card display craft


BANNISTER GARLAND | via The Sunny Side Up Blog

garland christmas card display idea


VINTAGE BOOK DISPLAY | via Four Corners Design

book used as Christmas card display

Those are all pretty amazing, right? Most of them look to be pretty simple and created with readily available items!


STORE BOUGHT HOLIDAY CARD DISPLAY IDEAS

Maybe you aren’t a super crafty person, or maybe.. just maybe… the holiday season is busy enough without another DIY project added to the mix. A store bought display might be more your speed. There are many fun (and affordable) options that you can purchase!

SPIRAL WREATH HOLDER | via The Container Store

holiday card display hooks


GARLAND DISPLAY | via Etsy

Christmas card display ideas


WHITE WASHED TREE | via Pier 1 Imports

Holiday card display


SHABBY STAR | via Birch Lane

Christmas card holder


REINDEER HOLDER | via Pottery Barn

Christmas card holder


PAINTED WOOD DISPLAY | via Etsy

Christmas card display


SIMPLE NEUTRAL HOLDER | via Bed Bath and Beyond

neutral Christmas card holder


LED TREE | via Wayfair

small Christmas card holiday card holder


PLANKED WREATH | via Pier 1 Imports

wreath holiday card holder


RIBBON DISPLAY | via Etsy

ribbon Christmas card holder

So many choices, so many Holiday cards to display! Yay!


PIN THESE CREATIVE HOLIDAY CARD DISPLAY IDEAS!

Pin the image below for easy access to these options!

holiday card display ideas