SATURDAY SKETCHBOOK: KITCHEN CEILING FINISH

We talked with our contractor this week, and he is 95% sure that our project will not break ground until Spring of 2019. It’s a little sad to have to wait through another winter, but we are looking on the bright side and realizing that this extra time will allow us to make sure everything is just as we want it.

There are various bits and pieces that Craig and I just can’t seem to agree on, or that he claims to not have an opinion on. And since I had such a great response when I asked for upstairs bathroom layout ideas, I figured I could come to you all again for a little input.

There have been a few exterior revisions, but mostly they are interior


I have been slowly fine tuning the design of our kitchen in collaboration with Cliq Studios, as well as determining the dimensions and design of our future harvest table – which I will share about in a future post.

We changed the window sizes and style to fit more naturally with the farmhouse sink we will be restoring. The larger center window will be a fixed picture unit, and the smaller side windows will be operable casements.

We also revised the cabinets to the right of the fridge. Initially I had them going all the way down to the counter. We eventually realized that we would like to have the extra counter space for small appliances, such as the microwave and toaster.


The cabinets to the left of the fridge are going to be shallow depth (12″ instead of the standard 24″). We see this area more as a built in buffet/ hutch space – to promote a sort of dining room within the larger kitchen space – since we do not have a separate room. The shallow depth allows more space for the dining table and chairs.


These are all changes that we think will add to the functionality and feel of the space. There is one more cosmetic option that we are having a difficult time deciding on. The ceiling.

When you enter into the house, there is a straight view from the entry into the living room, and beyond to the kitchen/dining space.


The small entry/ piano area is somewhat divided from the living room with built in cabinets and columns.


I want to also have some sort of definition between the living room and kitchen, while at the same time keeping the floor space open. I started by adding a dropped soffit between the two rooms.

It helps to separate the spaces, but I still felt that there needed to be something else to define of space or the other. Since the living room already has a feature fireplace and built in book-cases, I turned my attention to the kitchen. Here is where we are having trouble deciding – the ceiling.


Part of my family prefers the smooth drywall ceiling in both the living room and kitchen, as shown here:


Others of the family, myself included, feel that some simple 2×8 or 2×10 beams (non structural) could be that last finishing detail the kitchen needs for definition. Potentially, tongue and groove boards could be used instead of drywall (layered under the beams) as a way to add more texture. I didn’t bother drawing each and every line, but you can get an idea of what that might look like from this inspiration picture (image 3).


I prefer having the entire ceiling painted one color instead of keeping it natural/stained – mostly because we have wood shelves nearby, wood floors, and also a wood table. However, I  saw this picture on Pinterest, and thought that a soft color on the entire ceiling might look great while adding a bit of color to the all white kitchen. Perhaps a light aqua or a pale grey. I’m not sure I’m brave enough to go for it though!


So, tell me. Which do you think looks best? Please comment on this post or vote via Facebook or Instagram. I’m really curious what the majority of you favors! Thanks friends!

One last look at all of the options, side by side, as seen from the front door.


SIMPLE INTERIOR UPDATES FOR THE HOME

This post contains five simple home interior updates that don’t require a ton of do-it-yourself energy. In fact, you don’t even need to lift a hammer for any of them!


simple interior updates for the home. 5 ways to easily change up your interior without breaking the bank, or a sweat!


One of the joys of home ownership is the ability to ‘make it yours.’ From room size and layout, to window and cabinet choices – everything can be customized. And though you can hire a contractor or DIY your heart out to make things just right – sometimes you want to freshen things up without breaking the bank, or a sweat.


ADD SOME PAINT

Adding paint to the interior walls of your home is one of the most simple interior updates that you can do. It can make a dramatic difference, with minimal expense

Painting is one of the most inexpensive and simple interior updates a homeowner can tackle. Not only will the paint choice affect the feel and mood of the space, but it can also add visual interest. If drama is what you are after, consider painting one accent wall a bright or bold color, or adding a patterned design.

A peaceful, neutral color can soften a space and provide a simple background to build upon with other design elements such as furniture and art.


REARRANGE THE FURNITURE

Rearranging living room furniture is a simple interior update that you can try again and again until you find the furniture combination that works best

If your interior is feeling stagnant, re-arranging your furniture can give you a whole new perspective. Just swapping a few pieces can have a big impact. Play around with different configurations and make it an adventure/challenge by shopping your own house instead of the stores. You may find that a piece you didn’t care for in one room looks great in another!

Don’t be afraid to try out an antique hutch as linen storage in the bathroom, for example. You might be surprised at where each piece finds a new home!


CHANGE CABINET / DOOR HARDWARE

It's super easy to change out cabinet hardware - making it a simple interior update for your home

Hinges, knobs and pulls are like the jewelry of cabinets and doors. They make a statement. Perhaps though, yours are making an obvious statement that they are outdated. Thankfully, there is a wide variety of replacement options available at your local home improvement store and online. Grab new hardware that you love, and a screwdriver. Within hours you can have a transformed look.


ADD A GALLERY WALL

Gallery walls are a simple interior update for the home that can add style and personality.

One of the easiest ways to personalize a home is by including artwork and photographs that have special meaning to you. Arranged in unique ways, a gallery wall can really make a statement. Creating one of your own doesn’t have to be a mystery. There are plenty of tutorials online that simplify the process step by step. I always suggest using adhesive backed hooks for gallery walls, which will allow you the flexibility of re-arranging easily without filling in any pesky nail holes.


OPEN UP A CLOSET

reclaim your overstuffed closet and make it into a space that is useful. Simple interior updates for the home

Closets often house the most undiscovered / under-utilized square footage in a home. Many are either poorly organized or crammed with rarely-used items. By simply removing the doors to a standard depth closet you can gain space on the perimeter of the room for something useful, such as a small office or reading nook. A walk in closet can be transformed into a mini-bedroom or small meditation space. Get creative!

I wrote a post about alternative storage solutions. It offers tips on where to put any displaced items that you need to move out of the closet to regain the space.


These simple interior updates can be executed in a day or two, making them perfect beginner projects. The great news is that they are also reversible. If you aren’t happy with the results, you can always revert to the way things were pre-project.


PIN THESE SIMPLE INTERIOR UPDATES

Simple interior updates for the home that don't require a hammer or a lot of money

RESTORING OLD WOOD DOORS

I have to say, I’m pretty proud of myself.  Just two weeks after my big post regarding all the projects I want to accomplish, I was able to check one of them off of the list, and start two more!

There are projects on the list that range from minor to major, and I had a bit of a tough time deciding which to tackle first. Ultimately, I chose to work on the doors for the girl’s future bedroom closet – a project that I felt pretty confident I couldn’t mess up, and that wouldn’t take too long.

These old five panel doors were found in a barn over 15 years ago, and stored in various garages and sheds ever since. They were looking pretty rough, grungy and with mismatched paint – but for the most part were still solid.


STEP 1: REMOVE PEELING PAINT

I had a hunch that the doors were covered with lead-based paint. To confirm, I purchased a 3M lead test kit from our home improvement center. Sure enough, the reddish color appeared, indicating that lead was present.


The presence of lead paint isn’t overly alarming. If the application is solid and it is left untouched, it can be harmless. However, lead poisoning can occur if flaking, peeling, or chipping paint is ingested, or through the inhalation of dust created during removal. Because of this, sanding with a power sander is not a safe removal technique.


Instead, I found an article by Family Handyman – which outlines the steps needed to properly remove lead paint. I’ll admit that it did feel a bit cumbersome, especially wearing a face mask on a 90 degree + humid afternoon, but it wasn’t overly difficult.

I started with wetting the surface down with water, and then used a scraping tool to remove the paint.


I made sure to wear my face mask and rubber gloves the entire time, and disposed of the paint chips properly. I then cleaned it all really well and let it dry. Because of the intensity of the job, I only removed the paint areas that were flaking or damaged. If I had been able to sand, I may have gone all the way down to bare wood for a completely fresh start.


STEP 2: FILL/REPAIR CRACKS

In some ways, because it was covered only partially in paint, the doors looked more rough after the first step was complete. There was a bit of repair that needed to be completed though, before the new paint could be applied.

A panel on one of the doors was broken. There wasn’t a hole, but more like a pushed-in crack. Craig and I tried to position the wood back into place, but it wasn’t possible – likely because the area had warped through the years. Instead, I attempted to fill the crack with a product called Plastic Wood.


I applied the filler to the cracked panel, allowing it to dry and sanding between applications. I also filled in the areas on the side of the doors that were cut out for the hinges. The hinges were removed earlier in the prep process, because the doors will be hung with barn hardware.

The product did an amazing job of covering up the blemishes. I was super impressed! After another round of cleaning the doors, It was finally time to paint!


STEP 3: PAINT THE DOORS

It’s no secret that I love the clean look of white paint. If you have seen the 3-D renderings I have done for the cottage, you know that we will be using quite a bit of it in our home decor. I have known all along that I want to have white trim, cabinets, and doors. I’m not sure if you’ve researched white paint at all – but, there are about a million shades to choose from. It’s a tad overwhelming!


I caught a lucky break though, when I received the kitchen cabinet samples from Cliq Studios. Their ‘Cloud White’ finish is, to me, the perfect shade of white! Not too creamy or glaring, no grey or yellow tint. Just right. And since it is looking pretty positive that we will use their company for our cabinetry, I figured it would be nice to have doors that coordinated.

Turns out, Dutch Boy ‘Ultra White’ is a nearly identical match! I bought the DuraClean paint + primer in a satin finish. It went on really smooth!


I chose to use a foam roller to apply the paint.  I like using small rollers because I can more easily get into the little corners, using the end of the roller. I also feels like I am able to cover more evenly with a roller. You can see from this side by side picture the difference that even one coat of paint makes. It’s pretty incredible.


After three coats on each side, the doors were officially finished! I am so happy with how they turned out! Once we move into the new house, we will have the doors installed on barn hardware and I will do any touch-ups that are required. I haven’t decided yet if we will keep the silver knobs or not. That’s something else that can wait a while.


As I mentioned at the beginning of this post, I have already started the next two projects from the list. One is sanding down all the wood boards that will go on the ceiling in the master bedroom, the other is sanding down one of the wood chairs in preparation for painting it black. So yes, a whole lot of sanding – which is something I actually love! Sanding gives me a lot of time to think and let my mind wander, to daydream about our future home.

If you’d like to follow along with these projects in real-time, I record short clips on Instagram stories and have them saved as ‘Projects’ under my profile. I hope you can check it out!


*This post contains affiliate links*

AROUND HERE: JULY 2018

Around here, we have been….

CELEBRATING with family. The fourth of July holiday has always been a special one for my family. Growing up, it was tradition to visit my grandparents and take in all of the small town festivities – parades with lots of candy, sparklers, and of course a ton of barbecued food. Now, going home, it’s fun to watch our kids doing some of the same things. It was wonderful to see both of my sisters and their families. I cherish these moments.

This year, my hometown was having an all school reunion the same weekend as the 4th of July festivities, and so I was able to catch up with two of my best high school friends, and meet their kids. It was a blast to wander around our old high school and bring up all of the memories (both good and bad) that were had there.


RECOVERING from surgery. As part of her arthrogryposis, some of {K}’s joints formed in unusual ways. The hand specialist she sees in the Twin Cities evaluated her left wrist and thumb and let us know that there is potential for both of them to be more functional, which could help her gain more independence. However, he also mentioned that the window of opportunity to improve these joints is limited, and that if not done in the next year or so they may be permanently stuck in the stiff and awkward position.

We did a lot of talking with {K} about what she wanted, and ultimately, though she was scared of having the surgery, she wanted to have it done so that she could have the best possible function. She also wanted the surgery for aesthetic reasons. Our little girl was very brave and although after her surgery she was in quite a bit of pain and discomfort, she is now is back to her happy self with her bright pink cast, which will be removed in August.


TRYING new things, and trying old things again. We gifted {D} a flight lesson coupon for his 11th birthday last November. He saved it, waiting until the weather was perfect to take to the sky. He had a wonderful experience and is excited to continue on his training.

Craig finally got his hands on a box of King Vitaman. It was his absolute favorite cereal when he was a kid, and he wanted to try it again to see if it was everything that he remembered. The cereal is still in production, but in very limited quantities. Buying it online is an option, but an expensive one that we were too cheap to invest in. His sister and her husband bought him a box as a birthday present, and he was pumped! See the video of his reaction to the first bite HERE.


STARTING to cross things off of the never-ending project list. Being renters for nearly 4 years, we haven’t had much to do in the home improvement realm. It’s been a nice little break, but as we are preparing to build Arrow Hill Cottage in the not too distant future, our thoughts are once again turning to DIY. I organized a list of projects that I want to tackle for our new home.

I have to admit it feels pretty good to be getting my hands dirty again, and the kids have even gotten into the action.  We will see if we can finish all of these tasks before we break ground!


This is just a glimpse at what our family has been up to. If you’d like a closer look, be sure to check out our weekly ‘mini vlogs’ on our YouTube channel ARROW HILL FAMILY. Be well everyone!

THE MAIN ELEMENTS OF THE A-FRAME HOME STYLE

image source

Welcome to another installment in the ELEMENTS OF HOME series. Each month, I showcase a different residential style here on the blog. It is my hope that this information will not only teach you a little something about the various styles; but also equip you if are designing or searching for a new house – by allowing you to determine which style(s) suit your lifestyle and preferences the most.

Today I will be over-viewing the A-frame home – including the history of the style and what makes it unique.


HISTORY OF THE A-FRAME STYLE

The ‘hut like’ dwelling shape of what we now know as the A-frame style has been in existence for many years, and in many countries – Europe, China, and the South Pacific Islands – primarily as accessory buildings. In 1934, Austrian-born architect Rudolph Schindler built a simple A-frame vacation house in a California resort community, overlooking Lake Arrowhead – bringing the design style to the United States.  It had an open floor plan with exposed rafters and glass-walled gables.

Americans took note, and with the rise in disposable income after WWII, families were able to afford vacation homes. Because the A-frame style was relatively simple and inexpensive to build, they became a popular choice. Eventually, as the style’s popularity increased, companies started offering kit houses. In fact, the popularity of the style rose, not from the architecturally designed examples that were built, but instead by the grass roots movement formed by DIY homeowners.

The peak of A-frame building was between the years 1950 and 1965, coinciding with the Mid-Century Modern movement; Both design styles have been making a resurgence in recent years. There are even modern day kit houses available in this style!


MAIN ELEMENTS OF THE A-FRAME STYLE

LOCATION

A-frames are in their element when positioned in the midst of nature – the forest, the mountains, and lakeside. Very rarely is this style found in neighborhoods, or lining city streets.

The A-frame’s tent like form blends perfectly in nature. Image Source: A-FrameHaus 

SIZE

The majority of A-frame homes are used as vacation properties and, as such, do not require all of the common day to day comforts/extras of a standard home. They are generally pared down to the most basic form, which means that they are quite a bit smaller than the average American home.

The tiny house movement has brought the A-frame to a whole new level of simplicity, offering a model as small as 300 sf!


EXTERIOR TRADEMARKS


  • STEEP ROOF THAT FORMS THE WALLS: The roof of an A-frame extends to the ground on both sides, leaving two gabled ends.
  • TRIANGULAR SHAPE: These homes shaped like an equilateral triangle. Its distinctive peak is formed by rafters or trusses that are joined at the top and bolted to plates or floor joists down below. The cross-piece of the ‘A’ is created by horizontal collar beams. These beams are used to stabilize the structure and many times are used as the floor support for a sleeping loft.

image source

  • MANY WINDOWS: The gabled ends of these homes are typically filled with windows, in various sizes and shapes – flooding the interior with natural light and spectacular views to the outdoors.
  • DEEP SET EAVES: Many of these homes have deep eaves – which allow protection of the gabled ends, and provide shading to the windows.

image source


INTERIOR SPACES

Many interiors feature exposed ceiling beams and structure. Coupled with the natural light that is filtered in from the gabled ends, a ‘cabin’ like atmosphere is created.  The floor space is typically left open, with a combined living/dining/ kitchen space, and only the more private bedrooms and bathrooms positioned behind walls.

Due to the shape of the structure, dead space is created on the outside corners of the floor plan – making it a somewhat difficult layout to furnish and decorate.

image source

COLOR SCHEME

Following along with their ‘one with nature’ feeling – the exterior coloring of A-frames are typically composed of materials that will blend well with their surroundings – natural wood shakes, green wood siding, dark roofing materials, etc.


NOTABLE A-FRAME HOUSES

image source

Reese House | Andrew Geller | 1957


Photo credit: Russ Carmack, courtesy Metro Parks Tacoma

Hellyer House | David Hellyer |1957


INSPIRING A-FRAME HOMES FROM AROUND THE WEB

These classic homes showcase the A-Frame style well. Take a closer look!


1 | 2 | 3


I hope you have enjoyed learning a bit more about the A-frame style. Curious which residential style will be featured next month? Stay tuned!

And be sure to check out the previously showcased styles here.


WORKING WITH CLIQ STUDIOS: PART 1

We have been working through the design of our custom home build for about a year now; And even as someone who is well versed in home design and construction, I am finding the amount of little decisions that need to be made a bit overwhelming – and up to now all of our decisions have been made on paper! I imagine that as soon as ground is broken, the decision making process will increase – probably both in frequency and in the speed at which the decisions need to be made.

I’m trying to stay on top of the game as best I can, and so have been looking ahead at some of the bigger choices that will fall on our shoulders. Specifically, I am focusing on the decisions that will affect the bottom line – the total amount this house will cost to build.  With our chosen contractor’s bids in hand, we have been looking through them with a fine toothed comb in an effort to make the best financial choices we can.

Last week my focus was on cabinet design and price, specifically for the kitchen. It is well known that a kitchen is one of the most expensive rooms in a house, perhaps THE most expensive. A large portion of the cost is determined by the cabinets that are selected. The average bid that we received for custom kitchen cabinets was around $25,000. That’s not including the counter-tops, appliances, flooring, or wall treatments! Ouch!

After the sticker shock set in, I went into research mode to see if the same/similar kitchen design could be made for less. That’s when I found Cliq Studios.


I have seen ads for Cliq Studios both on Houzz and This Old House, which are both websites that I respect and trust. I figured that if these websites were standing behind Cliq Studios, they were worth looking into further. The company is based out of Nebraska, with a warehouse in Minneapolis – only about a two hour drive from where we live. Their cabinet line is constructed of solid plywood, includes ‘soft close’ drawers and doors, and has options for several specialty accessories – such as pull out garbage cans, drawer dividers and pull out trays.

Their website boasts a whole lot of FREE – Free samples! Free design help! Free estimates! Free Shipping! I decided to put them to the test.

First, I looked through their catalog of available cabinet door styles. Unlike custom cabinet services which give you seemingly endless options on color, glaze, size, and detailing – Cliq Studios offers a limited variety of semi- custom, stock size cabinets and styles. Lucky for me, their ‘Rockford’ style is perfect for what I had been envisioning for our kitchen. I ordered this style sample, in two different colors. They arrived a couple of days later, in perfect condition.

standard white on the left, cloud white on the right

It’s hard to tell from this picture, but he Standard White has a bit of a cream tint to it, which I wasn’t a huge fan of. The Cloud White, though, was just perfect!

door construction detail


Feeling pretty confident with the quality of the sample and a style and finish that I loved, I went ahead and entered some more information on the website so that I could get a bit of design help. I’ll admit that this step made me a little nervous. I spent so much time working on fine tuning the kitchen design and was worried it would be scrapped and re-designed by their personnel.

What happened was the exact opposite! Within 24 hours of submitting the design application, I was assigned a designer. She contacted me via email a couple of days later, and we scheduled a time to talk on the phone. She asked about my vision for the space, and which aspects were most important to me.

My designer stayed on the phone with me for well over an hour, working through each and every cabinet decision – her with her cabinet design program open, and me with my AutoCad drawing and Sketchup file. Together we tweaked a few items and made the kitchen the absolute best it could be, from stock cabinetry!

She worked on the estimate for a few more days, and came back with a price quote that was less than half of what we had been told by the custom cabinet manufacturers!


I am titling this post ‘Part 1’ – because my gut at the moment tells me that we aren’t yet finished with Cliq Studios. I want to do a bit more research, but am feeling pretty comfortable that we may be getting our kitchen cabinets through them! Stay tuned!


*This post is NOT Sponsored by or affiliated with Cliq Studios – these words are my own review and critique of the services that were provided to us, free of charge.


SATURDAY SKETCHBOOK: GIRL’S SHARED BEDROOM

The upstairs of the cottage is very simply laid out. It will contain two bedrooms (one for the boys, and one for the girls), plus a bathroom accessed from a small hallway.

I previously introduced the boy’s shared bedroom, and the hall bathroom. Today I would like to share the details of the final upstairs space – the girl’s room.


The room is 140 square feet total, with basic overall dimensions of 10′-4″ deep x 14′-4″ wide. A small portion of the rectangular area is used by the bathroom shower – giving the girl’s bedroom a bit of an irregular shape.


Though it is not a large room, the feature that will make it seem more spacious is the tall vaulted ceilings. At the very top, the ceiling is 11′-5″ high. It will be finished in the same way that we will finish the boy’s room ceiling – with pine tongue and groove boards, painted white. I am looking forward to this simple yet elegant look.


I mentioned the amazing cast iron metal beds that I got for FREE in this post. They still need some TLC, but they will be showstoppers once they are finished! As of right now I am planning on painting them black, to balance out the amount of white used on the walls and ceiling. The bedding will be simple, with aqua and pink accents – similar to what they have in their current shared bedroom.


In fact, besides the beds, the rest of the furniture and finishing accents that I plan to add to the space will come from their current set up. The pieces work perfectly and have sentimental value.

Their dresser will sit on the short wall behind the door. It was a gift to me as a little girl, from my grandparents. It will provide two drawers for each girl and house their shirts and pants.

On the wall behind the dresser will be a small accent mirror. I imagine the girls might at some point fight over bathroom space getting ready – so this will make for a convenient ‘overflow’ spot.


In the smaller ‘nook’ space of the room will sit a glider rocker, which used to belong to Craig’s grandpa. We had it reupholstered before our oldest child was born, and used it in the nursery for each of them. It’s a very special piece.


Couple the chair with a few floating shelves filled with books, and the girls will have a perfect little spot to cozy up and read.

The birdcages above are also from the girl’s current space. Each of the paper cranes, which symbolize peace and longevity in Asian culture, were hand folded by me – during the months we waited to complete the girl’s adoptions from China.


Their closet will be accessed through two sliding barn doors, which were found in a small barn/shed on the property of the very first home that Craig and I purchased as a married couple. They are rough right now; But as part of my Summer Project Bucket List, they should be whipped into shape soon.

Inside the closet, the ceiling slopes quite dramatically, from 6′-6″ at the doors, all the way down to the floor. There is just enough head space though for each girl to have her own hanging rack (one on each side) , plus a shared cabinet with baskets to hold socks and undergarments. The extra space in the closet has a pretty low ceiling height, but will be useful for shallow bins holding rarely used items, such as Christmas decorations.


So that’s it! Now the entire second level of the cottage has been designed and drawn up in 3D! Designing with the third dimension has really been key for me throughout this entire process.


I love the way it all flows, and the simplicity of the layout. I went into the design process with the hope that it would create very little ‘wasted space’ – and I succeeded!  I think all five of the kids will enjoy hanging out here.

SIMPLE + NEUTRAL ACCENT PILLOWS

Did you catch my recent post about Neutral Home Decor? The interiors I featured seem so relaxing and clean! If this is a decorating style that you are wishing to incorporate in your home, a great way to start is by adding accessories that are neutral; And one of the most versatile (and inexpensive) accessories is the basic throw pillow.

I have put together a collection of my favorite neutral accent pillows (and pillow covers) for inspiration. There are some great finds! * Numbers, with links, shown from left to right.


SIMPLE + NEUTRAL ACCENT PILLOWS

1. Crochet Pom Pom Pillow              2. Quatrefoil Trellis             3. Coastal Floral


4. Printed Burlap Lace              5. Gray Aztec Tribal              6. Natural Tan Burlap


7. Jute Pick             8. Natural Ticking Stripe            9. African Mud Cloth Print


10. Grey Dandelion Print             11. Embroidered Stripe              12. Metallic Diamond


Go grab one (ore more!) of these awesome finds! And be sure to pin the image below so that you can purchase the rest later. 😉


*This post contains affiliate links to products for your convenience. If you purchase via my links, I may receive a small commission at no additional cost to you. For more information, click HERE. Thanks for supporting Arrow Hill Cottage!

THE SUMMER PROJECT BUCKET LIST

With the building of Arrow Hill Cottage on hold at the moment until at least the Fall, and quite possibly until Spring of 2019, I am finding myself thinking about what CAN be done in the meantime.

I started this bucket list of projects that I hope to tackle in the next couple of months, during Summer break – when the weather is decent for outside work. The list is a doozy! There is so much that can be done. I think it’s time to get to work!
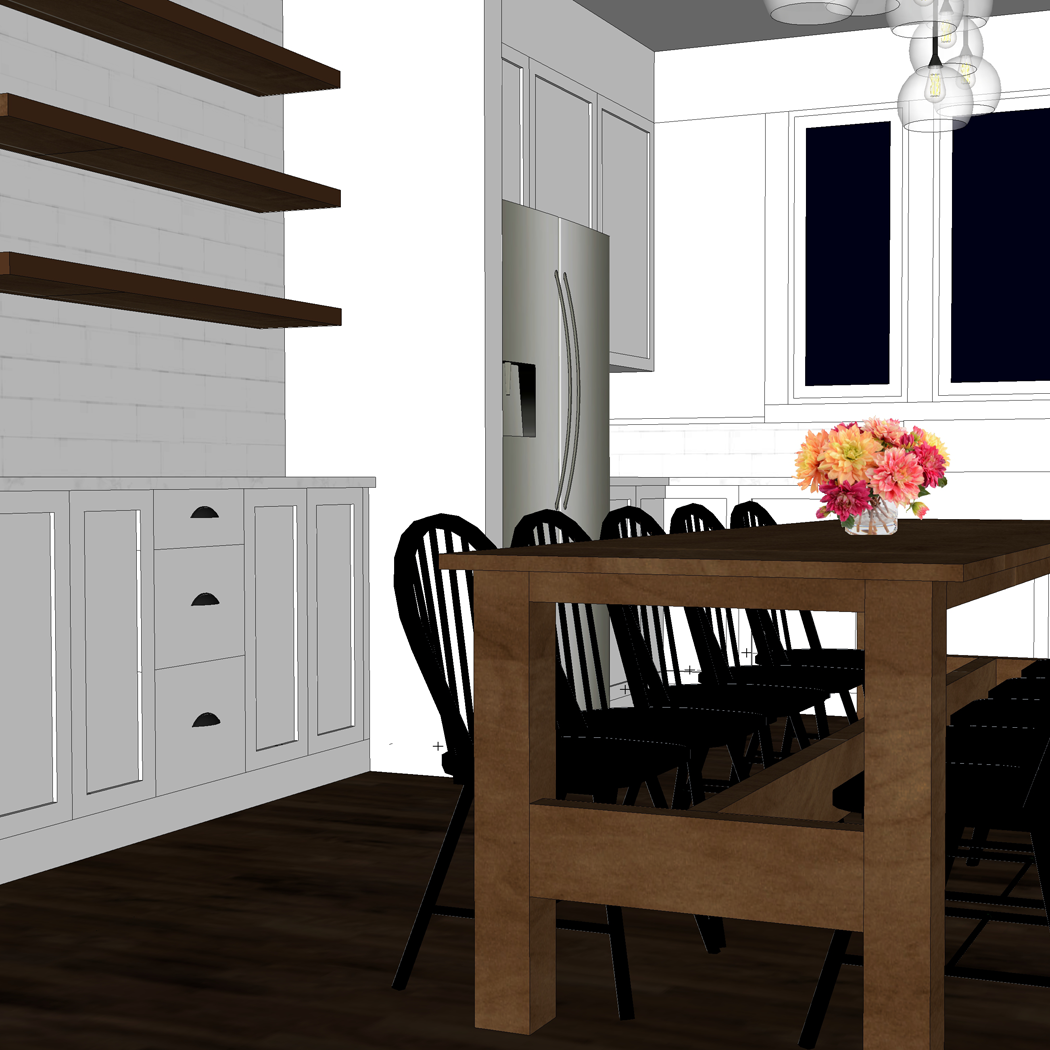
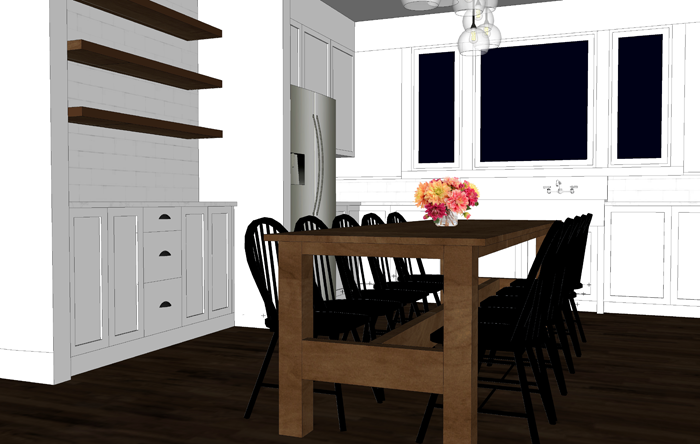
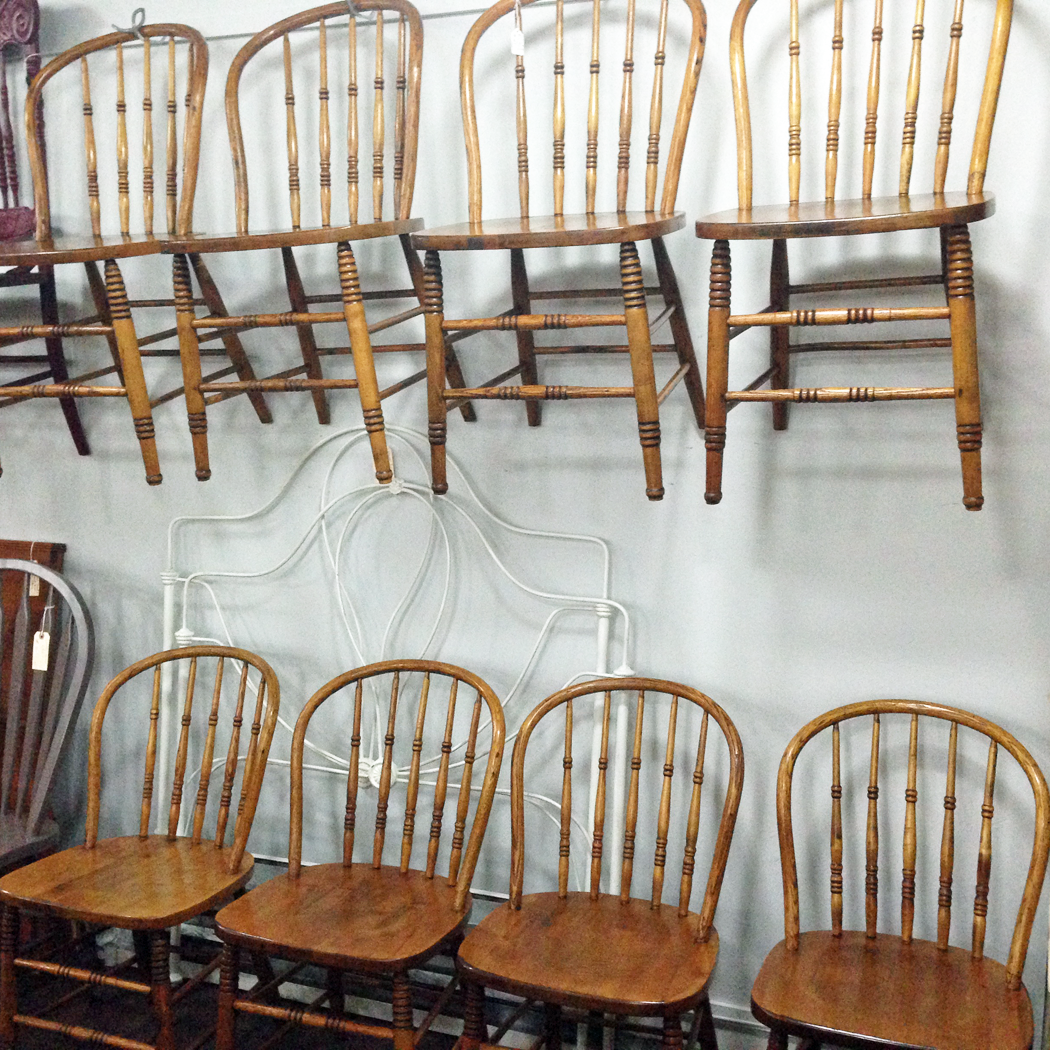
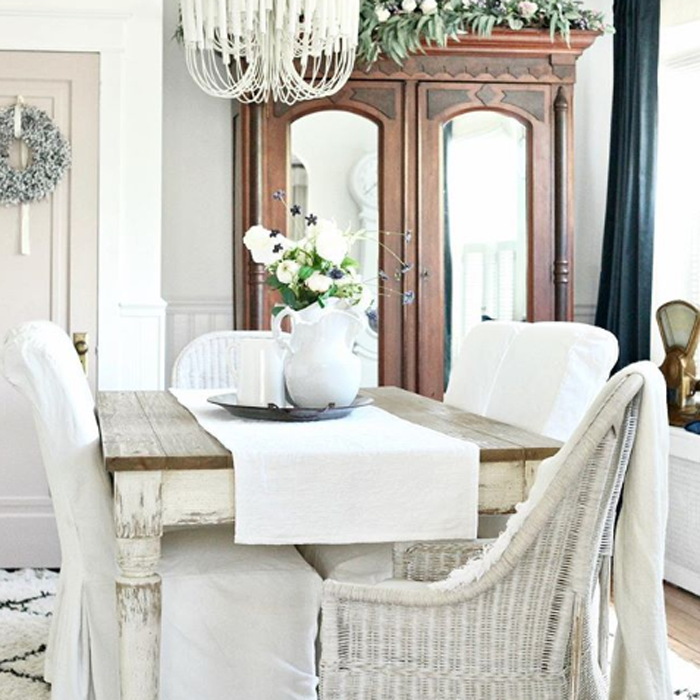
 

PAINT DINING CHAIRS

I purchased an amazing set of 8 chairs this past winter at an antique store in town. They had been lovingly stripped of years of paint and stained a beautiful color, and all pieces glued so that they are nice and sturdy. The antique shop owner confirmed what I was suspecting.. that chairs of this age (1940’s) are rarely found in such large sets anymore. Groups of 2 or 4 are much more common.

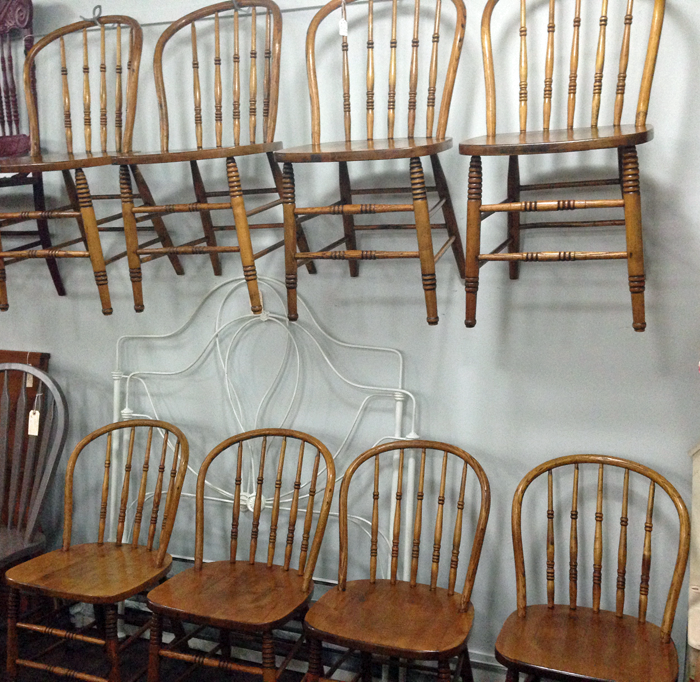
A couple of months later, I found just that – a set of 2 – painted brown. They were offered at a great deal and I decided to purchase them as well – to bring our collection up to 10 matching chairs. I love the spindle details and the curved backs.

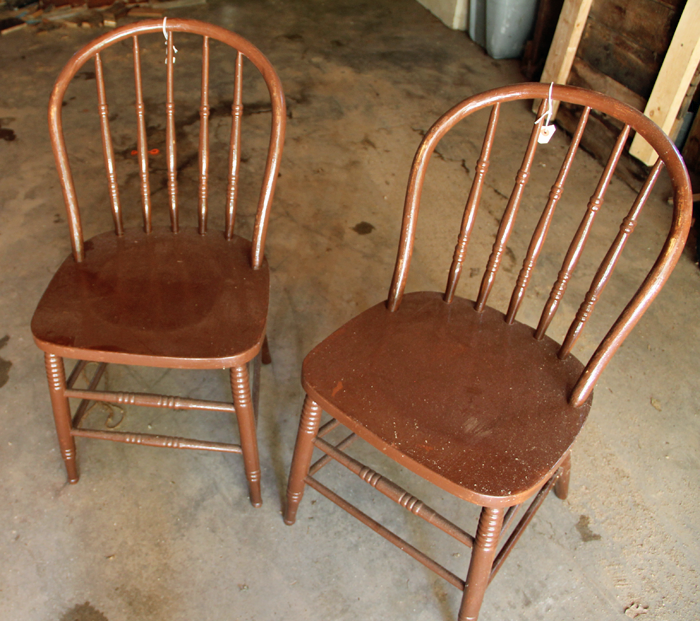
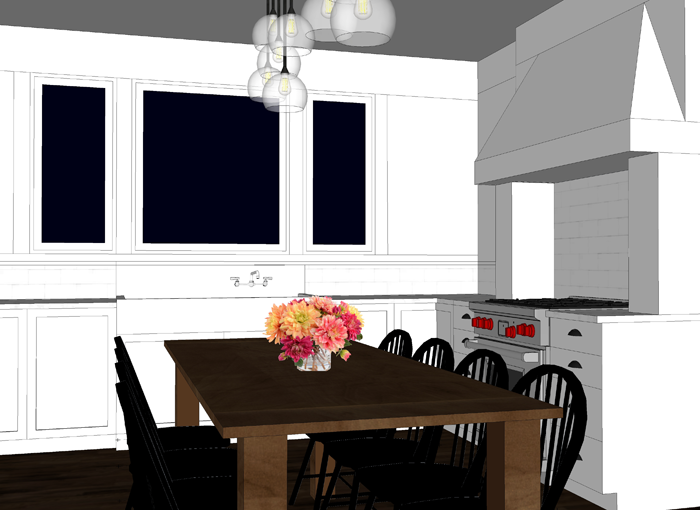
My vision for the kitchen/dining space in the cottage includes these chairs painted black. Although I love the wood grain/stained chairs, I have a feeling that the wood floor, wood chairs, and wood table might be a bit much. I am going to do some testing with the two painted chairs – to determine if I like the look before I paint them all.


DETERMINE DESIGN FOR A HARVEST TABLE

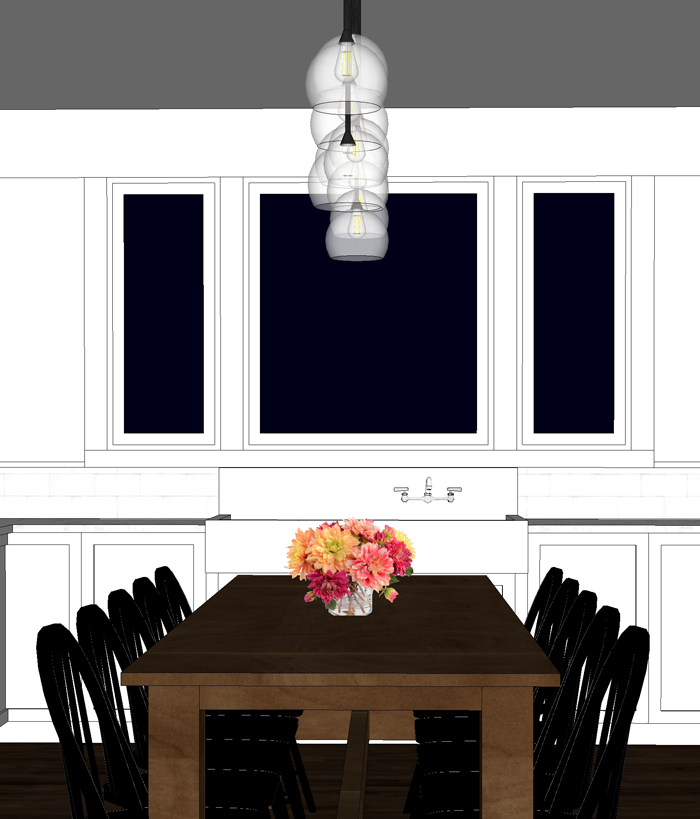
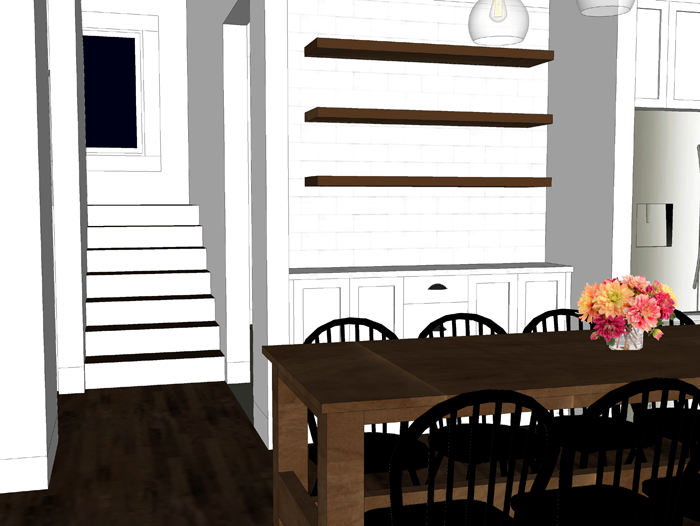
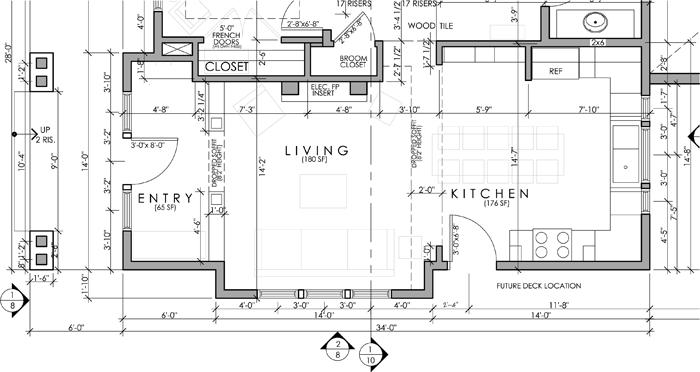
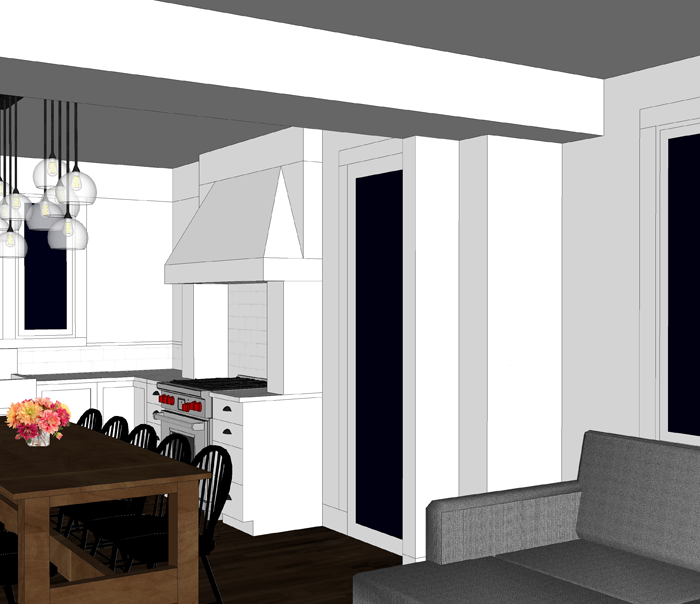
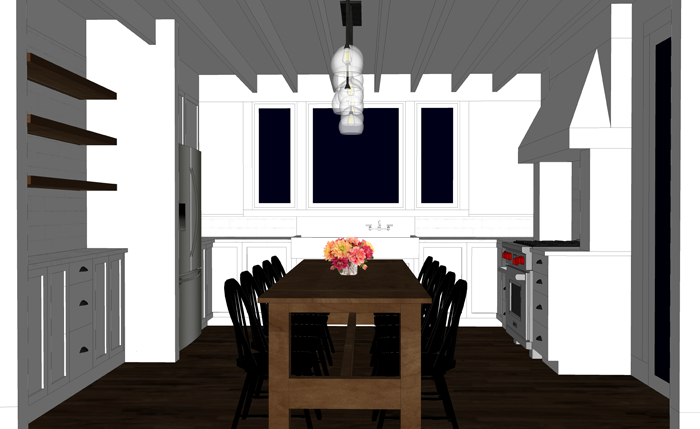
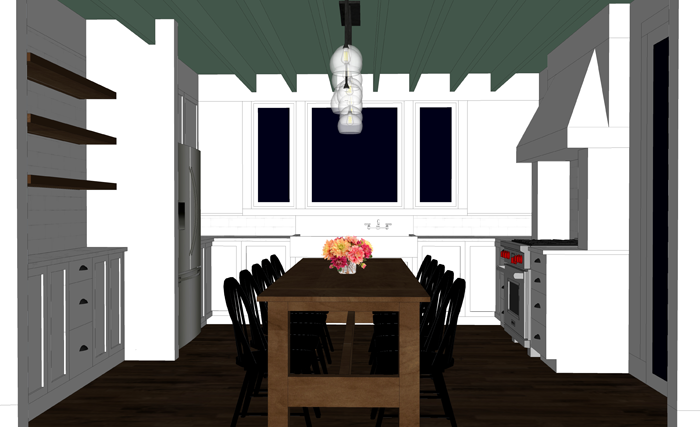
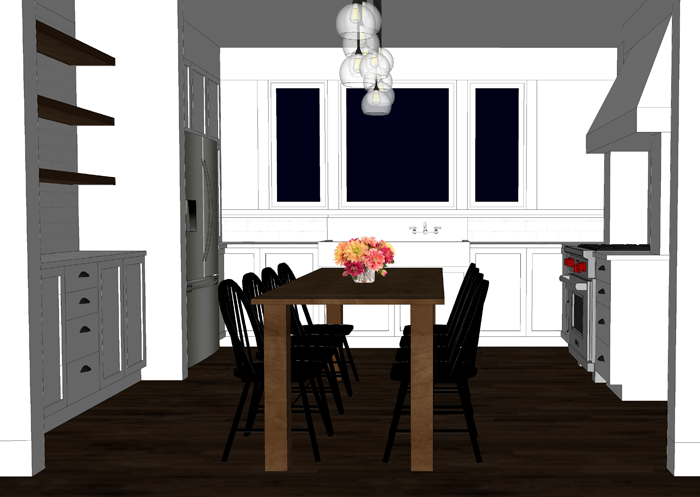
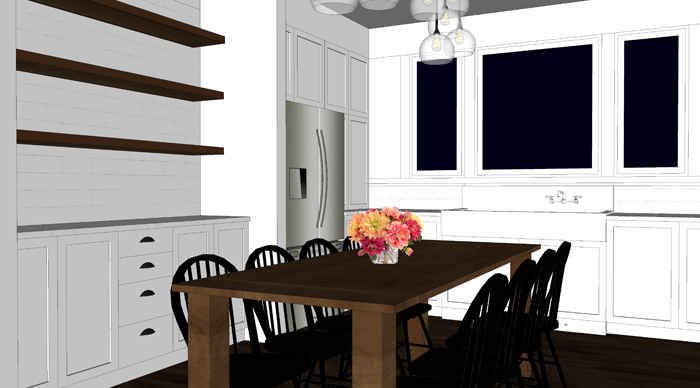
Speaking of the kitchen/dining space. If you remember from THIS POST we have made the decision to not use an island in the space, and instead center the dining room table. This will not only save square footage in the overall floor plan, but it will also allow the dining table to be used both for meals and for food prep.

Because the table will be a central feature in the space, we want to make sure it is very well designed and functional. We have said all along that we would like the the large trees that need to be moved from our property to be milled into wood boards. We envision some of these boards being made into a large harvest table.

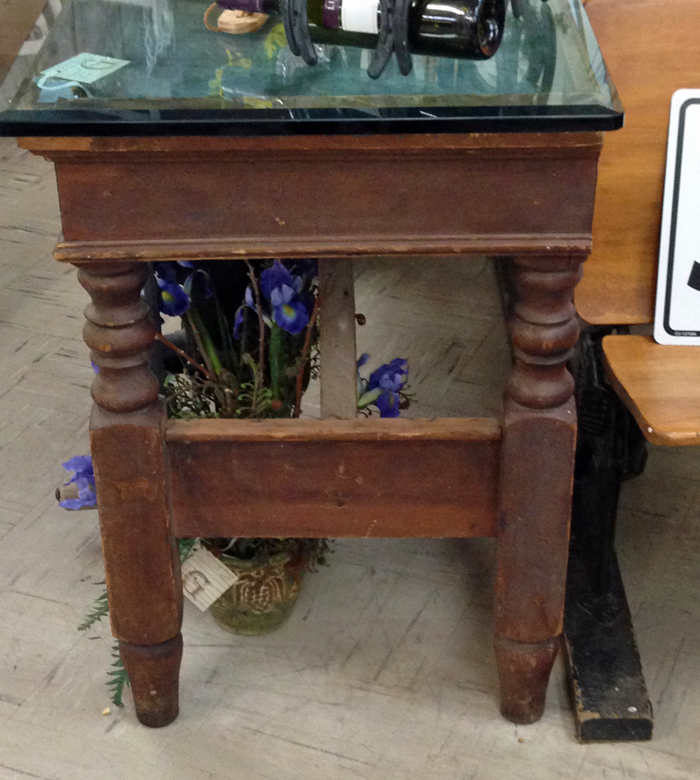
This table base that I saw at an antique store is sort of what I am thinking about.

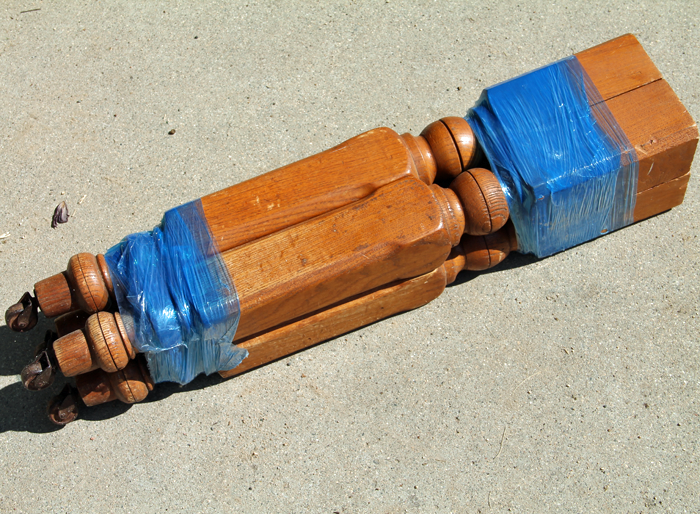
We purchased a set of table legs when on our surprise anniversary trip to Kansas. I love that the sweet memories of that amazing mini-trip will live on in our house. They came to me looking just like this – wrapped in blue. I haven’t even taken the time to unwrap them yet! I suppose that could be considered Step #1.

I will need to take some time to measure, sketch and determine the design for the table itself, and also find someone locally who is able to mill tree trunks into boards.


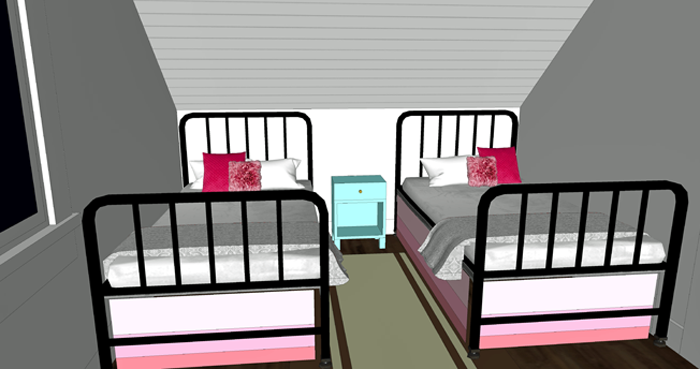
METAL BED REFINISHING

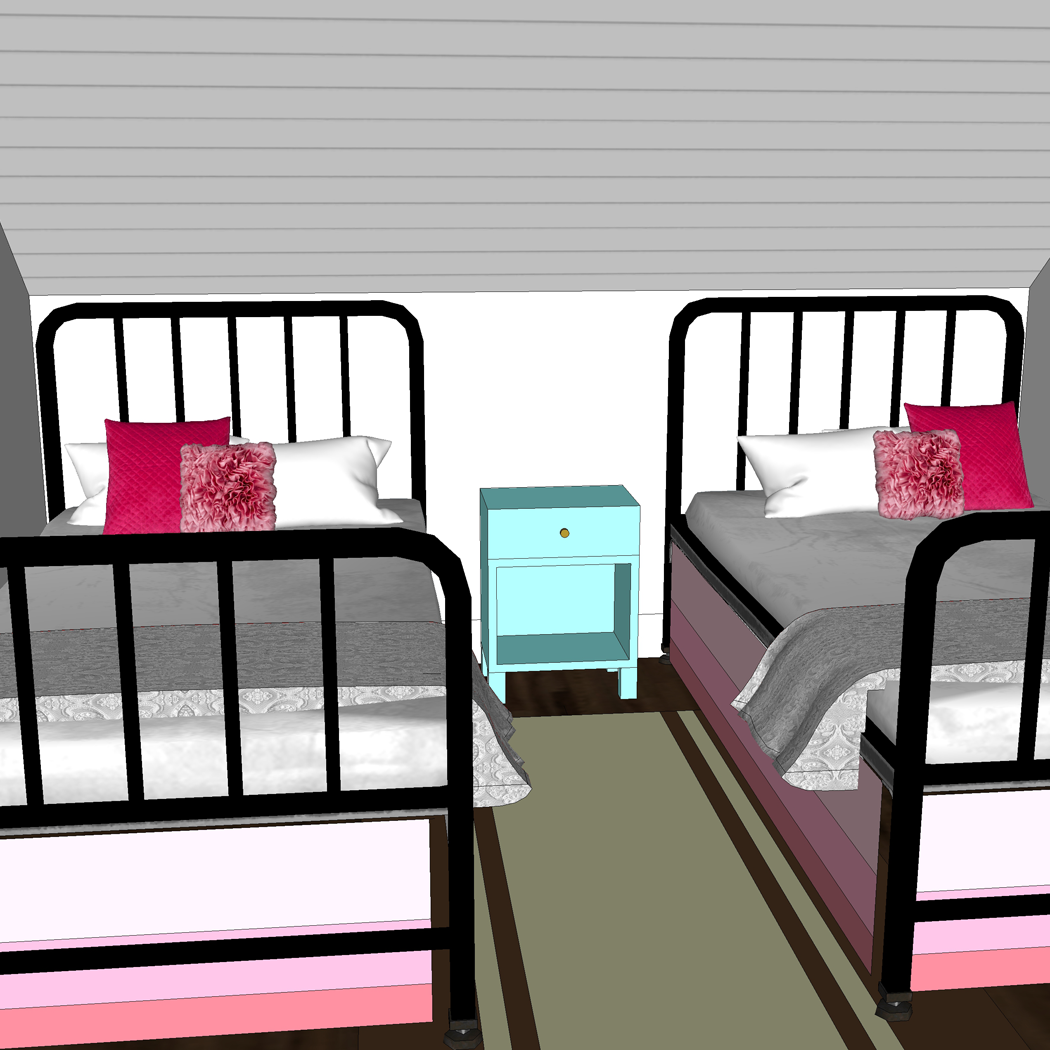
When thinking about our girl’s shared bedroom, I have always had the vision of identical metal beds. Over the past couple of years I have casually scrolled through websites trying to find the perfect metal bed frames. Those that I found and liked were always just too expensive to pull the trigger on.

Then, just a couple of weeks ago, a friend of mine posted about how her family was clearing out their storage shed and unearthed a whole slew of metal beds that she wanted to find new homes for, free of charge. I asked if she had any that were the same shape and size, and lo and behold she did!

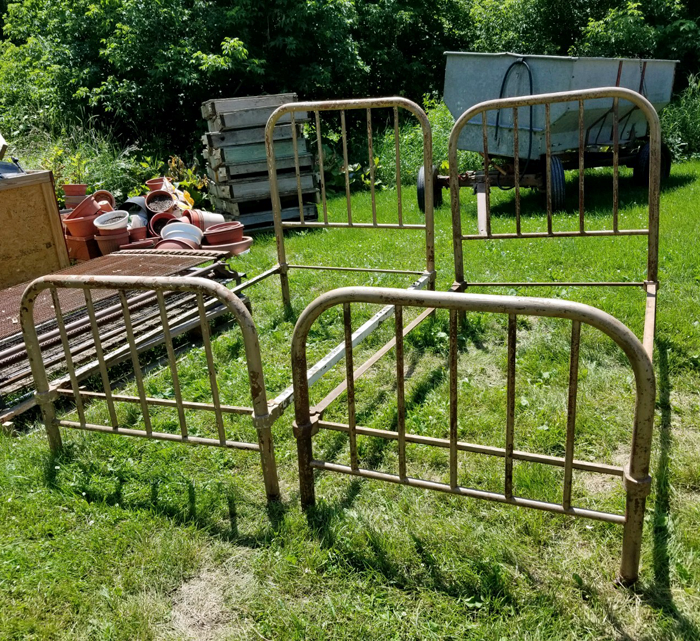
Authentic cast iron, matching farmhouse beds! I about squealed with excitement!  She and her husband were even nice enough to haul the two frames to our house so that I can begin work on them. After a good sanding and spray paint job, they should be good as new!


SINK REPAIR

I dedicated an entire post to the amazing cast iron apron sink that we inherited from Craig’s grandparents. At the moment it is sitting in a storage shed on Craig’s parents property. There are a couple of chips and scratches that will need to be fixed in order to get it ready for install. It’s too delicate of a job for us to take on personally; But I am adding it to my list to find someone locally who can!


FRIDGE CLEANUP

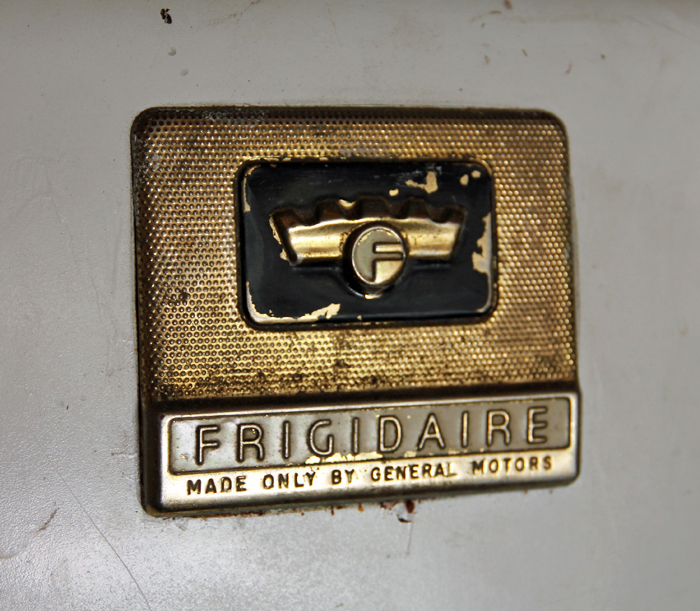
We also have an old fridge that we would like to have cleaned up a bit so that it can be used in the basement family room as the ‘snack fridge’. The fridge is unique in that it is a General MOTORS brand. Yes, before GM locked up a niche in the car industry, they had a focus on appliances. We scored this gem at a yard sale 10 years ago at a home in the historic neighborhood we used to live in. Because we had no truck, we carted it home on a two wheel dolly. Fun times, fun times.

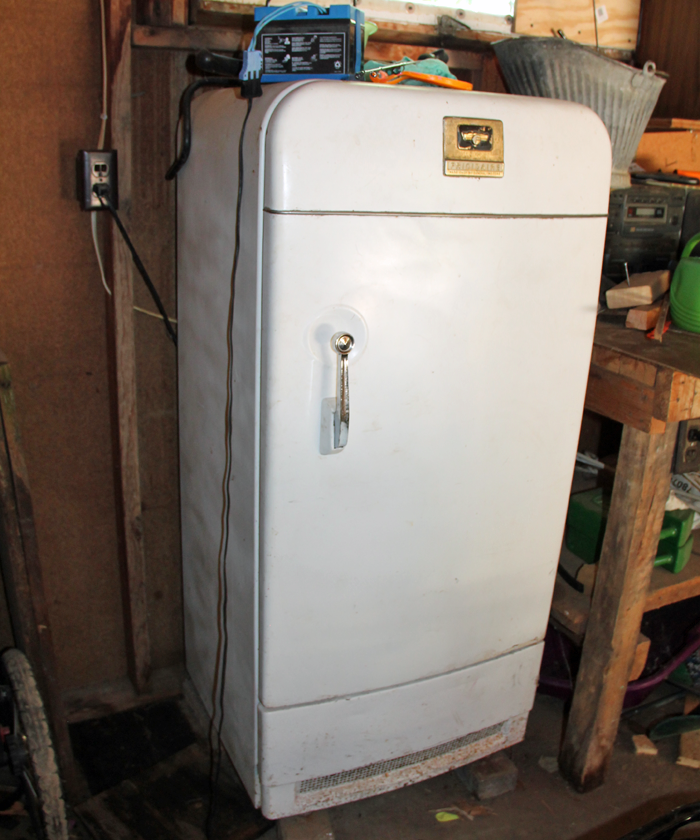
We are excited to see it restored to it’s former glory. It’s possible that the same person who restores the sink could take on this project as well.


SAND + PREP BARNWOOD

As part of our master bedroom design, I included a tray ceiling that will feature some old barn wood that was removed from a shed on Craig’s parents property. It is really beautiful wood – that is currently stacked up in our garage, covered in years of dust and dried up mud.

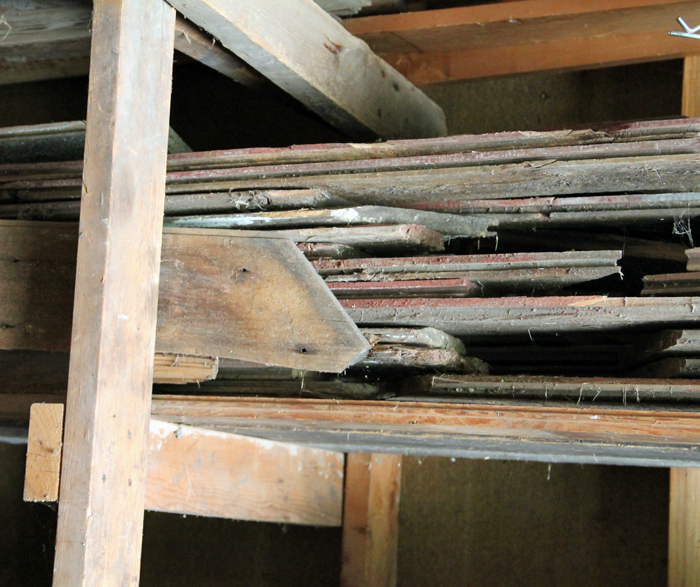
Not only do I want to get it cleaned up – I want to make sure that there is even enough here to get the job done! I am kind of thinking it would be good to get some 5/8″ plywood and cut the sheets into the size of the tray – which is 7’4 x 9’6 – then clean the barn wood and attach it… so that when the time comes to actually install on site, it will be as simple as screwing up a few sheets of plywood. Could save our builder some time I think!


CHAIR REFRESH

Another master bedroom project involves this sweet chair that I bought second-hand, about 5 years ago. I absolutely love the shape of it, and think it will make a wonderful accent piece for the room.

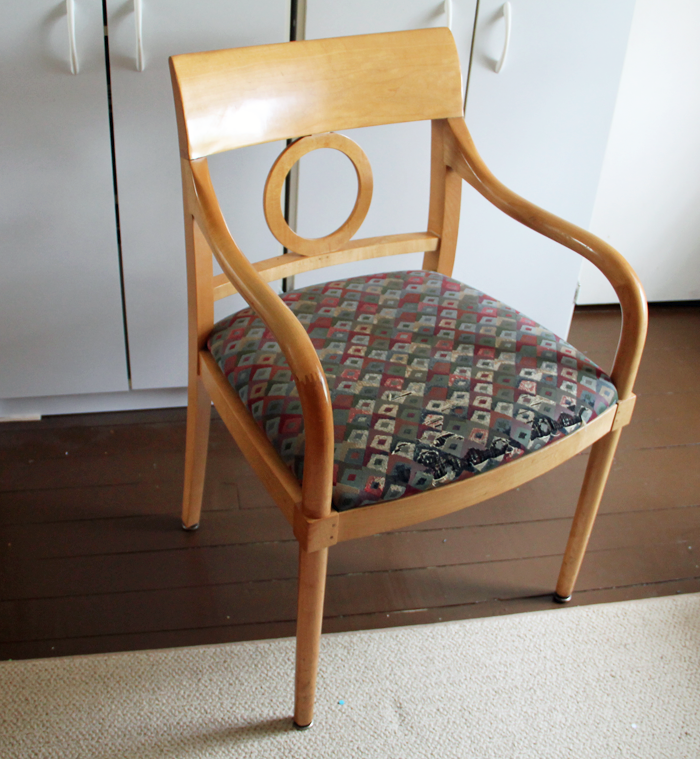
Problem is, it’s run down. Though it is a solid piece, the fabric on the cushion is beginning to fray and the wood portions are stained an odd color. It needs a refresh, and I think the summer will be a perfect time to do that.
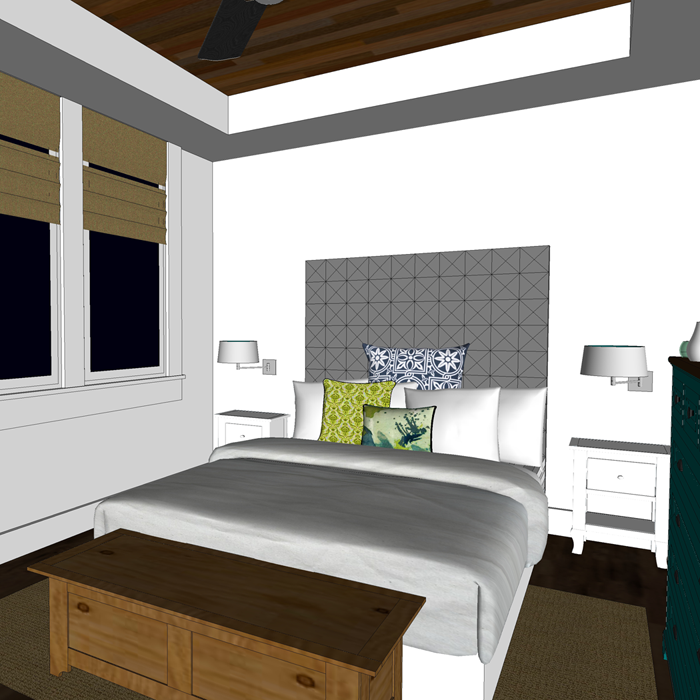


TUFTED HEADBOARD

Rounding out the future master bedroom is one of the projects I am most excited for – the tufted headboard!

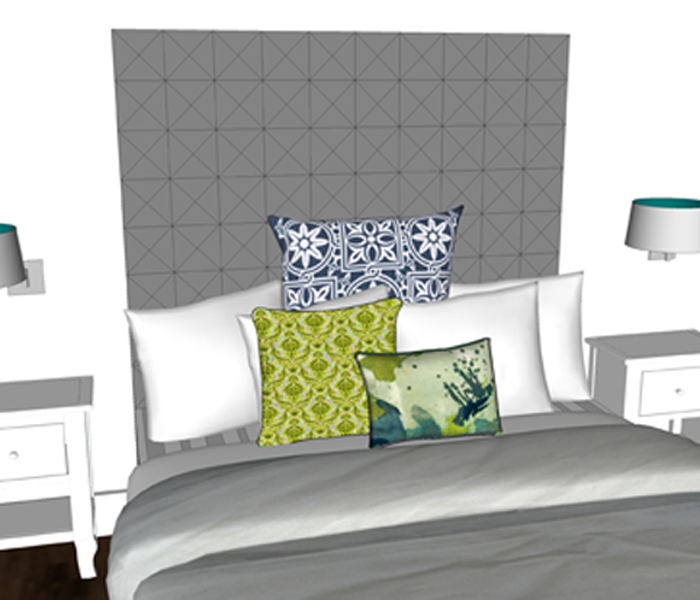
The headboard we currently use for our bed is the very first piece of ‘furniture’ Craig and I ever bought together. We scored it from the bargain bin at the very back of the furniture store. I have an idea to use this dated headboard as the framework for the new version – and add a little height with 1×4’s. I’ve never tufted anything before, but I’m a big fan of the look and the tutorials I’ve seen online make me feel like it isn’t super complicated.


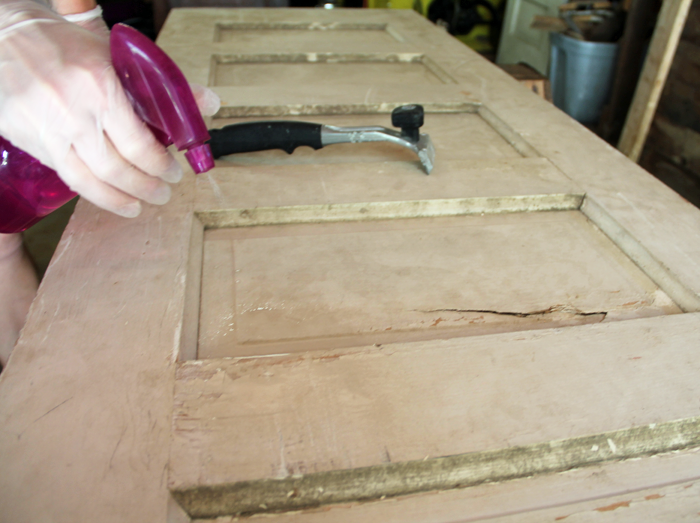
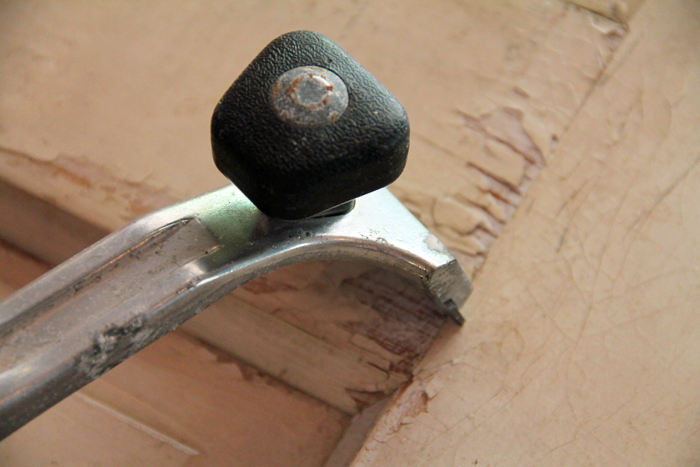
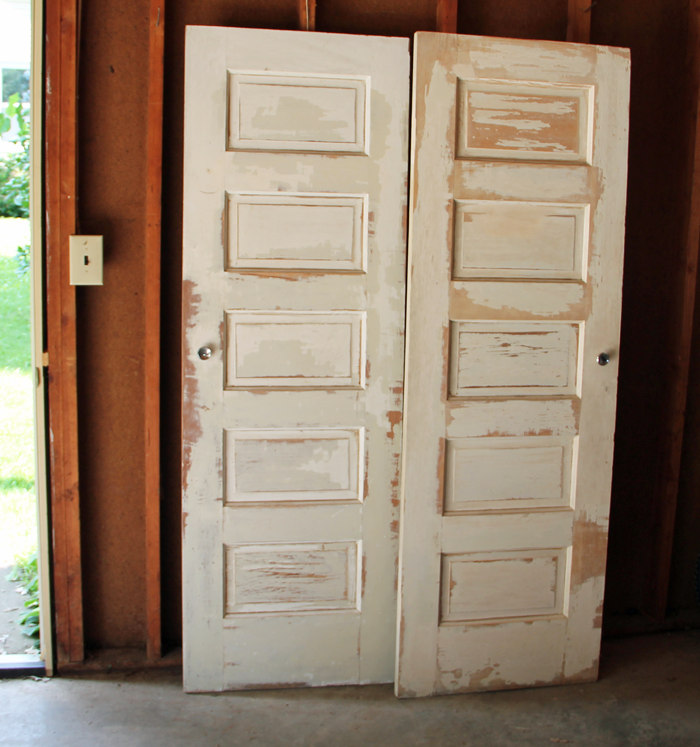
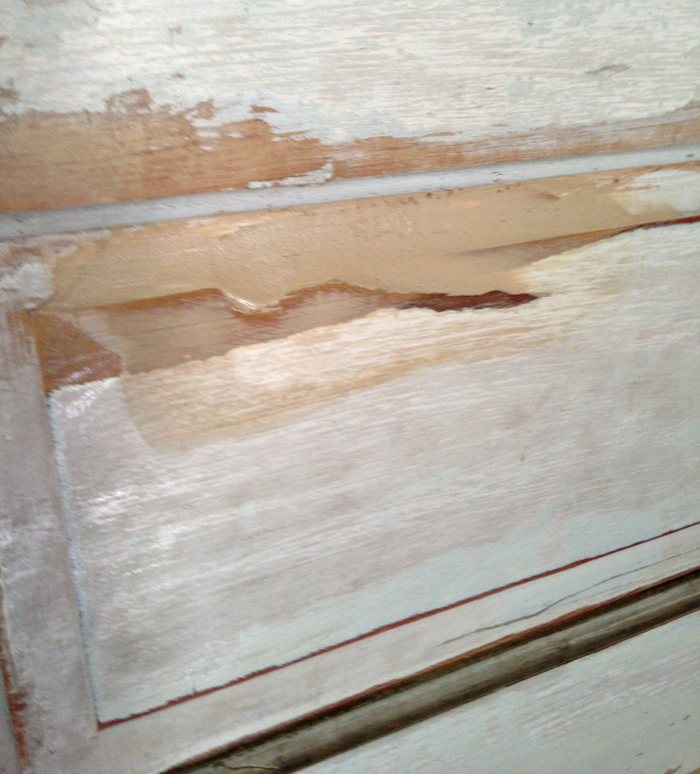
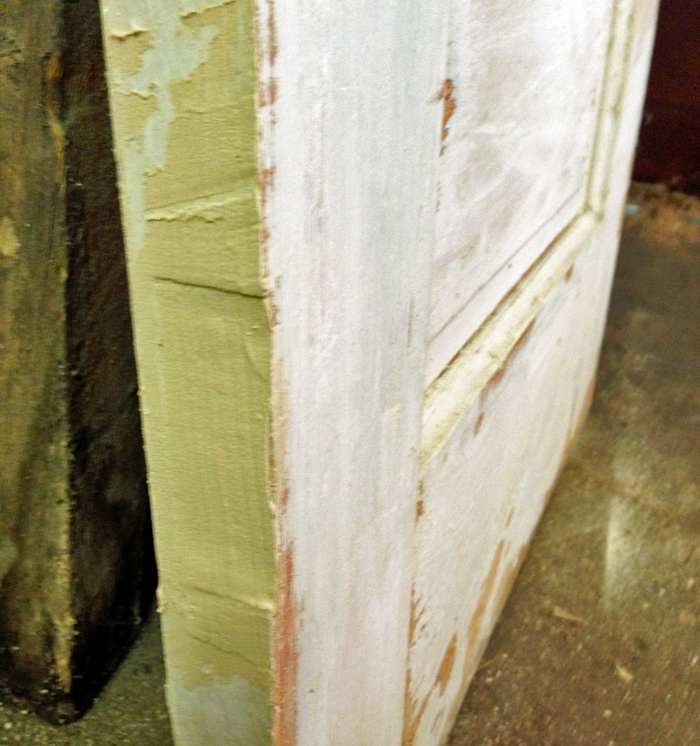
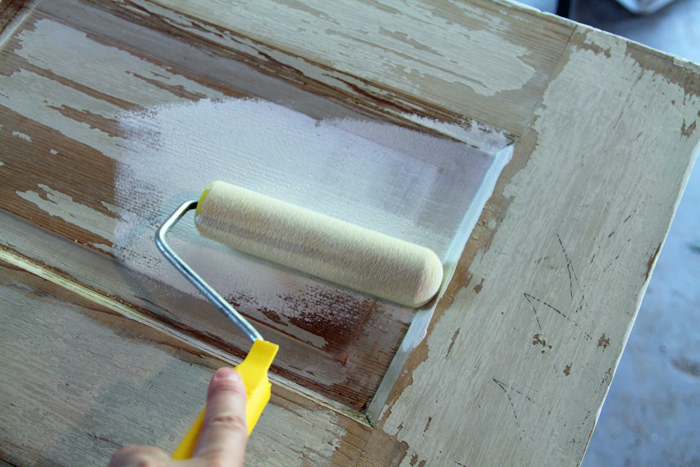
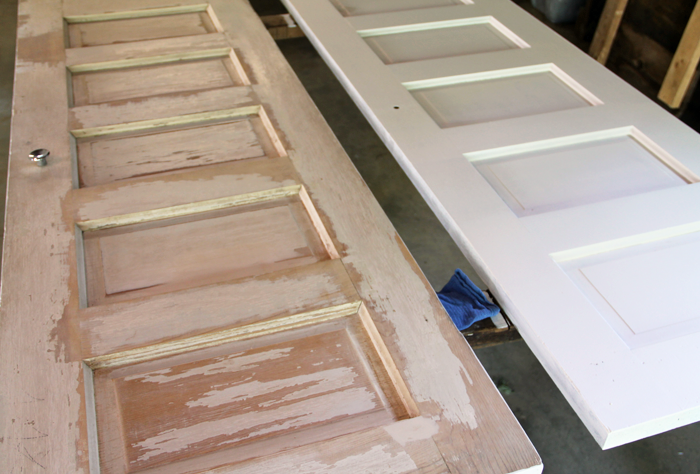
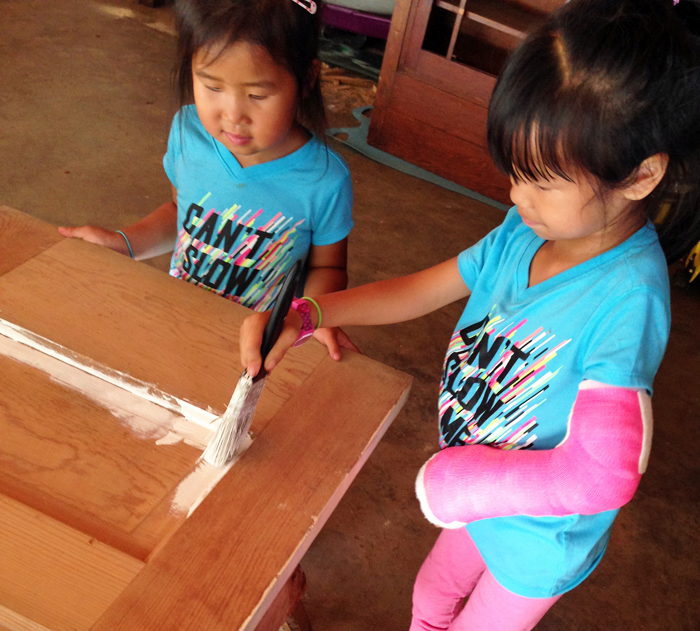
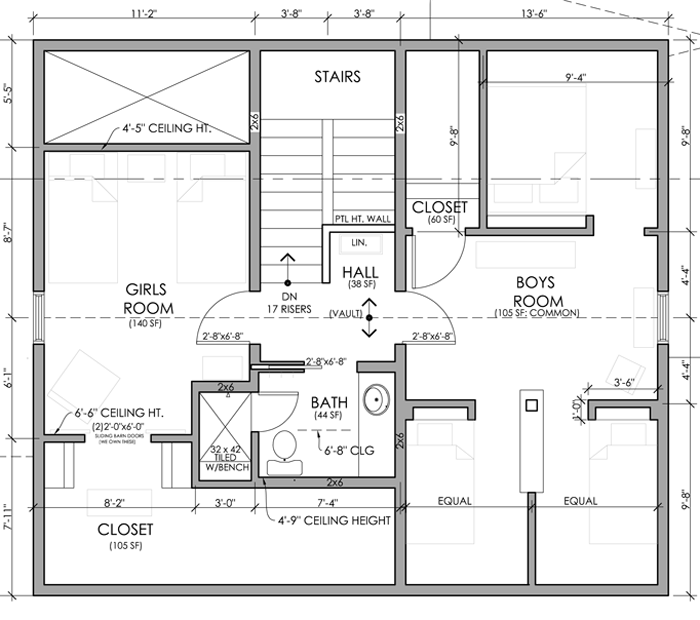
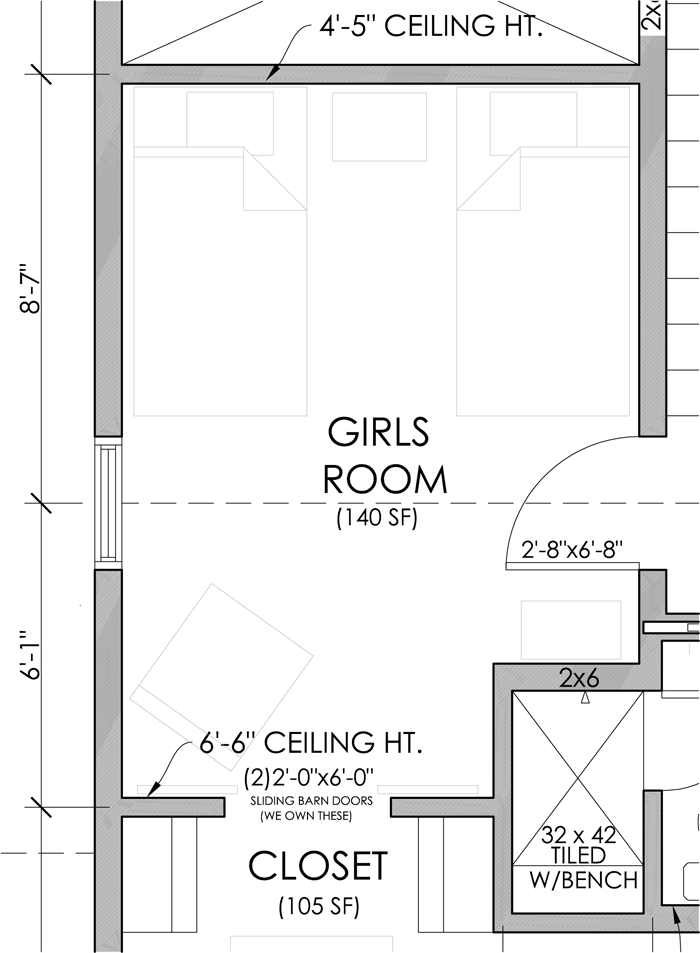
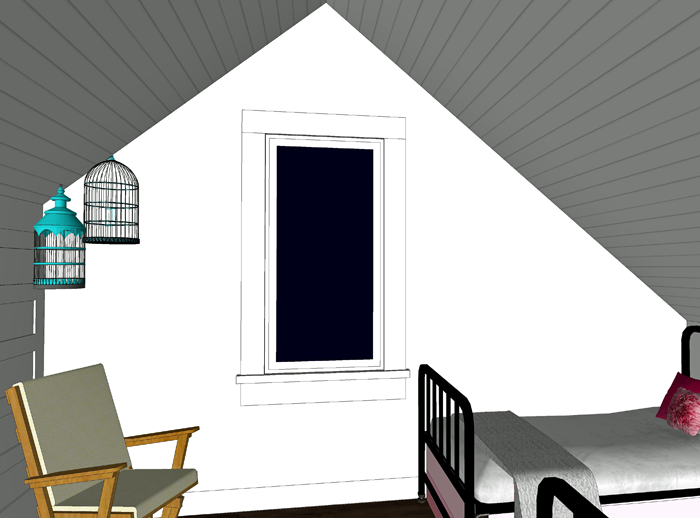
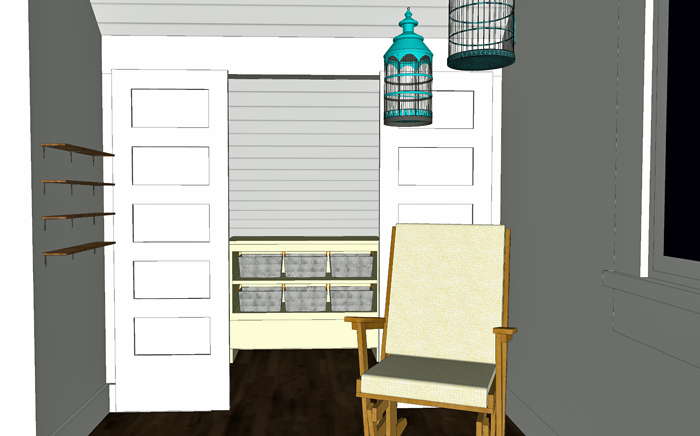
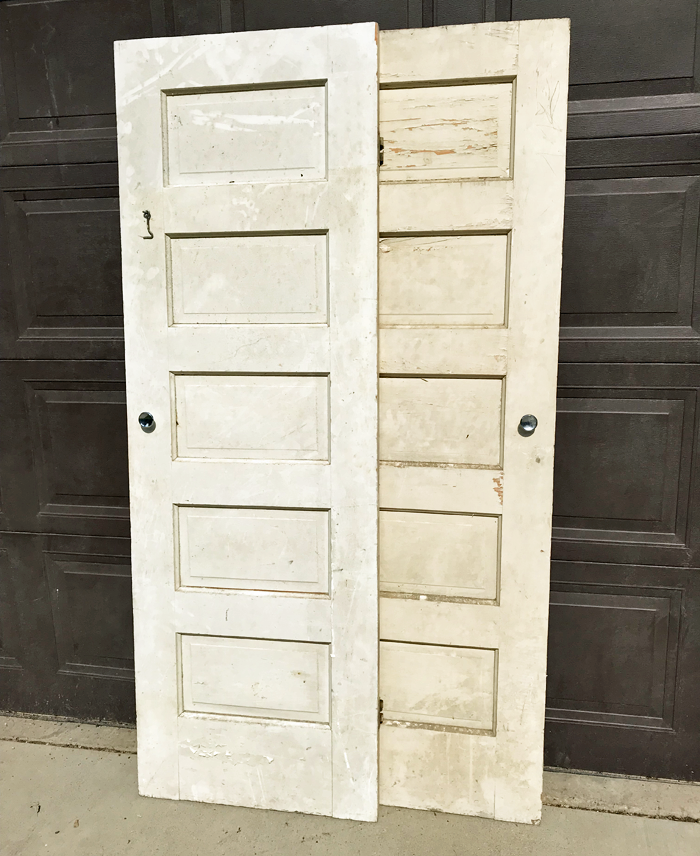
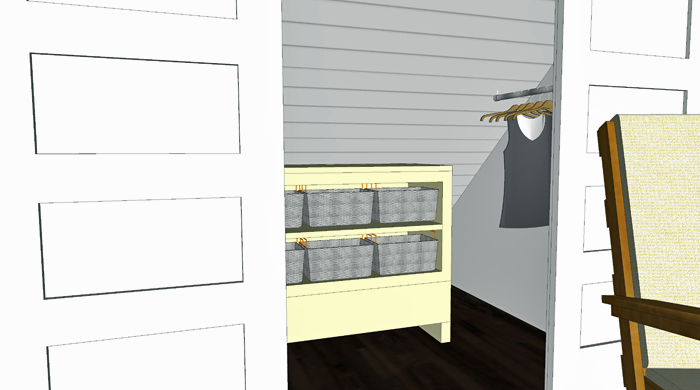
DOORS FOR GIRLS BEDROOM

Way back, a long long time ago, at the very first house we bought together – Craig and I had a backyard ‘mini barn/shed’ that was filled to the brim with corn cobs, electrical components, and a few treasures. Hidden within was a set of cute wooden doors.

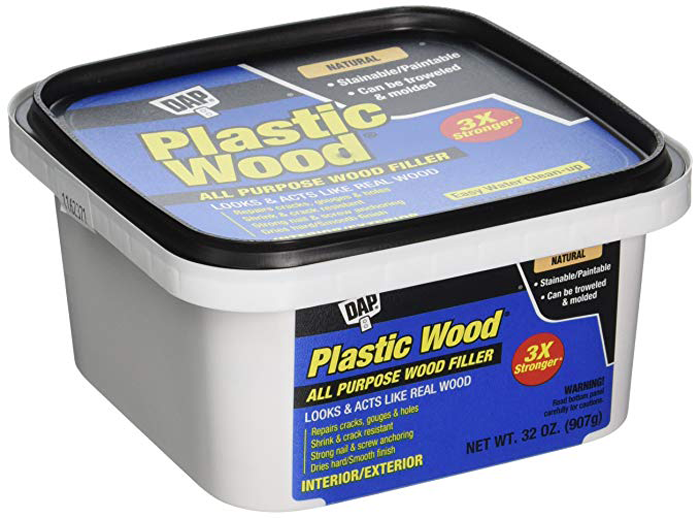
Though I haven’t finished designing the girl’s shared bedroom yet, I have been working on it; And have found the perfect spot for the doors as access to their closet! One of the doors has a bit of wood patching that needs to be done, but for the most part this should be a semi-simple sand and re-paint job. Famous last words, I know.


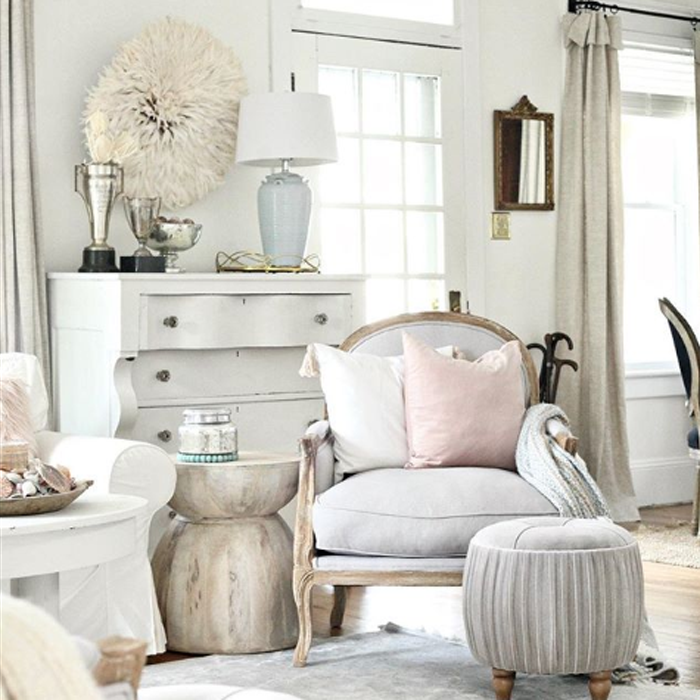
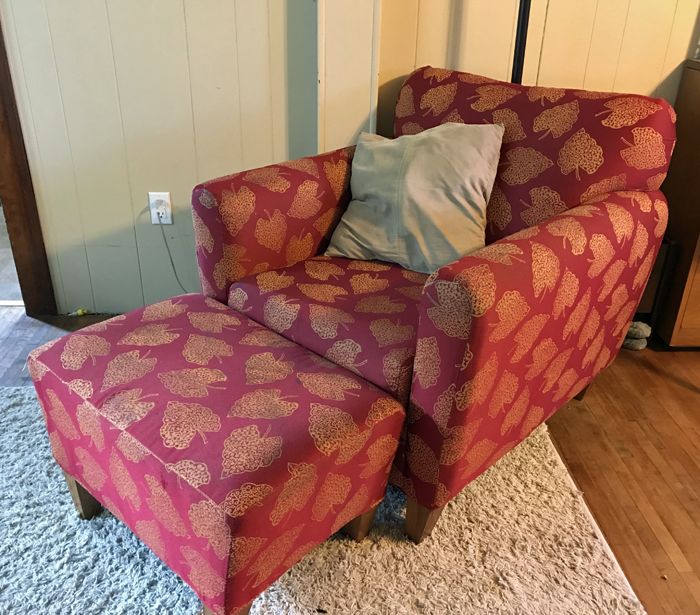
DOUBLE CHAIRS RE-UPHOLSTERED

Another of my discount finds were these two overstuffed arm chairs with matching ottomans. I got all 4 pieces for $125 – which is an absolute steal! They are super comfy and sturdy, but ugly as can be. I’ve got to figure out if this is a reupholstering project that I am willing to tackle on my own, or if I need to hire the professionals. Either way, I don’t want these pieces to make their way into Arrow Hill Cottage in their current state.
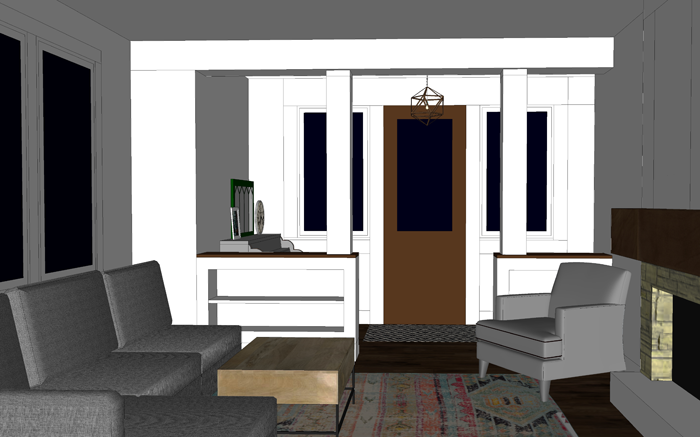
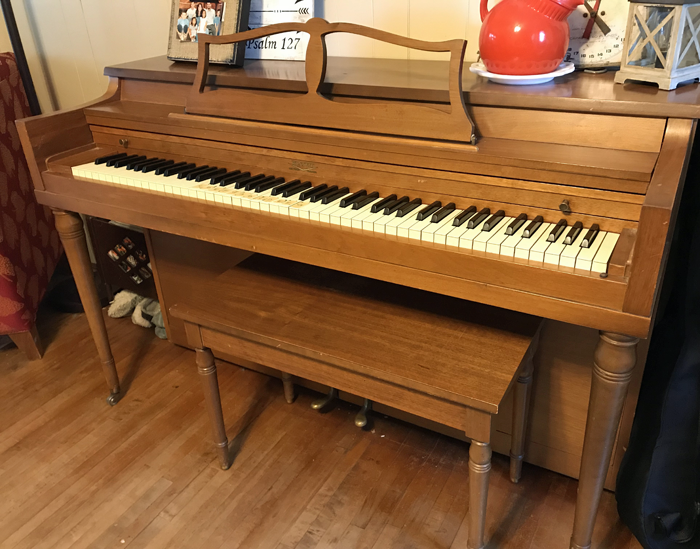
 

PAINT THE PIANO

Our piano will reside in the entry space of the new house – and I want it to really make a statement. It’s kind of a dull/aged brownish color right now and I think that a fresh coat of paint will make a world of difference. I’ve never painted a piano before though, and I will admit it does make me slightly nervous. The good news is that it isn’t a super fancy baby grand or anything – and we got it for about $100 – so if it does happen to get ‘ruined’ we won’t be out much dough.
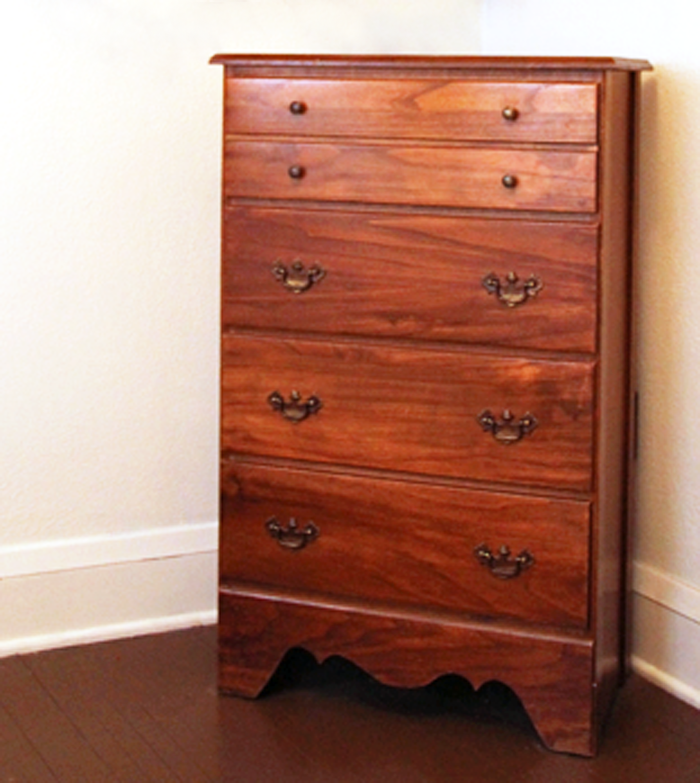
 

CABINET REPAIR

Last on the list, but not least – is this set of semi-matching little cabinets. The antique dealer who sold them to me said they came out of a historic home in which they were installed as built ins. They are each about 5 feet tall, 2 feet wide and 1 foot deep.

One of them has a glass front, and shelving. I think it would look cute as a small linen cabinet in the upstairs hallway

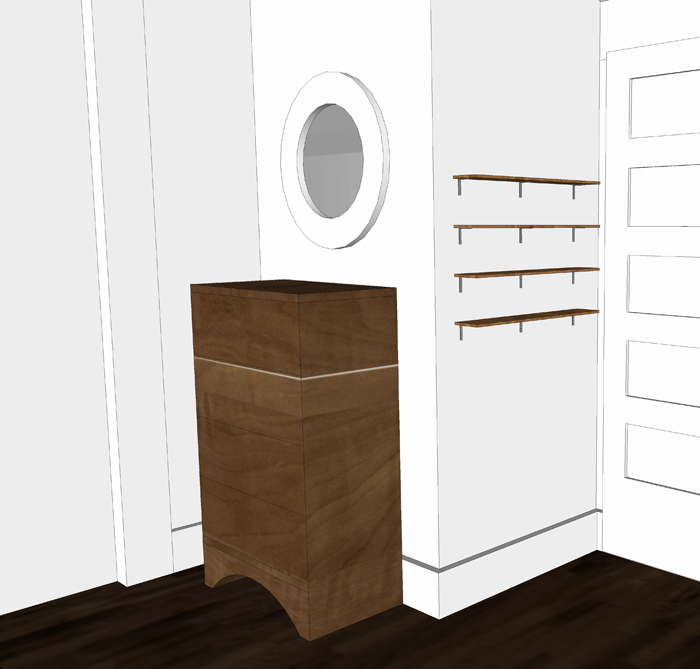
The other is in a bit more rough shape, but has some really neat features. I believe it will make a perfect mail sorting station in the mudroom, and also serve as a spot where we can charge all of our devices. I imagine it as the Family Command Center for the cottage.

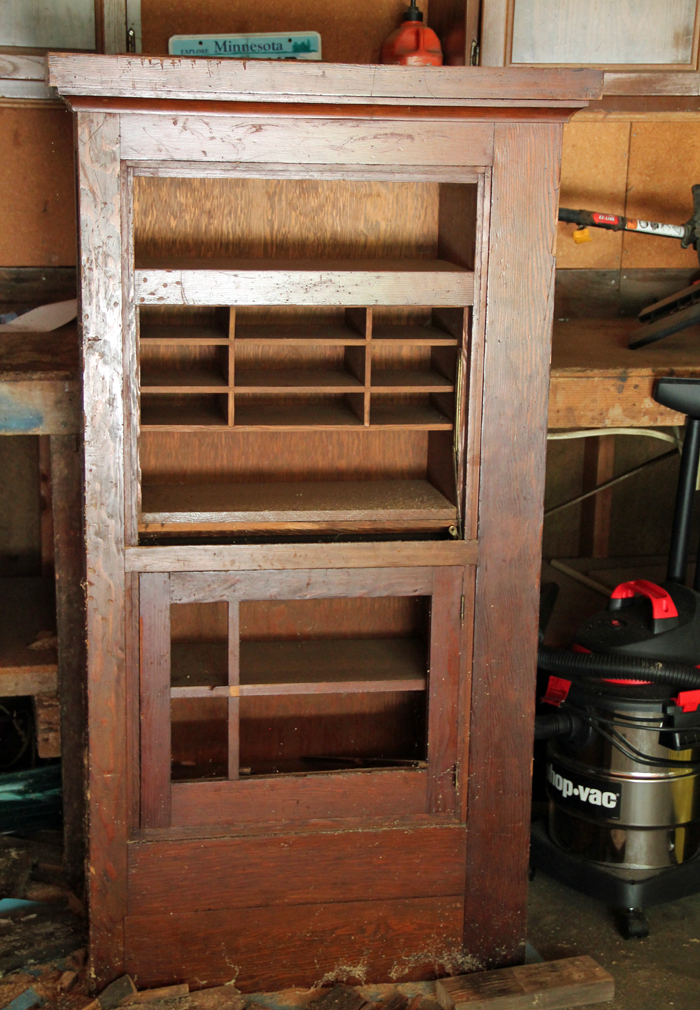
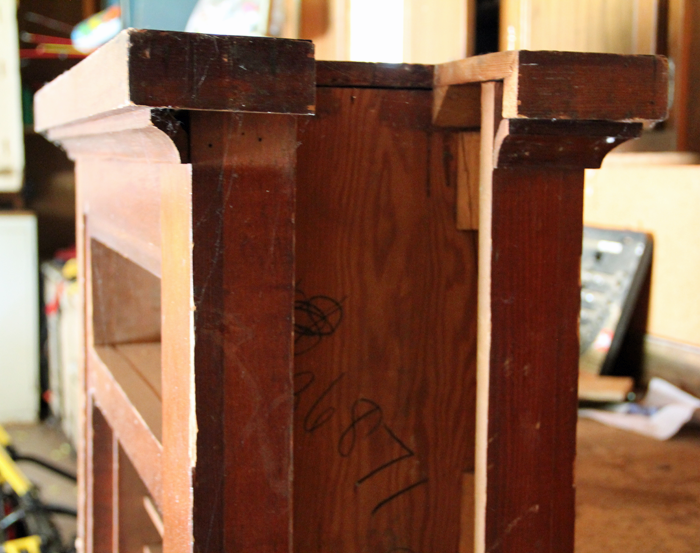
Both cabinets will need some work done on the side faces, where they were previously built into the wall. I might also do a sand and re-stain, although I do adore the patina – especially on the glass front cabinet.


Whew! That is quite the list! And since it’s already mid-July, I had better get in gear if I want to accomplish all (or most) of these items before school starts! What do you think I should tackle first? Leave a comment below!

As I work on these projects, I plan to share them on Instagram Stories. If you aren’t following me over there – here’s the LINK! Have a wonderful weekend!

MY FAVORITE INSTAGRAM ACCOUNTS THAT FEATURE NEUTRAL DECOR


Decorating a home is a very personal task. The reasons why people choose to use certain colors over others has a lot to do with the inhabitants personalities and the mood that they want their home to embody. Basic COLOR THEORY tells us how the use of colors can aide in creating the desired effect. I have previously posted about how I believe there are three main ways that people use color in their homes.


ONE: Neutrals Prevail

TWO: Pops of Color

THREE: Color Explosion


I first explored interiors that feature the  COLOR EXPLOSION school of thought. I listed my three favorite Instagram accounts that display this decorating style well. Today I want to swing the pendulum in the opposite direction and offer up my three favorite Instagram accounts that have the Neutral touch.


@farmhouseonboone

With a strict color palette of white, cream, grey, black and brown, Lisa has pulled together a lovely home that has a calming and peaceful feel. Her Instagram feed gives off the same vibes. Peace.


@bluebarnandcottage

Loren’s ability to pull neutral textures together makes her interiors stand out above the rest. The visual interest that the curated variety of surfaces and materials create, mean that the spaces she designs – though minimal in color – are not stark or boring.


@thecultivatedhome

I am drawn to the casual, carefree, neutral style that Tammy has created in her home. Looking through her feed makes me feel like I could just pull up a chair and relax. The colors that she does incorporate into her spaces are muted and calming, making them perfect accents to a neutral palette.


If a neutrally decorated home is the look you are after, I hope that you will take some time to visit these accounts to see even more inspiration! Besides Instagram, each is linked to a blog that is just as impressive!