HOME DESIGN PLOT TWIST!

Just two weeks ago I wrote about how our home design has evolved. I saw it as a bookend to the design – a way to finish off the chapter of floor plan configuration, and usher in the next phase of material selection.

And then, well… life has a funny way of sending you twists and turns when you least expect them! Today I will be writing about some major house changes that have happened – changes we didn’t even see coming!


home design changes


I have written in previous posts how we have had to make some sacrifices for our house design – based primarily on site constraints and financial limitations. Most of the things that haven’t ‘made the cut’ have been no big deal. I can live without an extra window, or the specific roofing material I was hoping to use.

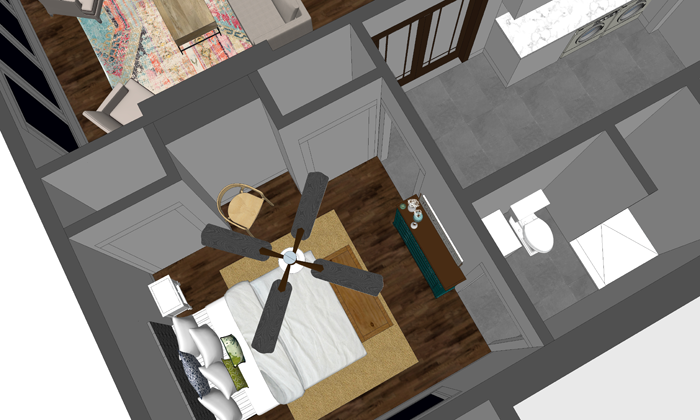
There are other house elements though, that we have been bummed about not being able to include. One of the most difficult to accept was the idea that our main floor master bedroom would not have an attached bath. An attached bathroom was high on both of our wish lists, but ultimately we decided that we could live without it. After all, we have never had a true master suite in all the years we have been married.


But after working through the design of the upstairs bathroom that our kids will share, I started to think more about the bathroom situation for the rest of the house. That led me to begin feeling sad once again that I had not been able to work in the master bathroom we had been dreaming of.


And so, since our build is on hold until Spring of 2019, I figured I had some time to tinker with the home design & floor plan layout a bit more


Much to Craig’s annoyance. The blessing and the curse of loving home design is that it is probably never fully DONE. Craig is ready for things to be set in stone now. He may not understand that even after the house is built I will be tinkering, with paint colors and accessories! Ha!

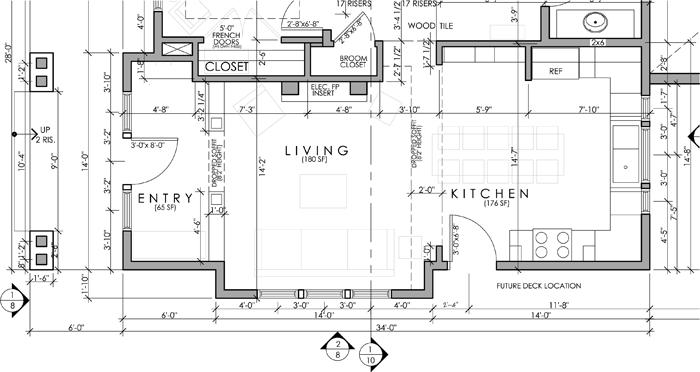
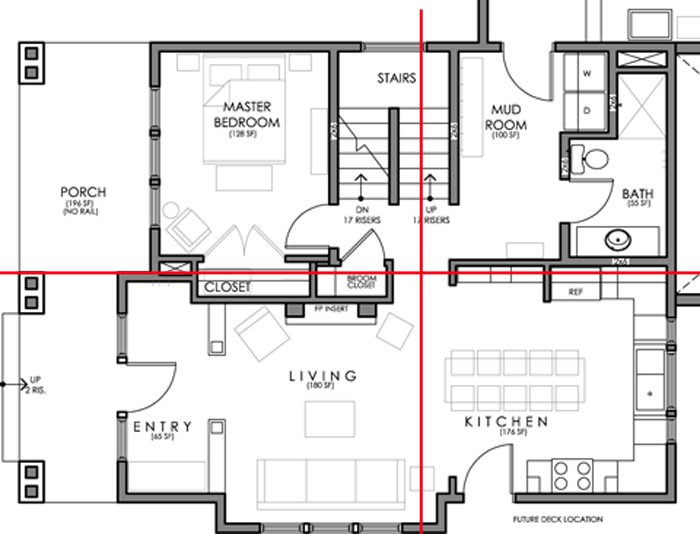
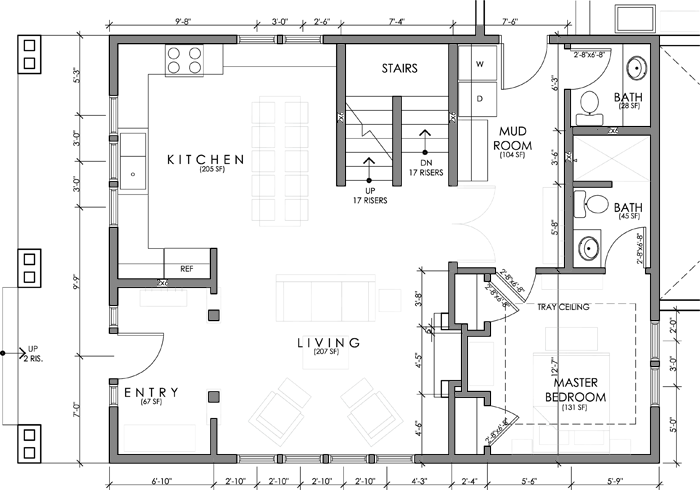
During one of these mini design sessions, I realized something about the main level plan that I hadn’t before. It is essentially split into four quadrants: Living room, Kitchen/Dining, Bedroom, Utility. Maybe it is because the plan has evolved for such a long time and my eyes have been looking at it for so long, but I had never noticed that aspect before.

I also hadn’t really given much thought to the fact that the main floor was also divided in half in terms of the public and private spaces. The kitchen/living/dining half (public) and the master bedroom/bathroom/utility spaces (private).

home design plan layout


THE BIG IDEA

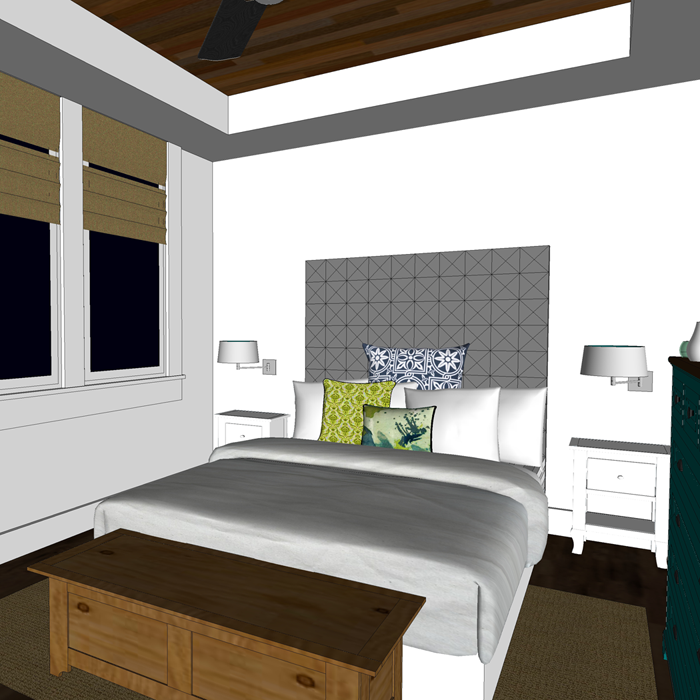
Then suddenly, I had an idea. I tried to swap the kitchen/dining quadrant with the master bedroom quadrant. Things suddenly started to make sense! By making this one simple swap the front half of the house would then be public, and the back private. But best of all? You guessed it. The master bedroom could finally have that attached bathroom! And just like that, we were headed in a new home design direction. PLOT TWIST!

custom home design


OTHER HOME DESIGN BONUSES

There were other fun surprises from this room swap.

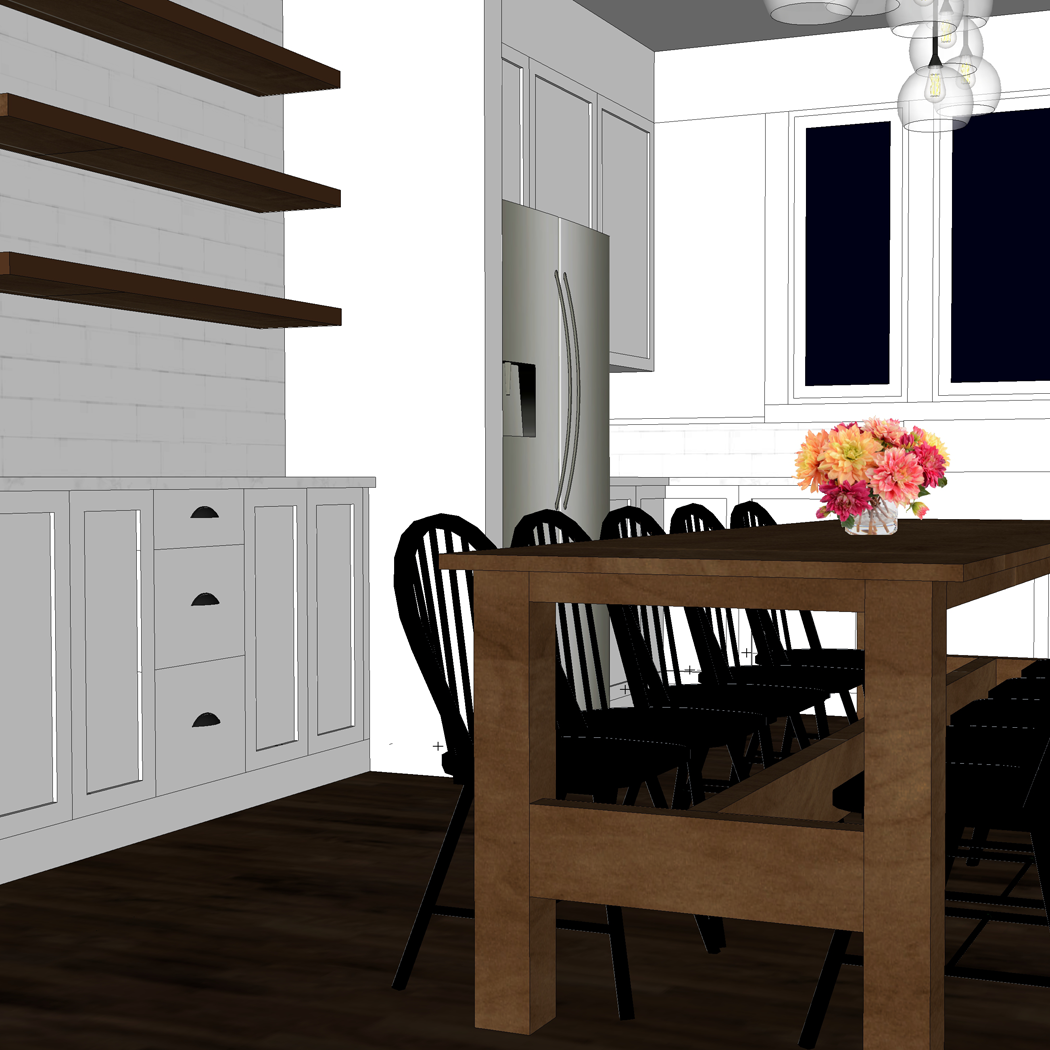
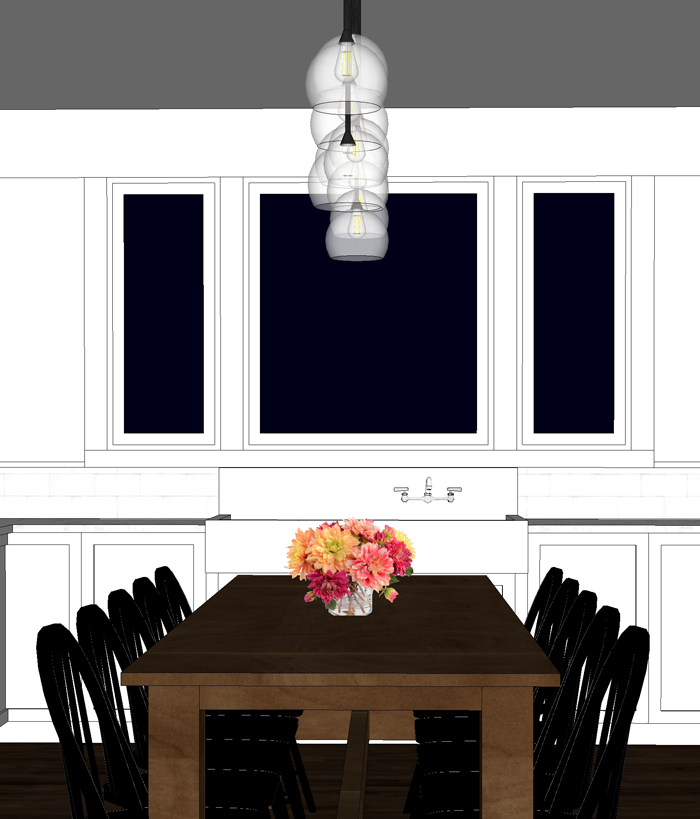
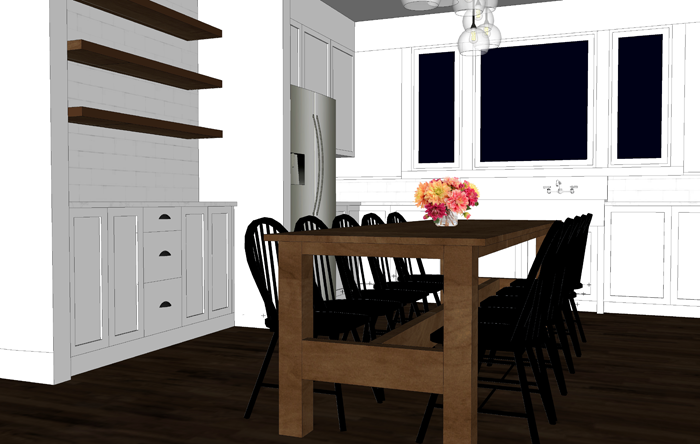
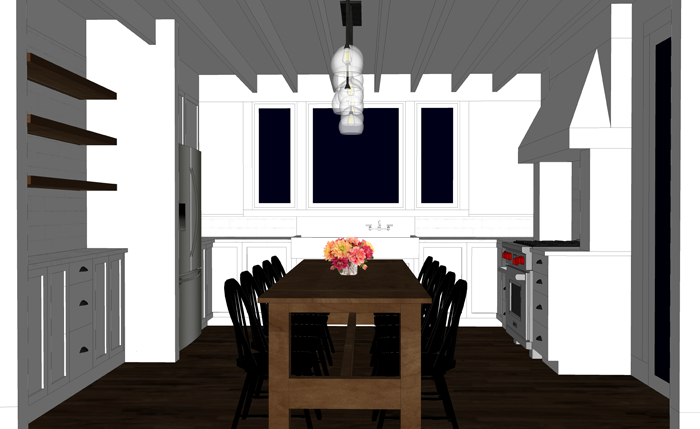
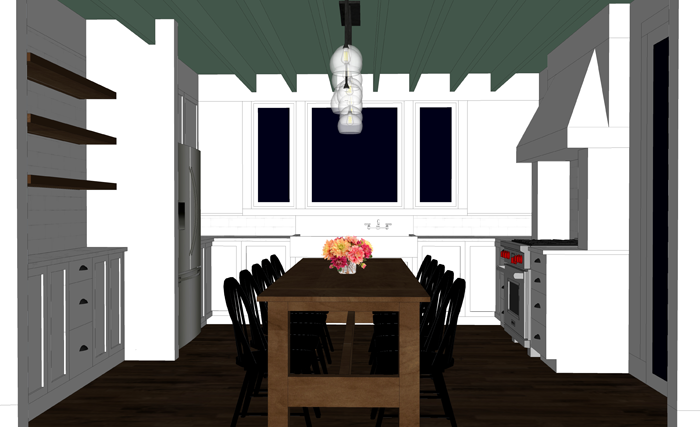
I had never been super keen on the idea of having the kitchen immediately visible to people who visit. Visitors are likely to come through the front porch entryway.  Although I do try to keep my home tidy, the kitchen is ALWAYS the messiest. I think that’s normal. With the new layout, the kitchen is easily accessible – yet in a more visually private location. It will have a very similar cabinet setup as before. The biggest change is the movement of the dining table so that it in it’s own little space.

kitchen home design


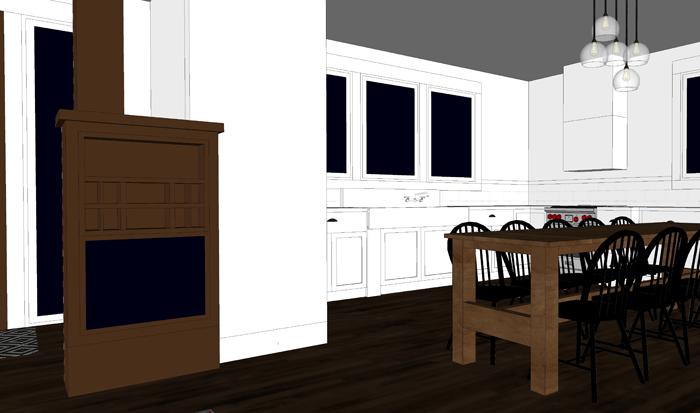
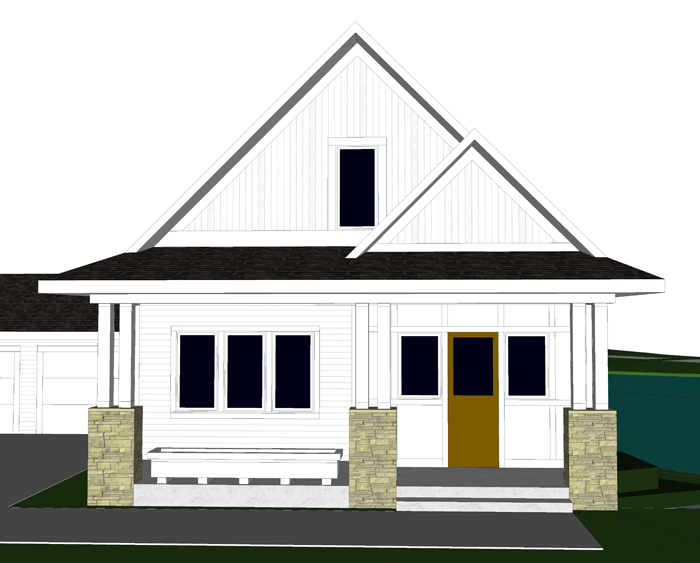
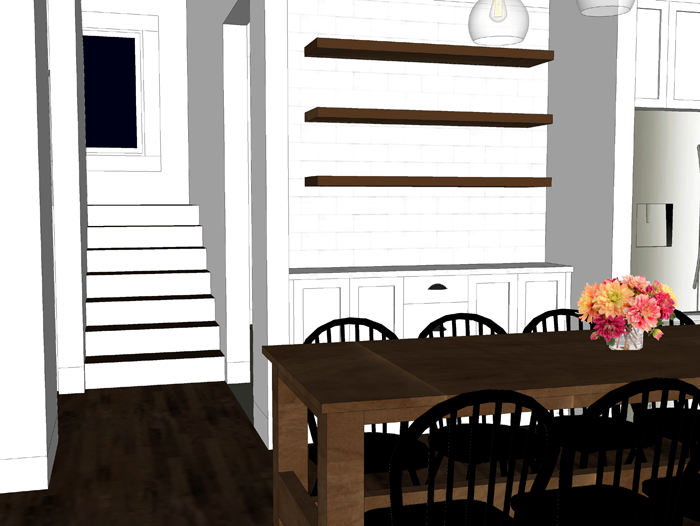
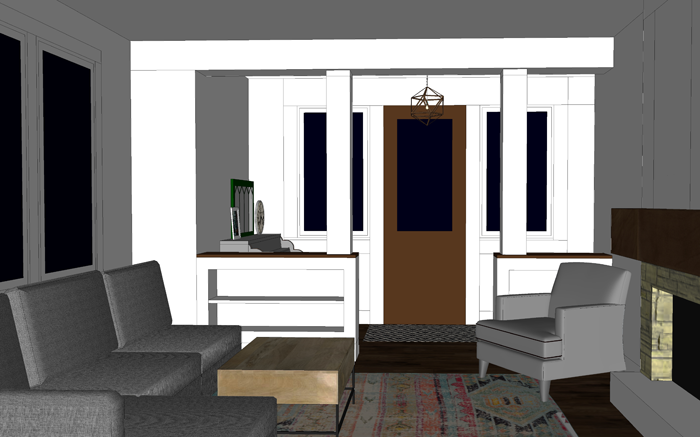
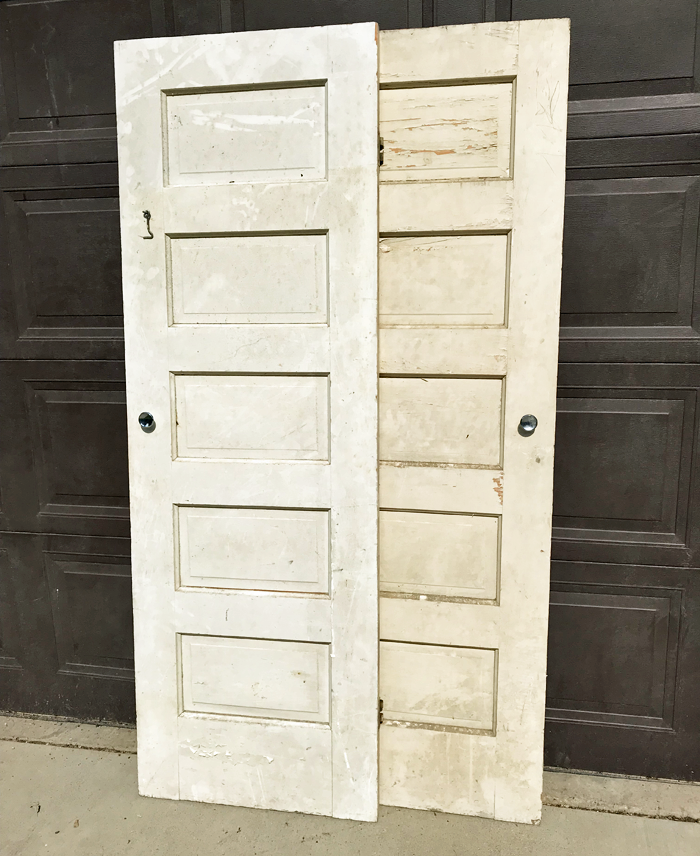
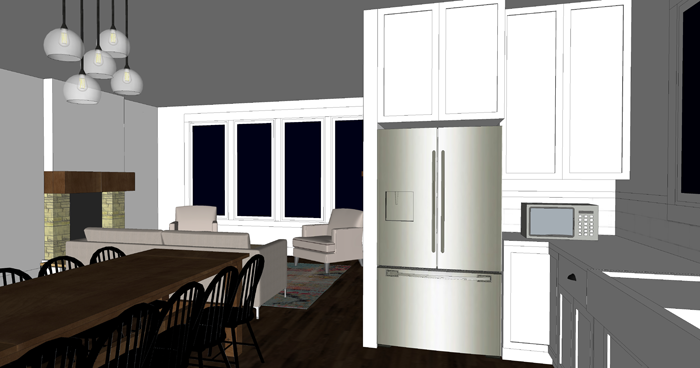
When entering the front door now, the view will be of the wall of windows to the right and the fireplace directly in front. The beautiful wood french doors that we will bring with us from Craig’s grandparents homestead farmhouse will also be visible. This prominent living room location is the perfect spot for them! Previously they had been designed in as doors to our bedroom closet. The doors will likely be open most of the time. But it is nice to have the option to close off the laundry room/ mudroom space if we want.

living room home design


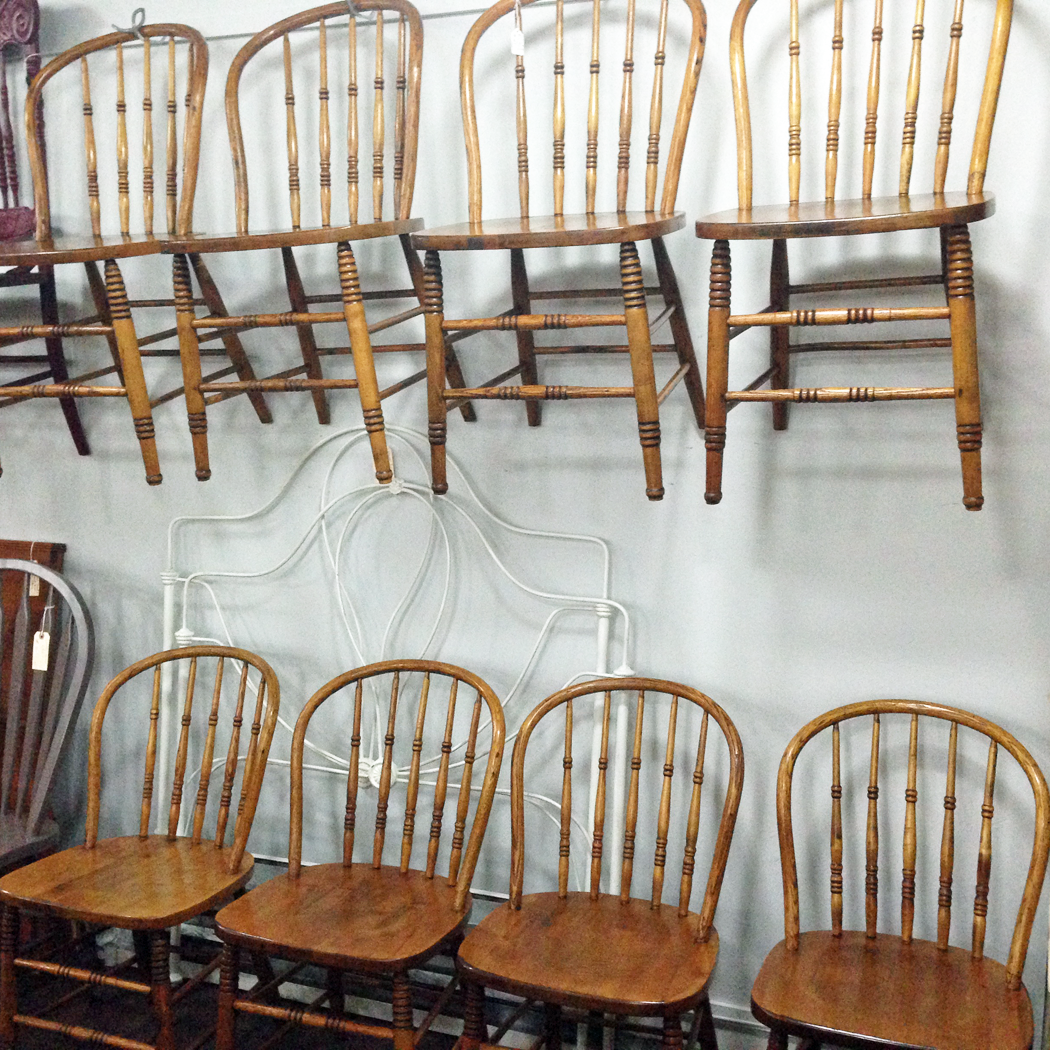
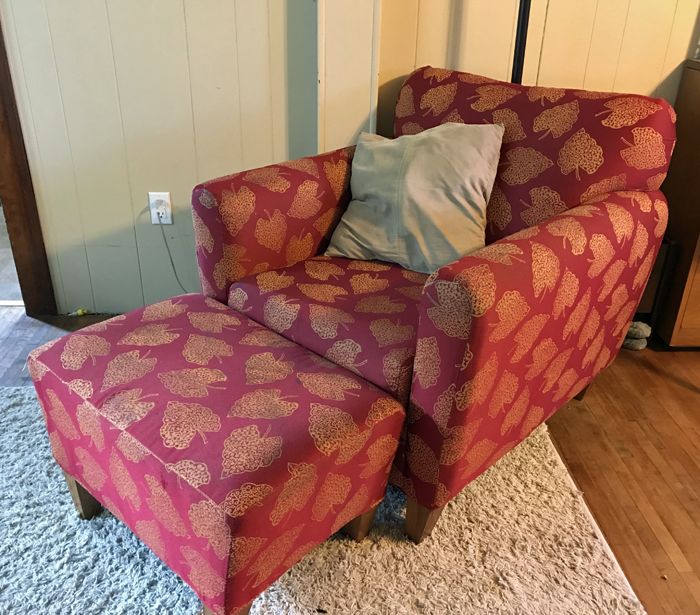
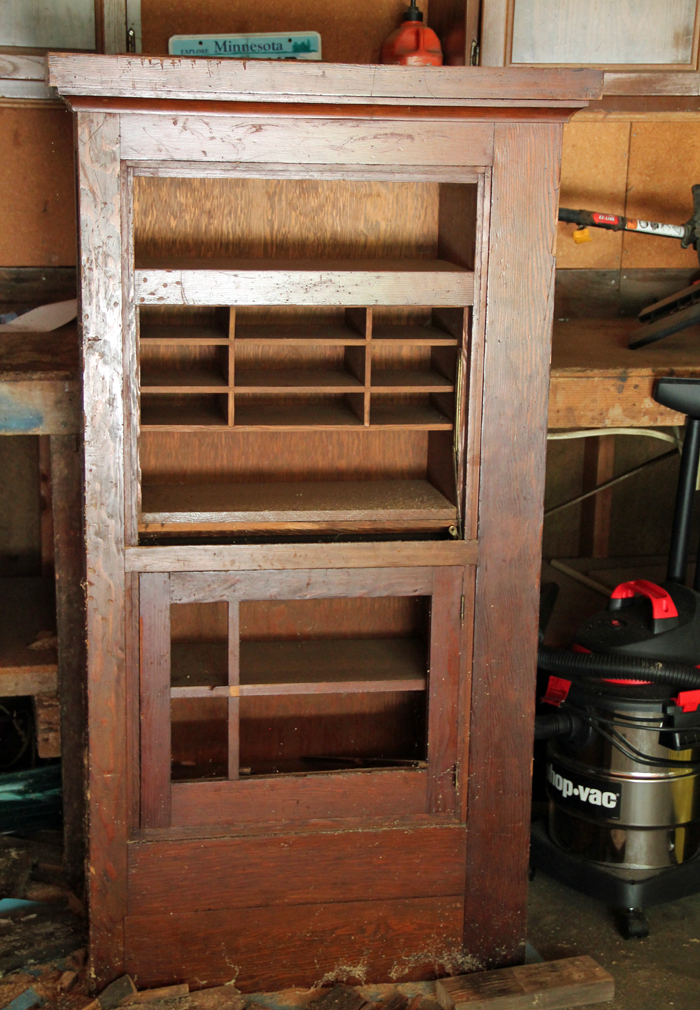
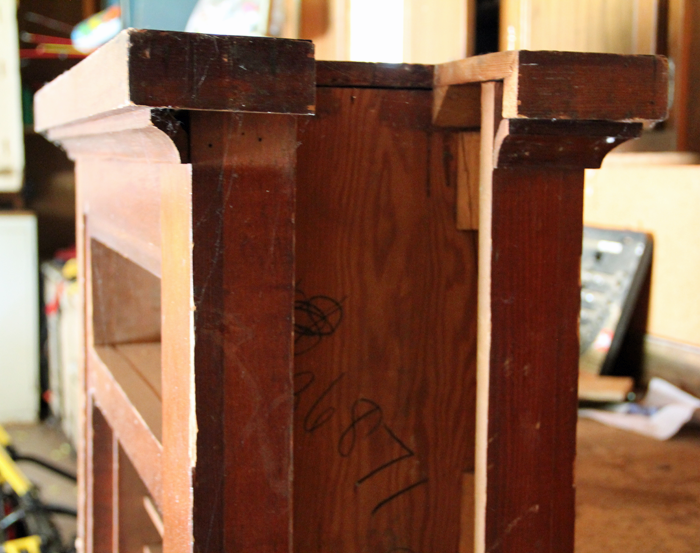
Also, we will be able to reuse the antique cabinets we own as room. They will act as dividers between the living and entry spaces. These cabinets have so much character, and Craig has already begun the process of refinishing them!

home design front entry idea


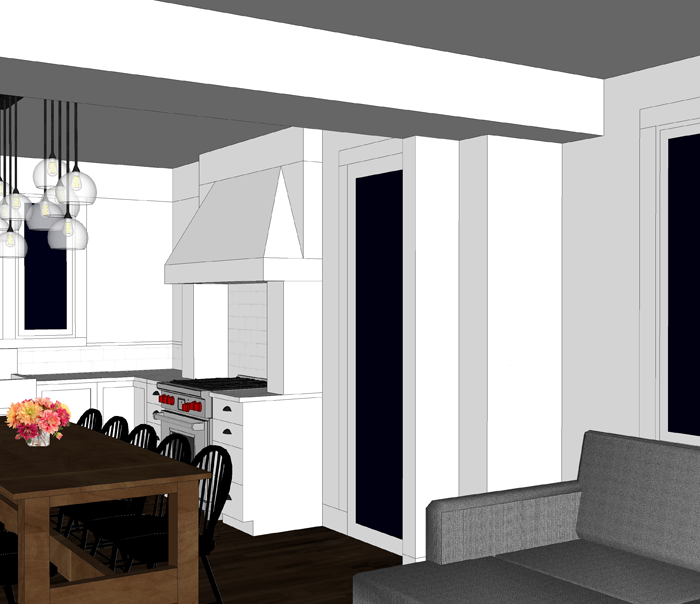
The improved sight lines are possibly my favorite aspect of this plan change. The openness will allow for more natural daylight to flood the common/ public spaces in the house. From this kitchen corner, we will have views to the west, east and south!

virtual home design open concept


NEW CHALLENGES

Of course, not all things magically fell into place. I did ended up pushing part of the house out two feet, to give the kitchen/dining more space. This added about 50 square feet to the overall plan, but also simplified the exterior shape of the house. We are hoping that the changes offset each other cost-wise.

I wonder what our contractor will think of all this – He will probably be as surprised as we were!


home design 3d floor plan

What do you think friends? Do you think this change is for the better like we do?


SATURDAY SKETCHBOOK: KITCHEN CEILING FINISH

We talked with our contractor this week, and he is 95% sure that our project will not break ground until Spring of 2019. It’s a little sad to have to wait through another winter, but we are looking on the bright side and realizing that this extra time will allow us to make sure everything is just as we want it.

There are various bits and pieces that Craig and I just can’t seem to agree on, or that he claims to not have an opinion on. And since I had such a great response when I asked for upstairs bathroom layout ideas, I figured I could come to you all again for a little input.

There have been a few exterior revisions, but mostly they are interior


I have been slowly fine tuning the design of our kitchen in collaboration with Cliq Studios, as well as determining the dimensions and design of our future harvest table – which I will share about in a future post.

We changed the window sizes and style to fit more naturally with the farmhouse sink we will be restoring. The larger center window will be a fixed picture unit, and the smaller side windows will be operable casements.

We also revised the cabinets to the right of the fridge. Initially I had them going all the way down to the counter. We eventually realized that we would like to have the extra counter space for small appliances, such as the microwave and toaster.


The cabinets to the left of the fridge are going to be shallow depth (12″ instead of the standard 24″). We see this area more as a built in buffet/ hutch space – to promote a sort of dining room within the larger kitchen space – since we do not have a separate room. The shallow depth allows more space for the dining table and chairs.


These are all changes that we think will add to the functionality and feel of the space. There is one more cosmetic option that we are having a difficult time deciding on. The ceiling.

When you enter into the house, there is a straight view from the entry into the living room, and beyond to the kitchen/dining space.


The small entry/ piano area is somewhat divided from the living room with built in cabinets and columns.


I want to also have some sort of definition between the living room and kitchen, while at the same time keeping the floor space open. I started by adding a dropped soffit between the two rooms.

It helps to separate the spaces, but I still felt that there needed to be something else to define of space or the other. Since the living room already has a feature fireplace and built in book-cases, I turned my attention to the kitchen. Here is where we are having trouble deciding – the ceiling.


Part of my family prefers the smooth drywall ceiling in both the living room and kitchen, as shown here:


Others of the family, myself included, feel that some simple 2×8 or 2×10 beams (non structural) could be that last finishing detail the kitchen needs for definition. Potentially, tongue and groove boards could be used instead of drywall (layered under the beams) as a way to add more texture. I didn’t bother drawing each and every line, but you can get an idea of what that might look like from this inspiration picture (image 3).


I prefer having the entire ceiling painted one color instead of keeping it natural/stained – mostly because we have wood shelves nearby, wood floors, and also a wood table. However, I  saw this picture on Pinterest, and thought that a soft color on the entire ceiling might look great while adding a bit of color to the all white kitchen. Perhaps a light aqua or a pale grey. I’m not sure I’m brave enough to go for it though!


So, tell me. Which do you think looks best? Please comment on this post or vote via Facebook or Instagram. I’m really curious what the majority of you favors! Thanks friends!

One last look at all of the options, side by side, as seen from the front door.


THE SUMMER PROJECT BUCKET LIST

With the building of Arrow Hill Cottage on hold at the moment until at least the Fall, and quite possibly until Spring of 2019, I am finding myself thinking about what CAN be done in the meantime.

I started this bucket list of projects that I hope to tackle in the next couple of months, during Summer break – when the weather is decent for outside work. The list is a doozy! There is so much that can be done. I think it’s time to get to work!


PAINT DINING CHAIRS

I purchased an amazing set of 8 chairs this past winter at an antique store in town. They had been lovingly stripped of years of paint and stained a beautiful color, and all pieces glued so that they are nice and sturdy. The antique shop owner confirmed what I was suspecting.. that chairs of this age (1940’s) are rarely found in such large sets anymore. Groups of 2 or 4 are much more common.

A couple of months later, I found just that – a set of 2 – painted brown. They were offered at a great deal and I decided to purchase them as well – to bring our collection up to 10 matching chairs. I love the spindle details and the curved backs.

My vision for the kitchen/dining space in the cottage includes these chairs painted black. Although I love the wood grain/stained chairs, I have a feeling that the wood floor, wood chairs, and wood table might be a bit much. I am going to do some testing with the two painted chairs – to determine if I like the look before I paint them all.


DETERMINE DESIGN FOR A HARVEST TABLE

Speaking of the kitchen/dining space. If you remember from THIS POST we have made the decision to not use an island in the space, and instead center the dining room table. This will not only save square footage in the overall floor plan, but it will also allow the dining table to be used both for meals and for food prep.

Because the table will be a central feature in the space, we want to make sure it is very well designed and functional. We have said all along that we would like the the large trees that need to be moved from our property to be milled into wood boards. We envision some of these boards being made into a large harvest table.

This table base that I saw at an antique store is sort of what I am thinking about.

We purchased a set of table legs when on our surprise anniversary trip to Kansas. I love that the sweet memories of that amazing mini-trip will live on in our house. They came to me looking just like this – wrapped in blue. I haven’t even taken the time to unwrap them yet! I suppose that could be considered Step #1.

I will need to take some time to measure, sketch and determine the design for the table itself, and also find someone locally who is able to mill tree trunks into boards.


METAL BED REFINISHING

When thinking about our girl’s shared bedroom, I have always had the vision of identical metal beds. Over the past couple of years I have casually scrolled through websites trying to find the perfect metal bed frames. Those that I found and liked were always just too expensive to pull the trigger on.

Then, just a couple of weeks ago, a friend of mine posted about how her family was clearing out their storage shed and unearthed a whole slew of metal beds that she wanted to find new homes for, free of charge. I asked if she had any that were the same shape and size, and lo and behold she did!

Authentic cast iron, matching farmhouse beds! I about squealed with excitement!  She and her husband were even nice enough to haul the two frames to our house so that I can begin work on them. After a good sanding and spray paint job, they should be good as new!


SINK REPAIR

I dedicated an entire post to the amazing cast iron apron sink that we inherited from Craig’s grandparents. At the moment it is sitting in a storage shed on Craig’s parents property. There are a couple of chips and scratches that will need to be fixed in order to get it ready for install. It’s too delicate of a job for us to take on personally; But I am adding it to my list to find someone locally who can!


FRIDGE CLEANUP

We also have an old fridge that we would like to have cleaned up a bit so that it can be used in the basement family room as the ‘snack fridge’. The fridge is unique in that it is a General MOTORS brand. Yes, before GM locked up a niche in the car industry, they had a focus on appliances. We scored this gem at a yard sale 10 years ago at a home in the historic neighborhood we used to live in. Because we had no truck, we carted it home on a two wheel dolly. Fun times, fun times.

We are excited to see it restored to it’s former glory. It’s possible that the same person who restores the sink could take on this project as well.


SAND + PREP BARNWOOD

As part of our master bedroom design, I included a tray ceiling that will feature some old barn wood that was removed from a shed on Craig’s parents property. It is really beautiful wood – that is currently stacked up in our garage, covered in years of dust and dried up mud.

Not only do I want to get it cleaned up – I want to make sure that there is even enough here to get the job done! I am kind of thinking it would be good to get some 5/8″ plywood and cut the sheets into the size of the tray – which is 7’4 x 9’6 – then clean the barn wood and attach it… so that when the time comes to actually install on site, it will be as simple as screwing up a few sheets of plywood. Could save our builder some time I think!


CHAIR REFRESH

Another master bedroom project involves this sweet chair that I bought second-hand, about 5 years ago. I absolutely love the shape of it, and think it will make a wonderful accent piece for the room.

Problem is, it’s run down. Though it is a solid piece, the fabric on the cushion is beginning to fray and the wood portions are stained an odd color. It needs a refresh, and I think the summer will be a perfect time to do that.


TUFTED HEADBOARD

Rounding out the future master bedroom is one of the projects I am most excited for – the tufted headboard!

The headboard we currently use for our bed is the very first piece of ‘furniture’ Craig and I ever bought together. We scored it from the bargain bin at the very back of the furniture store. I have an idea to use this dated headboard as the framework for the new version – and add a little height with 1×4’s. I’ve never tufted anything before, but I’m a big fan of the look and the tutorials I’ve seen online make me feel like it isn’t super complicated.


DOORS FOR GIRLS BEDROOM

Way back, a long long time ago, at the very first house we bought together – Craig and I had a backyard ‘mini barn/shed’ that was filled to the brim with corn cobs, electrical components, and a few treasures. Hidden within was a set of cute wooden doors.

Though I haven’t finished designing the girl’s shared bedroom yet, I have been working on it; And have found the perfect spot for the doors as access to their closet! One of the doors has a bit of wood patching that needs to be done, but for the most part this should be a semi-simple sand and re-paint job. Famous last words, I know.


DOUBLE CHAIRS RE-UPHOLSTERED

Another of my discount finds were these two overstuffed arm chairs with matching ottomans. I got all 4 pieces for $125 – which is an absolute steal! They are super comfy and sturdy, but ugly as can be. I’ve got to figure out if this is a reupholstering project that I am willing to tackle on my own, or if I need to hire the professionals. Either way, I don’t want these pieces to make their way into Arrow Hill Cottage in their current state.


PAINT THE PIANO

Our piano will reside in the entry space of the new house – and I want it to really make a statement. It’s kind of a dull/aged brownish color right now and I think that a fresh coat of paint will make a world of difference. I’ve never painted a piano before though, and I will admit it does make me slightly nervous. The good news is that it isn’t a super fancy baby grand or anything – and we got it for about $100 – so if it does happen to get ‘ruined’ we won’t be out much dough.


CABINET REPAIR

Last on the list, but not least – is this set of semi-matching little cabinets. The antique dealer who sold them to me said they came out of a historic home in which they were installed as built ins. They are each about 5 feet tall, 2 feet wide and 1 foot deep.

One of them has a glass front, and shelving. I think it would look cute as a small linen cabinet in the upstairs hallway

The other is in a bit more rough shape, but has some really neat features. I believe it will make a perfect mail sorting station in the mudroom, and also serve as a spot where we can charge all of our devices. I imagine it as the Family Command Center for the cottage.

Both cabinets will need some work done on the side faces, where they were previously built into the wall. I might also do a sand and re-stain, although I do adore the patina – especially on the glass front cabinet.


Whew! That is quite the list! And since it’s already mid-July, I had better get in gear if I want to accomplish all (or most) of these items before school starts! What do you think I should tackle first? Leave a comment below!

As I work on these projects, I plan to share them on Instagram Stories. If you aren’t following me over there – here’s the LINK! Have a wonderful weekend!

VIDEO TOUR OF ARROW HILL

As we continue to wait for contractor bid numbers to come through – we’re getting close! – our excitement level is rising at the prospect of building our little dream house.

We purchased our piece of land nearly 10 years ago; But because it is located a 20 minute drive from our current rental home, we don’t make the trek out to visit very often. I wanted to do a bit of site verification this week, and just generally check on things there – so I loaded up the kids and off we went.


As you can see, the property hasn’t been mowed or tended to in quite a long time. I wonder if the neighbors have complained at all? Not only was the grass, trees, and weeds overgrown – the mosquitoes were absolutely awful! I guess that is what happens when there is a lot of humidity, heat and rainfall. We should expect that by now from Minnesota summers. First order of business when we do move into the new house is figure out pest control!


After a thorough spray in bug repellent, I decided to take a short video tour of the property to share with all of you. I apologize for my shaky camera skills and heavy breathing – I was literally swatting the mosquitoes away while filming. The video gives you a basic lay of the land anyway. I am considering this the ‘pre-construction’ walk through.


I also had a fun little Photoshop experiment This is the approximate location where the house will sit. Beautiful, isn’t it? I imagine the views out of the windows will help keep us connected to nature.


I’m pretty sure that this Fall will have us back here again, with mowers, chainsaws, and clippers in hand – ready to give the property a much needed manicure and dream some more. Anyone care to join us for a work party?

If you’d like to learn more about about our site – THIS POST goes into a lot more detail!