HOW TO CREATE A COMFORTABLE OUTDOOR ROOM

With Summer right around the corner, you may be anticipating enjoying the outdoors – listening to the birds sing, sipping lemonade on the porch or grilling steaks on the patio. You may be wondering what steps to take to make the perfect summer outdoor space of your own.

The truth is that not all rooms in nature are created equal. There are six key elements that will help you make an outdoor room as pulled together and comfortable as possible – one that you, and your potential party guests, will want to linger in all summer long.


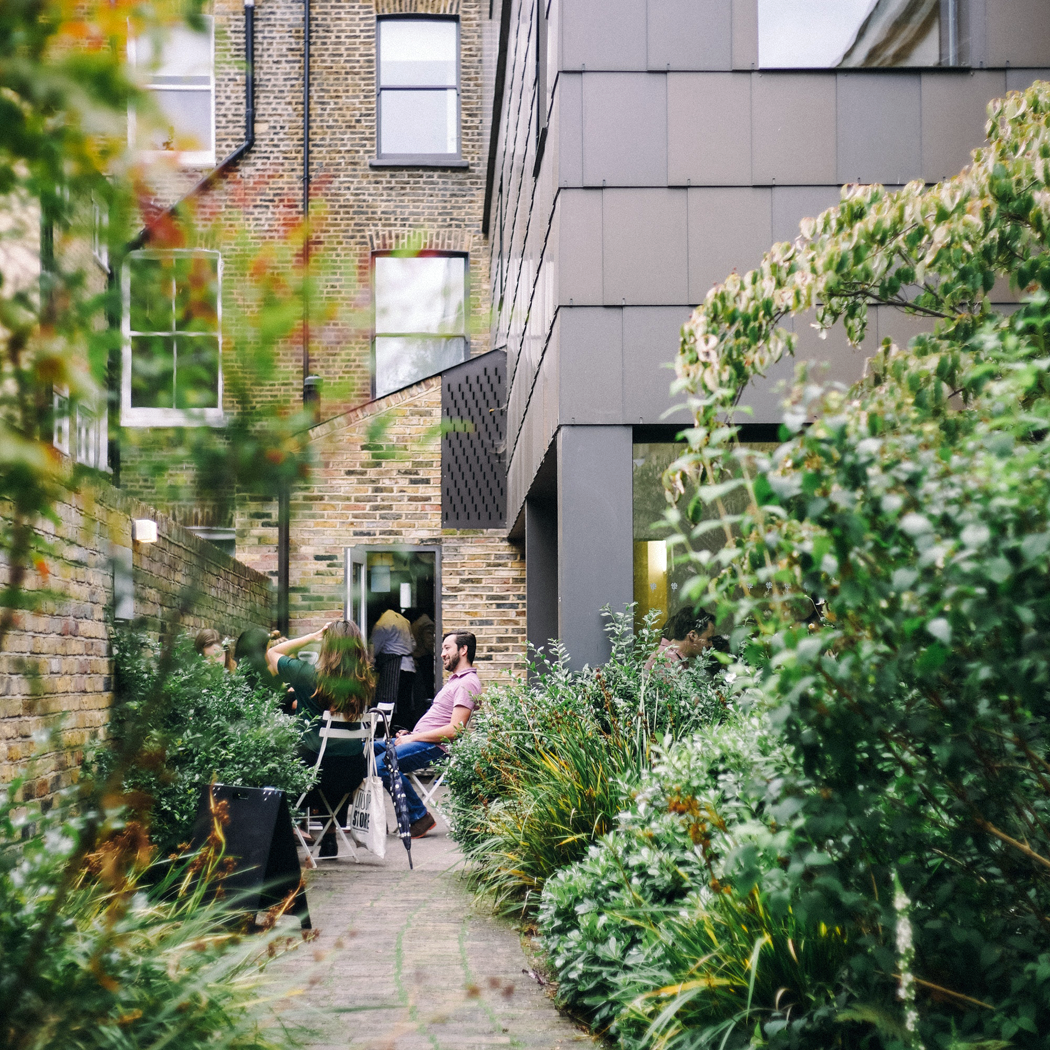
1. DEFINE A SPACE, AND MAKE IT PRIVATE

How to Create a Comfortable Outdoor Room

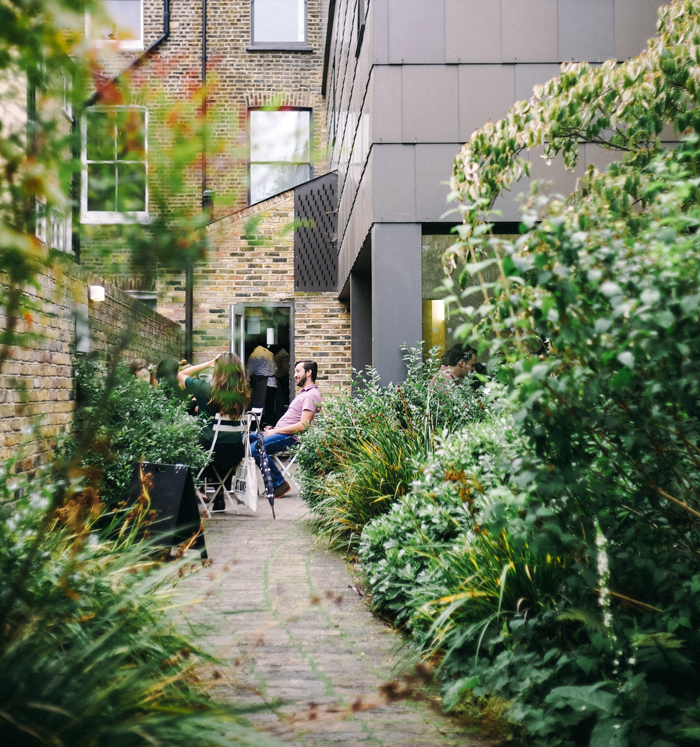
Intimate spaces are inviting spaces. Instead of trying to figure out a way to make your entire yard an oasis, start small. Begin by locating a portion of your yard that is relatively convenient in relation to your home. A spot directly outside a dining room or kitchen, for example, might be a good choice.

Defining a space could be as simple as building a fence around the area, or changing the ground cover. Patios made of bricks or slabs of stone are popular, as are wooden decks. This defined space will be even more enjoyable if it is hidden from public view. Potted plants of varied heights could make a natural ‘green wall’ or a privacy screen might be created with chicken wire and vines.

Fun privacy ideas for your outdoor room:  1 | 2 | 3


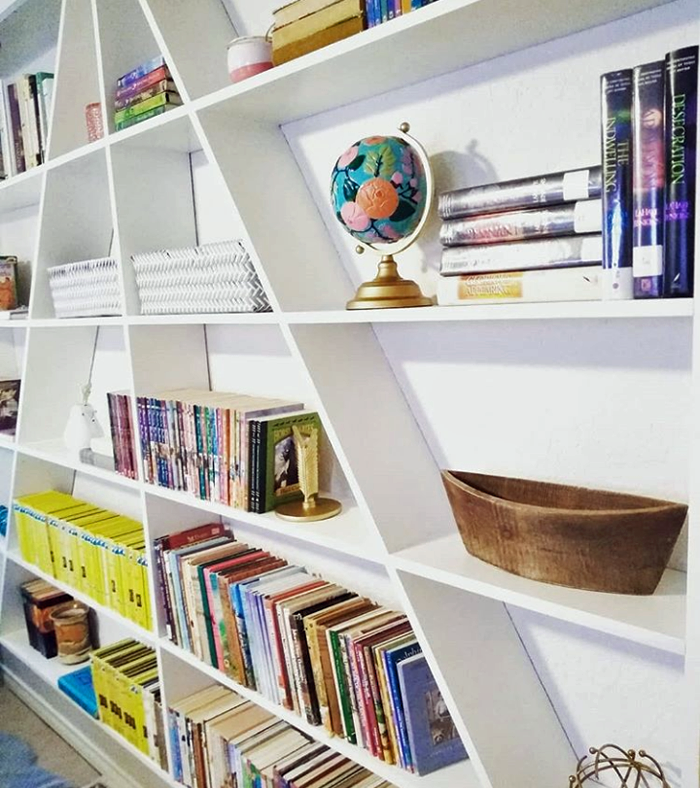
2. BRING THE INDOORS OUT

You’ve heard of bringing the outdoors in – now think about that concept in reverse. Make it feel like an extension of the home you love, by drawing elements from the inside – outdoors. Perhaps there is a certain color or theme that your interior is decorated with. Using those same elements outdoors will create a unified look.
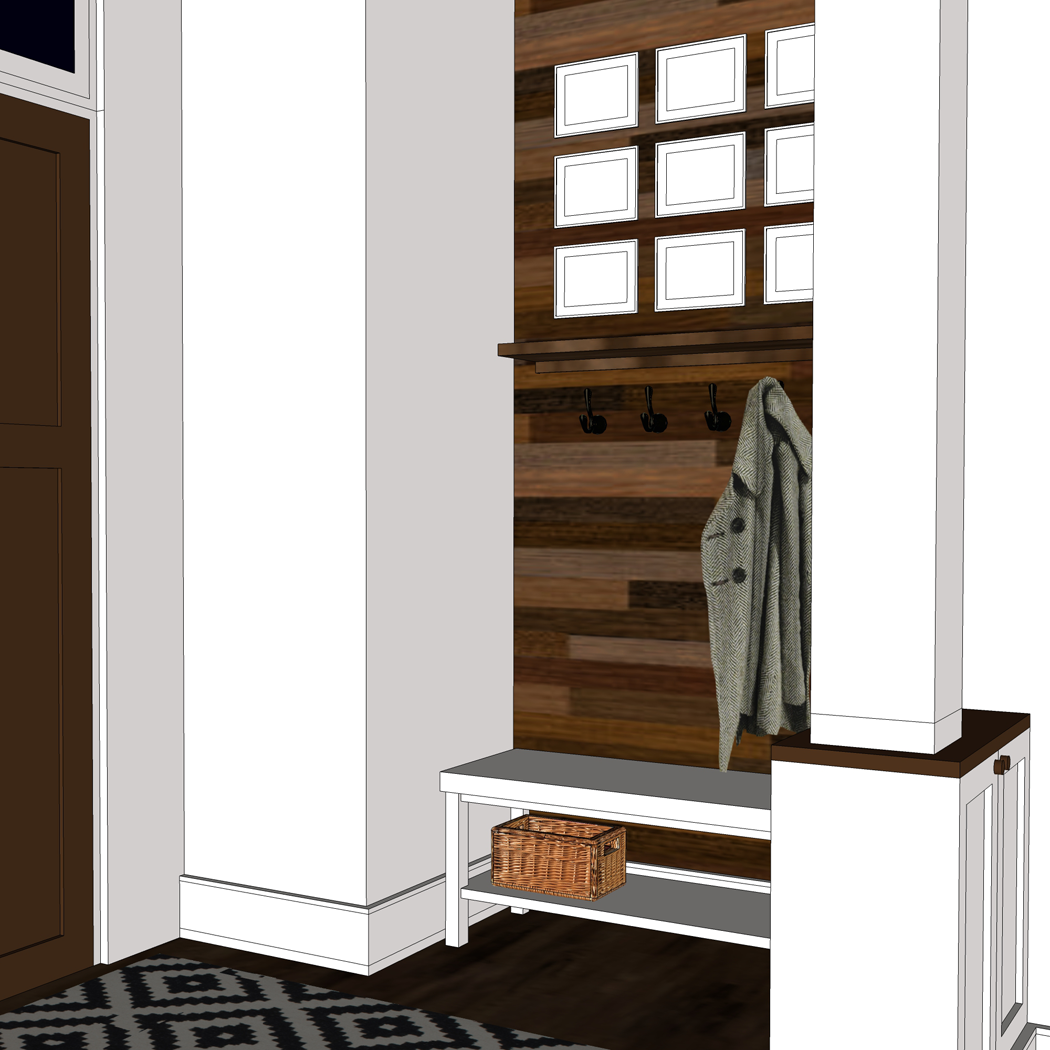
 

3. ADD CONVENIENCE

For an outdoor room to be comfortable, it also needs to be functional – so that once you are in the space, you won’t need to leave it to grab a convenience item.

If you have a grill in your space, make sure that all the grilling tools are handy. If it is a place you plan to nap in, have pillows and blankets nearby. A cart to hold beverages and snacks would be welcome in just about any outdoor room!

These conveniences are clever and useful! 1 | 2 |


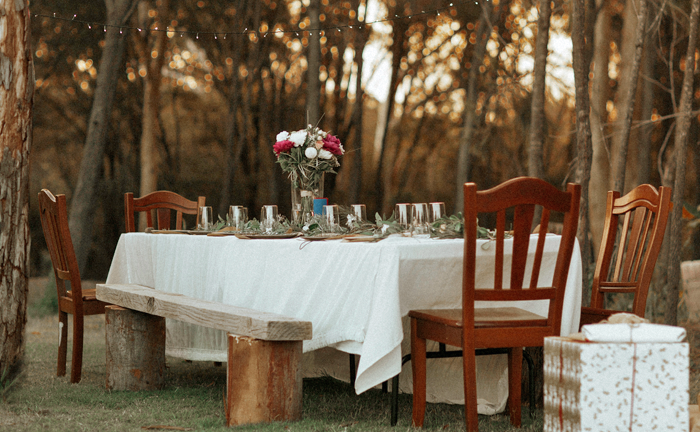
4. PROVIDE VARIED SEATING

Think about your outdoor room being used by various group sizes. You may want enough seating to accommodate small group conversation, a place to dine, or even a one person seat – such as a hammock.  You can include multiple seating options, which can be rearranged as needed.

Various seating options for outdoor rooms: 1 | 2 | 3


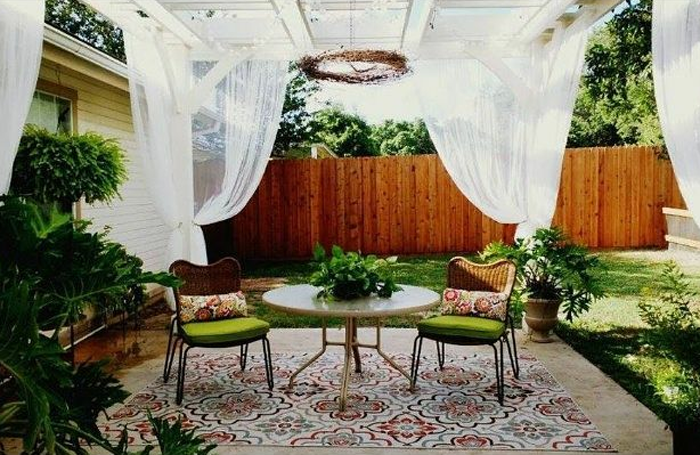
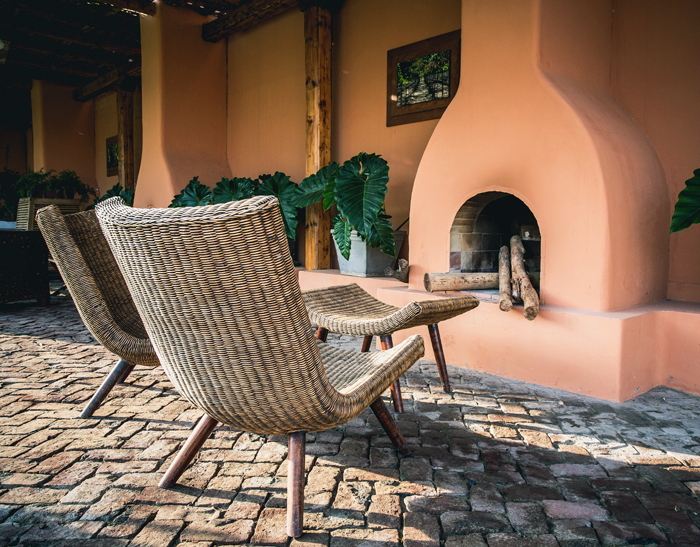
5. KEEP IT SHADY AND PROTECTED

A shady and protected outdoor room is essential for use in the warm summer months. Shade options can range from a simple draped canvas overhead, to a detailed pergola. A full roof will offer a more protected feel, and possibly a longer season of use for your outdoor room.

If you want to extend the use of your space into the cooler months, you may consider adding operable screens/ windows and a heating source such as an outdoor gas fireplace or wood burning fire pit.


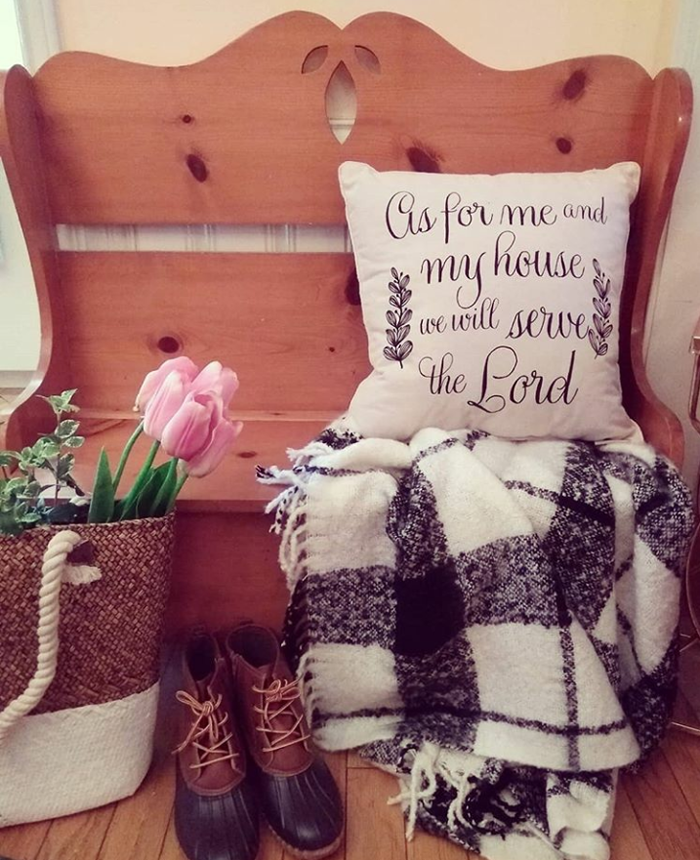
6. LAYER THE AMBIANCE 

Your outdoor room will come to life if you consider all five senses, and how they can be connected to nature, when pulling it together.

Sight: What will you see when you are in your outdoor room? A pleasant view will allow you to relax and let your other senses to be engaged. At night, solar lights or strands of lights above create a magical feeling that will make you and your guests want to stay up past bedtime.

Smell: This sense can make or break an outdoor room. Take care to ensure that items which could produce unpleasant smells, such as a garbage can, aren’t close by. Using flowers and other sweet foliage can help you connect with nature. A fire feature can also create ambiance and a pleasant, familiar smell that is sure to be enjoyed.

Hearing: Often this sense is overlooked, yet it has a huge impact on the enjoyment of a space – especially outside. If your home is in a loud neighborhood, consider a white noise machine to cancel out some of the noise. Add in pleasant sounds, such as a water feature, for comfort and tranquility.

Taste: The pleasure of preparing food outdoors is multiplied when you can pick fresh food and spices. The installation of a raised-bed garden nearby, or pots with herbs, adds an interactive element to an outdoor room.

Touch: Tactile elements such as pillows, rugs, and even the furniture that is selected to fill your outdoor room can engage the user of the space in a way that no other sense can. Take care to ensure that these items are not only pleasant, but interesting to touch.


By following these six key elements of design, you can create an outdoor room that is not only comfortable – but also engaging and interesting. Put them to work for you, then sit back, relax, and enjoy the summer!
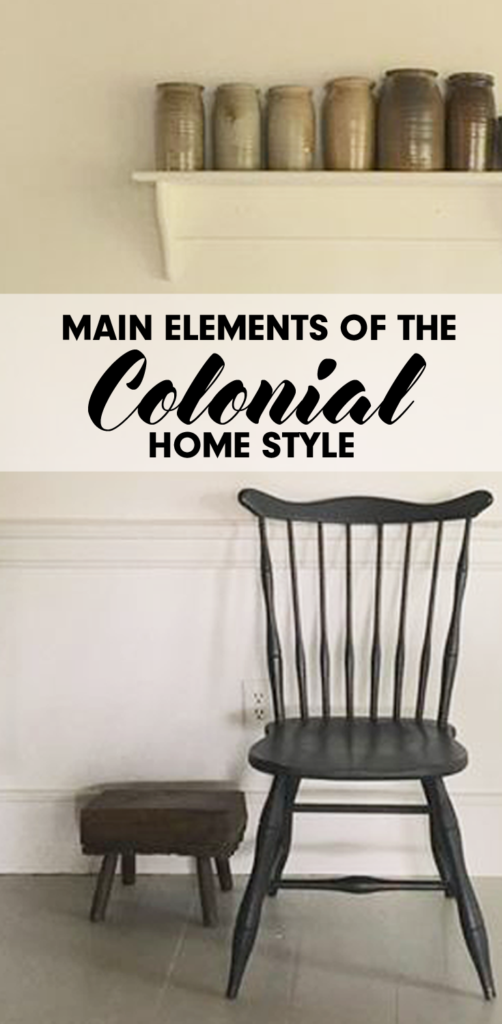


Pin this for later:


A FARMHOUSE SINK FOR OUR COTTAGE

They say that the kitchen is the heart of the home; And a beautiful kitchen is high on the priority list of many homeowners. I am in agreement with these sentiments. After all, if my family is going to be spending a lot of time in one room, it should function well AND look nice.

The kitchen for Arrow Hill Cottage will have a classic look, with clean materials and tons of natural light. But I have to say, in all honesty, the feature I am most excited about is the kitchen sink.


Time for a little story:

About eight years ago, when my husband Craig’s family was helping his grandparents clean out their farmhouse (the very one we are living in at the moment), I spotted a cast iron sink laying in the weeds on their property – ready to be hauled away by a scrap metal collector who was paying by the pound. I am pretty sure I let out an audible shriek, then quietly and as calmly as possible, asked Craig to please find out more about it.

Turns out that it was the farmhouse’s original 1920’s kitchen sink that was removed (and tossed outside) in the late 60’s, when the room was remodeled to a more modern style.

It didn’t take too much begging for his grandparents to agree that we could save it from the pile. Craig though, needed a bit more convincing. Mostly because the thing was a beast, and hauling things around is low on his list of favorite things to do. He loves me though, and eventually gave in to my desire. We had absolutely no place to store the relic of a sink, and so we asked Craig’s parents if we could keep it in one of the sheds on their property until we built our house. And that is exactly where it has been ever since.

Craig was there last weekend, and I asked him to get a few measurements for me so that I could fine tune the kitchen design a bit more. He took pictures of the sink – in all her muddy, rusty glory – and seeing them made me fall in love all over again.


We will need to look into getting it refinished – probably at a body shop – but even with that expense I believe we are sitting on a great deal. I saw a very similar model on Etsy selling for $1,800! Another sink, on Ebay is listed for close to $1,000. Even reproduction models are over $700!

There are a couple of challenges that this farmhouse/apron sink will present. One is finding wall mounted faucet hardware. They aren’t quite as common as the counter mounted variety.

I like the look of this bronze faucet from Wayfair.


I have a feeling that lever handles might be a bit easier to operate though – so this option from American Standard might do the trick.


This one with a pull out spray faucet would be very functional – but I’m afraid it might not quite be in the budget. Maybe I can find something similar for less when the time comes to make a decision.


Another challenge will be determining how to lay the counter material. This sink style was originally designed to be a free standing unit. It probably had matching legs at some point. Kitchen design & style has changed quite a bit since the 20’s.

I am still pretty set on using a quartz counter-top material. I love the clean look. The sink will will either need to be set a bit lower than the counter height, so that the counter material can overlap the edges – to ensure that no water slips onto the cabinet below – similar to this:


OR possibly more likely, because of it’s integral back-splash, we will need to set the sink up higher and butt the counter-top material into the sides, like this:


The final design challenge that I can foresee, and perhaps the largest, is the placement of the sink itself. Because it is a single bowl sink, the placement of the faucet will be further to the right (and not in the center of the overall unit. There will be three large windows on the wall where the sink will be located, and I am unsure if I want the entire sink to be centered on the middle window (and hence, the faucet offset), or the faucet / sink basin portion centered on the middle window. Maybe you can all help me out.  Tell me which you prefer!


SINK UNIT CENTERED ON MIDDLE WINDOW


FAUCET CENTERED ON MIDDLE WINDOW


I should note that the dishwasher will likely have a cabinet panel front, so that it blends with the rest of the cabinetry. I feel like it seems to have more space on the right of the sink. Thoughts? Maybe I should take another look at the window placement and series?

Please comment below or via social media. Would love some help!


UNDERSTANDING WHAT MAKES HOME ‘YOURS’

We are in waiting mode, as three local contractors are pouring over our house plans in an effort to get us accurate bid numbers. They have seen plenty of house designs in their day – and no two exactly alike I’m sure.

There were some questions when we had our meetings with the contractors – and some comments made by friends and family, regarding the design choices we have made that make our home what it is. And I have been thinking a lot lately about how tailor fit this house is for OUR family.

I just wanted to take a little time today to encourage each of you to understand the home that YOU want to live in. What works for you and your family may not be the norm. It might not be what the real estate market expects, or trending on Pinterest. And guess what? That’s okay!


This is a list of a few of the unconventional features that have been incorporated into our new house design, and why we are happy with our choices:


LACK OF SQUARE FOOTAGE:

We understand that our house is on the small side. The primary dimensions of our house are 28 feet by 32 feet, making a rectangular footprint about the size of a standard two car garage. The smaller footprint was a function of both our challenging site, and also for monetary purposes.

We have said all along that we do not wish to live in a large house; but rather one that can accommodate today’s needs while we raise our five children, and won’t seem too spacious when they are all grown and gone. All told, the finished square footage of the cottage, including lower level and upstairs half-story, will be just over 2,000 square feet.


NO MASTER SUITE:

Most newly built homes feature a main level bedroom, complete with a large walk in closet and attached on-suite bathroom. Though our cottage will indeed have a main floor bedroom, so that we can age in place, the room will not have the features to make it a ‘suite’.

We have instead opted to have a large shared bathroom on the main level, near the mudroom/ back entry. It is only a short, accessible, distance from the bedroom; But it’s location through a public shared space will make it convenient for guests as well.

The closet for the main level bedroom is large – about 5 feet in length – but it is not a walk in style. We have justified the smaller closet space by realizing that we try not to keep items that are not useful to us. In fact, the only other closet on the main level is a small broom closet near the bedroom door.


SHARED KID BEDROOMS:

This design item seems to get a lot of attention. The idea that we can fit five children into two bedrooms gets a few raised eyebrows. For us though, it is the perfect set up. The kids will have the entire second level, which simply features two bedrooms (one for the girls, and one for the boys), and a hall bathroom to serve both rooms.

To be honest, our kids have always shared bedrooms and I think they would be a bit lost having a room all to themselves. We do, however, anticipate that as the teen years approach (our oldest son is 11) – they will want more privacy. The sleeping nooks in the boys room will aide in that regard – while still keeping them close.

Fewer bedrooms mean less nagging from mom and dad to get the rooms in order, and hopefully will develop some shared responsibility among the siblings to do their part in keeping things clean.


COMBINED KITCHEN/DINING:

While this design decision was driven primarily by the budget, during the simplification process, I have to admit that I am actually looking forward to the combined kitchen and dining space. The table, though standard height, will serve somewhat as an island if need-be.

I have been tinkering with the plan, and was careful to maintain a functional kitchen work triangle – with the table slightly offset from it. The large area of open shelving, with shallow cabinets below, almost mimics a hutch – which signifies a ‘dining’ space ever so slightly


RELATIVELY LITTLE STORAGE:

Because we know that, for us, items stored behind doors rarely get used, we have opted to have very few storage/closet spaces in the cottage. There is one small broom closet incorporated in the plans for the main level, but no coat closets. Instead we will use cubbies or hooks in the mudroom to house our outerwear. Upstairs, each bedroom will have a closet, and there are a couple of small unfinished storage areas in the eaves which will be useful for Christmas decor and other seasonal items.

It is standard to build three stall garages for new homes. Most families now have two vehicles, and will use the third stall for either an accessory item such as a boat/ ATV, or as storage space. Though we have been told that garage square footage is cheap and we should consider making ours larger – perhaps with a bonus space above – we have decided that a two car garage will be just fine for our needs. We are hoping that by setting the garage back from the house and making it only one story, it’s appearance will be minimized from the curb view. The fact that the garage will be attached is a huge bonus for our family, as we have never owned a home with that luxury. It will especially be appreciated during the cold winter months!


There you have it! Though these design choices may not be popular in today’s market – we aren’t looking to ever sell our house (instead hoping it will passed down through the generations) – and so feel no hesitation in making these changes that will allow the cottage to function in the best way possible for our family.

What makes your home personal? A unique shade of color on your walls? No formal entry space? Mix-matched cabinetry? I would love to hear, in the comments below!


5 REASONS THE HOME DESIGN PROCESS SHOULD INCLUDE 3D MODELING

I have written before that I wholeheartedly believe that homes should be designed in both plan (2D) form and in the third dimension. Years ago architects and designers – in order to understand all aspects of space- would make physical 3d models. Physical models involve a considerable amount of time and attention to detail, and any little change to the design can add hours to the process. For that reason, designers would create rough models while working on concepts and save the detailed models for the very end stages of design.


Designers today have the benefit of technology on their side. Specialized software allows us to work in the third dimension through the entire design process. There are many 3D programs available for use, each with their own set of advantages. I personally use Sketchup, which I find to be extremely user friendly and powerful at the same time. One of the major bonuses of this program is that it is available FREE for personal use! In the future, I plan to offer tutorials here on the website – teaching easy steps to get started using Sketchup! In the meantime, I am offering the top five benefits of implementing 3D modeling during the home design process.


1: UNDERSTANDING THE FLOOR PLAN

Many people struggle to make sense of floor plans. Because we naturally don’t see walls cut through, or view furniture from above, a floor plan is difficult for the mind to process. It literally feels like a second language to some. Designers are trained to read these documents – but because their clients are not, frustration can arise when using a floor plan as a point of discussion.

standard floor plan view of Arrow Hill Cottage


By adding the third dimension, we are able to more fully understand how walls relate to one another, and also determine sight lines from one room to the next.  This is not only helpful for the designer, but also for the client that they may be sharing the information with.

three dimensional floor plan


2: ADDITION OF DEPTH + DIMENSION 

Construction documents are very useful for the crew who will ultimately build the house – these people are used to reading and understanding a plan set, and know how to transfer the information into a three dimensional built form. But the average person who sees a two dimensional drawing can not bring their mind to see beyond the flat image.

This is the front of Arrow Hill Cottage, as seen in a flat elevation drawing. From this view, it appears that the cottage is very long, and without depth.


Seeing the same design in three dimensional form gives you additional information – and as you can see, the garage is actually pulled back from the face of the porch by nearly 30′, giving it much less importance and prominence than what the elevation drawing would have you believe.


In this instance, the 3D model combined the information from BOTH the floor plan and the elevation into one image, making it easier to understand.


3: SCALE COMPARISON

Have you ever been in a space and found it to be either uncomfortably large or so small that it was not functional? The scale of a space is an important element that can be overlooked easily when working only in 2D.

Volume can only fully be understood with the addition of the third dimension. When designing in 3D you can easily determine the differences of how a room would look and feel with a flat ceiling versus a ceiling with a vault. In rooms with sloped ceilings, it is considerably easier to understand the amount of headroom available. Consider our boy’s bedroom design. This is a very unique space with a ceiling that slopes from 11 feet in the center, all the way down to the floor. In order to determine where to place the boy’s beds so that they wouldn’t knock their heads on the ceiling in the middle of the night, I turned to 3D modeling.


Once the Sketchup model of their room was complete, I was able to show these images to the boys – and they could literally imagine themselves IN the room. Huge smiles all around! It is really comforting to know that after all the work, they will enjoy the final product.


4: PRECISION IN PROBLEM SOLVING

There are many little details that can be missed when working only with two dimensional drawings. I find that adding the third dimension is especially helpful when I am fine tuning the design. For example, When I was looking at the cubbies in our future mudroom, I wasn’t sure which height would work best for the individual shelves and hooks. I measured items in our existing home to get a general idea of what would be most functional, but when I put those dimensions into the 3D model, I realized that the heights of the shelves competed with the height of the nearby trim, creating an awkward look.

With a bit of tweaking to the dimensions, the design is now visually appealing.


5: VISUALIZING THE FINISH PRODUCT SELECTIONS

Many of today’s 3D modeling programs, including Sketchup, have the capability to render in a semi-realistic way. Designers can add material selections, such as wood floors or a subway tile back splash. They also offer the ability to add furnishings and accessories.  These extra capabilities allow designers to create views of what the final product may look like, before the builder ever lifts a hammer.

When designing the living room of the cottage, I could tell that the space would benefit from the use of a sectional sofa. I was able to use Sketchup to find an amazing couch that fit perfectly. When the time comes to furnish the room, I can simply purchase the exact piece that I used in the design, or find an item with similar dimensions. Retailers are beginning to see this as a benefit, and have begun offering their furniture in three dimensional form, for designers to use in their mock ups – with the hope that their clients will purchase the exact pieces once they visualize how they could look in the room.


If these five reasons have convinced you that adding 3D modeling to your home design process is beneficial, I hope you will join me in the future as I share tutorials on how YOU can get started.  And, as always, if you need help in visualizing the space you can ask for a Makeover Takeover!


THE FIVE PHASES OF NEW HOME DESIGN

In the course of designing your new home, you will walk through a variety of phases – each a bit different in nature. Though they tend to flow into each other slightly, there are five general categories of progression: analysis, preliminary design, development, documents, and construction review.

Understanding what to expect in each phase can be a helpful guide for your home design process. If you are considering designing your home solo – or working with an architect or designer – you can prepare early by knowing what is to come.


PROGRAM ANALYSIS

In this phase you will determine what your needs and wants are for your future home. You will be looking at potential building sites and thinking about the number of bedrooms, bathrooms and common spaces your home will have. You will also begin to think about your project budget. To help you answer these program analysis related questions, visit this blog post and complete a series of worksheets.


PRELIMINARY DESIGN

Through this phase you will be determining the desired spacial relationships within your home and also the connections that will be made from indoors to outdoors. The spaces will begin to resemble a floor plan in it’s very basic sense. Drawings will be created in the form of quick basic sketches.

You will also be thinking about the house styles that appeal to you most, and likely searching Pinterest for inspiration photos.


DESIGN DEVELOPMENT

Just as it’s name implies, this phase of home design refines the spaces and their relationships. You will begin thinking about your home in three dimensions – focusing not only on the floor plan but also how the home will feel on the inside and look from the outside.

Near the end of this phase, you will want to get a better idea of what it would cost to build your home project. By obtaining estimates at this point, you will still be in the position to make major changes to the design if needed for budgetary reasons.


CONSTRUCTION DOCUMENTS / BIDDING

This is the phase when things begin to feel very real. Your drawings will include measurements and notes for the construction crew. Specifics on window and door sizes and styles will need to be made, as will finish material selections. Legal and technical information will be gathered and compiled to form the final ‘blueprints’ of your home.

During this step, you will be obtaining solid construction bids and determine who you will be hiring to build your home.


CONSTRUCTION ADMINISTRATION/ REVIEW

Homeowners vary greatly on the amount of involvement they have in this final phase of the process. While some choose to be on site every day to monitor progress, others pass the responsibilities onto their contractors (or architects) completely. I would advise that it is best to have at least some involvement – to build a great relationship with your contractor and design staff. The truth is that no matter how detailed you are able to get on your construction documents, there will inevitably be questions that will arise during construction; And if you put forth all the effort to be involved in the design of your home, you will want to follow through completely and ensure it is built the way you envisioned.


These five phases should work together seamlessly so that your ideas about home function and comfort can be brought to life. Each phase can be demanding, but the hard work will pay off in dividends when you are enjoying your brand new custom designed home.

SATURDAY SKETCHBOOK: PLANNING AND REVISING

This winter has been brutal. Think freezing or below for months at a time. No, I’m not exaggerating – anyone who lives in the Midwest will agree.

As I have mentioned before, our family currently lives in a rental house. As part of our agreement, we pay our own utilities – which includes the propane used to heat the house. Let’s just say the propane guy has been out here multiple times already this season, and gas isn’t cheap! The house just doesn’t heat well. It’s an older home and has leaks and cracks and windows that aren’t perfectly sealed.

This winter has been breaking us down.

One day at the dinner table Craig asked me “Is there ANY way that we can build our house sooner? I am not sure I can make it through another winter like this in the rental.” My honest answer was that I really did not know. I hadn’t let my mind go there.

But I agreed to check into it, and found myself at the bank the following week – sitting down with a loan officer who very kindly told me that our finances looked good but that she needed to have some clear estimates of how much this house would cost us to build. Gulp. Time for the dreaded bottom line.

I wrote about making sure you know what you can afford in THIS recent post. Craig and I are frugal people and no matter what a bank would tell us that we CAN spend, we would never put ourselves in a position where we had a monthly payment that was too difficult for us to meet. We had our best guess dollar figure about what we could handle/month on a loan, but had not yet determined full building costs – besides a general cost per square foot number.

We called up a contractor friend who met with us and talked us through various material decisions. He let us know industry standards and which finishes he thought weren’t worth their price tags. All very good information. Then he started throwing out numbers of recent newly built houses, similar in square footage to what we had designed, and the price tags they had attached to them. GULP again. Wow. Did he really just say that? His cost per square foot numbers were quite a bit higher than those I had been working with.

Of course, there is a range – but in all honesty even the lowest priced was slightly above our comfort level.

main level of the cottage (as designed when talking to the contractor)

Finishes will play a major role in the overall cost, and so in the next couple of weeks we are going to sit down with him once again and talk through actual numbers as they relate to our project. I am already guarding my heart – and I am pretty sure that the bottom line will require some major changes to be made. I’ll be honest that I was pretty bummed for a day or two after our meeting.

The good news is that we are heeding our own advice and finding out these costs early. We aren’t just hoping that everything will come in within our magical budget number.

And, it’s also good that I love to design. I’ve already gone back into the ‘archives’ of plans to see how different ideas could be incorporated. One of the first areas we noticed that could be revised was the large vaulted living room. The elimination of that wing of the house would essentially remove 640 square feet (320sf per level: main and lower). Based on what the contractor was telling us, in ‘real world dollars’ that may be a $100,000 decision. For our family that is a MAJOR amount of money.

I went looking for how that wing could be eliminated and eventually realized that by simply eliminating the kitchen island and moving the table into the kitchen in it’s place, a large area could be opened up and re-imagined into a living room. Interestingly, the positioning of the dining table in the kitchen is a building design trend that makes sense for a lot of families.

image source


Though this revised living room isn’t as large as the initial design and doesn’t come with all the bells and whistles I had been dreaming of, it’s okay. It has the potential to be a lovely space, maybe even with a small vault space and extra windows in the bump out area.

main level of the cottage – simplified and reduced square footage


The other major bonus is that nothing else on the main level would have to change much, so from the exterior the house looks essentially the same, minus the extra wing.

potential revised exterior without living room wing


These are all still ideas, and until we get actual bids on construction materials for our home we won’t know if this major cut will need to be made. But we are preparing for the potential, and know that whatever we end up with will be the perfect fit for our family – in size and style – while at the same time making sense for our pocketbook.


THE 4 QUESTIONS YOU SHOULD ASK YOURSELF BEFORE DESIGNING A NEW HOUSE

Designing a new house is an exciting and exhausting time for homeowners. It seems there are no less than a thousand decisions that will need to be made to create a house that is ‘just right’ for your family. And while each and every decision during the design process is an important one, there are four important questions you should ask yourself BEFORE you ever sit down at the drawing table by yourself or with a design professional.


1. WHICH HOME STYLES DO WE PREFER?

While it isn’t necessary to pick only one home style that your design MUST be based on -it is valuable to understand, at least generally, which types of homes you are drawn to. Are simple, clean lines your thing? Perhaps a modern home will be a good design guide. Do you love the charm of cozy houses? Consider the characteristics of the cottage or bungalow style. You can ask yourself if you prefer an open floor plan or one with more defined spaces, and if your family would benefit from one level living or multiple stories.

Each month I work through a series here on the blog entitled ‘Elements of Home’. I dive deep into what makes each home style unique, with the hope that the information can benefit you in determining which style would be best suited to your family’s lifestyle and preferences. You can access the series HERE.


2. WHERE WILL OUR HOUSE BE SITED?

Location, location, location. It is the mantra of real-estate. You can change a house in many ways, or in this case – build nearly anything you want – but you will not be able to change your home’s location once it is tied to the foundation; That is, unless you are willing to spend major money to do so.

You may be tempted to look at home plan books or online for floor plan ideas. And while these tools can be extremely helpful, you should at the very least have an idea of where your proposed home will be located before considering floor plans. Will you be building a new home in an established historic neighborhood? In that case, the sleek modern home with floor to ceiling panes of glass that you spied online may not be the best choice. Do you love the option of having a home with a basement level that you can walk out of? If so, you will want to make sure that you have a site in mind that will accommodate that type of setup – preferably somewhere with sloped land.

There are more detailed site related questions that you will need to answer, such as how the natural daylight will affect the interior spaces of the home – but these are questions for further in the design process.

3. WHAT DO WE NEED IN A HOME?

Generally speaking, we more easily identify our wants over our needs. Sometimes the two get mixed together, in fact. When designing a home it is very important to establish the difference. The needs are absolute must haves, whereas the wants are not as important – and can possibly be added at a later date.

Size is one of the most troubling aspects to determine. When considering home square footage, a variety of questions may arise. How many bedrooms should the house have? Will 1 bathroom be sufficient, or will we need more? What is a comfortable living room size? These questions about size can leave your head spinning – but they are some of the most important decisions regarding home design. A too small home can leave you feeling cramped; While a home too large will not be comfortable or cozy – perhaps leaving you with the feeling that you are living in a museum or office building.

As a guide to determine how much space you should design for your family, I have created a variety of worksheets – which can be accessed in THIS POST.


4. HOW MUCH CAN WE AFFORD?

It’s the age old question: How much is this going to cost me? It is best to consider the financial aspects of home construction well before you fall too in love with a design. If you speak with a loan professional about what a realistic budget for your project is, you will be able to make better informed decisions as the design process progresses. If you know you will be working with a fairly strict budget, you likely won’t be looking at the granite selection for your counter tops. Better to know what you can afford than to choose those expensive finishes only to be told you will need to downgrade the quality to something cheaper.

Another benefit to determining building budget early is that you can plan your project in phases. Perhaps the entire shell can be built straight away, with the main living spaces finished – and the basement or upper level left to be finished when the budget allows, in the future.

I lay out tips on ways you can save money on your new build in THIS POST.


If you have worked through each of the four above questions, you are well on your way to laying the groundwork for the design of your future home.

For your convenience, I have laid out these questions in a simple, one sheet print out – available in the RESOURCE LIBRARY. Search for the Preliminary Home Design Worksheet – and keep it handy for when you are ready to start thinking about designing your dream home.


READER SHOWCASE: MINNA + SCOT’S HOME

You’re in for a treat today friends! The Reader Showcase is where I feature the homes and home projects that my readers have tackled. I am constantly amazed at the talent and varied styles that each person has to offer!

Today’s talent is no exception. I first met Minna on Instagram. She posted photos of her absolutely stunning home, The Little Plaid Cottage, which is plump full of character. She is super creative and her husband Scot is super handy. They make quite the duo. I think you will agree!

Minna, please tell me a little bit about your home:

I would describe our home as a cottage. It is a single story 1,430 square foot house that has lots of charm, including a large front porch, built in bookcases, a floor to ceiling rock fireplace, cedar beams on 12 foot ceilings, and a brick surrounded cook-top in the kitchen.

It was built in 1991 on the outskirts of town, and sits on half an acre.

That front porch speaks to me. Looks like a great place to relax!

What is your personal design style?

If I had to define it, I would say cottage/farmhouse. I prefer to find interesting antiques to decorate with rather than just going to Target and buying the latest Magnolia pieces that are on the shelves. I love Joanna Gaines as much as the next person, but I don’t want my house to look exactly like everyone else’s house.

Antiques have history and tell a story. They have stood the test of time and have a beauty all their own. I love displaying vintage finds in my home and plan to enjoy them for years to come. I also love decorating with plaids & buffalo check, and tend to gravitate towards wreaths and white pitchers.


Explain your favorite remodel projects. What was done to each space?

We have done quite a bit of work to our current house during the 7 years we have lived here!

KITCHEN

Our kitchen has by far been my favorite remodel project to date. We started off with popcorn ceilings, a pantry cabinet that was limited to opening the full way because it would hit the oven handle, chipped tile counter-tops, original builder grade appliances, and a shallow kitchen sink with a rotted cabinet below.

Kitchen before. Charming, but very ‘vanilla’


The first thing we did was add a walk in pantry. We were able to carve a bit of space from the attached garage and include it in the kitchen. My husband did all of the framing, finishing, painting and even built custom shelving. I found some fabric from Hobby Lobby to use on the back wall in lieu of wallpaper. We installed matching tile and added a screen door, which may seem an odd choice for a kitchen – but it works for us for two reasons: 1. It adds charm + character, and 2. It forces me to keep the things inside clean and organized!

My goodness what a great idea! The pantry looks so organized.


I found a farm sink on Craigslist for $50. The price was low because it had a chip on one corner, but I knew that we would be under-mounting it and that the counter material would hide the chip. The sink literally sat in my garage covered in a blanket for two years while we saved up for the remodel.

I can’t see the chip, can you?


To save money during the remodel, we decided to keep the upper cabinets and update them with crown molding and new doors. I knew that I wanted glass for the upper cabinets, but also wanted to do an interesting design. My husband built a triple X design on the doors and we used wavy glass, which I love because it reminds me of something you might find in an old home.

Custom cabinet design. I love the look!


We also removed the middle cabinet door above the fridge so that I could add some warmth and contrast with baskets. I lined the backs of the glass front cabinets with contact paper from Dollar tree.

My husband converted all of the bottom cabinets from shelves to drawers. It is so nice not having to get on my hands and knees to find a missing Tupperware lid in the back of a dark cabinet anymore!

Let’s all just take a moment and appreciate how lovely their cook-top is. Such a happy place to create meals!


We got an amazing deal on our quartz counter-tops and my husband cut and installed them without ever having done it before. I have to say, I am married to a perfectionist – and they turned out fabulous! Since the cabinets and counters are both white, I decided to make the back splash a contrasting color and found bluish gray Arabesque tile from Home Depot.

The tile is gorgeous, and I really love all of the neutral accessories!


The final part of the remodel was installing wood planks on the ceiling, which added so much character. We have a large skylight in the kitchen that is a wonderful feature. The ceiling height in the room is only 8 feet but the skylight opening extends to 12 feet! To draw the eye up I found bird decals online, which we affixed within the skylight. They add a special unexpected touch.

How’s that for whimsy? And a chandelier in the kitchen? Yes please!


My husband Scot DIY’d so much of our kitchen and it saved us a ton of money! We would  not have been able to afford to do a full kitchen renovation had it not been for all of his hard work!


DAUGHTER’S BEDROOM

Another area in our house that I had so much fun designing and decorating is our daughter’s bedroom. For Christmas this year we gave her a whole new room. We painted the walls with Sherwin-Williams ‘agreeable gray’, and my husband installed board and batten on an accent wall for contrast.

Her armoire and nightstands were painted with Sherwin Williams ‘cityscape’. The headboard was an incredible Black Friday deal from Walmart. We got it for a steal at $59! I shopped various other stores – including Target, H&M, and Hobby Lobby – to pull the decor of the room together.

Such a soft and comfortable looking space!

I am most pleased with the A-frame bookcase that my husband built for the room. It adds so much visual interest to the space and is so fun to style!

This bookcase is a stunner! Fun looking + functional = major win!


What would you like readers to know about designing and styling a home? Do you have any tips to share?

Think about what you personally like and are drawn to, and not necessarily what’s popular in the moment that everyone else can go to the store and buy. You are a unique individual created by God to shine and share your own creative talents with others.

Scot made this cute bench for Minna as a gift years ago

Don’t get stuck in a mold with everyone else. Be your own person and display what’s important to you and that which speaks to you. I believe Edith Schaeffer says it best: “This place should be expressing something of yourself. It should be communicating something of you to your visitors, but it should also satisfy something within you. You should feel ‘at home’ here, because you have made it home with something of yourself.”


Do you have any remodeling / decorating plans for the future?

My immediate plans are to style the small guest bedroom, which used to be our son’s bedroom before he moved out. We also want to scrape the popcorn texture off of the ceiling in other rooms in the house. It’s a messy job, but it isn’t difficult and it really does make a dramatic difference!

Outside, we have plans to paint the front porch once the weather warms up and remodel our back patio – including the addition of an outdoor kitchen and fireplace.

This space is already pretty amazing. I can’t wait to see the new additions!

A few months down the road, I would love to tackle a master bathroom remodel. We tend to focus on one project at a time and at our own pace.

We are enjoying the fruits of our labor in this house and though we don’t have plans to move any time soon, I can envision us living in a smaller one or two bedroom home on a larger piece of property sometime in the future.


Thank you so much Minna and Scot for sharing your wonderful home with all of us! I encourage all of my readers to go check out Minna’s Instagram account HERE to watch the progress while she and Scot continue to remodel and make their house into a home that reflects their personality and style.


Now it’s your turn! Have you been putting your personal touches on your home? Maybe the entire house isn’t finished, but you are particularly proud of one room – I would love to see, and share with my readers!

If you are a blog subscriber, you are eligible! Simply email photos and a brief description to angela@arrowhillcottage.com for your chance to be featured!


FRONT ENTRYWAY DESIGN IDEAS

A front entrance for guests is a great feature to add to any home. It doesn’t need to be a large space, but having it laid out well is important. Today I am sharing the front entryway design ideas I have for Arrow Hill Cottage.

Although our home will have an attached garage, and our family is most likely to enter and leave in that direction, I wanted to make sure to include a straightforward front entrance – where we expect visitors to enter. I’m not sure about you, but our garage has a tendency to become cluttered and dirty far faster than any other space we own – and we don’t want our visitors to experience our day to day.


ENTERING FROM OUTSIDE

As you can see in this image, the front door will have a prominent position. Although the house is not symmetrical, your eye is drawn to the small gable above the door.

creating a charming front entryway

In case you noticed… yes, I am still #teamplanter, and it remains as part of the design, at least for now. If you have no idea what I’m talking about – go ahead and visit THIS POST to learn all about the debate.

The large stone pillars and double columns frame the view.  I’m sure there will be some sort of feature light fixture here also, but I haven’t made any decisions on that yet. And yes, I am dreaming of a light blue bead-board ceiling for the porch. Love.


cottage front entrance. Covered porch with sweet and simple front entry

I have chosen a solid wood door. Because there will be windows directly next to and above it (transom), I felt that including a smaller pane of glass within the door itself would complicate the arrangement. The windows should provide plenty of natural light (this wall will be south-west facing)


INSIDE THE ENTRYWAY

Stepping through the door, you are welcomed with a space approximately 6 feet deep by 12 feet wide. The room is partitioned from the dining room by a pair of built-in cabinets and columns.

front entryway with custom built ins and columns used to divide space

We will likely have our builder or cabinet maker create these cabinets and columns, but This Old House wrote a fantastic post about how you can make this a DIY project. I purposely chose to offset the built-in slightly from the alcove since the wall finish and the cabinet finish will be different. This will help eliminate a clumsy transition from cabinet to wall. The baseboard trim will help to tie everything together.

front entryway design ideas for our new home. Simple white bench in front entryway

As I mentioned in this post, we have found that with fewer closets we are less likely to hold onto items we don’t need. This entry is indeed the perfect opportunity to live that theory. Because most of our family’s shoes, coats and bags will be coming in through the back entry / mudroom, we won’t need much for storage near the front entry. Instead of using the recessed space as a closet, I am opting to leave the alcove open and instead will incorporate a bench with simple hooks and a shelf above.

simple front entryway design ideas

This alcove also lends itself to the inclusion of a feature wall. At the moment, I am thinking that beautiful rustic barn wood would serve as the perfect surprise. The feature wall will serve as a backdrop for a family photo gallery.

gallery photo wall in front entryway. front entryway design ideas for our new cottage

This post, from the blog Ivory Lane , has given me a ton of inspiration for the entryway gallery. I love the simple nature of the metallic frames, white picture mats, and black and white images.


ACCESSORIES + DETAILS

On top of the small shelf above the coat hooks, I envision some cute artwork that represents our family. These number squares are amazing.

cute front entryway decorations

image source


I also love sentimental signs and would love to work something like this into the entryway space.

front entryway sign idea. This simple phrase is beautiful and would be perfect in the front entryway of a home

image source


Opposite the bench area is where I envision our piano being placed. We own a low grade piano that is natural wood and wood grain veneer at the moment. I would love to paint it a soft gray color and decorate it with special accessories – such as the vintage green cottage window that I recently purchased at an antique store. I know there is some debate about painting pianos, but they make it look so easy on Pinterest, and I am really intrigued by the results.

piano positioned in front entryway

Nobody in our family is a concert pianist, but we do enjoy having a piano to tinker around on. In this location it is available, but set aside so that it isn’t in the way of other daily activities.

For the center of the room I would like to find a special light fixture. I am thinking something with a metallic finish, probably a hanging pendant.

front entryway design ideas. new home design

Perhaps something from this collection would work well.

wire framed pendant light fixtures for the front entryway. Front entryway design ideas for our new home

image source

The floor will require some sort of durable rug that will mostly protect the wood floors. I love the idea of a black and white patterned rug.

view of small and simple front entryway

This website seems to have a wonderful selection of rugs to choose from.


decorative features for our front entryway


ADDITIONAL ENTRYWAY VIEWS

And now for a few more views of the entryway. First, a view from above – one that nobody will ever experience in real life. It shows the overall space well.

front entryway floor plan layout


A view from the kitchen (standing near the stove) looking toward the entry. You can see the kitchen design in this post. The space between is the dining room, of which I am still working on designing. The only thing I know for sure is that I want to include some sort of antique hutch on the long wall.

view of front entryway from the kitchen


Another room that is still a blank slate is the living room. Besides knowing that I want to include a large sectional sofa for our large family, there are still a lot of decisions to be made here. This is a view of the entryway as seen from the living room. Again, that large open space will eventually house our dining table.

front entryway design ideas. open concept floorplan layout

I am really loving how the main level is laid out. The flow seems like it will work well for our family. In this image you can see the stairs leading to the bedrooms (up) and the family room (down). That blank spot at the landing is where the largest window of the house will be positioned. I’m excited to see the design of the stairs come together.

Maybe I will work on that next!

UPDATE: Our floorplans changed quite a bit since this was originally posted. You can see our revised design HERE.


PIN THESE ENTRYWAY DESIGN IDEAS

feeling inspired? Be sure to save this post for later!

front entryway design ideas. small space design solutions for your home. How to create a simple, small entryway design for your home

COLONIAL HOME STYLE ELEMENTS

Learn about the main elements of the Colonial home style in this article. The history of the Colonial Home is important to the fabric of America.


Colonial Home exterior

image source

Welcome to another installment in the ELEMENTS OF HOME series. Each month I showcase a different residential home style here on the blog.

It is my hope that this information teaches you a little something about each style. In addition, I believe that these guides can be useful if you are designing or searching for a new home.

Today I overview the Colonial home style. I include the history of the style and what makes it unique.


HISTORY OF THE COLONIAL HOME STYLE

The Colonial home style is traced back to England, where most of the U.S colonists emigrated from. A large portion of London burned in the year 1666. After the disaster, several architects influenced the city’s reconstruction.

British architects Christopher Wren, James Gibbs and Robert Adam were at the forefront. Their combined architecture was based partly on Roman and Greek ruins. Therefore, influences such as geometric proportions and large columns are seen in Colonial home design.


Colonial Home Style

image source

Most of the original Colonial homes built in the early years have been remodeled. Others are used as historic examples, as museums for example.

It is far more likely that the Colonial homes you see today are Colonial Revival. In other words, they were made to resemble their ancestral counterparts.

Between the late 1800’s and 1950, there was an increased interest in the architecture of early colonists. Because of this, many Colonial Revival homes were built – using more modern materials and amenities.

In this article, I discuss the elements of both the original Colonial homes and their more newly constructed counterparts.

White Colonial Home with black door

image source

LOCATION OF COLONIAL HOMES

There are examples of the Colonial style dotted throughout the country.  Slight variations were developed to withstand environmental elements. These variations were each given their own names.

Most Colonial homes are concentrated in two main regions, the Northeast and the South.  For the purposes of this installment, I focus on the New England Colonial style found in the Northeast region.

Historic Colonial Home

image source


SIZE OF A COLONIAL HOME

The original New England Colonial homes were built primarily during the years 1630 to 1700. They were modest in size and began as one story structures.

As more family members immigrated to the area, a second story was typically added. The two rooms on the main level (kitchen and living space) were then complemented by two upstairs bedrooms. A central stairway and large fireplace divide the rooms on each level.

One story Colonial home

image source

Although the size of the Colonial home increased as construction techniques improved, they continued to retain a compact rectangular form.

Colonial Home floor plans

image source

EXTERIOR TRADEMARKS OF A COLONIAL HOME

TWO STORY DESIGN: Typically, the living spaces are located on the main level and the second level is reserved for bedrooms.

Colonial homes feature steeply pitched roofs. The pitch is essential for shedding heavy snowfall. Dormers are  included in the more contemporary Colonial Revival homes.

Colonial Home with dormers

image source

SYMMETRY: The facades of Colonial homes are almost exclusively symmetrical in nature. For example, if you were to draw a line down the center of the house, the left side would be a mirror image of the right side.

Typically the door of a Colonial Home is located in the center. Two windows are evenly placed on either side of the door on the main level.

The second level generally features five windows. Each window is positioned above it’s main floor counterpart. A central window is immediately above the door. In addition, the fireplace is also commonly found in the center, dividing line, of the house.

Colonial Home with simple front door

image source


WOOD CLAPBOARD SIDING: Wattle and daub cladding was the common practice in England at the time. The American colonists made use of readily available local timber. This meant that their homes were typically clad in white pine instead.

The clapboards offer the functional aspect of shedding rainwater.

Colonial Home front porch

image source


CENTRAL ENTRY DOOR: Colonial homes almost always feature a central entrance point.

The door is generally flanked by a window on either side and/or a transom window above. The original Colonial style homes did not include a porch or portico. In contrast, both were commonly added for Colonial Revival homes.

Colonial Home front door

image source


INTERIOR SPACES OF A COLONIAL HOME

The interiors of a traditional Colonial home had small windows and low ceiling heights. Because of this, most of the interiors were rather dark.

In contrast, Colonial Revival homes many times feature bay windows or a larger window groups to allow more natural light.

Colonial Home living room interior

image source


Colonial homes are often filled with simple furnishings in muted earthy colors. The Windsor chair is a common symbol of this home style. They can be found in more modernly renovated homes as well.

Colonial home dining room with fireplace

image source

COLOR SCHEMES FOR COLONIAL HOMES

Paint colors essential to early Americans were mostly those derived from iron oxide. Colors such as Yellow Ochre, Red Ochre, Raw Sienna, Black, Burnt Umber, and Terre Verde were common.

These earthy tones were somewhat bold, though faded rather quickly.

Colonial Home paint colors

image source


Colonial home entry foyer

image source


Colonial Revival exteriors are very commonly clothed in white. This crisp look is accented by contrasting black on many occasions.

Simple white colonial home style

image source


COMMON FEATURES OF A COLONIAL HOME

Of course, no two houses are exactly alike.  But there are design elements that are seen again and again in Colonial homes, such as these statement features:


LARGE FIREPLACES & CHIMNEYS: The most efficient way to heat the homes during the cold Northeastern winters was with a large, central fireplace.

In addition, fireplaces were also used for cooking purposes. These fireplaces were very important in the early days and remain useful and fashionable in Colonial homes of a later era.

Colonial home fireplace

image source


Colonial home exterior

image source


SMALL PANED GLASS WINDOWS: Glass was expensive and difficult to find. Because of this, and the primitive glass-working techniques, the glass was set in smaller panes.

As a result, windows were later flanked with operable shutters, which would be closed when bad weather arose.

Newly constructed Colonials today will many times include stationary shutters, which serve an exclusive decorative purpose.

Colonial home divided light windows

image source


INTERIOR DECOR FOR COLONIAL HOMES

The early colonists believed in a simple lifestyle. Because of this, the pieces they did include inside their homes had a purpose for everyday living. They added little to nor adorning decorations to their interiors.

Colonial home interior

image source


Traditional colonial home dining room

image source


Traditional furnishings work well in Colonial Revival homes, as do items that are simple in nature. Interior wainscot paneling is used as a simple decorating technique, for example.

Colonial style chair

image source


FAMOUS COLONIAL HOMES

red Colonial home

The Home of Rebecca Nurse | 1678 | Salem Witch-trial accused


Colonial Home with central fireplace

Orchard House | 1690 | Home of ‘Little Women’ author Louisa May Alcott


Original Colonial home

Jethro Coffin House | 1686 | Oldest surviving house on Nantucket


INSPIRING COLONIAL HOMES FROM AROUND THE WEB

These classic homes showcase the Colonial home style well. Take a closer look!

Colonial Home Interiors

Left to Right: 12 | 3

I hope you have enjoyed learning a bit more about the Colonial home style. If you are curious which residential style will be featured next month, stay tuned!

And be sure to check out the previously showcased styles here.


PIN THIS FOR LATER

Colonial Home Style