BUSY! If I could use one word to describe our lives at this moment in time, it would be this one. The days are speeding by so quickly it is as if they don’t even exist. With school, finishing the house, traveling for various activities and the holiday – we have been finding ourselves spinning.
To be honest, I genuinely hate being this busy. I do know that this is a season in our lives that will eventually pass. And with that knowledge, I am able to press on.
In the midst of all the craziness, our sweet {D} became a teenager! How have thirteen years passed so quickly? We are so proud of the young man he is becoming.
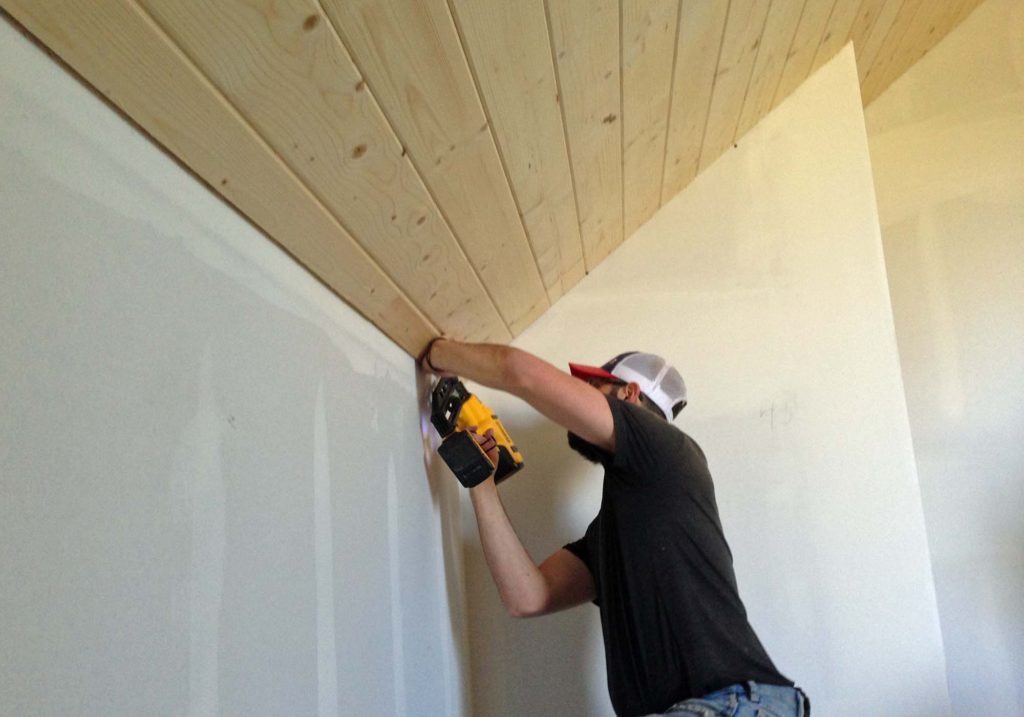
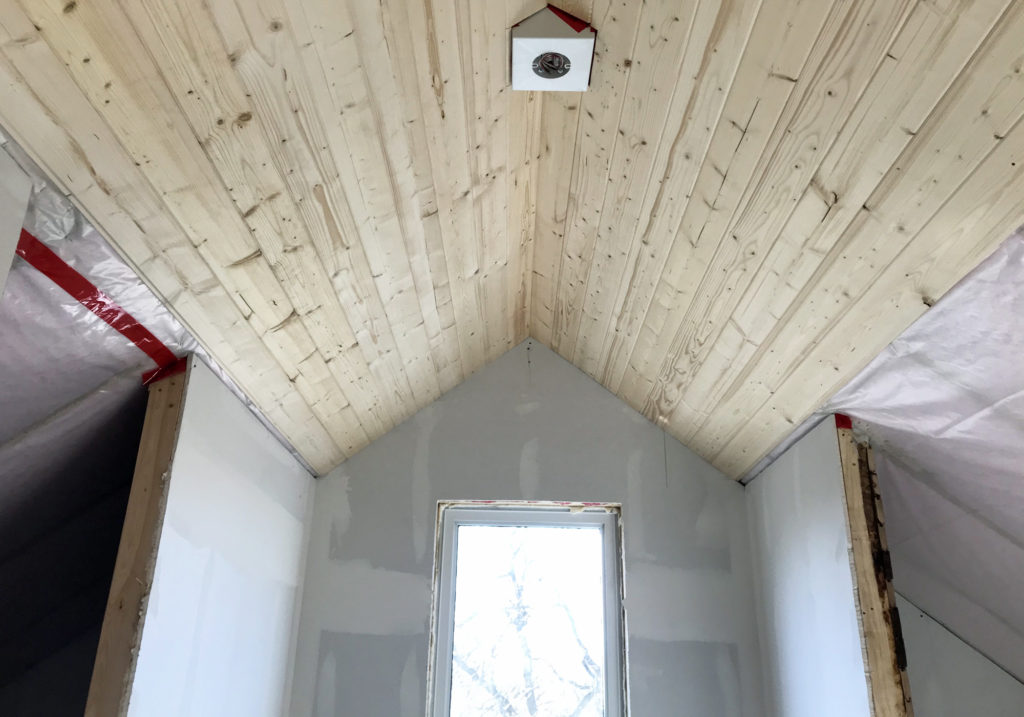
SEEING a lot of progress at Arrow Hill Cottage. Some of the bigger milestones that were hit this month include having our furnace hooked up to natural gas, installing the upstairs pine ceilings and the cabinets throughout the house, and getting a working bathroom!
We are doing a good chunk of the finish work ourselves, specifically all of the flooring. Craig already finished the basement vinyl plank floors and has moved onto the hardwoods. I am in charge of the tile work in two of the bathrooms. It is a bit slow going, but we are making progress and we can see a teeny tiny light at the end of this long tunnel.
MOVING our things to the new house! Though it isn’t quite ready for us to move into yet, we wanted to open up the rental farmhouse to the new renters before December first. Beating the snow and cold temps was also very important to us.
With our belongings safely in the garage, and the rental farmhouse all cleaned, we were invited to sleep during the night at Craig’s parents house. We are so fortunate to have family so near!
GIVING Thanks for all of our many blessings. We took a short trip to visit family over Thanksgiving. It was wonderful to be able to visit and just relax. Angela’s 95 year old grandma was able to join in the festivities and had so many amazing stories to share of her history.
The kids all had a great time with their cousins too, playing with play-doh and the vintage Nintendo game system.
This is just a glimpse at what our family has been up to. If you’d like a closer look, be sure to check out our weekly ‘mini vlogs’ on our family YouTube channel ARROW HILL FAMILY. Be well everyone!
MOURNING the loss of a wonderful woman. Craig’s grandma Violet passed away at the beginning of the month. The loss of a loved one is so hard. Her funny, dry sense of humor, her ability to make a feast out of a sparse cupboard, and her knack for putting together puzzles. All these things and more, we will miss about great grandma.
We are so thankful that our kids all have memories of great grandma Vi. Memories that they can take with them throughout their lives. The above photo was taken two years ago at Halloween. She always loved to see their costumes.
FINISHING football season.
Both {D} and {L} had wonderful football seasons! The league for {L} was for flag football, and he worked hard at learning the fundamentals of the game. The coaches had him playing a lot of different positions. Ultimately though, I think he preferred being quarterback. Though their team didn’t win any games, they did tie their final match.
The seventh grade team that {D} played on was extremely well rounded. They had a great season and were undefeated until the very last game, which they lost by one touchdown.
{D} was able to kick at any games that were played on a field with goal posts. He loved the opportunity, and of the thirteen extra points he attempted, he only missed the very first one! His team-mates were very encouraging as he honed his skills. He even splurged on a new pair of kicking cleats near the end of the season.
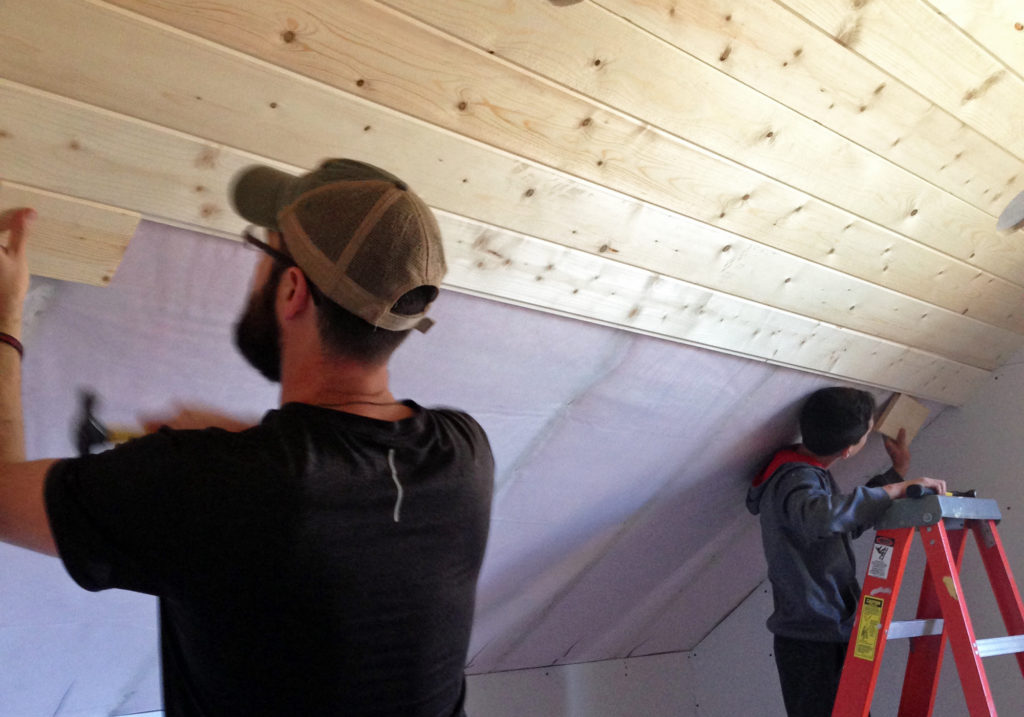
ADDING the finishing touches to our new house. We are now at the portion of our house build where we are putting in some ‘sweat equity’. Our main jobs include installing the pine boards on the vaulted upstairs ceiling, laying the flooring, and painting the walls.
There still seems to be a lot that needs to be done before we can actually move in, yet items are being completed each and every week. So, we know that we are getting closer.
LIVING in chaos. We were really hopeful that we would be moved into our new house by now. Since we aren’t, we are finding ourselves driving miles and miles every day back and forth between working on the new house and sleeping at our current rental house. We have things packed up in boxes and some of us are sleeping on mattresses on the floor.
I very much dislike feeling so scattered, but I do know that it is only temporary.
To add to the chaos, we decided to trade in both of our older vans. One was replaced with a car that Craig inherited from his grandma, and the other was replaced with a newer (2010) van. It was a little sad trading in the vans, especially Old Blue, who had been a part of our lives for over thirteen years. The new van is really nice though!
This is just a glimpse at what our family has been up to. If you’d like a closer look, be sure to check out our weekly ‘mini vlogs’ on our family YouTube channel ARROW HILL FAMILY. Be well everyone!
This no-fail apple crisp recipe is so easy to make and absolutely delicious! With simple instructions and basic, on hand ingredients, you can bring the taste of Fall to your table!
This post contains affiliate links. As an Amazon associate, I earn from qualifying purchases. See my full disclosure here
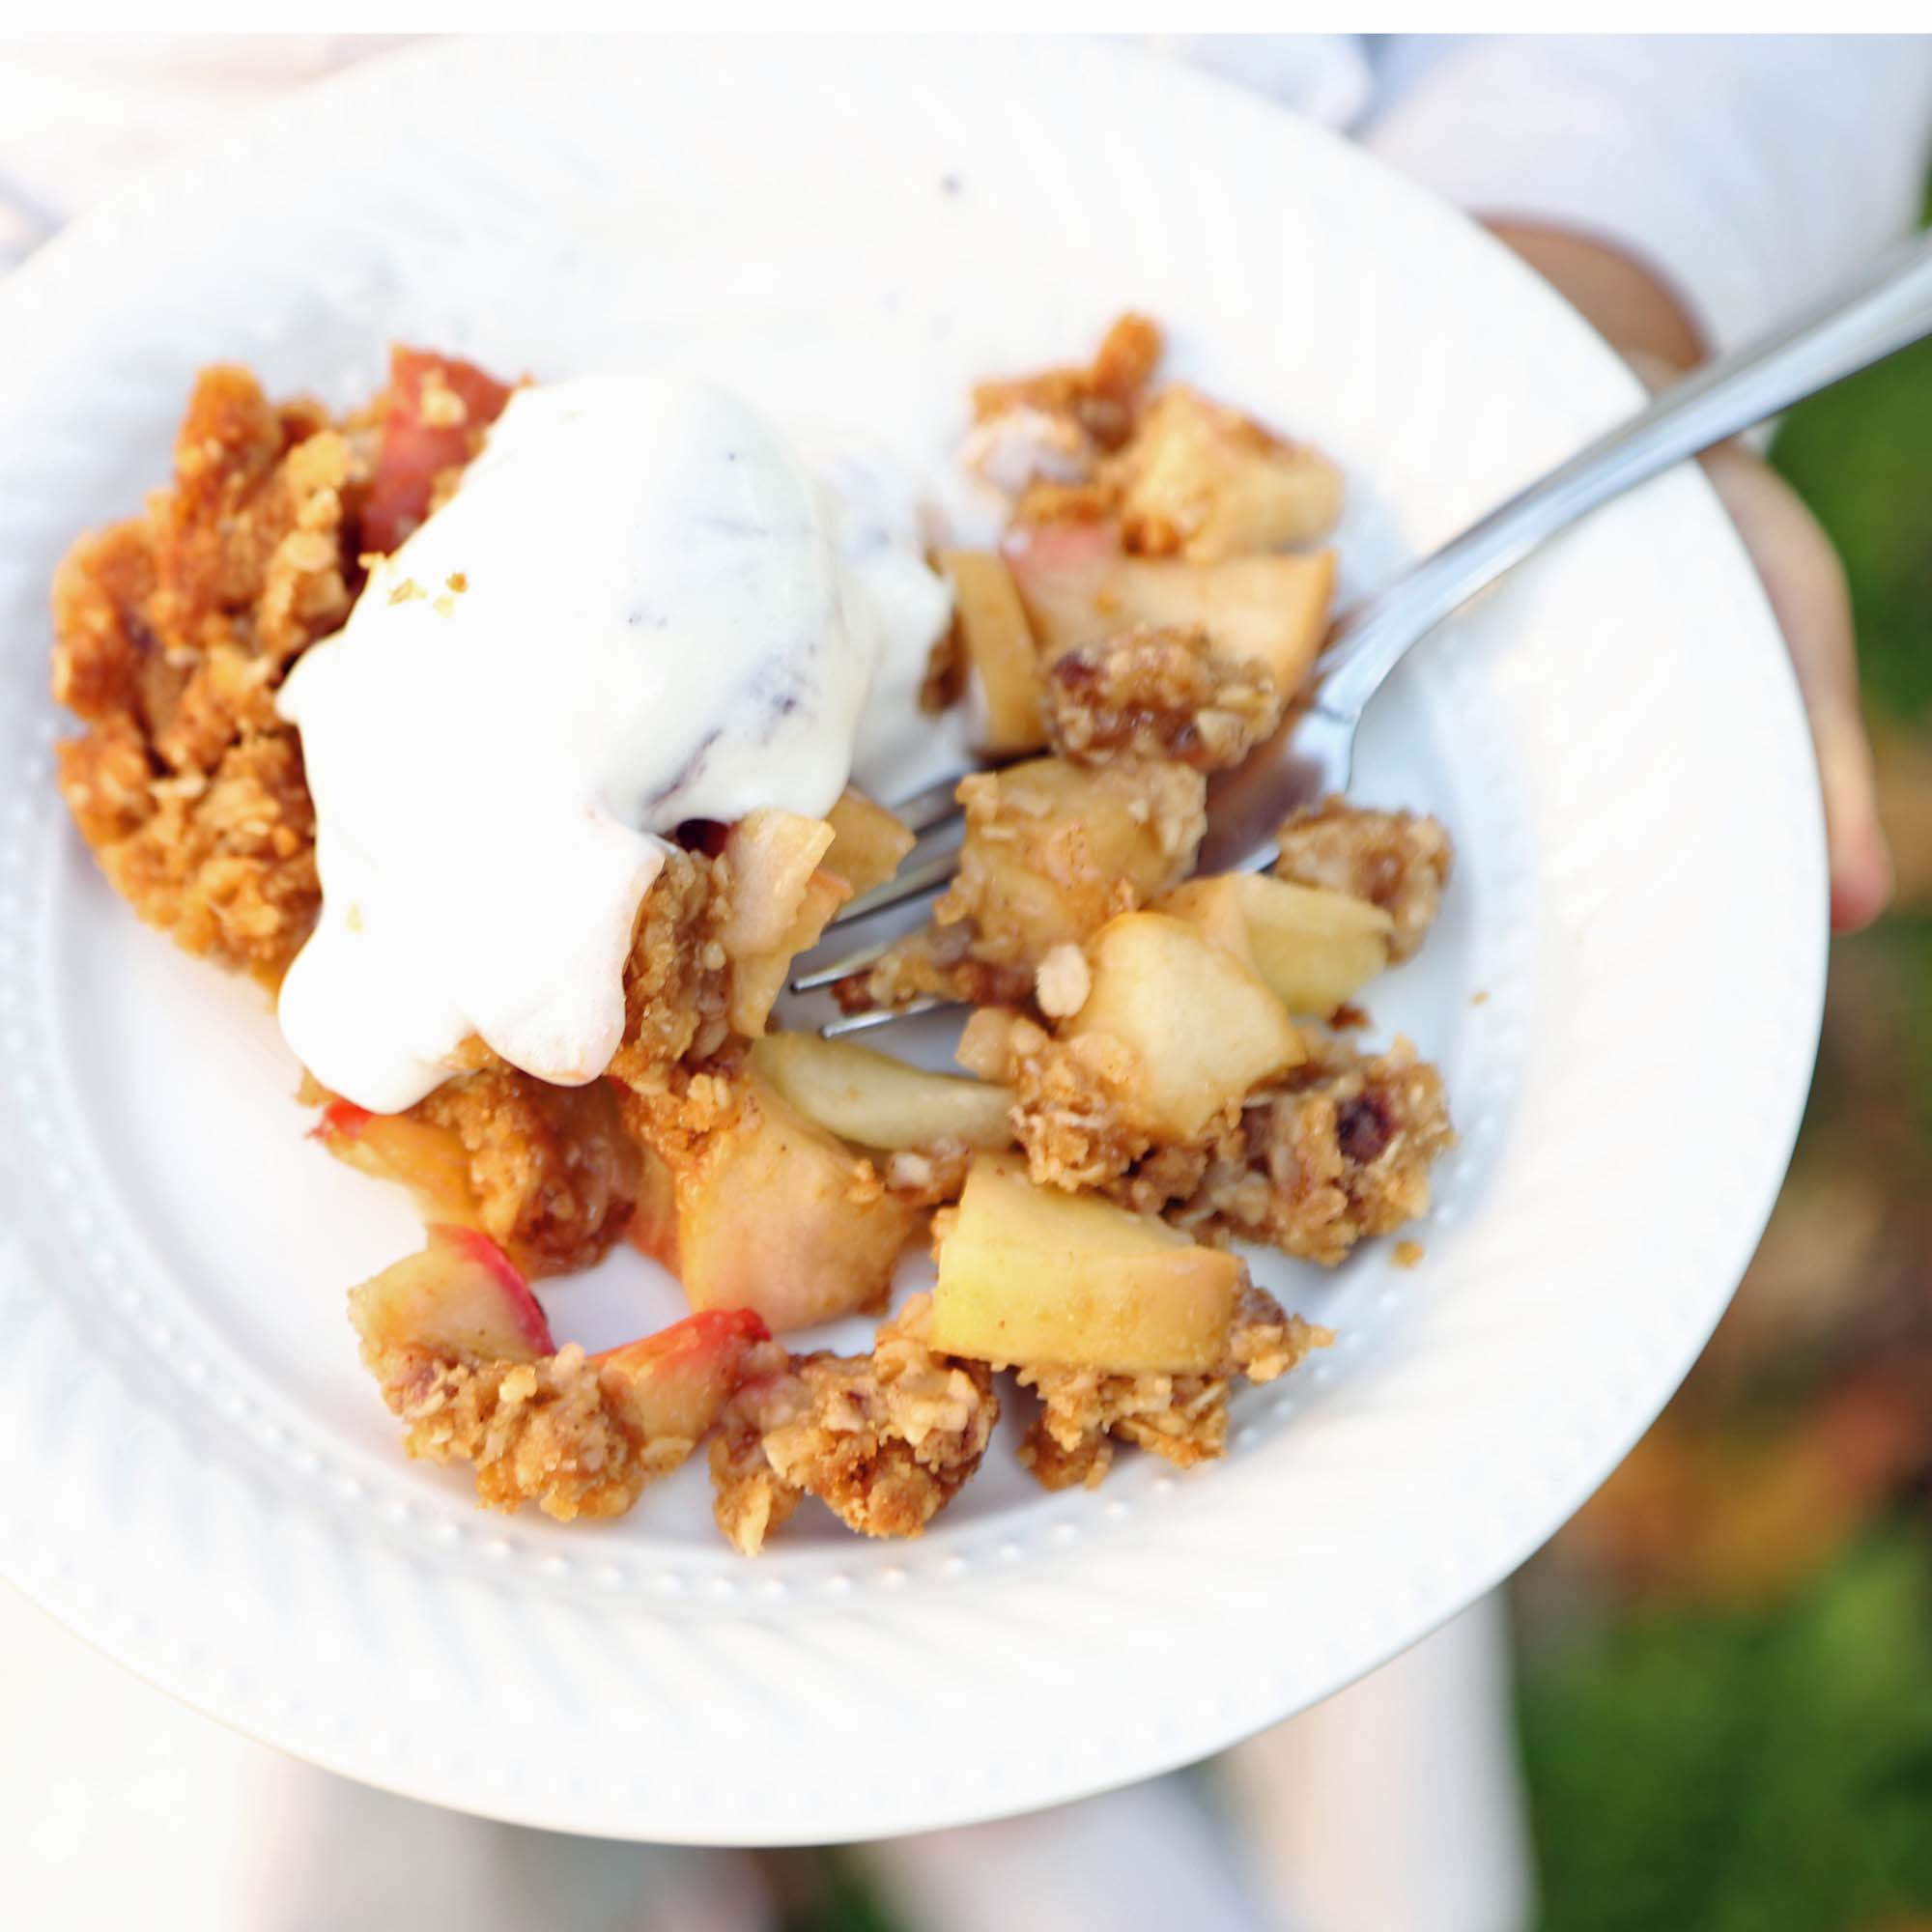
OUR FAVORITE APPLE CRISP
We aren’t big on desserts at our house. But when the Fall season comes around, it is a tradition to make apple crisp. Through the years I have tried many different apple crisp recipes, but this one is hands-down our favorite! It was originally included in a church cookbook, but no credit was given to the person who created it. We have since adopted it as our ‘secret family recipe’. I guess it won’t be very secret anymore!
I have a feeling that once you try this recipe it will be a favorite of yours also. The topping has a nutty, caramel flavor which pairs perfectly with the tartness of the apples.
HOW TO MAKE THIS SIMPLE APPLE CRISP
Follow this video tutorial for step by step guidance.
APPLE CRISP INGREDIENTS
It’s probably a sure bet that your pantry and fridge have most, if not all, of these ingredients on hand.
Ingredients
8 cups pared and sliced apples (About 8-10 apples, any type)
You are going to be shocked that something that tastes so amazing is so easy to create!
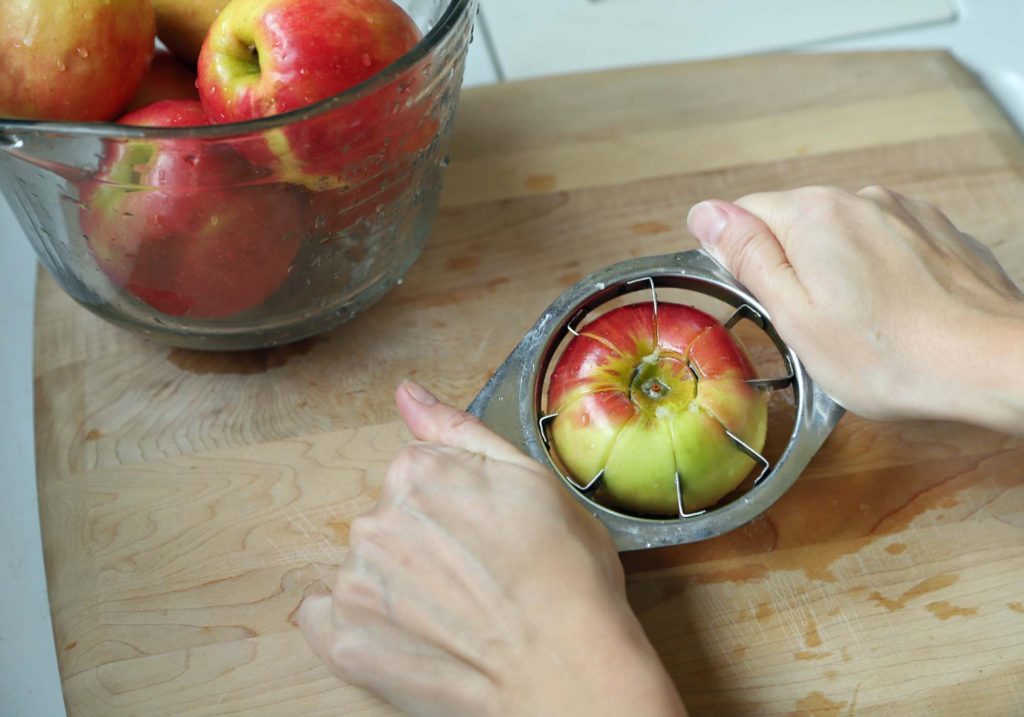
Wash all apples thoroughly
Core the apples. To speed up the process, I like to use a corer. Although you can if you prefer, there is no need to peel the apples
Slice apples into bite sized pieces. The thinner the slices, the more quickly they will cook through
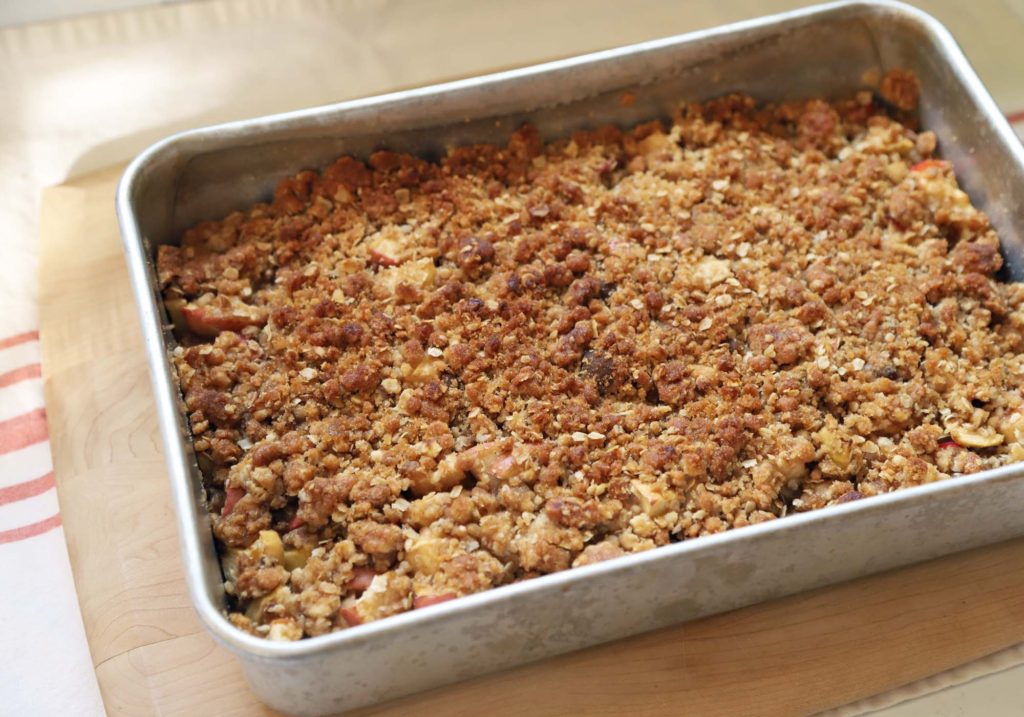
Place apple pieces into the baking pan
Mix together remaining ingredients in a separate bowl until blended
Cover apples with the topping mixture
Bake at 375 for 30-40 minutes, until apples are soft
PIN THIS FOR LATER
Although this is delicious any time of the year, you will definitely want to try this apple crisp dessert before the Fall is over. Treat your Thanksgiving guests to the sweet combo of apple crisp and ice cream!
Wash apples thoroughly, then core and slice them. Though you can peel the apples if you prefer, there is no need to do so. The thinner you slice the apples the quicker they will cook through.
Mix all remaining ingredients together in a separate bowl
Place apples in one layer, in a 9x13 baking pan
Pour mixed topping over apples and spread evenly
Bake uncovered at 375 degrees, for 30-40 minutes, until apples are cooked through
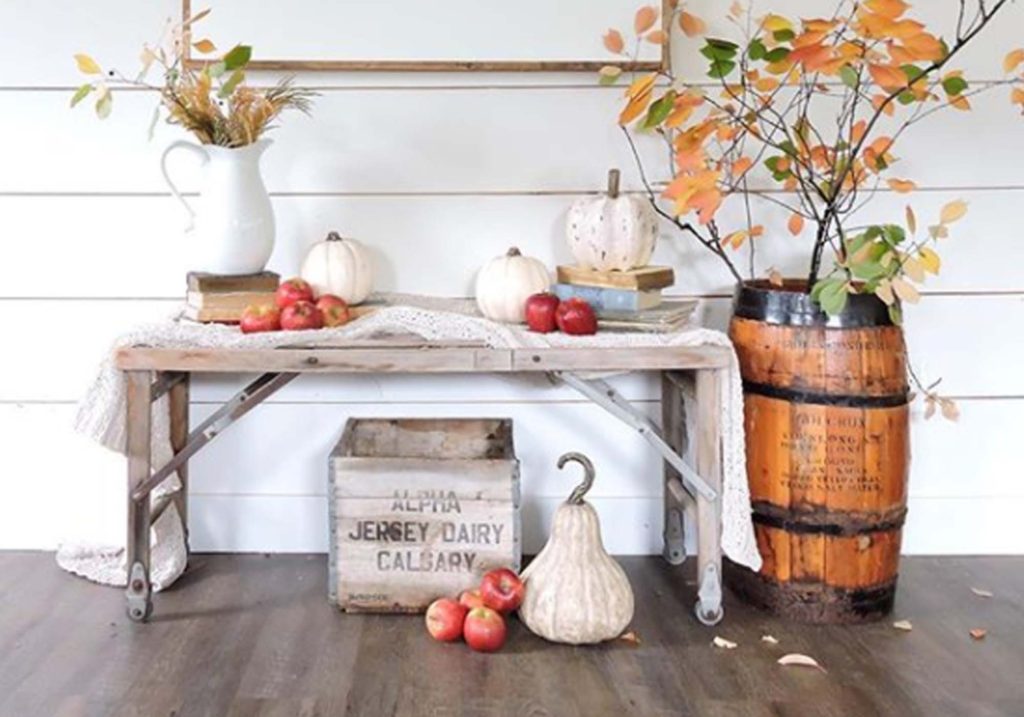
Gather inspiration from these simple Fall decor ideas. They will have you ready to celebrate the season!
It’s officially Fall here in the Midwest! It honestly feels like there was a switch that turned the weather from warm and sunny to cold and rainy. The change just happened so suddenly!
Fall is probably my absolute favorite season of all, and I am genuinely bummed that I likely won’t be able to decorate this year. With the building of Arrow Hill Cottage nearing completion, our time is split between site visits, choosing finishes, and packing up the rental house. Add in school activities, and we essentially have no spare time anything for extra, including decorating!
But, if YOU have time to decorate, I have some ideas for you today! Though these ideas have been on the blog before, I thought they were worth another share. Click on the link below each picture to read more details about the decor.
SIMPLE FALL DECOR DIY
Looking to create something unique to decorate your home? Try one of these simple DIY ideas.
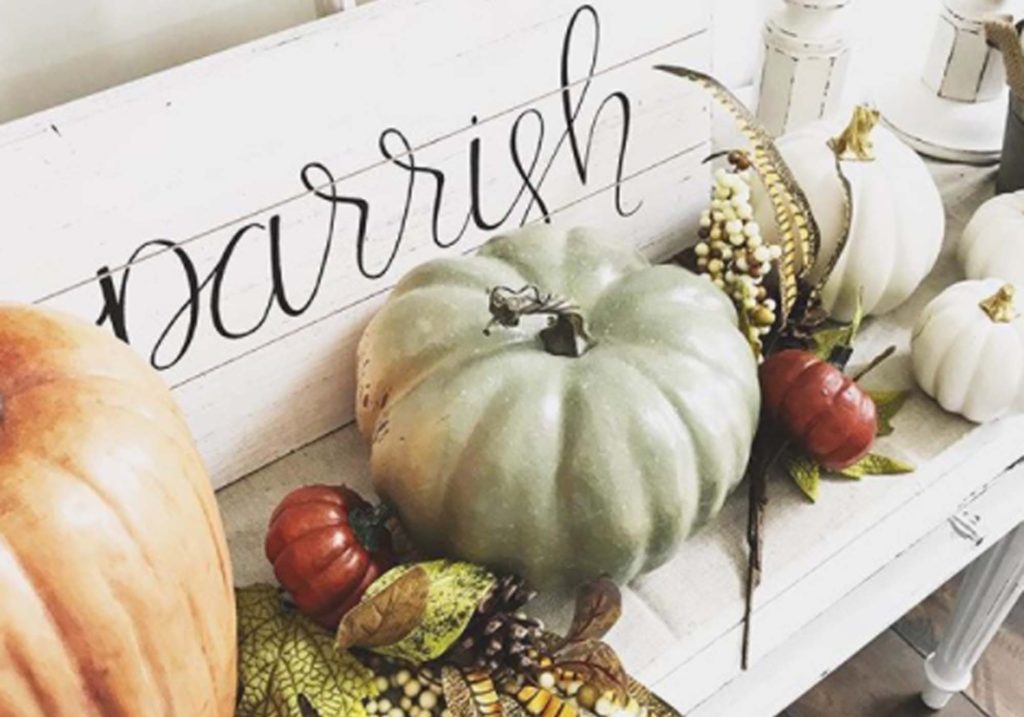
Natural Centerpieces
These natural Fall centerpieces would be the perfect accent to any tablescape, from now through Thanksgiving!
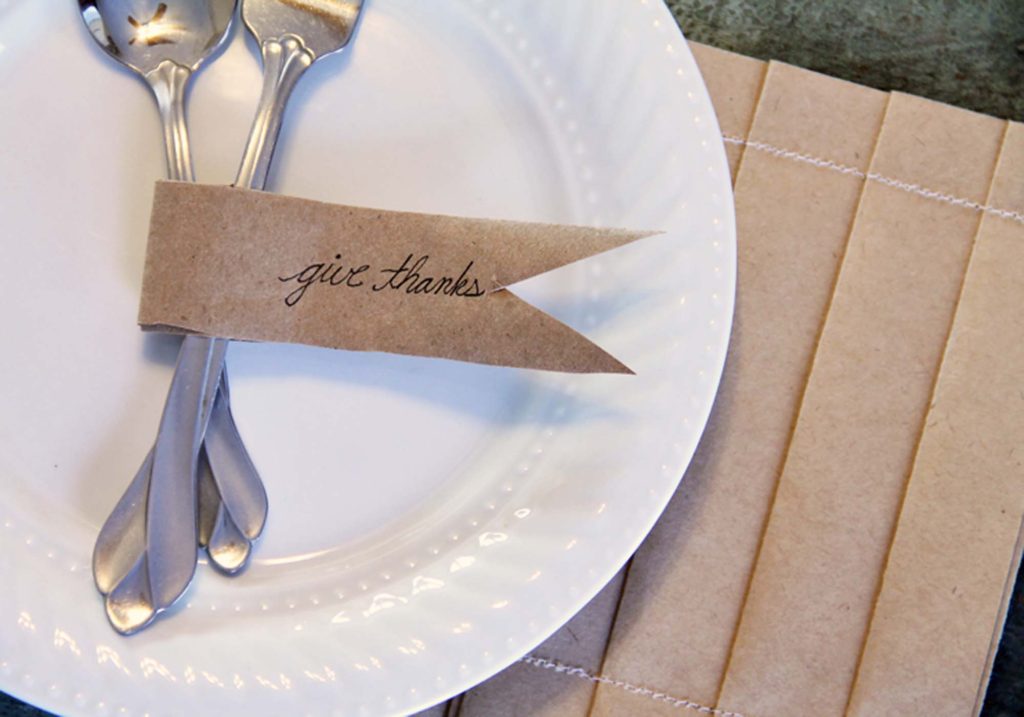
Even though it looks like a detailed and complicated piece, this pleated table runner can be made in just minutes. And for less than five dollars in material costs it is definitely worth a try.
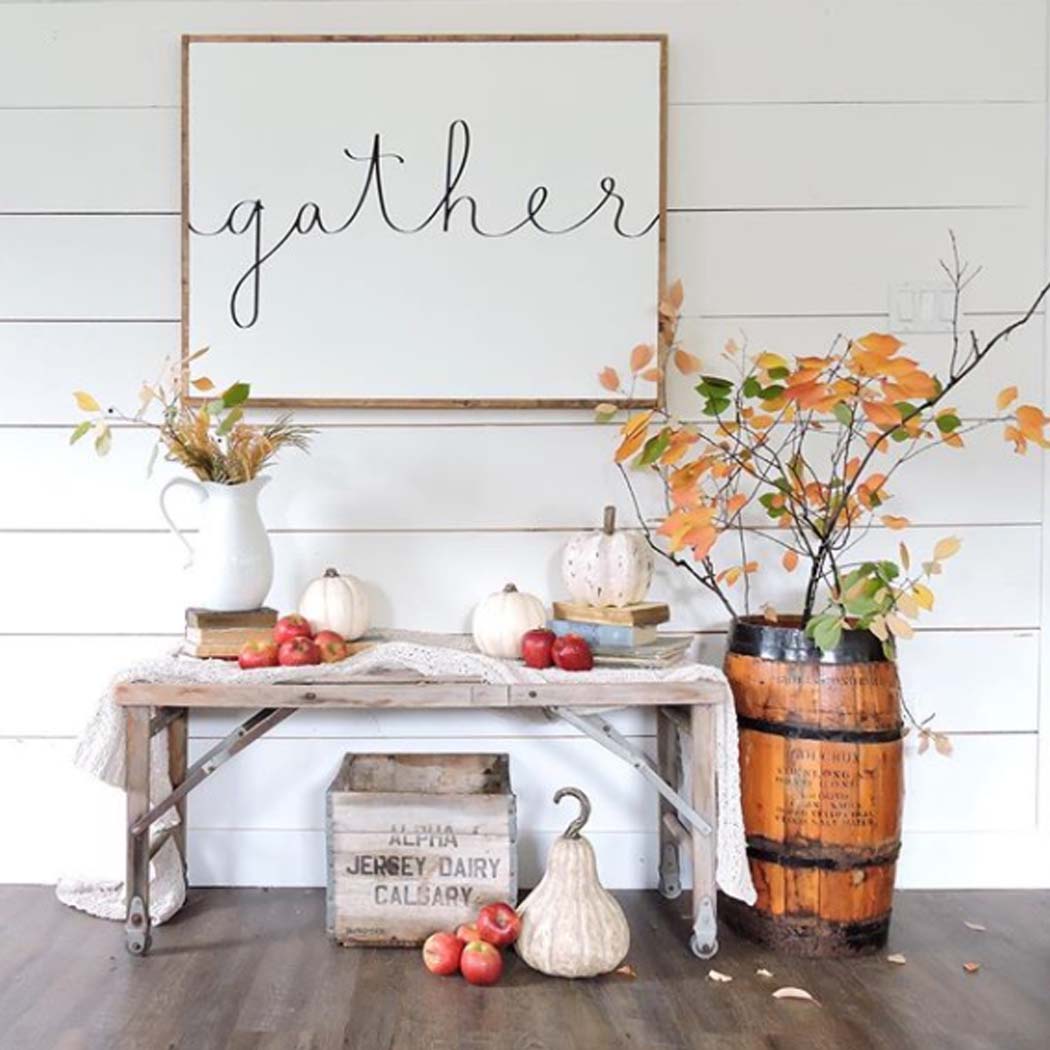
The start of Fall means that Thanksgiving is right around the corner. One of the most simple ways to decorate this Fall might just be printing out this sign!
STARTING a new school year! All the kids are once again at the same school. It’s fun that they span in grades from Kindergarten to Seventh, and yet all still be together and see each other off and on throughout the day.
{M} was extra excited for her first year of full time school! She has been pretty tired though, so we are careful to make sure she gets naps in on the weekend.
CELEBRATING birthdays. Both of the girls have September birthdays. We decided on a new tradition this year by taking each child out on a date, with just with mom and dad. This one on one time has been awesome and means so much more to the kids than any presents could!
The girls also were able to choose a small gift. They went for art supplies and snacks. Nice choices!
PLAYING a lot of football. Both {D} and {L} are in leagues. This is {D}’s first year of true tackle football. His real passion though is, of course, kicking! He has already had quite a few chances to kick extra points during the games, and hopes to get in a field goal or two before the season is over.
{L} is doing flag football and is learning the basic skills of the game.
In the evening, and on the weekends, Craig is busy with all three boys – outside playing two on two games. They have so much fun!
TAKING family pictures out at the new house. With the house starting to look a lot more like home, we thought it would be special to take our Fall family photos at the site.
We absolutely can not wait to live here! I’m sure we will cherish these pictures for many years to come.
This is just a glimpse at what our family has been up to. If you’d like a closer look, be sure to check out our weekly ‘mini vlogs’ on our family YouTube channel ARROW HILL FAMILY. Be well everyone!
Join me today as I share a full tour of our framed house! So much has happened since I last posted about the progress at the site, and I’m excited to show you everything!
Last we left off, on construction update no. 5, the second floor trusses were just being delivered to the site. Boy have things changed a lot since then!
PROGRESS IMAGES
Here’s a quick photo recap of all the little steps that have happened from then until now.
The large scissor trusses for the second floor were delivered. They are massive! With no dormers on the roof, they were able to get everything in place very quickly. In just a few hours they were ready to put on sheathing!
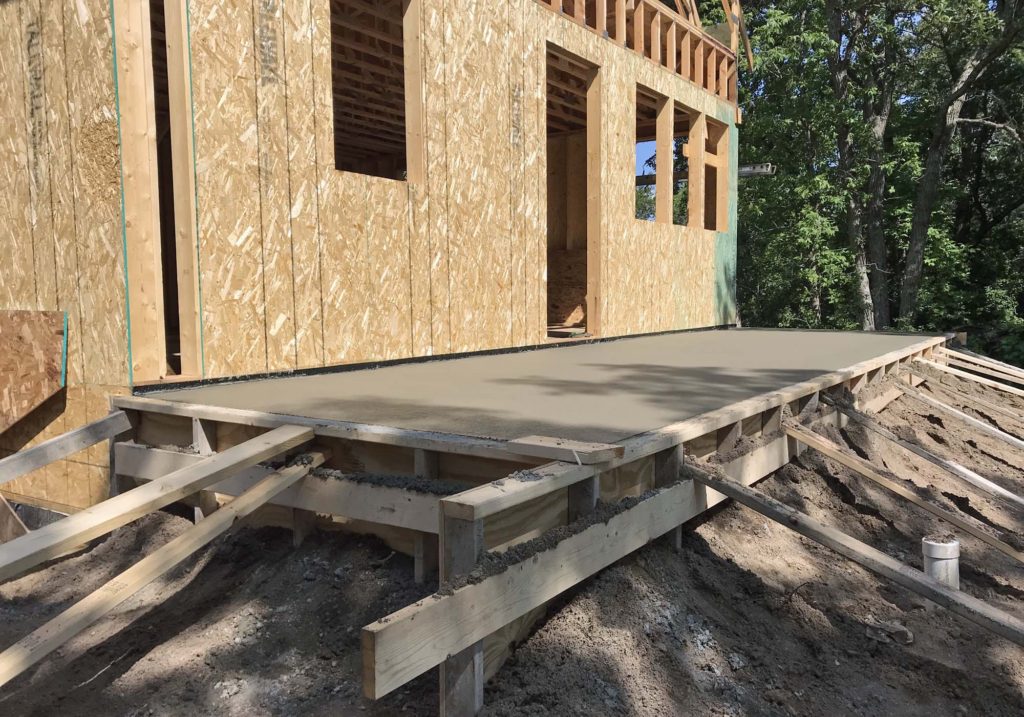
Next, the concrete for the porch was poured. They did beautiful work, and applied a broom finish. Because the posts needed to rest on the concrete, the porch floor needed to cure a bit before the next step.
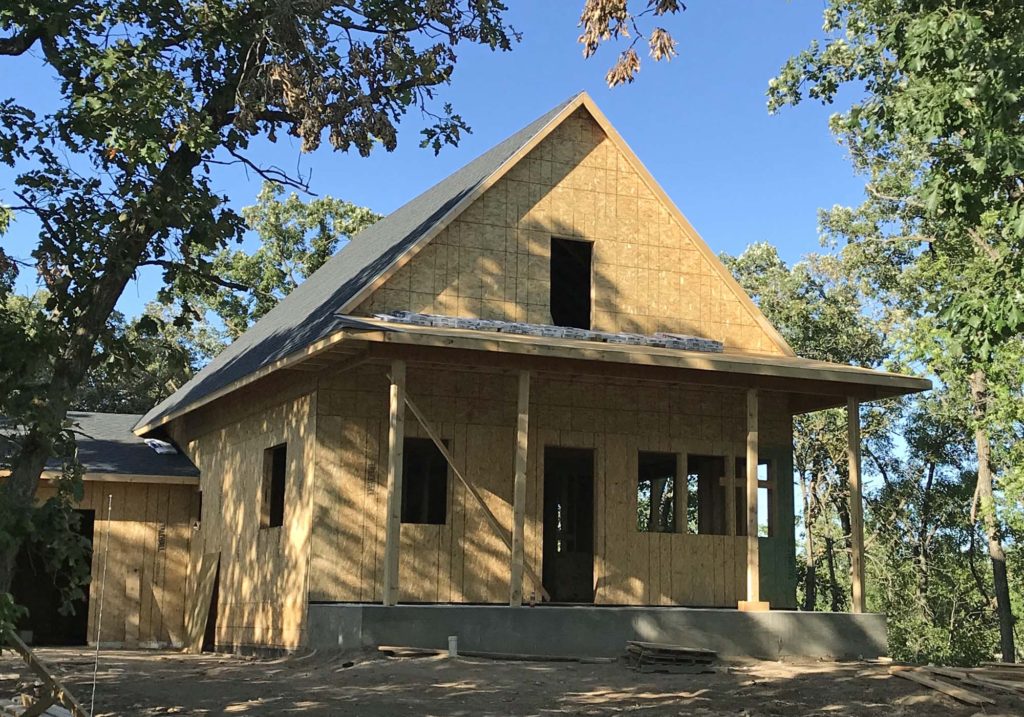
They finished sheathing the front gable end and began to set up the framework for the front porch. The posts are only temporary, until the thicker cedar posts are ready to be installed.
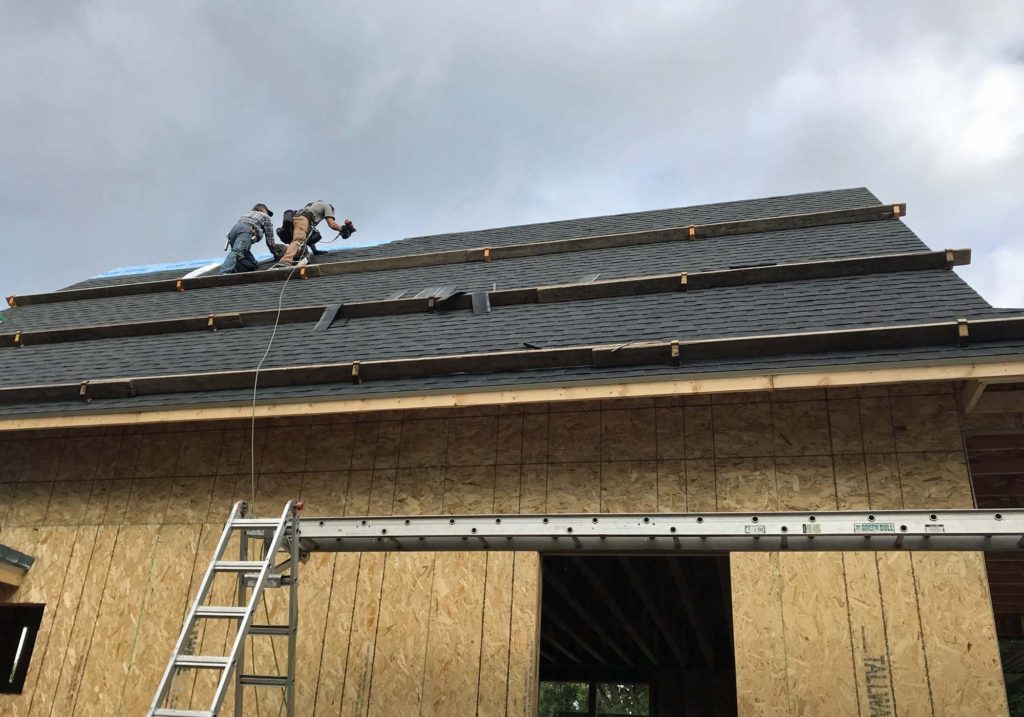
Once the porch roof was on, it was time for the shingles! We were more than excited for this step, as our area has experienced heavy amounts of rain for most of the Fall. It was finally time to get this huge asset of ours protected from the elements!
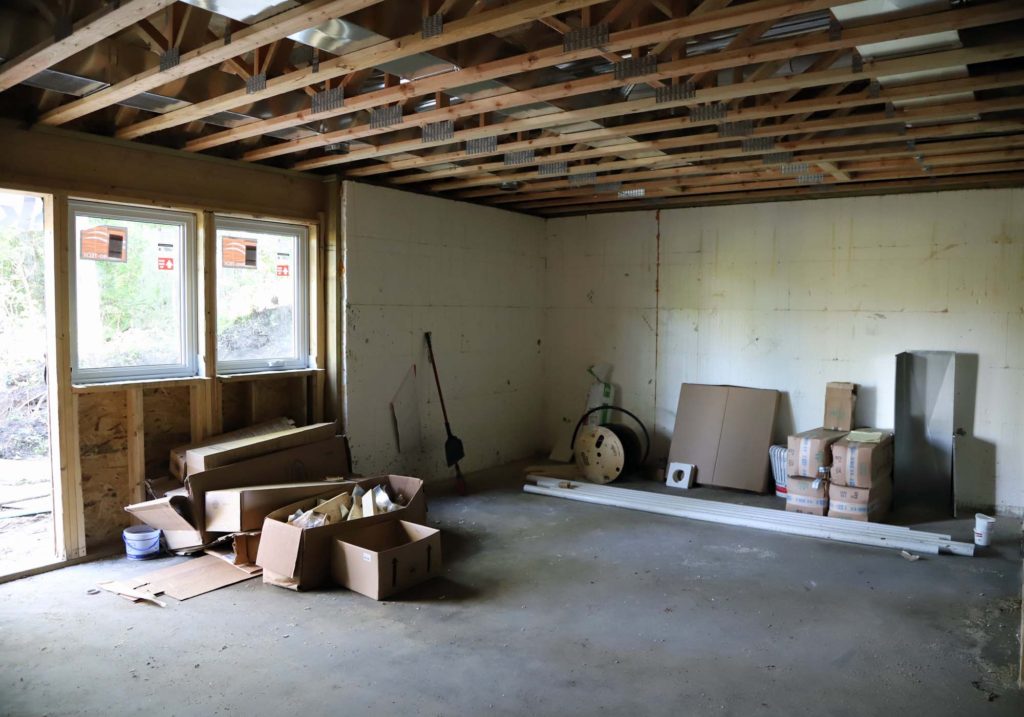
View from the front of the house with the shingles finished, windows framed out, and temporary porch posts. We will be doing some grading so that we don’t have so many steps to the porch.
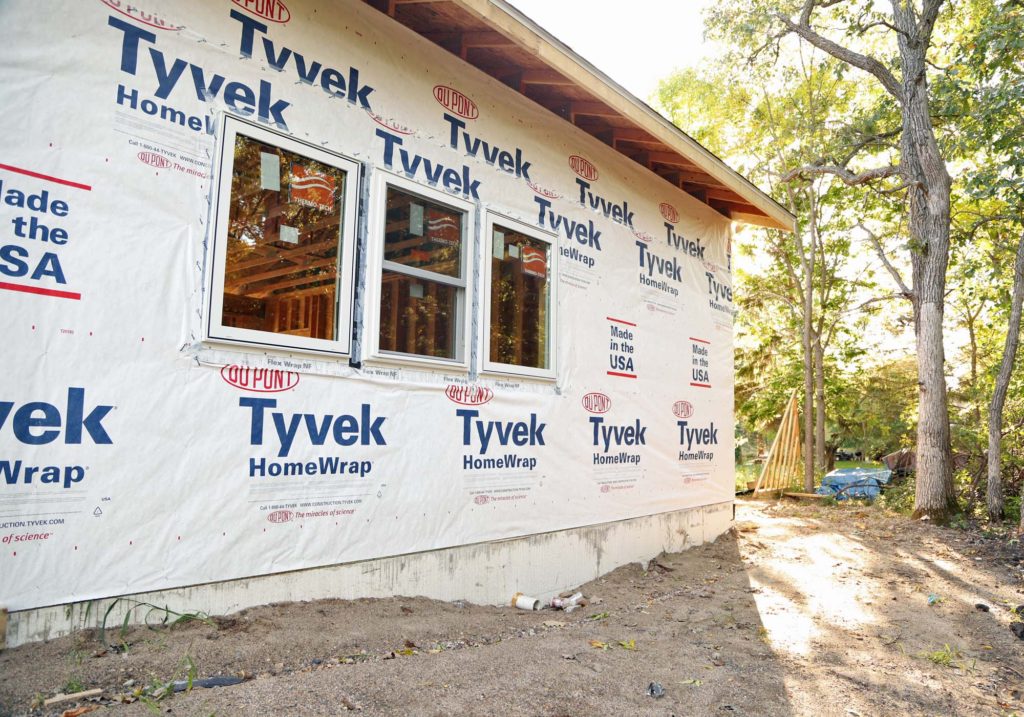
The waterproof wrap was added to the exterior, and the windows installed! This step really helped to brighten up the entire exterior of the house! Since our final siding and trim will all be white, it is fun to see it this way.
FRAMED HOUSE TOUR
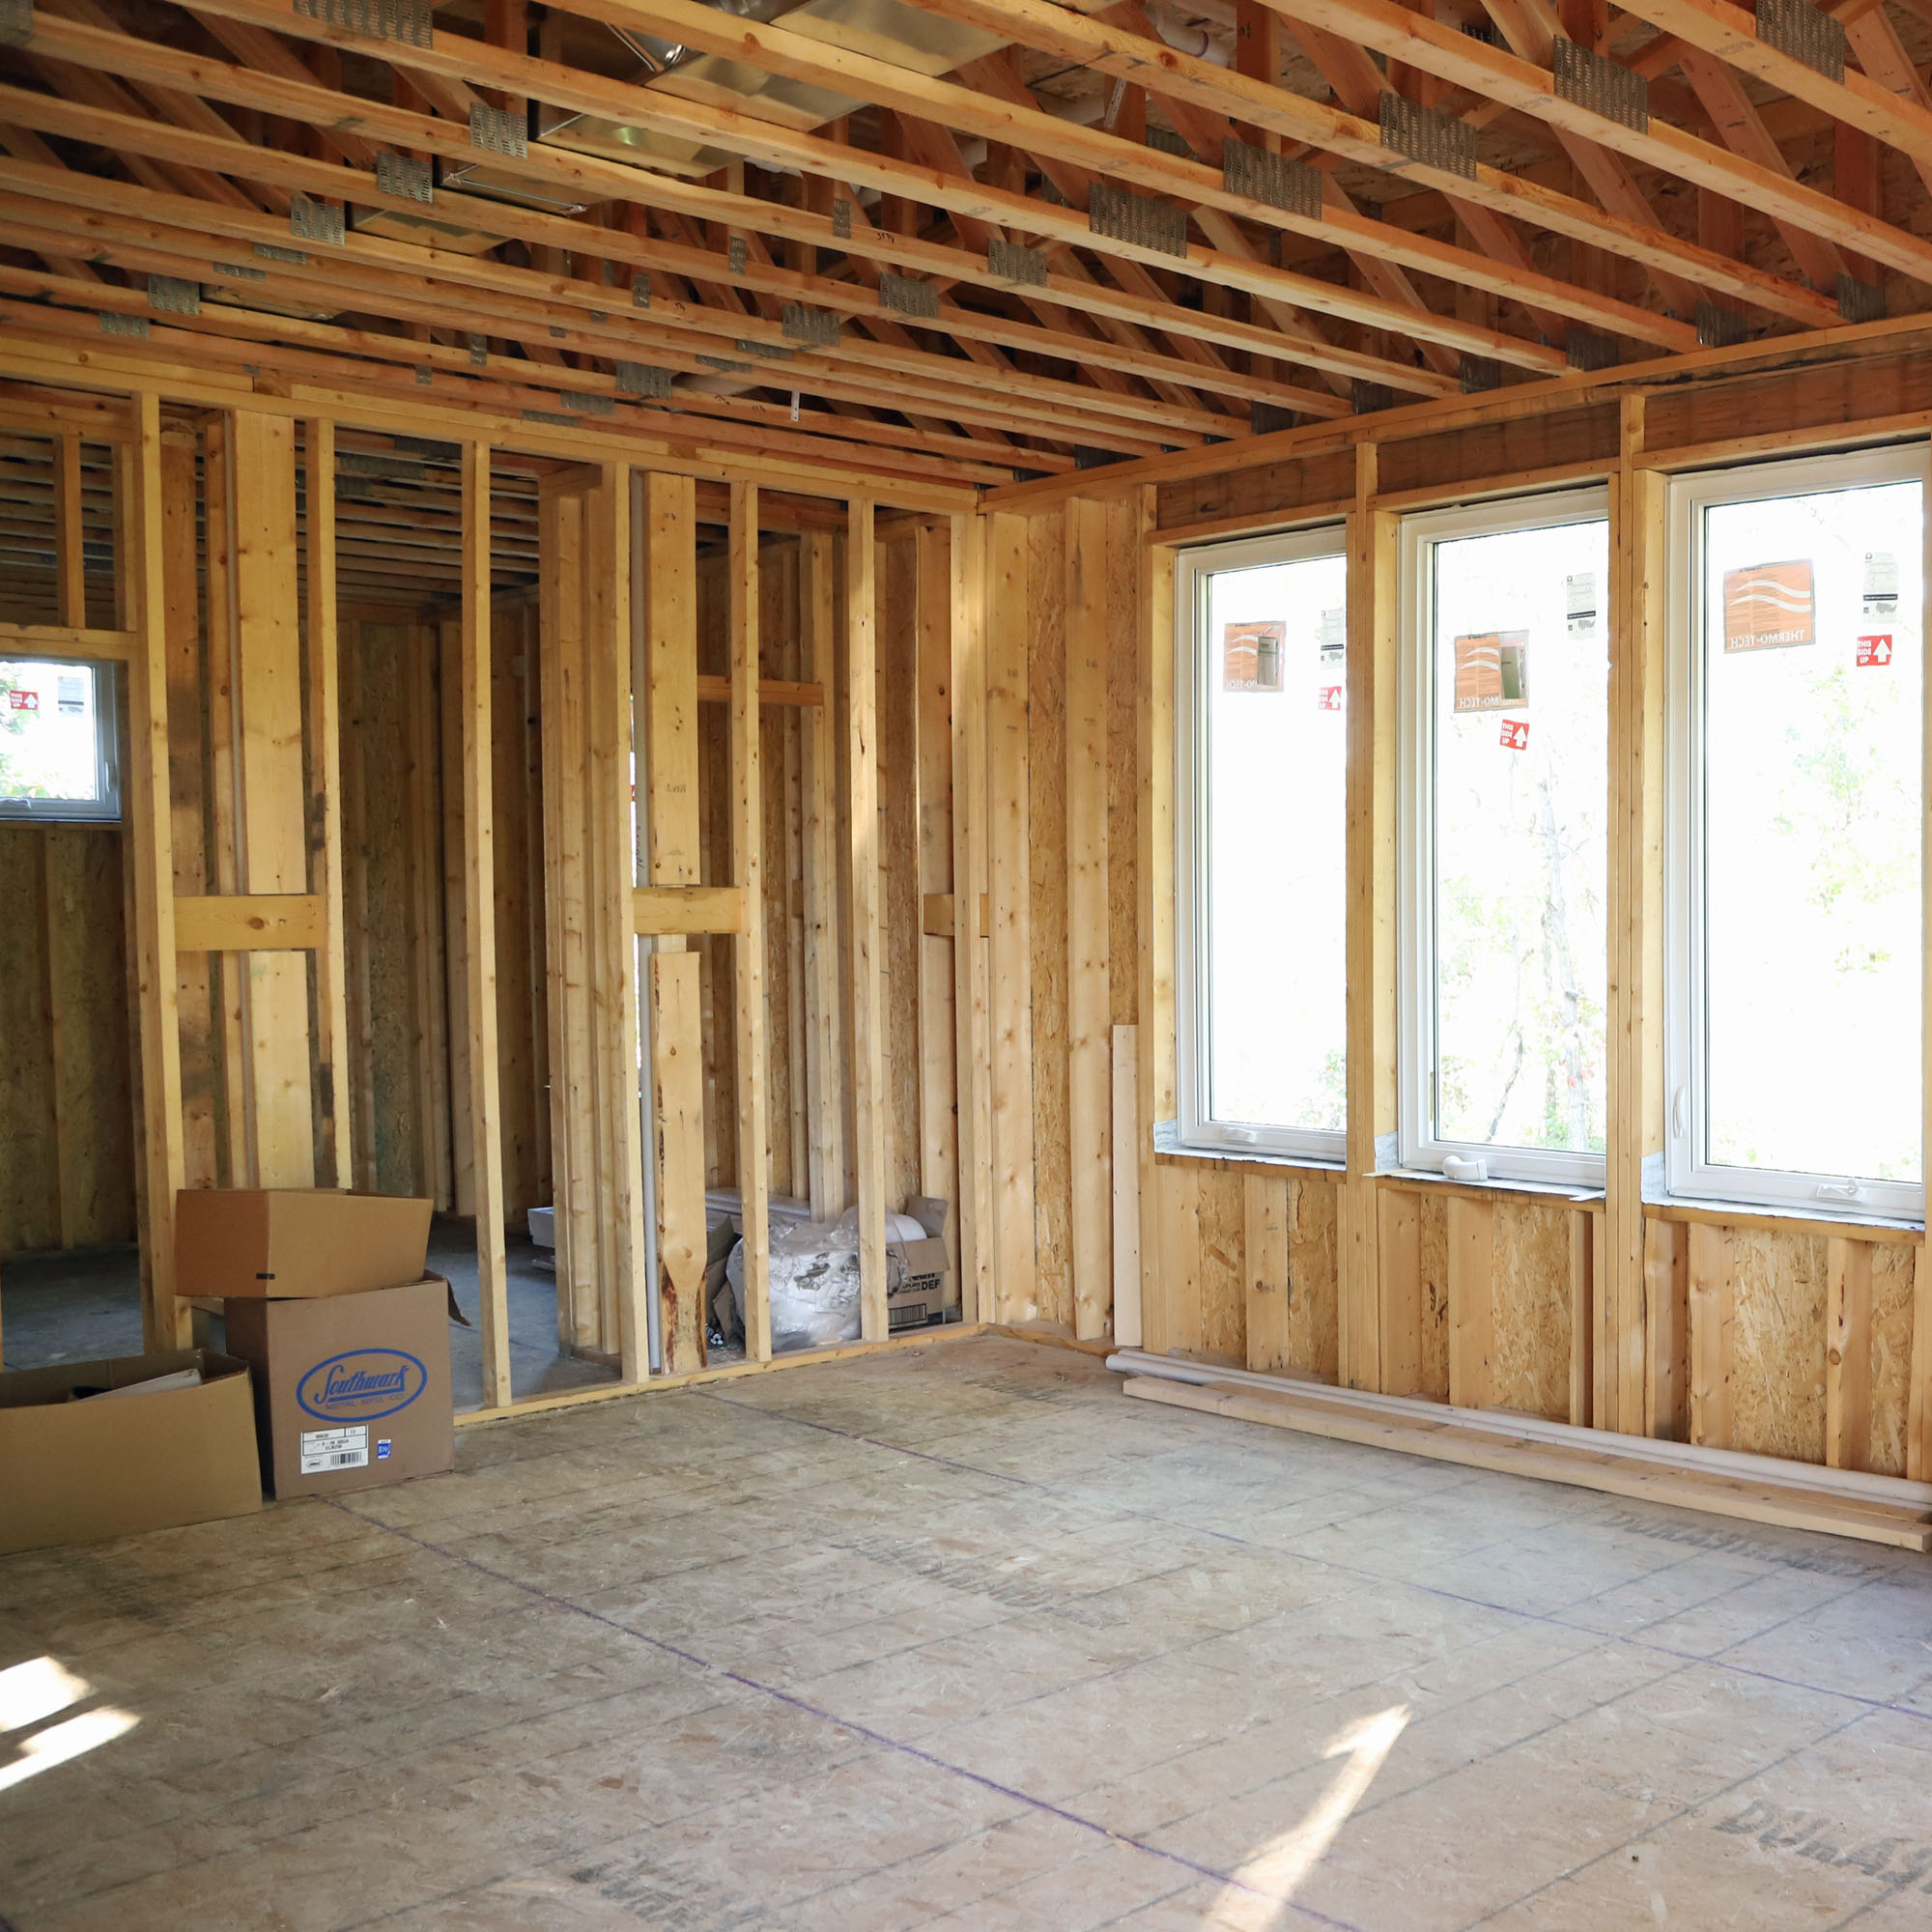
While all this was happening on the outside, a ton was also going on inside the house. In fact, the inside framing process is essentially complete! The HVAC crew has started running ductwork, and the plumbers have been coordinating as well. I thought it might be fun, before all the walls are covered with drywall, to take you on a full house tour!
Below are a few pictures from the interior of the house. Scroll through to the bottom of this post for a link to the video tour, and see every nook and cranny of our future house!
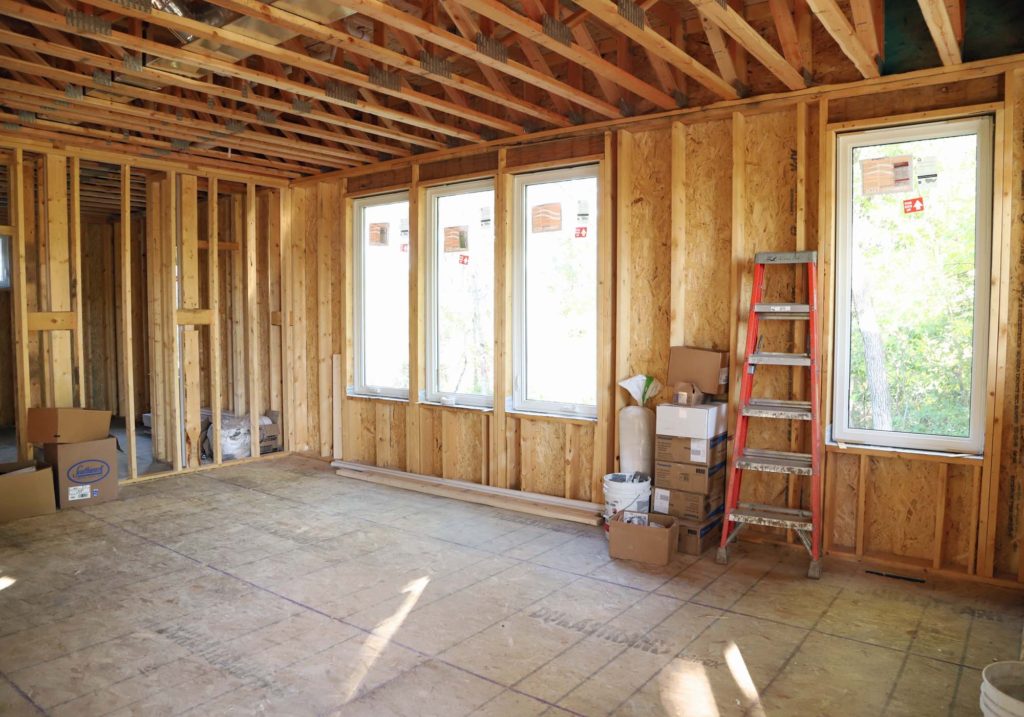
View of the living/dining space
Looking toward kitchen and stairway, from the living room
Master bedroom
Mudroom/ laundry room space
View of upstairs hall space and vaulted ceiling
Girls bedroom space
Boys bedroom space
View from hallway space into boys bedroom
Basement family room
View from family room into the ping pong table space
FRAMED HOUSE VIDEO TOUR
Join me on the first full house tour of Arrow Hill Cottage!
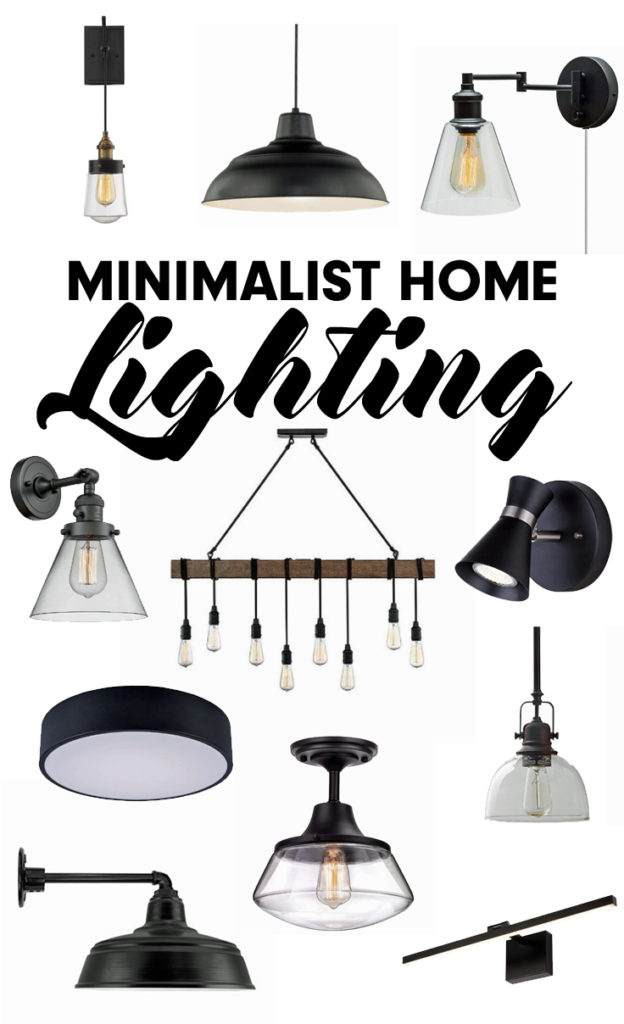
In today’s post, I share the simple light fixtures we have chosen for our new home. The clean lines and basic color palette of these selections make them the perfect compliments for the minimalist home.
This post contains affiliate links. As an Amazon associate, I earn from qualifying purchases. See my full disclosure here
This has been a very exciting week at Arrow Hill Cottage. The interior framing is just about complete, the house wrap is on, the windows are going in, and the mechanical duct work has started! Now is the time to begin ordering the light fixtures for each room.
Over the past few months, I have been searching various websites and stores for simple light fixtures that would complement the overall feeling we are trying to achieve with our home. Classic, clean, and minimal, with a bit of a vintage industrial vibe.
INTERIOR LIGHT FIXTURES
We will be using quite a few canned light fixtures, especially in the open spaces – such as the dining/ living room and basement family room. However, in many of the other rooms there will be a need for various types of task lighting.
If you are interested in any of the light fixtures we have chosen for our home, be sure to click on the links below each picture!
Flush Mount Ceiling Fixture
This ceiling hugging fixture has sleek lines, and gives off a good amount of light. We will likely install in the downstairs office and possibly in the upstairs mudroom/ back entry space.
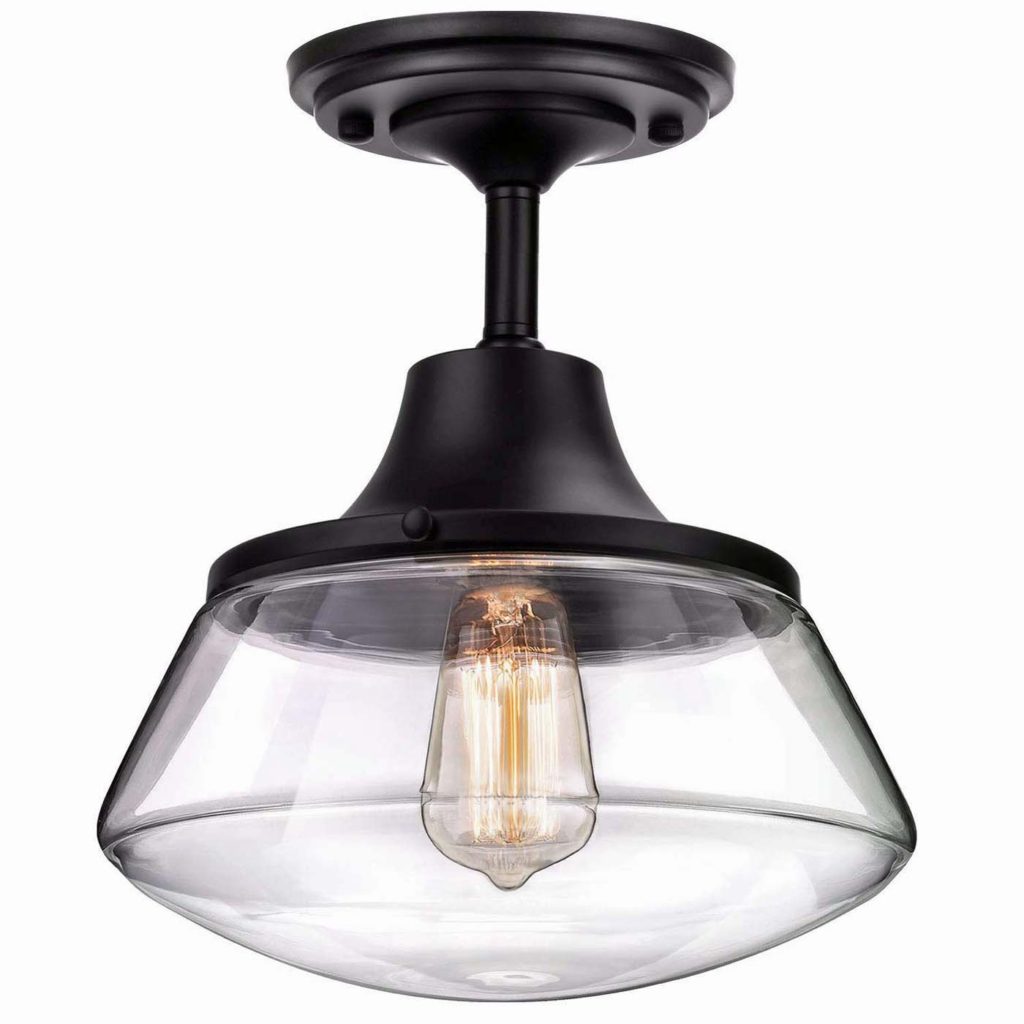
In rooms where we want a bit of an upgraded look, we will be placing these semi-flush mount fixtures. The master bedroom will have one, as will the main floor powder room.
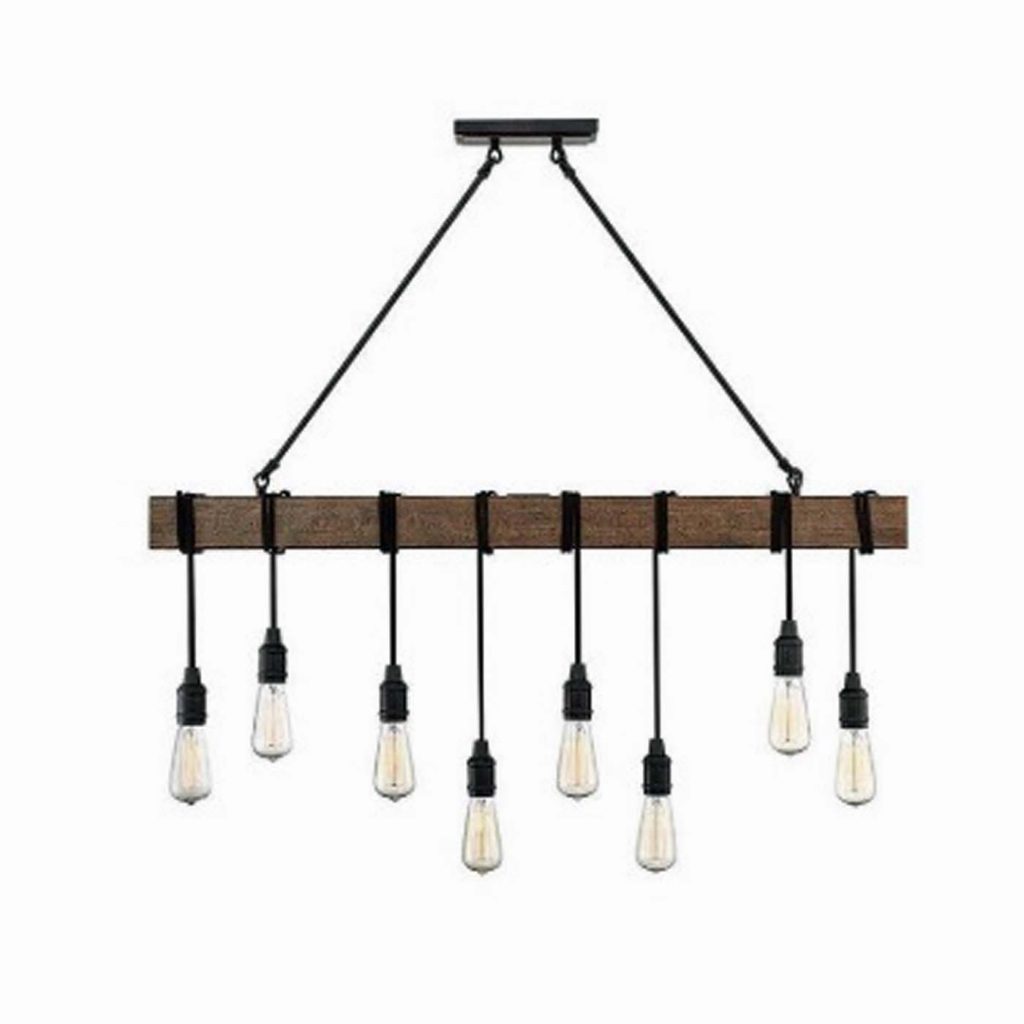
We searched for a special light fixture to be used above our dining room table. This eight light pendant fixture is the perfect fit for what we were looking for. The linear design will mirror the long farmhouse style table we will be building custom, from trees felled on our property.
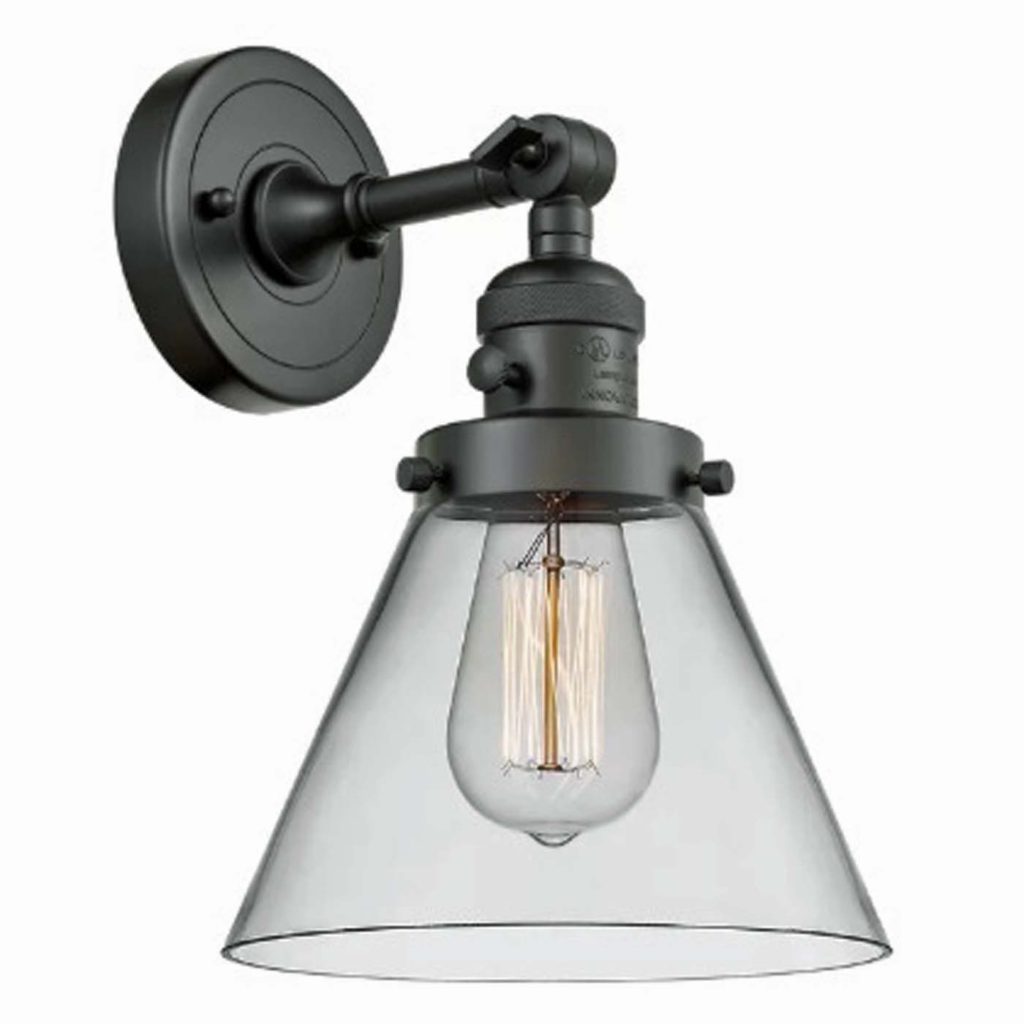
In the master, basement and upstairs bathrooms, this simple wall pendant will give just enough character. Using the same light fixtures in multiple rooms will help keep the continuity throughout the house.
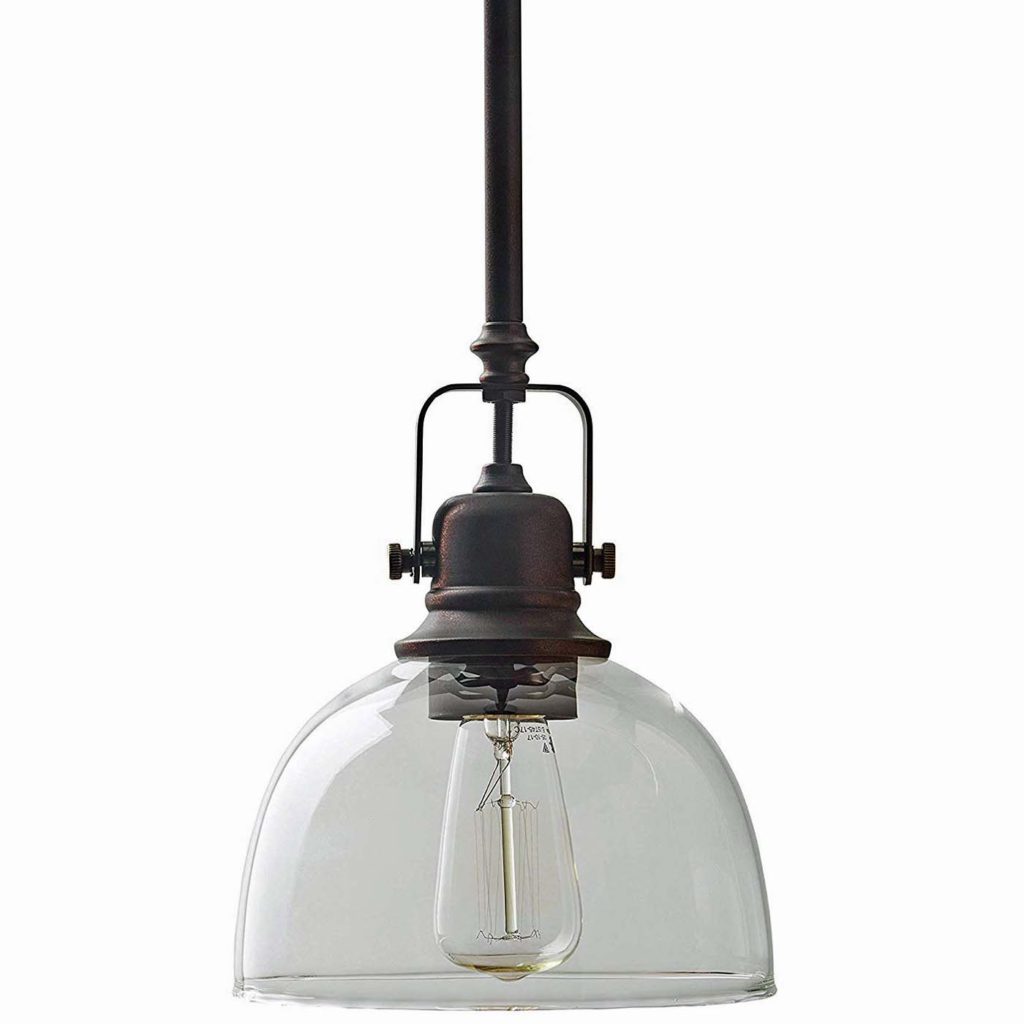
This pendant will be perfect, hanging above our large cast iron sink in the kitchen. In such a clean and minimalist space, this accent will really shine.
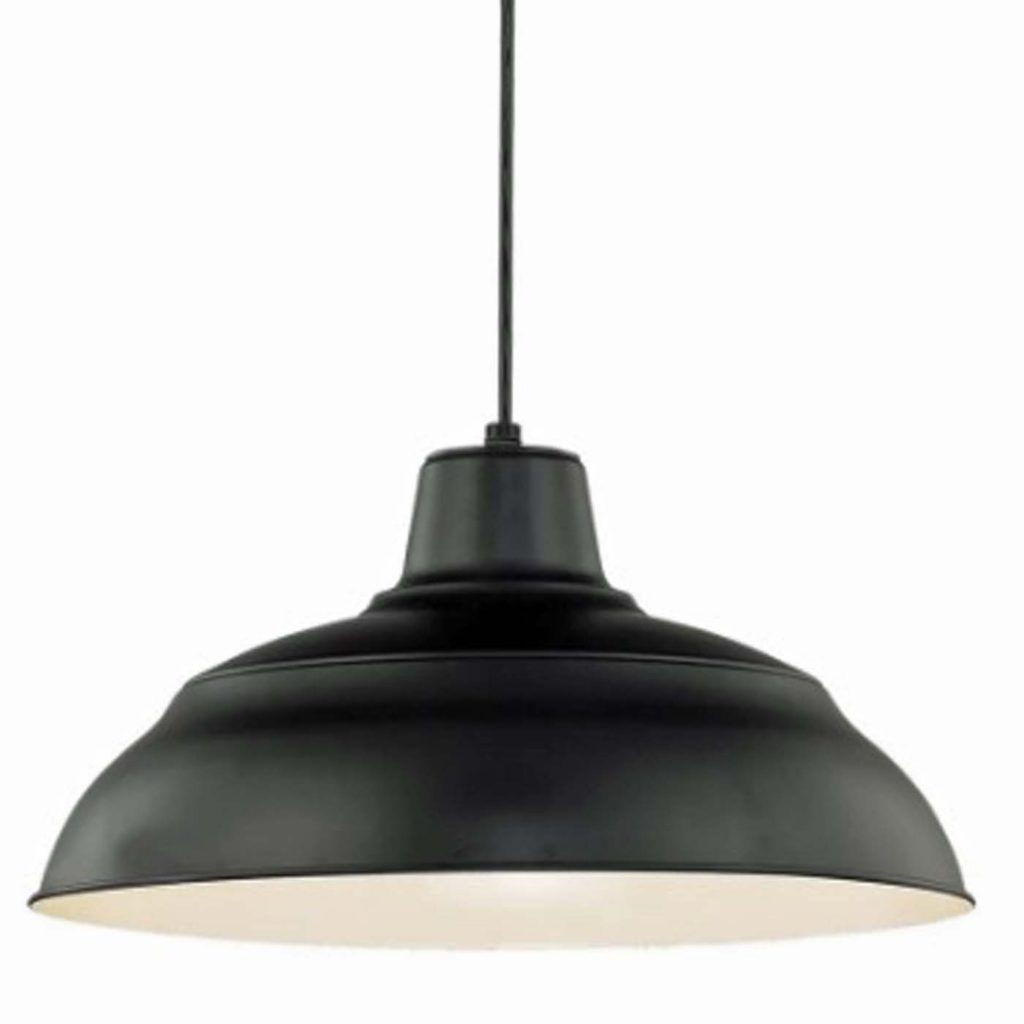
With the vaulted ceilings upstairs, we will be using larger pendants. These farmhouse style industrial pendants have long cords, which will bring the light lower into the room – allowing for better coverage.
Three identical pendants will be set upstairs. One for each bedroom, and one for the hallway space.
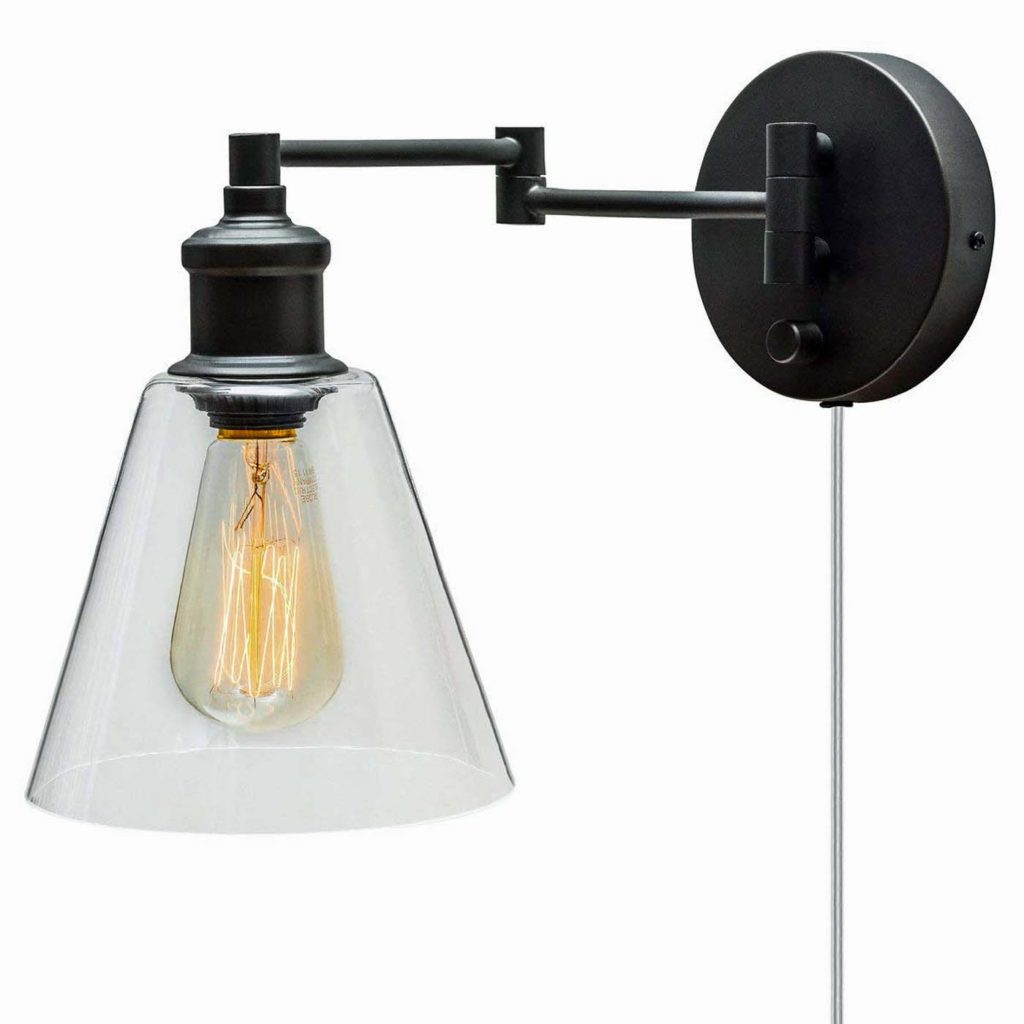
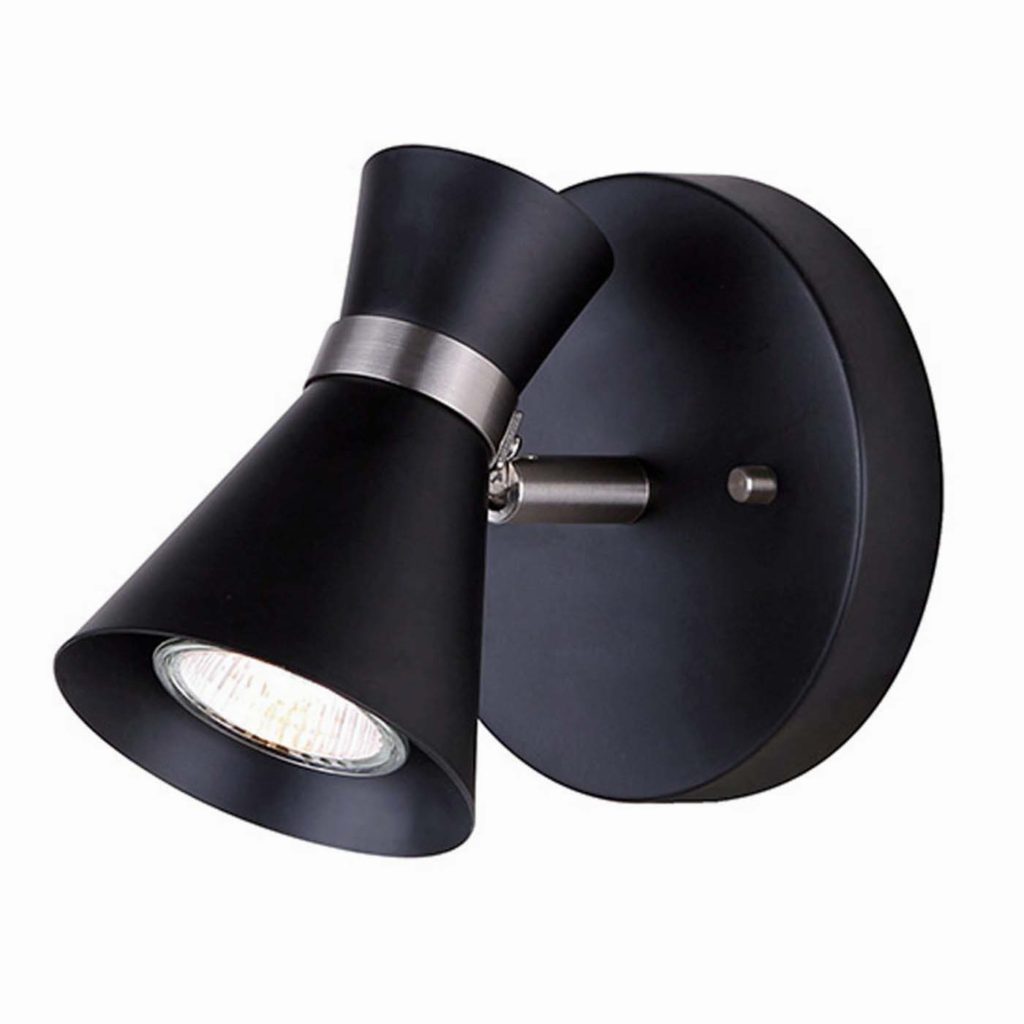
In each of the boys sleeping nooks, they will have small reading lights as well. The multi-directional quality of these trumpet style lamps is really nice.
In the closets, we will be using smaller wall mounted fixtures. This is a bit of a splurge perhaps, as some of the closets really don’t need any lighting. However, the larger closets in the kid’s rooms will benefit from the extra illumination – especially in the dark storage space behind their hanging rods!
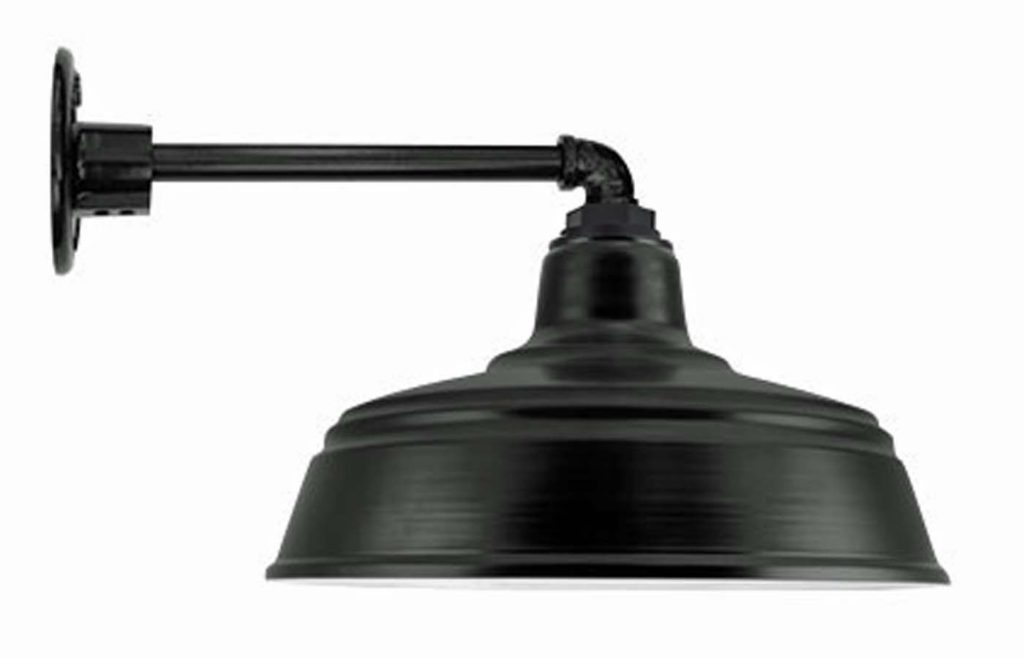
The light fixtures for the exterior of the house will follow the same style as the interior of the house. There are two different styles we are going to incorporate. Barn lights, which will be placed in feature positions – above the front door and above the garage doors.
Garage sales are a lot of work, but they can also be quite profitable! Read on for tips on hosting a successful garage sale and maximizing the profit from items you no longer need.
Our family has been busy the last nine months decluttering our rental house, in preparation for our big move to our forever home, Arrow Hill Cottage. Through this process, we have come across many items that, although in great shape and of good quality, we don’t plan to bring with us when we move.
Faced with the decision of what to do with these unwanted items, we have a few options. Throwing, donating, or selling. While there were a few broken things that made their way to the trash bin, ultimately we much preferred to get the quality merchandise into the hands of people who could use it.
IS A GARAGE SALE RIGHT FOR YOU?
There are a variety of reasons you might question if a garage sale is your best option. Weighing the pros and cons can help you make the decision more easily. Start by asking yourself the following questions:
Do I have enough to sell?
If you have only a couple boxes of items to sell, it may not be worth the hassle to set up a sale. Consider instead placing an ad on social media with descriptions and pictures of the items you have available. You may have better luck pin-pointing buyers in this fashion.
Are my items current?
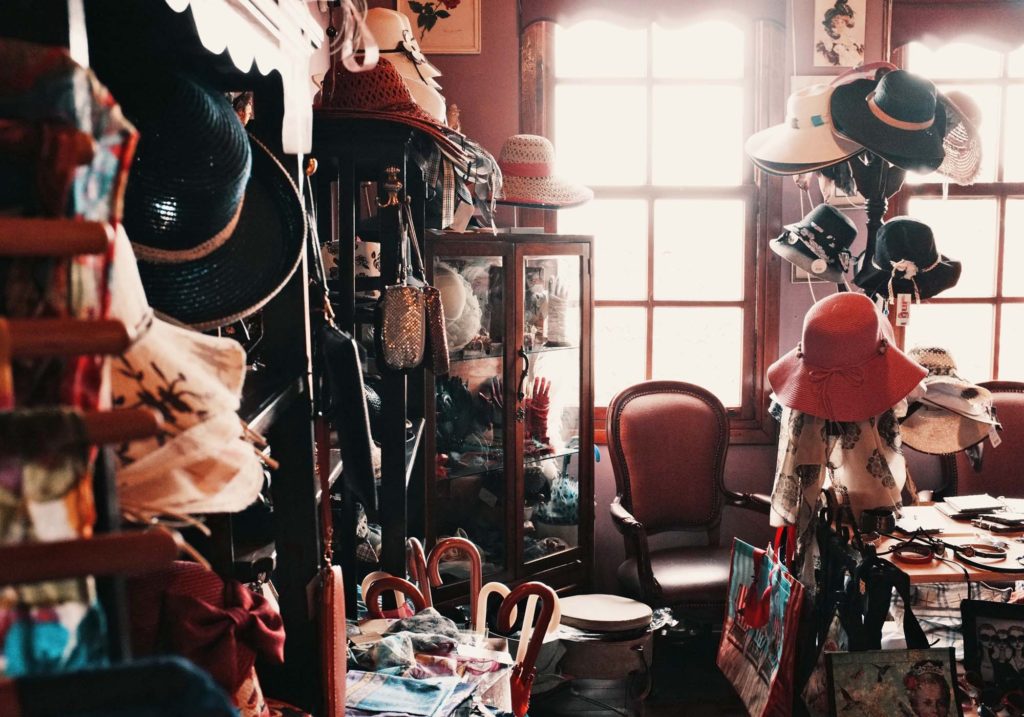
Decluttering storage closets and other rarely looked at spaces in your home may yield items that are many years old. Although clothing and home decor styles do tend to eventually cycle back around, it is possible that the items you have been holding onto are no longer desirable to others at the current point in time. If so, donating might be your best option.
Is my location appropriate?
You might have a house-full of good, quality items. But, with a poor sale location, you could struggle to find paying customers. A garage sale set at a remote country house off of a gravel road might not be as successful as one in a quiet city neighborhood, for example.
PREPARING FOR A GARAGE SALE
If you answered ‘yes’ to the above three questions, chances are you will be able to have a successful garage sale! With the proper preparations, your sale can be the go-to place for good deals.
Months before the sale
Begin sorting through your sale items early. We found it helpful to declutter our entire home before our sale. Every room, closet, and cupboard was scoured. This ensured that everything we wanted to sell was available to our customers. And once these items were out of our house, we knew they wouldn’t be coming back in!
Ask relatives or friends if they would like to go in on the sale with you. Sometimes, advertising a ‘multi-family’ sale can draw a larger crowd.
The week before the sale
Allow yourself enough time to clean and organize your garage in preparation. Take extra care to cover any items that are not going to be included, to avoid sale-day confusion from customers.
Borrow long tables if needed. The more organized the setup is, the easier it will be for people to find the things they might be looking for.
Price the merchandise. In the past, I have hosted fundraiser garage sales, where none of the items for sale had price tags. Customers were asked to simply make a donation of any amount. If you have a specific cause that people feel passionate about donating toward, you may do well without price tags. However, as a general rule, most shoppers prefer to know upfront how much you expect for each item. Price tags can help customers avoid confusion.
Think about advertising. If you plan to place an ad in a local newspaper or shoppers guide, be sure to contact them early enough. One week ahead of the sale is usually sufficient.
The day before the sale
Prepare the money box. Starting the day with sufficient change is a good idea. For our sale, we used the guidelines from bizfluent to set up our cash box. Within the first two hours of the sale, we were able to take our ‘seed money’ out of the box, for safe keeping.
Create clear signage. It’s a good idea, even if you took out an ad in the local paper, to place signage the day of the sale. They can help direct customers who might be looking for your sale, and also draw in a few others! The night before the big day is the perfect time to whip up those signs. Be sure to use large, block letters that can be clearly read from cars driving by. Place them at popular intersections, and along the road. Adding streamers and balloons can also be effective!
Consider supplemental advertising. If your community or neighborhood has a way to digitally advertise, such as through a group Facebook page, or Craigslist, take advantage of the free publicity. At least half of the traffic to our garage sale came from an ad I posted on Facebook Marketplace the night before.
EXTRA GARAGE SALE TIPS
Through the years, we have hosted quite a few garage sales. Some more successful than others. These are the things we have learned that have helped us run a smooth and successful sale.
Set a goal
If your family has a specific goal that the garage sale proceeds will go toward, it may motivate everyone to declutter as much as possible. The money earned from our latest garage sale will be applied toward a sectional sofa for our new home’s family room. Anticipating a family movie night together was a huge motivator for all of us.
Price in quarter increments
It can be stressful trying to make change for a fifteen cent item. Speed up the process by pricing everything with the basic quarter in mind. Twenty-five cents per book, or four for a dollar, for example. It’s easy for the customer, and easier for the cashier!
Allow bulk deals
If you have a large amount of any one type of item, consider allowing a bulk deal. We have had a lot of luck selling bags of clothing for three dollars apiece. Knowing they can buy each piece of clothing for fifty cents, OR spend three dollars on an entire bag, customers might choose to bring home more.
Last minute sales
For the last hour of so the sale, when you want to get the garage cleaned out, allow greater discounts. Everything half priced or ‘make an offer’ are a couple of ideas that have worked well for us.
After the sale
Once the garage sale has ended, you may find yourself with quite a bit remaining. I will usually try to sell the high quality items through Facebook Marketplace. Remaining items can then be donated, or offered for free curb-side.
OUR CLUTTER TO CASH TRANSFORMATION
Our most recent garage sale was a major success. With the clutter now out of our house, and the cash in our pockets, we are ready for our move! Watch the video to find out how much we earned!
TIPS FROM OTHERS
Everyone has different ideas about how to plan for and run the best garage sale. Consider checking out the tips from these other bloggers for more ideas on how to cash in on your clutter.
ENJOYING the last part of summer. It is really hard for me to believe that summer is really almost over. Only one more long weekend and school will be starting up again! This gives me all the emotions.
It has been a good summer. One that has gone much too fast. The kids are just at that perfect age where they are mostly independent, and at the same time enjoy each other’s company. They have all played together very well over the past few months.
EXPLORING a new park in the area. Our city has developed a large piece of land just outside of the city limits. It borders a lake and many rolling hills – which are used for mountain biking in the summer and sledding in the winter.
The park itself is full of structures suitable for all ages. Small slides and a mini playhouse for the toddlers, and a zipline for the pre-teens. All of our kids, ranging in age from five to twelve, had so much fun exploring! Even Craig got into the action!
GETTING anxious for the house to get weather tight. With Fall fast approaching, we have seen quite a bit of rain and increasingly colder weather. Each time it rains, we need to go to the site and sweep all the water off of the sub-floor. It makes us so sad to see our largest asset take on damage.
However, the shingles are starting to go on the roof now. And hopefully in the next week or so the windows will be put in and the entire house wrapped for protection. We continue to pray for the snow to hold off until we move in!
PREPARING for a large garage sale. Angela has been busy going through the entire house – decluttering anything we don’t plan to move with us. We have been shocked by the amount of items that we realize we can live without.
With the proceeds from the sale, we hope to buy a sectional sofa for our new family room. Something large enough that we can all snuggle together and watch a movie.
This is just a glimpse at what our family has been up to. If you’d like a closer look, be sure to check out our weekly ‘mini vlogs’ on our family YouTube channel ARROW HILL FAMILY. Be well everyone!
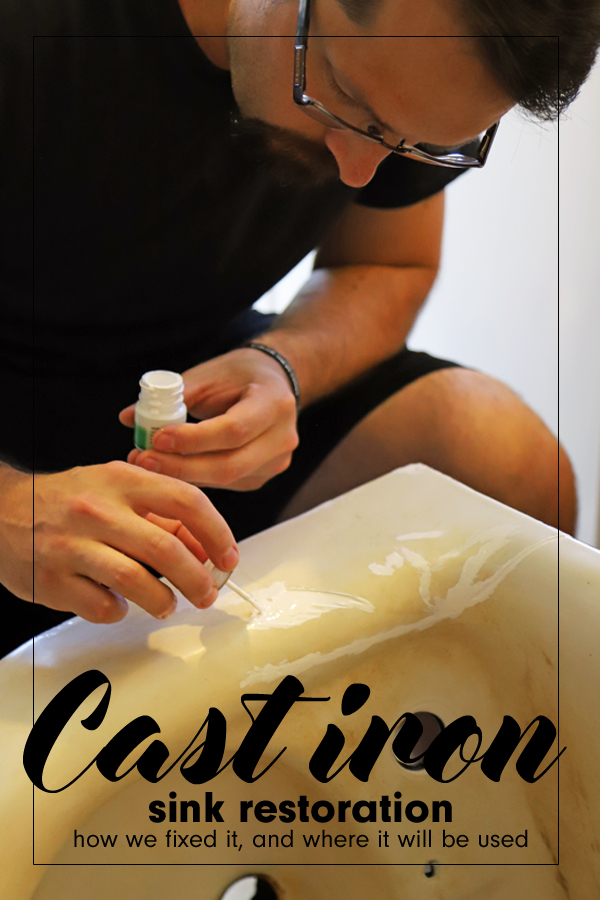
While the crews are hard at work on our house construction, my husband has been busy with a cast iron sink restoration. Read all about his progress and see how the sink looks now!
It’s been a super busy summer for the construction crews out at our house build site. They are currently finishing up the framing and sealing the exterior. Hopefully, all of that can be finished before the cold Fall weather starts up! In the meantime, We have been cleaning and preparing items that will be used in the new house. Bathroom vanities are getting painted, chairs are being refinished, and the cast iron sinks are getting restored!
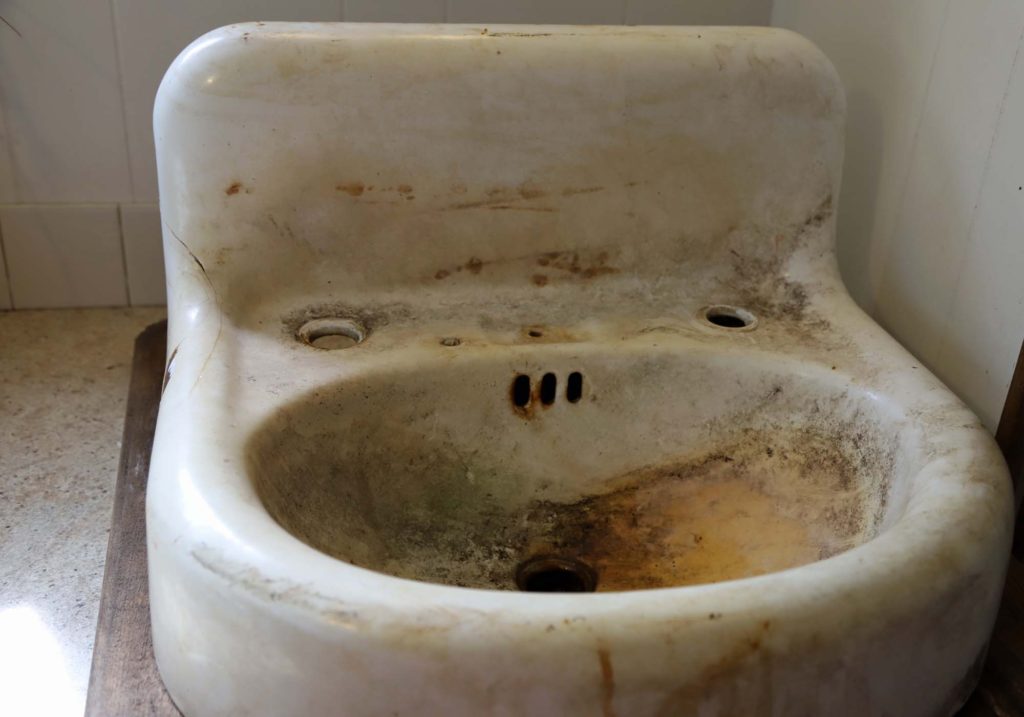
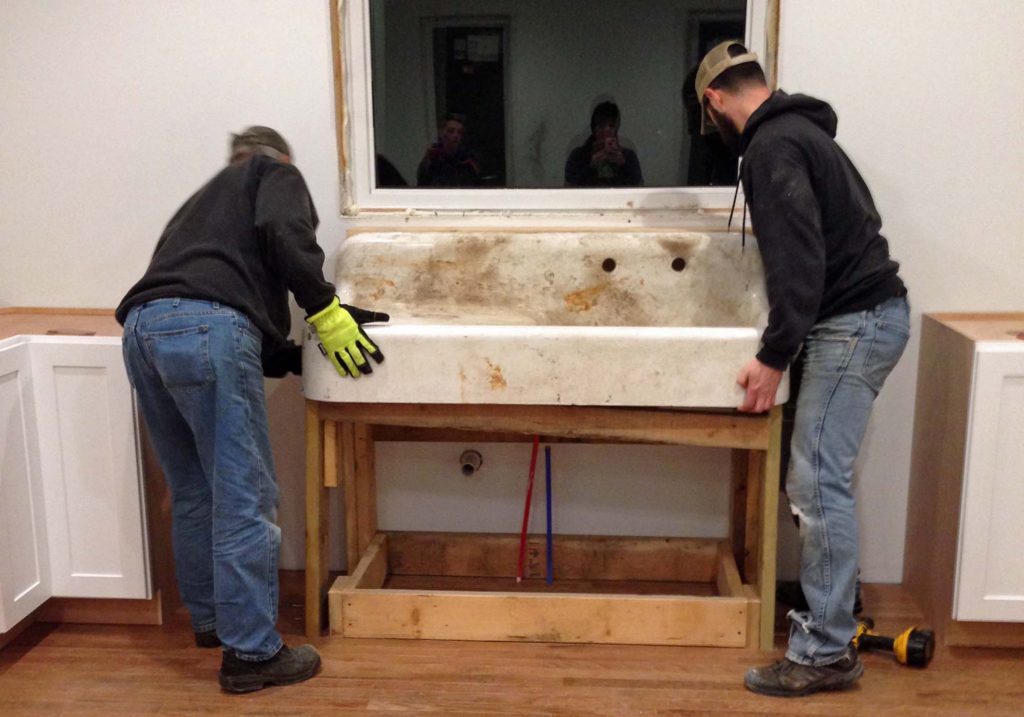
We have two vintage cast iron sinks that will be installed in the new house. One is a large, single basin farmhouse sink which will be used in the kitchen. The other is this smaller model 1930’s Kohler wall hung unit, which will be the perfect compliment to our main level powder room.
HISTORY OF THE CAST IRON SINKS
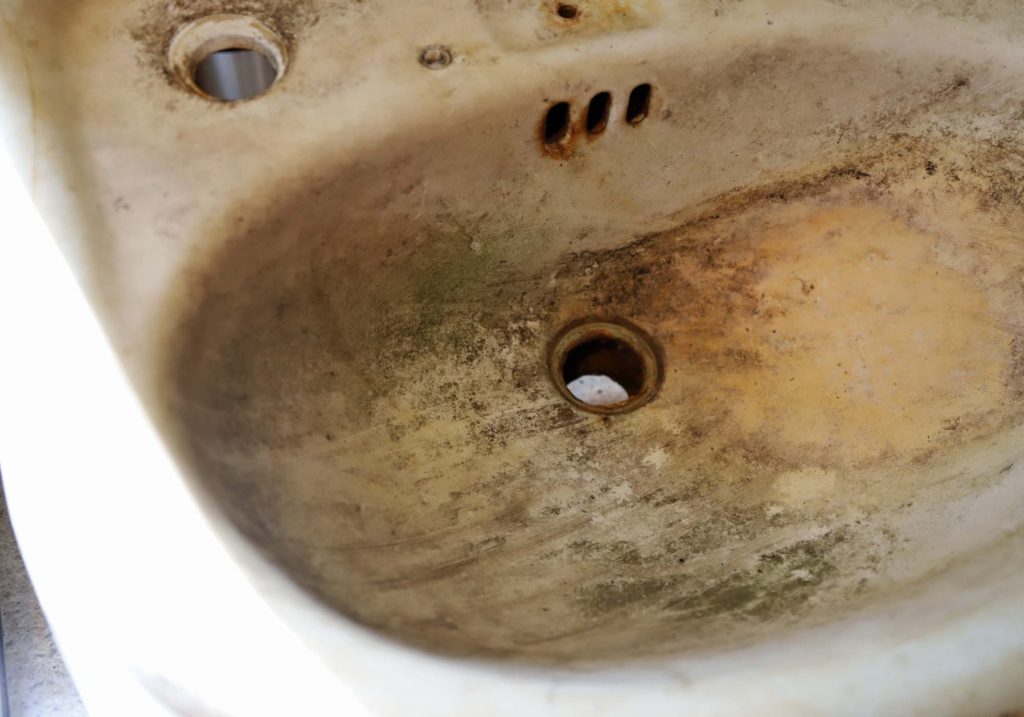
Both sinks were recovered from the property we are currently renting, my husband’s grandparents farmstead. They remodeled their house sometime in the 1960’s, and at that time put the sinks outside. They sat for 50+ years in the woods, covered with leaves and debris. Because of this, the sinks definitely needed some TLC.
We talked about hiring a company to do a complete restore, but decided to test out a DIY version on the smaller sink. Once we knew the results, we figured we would be able to make an informed decision about what to do with the larger one.
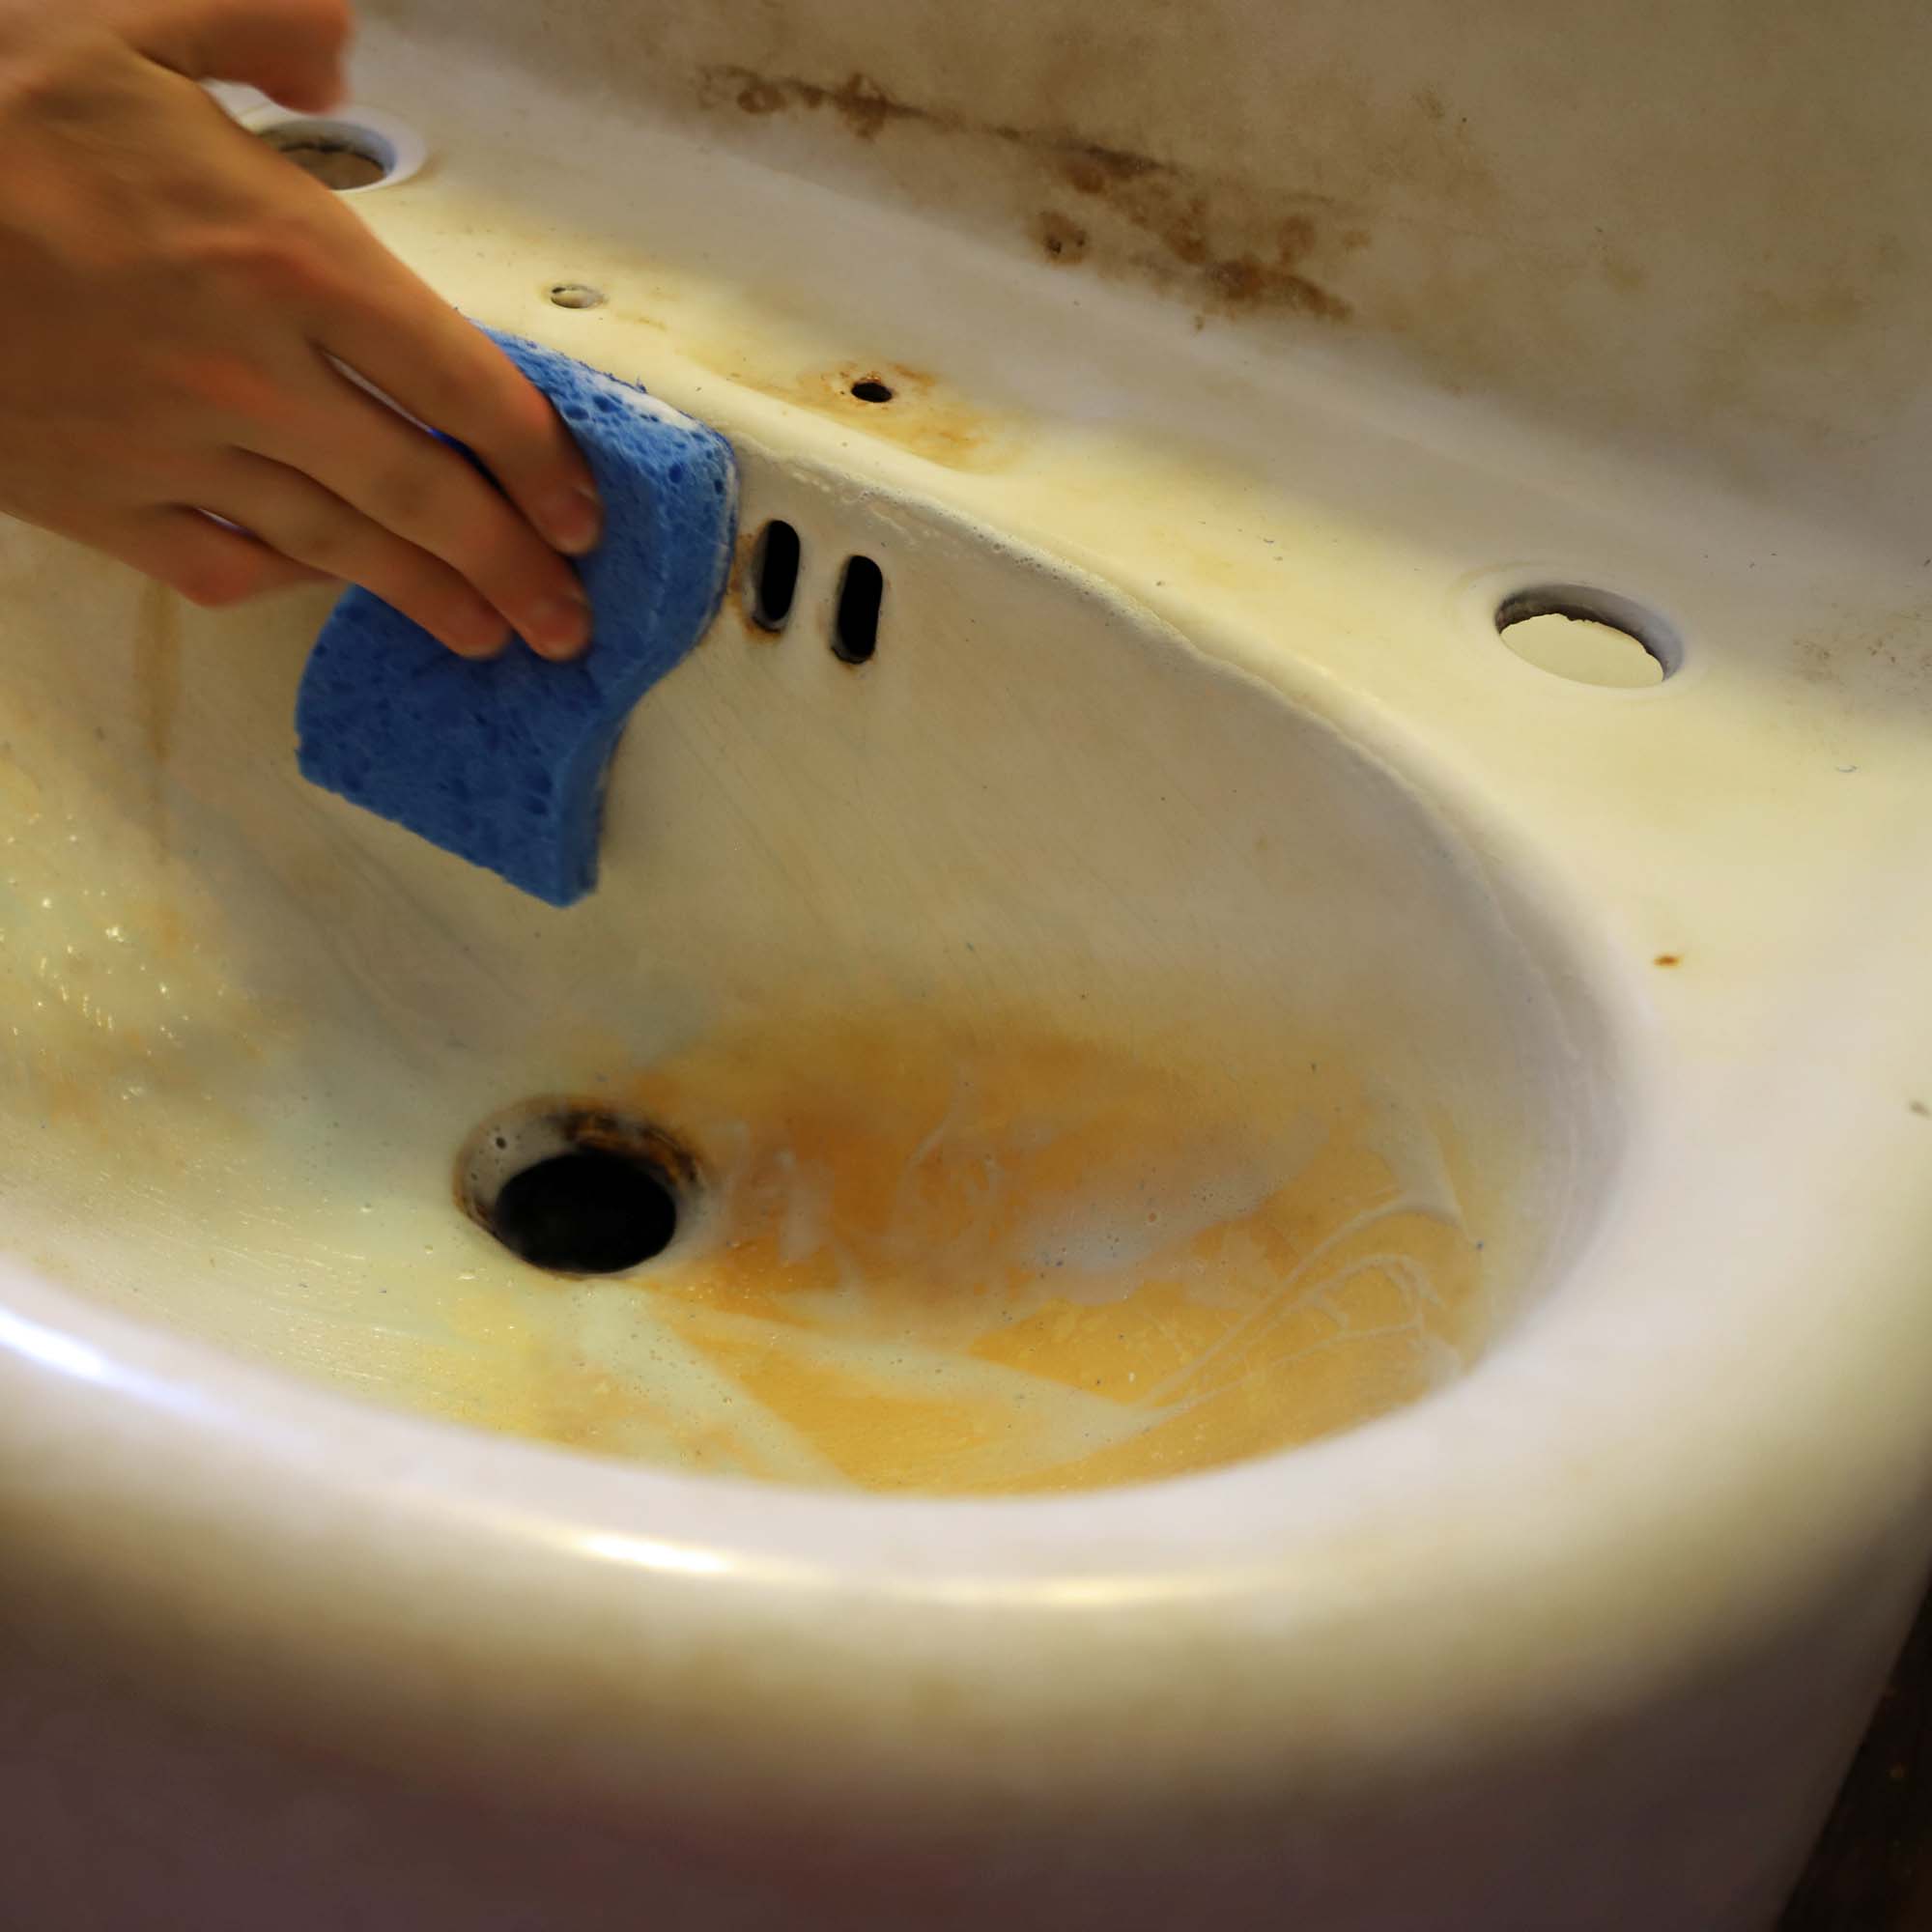
CAST IRON SINK CLEANING
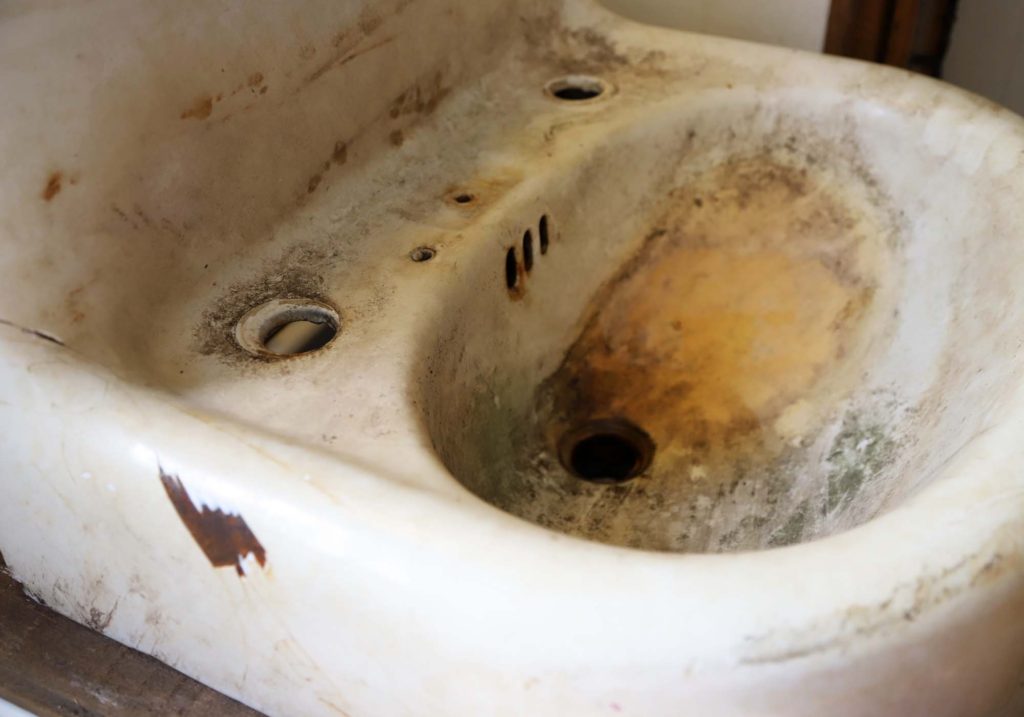
First, the sink needed some good old elbow grease. Craig started with very mild cleansers – such as a baking soda/water mixture. Eventually, he moved to harsher chemical cleaners, including ‘Iron Out’ and ‘Bar Keepers Friend.’ While they did clean the sink somewhat, none of the products were completely removing the rust stains.
Craig really wanted to remove the rust, as it could affect the sink’s future integrity if not addressed properly. He ultimately needed to use a wire wheel brush to remove the rust spots.
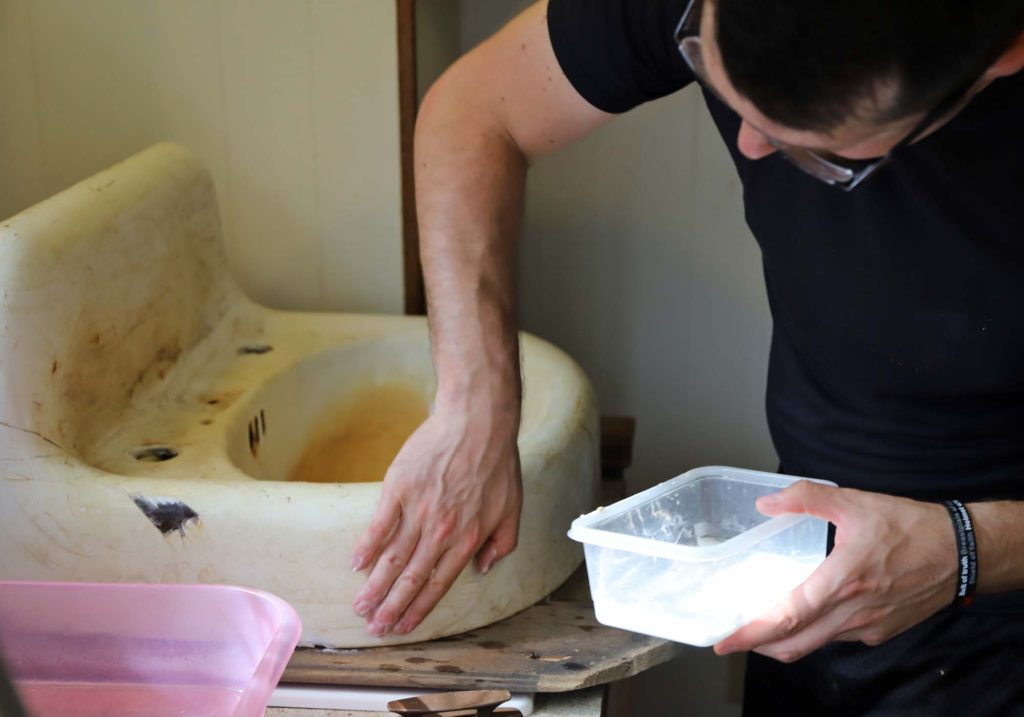
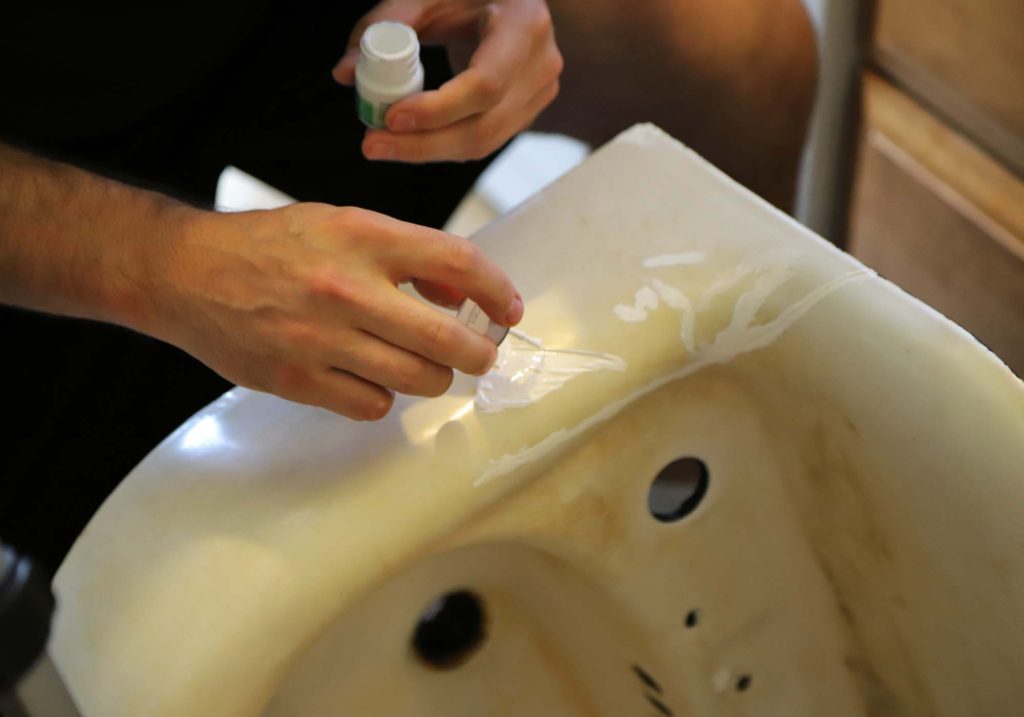
FIXING THE CHIP
Besides the rust, the biggest issue with this sink was a large chip in the enamel, as well as a hairline crack that ran along the side and up the back splash. They were both cosmetic issues, as they did not cause any problems with the sink being able to hold water.
We found an epoxy material that could help fill in the imperfections. Over the course of a day, Craig applied layer after layer, allowing the epoxy to dry between coats. Once the material was above the height of the original enamel, it was left to dry for a few days before sanding.
This product requires a ‘wet sanding’ technique – to help keep the dust down, and to eliminate scratches on the sink’s surface.
PAINTING THE CAST IRON SINK
We had determined, while cleaning, that the original enamel would need to be covered to get a uniform look. We were in no way looking for perfection, as we understand that this is an old sink. However, the discoloration was pretty bad from the years the sink had sat outdoors.
Once the epoxy had been sanded down smooth, it was time for paint! Craig started by painting the back of the sink with a black ‘rust inhibitor’ paint.
Rustoleum makes a specialty paint product that can be used for bathroom fixtures such as sinks and bathtubs. We decided to give it a try for the front!It goes on about the same as a standard can of spray paint, but the drying time is much longer. This allows the paint to harden.
After three coats, the sink is looking great! The finish isn’t quite as shiny as the original enamel, but it is pure white and uniform. All of the rust spots are covered, and you would need to look extremely close to see any sign of the large chip or crack.
We are quite pleased with the outcome – especially considering the money we saved by doing it DIY style! Of course, until the sink is in use, we won’t know how this paint will hold up over time. I will try to remember to write an update after we have used the sink for several months.
WATCH THE CAST IRON SINK RESTORATION
For an even closer look at the steps involved in this restoration process, check out the THREE PART SERIES of videos that my husband created for his new YouTube channel, Weirdy Beardy Workshop. He has been busy filming a lot of projects, actually. So, if you want to see some behind the scenes footage, go check out his channel!


 Girls bedroom space