For over 4 years, my husband and I were ‘boy only’ parents. With 3 young boys, we had plenty of trucks and action figures, and a giant stash of Legos. We knew all about Thomas the Train and how to allow the boys to rough house without getting injured. So when we prepared to adopt our daughter {M} in 2015, we realized we were lacking a bit in the ‘girl’ department. We added a few dolls, a tea set, sparkly dress up clothes, and other fun girl toys – not sure what her preference would be. Once home, it became clear pretty quickly that her favorite thing to do was spend time in the kitchen with me, pretending to cook.
THE IDEA
A couple of years later, in the spring of 2017, while in the adoption process for {K}, I had the idea that pretending to cook might be something the girls could do together – and that maybe the imaginative play would be a good bonding experience for them. I went on a hunt for toy play kitchens, but sadly found that the store varieties I liked were either out of our price range or constructed with flimsy materials. I then turned to Pinterest, where I was faced with an absolute treasure trove of DIY ideas!
Seriously, check THIS out! So many creative people!
I made the decision that I would go the DIY route for the play kitchen project. Not only would it allow me to create a unique piece, it would cost much less! A few weeks later, my father in law asked if we wanted an old dresser that was his as a child. He offered it with the thought that we might need more space to store clothes with a new little person joining our family; But when I saw it I knew. It was meant to be a kitchen!
This is the story of how I turned an old dresser into a beautiful farmhouse style DIY play kitchen.
THE INSPIRATION PIECE
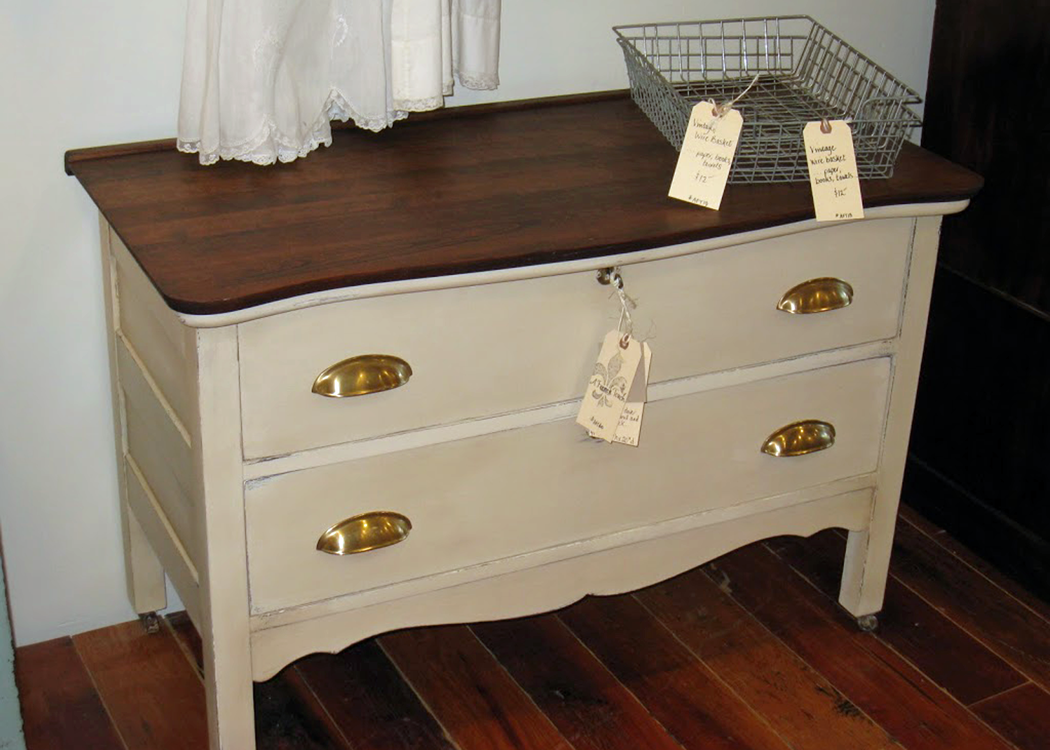
The dresser was low – 2′-1″ high to be exact, and had two large drawers. It had simple sculpted feet, a bit of a decorative top, and really good bones. It was a sturdy little thing! I really wish that I would have taken a photo of the dresser before I started to modify it, but at the time, I had no idea I would be starting a blog!
I searched online and found a photo of a similar dresser. Minus the paint, the dresser I transformed looked a lot like this one. The listing says it is from the 1890’s. I’m not sure the age of ours, but it had a musty smell that makes me think it had been around for quite a while.
Again, I wasn’t really thinking about documenting the process so much at the time – But here is one photo of the kitchen ‘in progress’.

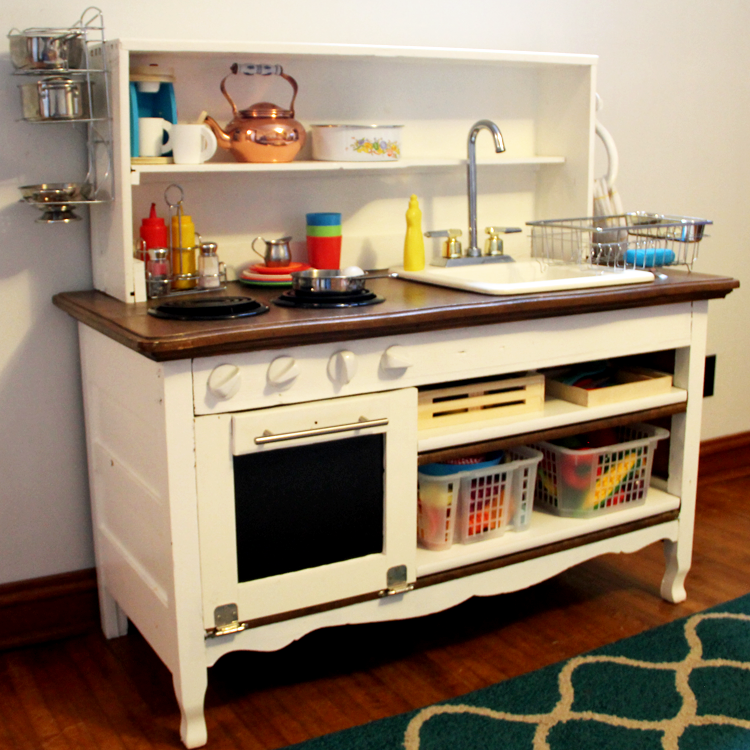
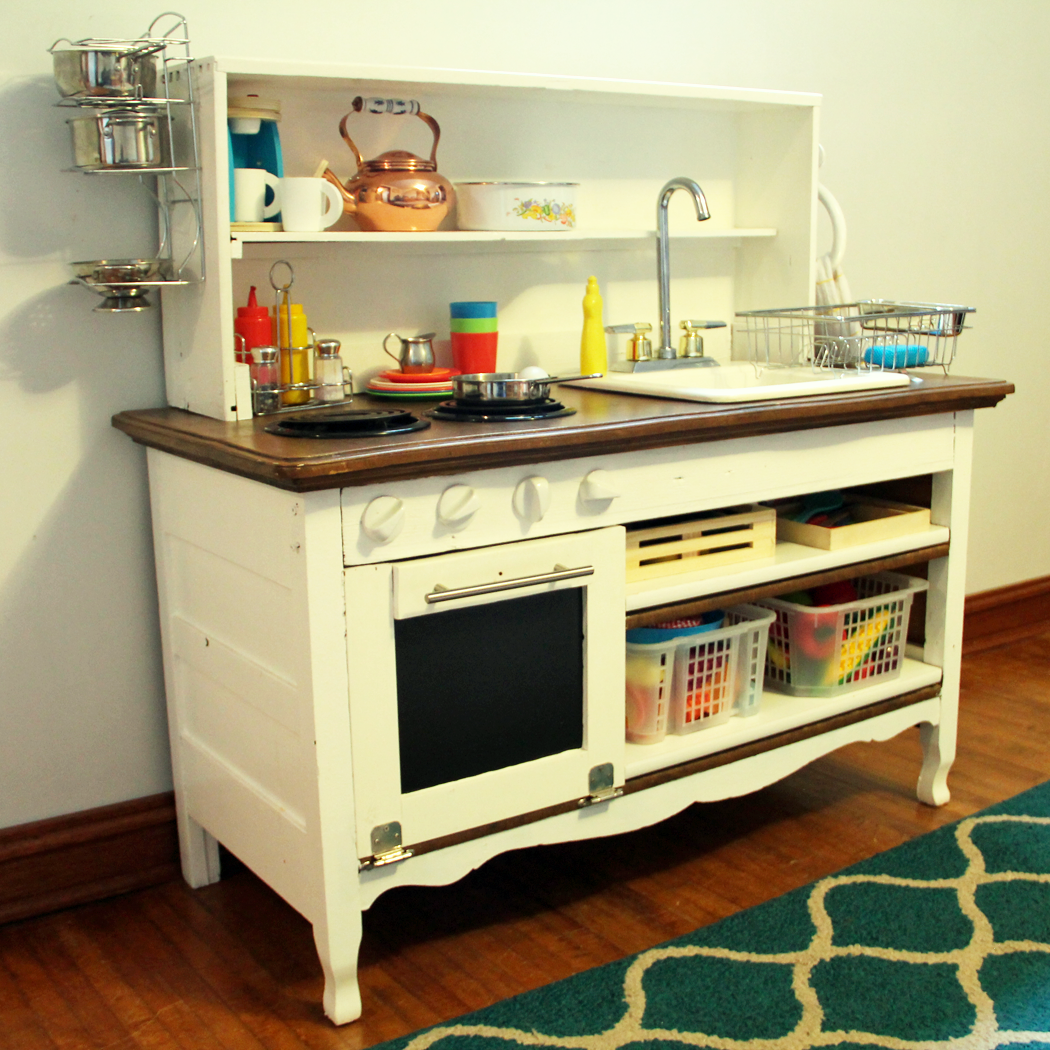
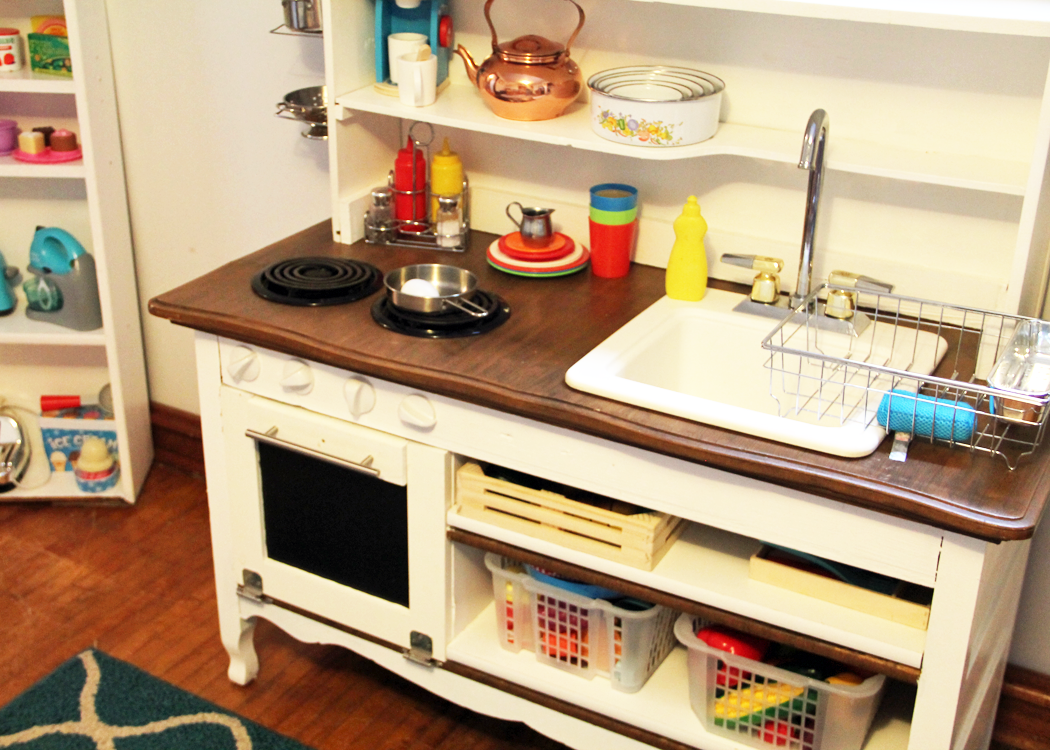
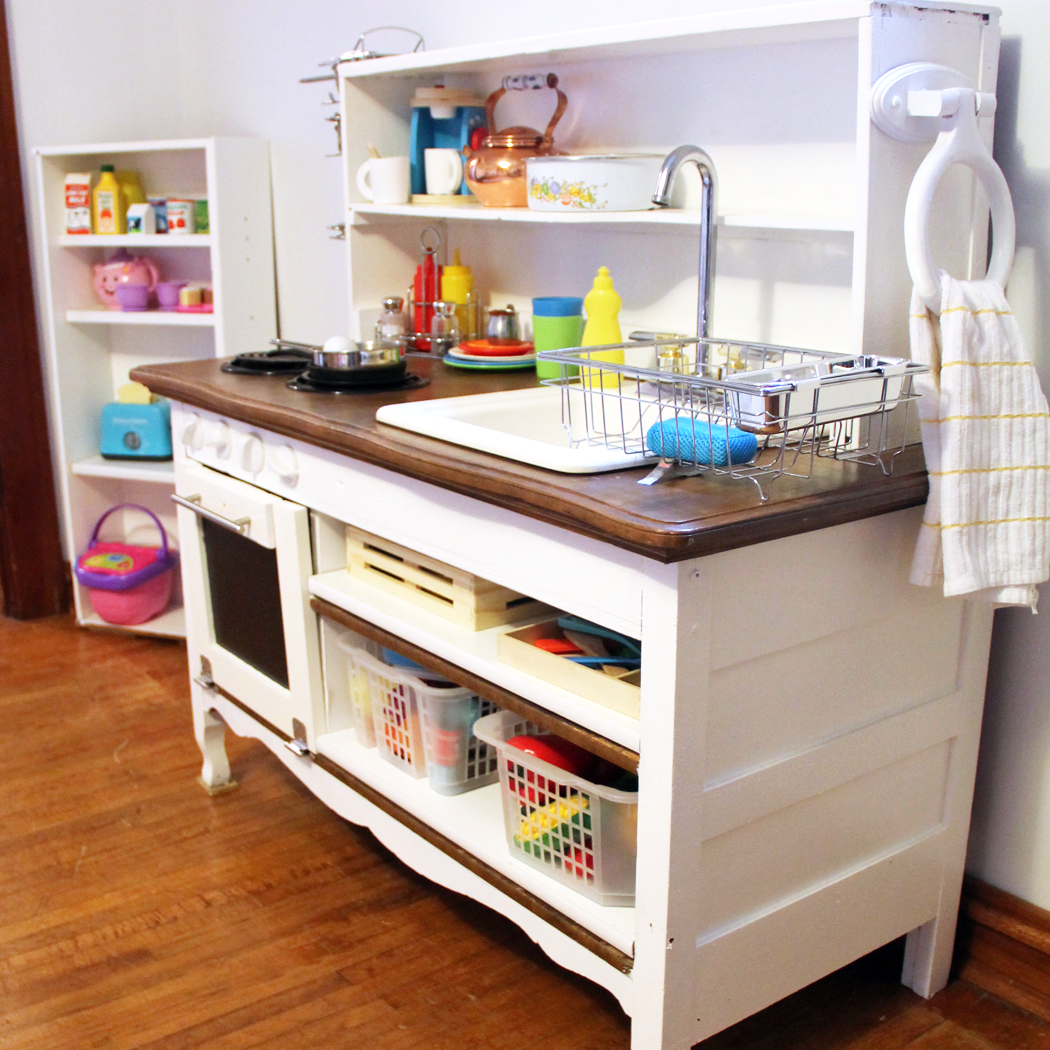
And after a bunch of work, this is the finished product!
WHAT I DID
Step 1: The first thing I did was make a trip to our local Habitat for Humanity Restore to find some bits that I could use. The Restore is my go to place for DIY projects. I can usually find unique items at a low cost, and the bonus is that the sales go back to support the building of houses for people in our community. Double win!
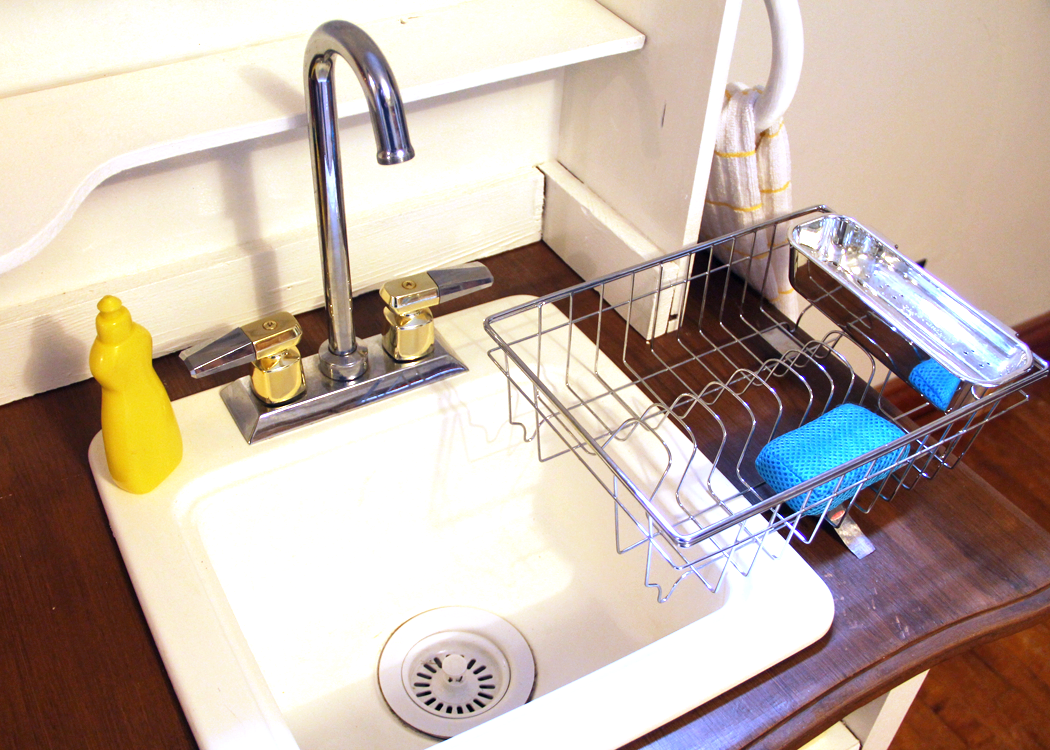
At the Restore I scored the sink basin for $10, a small cabinet door for $3, a towel bar for $1, and a couple of hinges for 50 cents each. When I told them what I was working on, they generously gave me some old burners, oven knobs, and a sink faucet (which apparently they are not allowed to sell). I totally felt like I hit the jackpot!
For the items I couldn’t find at Restore, I searched the home improvement store in our town. There I purchased a large metal handle for $8, a sink strainer for $4, and 10 feet of white particle board shelving at a cost of $20.
I had the rest of supplies I needed on hand – black and white paint, miscellaneous lumber, nails and screws. My grand total project budget was $47!
Step 2: Next, I removed the dresser drawers. I decided to use one as a hutch/upper shelves for the kitchen, and the other as a side ‘pantry’. For the hutch, I removed the back of one of the drawers – then moved it up so that it would serve a as a shelf. I cut it with a bit of a curve, to add some visual interest. The second drawer was turned on it’s side and fitted with inexpensive white particle board shelves.

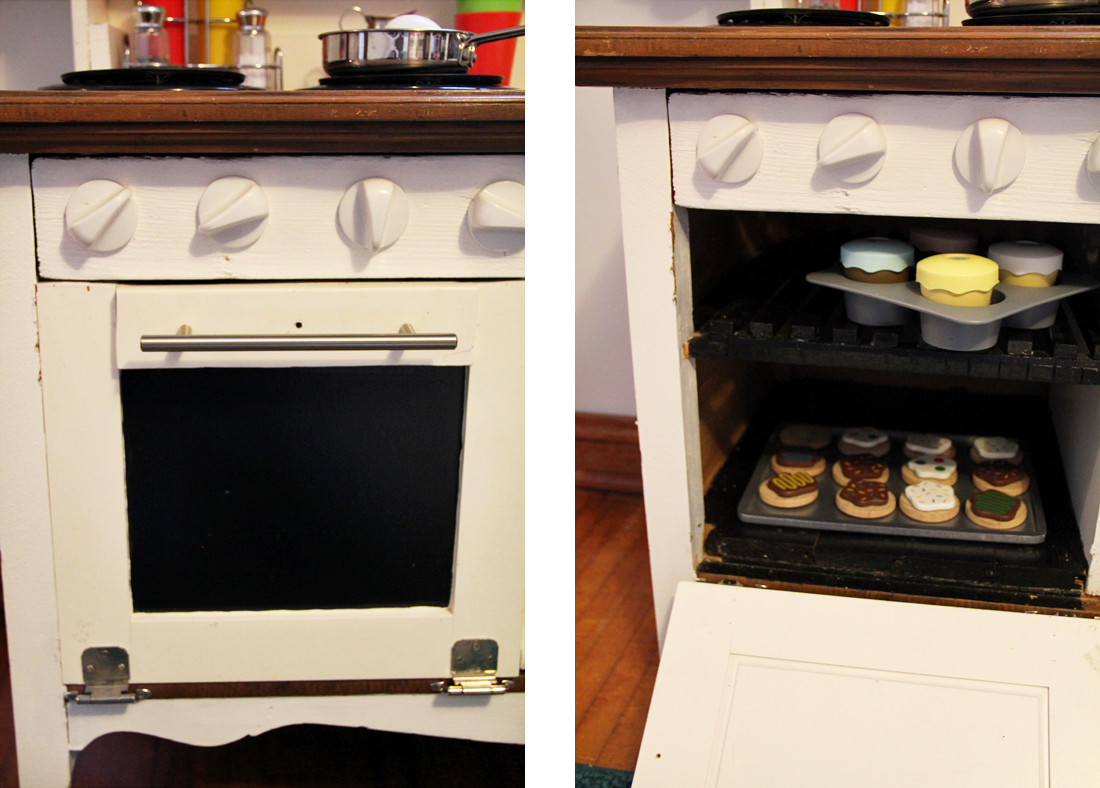
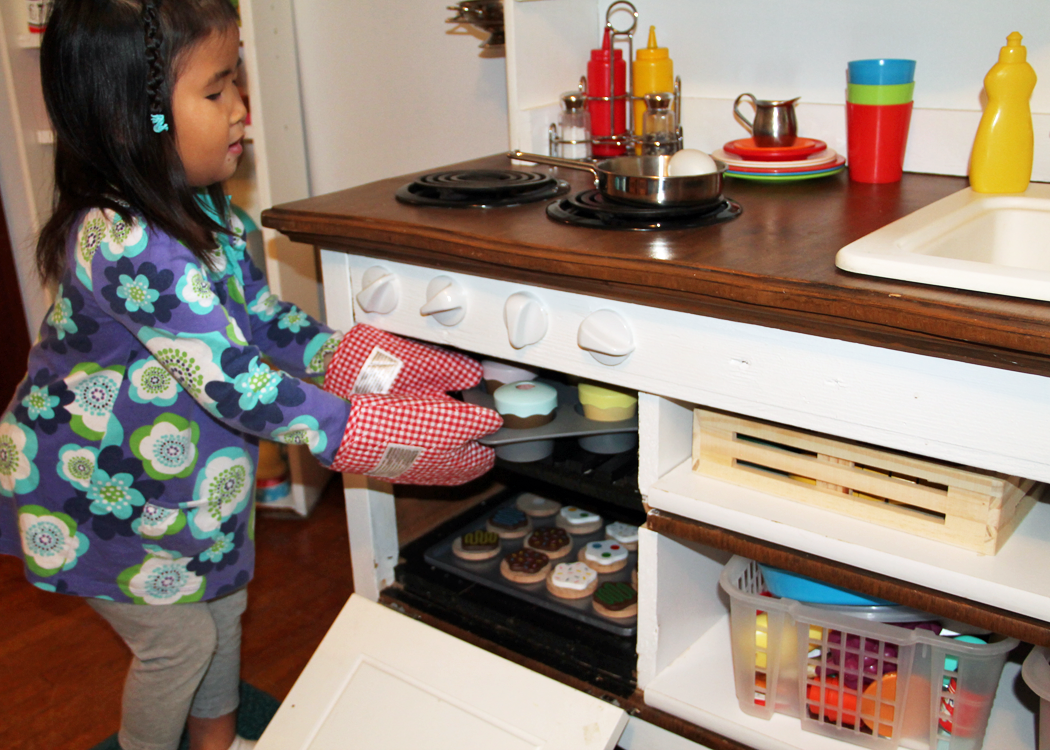
Step 3: Using the ReStore cabinet door as a guide, I closed off a portion on the left of the dresser to create an oven space. A 2×4 was secured along the front of the dresser, and is where I attached the oven knobs with screws. The oven interior was fitted with 1/2″ square trim pieces, spaced apart to simulate an oven rack. The entire interior was painted black. I also painted the center portion of the cabinet door black, to give the appearance that you were looking through to the inside. The cabinet door was hinged on the bottom, allowing it to swing down. The finishing touch for the oven was the metal handle. It was the single most expensive piece of the project, but the added charm and realism was worth it I think.
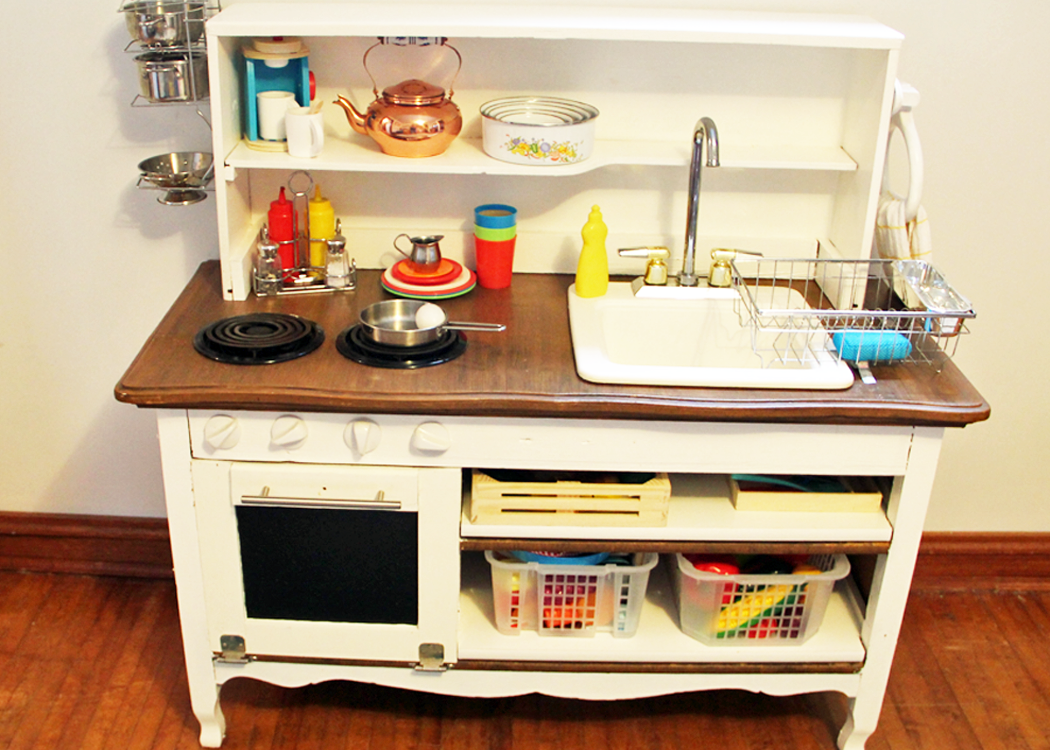
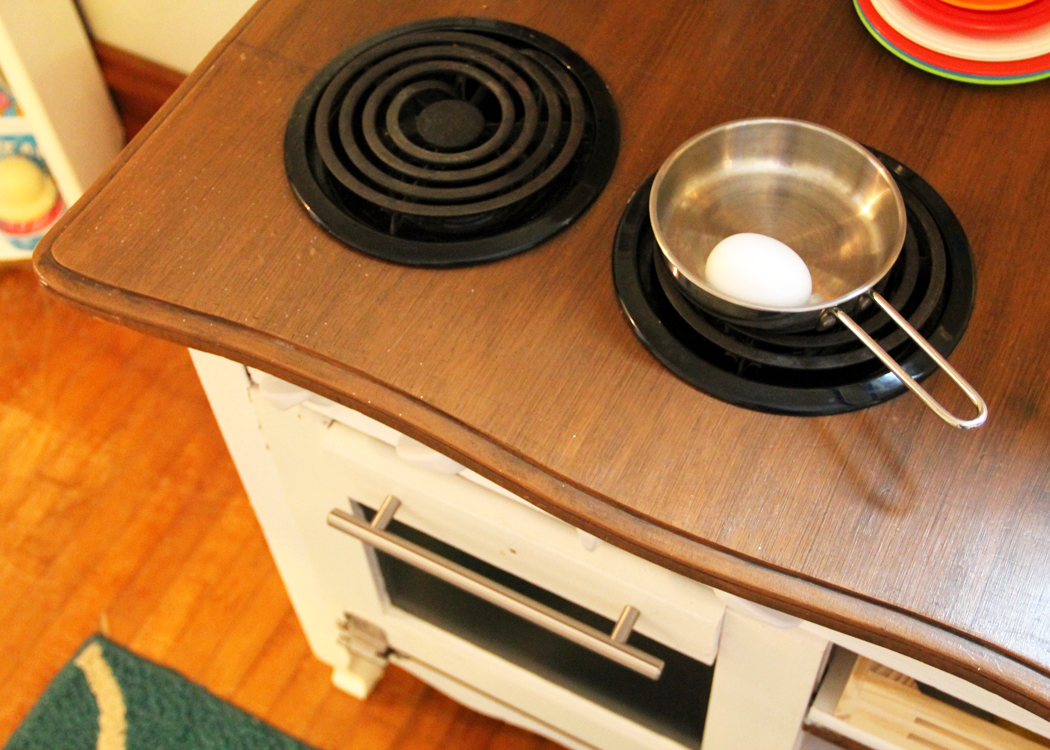
Step 4: I then turned my attention to the dresser top. I traced the outline of the burners and sink in the locations that seemed visually balanced, and used a reciprocating saw to cut out the holes. I placed the burners and the sink into the holes and used lock tite to secure them in place. The addition of the faucet and sink strainer really dressed up the piece.
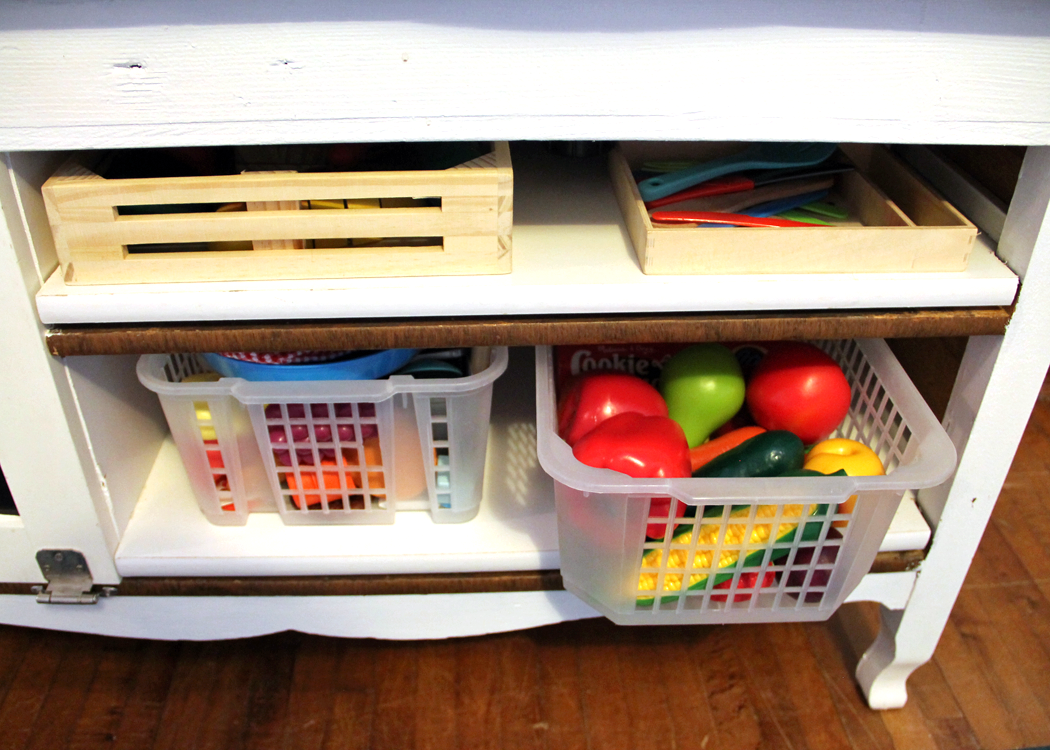
Step 5: Next I added in the remaining shelving material that I had purchased, to make two open shelves under the sink. This space is absolutely perfect for baskets of pretend food, plastic dishes, and pots and pans.
Step 6: For the final step, I grabbed a paintbrush and gave the dresser a nice coat of bright white! I chose to leave the dresser top in a wood tone, to add interest and dimension. I think it looks a bit like a butcher block counter top – very farmhouse friendly!
ACCESSORIZE!
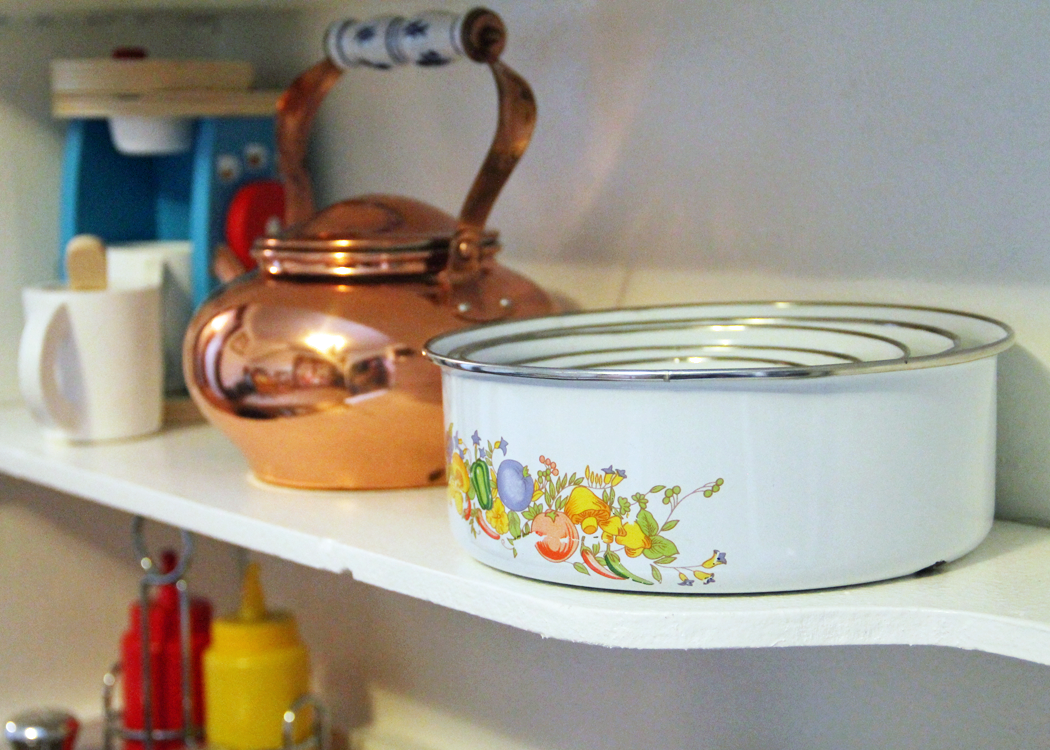
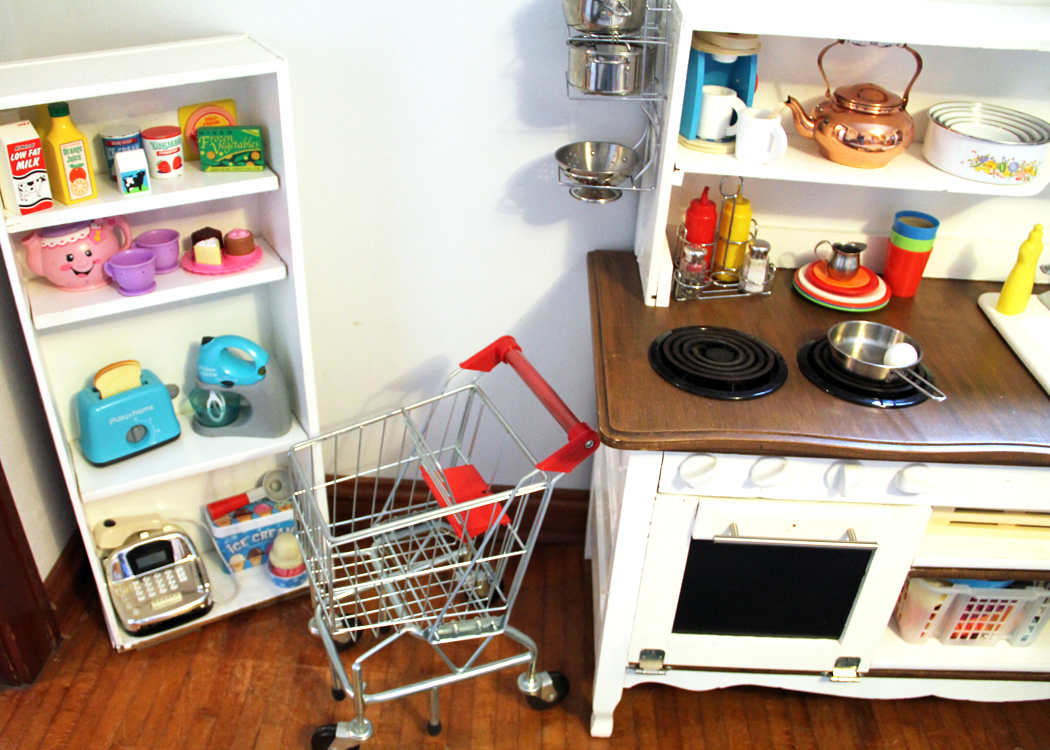
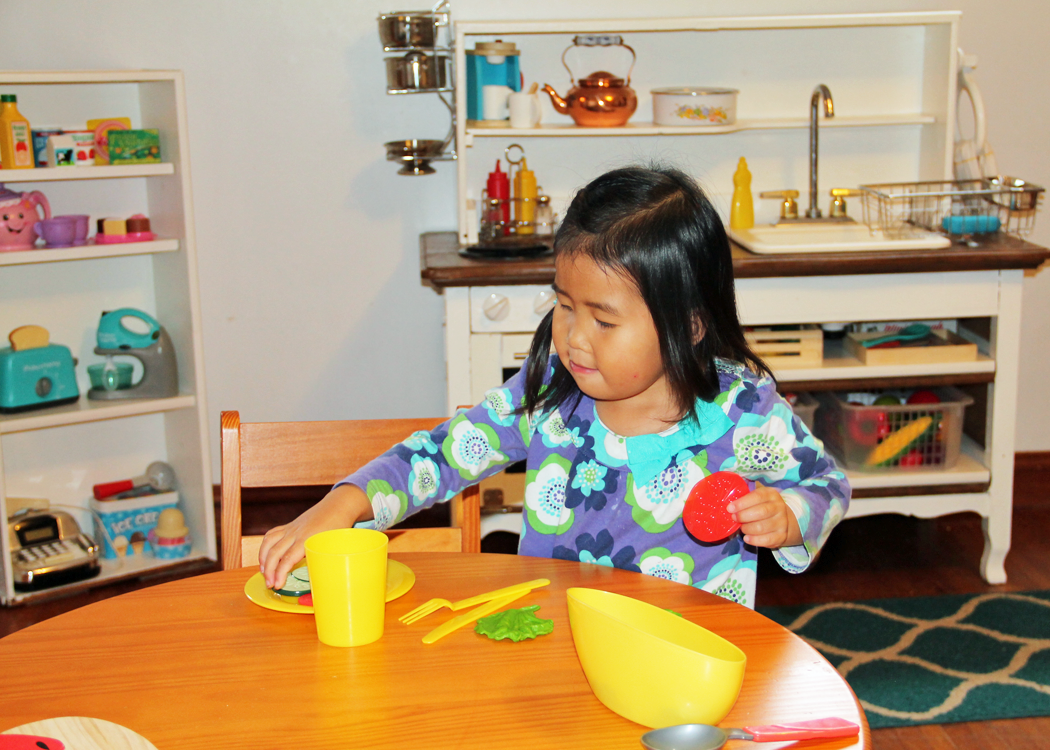
As you can see from the pictures above, after the project was complete I had a blast purchasing accessories! I love the quality of Melissa & Doug items, and our girls have hours of imaginative play with these fun toys. We also have a couple of other brand toys that the girls like to use when playing with the kitchen. If you are interested in purchasing any of the items from the above photos for your own children, I have linked them below.

PLAY AND ENJOY!
I have been so happy with how the play kitchen turned out , and the girls love it just as much as I imagined they might. It is so special that it is a new piece, created from something that has family history. I believe it is built well enough to last for a long time. Maybe in the future we will be watching our grand kids playing with this creation!
Does the idea of creating a play kitchen for your kids or grand-kids have you intrigued? Take a look at these cute DIY ideas for even more inspiration to get you motivated! I love how they are each so unique, and made with all sorts of different materials!
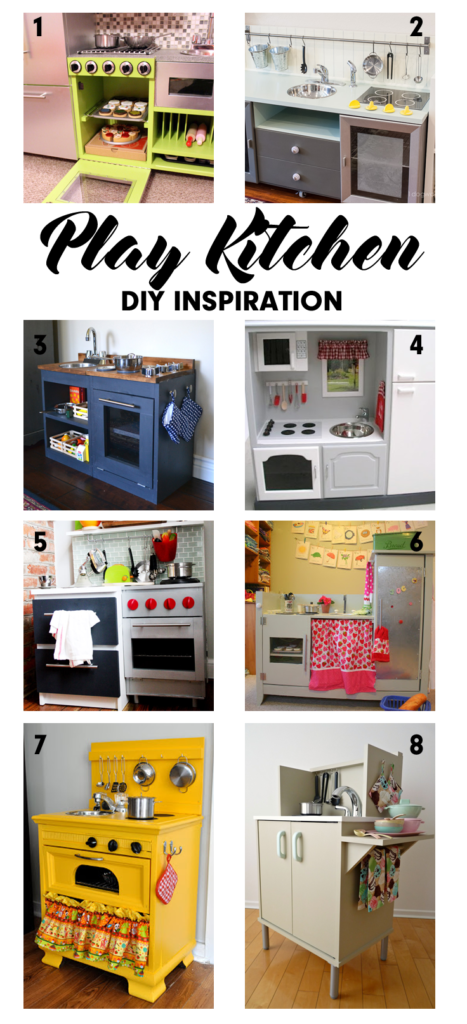
Cute, right? Go ahead… give it a try! The beauty of DIY is that your creation will be unlike any other, and there is no right or wrong way to approach it. Just have fun, and make it your own!
This post contains affiliate links. To learn more about my website disclosures, click here.
this is so cute!!!! ? ? ? I bet your girls love it!!
absolutely LOVE it, yes! Even though we are minimalists, this is one piece I will hold onto for the grand kids. 😉