Kids Clothing Declutter | How much to keep

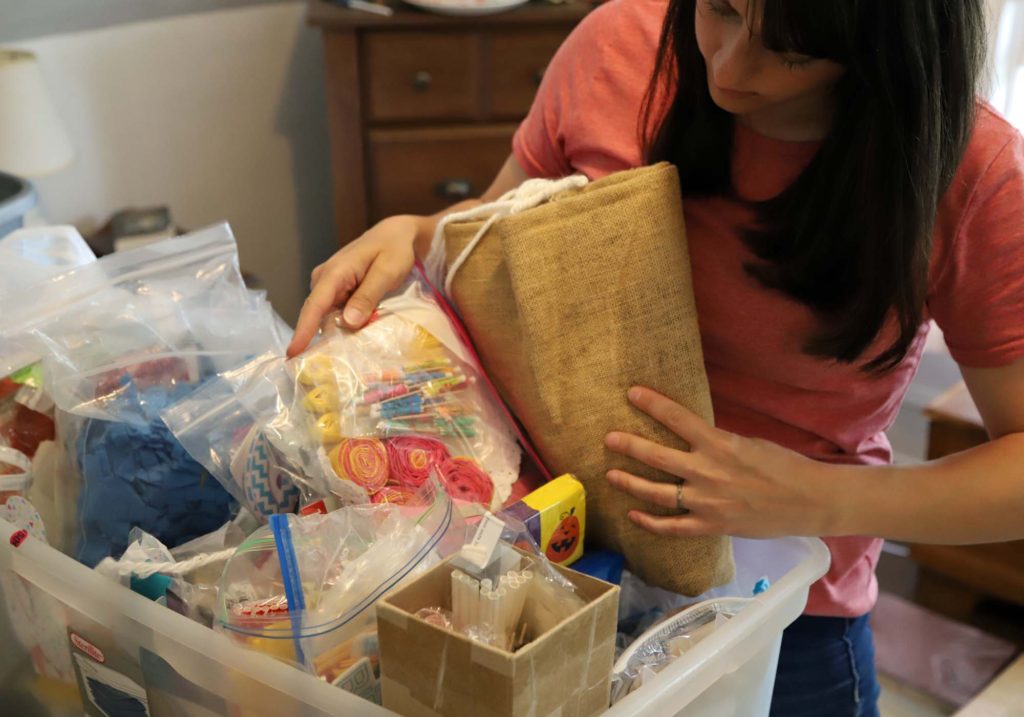
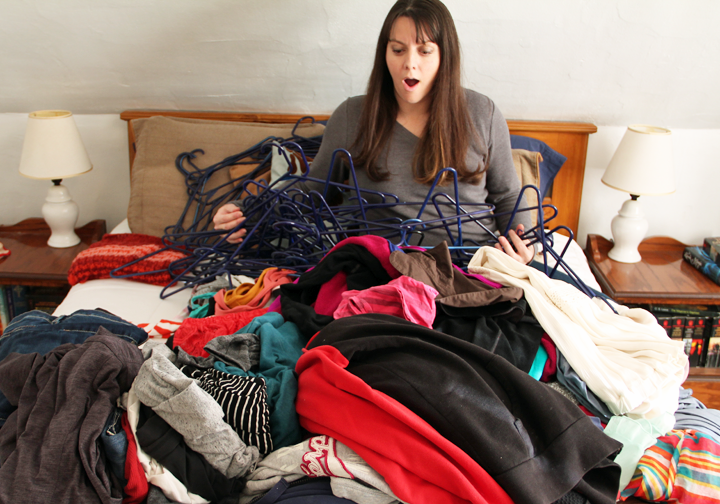
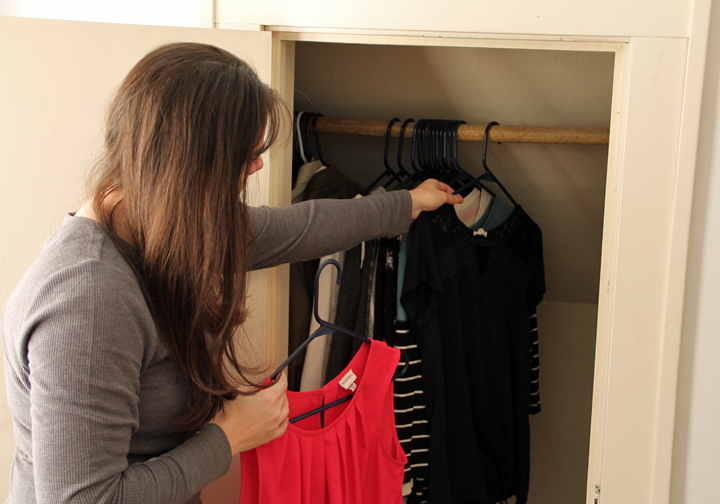
We are just weeks away from our mega garage sale in preparation for our move. I have been finishing up going through the last bit of items in our house, and the focus this week was on decluttering kids clothing.

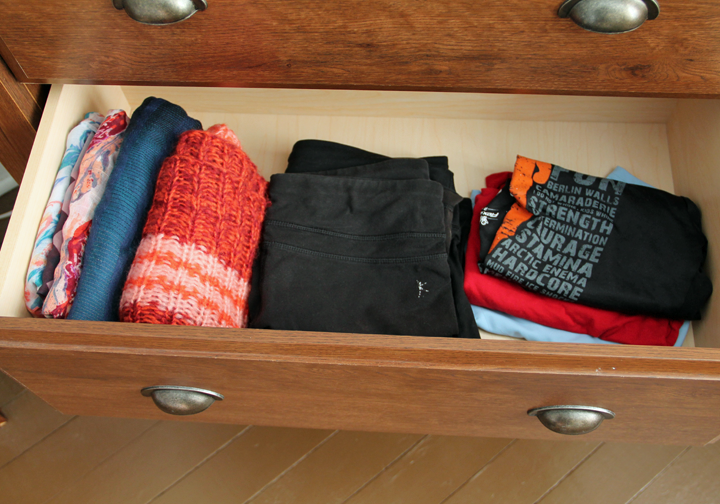
You know the saying about how socks seem to be eaten by the washing machine? I feel that they magically reappear in the form of extra pants and shirts, in the drawers of children. And for someone who is attempting to become more minimal, this multiplication can be extremely upsetting.

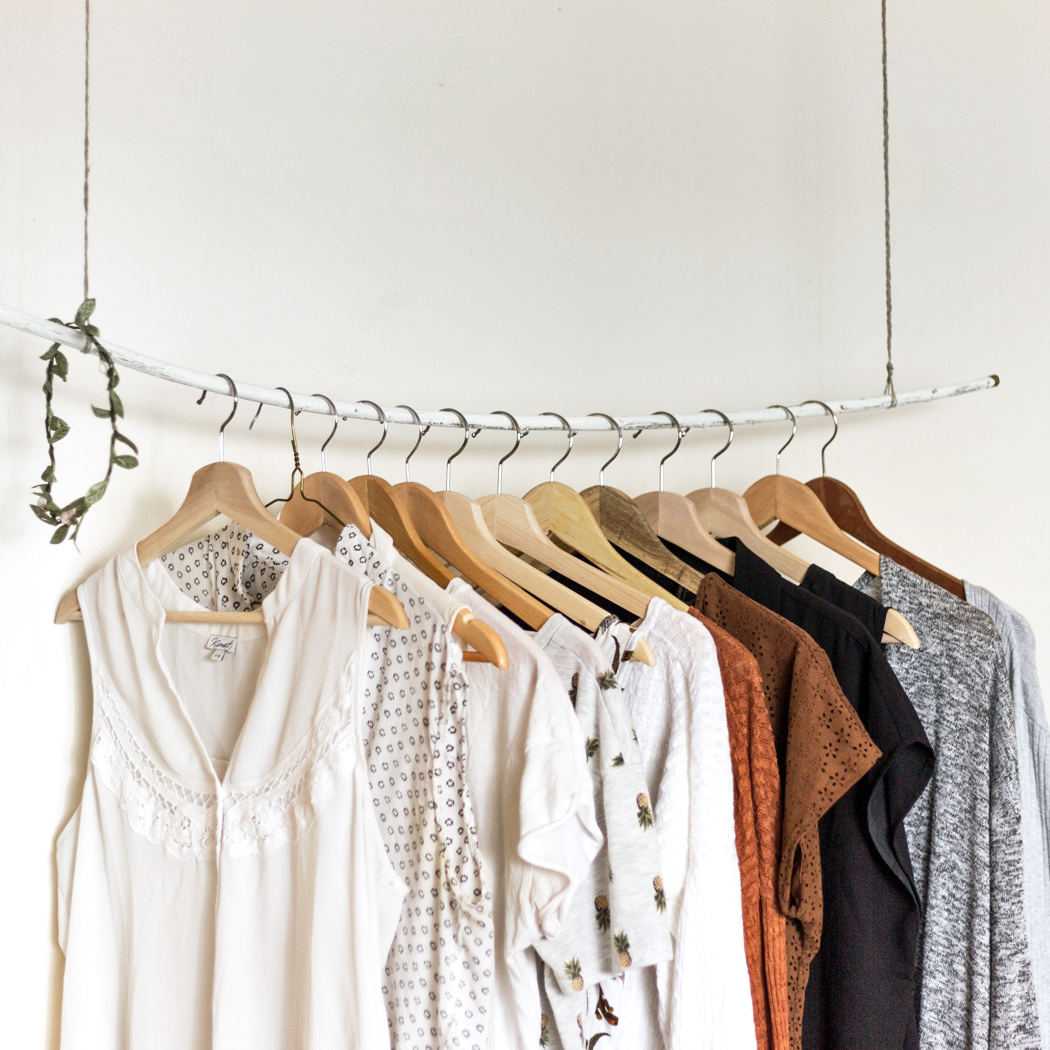
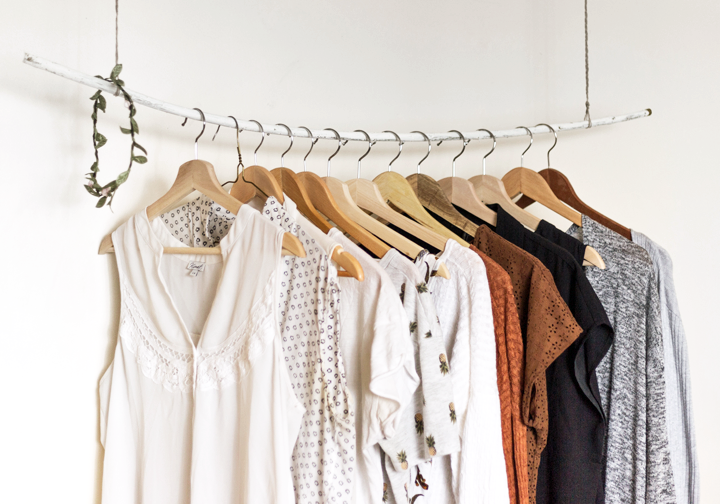
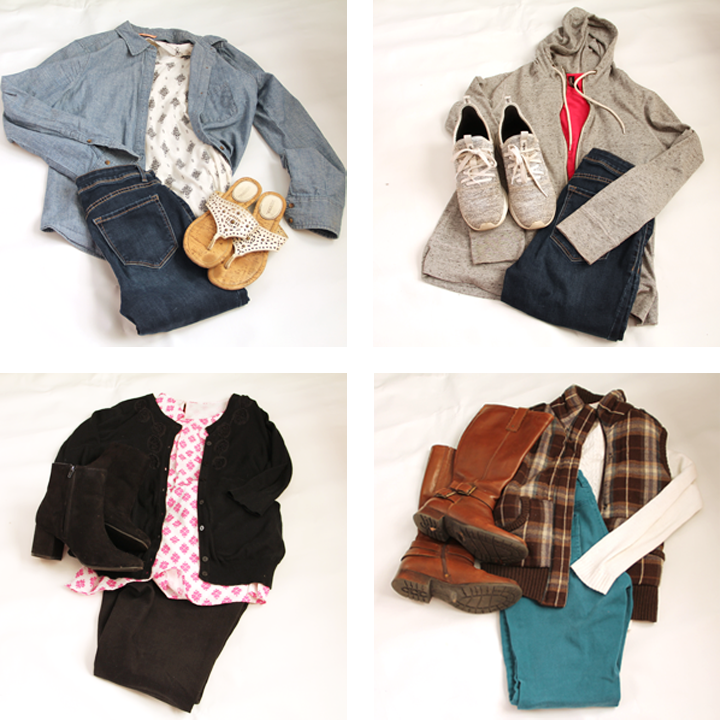
This past winter, I took the leap to create a capsule wardrobe for myself. I ended up paring my entire collection down to fifty total items, excluding a few items such as outerwear and jewelry. I found it so freeing, in fact, that I eventually convinced my husband to declutter his clothing as well. Neither of us have missed a single item and we both find it super easy to make our outfit selections.


WHY KIDS CLOTHING ACCUMULATES

For a variety of reasons, it seems that kids clothing accumulates faster than adults. By understanding the reasons it is easier for these items to enter our houses, we can be more mindful in the future to stop it from happening.

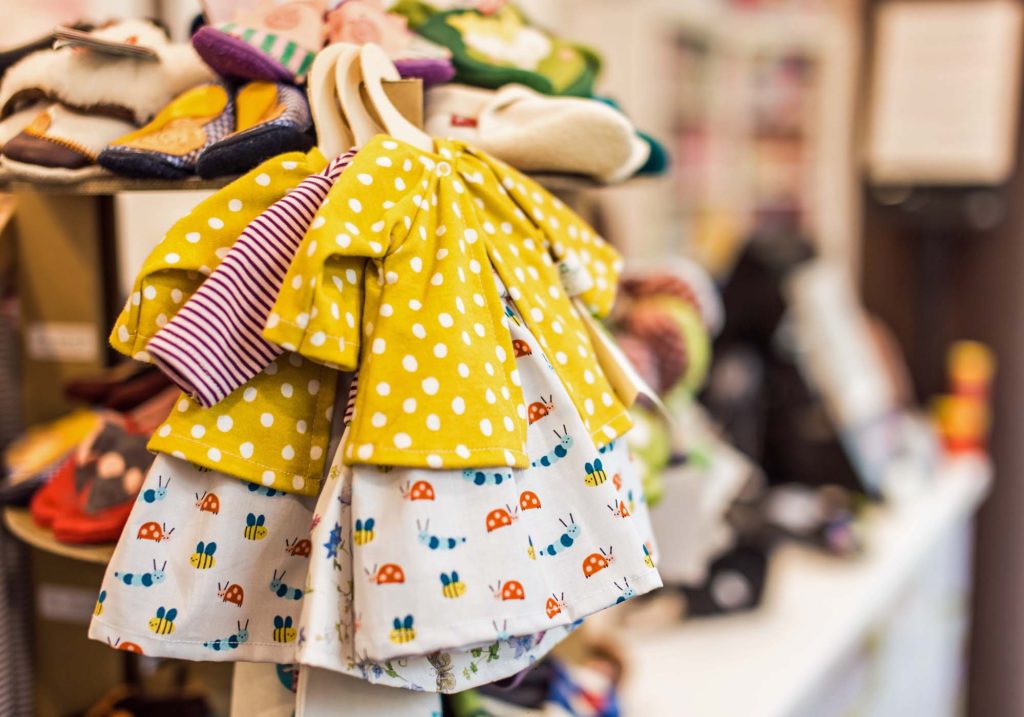
Kids clothing is cheap

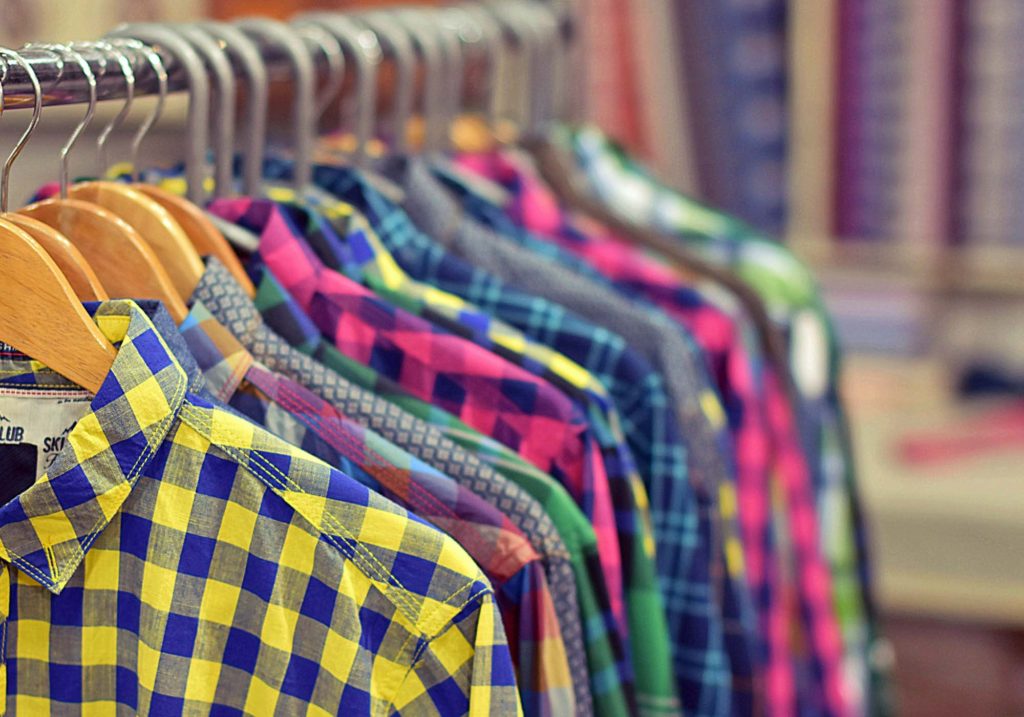
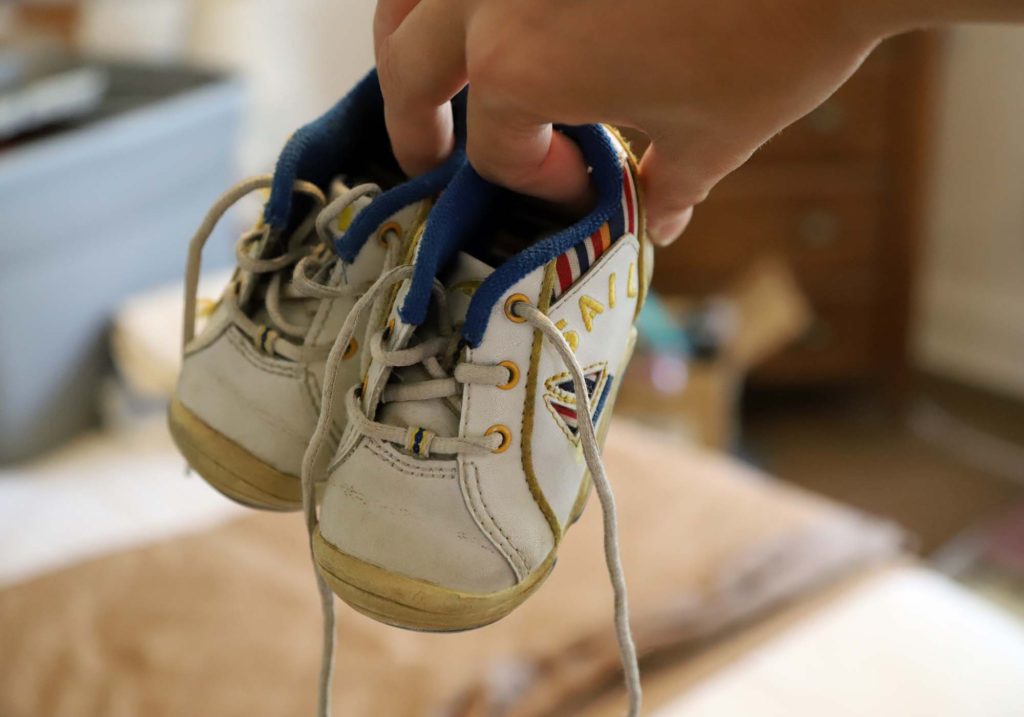
For a small amount of money, you can build your child’s wardrobe. A dress here, a pair of pants there. And don’t forget all those cute shoes! There are also plenty of garage sales that feature extremely inexpensive kids clothing. At fifty cents per piece, it isn’t easy to pass up those closet filling bargains!


They take up little space

Unlike large toys or furniture pieces that might get in our way and remind us we need to pare down, clothing is relatively small. We know that we can usually fit ‘one more’ shirt in a dresser or one more coat in a closet. It’s when all of these little pieces are added together that we really start to notice a problem at all.


There are never ending hand-me-downs

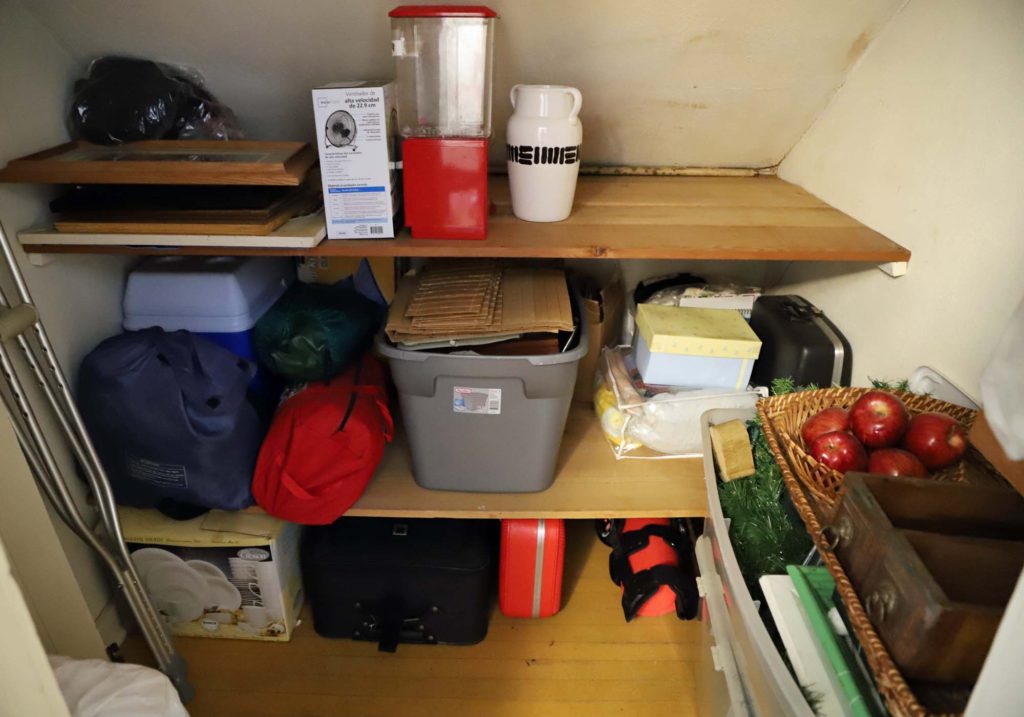
If you have multiple children, or generous friends and family, the accumulation game becomes even more dynamic. You may be suddenly faced with multiple storage totes full of prospective outfits, whether your child is ready to fit into them or not.


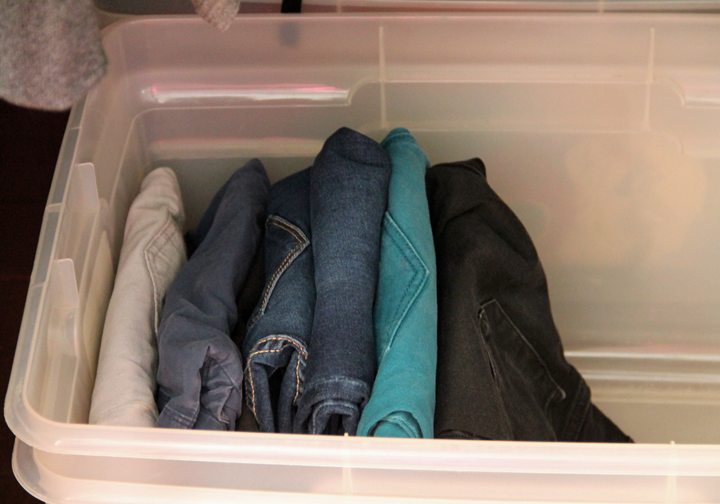
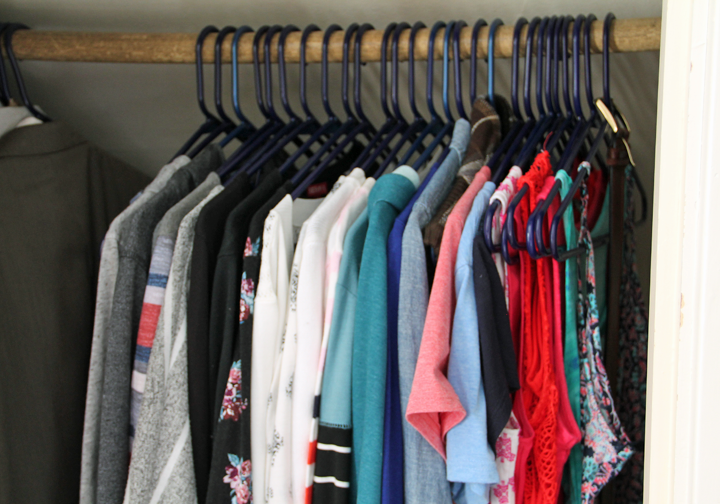
STORING KIDS CLOTHING

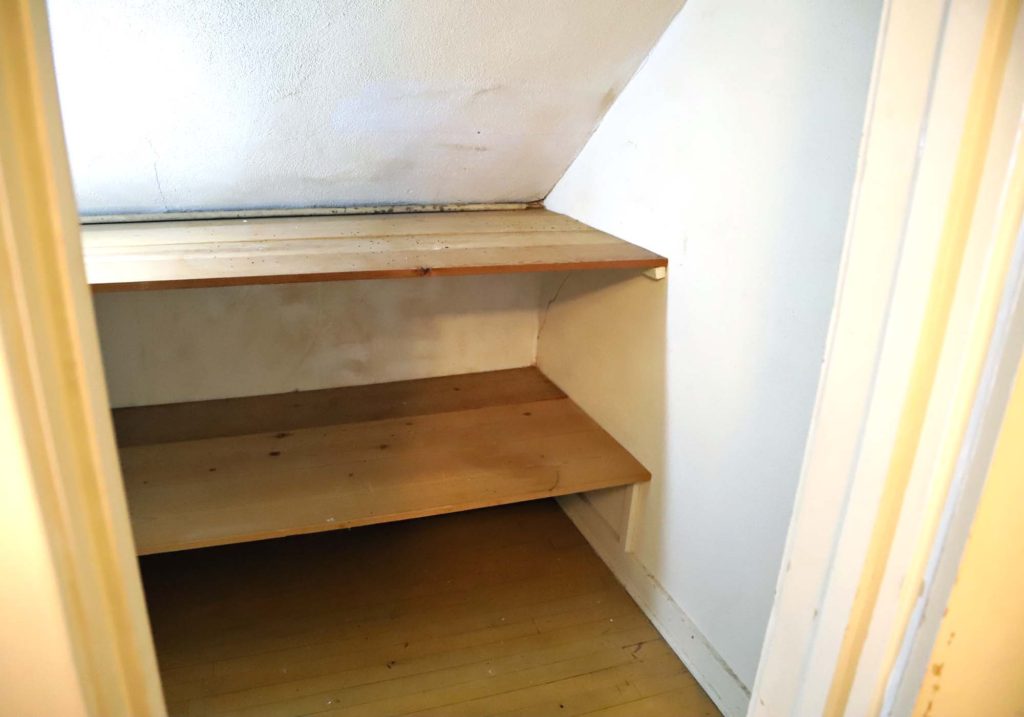
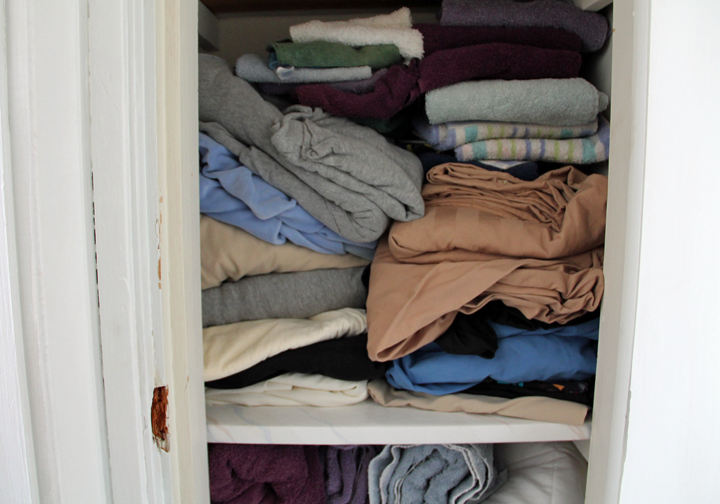
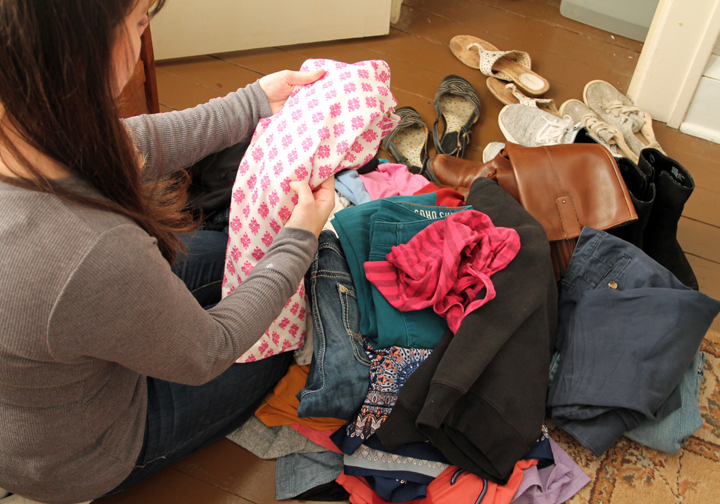
It’s easy enough to get rid of the items that have been outgrown or those that are riddled with holes and stains. But, what if the seasons are shifting and your child has a number of perfectly good clothing items that still fit? Or older brother has grown out of a favorite sweatshirt, and there is another brother just a couple years younger?

decluttering kids clothes

I am definitely guilty of keeping clothes around with the thought that ‘someday’ one of the other kids might need it. Though, through my nearly thirteen years of parenting, there have been only a handful of times when that has truly been the case. Styles change, body shapes are different, kid’s preferences might be particular.

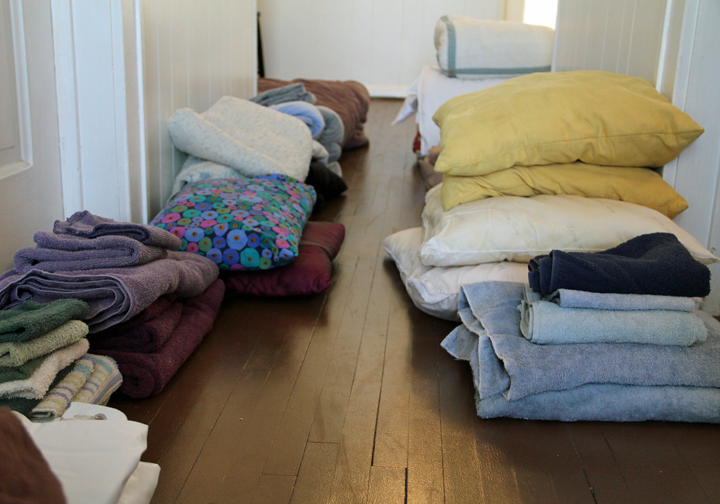
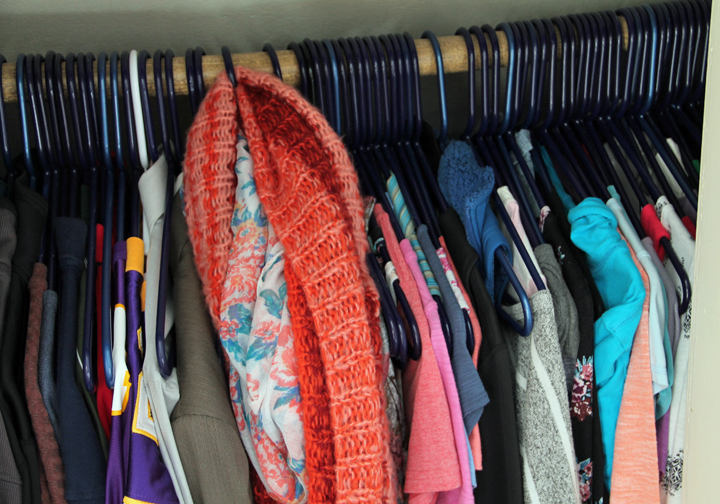
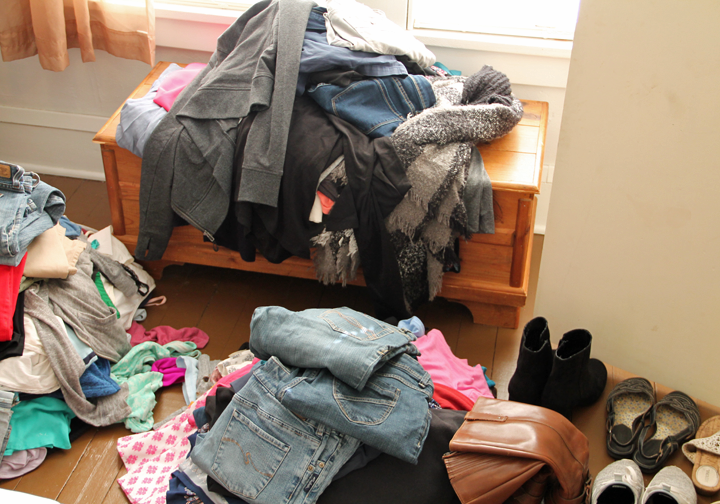
Because of the sheer amount of items that can accumulate, dealing with stored clothes can be downright overwhelming.


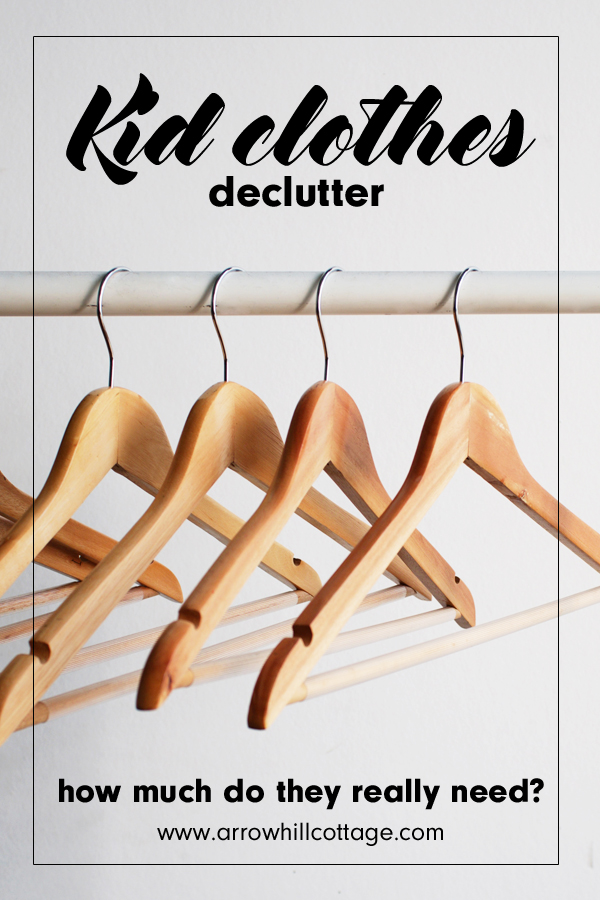
HOW MUCH DO THEY REALLY NEED?

In the end, I am left with this very question. How much clothing do the kids really need? Probably every family’s scenario is a bit different. I can only speak for our family. And I know that our kids have way more clothing than they actually need.

how many clothes do kids need

I will admit that this is probably going to take me a series of edits before we get to the magic amount. And yes, it will most likely be left up to me to decide, since not one of my kids care much at all about clothing.

There are a variety of guides online that discuss how to create a capsule wardrobe for kids. They even go so far to indicate the number of each type of item (shirts, pants, etc) that it should include. This blog post, for example, gives some great tips on how to pare down.

Generally speaking, the rule of thumb has to do with how many days you want to go without needing to do laundry. Ideally, for our family, the kids clothing supply would last, at a bare minimum, a week to week and a half.

Potentially, our kids clothing capsule might look a little something like this:

BOYS

16 short sleeved shirts (shared)

18 long sleeved shirts (our youngest would need 6 of his own, and his brothers could share the remaining 12)

4 sweatshirts/hoodies (each)

5 pairs of shorts (each)

5 pairs of comfortable pants (each)

2 pairs of dress pants/jeans (each)


GIRLS

8 dresses (shared)

16 short sleeved shirts (shared)

16 long sleeved shirts (shared)

2 sweatshirts/hoodies (each)

2 pairs of shorts/capris (each)

7 pairs of pants (each)


After the move, I will plan to go through my kids closets and dressers again. At that time, I think I will attempt this capsule scenario. Perhaps keeping a few additional ‘backup’ items, in case the inventory seems too low.

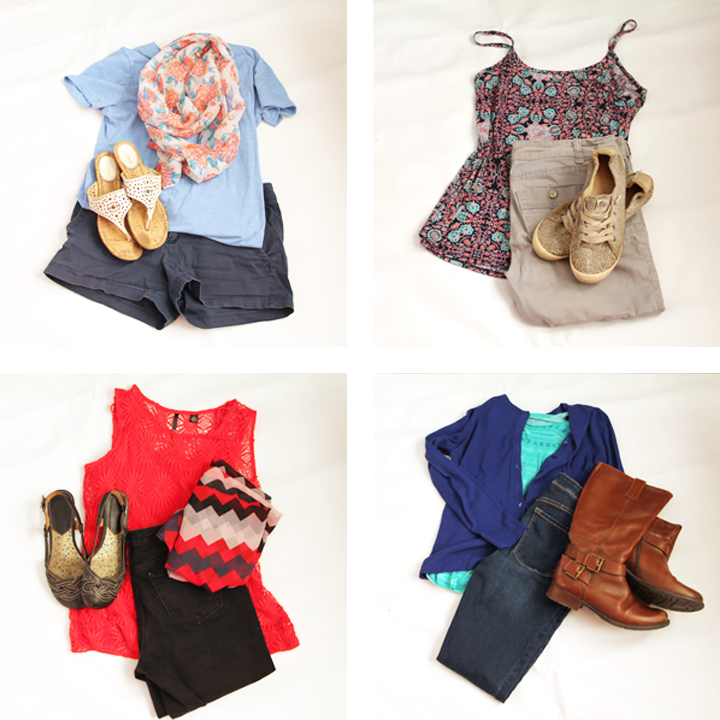
The great thing about having a minimal wardrobe is that if something becomes stained or worn you can replace it with something new, guilt free. Another benefit to a smaller wardrobe is being able to customize it for each child’s comfort and style preferences, without breaking the bank.

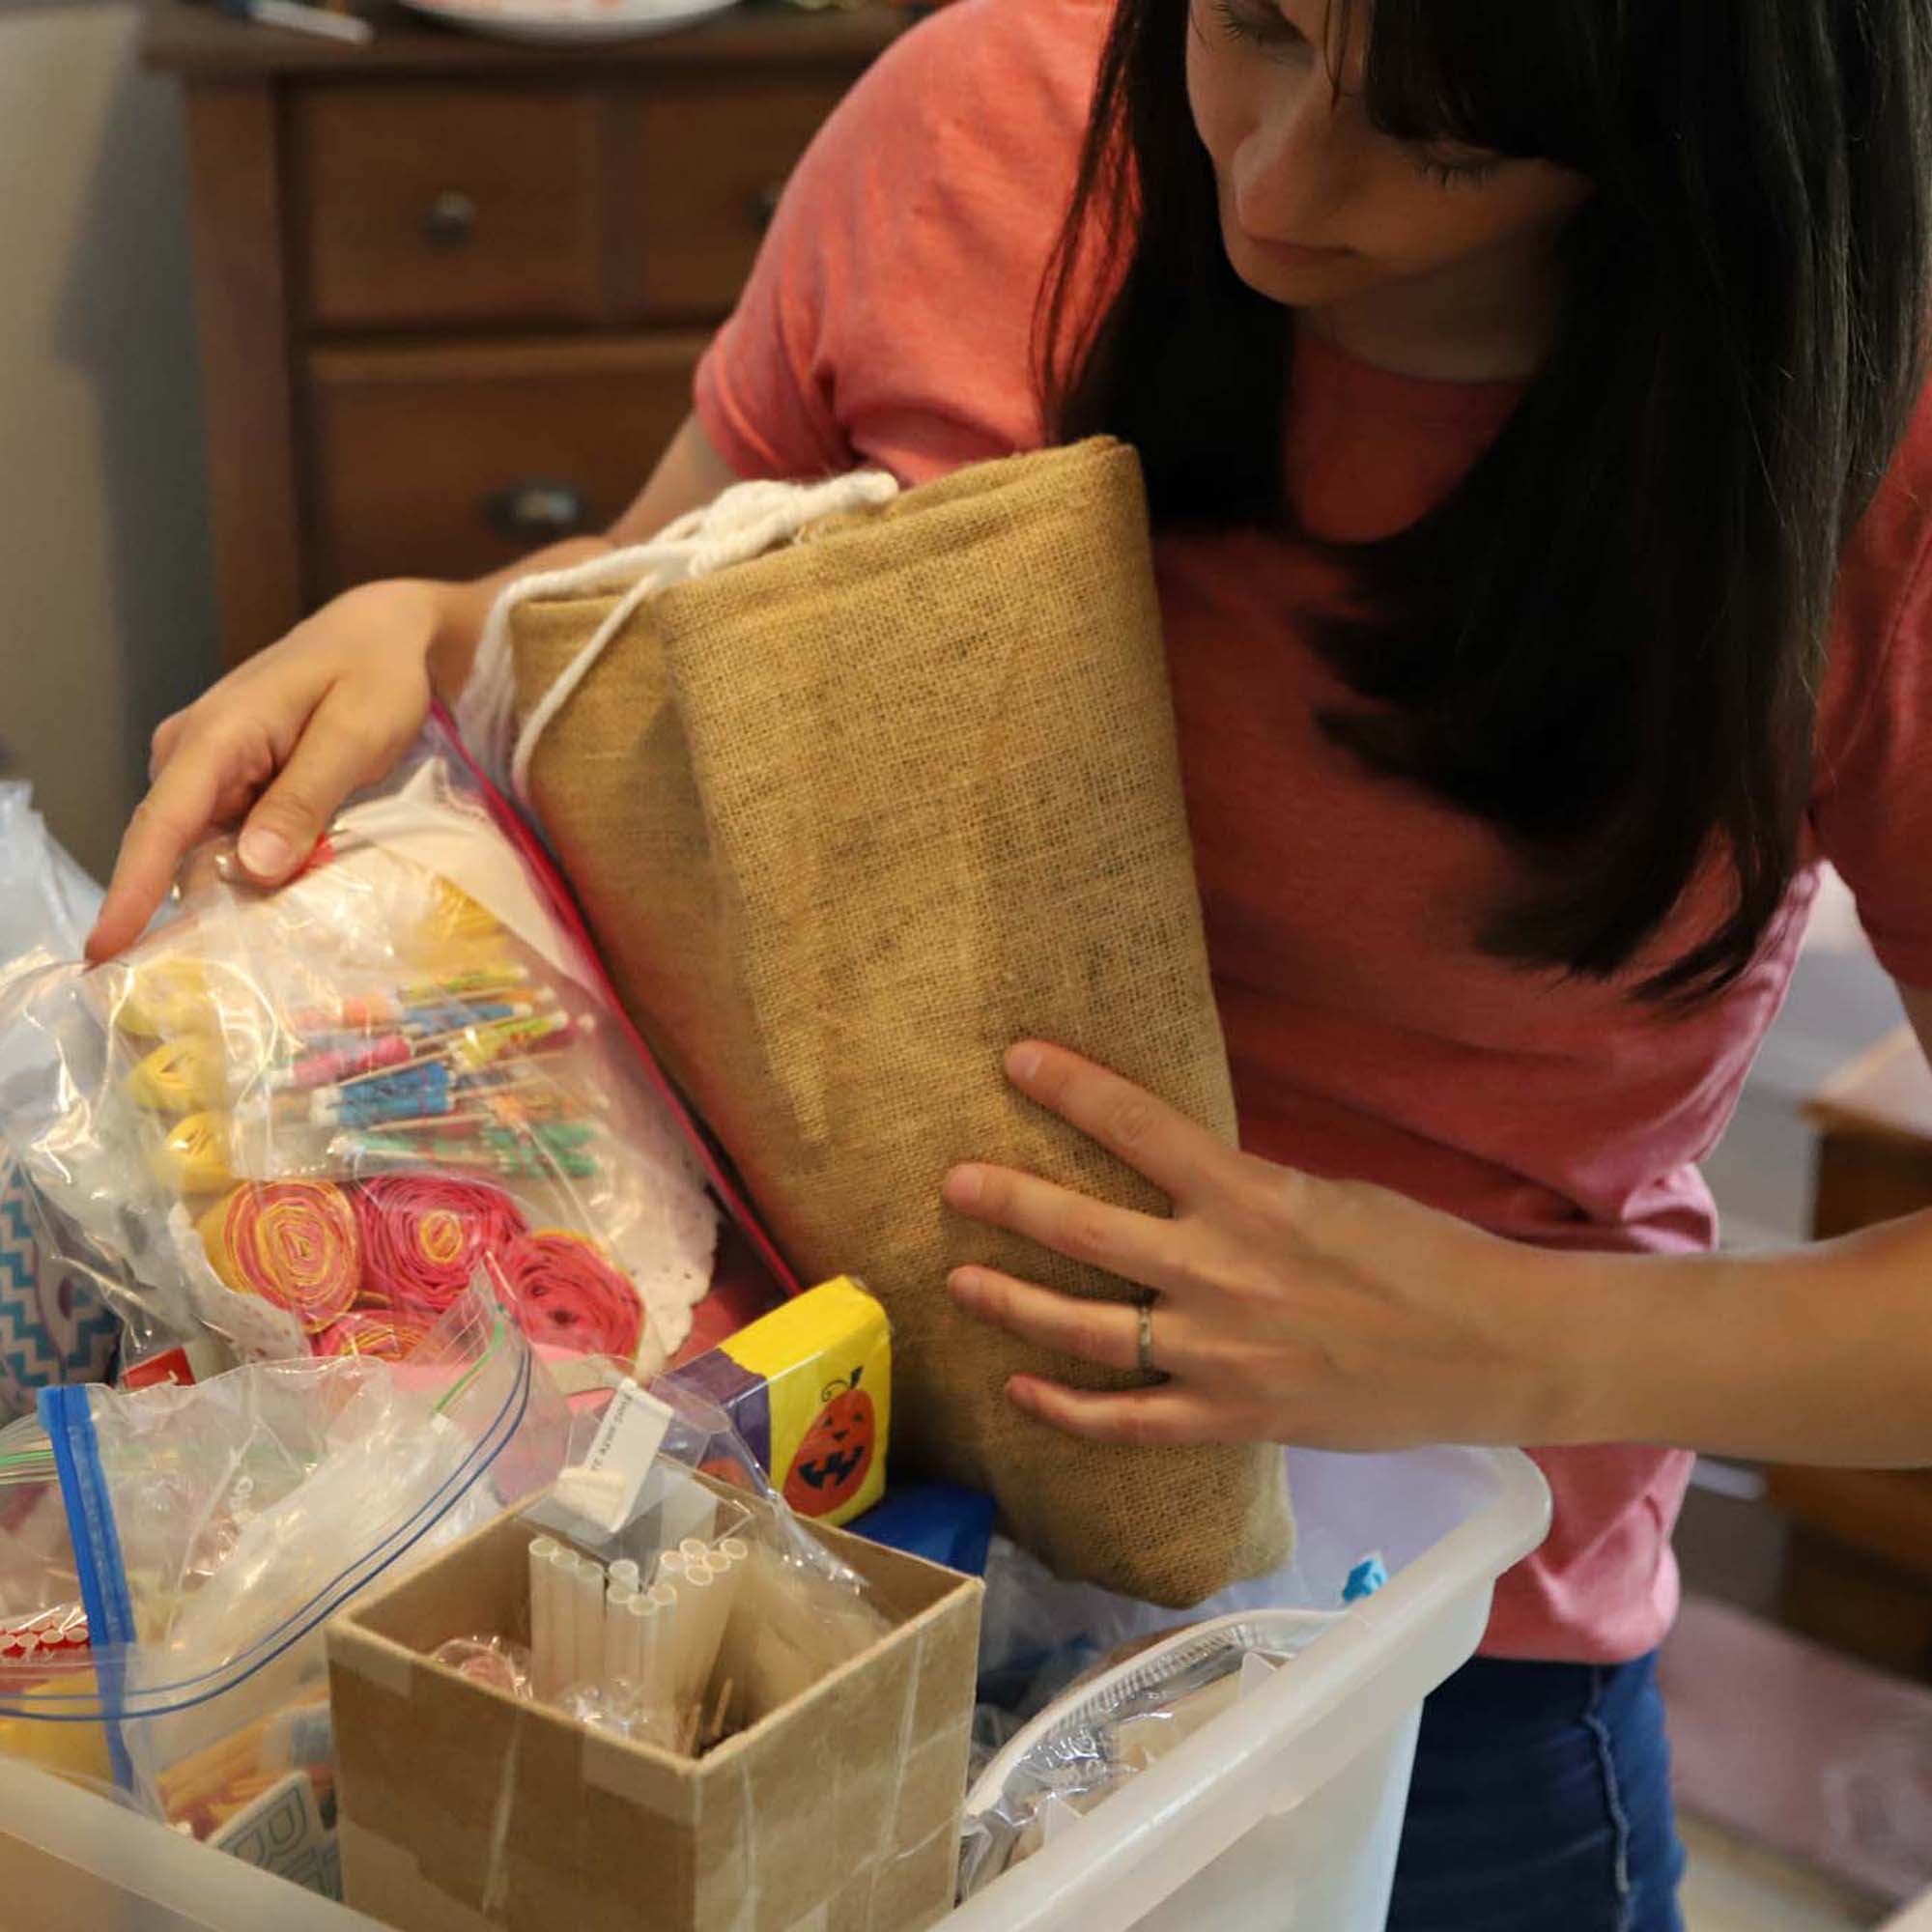
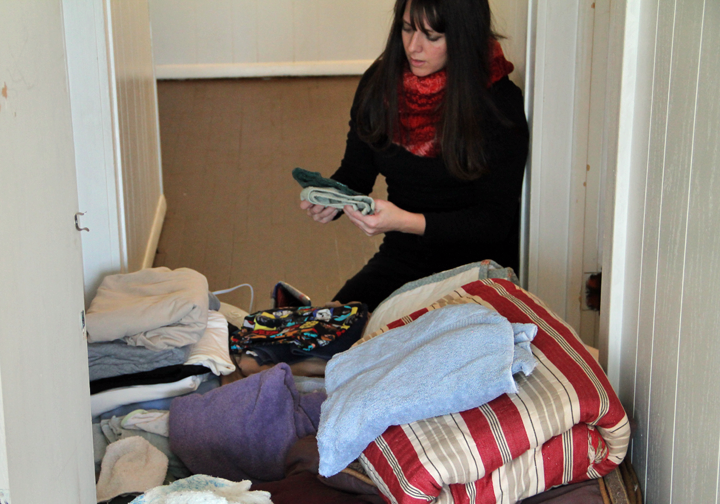
And dealing with an item or two, here or there, would definitely be favored over the four hour decluttering session I just went through in their closets! If I look exhausted at the end of the video, it’s because I was!

WATCH ME DECLUTTER


PIN THIS POST

kids clothing declutter

STORAGE CLOSET DECLUTTER

We are in the final stage of decluttering our rental farmhouse. Only a few areas and categories remain to be sorted through before our big move! This week I took on the storage closet declutter, and am happy to have it behind me!

clutter found in the storage closet

Embarrassing as it is, all of these items were stuffed in our hall storage closet


STORAGE CLOSET DECLUTTER – OUR WHY

My husband and I have lived in three houses during our marriage. The first, for only a year. The second, for ten years. And our current rental farmhouse for the past four and a half years. Each time we have moved we were shocked to find the amount of boxes that were transported from house to house, without being opened. Because of this, we were determined to really SEE what we own before our next (and hopefully final) move.

The goal when sorting through this storage closet was to determine which items we plan to keep. There is no sense in moving the weight of extra items that we don’t need or want anymore. By doing the sorting before the move, we are more likely to be critical. In contrast, if the boxes were to come with us to the new house without being looked through, they likely would have found a spot in a closet there. And sat, again unopened, for who knows how long!

We actually designed our custom cottage home to have relatively little storage. Some people may be shocked to learn that our master bedroom has no walk in closet, and our kitchen doesn’t feature a pantry. This conscious decision was made because my husband and I both recognize that we have a tendency to fill large storage spaces with unnecessary items.


TIPS ON DECLUTTERING A CLOSET

Decluttering a storage closet is a big undertaking. From my own experience, I am offering tips to help you achieve the best results, without too much stress.


CLEAR OUT THE SPACE

The very first step when decluttering a closet is to remove everything. It will seem daunting, to be sure; But it is very important to see the closet completely emptied. Seeing open shelves and space on the floor will give you a better sense of just how much room you have to work with. It can also help you recognize the dark, tricky corners where items can easily be lost and forgotten.

cleared out closet space


SORT ONE BOX AT A TIME

Tackling the clutter in bite sized pieces allows you to focus your mental energy without feeling overwhelmed. It can also help prevent decision fatigue. I suggest moving one or two bins/boxes into a separate room for sorting.

PUTTING ITEMS BACK IN

Think carefully about which items make their way back into your storage closet. Generally, it is best to store like-purposed items in the same space. If you must store many random types of things together in one closet, as we do, consider giving the closet ‘zones’. One shelf for camping gear, another as a spot to keep decorations, for example.

storage closet declutter after


THE RESULT OF OUR STORAGE CLOSET DECLUTTER

I am happy to report that less than half of the items originally stuffed into our hall closet made their way back in. There is still a bit of randomness in there though. Camping gear, holiday decorations, DIY supplies. Quite a mix. We are hopeful that at Arrow Hill Cottage we will be able to be more intentional about where these items are stored. Camping gear will likely find a place in the garage, where it can be easily accessible, for example.

While sorting through the stored items, I found some real gems that we had completely forgotten about.

These adorable little shoes were worn by our oldest son, when he took his first steps.

closet declutter - finding treasures

And these chess pieces were hand painted by Craig’s mom, many years ago. Now that a couple of our kids have learned how to play, we plan to keep this set up and available for a game at any time.

decluttering a storage closet

As I was sorting, I made it a point to really think about these items. If they were things we wanted to keep, I needed to commit to finding a place for them at the new house – to give them prominence. Otherwise, we will be left with unopened storage boxes once again.


WATCH ME DECLUTTER

Need a little extra motivation to get started on your storage closet? Take a peek at what our closet looked like before. It was insanely stuffed. And watch me tackle it head-on. It took a lot of effort, but I am very happy with the result!


BONUS STORAGE CLOSET DECLUTTER TIPS

More great posts from other websites, offering you even more insight on how to approach these tricky spaces!

Declutter Storage Area |Home Storage Solutions

How To Declutter Your Storage Area Without Feeling Overwhelmed | Simple Lionheart Life

8 Surprising Decluttering Benefits | Lady Decluttered


PIN THIS POST

Keep this motivation and inspiration close by and add it to your relevant Pinterest board! Happy decluttering!

tips to organize a storage closet


Toy Room Refresh | Quick clean

Let’s be real. The rooms where kid’s play tend to get messed up faster than any other room in the house. Today, I am sharing a quick toy room refresh that I recently did at our rental home.

How to keep toys organized

We have lived in this rental house for four years now. There is no basement here, and I can honestly say that I miss having a ‘kid zone’ space tremendously. While we definitely have a nice basement in the works for our new home, we have been making due, for now.


OUR TOY ROOM

The main level of the rental farmhouse has a small room that we have set up as a play space for the kids. It includes a tv with a gaming station, a couple of computers, a whole lot of Legos, and other miscellaneous toys. Brace yourself for a couple of pre-cleaning before photos.

toy room before cleaning

This room is used on a daily basis. And, generally, we have the kids tidy it up every night before bed. However, the past couple of weeks have been beyond busy. With house building preparation in full swing, we haven’t always remembered to have the kids clean up. I walked into the toy room the other day and was horrified. It was an absolute mess!

cluttered toy room

In some weird way, cleaning is therapeutic for me. And so, this week I decided to use part of the afternoon, before picking the kids up from school, to get the job done.


WATCH ME CLEAN

I put on a pair of headphones, and my favorite Podcast (Young House Love Has A Podcast), and set to work. Listening to something entertaining while cleaning definitely keeps me going. Give it a try!


OUR TOY ROOM AFTER

With one hour of focused attention, I was able to get the play area tidy. You parents out there know that it isn’t likely to stay looking like this for long. But, I suppose that is just as it should be. After all, a toy room’s main purpose is to be played in!

cleaned up play space

I appreciate that the room has a bit of open floor space for the kids to sprawl out with their toys. The trampoline is also a hit with the girls. We are still debating if we will take it with us when we move.

play room electronic station

The electronics section got a major cleaning. I made sure to use Clorox wipes on the controllers and computer mice. It’s doubtful that the kids would ever think to do that on their own!

Lego sorting and building corner

The Lego area is ready for more creativity. Just in case you are wondering, yes. We do sort our Lego’s by color! Since this cheap shelving unit won’t be making the move with us, I will be searching for other ideas on how to store the collection.


TIPS FOR CONTROLLING TOY CLUTTER

At some point I will do a more in depth post about how to keep kid’s toys in check. But, for now I want to offer up a few quick tips.


ONLY KEEP WHAT THE KIDS USE

As I mentioned in this post about Kids + Minimalism, we have definitely seen that less is more when it comes to toys. We have decluttered our kid’s collection down to the basics. Their favorites include standard wooden blocks, a few dolls, matchbox cars, and, of course, Legos. All of these toy items allow for plenty of open ended playing.


STORE IN EASILY ACCESSIBLE BINS

Unless you want to be constantly supervising play time, it is essential that the toys themselves are accessible to the kids. Keeping them on low shelving and in durable bins is a good idea.


ESTABLISH SOME RULES

Teaching kids to clean up after themselves is an important life lesson. A great place to start is by making sure that they learn to put away any toys they are finished playing with. This is also one of the seven daily habits that can help you keep your house tidy without the stress!


PIN THIS POST

If you found anything in this post inspirational or helpful, share it! Or save it to read again later.

cleaning up kid toys


JEWELRY DECLUTTER | HOW ORGANIZING SMALL THINGS CAN HAVE A BIG IMPACT

This week I spent some time doing a jewelry declutter. I thought that it would be a quick process, and in a lot of ways it was. But, it also got me thinking – even the small things can make a big impact when it comes to decluttering and organizing.

jewelry declutter ideas

I’ve never been much of a jewelry wearer. Though I like the idea of wearing jewelry, and I think that it looks nice on other people, wearing it myself is uncomfortable. It might be because I have sensitive skin and the metals make me itch. Or it might have more to do with the fact that for many years any necklaces or earrings I wore ended up being tugged on by my kids. These days, I tend to only wear my wedding ring on a regular basis.


While going through all of our belongings in an effort to only bring our favorites to Arrow Hill Cottage, I knew I wanted to leave no stone un-turned. And that meant I would need to take a close look at everything we owned. Even the smallest of items that seemingly take up little space.


STARTING THE JEWELRY DECLUTTER

And so, I opened up my little cabinet and started my jewelry declutter. Funny story about this little jewelry cabinet. It was one of the first gifts my husband gave me when we were married nearly seventeen years ago. I’ll admit that I was less than thrilled when I opened it. Why? Well, because what I had suggested to him as a ‘gift hint’ when he asked was a stand up furniture piece jewelry cabinet, not some small little table top storage piece.

How to declutter your jewelry collection

I remember thinking that there was no way all of my jewelry would fit inside it. I wanted bigger, I wanted better. But was it necessary? Not even close. Looking back, I think my husband knew me better than I knew myself. He had seen that I didn’t wear jewelry often. He had noticed that when I did wear something, I always grabbed for the same one or two items.

This cabinet has moved with us into each home we have shared together. And, if I’m being completely honest, I don’t think I have opened it once since we moved into our current rental farmhouse four years ago. Are the items it contains precious and useful to me? I think we all know the answer to that question.


LAYING THE JEWELRY OUT

Opening up the cabinet and laying every piece of jewelry out on the table was like a blast from the past. Necklaces from junior high. Sparkly hair combs from high school prom.

How small items can make a major impact when it comes to decluttering

A handful of keys that unlock… who knows what!

decluttering

There were also a few sweet surprises. My wedding jewelry that, although I don’t intend to wear ever again, I could never part with. And, my husband’s high school class ring, which I distinctly remember him wearing the first time we met. When we started dating he put it on a chain and I wore it around my neck.


WATCH MY JEWELRY DECLUTTER


THOUGHTS ABOUT THIS PROCESS

As I was sorting through everything, I realized that, on a very small scale, jewelry can serve as a metaphor for all types of clutter.

Stop and think about it. A bracelet is a small item. So small, in fact, that we find no harm in holding onto it, even if it isn’t something we use or really love. Add to it a few more bracelets, a necklace or two, and a pack of earrings. Suddenly we are finding ourselves needing a place to store these items. It’s like a snowball that keeps getting bigger.

Compare jewelry to other item types in your home. Those dresses you are holding onto, hoping that the next time you slip them on they will fit perfectly. The camping gear your family used once, then stored away. The space that these unused items are taking up is more valuable than you may currently realize. And the more items that are accumulated, the more space that is needed to store them.

This is why it is important to be honest with yourself regarding each and every item in your home. There is no reason to keep anything that is not special or useful.


NEW JEWELRY STORAGE SOLUTION

After my jewelry declutter, I was left with a handful of special items. Will they go back into my jewelry box? In a word, no. Just as you a person doesn’t need an entire walk in closet for a few pairs of jeans, I do not need a storage box for my favorite jewelry.

Instead, I will be storing my special items in a set of silk and velvet bags. These small bags have special meaning to me. They were given to me when I purchased a set of pearls during our adoption trips to China.  Twice we watched skilled women string the pearls of my choosing, add the clasp, and delicately place them into a bag. Two adoptions, two bags.

The bags will be placed in my sock drawer, where they will be kept safe and easily accessible. And you can bet that every time I look at them I will have a smile on my face.

jewelry storage idea

I also will be keeping a small, velvet lined, silver jewelry box that was my grandma’s. It will surely find a place of importance in the new house decor.

small antique jewelry box storage


Don’t worry though. My husband has given me his full blessing to donate or sell the jewelry box he gifted me all those years ago. I hope it falls into the hands of someone who will cherish it.


FINAL THOUGHTS

I’m extremely happy to admit, once and for all, that I’m not a jewelry wearer. And that is okay! The pieces I have kept reflect my personality and style, and have strong memories attached to them. That is what is more important to me. If you are considering a jewelry declutter, I definitely recommend it! Don’t let the little things get in the way of the big picture you envision for your life!


PIN FOR INSPIRATION

jewelry declutter | how small items can make a big impact

KITCHEN CLEANING CHECKLIST + TIPS

Kitchen cleaning can really be a chore. Though keeping the kitchen clean is something that is ongoing, a deep clean session is required every so often. This article provides a kitchen cleaning checklist, plus tips on how to get the job done well. Be sure to read until the end to see a video of my own personal kitchen cleaning and declutter!

Ultimate kitchen cleaning checklist plus tips on how to get the job done right!


BEFORE YOU BEGIN

If you plan to do a major kitchen cleaning in one day, be sure to get plenty of rest and to drink enough water during the process. It can be tiring work! Gather your favorite music, or download a few of your favorite podcasts to listen to. This really will help the time be more enjoyable! Be sure to think about what your ultimate goals are for your kitchen. If you want to cook more, every decision should be driven by that. If it is a calming space you’re after, keep that in mind while you work.


DECLUTTER THE DISHES/ CUPS AND COOKING ITEMS

In order to truly see how many of any given type of item you own, Marie Kondo suggests to lay them all out in one place. When it comes to dishes and cooking items, it is really easy to collect more than we actually need or use.

Think carefully about which items you use often. Are there small appliances or serving dishes that can do double duty? Which is the one coffee cup you tend to gravitate toward? Are the others in the cabinet really serving you well just sitting there taking up space? Trust that the items you decide to part with will likely be useful for someone else.

when kitchen cleaning, keep only the items that bring you joy and donate the rest!

Once you have sorted through the items and begin to put things back, don’t automatically assume that the place it was before is the best option. Really think about where the items will be most useful.


RETHINK THE ‘EVERYTHING’ DRAWER

If you are like me, you have a drawer in your kitchen that is dedicated to cutlery – knives, forks and spoons. Then you have a drawer that is for everything else. I’m embarrassed to show you what mine looked like before my deep clean declutter. It was basically a tangled mess of serving spoons, spatulas and other random items. In my mind, I justified this scenario saying that at least everything was in one spot. However, because the drawer was so full, it was still overly difficult to find items when I needed them.

eliminate the everything drawer when cleaning your kitchen. Find a solution that keeps your most used items close by and easily found

I emptied out the entire drawer and eliminated all of the items that we rarely used. I decided to place the most regularly used items in a large ceramic container I had purchased on sale a few months ago. Items were positioned standing up for easy accessibility. A few odd things, such as a potato masher and apple slicer, did not fit comfortably. They were given a spot in the cutlery drawer instead.

This solution looks nice and is functional!

Kitchen cleaning utensil holder for frequently used items


SORT THROUGH THE PANTRY / FOOD STORAGE PLACES

Go through all the areas where food is stored. That may be in a large walk in pantry, or in simple cabinets and drawers. While kitchen cleaning, remove any expired canned or boxed goods. Remember that you can not donate expired items. Though it will seem like a waste to dump all of this food into the trashcan, it may serve as a good reminder to only purchase items that you can use quickly.

When cleaning your kitchen, be sure to throw out any expired products that might be hiding!

I will admit that our Lazy Susan cabinet, which holds most of our dry and canned goods, was filled with expired product. Most of these items had been gifted to us by someone who didn’t want to throw them out herself. We thought we might eat the food, but never did. And now, it has made it’s way to the trash anyway. Lesson learned.


TAKE CARE OF THE WORK HORSES

The appliances and sink are the work horses of the kitchen. They work hard so that, in some cases, you don’t have to. You can respect their help by cleaning them regularly.

FRIDGE

A fridge is likely the most overlooked appliance in the entire kitchen. It silently does it’s job, acting much like a storage cabinet. But, the fridge has a step up on the standard cupboard in that it keeps our food fresh. If it were to break down, we really would miss it’s function!

Fridges can benefit from a regular cleaning. Remove any sauces that are basically empty, throw out any questionable food, and wash the crisper drawers and shelves.

Give the fridge a quick clean during a deep clean declutter of the kitchen

OVEN

The oven has to be one of the most dreaded items to clean in the entire house. It is large, grimy, and downright awkward to sanitize. That may be the reason why many of us put off the task until the grossness has gotten well out of control.

baking soda and vinegar are the perfect pair for natural home cleaning

There are plenty of techniques people swear by when it comes to oven cleanliness. Bren, from the blog Bren Did, has a wonderful post that compares all of the homemade and natural oven cleaning methods. And she found a clear winner! One tip I have found to be helpful is to place aluminum foil on the bottom of the oven. It will catch splatters and spills, making cleaning up a lot faster!

MICROWAVE

If your microwave is set above your oven/stove, as ours is, it is likely to see it’s fair share of grease. A simple spray of white vinegar and a hot rag rinse can do wonders. Make sure to remove the turntable and give it a thorough washing as well.

DISHWASHER

I personally have very little experience with a dishwasher, since we don’t own one and don’t plan on installing one in the new house. However, I do know that even this little cleaning machine needs a good clean of it’s own on occasion. 101 Days of Organizing has a great post on how to keep your dishwasher running smoothly and grime free.

SINK

Give your sink a good scrub with a natural scouring product, such as baking soda. Spraying a stainless steel sink with vinegar and rubbing with a damp rag can help to remove any pesky water spots. Be sure to clean the faucet handles and nozzle with natural products.

spotless stainless steel sink


CLEAN ALL THE FLAT SURFACES

Kitchens have likely the largest amount of surface area that needs cleaning. Where you can get by in a bedroom without needing to clean the walls for many years, for example, the same is not true for a kitchen. Look at each and every surface as an opportunity to really make the room shine.


FLOORS

If your kitchen has any area rugs, now is a good time to shake them out or throw them in the washing machine. Sweep the entire floor, then mop with warm soapy water.

cleaning floors during a kitchen declutter and deep clean


COUNTERS

It is important to keep counters as clear as possible. After all, they are intended to be working space! By keeping them clear and clean, your kitchen will be more efficient, and look a lot less cluttered. This is one of the seven daily habits I believe to be most important for a tidy house, and a clear mind.


WALLS AND CABINET DOORS

When deep cleaning, be sure to spray down walls and cabinets doors. Pay special attention to the cabinets that are near the oven, as they are most likely to have grease build up.

clean the inside of your cabinet doors and drawers

Walls should be painted in a satin or semi gloss finish, to ensure a wipe-able surface and easy clean up.

Give the back splash extra care, checking grout lines for signs of mildew and wear.


CABINET INTERIORS + TOPS

While you are sorting through your dishware, remove everything from your cabinets and drawers and give them a quick wash. Add shelf and drawer liners for an easy clean surface. They come in many fun styles and are relatively inexpensive. This post from Salvaged Inspiration has great tips on how to fit the liners perfectly.

Don’t forget to clean on top of any cabinets that don’t reach the ceiling. This soffit space can collect plenty of dust, especially if you use it for decor display!


MY KITCHEN CLEANING VIDEO

I recently went through this exact same process with the kitchen in our rental home. And though it was an exhausting long day of hard work, the reward was worth the effort!


SAVE THESE KITCHEN CLEANING TIPS

Not ready to start your major kitchen cleaning and declutter yet? Save this checklist and tips for later!

clean your kitchen with this thorough checklist and tips


Organized Linen Closet | Quick Declutter

Today I am going to share how I tackled a seriously stuffed hall closet and turned it into a simple and organized linen closet – in less than 30 minutes!

How to organize a small linen closet

*This post contains affiliate links. As an Amazon associate, I earn from qualifying purchases. See my full disclosure here**

In this decluttering journey, I have to admit that this space was one I was not looking forward to. Our linen closet had become one of those places in our house that was just out of sight, and out of mind. I knew what was lurking behind those doors – and knew it wasn’t pretty. But I didn’t really want to acknowledge the task at hand.

Faced with the lofty New Year’s goal of finishing our rental house declutter before we break ground on Arrow Hill Cottage in the spring, I knew that there was no more holding back. It was time.


LINEN CLOSET BEFORE

We moved into this rental house four years ago. In our previous home we did not have a linen closet, and so we saw this as a bit of a luxury upgrade. We piled all of our bedding, towels, and extra pillows into the closet and called it good. Except, it wasn’t good.

Organized linen closet. How to go from stuffed to simple

Here’s the situation. I wash laundry only once per week. I like this system, especially since it gives me a sense of finalization, at least for one day. The towels we use daily are stored in our bathrooms. They make their way into the laundry baskets throughout the week, and on Sunday get a thorough washing. That means that every towel behind this closed linen closet door are ‘extras’, and are rarely used. They are brought out primarily when we have guests stay in our home.

Bedding is similar. After I wash the sheets, they go right back on the beds. Again, as the above photo illustrates, we had saved plenty of extras.


DECLUTTERING THE LINEN CLOSET

Starting this declutter was by far the most difficult part. I think I was a bit overcome by just how MUCH we had stored away in this small closet. Once I began to take it all out though, a weight started to lift.

Our linen closet is located at the end of a long hallway upstairs. As I removed the items from the closet, I grouped like category items together. This made it easy to see the quantity of each type of item. Noticing the amount of duplicates made it easier to make decisions regarding what should stay and what should go.


linen closet declutter. creating a simple linen closet

Sorting through the piles, I placed items that I thought we should keep on the right side of the hallway, and those that we could donate or sell on the left.

sorting through linens


FINDING TREASURES

One of the biggest surprises during this declutter project was finding a special quilt I had made years ago. It was presented to my husband at the groom’s supper, the night before our wedding. I clearly remember the months leading up to our marriage. Craig was doing a mechanical engineering internship near Chicago, and I was in North Dakota, at college. Those months apart were long and difficult, and I spent many hours working on the quilt and dreaming about married life.

decluttering our hall linen closet, and finding treasures

Honestly, this quilt means more to me than my wedding dress. So why was it stuffed in the bottom of the closet, completely forgotten? When I first saw it, I felt really sad that it had been so neglected. Now I am ever more committed to this process, and discovering which items bring us joy.

This quilt will serve as a reminder of how easily items you cherish can be crowded out by other, less important, belongings. It will be going to the dry cleaners, and a more prominent spot will be found for it in our new home.


THINGS TO CONSIDER

When decluttering and creating an organized linen closet, there are a few important questions you should ask yourself:

Is this a convenient location for these items? Linen closets were very popular in older homes, but have fallen out of favor somewhat in recent years. I believe the reason is that more people now place items closer to where they will be used, instead of grouped together in a central location. For example, the bed sheets may be stored in the bedroom closets, and the extra toilet paper in the bathroom.

Really think about what works best for you and your family. Where some might find a central linen closet the prime location to store towels and bedding, others may find that a hall linen closet in their home is better suited to store cleaning supplies, small appliances, or even toys.


How many of _____ do we need? In our household, whenever a new set of towels was purchased we continued to hold onto the old set. Just in case, we said. If we have company, we thought. The truth of the matter is that if we chose to buy new towels, our old ones had more than likely finished their purposeful life for our family.

I encourage you to determine how many towels, bed linens, etc. your family really needs. Any more than those items used on a weekly basis will likely be stored. Don’t let them multiply behind closed doors like we did!


ORGANIZED LINEN CLOSET

Like a lot of people, I have been watching ‘Tidying up’ on Netflix. One of the tips I have learned from watching the show is the idea of placing like items into smaller baskets for storage. I have mentioned before that I have a love for baskets. In fact, I have a stash of them in our storage closet, just waiting to be used.

Organizing a linen closet the simple way

These chrome wire baskets were the perfect size to hold the items I had chosen to keep.

Though I don’t have quite the ‘magic’ of Marie Kondo, I did try her method of folding into thirds and storing them upright. I have to say that it really did save space! An entire set of towels (two bath towels, one hand towel and one wash cloth), was able to fit into a single basket, for example.

When putting the linens back into the closet, I made sure to put the items that will be used more frequently on the eye level shelves. The large blankets were placed on the highest shelf, since it is likely they will be accessed by the adults only. The extra pillows are now within reach for the kids to use for camp-outs and movie nights.

tidy small linen closet using wire baskets to hold like items

It is important to note that we are living in a rental house. Because of this, we aren’t able to modify the spacing between shelves. If you have a closet with adjustable shelves, customizing your storage should be much more efficient!


BENEFITS OF AN ORGANIZED LINEN CLOSET

Now that our linen closet is organized, I definitely want it to stay that way! The following benefits will help me keep the clutter from coming back.

Items are easily found. One glance in, and you can see how things are organized, by category. This makes it much faster to find that towel when you need to clean up a spill, or retrieve a clean set of bedsheets for a child who had a middle of the night accident.

Linens have room to breathe. With the linen closet stuffed to the max, there was little air circulation. Stored in this way for too long, and you could be dealing with musty towels and bedding. That’s just not pleasant. In your organized linen closet, you may consider adding an open box of baking soda. It will help cut down on moisture and will keep things smelling fresh and clean.


WATCH ME ORGANIZE MY LINEN CLOSET

See the process of of decluttering my personal linen closet. I am still shocked to see the drastic change!


ORGANIZED LINEN CLOSET INSPIRATION

Inspired by this post? Share it!

Organized linen closet. How to take yours from stuffed to simple

CAPSULE WARDROBE | DECLUTTER CHALLENGE

Clothes have a way of sticking around and cluttering closets and drawers. This week I attempted to build my very first capsule wardrobe, as the fourth challenge in the December Declutter!

starting a capsule wardrobe


Welcome back to the fourth and final week of the December Declutter Challenge! This month I have already completed a Konmari declutter of our Christmas Decor, a speed declutter, and a deep cleaning of one room, top to bottom. Today I am sharing how I decluttered my clothing in an attempt to create my first capsule wardrobe.


CAPSULE WARDROBE PRINCIPLES

The main idea behind the capsule wardrobe is to fill your closet with clothing items you like and that you like on your body. Though the term was coined in the 1970’s by  Susie Faux, the concept has become even more popular in recent years. With people busier than ever, overwhelmed by their lives and jobs, minimalism has gained recognition as a way to slow down and simplify. Capsule wardrobes are in line with minimalism techniques.

A typical capsule wardrobe includes between 25 and 50 pieces. Some include enough pieces for year round wear, while others offer a seasonal selection only. The great thing about a capsule wardrobe is that it is personalized to fit each individual. As such, the rules can vary from person to person.


MY CAPSULE WARDROBE RULES

Because we live in the Midwest, we experience dramatic temperature changes with each season. My wardrobe has to incorporate shorts as well as sweaters. For this reason, I opted to allow my capsule to include the maximum number of fifty pieces.

This will be a full year capsule wardrobe. I chose not include jewlery/scarves, pjs, or outerwear (coats, snow boots, etc.) Even so, I attempted to minimize the number of items in these categories to a combined twenty. Undergarments were not included in any item totals.

My long term goal for this challenge is to actually use the clothing I have. To create different outfit combinations with a minimal amount of items. I want to get to the point that I love everything in my closet.


CLOTHING CLUTTER (BEFORE)

My husband and I share a teeny tiny closet that is built into the eaves at our rental farmhouse. It was pretty well stuffed to the brim on the hanging bar.

how to create a capsule wardrobe

We also had some bins on the closet floor that held bulkier items such as pants and sweatshirts. And I had one dresser drawer plump full of workout and lounging clothes.


SORT THROUGH THE CLOTHING

I used a method outlined on the website The Penny Hoarder when sorting through my clothing. The first step involved gathering all clothing items and footwear in one area, similar to what is done in the KonMari method.

Taking every item out of the closet, drawer and bins and laying them all on the bed was a huge eye opener to me. It was a massive pile of clothing. Considering that I can only wear one outfit at a time, I would say it’s obvious that I had far too many clothes.

clothing clutter to capsule wardrobe


The next step in the process is to sort all of the clothing items into three separate piles. One pile for items that you love, your favorites. Another pile for items that you like, and a final pile of items that you are certain you no longer need. Clothing that doesn’t fit properly or has stains/tears should go into the third pile.

Even if at one time the pieces were your favorites, if they don’t fit or are damaged do you really want to include them in your minimal wardrobe?

sorting through clothing to create a capsule wardrobe


After my sorting was complete I was left with quite a few items that were destined to be sold or donated. I went ahead and bagged them up straight away. In this way, I wasn’t tempted to go back through those items searching for something to keep.

clothing donations. Clothing declutter


FINE TUNE THE SELECTIONS

The two remaining piles including clothing pieces that I love, and those that I like. At this point I needed to do some more critical thinking. I thought about which items could be used in multiple ways to form various outfits. I thought about how many seasons each piece would be useful in. Further sorting through these two piles back and forth, I was able to narrow down my capsule wardrobe to the pre-set 50 pieces.

clothing declutter challenge. Creating a capsule wardrobe


HANG UP FAVORITES

My favorites were then hung back into the closet. I tend to arrange my clothing in color categories and by sleeve length.

how to create a simple capsule wardrobe

Because this is my first capsule wardrobe, I decided to keep a ‘back up’ of 16 items that were from my maybe pile. These clothing pieces were placed into a bin and are stored in the back of my closet for the moment. If, after 365 days none have been needed, they will be moved into the donation bags.

year round capsule wardrobe

While I am learning the ins and outs of my particular capsule wardrobe, I am giving myself lots of flexibility and the freedom to make fine tuning decisions. For example, I may find that I need fewer long sleeve/ winter items but more short sleeve options.

Each time a new item is added, either from my back up pile or purchased new from a store, one of the items in my capsule must be set aside. This will allow me to keep the item count consistent throughout the year.

I am hopeful that after a full year using these fifty items that I will have a good handle on what I need and use most often.


WATCH ME CREATE A CAPSULE WARDROBE

Take a virtual tour of my clothing before, and watch me declutter my clothing to create my very first capsule wardrobe!


MY CAPSULE WARDROBE SELECTIONS

I will admit that this was probably the most difficult of all the challenges I was faced with this month. Perhaps it has something to do with the intimate nature of clothing, which causes a person to become attached more easily.

Even still, it was an exciting exercise. I personally am really looking forward to knowing that everything in my closet fits and is useful. My final capsule wardrobe includes the following 50 items:


FOOTWEAR

7 pairs total: 2 flats, 2 boots, 1 casual canvas, 1 nicer pair of sneakers, 1 pair of running shoes.

capsule wardrobe shoe collection


BOTTOMS

8 total: 4 pants/jeans, 1 Capri, 2 shorts, 1 yoga pant

50 piece year round capsule wardrobe


TOPS

27 total: 6 tanks, 3 short sleeve, 1 vest, 1 cover/wrap, 4 cardigan/pull over, 6 long sleeve, 5 sweaters, 1 dress

small year round capsule wardrobe. Minimalist clothing collection


WORKOUT

8 total pieces: 3 bottoms (1 short, 1 Capri, 1 pant), 1 long sleeve shirt, 1 short sleeve shirt, 3 tank tops

clothing in minimalist capsule wardrobe


ADDITIONAL ITEMS (not included in the capsule wardrobe total)

20 total items: 1 swimsuit, 1 pair of snow boots, 2 winter coats, 1 spring/summer jacket, 1 poncho, 4 PJ pieces, 5 scarves, 3 necklaces, 1 pair earings, 1 ring.


OUTFIT OPTIONS

Probably my favorite part of the entire challenge was coming up with different outfit ideas with the smaller number of pieces. These are just a few of the options that I am excited to wear!

outfit options from year round capsule wardrobe

one year capsule wardrobe outfits

I love how most of the items can be either dressed up or down depending on how they are paired and with different accessories. For example, a basic t-shirt can be worn with a pair of shorts or yoga pants for a comfortable casual look. The same shirt can also be dressed up with a scarf and nicer shoes.

I plan to print off index card sized pictures of outfit options. These cards can then be placed on a binder ring and stored in my dresser. That way, if at any time I feel that I have ‘nothing to wear’, I will have visual outfit inspiration!


WHAT I LEARNED FROM THIS CHALLENGE

This challenge was eye opening for sure. If you had asked me before how many total clothing items I had, I doubt I would have thought I owned even fifty total. The truth is that I had nearly two hundred. Essentially, this exercise cut my wardrobe in less than half.

While having a final item count might seem restrictive to some people, I actually found it useful. Knowing that I couldn’t go over my predetermined number caused me to really think about which pieces I wanted to hang onto.

I also found it surprising that the items I chose to keep in my capsule wardrobe shared a lot of similarities. Apparently, I enjoy wearing comfortable pieces that are generally plain or have small patterns/prints. There are also quite a few striped items that made the cut. Color wise, there is a definite palette of favorites – something I never realized before!

capsule wardrobe color palette


My side of the closet is in order and looking awesome. Perhaps for this reason, my husband has given me the green light to tackle his wardrobe next. I call that a declutter win!


PIN THESE IDEAS FOR LATER

Are you ready to tackle a clothing declutter and create a capsule wardrobe of your own?

clothing declutter. How to create a basic capsule wardrobe. Capsule wardrobe for beginners


ONE ROOM CHALLENGE : DEEP CLEANING

Join me for the third installation of the December Declutter series. This week I attempted a One Room Challenge, deep cleaning one room in our home. Read on to see how I did!

One room challenge deep cleaning

Welcome to Week #3 of the December Declutter challenge. During this month, I am tackling various challenges to help us sort through our household belongings. Our end goal is to bring only those with great value and purpose to our new home, Arrow Hill Cottage.

I have previously taken on a KonMari declutter of our family’s Christmas decorations, and performed a speed declutter – finding 60 items in 60 minutes to either donate or sell. While both of these techniques were effective and freeing, neither provided a radical visual improvement to any one space. The One Room Challenge is different.


ONE ROOM CHALLENGE PRINCIPLES

The basic idea behind the One Room Challenge is to, obviously, focus on one room only. Decluttering and cleaning efforts should be concentrated in that space to create an environment that is functional and pleasing to look at. Because the entire room will be sorted through, decluttered and organized, it is also a great time to do a deep cleaning.


OUR ROOM CHOICE

Of all the rooms in our rental farmhouse, the mudroom is by far the one that becomes cluttered most often. In actuality, it is a multi purpose space. It is the entrance point into our home, as well as a laundry room. And, because our only bathroom on the main floor is very small and located on the other side of the house, we also use the space to get ready in the morning.

It is a hard working room, to say the least. So it isn’t a huge surprise that it gets cluttered easily.


THE CLUTTER PROBLEM (BEFORE)

Keep in mind that we are renting this farmhouse. It was built in the 1920’s and later remodeled in the 1960’s. The style of finishes isn’t what we would have chosen, nor is the layout of the rooms. As renters, we have no ability to change these features. However, we don’t have a great excuse as to why the clutter has gotten so bad, except that we haven’t kept on top of it.

You can see a video tour of what the space looked like before the cleaning, later in this post. First though, I will share a couple of the more difficult aspects I was facing when starting the One Room Challenge.


LOW THRESHOLD

The floor in the front entry has been built up over the years with layer upon layer of linoleum, meaning that there is very little threshold. Because of this, there is no way that a welcome mat can be placed in front of the door. This becomes a problem in the winter months when the Midwestern skies open up in all of their snowy glory.

one room challenge cluttered entryway

We have, at times, resorted to throwing a few bath towels down so that we don’t immediately slip when walking through the door. Tacky, yes. Functional, kind of. We are looking for a more permanent and eye pleasing solution.


LAUNDRY SHELF

Flat spaces seem to be a magnet for clutter. As you can see, our laundry shelf is no exception. While I had Craig add this soon after we moved in, as a place to temporarily set folded clothes, it has become a catchall. It seems that any random knickknack that didn’t have a place anywhere else found a home here.


cluttered shelf before. One Room Challenge 
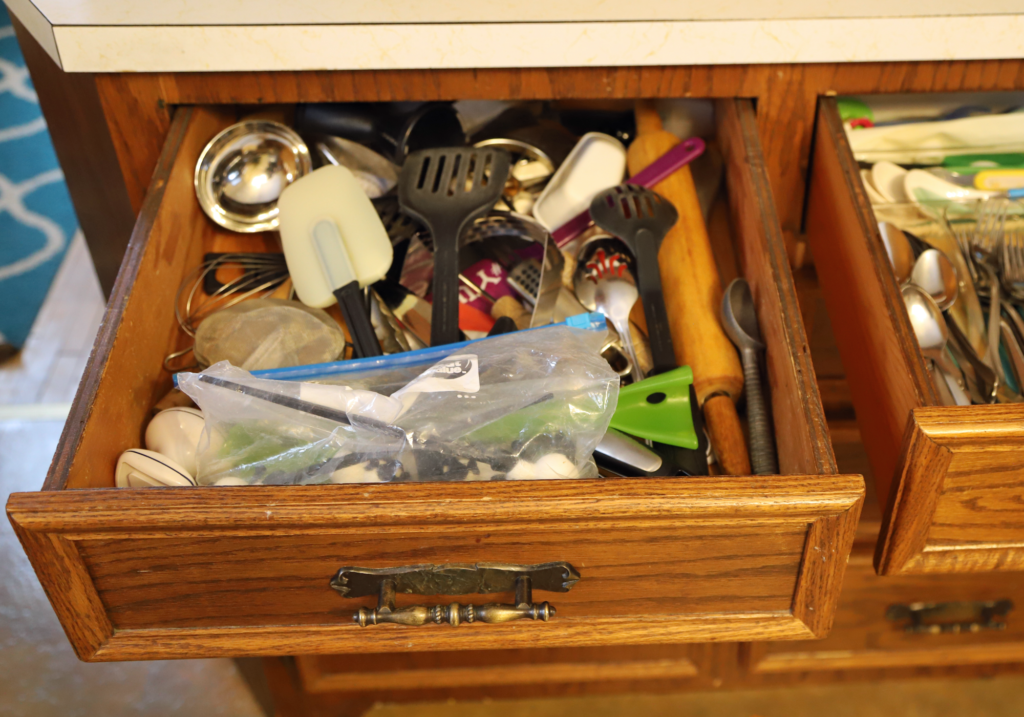
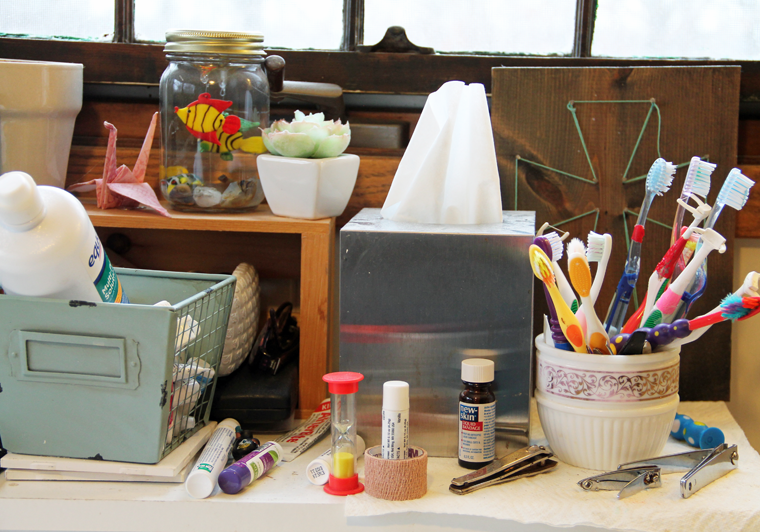
Worse yet, our family’s toothbrushes were also stored here because it is the most convenient and accessible space to brush our teeth.


WATCH ME DEEP CLEAN AND DECLUTTER

The room needed a lot of work, and an entire afternoon of focused concentration. Take a look at what it looked like before, and watch me whip it into shape!


THE RESULTS (AFTER)

I am absolutely thrilled with the way the room looks now. More importantly, our entire family is happy with the way the space now functions.


clear entryway after One Room Challenge

The entryway rug, pulled away from the door a bit, is a place where we can step while we take off our shoes. It is simple, yet pretty. Goodbye old towels!


minimalist family home. cutlery try as toothbrush divider 
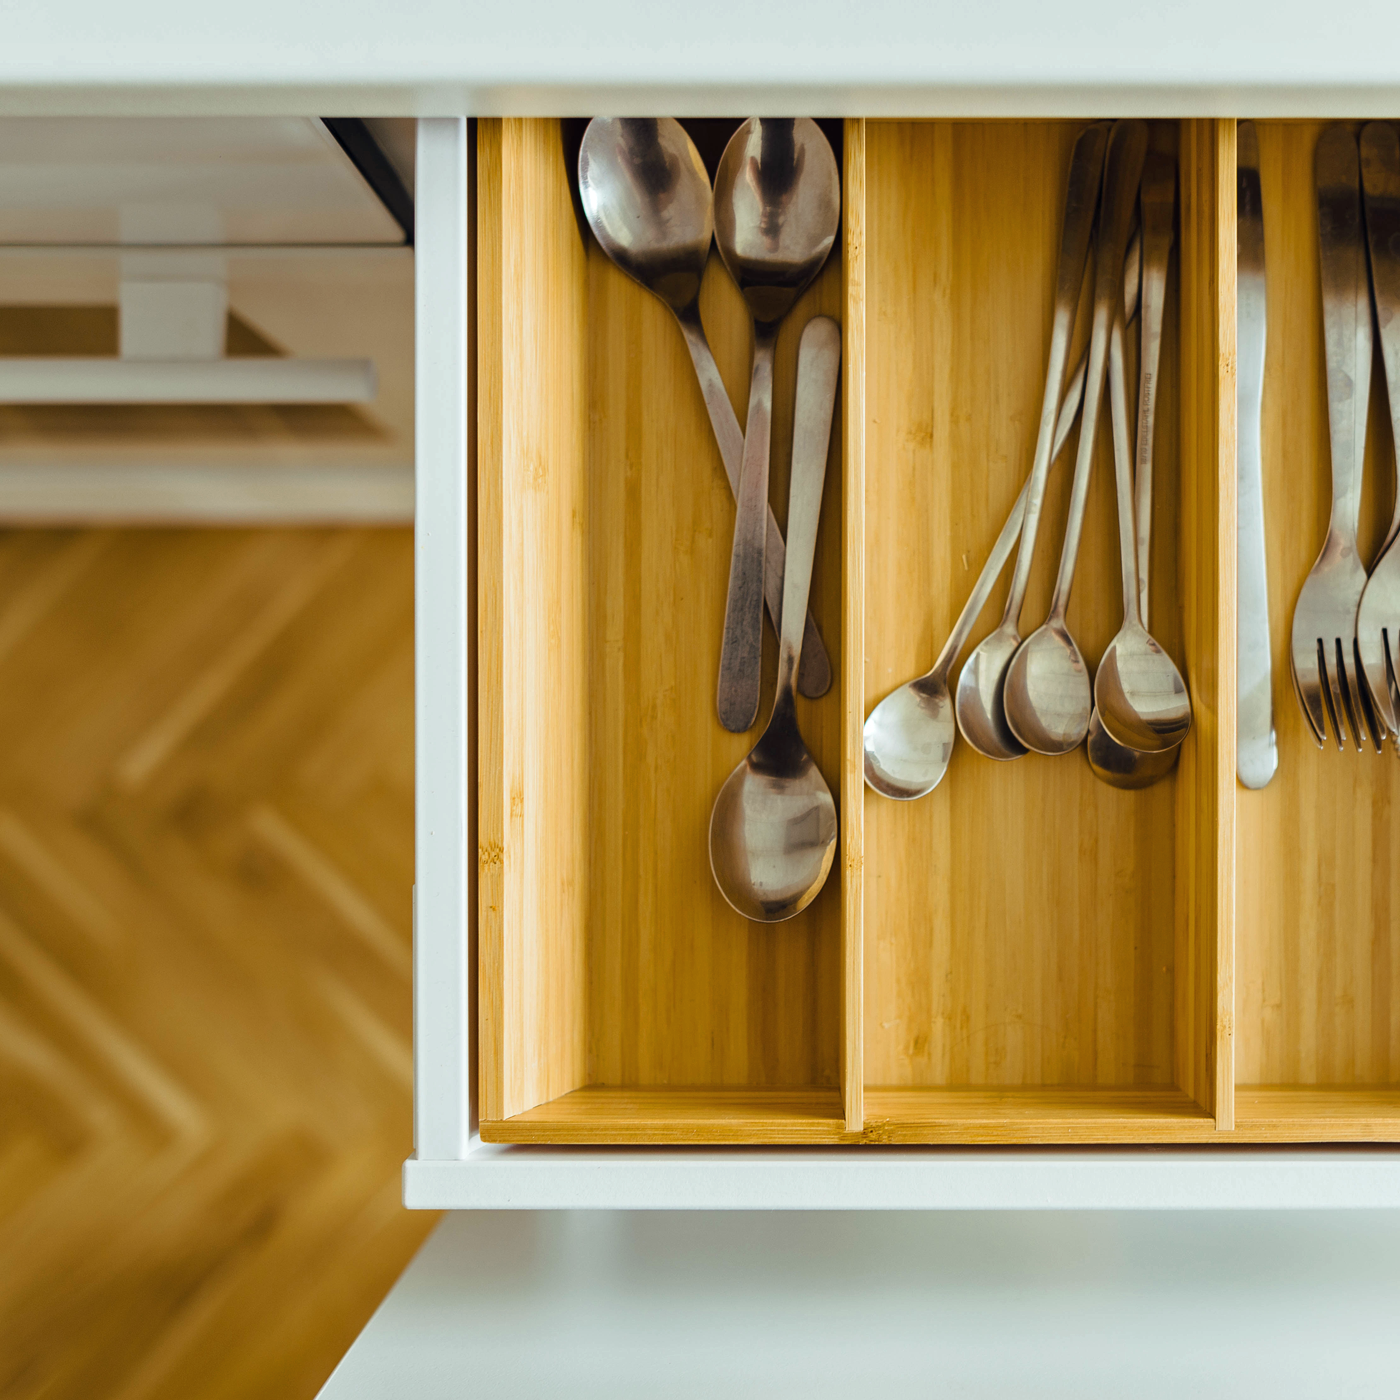
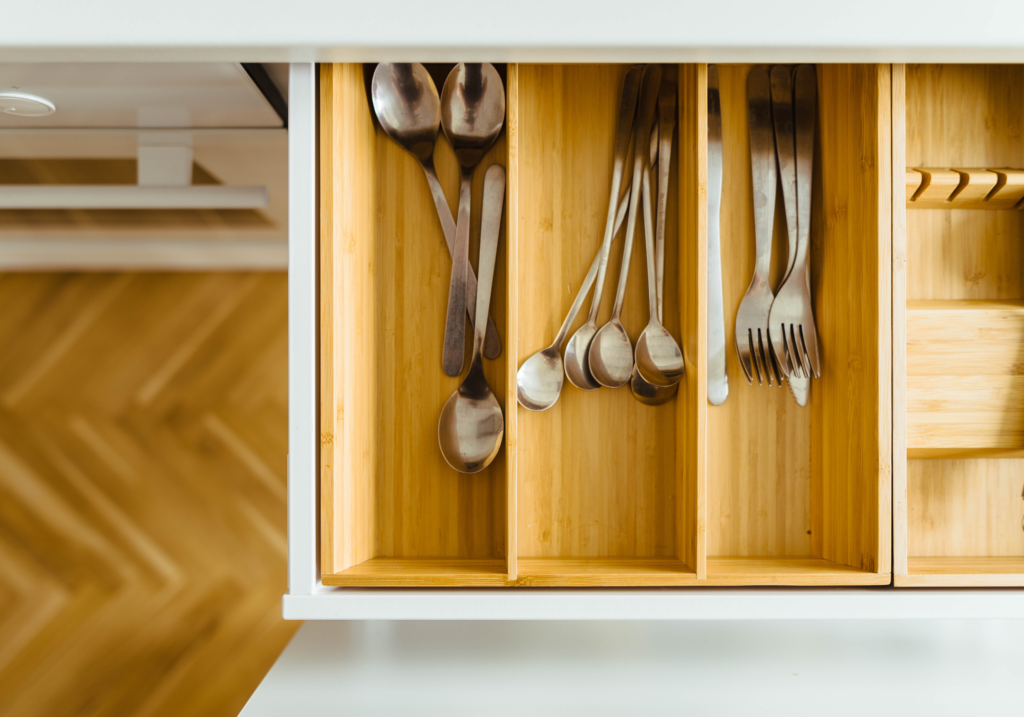
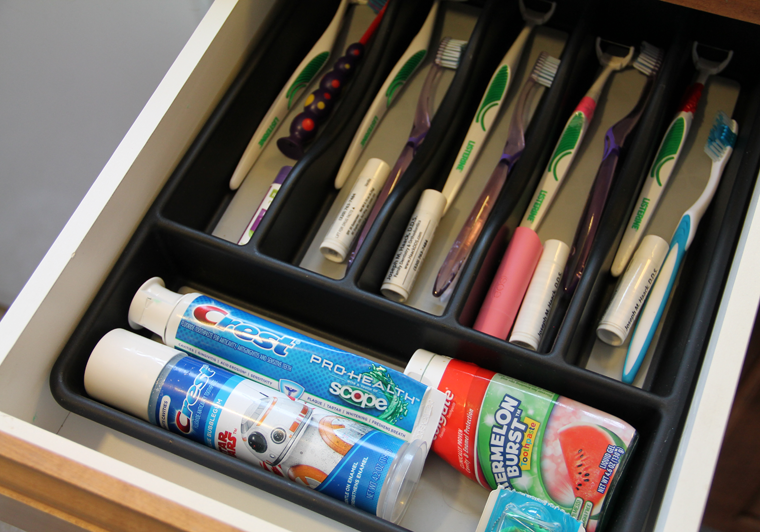
The drawers were thoroughly decluttered, and then organized with our everyday essentials. An inexpensive cutlery tray was the perfect fit for the top drawer, which now is a clean and safe spot for our toothbrushes. Each family member, besides the girls who do all of their brushing upstairs with help, has their own divided space. The perfect size for a toothbrush, flosser, and personal chap-stick.


minimalist family home. Organized drawer with personal care items.

The second drawer was emptied of the many reusable and disposable plastic bags that it housed. Smaller bins were placed in the drawer, and organized with personal care products.


antique anchor brand washer wringer. Laundry room decor. One room challenge 
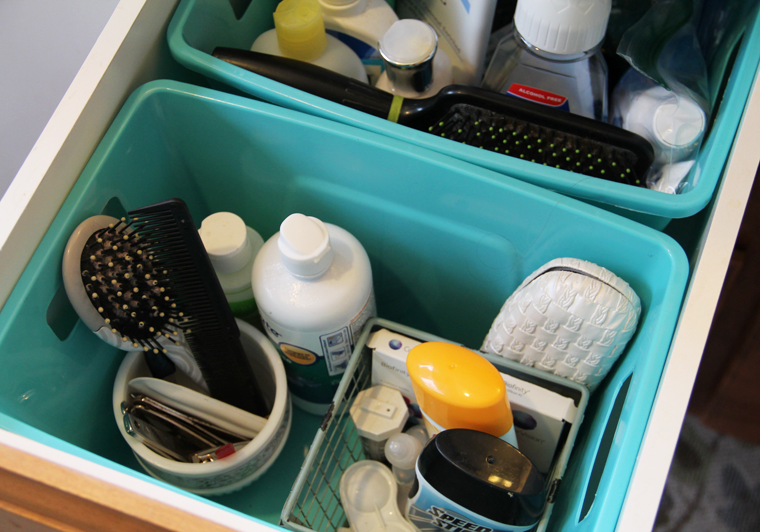
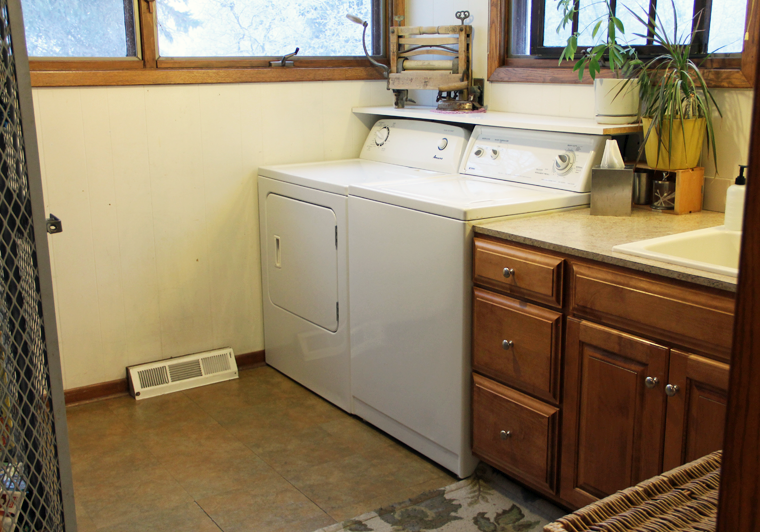
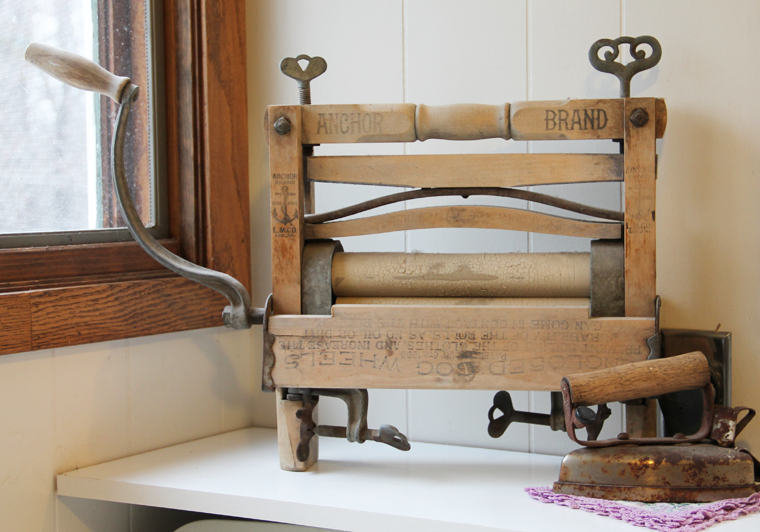
Perhaps the greatest visual improvement is the open shelf. With all of the clutter gone, the vintage clothes wringer and steam iron take center stage. Two houseplants serve to soften the space, as well as camouflage oddly placed outlets. And my antique window adds a bit of charm.


one room challenge after. clean laundry room 
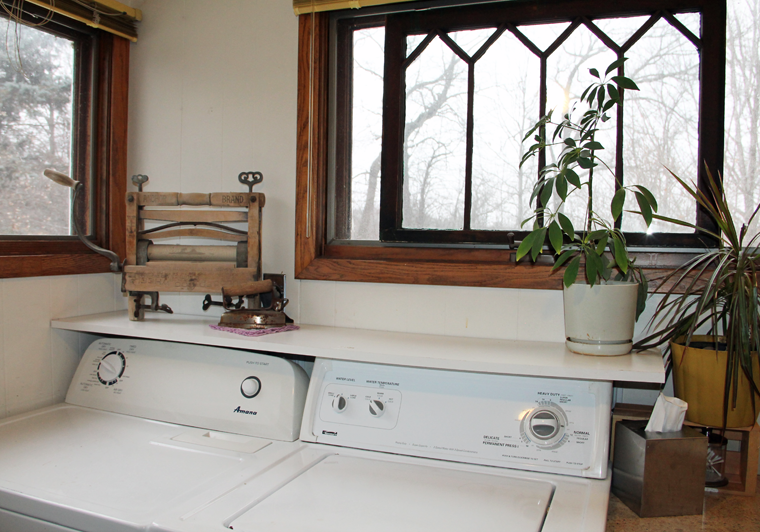
The room is bright and clutter free, and I think it seems larger than before!


WHAT I LEARNED FROM THIS CHALLENGE

I have to say that it feels great to have this one room cleaned top to bottom. Even though the rest of the house has a lot of decluttering left to do, this room is like a breath of fresh air. Because it is the first space we enter in our home, the impact is even greater. It now brings a smile to my face rather than anxiety. That’s a great ‘welcome home’ feeling.

clean minimal laundry room after One Room Challenge


I do have a few words of advice if you would like to take on the One Room Challenge for yourself.

Depending on the size of the room you take on, this may be an all day or multiple day exercise. In order to achieve a true deep clean, you want to allocate enough time.

Also, know that when items are removed from one room they may make their way into another. In our case, most items that I didn’t want to keep in the space were put into the garbage or a donation bin. But there were a few things that we have yet to decide the fate on. They were moved into another room, for now.


I definitely appreciated the finality of this challenge. I could see using the same technique on other rooms in the future, until each has been gone through. The Spruce has some great tips on how to tackle each type of room. Until then, we are going to focus on keeping this one room clutter free and organized, because it feels great!


PIN THIS FOR LATER

If you are thinking about taking on your own One Room Challenge, but aren’t quite ready to dive in quite yet, pin this image as a reminder!

One room Challenge. Minimalist family home. Declutter and deep cleaning