It’s time to describe the final level of our future cottage/home! If you missed the other levels, go ahead and click the links below to get caught up.
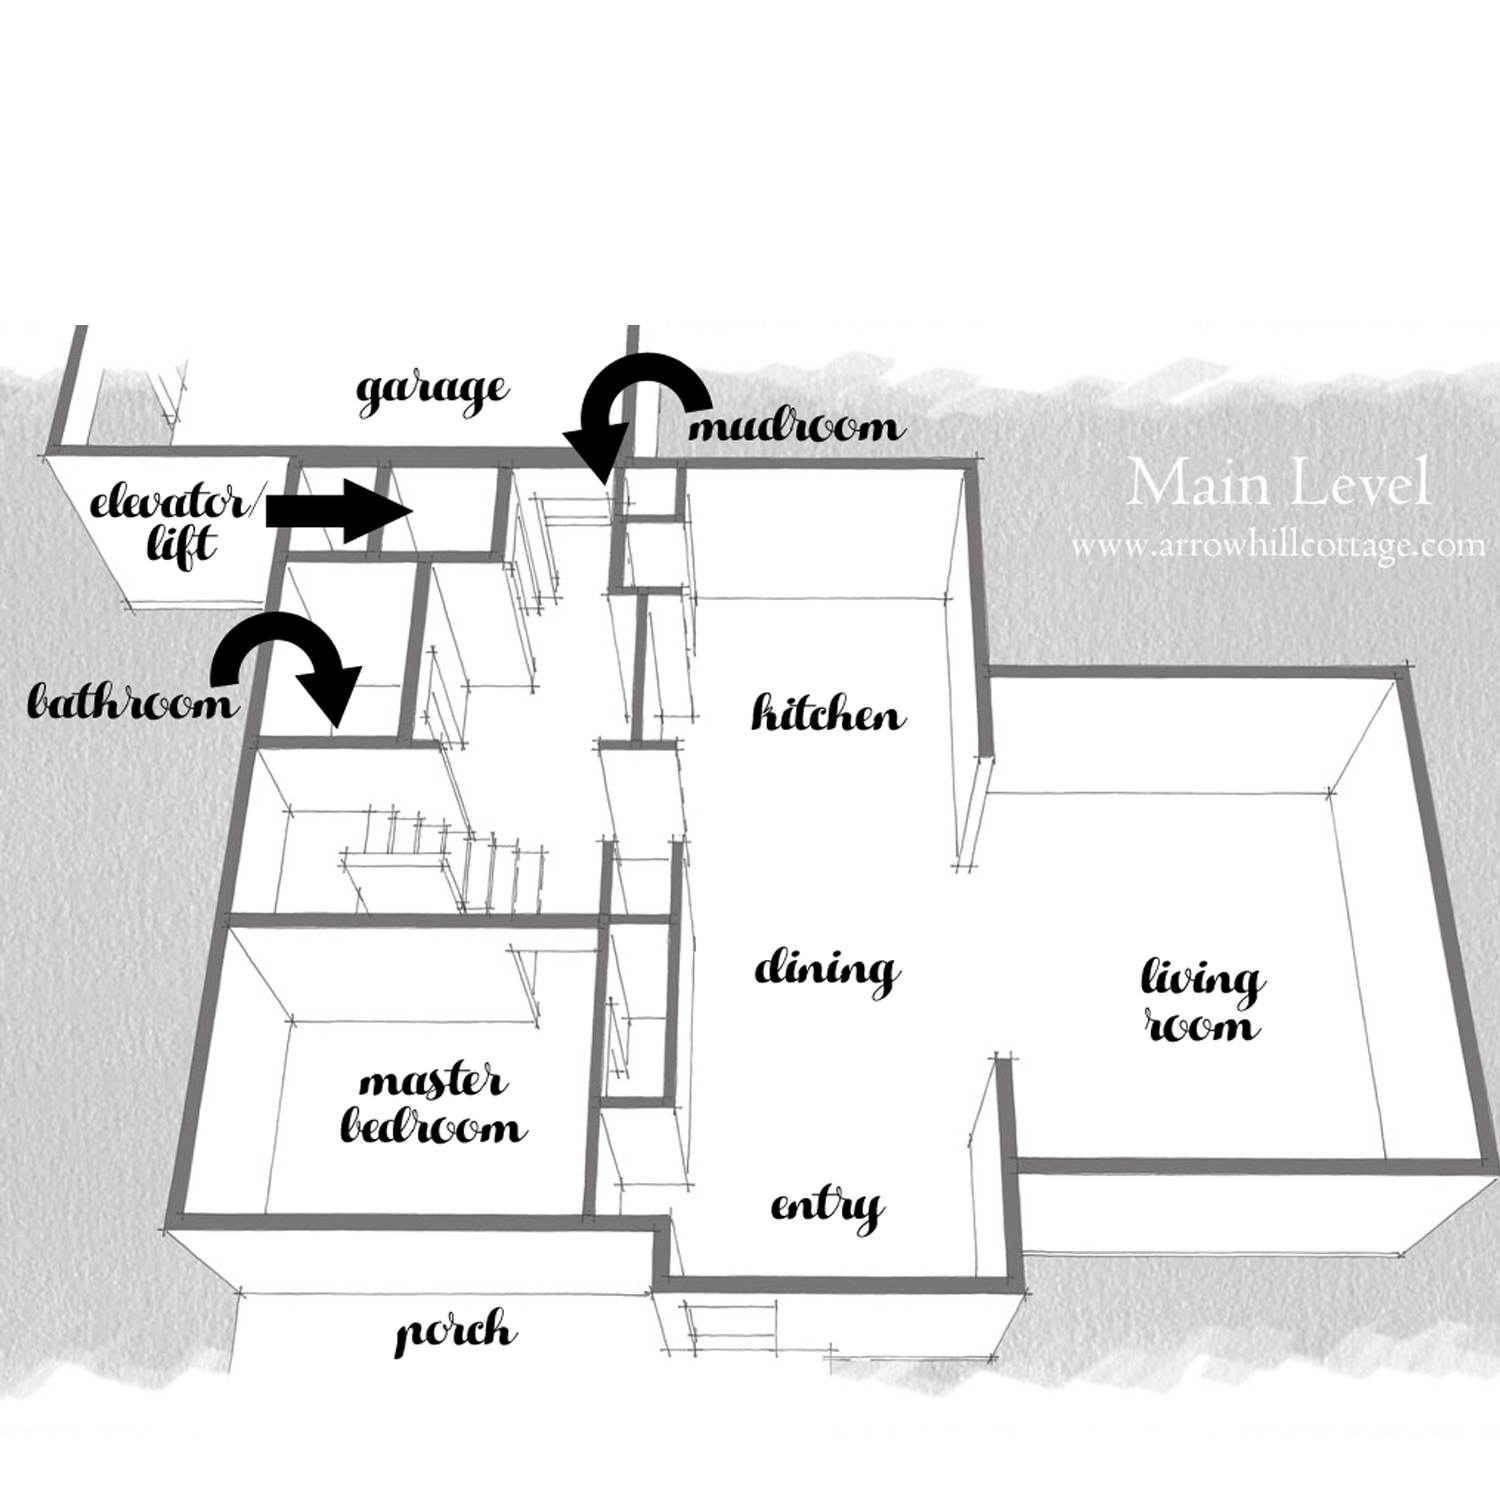
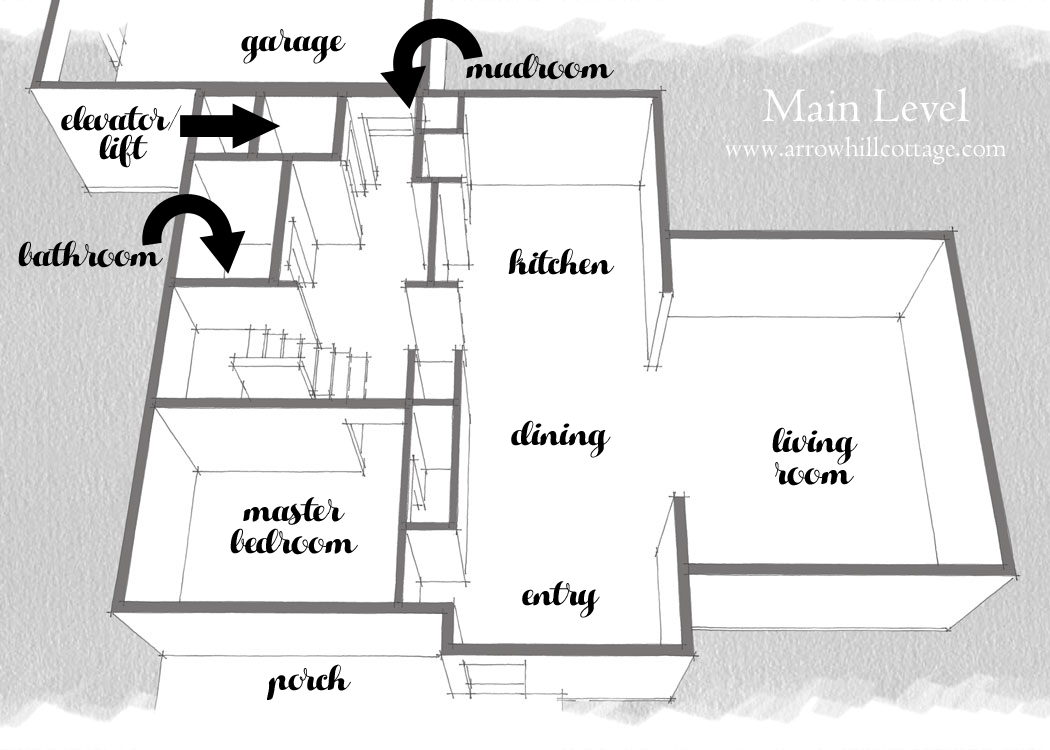
MAIN LEVEL
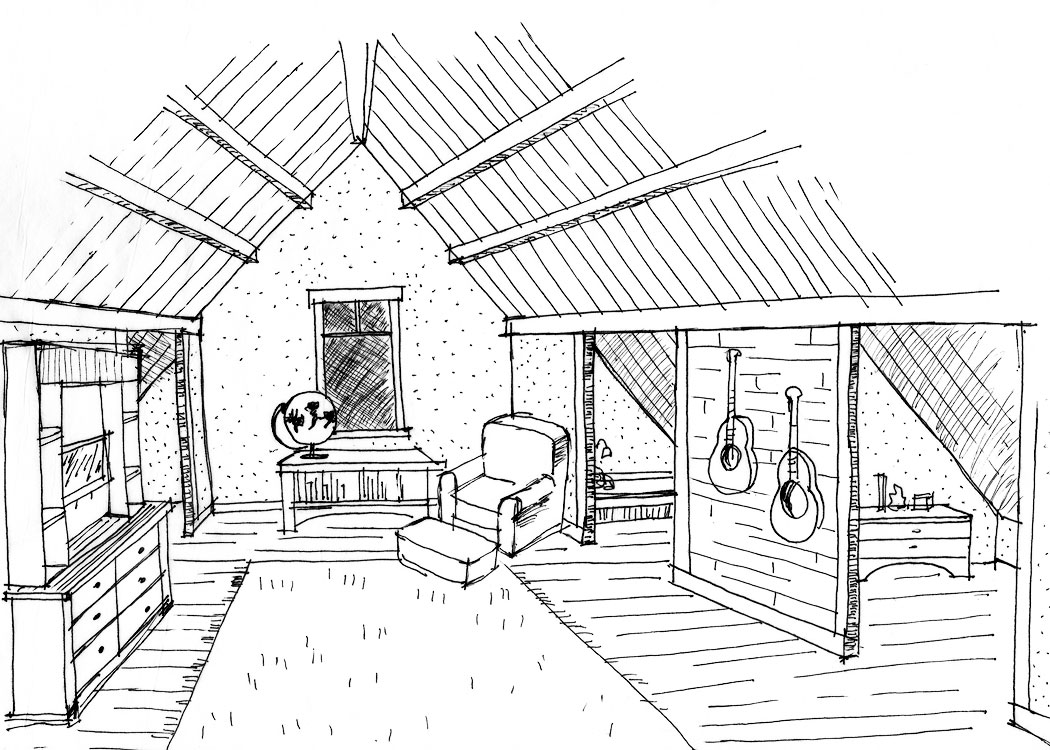
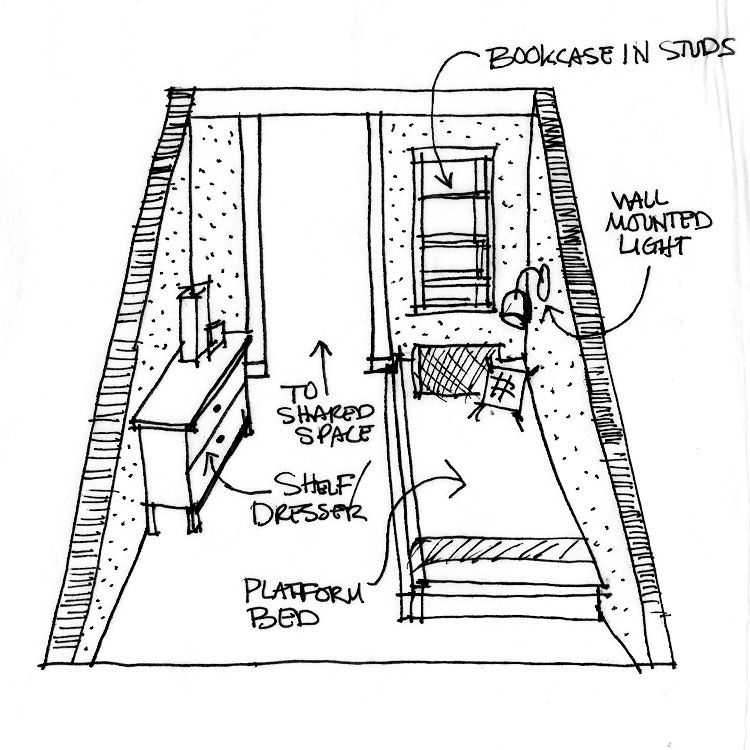
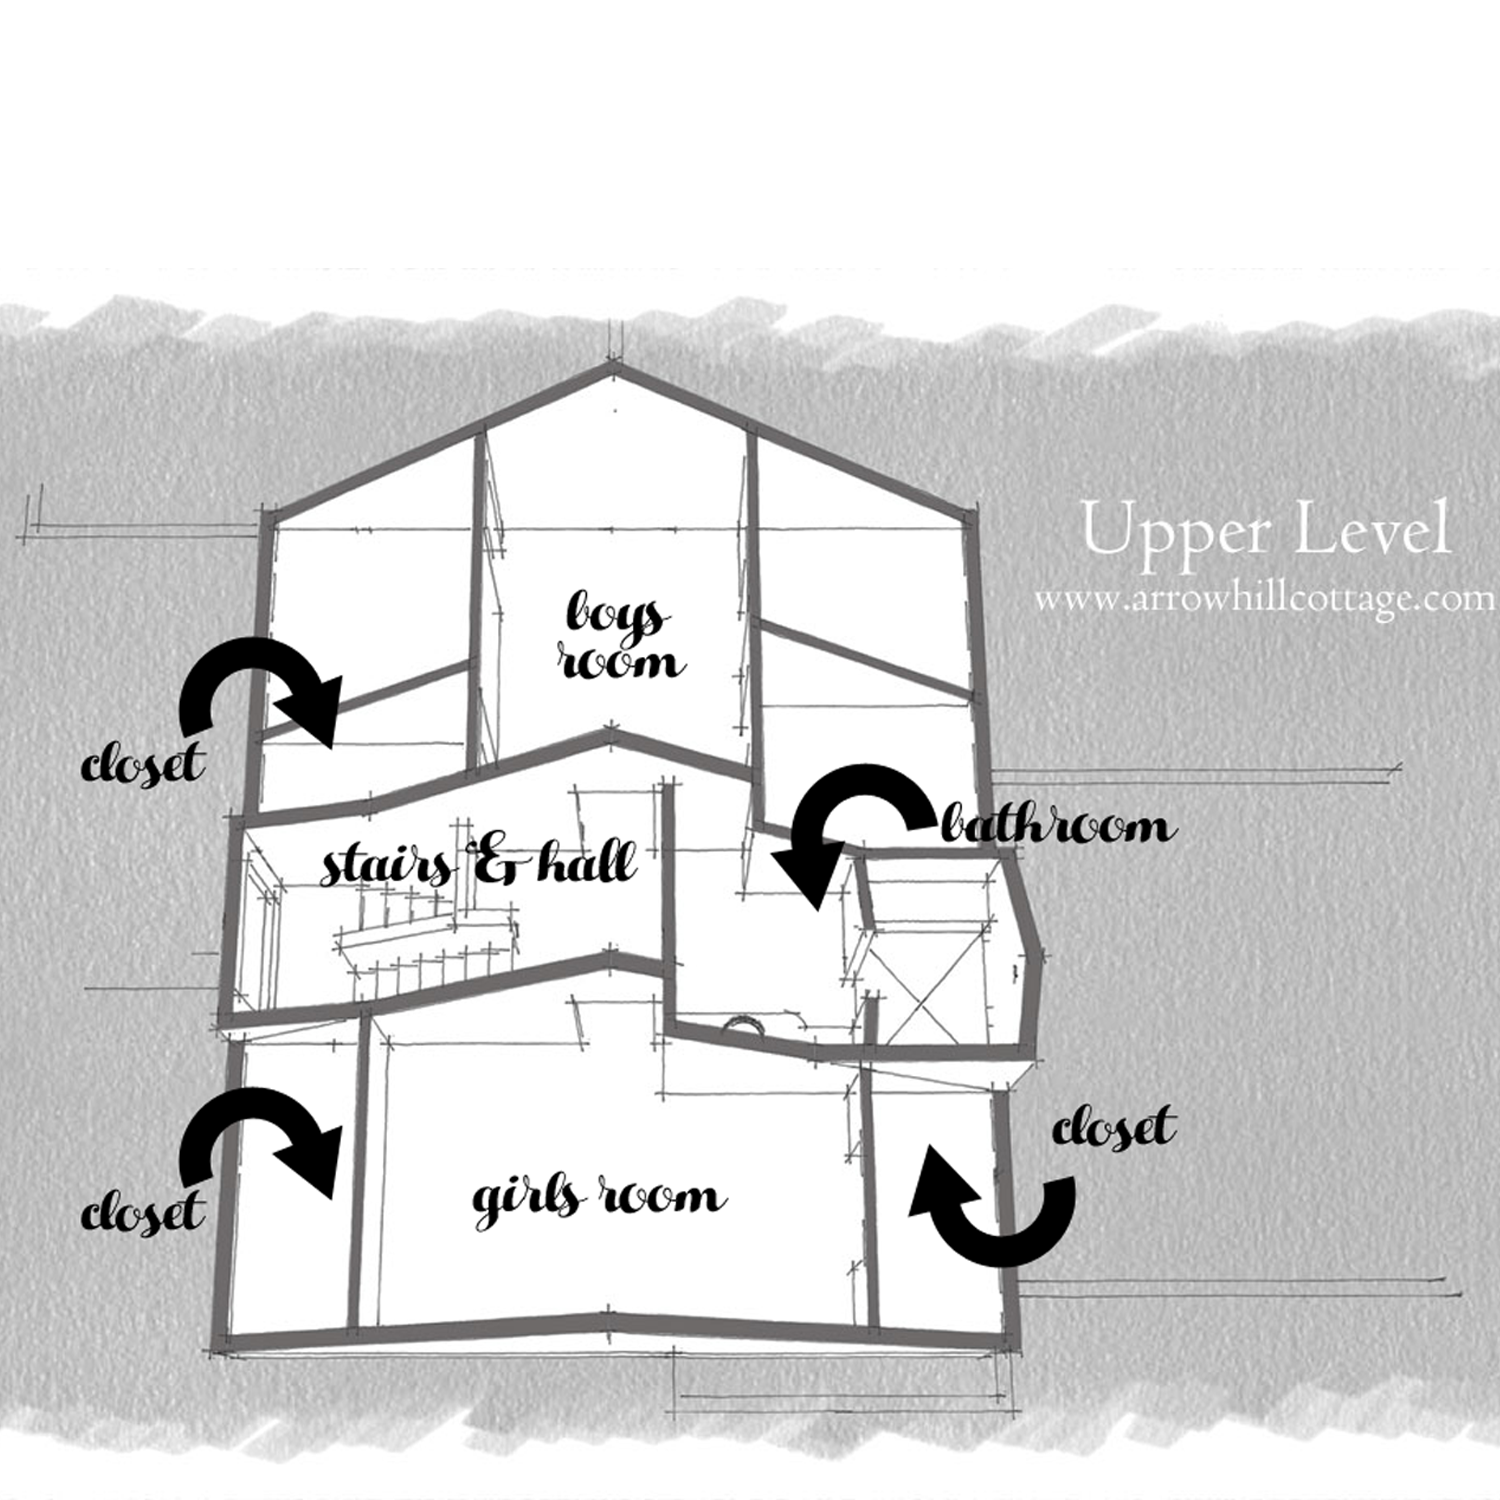
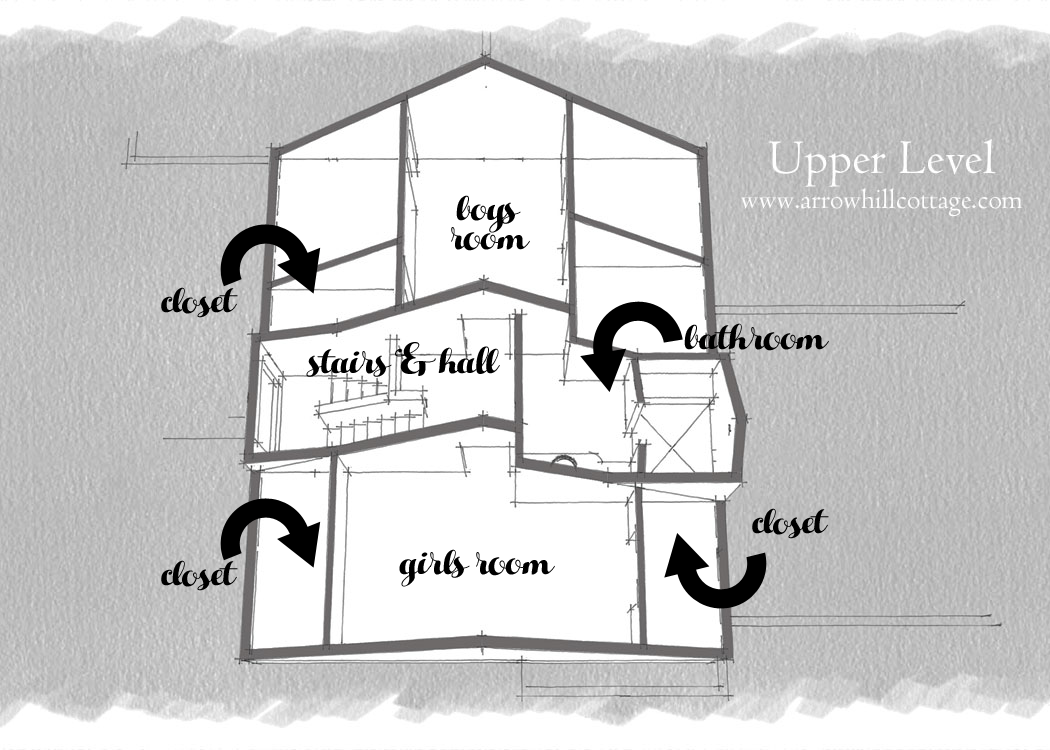
UPPER LEVEL
As I mentioned in THIS post, our building site is quite sloped. Therefore, it was the perfect candidate for a walkout basement. We are super thrilled about that prospect! Not only will we have great connection to the outdoors, we will also have a basement with decent lighting – which is the stuff dreams are made of. I’m pretty sure that natural daylight is one of my love languages.
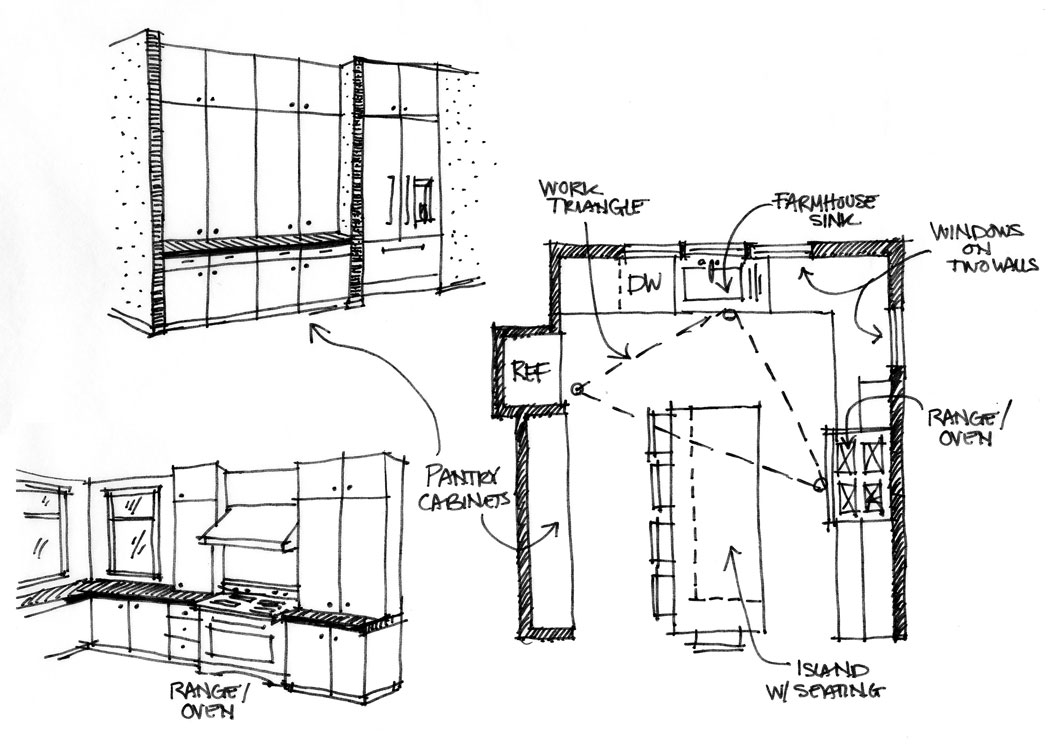
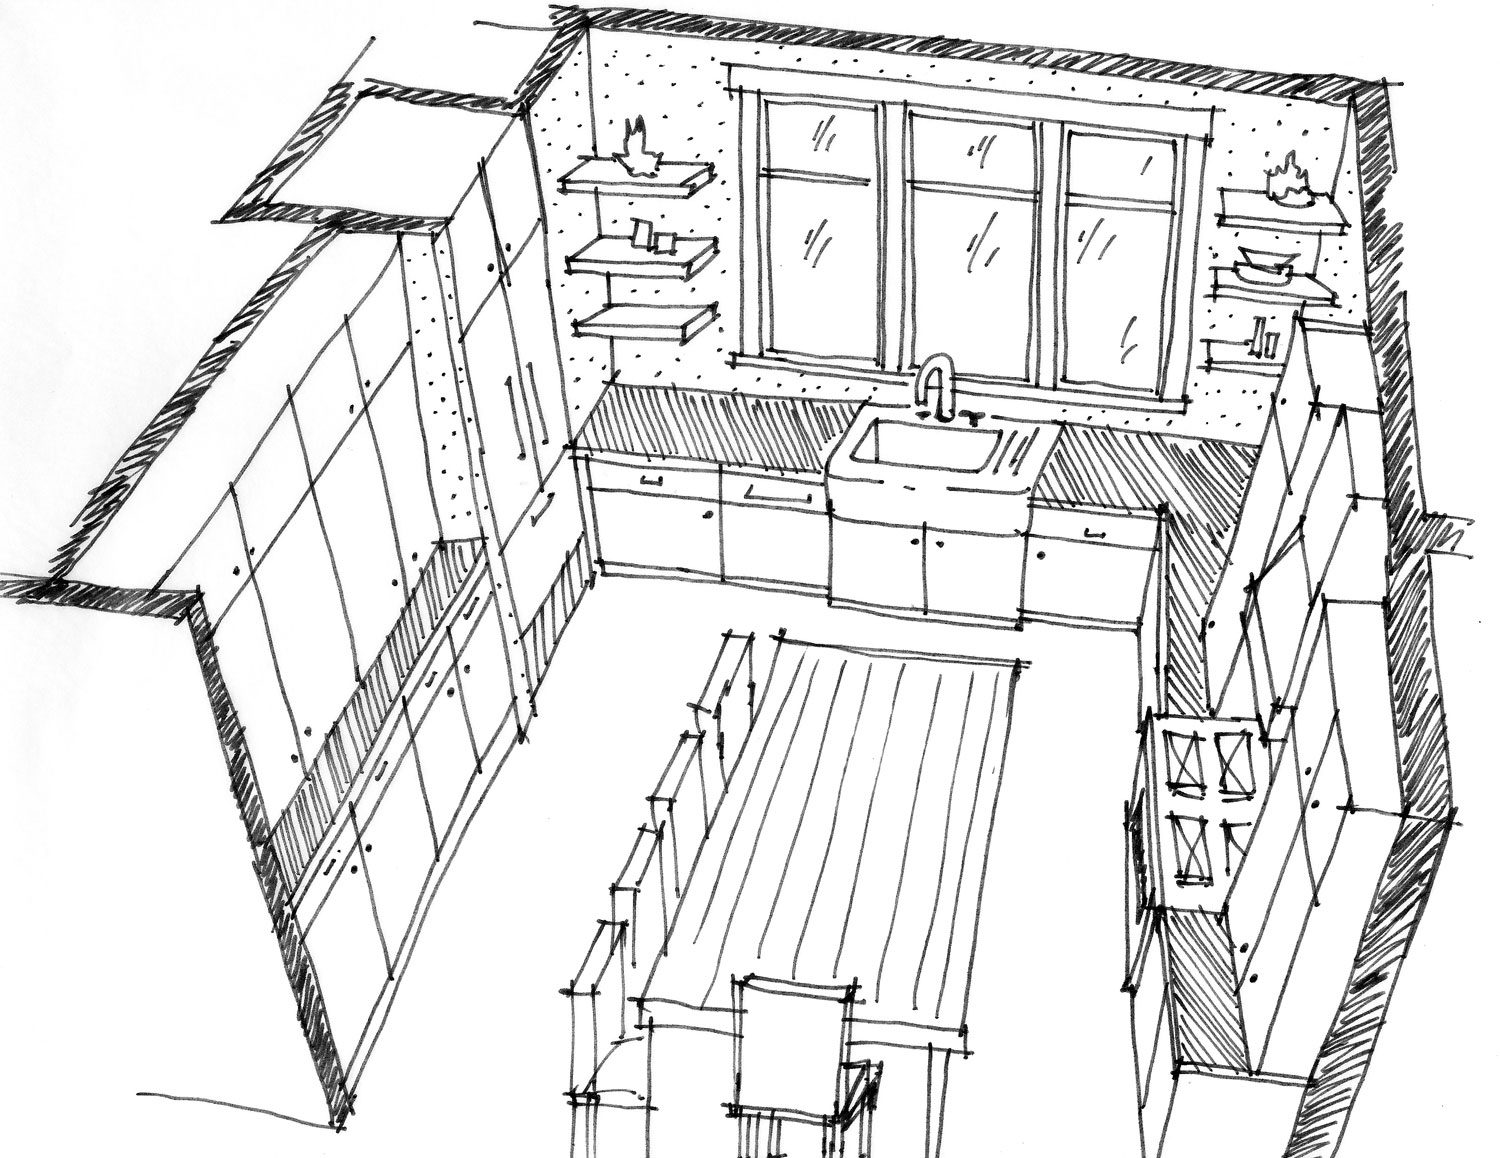
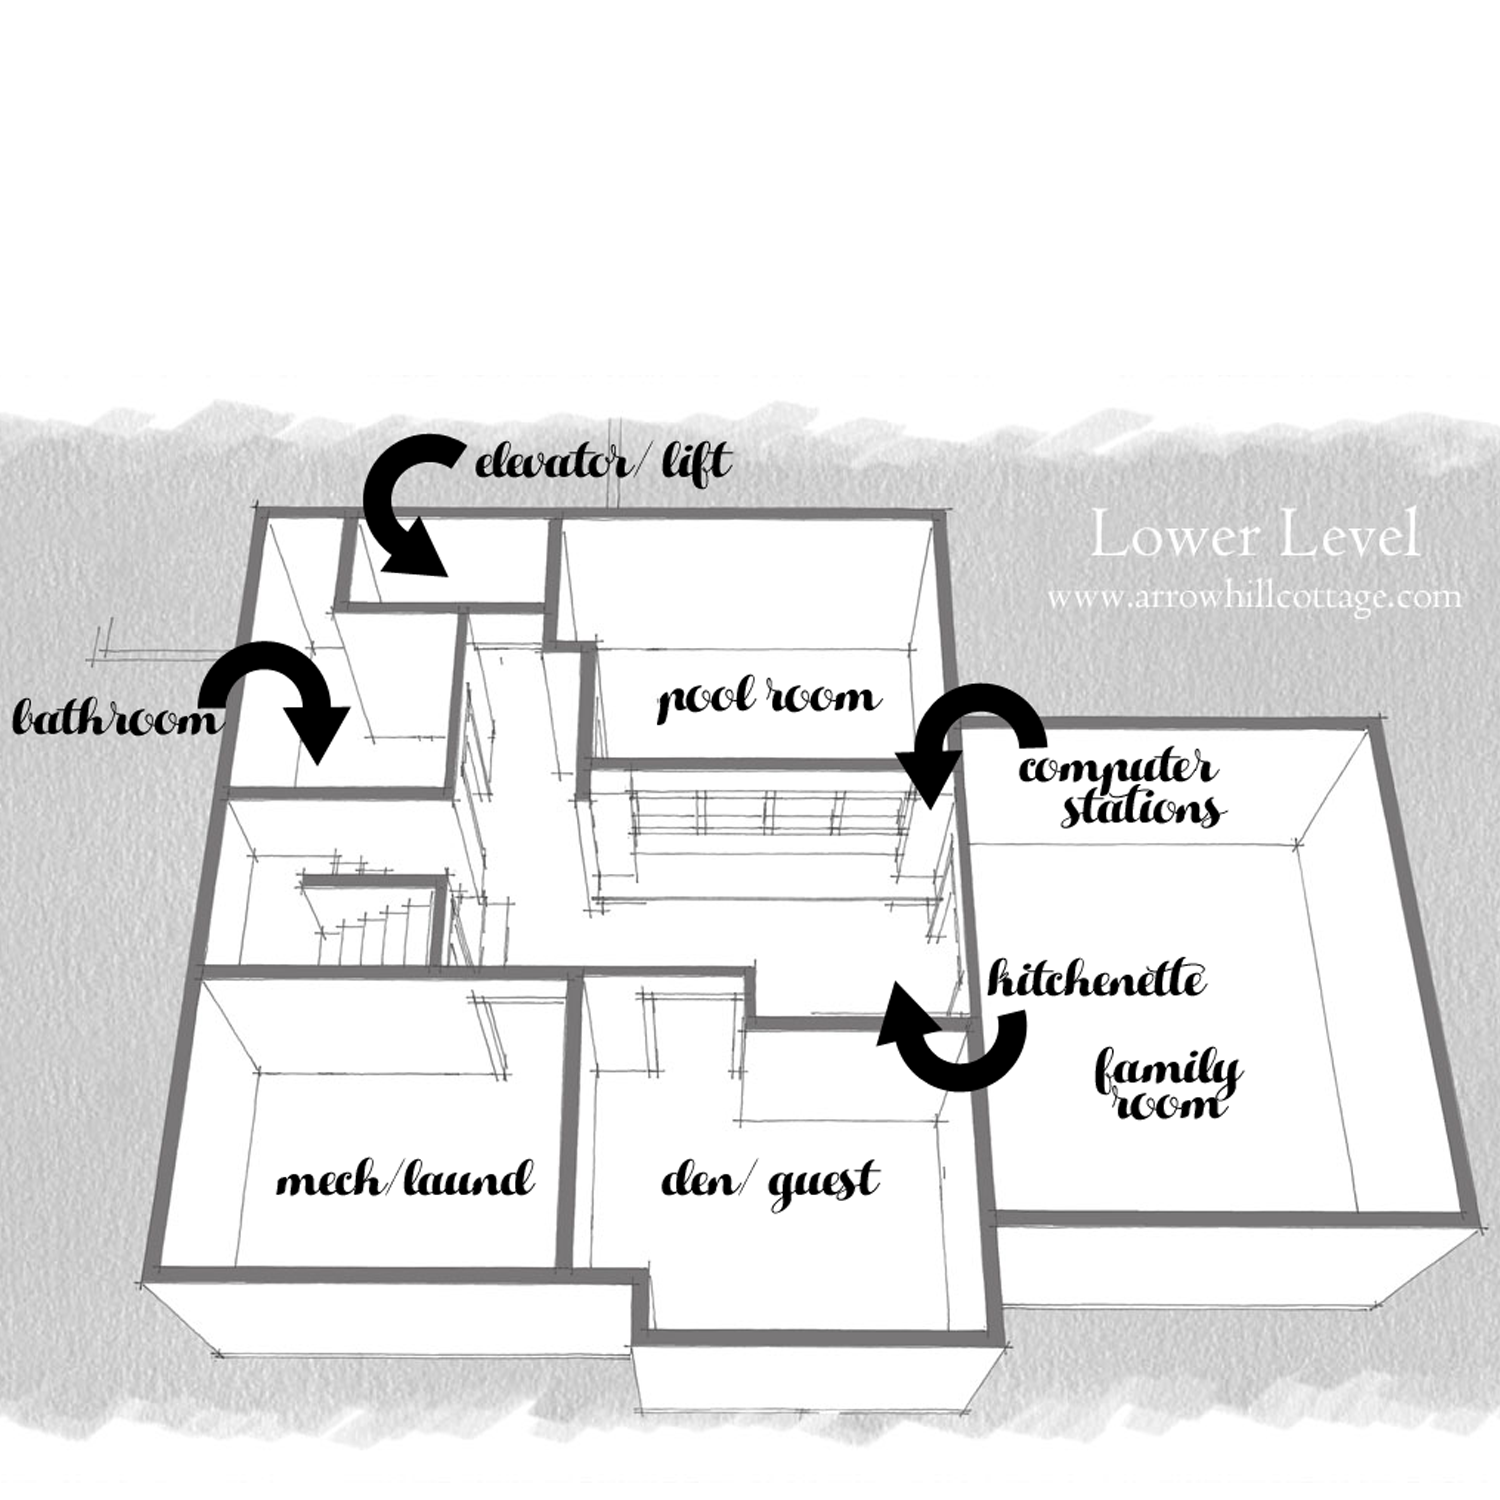
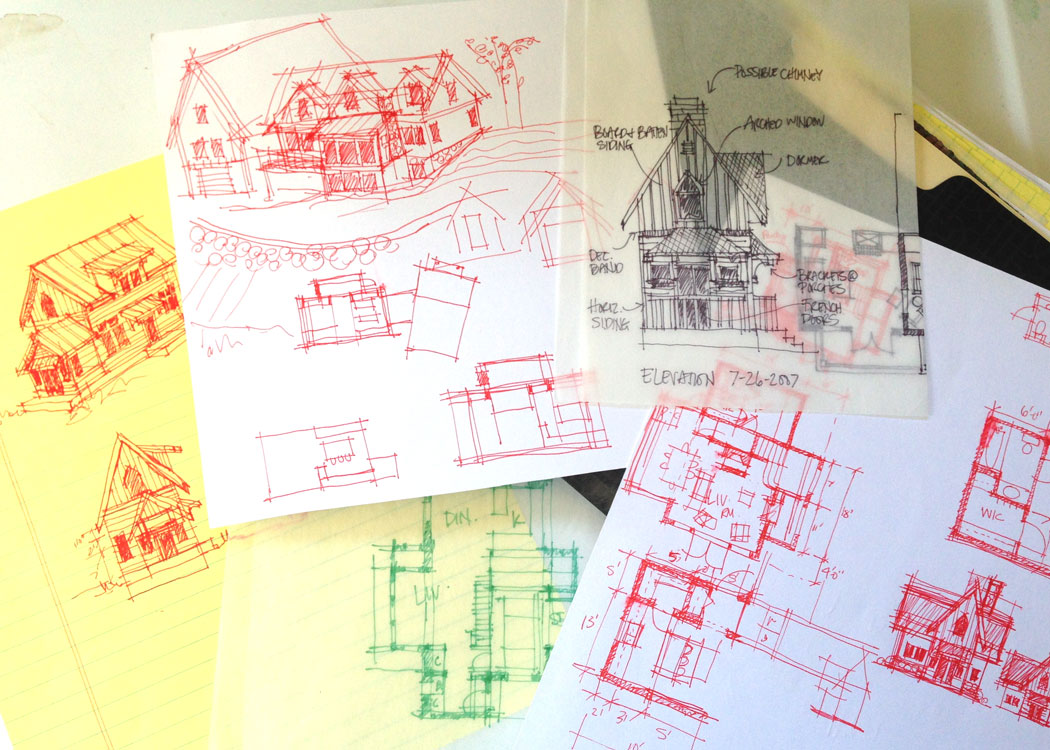
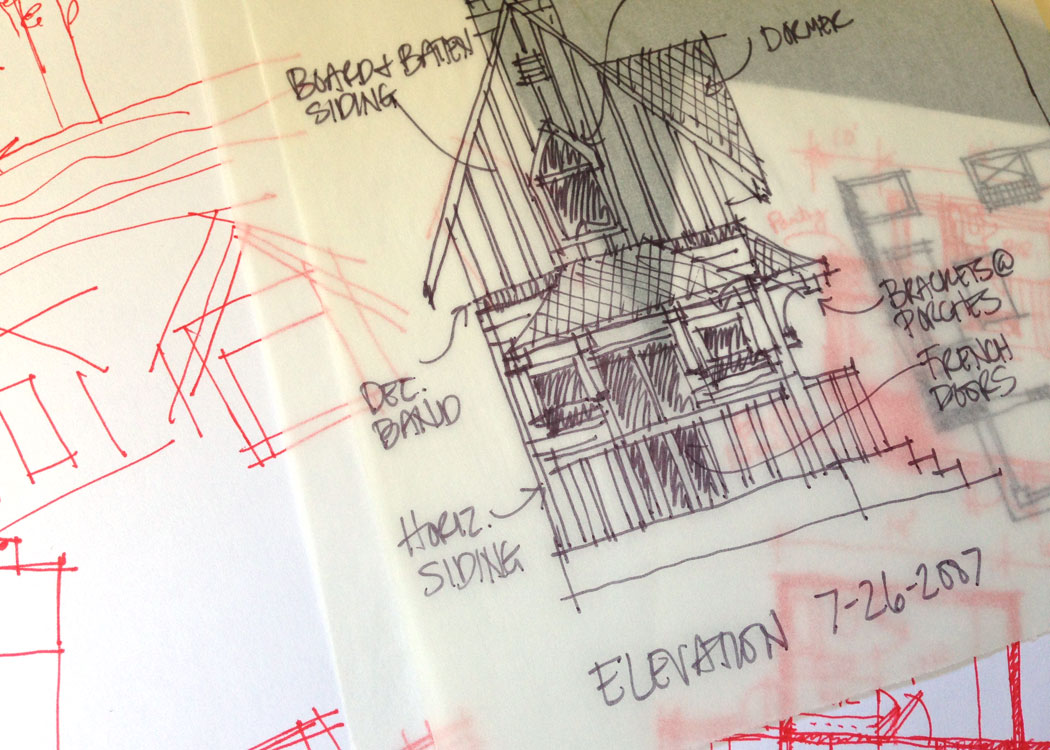
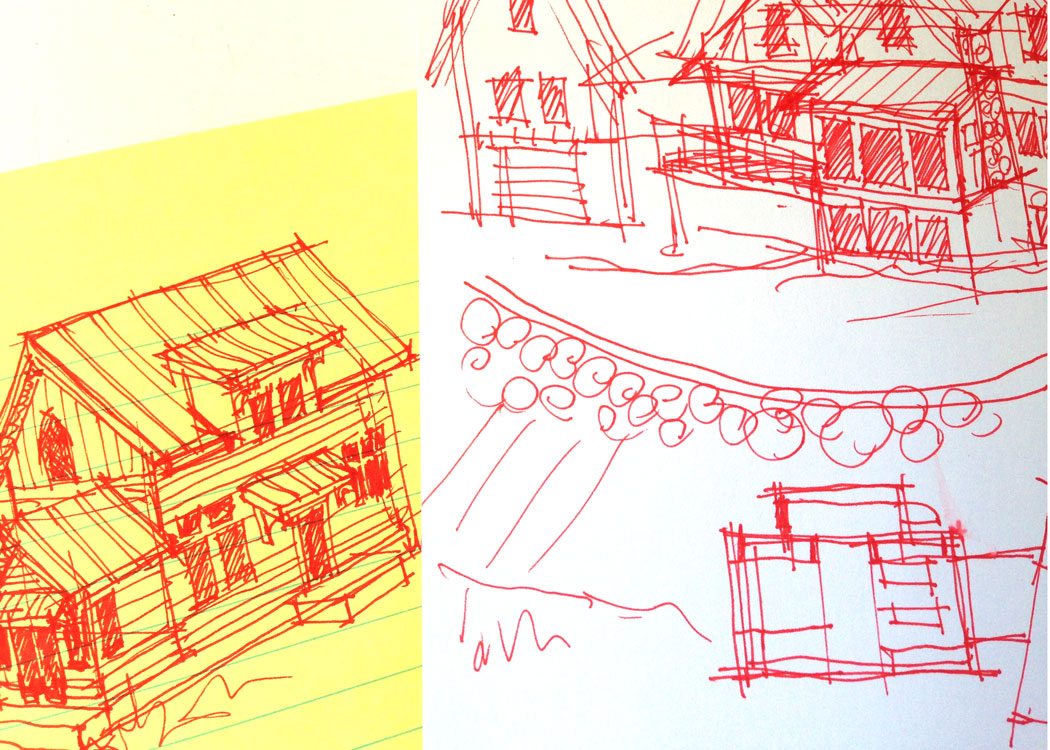
Below is the layout of the lower level. Use it as a guide while you read through the descriptions, and take a look at our Pinterest boards (which are linked at the end of each room description). They show some inspiration images we have found for each space. And here comes the disclaimer…* As mentioned before, these floor plans are currently not showing any real detail – I will be working on adding detail for future posts.
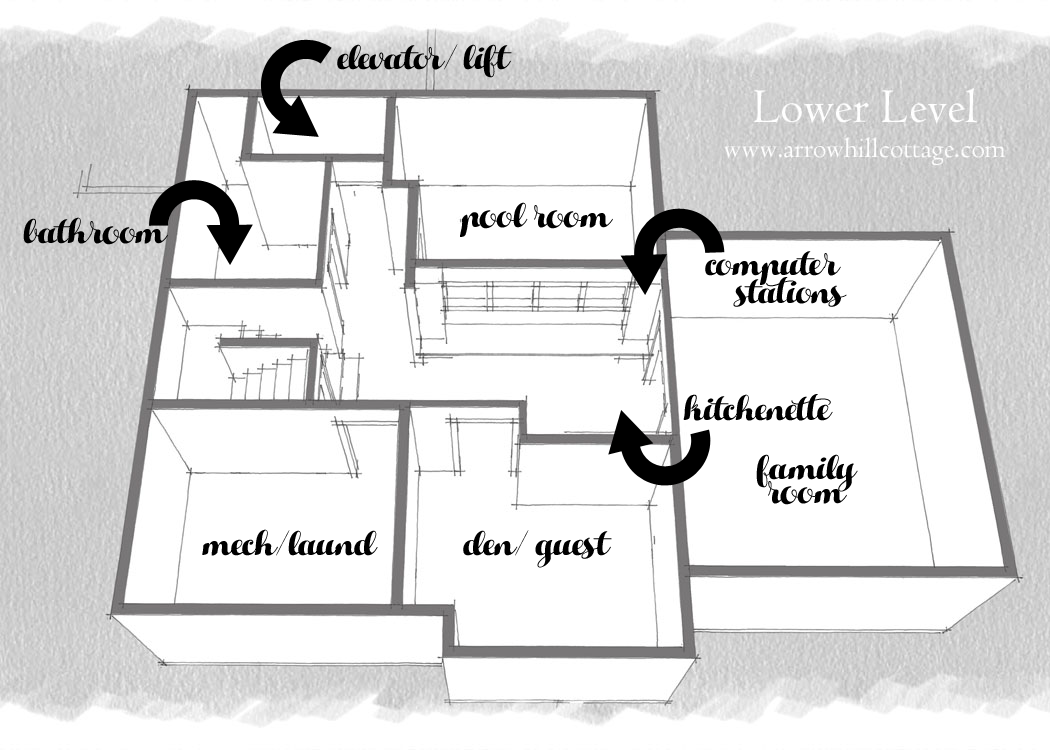
Generally speaking, the lower level is laid out in a fairly straightforward way. The bathroom is stacked under the main level bathroom, with the mechanical space nearby – to cut down on plumbing costs. All of the rooms situated on this level, besides the mechanical room of course, are ‘extras’ – meaning that they are not as important for the day to day function of our family. If money runs short while we are building the house, they can be left unfinished and DIY’d or hired out at a later date.
{ELEVATOR / LIFT} Let’s get straight to the obvious. This is not a typical feature in most houses, but we felt that it was an important addition for our family. First off, we want to be able to live in this home for as long as we can – and there is always the potential that stairs may become difficult or even impossible at some point. Secondly, our oldest daughter {K} has arthrogryposis and even now stairs give her some troubles – we want to make sure that the entire house is comfortable and useful for her. We have dreams that she will one day live independently, but if that is not possible, the lower level can become her apartment. Lastly, if in the future either of our set of parents live with us, we want to provide accessibility for them. Essentially, the elevator/lift will allow us to plan for multiple scenarios – and ensures that all the awesome features of the lower level are not limited to only some inhabitants and visitors.
{BATHROOM} Probably the best feature of this room is it’s location. Located near the stairs and the lift space, it will definitely be a go-to room when the main level bathroom is occupied. It also is across from the pool room. Handy. This will be the largest of the three bathrooms in the house, and will feature both a tiled shower and a separate jetted soaking tub. (PINTEREST)
{POOL ROOM} We aren’t talking about a room that houses a pool table. No, this room will feature a pool pool, the kind you swim in. Something from Endless Pools perhaps – where the water jet provides a current to swim against. It is the one surprise luxury that we are having in our house, and it’s a useful one. Our daughter {K} will be able to do her pool physical therapy at home and the rest of our family will be able to get some good exercise as well. There will be plenty of natural light coming in through large windows and a glass door that leads out to a lower level patio. (PINTEREST)
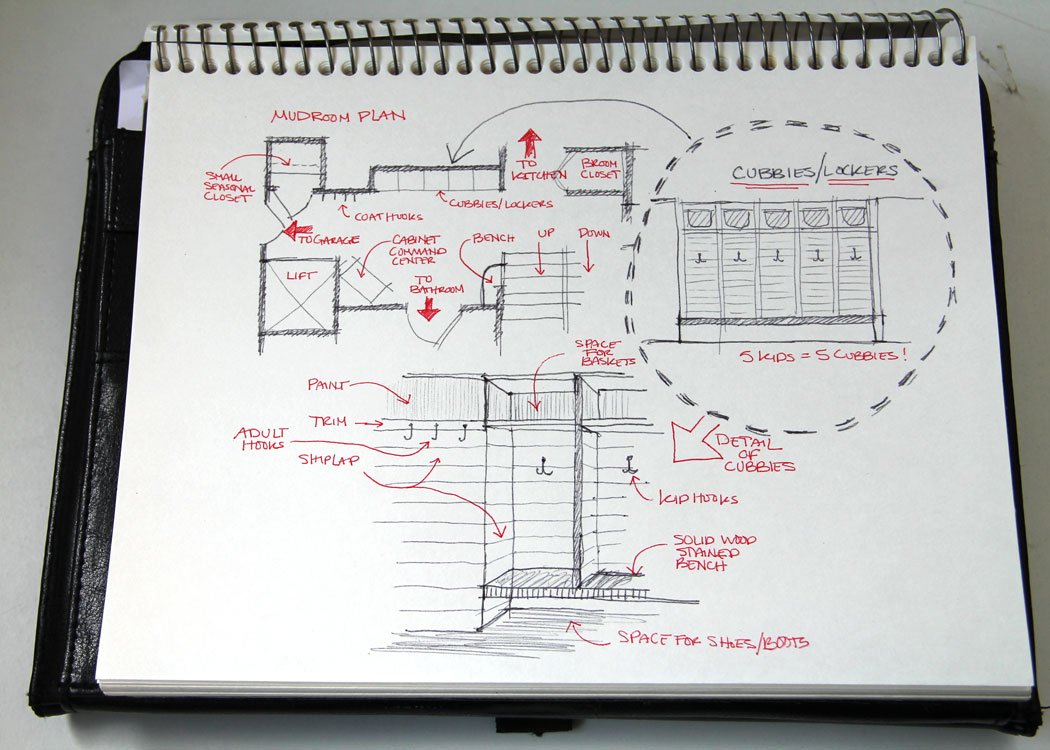
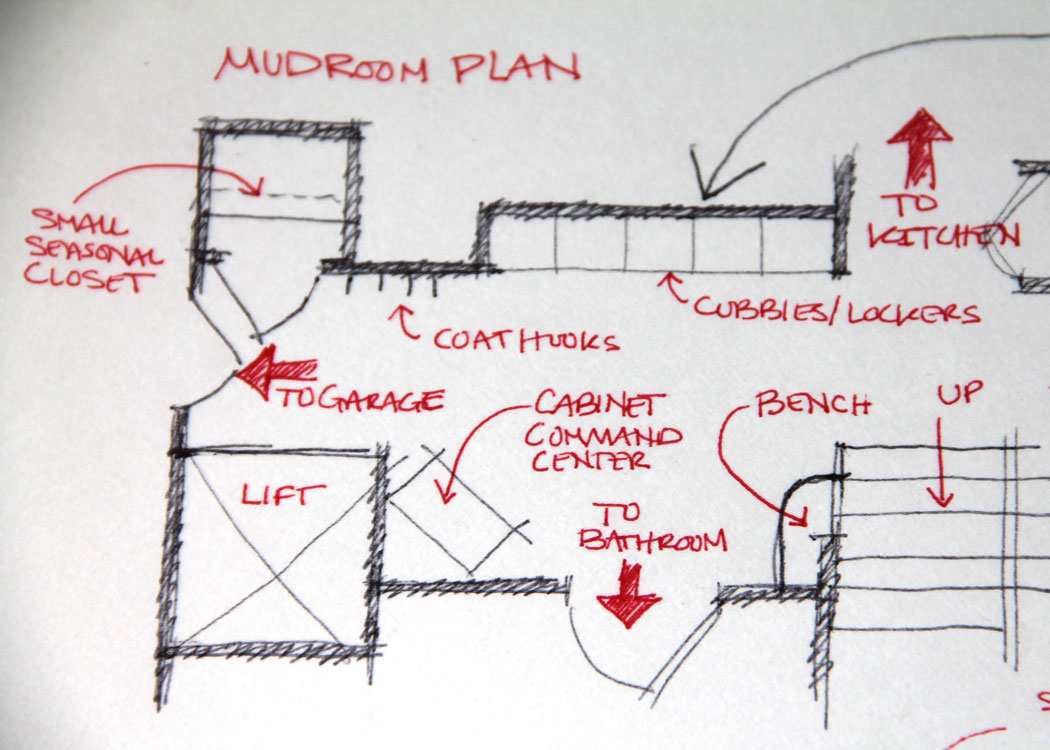
{MECHANICAL / LAUNDRY} This space is definitely still in the idea phase. Essentially, right now it is just a large open space where all of the mechanical equipment will be housed. It is also where the washer & dryer will be located. When I was first designing the house, the laundry was for SURE going to be located on the main level. But, because we decided on a smaller footprint, some concessions had to be made. Essentially we took the space that could have been used for the laundry equipment on the main level and replaced it with the lift/elevator space. Don’t worry though, I have a back up plan if it gets to annoying to haul laundry up and down the stairs or if we need a second set of appliances. There is a large ‘broom closet’ on the main level that will be fitted with water hookups, just in case a stack-able washer/dryer is it’s final destiny. (PINTEREST)
{DEN / GUEST} Craig has been dreaming of this space for such a long time. On a day to day basis it will be used as his ‘man land’ – a place to watch a football game in private, read a book, or work on some computer programming in peace & quiet. I imagine the vibe in here to be pretty laid back and cozy. The room will have a couple of small closets and a pull out couch to accommodate guests. (PINTEREST)
{HALL} Rule number one of small house design is to eliminate hallways – and such, this ‘hall’ is more than just a walking space. It is essentially a connecting room. It will house some pretty important features. On the wall that connects to the pool room, we will design some nice computer/ homework niches for the kids. There will be high windows in this location, to allow the natural daylight from the pool area to spill in. A kitchenette will be placed on the opposite wall. Again, planning for all sorts of situations, the kitchenette will have a fridge, small sink, microwave and possibly a small cook top. Day to day it will be a place the kids and their friends can go for snacks. The hall space inspiration images are included in the family room Pinterest board, linked below.
{FAMILY ROOM} We are imagining this room as a great space for our family to kick back and hang out together. I envision lots of comfy seating and a large TV for family movie nights. In one corner I would love to have a table that can be used for arts & crafts projects, and also as a place to gather and play games. There is a set of multi-pane glass french doors in our current farmhouse that we are hoping to remove and install in the cottage. As of right now, we imagine the family room being the perfect spot for the doors. When closed, they would create a nice separate room that could double as a guest space when we have visitors. The family room will also have great access to the outdoor patio space through a set of sliding glass doors. (PINTEREST)
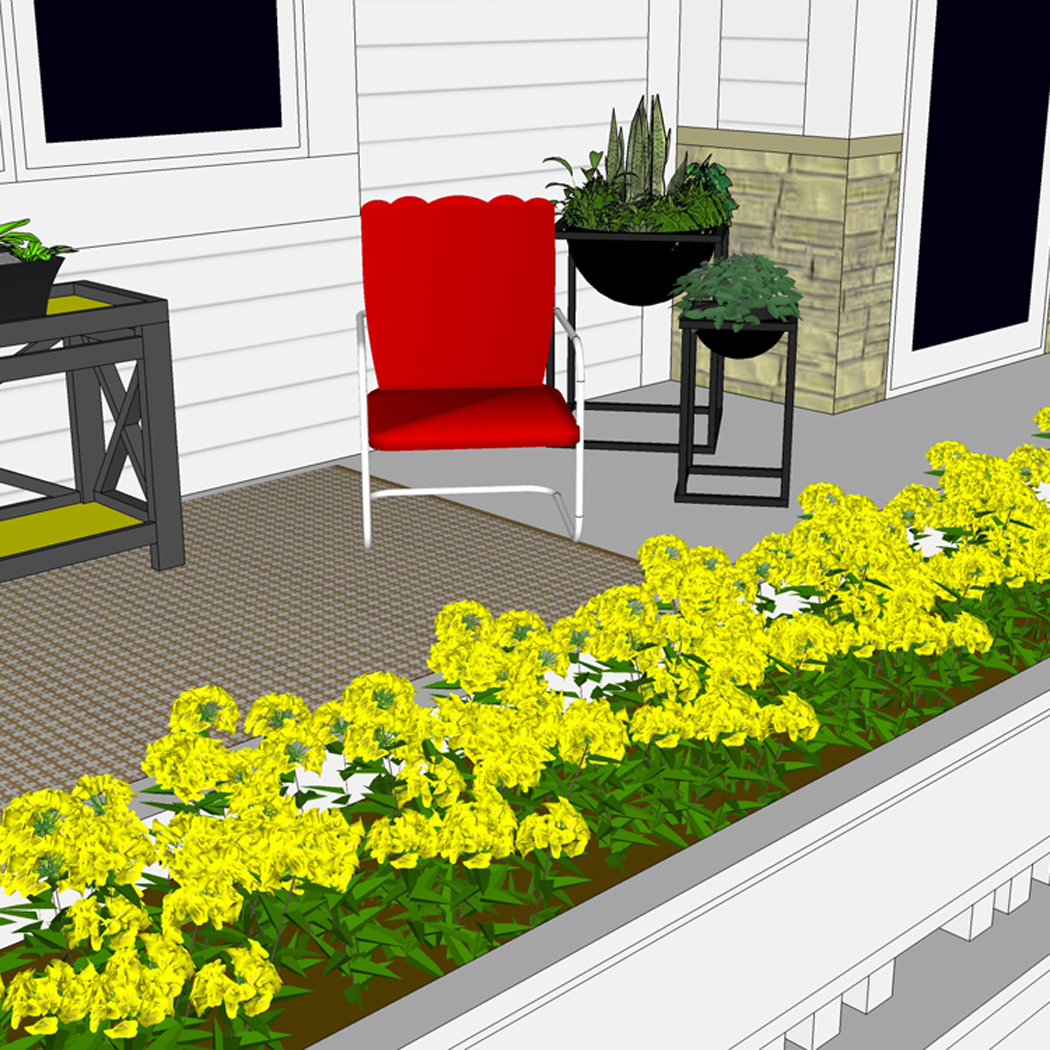
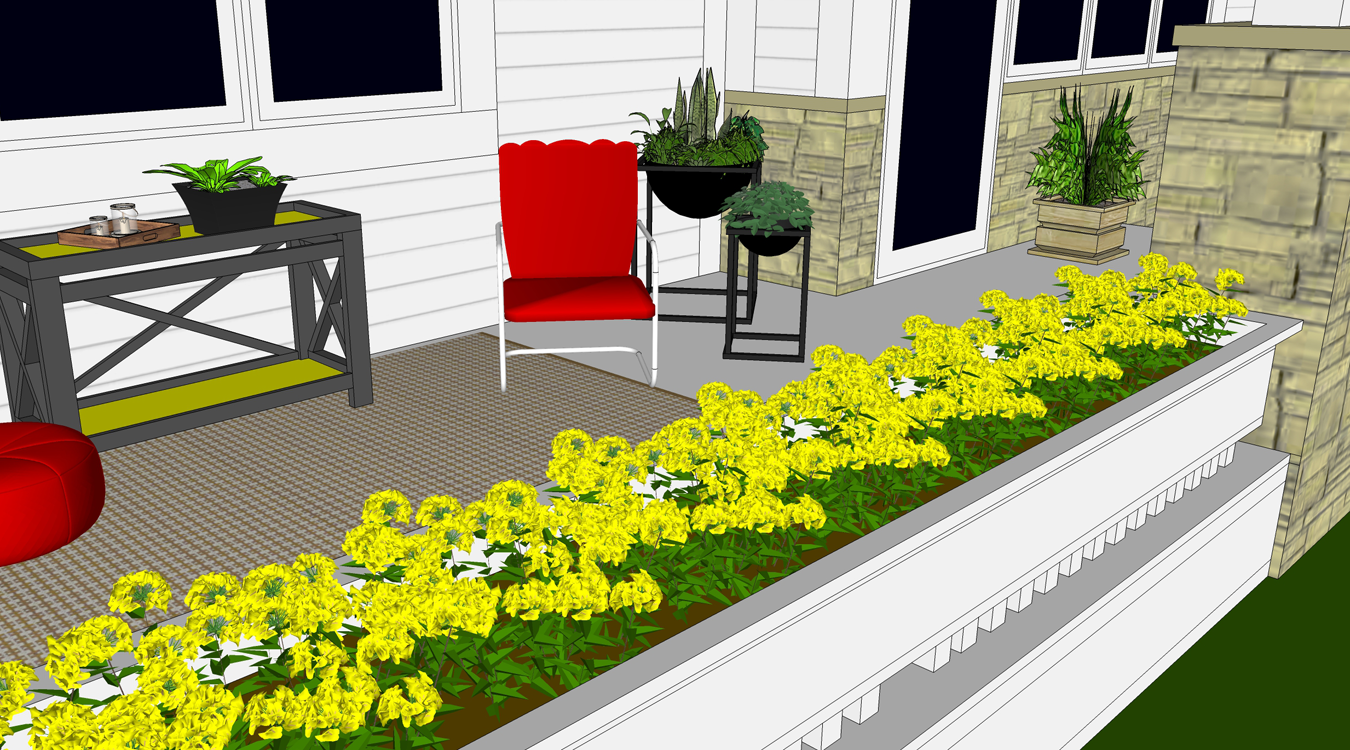
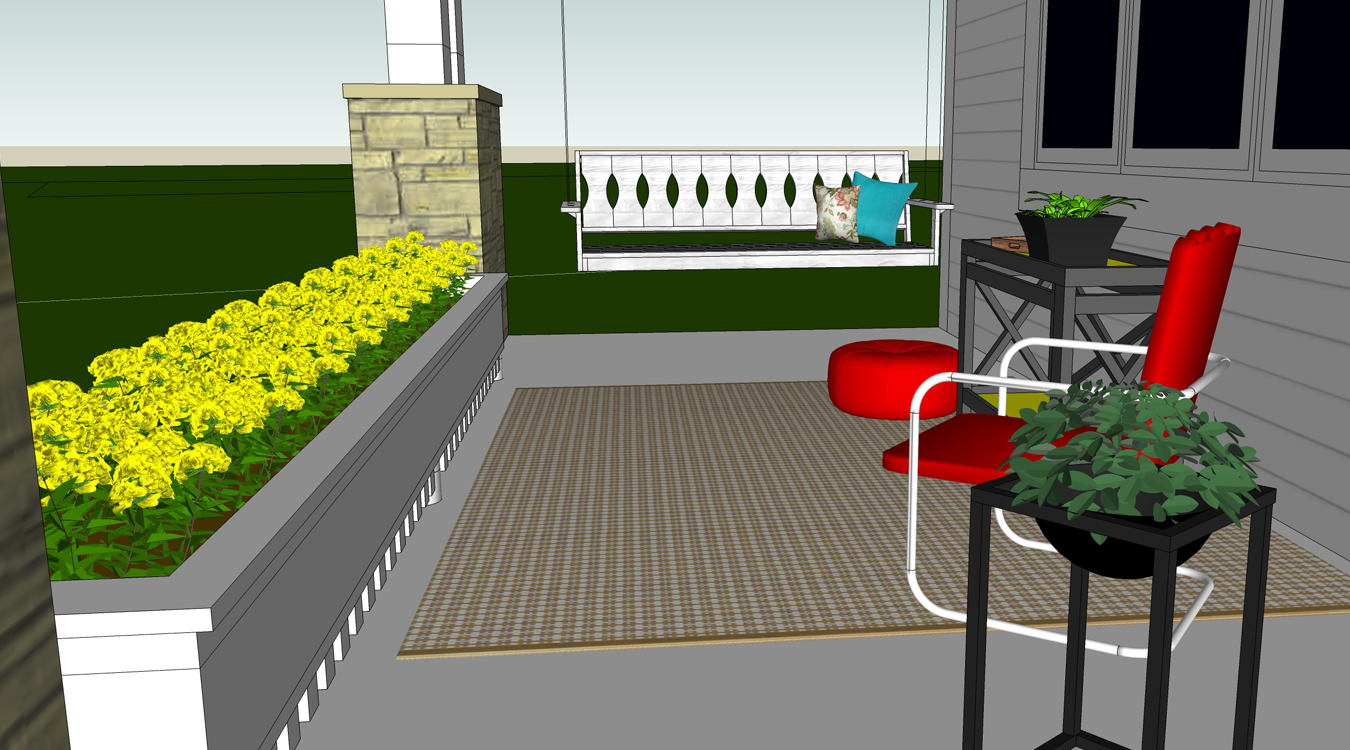
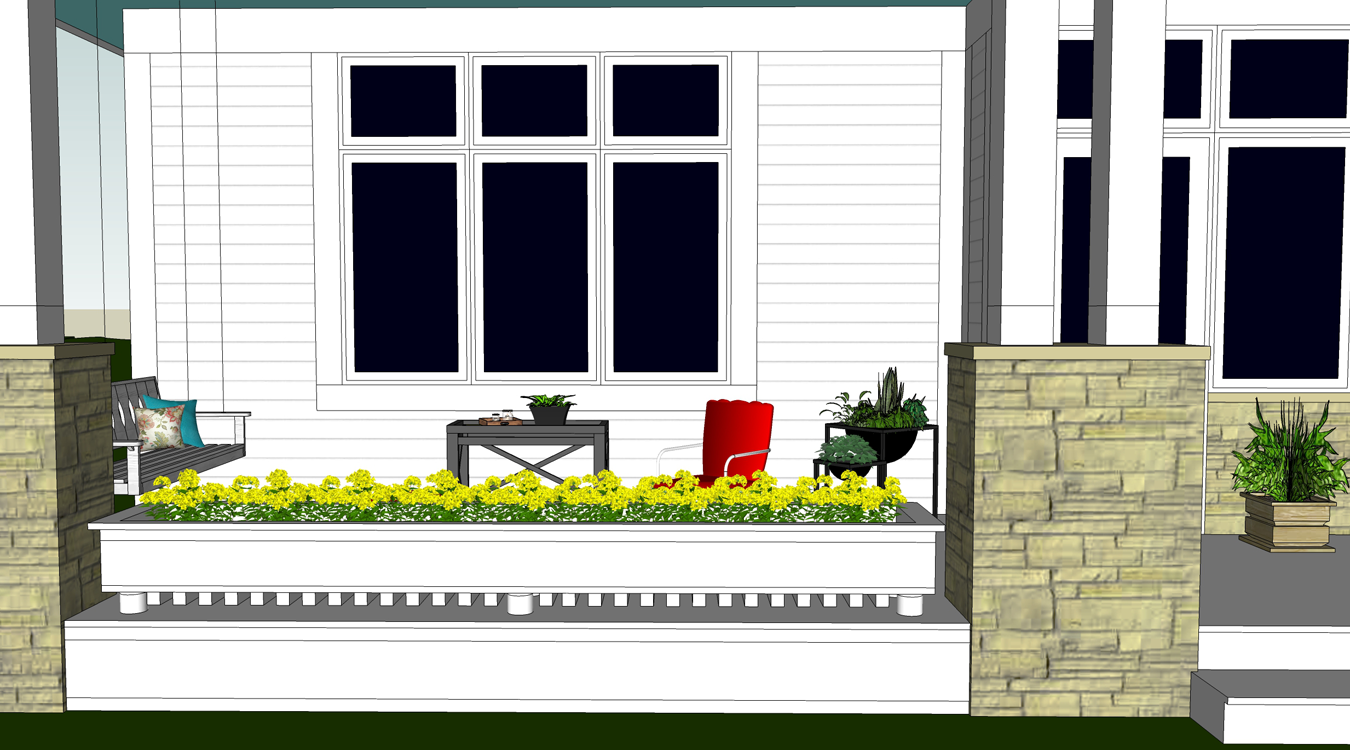
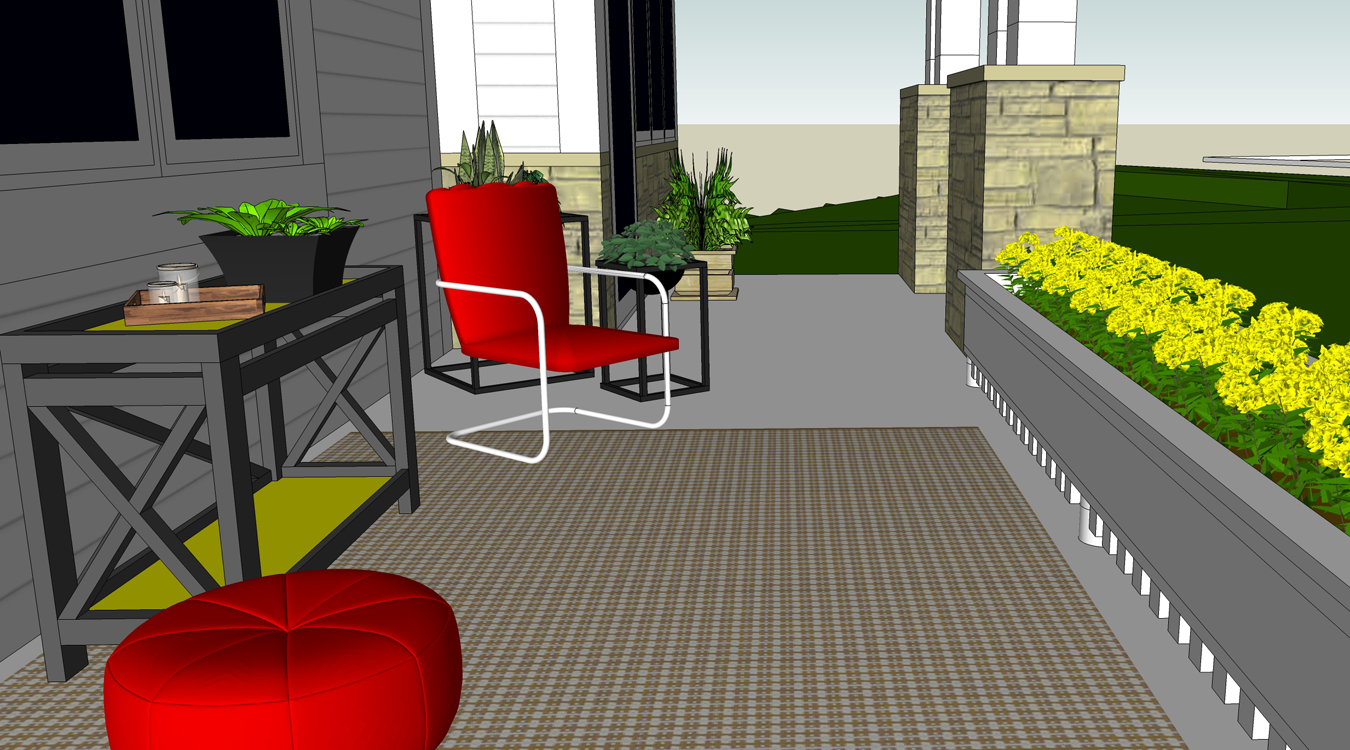
{PATIO} This will be located, as I mentioned, right off of the family room and the pool room. If you look at the above graphic, it will fit in the little ‘L’ shape adjoining the two. As of right now, I don’t have a separate Pinterest board for this space alone, but thought I could share the outdoor board which has a few photos of what I am imagining. (PINTEREST)
And there you have it! The entire house layout / floor plans! My next step will be to take you inside each room and add details, colors, and even furniture. I’m hoping to have the computer video recorder up and working next week to share a video. Now… which shall I detail first?!