A MINI GUIDE TO INTERIOR DOORS

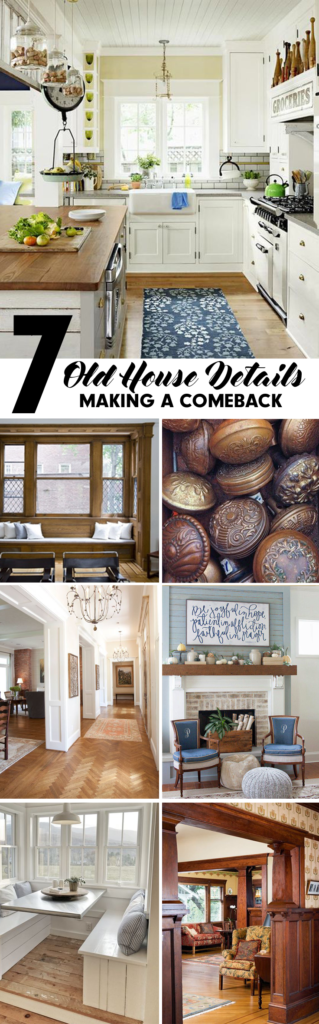
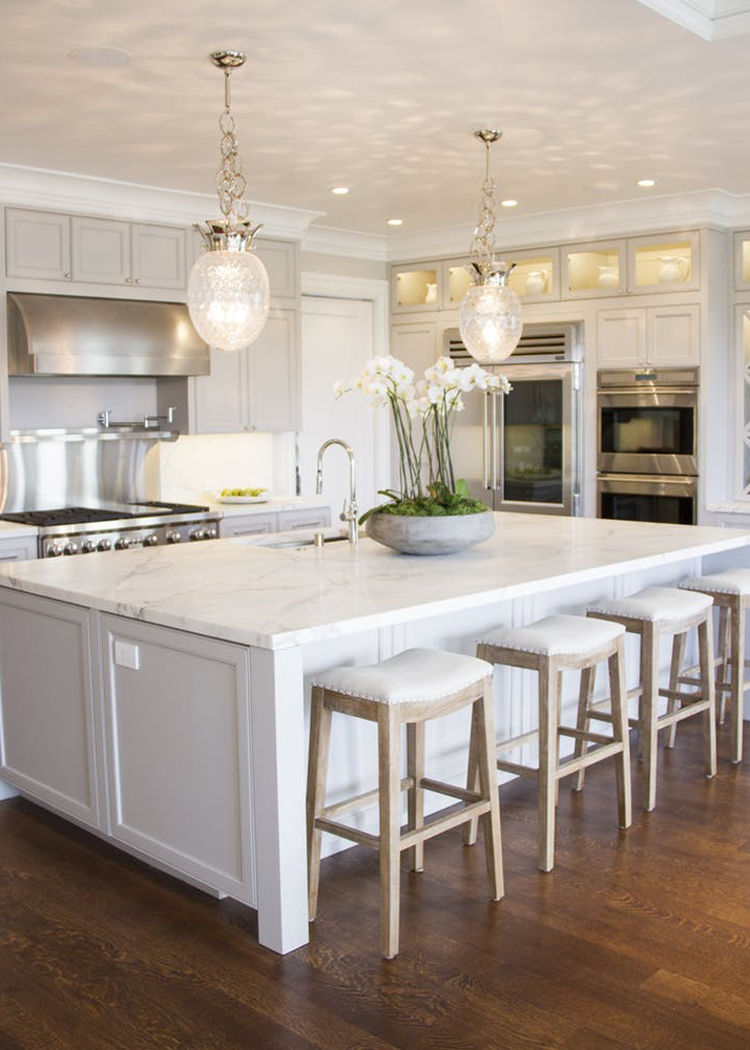
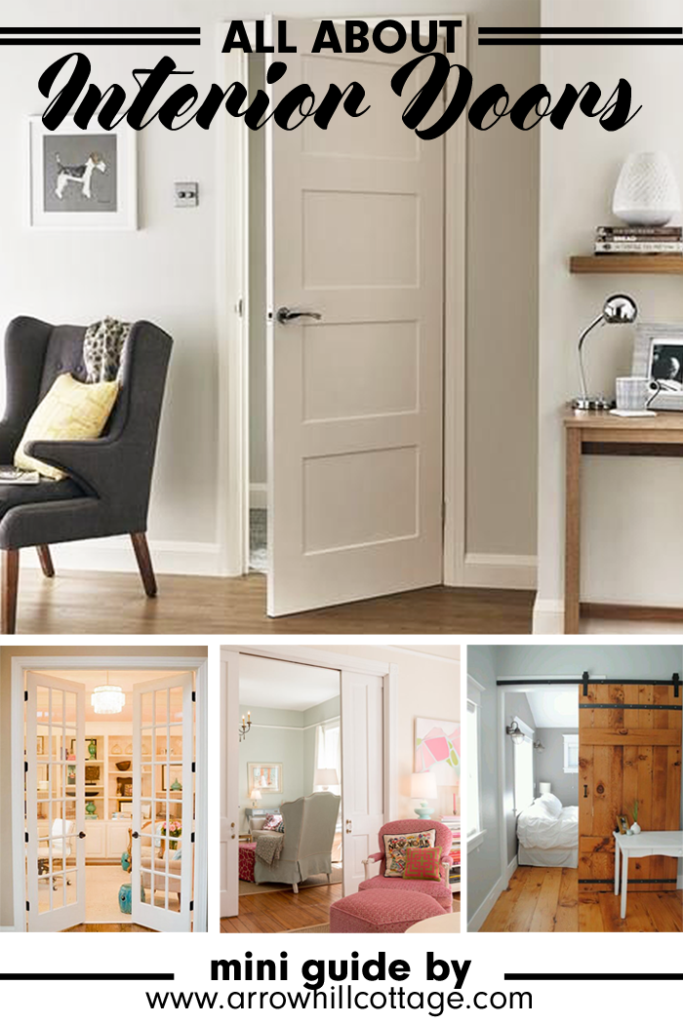
Each home interior has it’s own personality. When it comes to decorating inside our homes – paint colors, furniture, and throw pillows are usually the first things that come to mind. During a more extensive decor remodel – the floors, walls and ceilings will typically get special attention. But many times an important element is overlooked.

Interior doors.

Choosing the interior doors for your home can be a challenge, but finding a type and style that flows with the rest of your interior can add an extra detail that will really make your home feel pulled together and unified. The great news is that there are many interior door choices available (both for purchase and as DIY endeavors) – and finding the right match for your home should not only be possible, but fun.

I have put together a little guide, complete with inspiring images, to help take the guess work out of your decision making.


DOOR OPERATION TYPES

Choose which will work best for the function and space you are trying to serve. Each has it’s own benefits. Listed below are the most popular types available in today’s market.


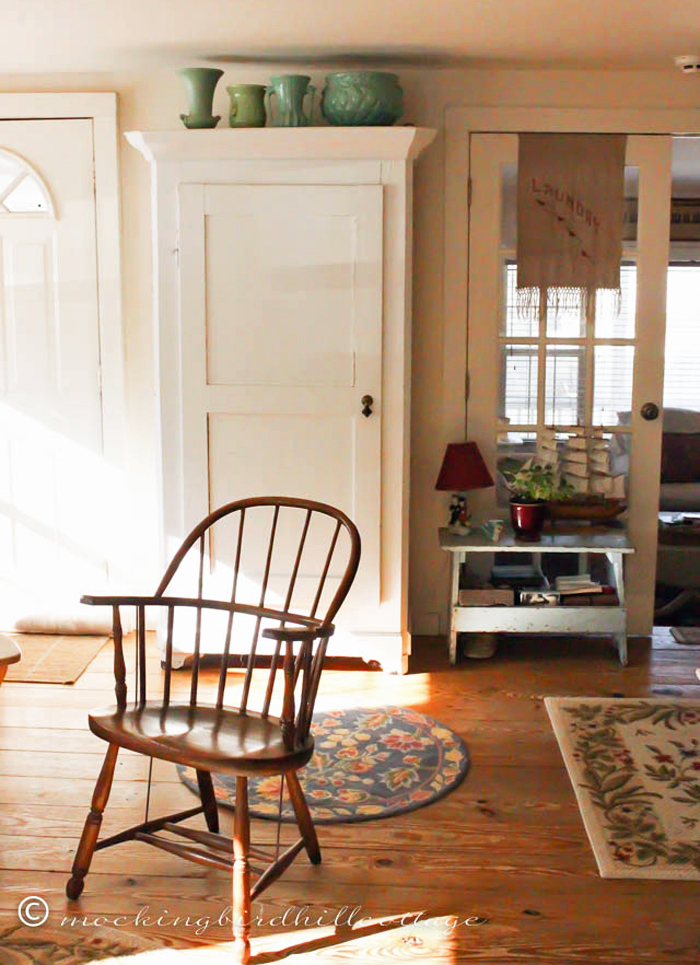
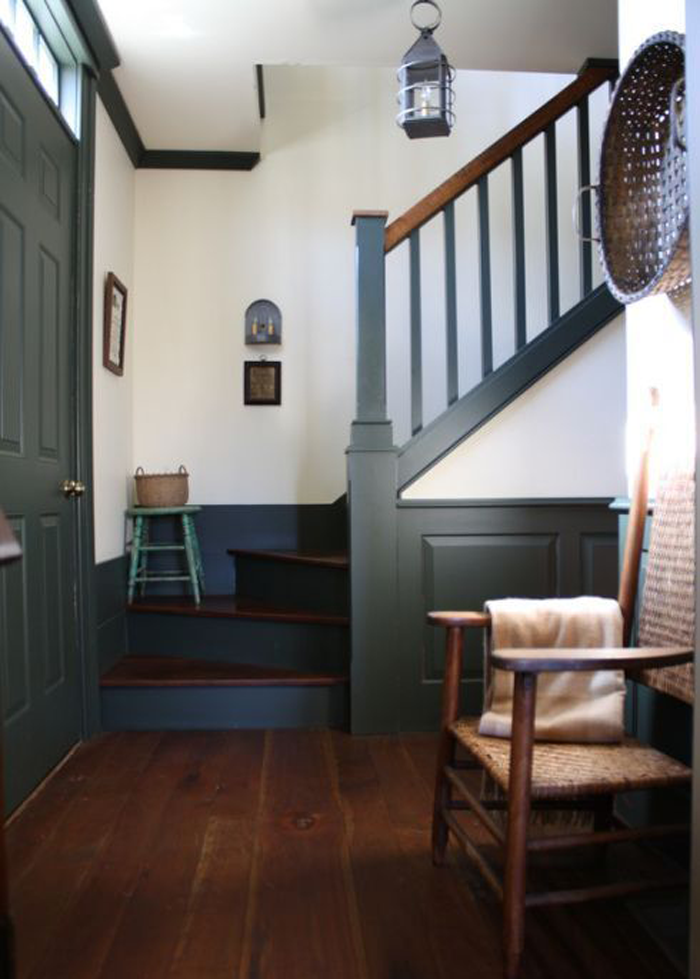
HINGED/CONVENTIONAL SWING

image source

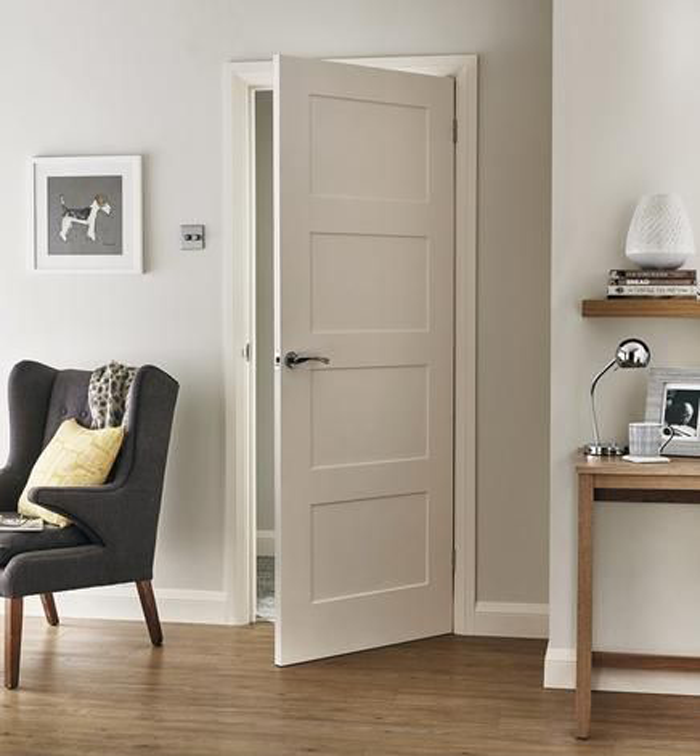
This door type is the most common used for home interiors. They can be hinged on either the right or left side of the frame, and swing into or out of the room – depending on how you want them to function. These doors are readily available in a large variety of sizes. The most common residential size is a standard 2′-8″ wide by 6′-8″ high.


BI-FOLD

image source

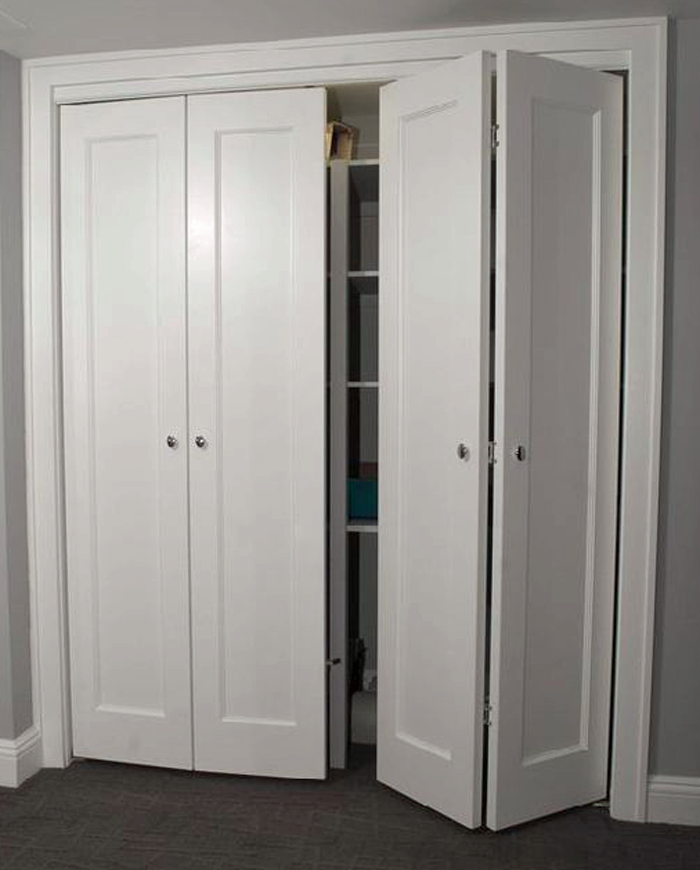
Bi-fold doors are also called folding doors, and are most commonly used for closets in homes. The door, when closed, fills the entire cased opening – but, as the name would suggest, fold in half (outward) when opened. The benefit of the bi-fold door is that you do not need as much space in front of the door to be clear when opening.
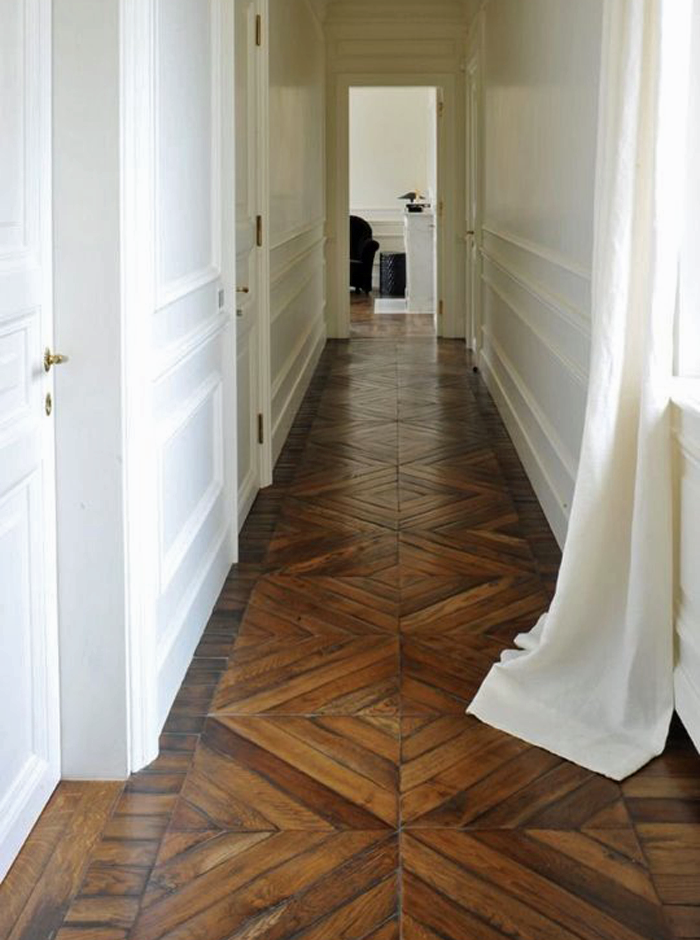
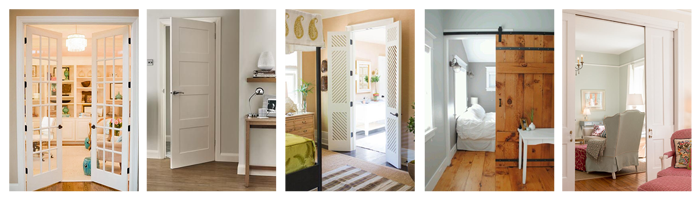
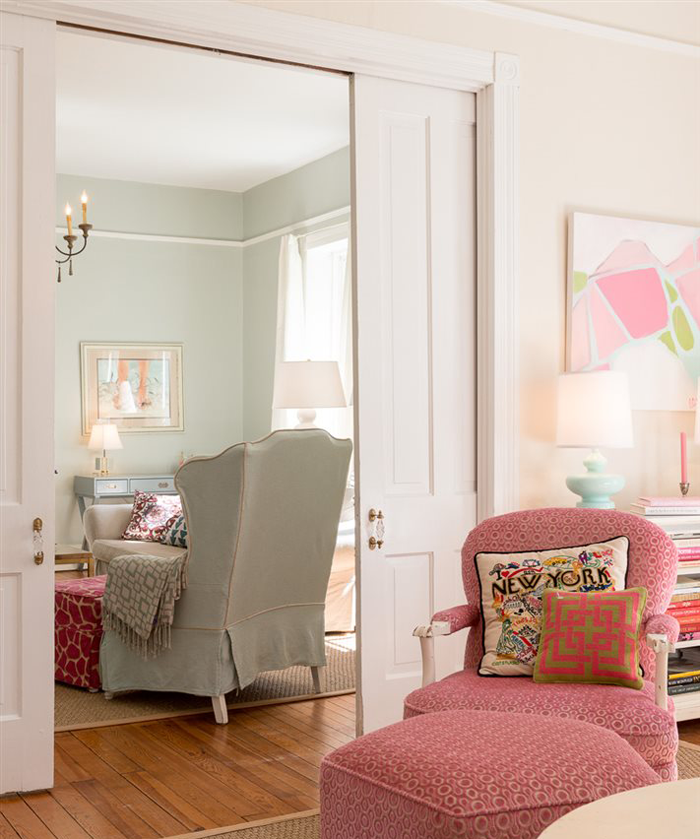
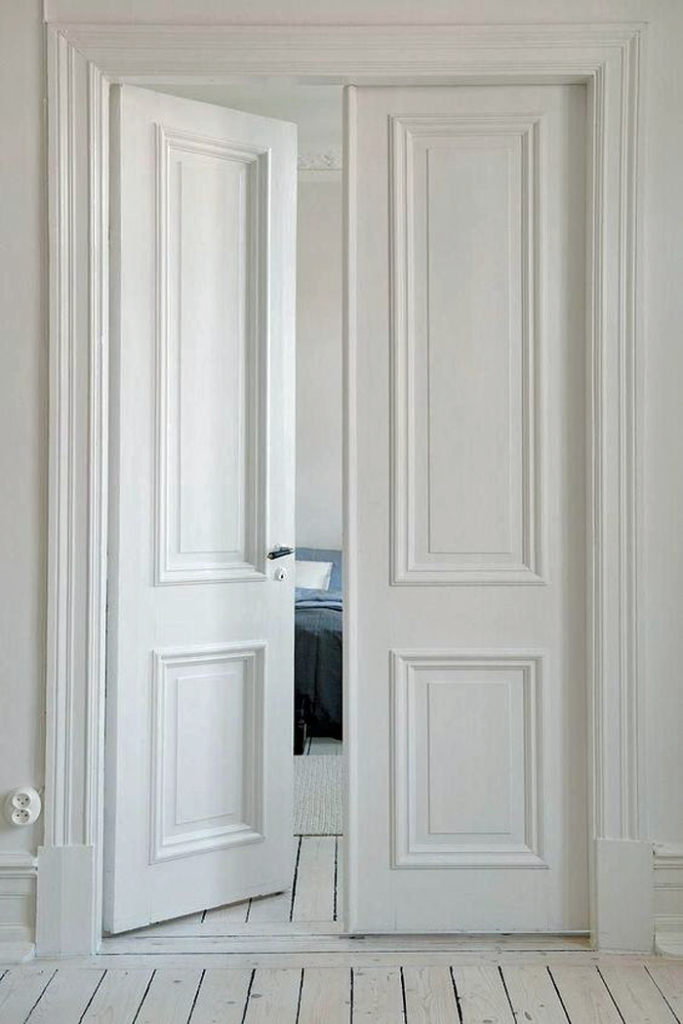
 

FRENCH

image source

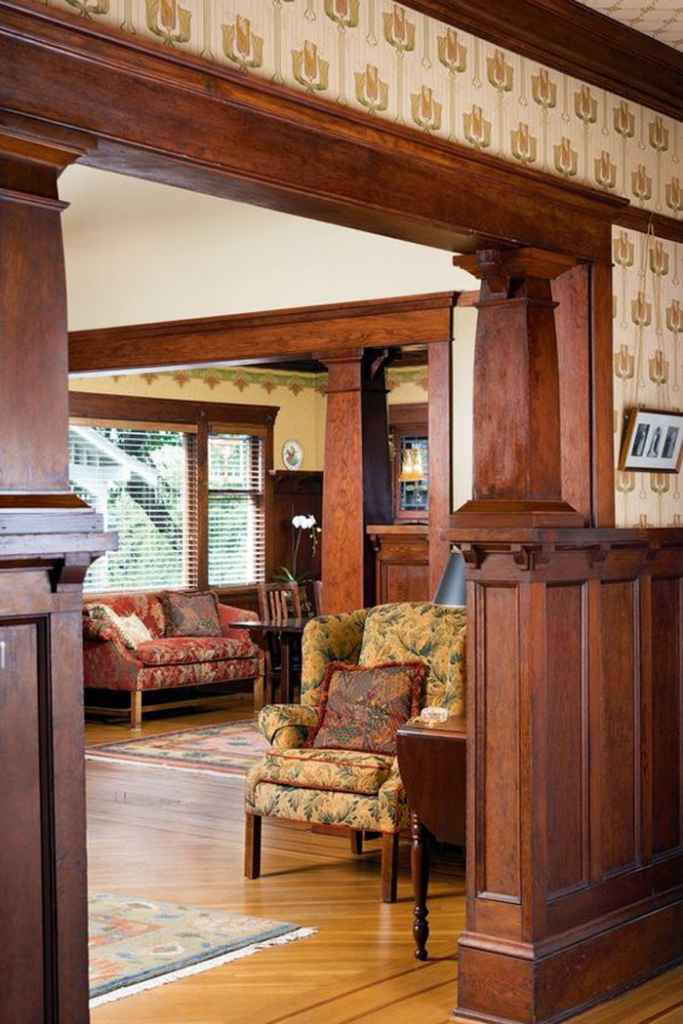
A pair of doors that swing either into our out of a room, hinged on the outer edge of the opening. When both doors are open a large opening is created. This door type is very popular to use between rooms – for privacy when needed, or the feeling of an open floor plan when privacy is not a concern. Generally french doors utilize some sort of glass panel configuration.


POCKET

image source

Pocket doors are considered the ultimate space savers. The door travels on rollers that are suspended in an overhead track. When fully open, the door is completely hidden in a cavity created in the adjacent wall. This type of door is becoming more common as the function has improved over the years. Pocket doors have the ability to lock, making them useful in a variety of applications – from closets to bathrooms.


BYPASS

image source

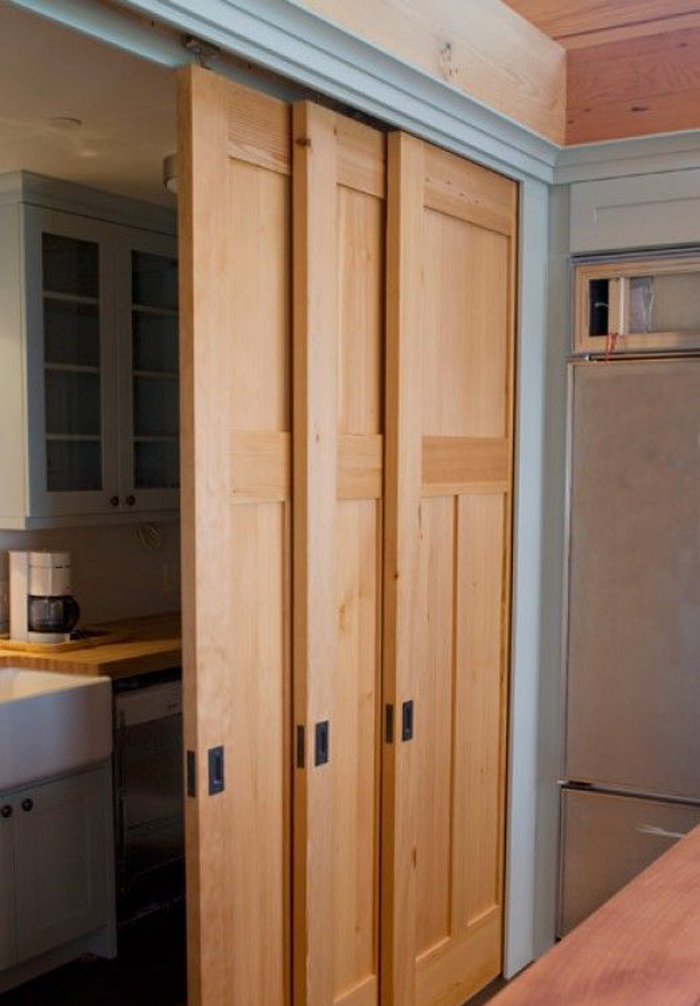
Bypass doors also come in pairs, or in a three door configuration (as shown). They are set on a track that fills the opening, with one door mounted slightly in front of the other – so that when they open they will slide past one another. These doors are almost exclusively used for closet applications. The benefit of this door type is that it does not take up extra floor space with a swing; But, you will only have access to those things behind the door that is open – making them a bit inconvenient.
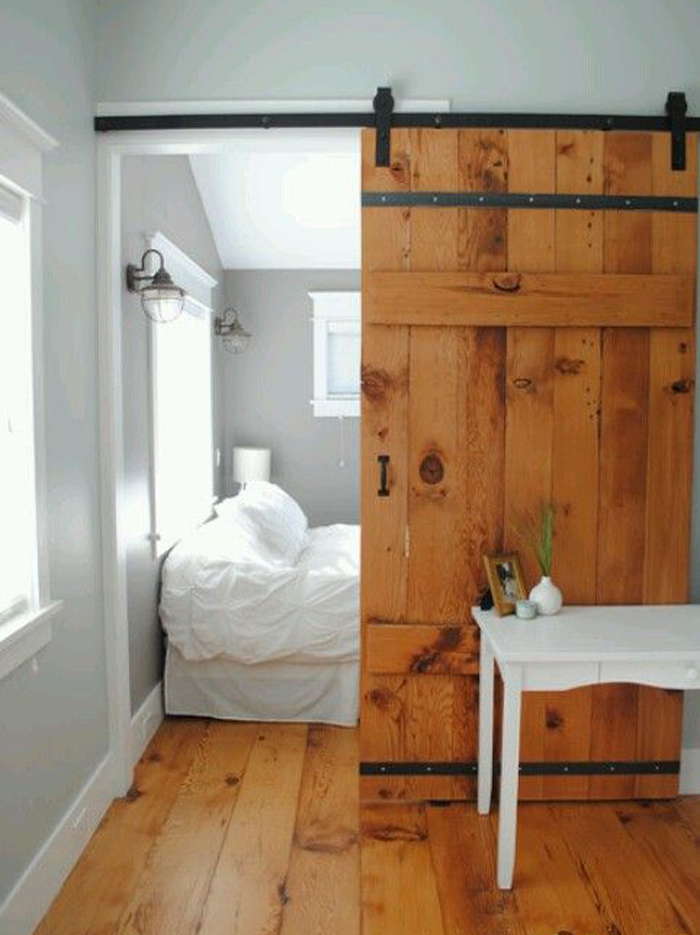


SLIDING BARN

image source

This type of door has been made very popular recently by the tv show ‘Fixer Upper’. Barn doors hang from a track outside the room/closet that will be accessed. Because of this, the doors themselves need to be wider than the opening – and the track needs to be long enough so that the door can slide completely out of the way. Essentially, the track needs to be at least double the width of the opening you want to access. Be sure that the hardware used to mount and operate the door is high quality – so that you don’t end up with clunky (or squeaky) operation.


INTERIOR DOOR STYLES

You can find the above door operation types in a variety of styles to match the preferences for your home design. Listed here are the most common styles.
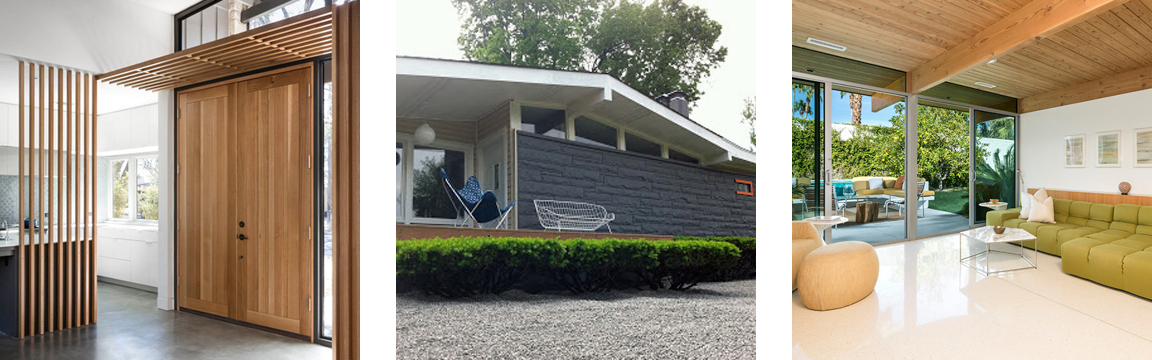


FLAT

image source

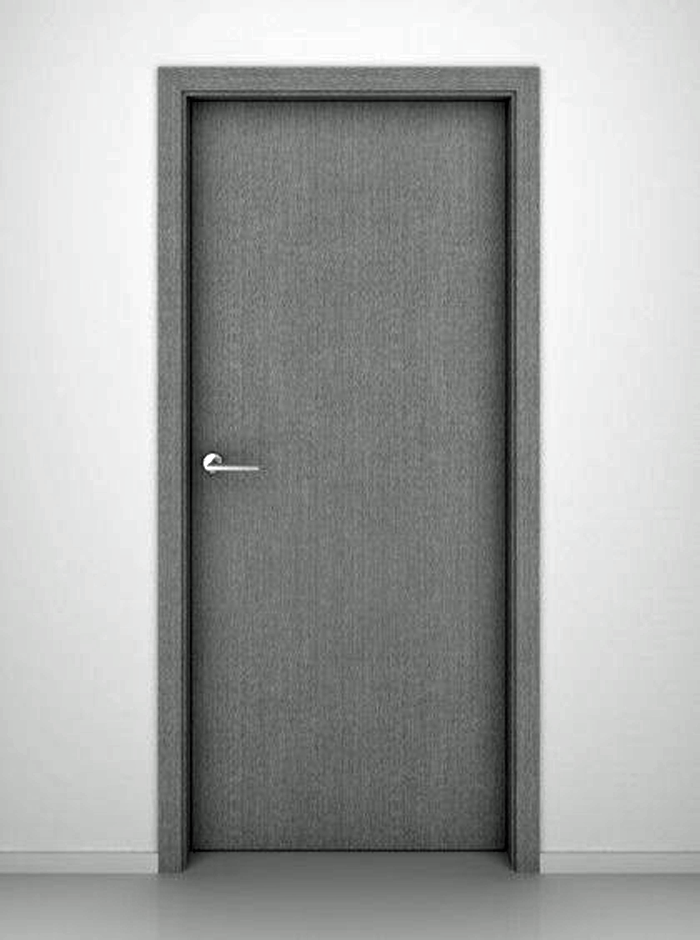
This style of door is also called ‘flush’. Essentially these are doors that have no extra ornamentation, and have a smooth simple finish. They are most commonly used in modern styled homes. They can be made of a solid piece of wood, but more commonly are composed of thinner veneer pieces of wood – which creates a door that is more lightweight.
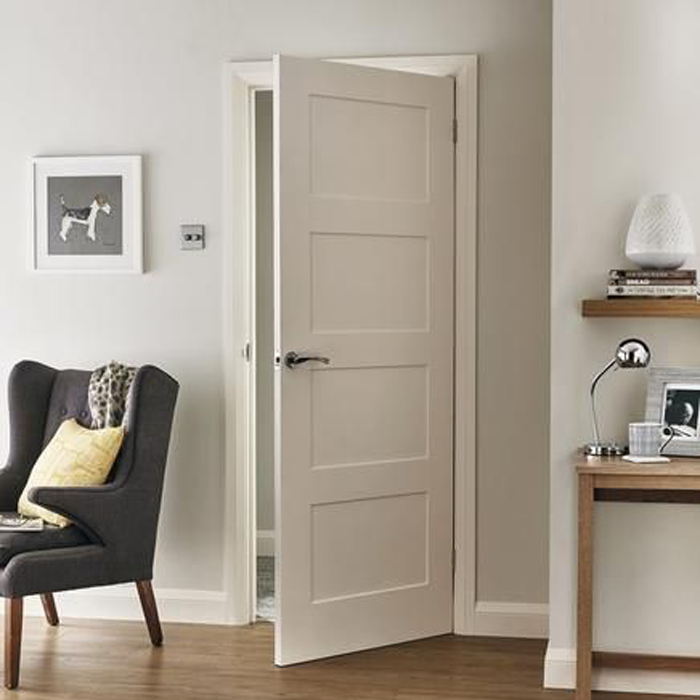


SHAKER

image source

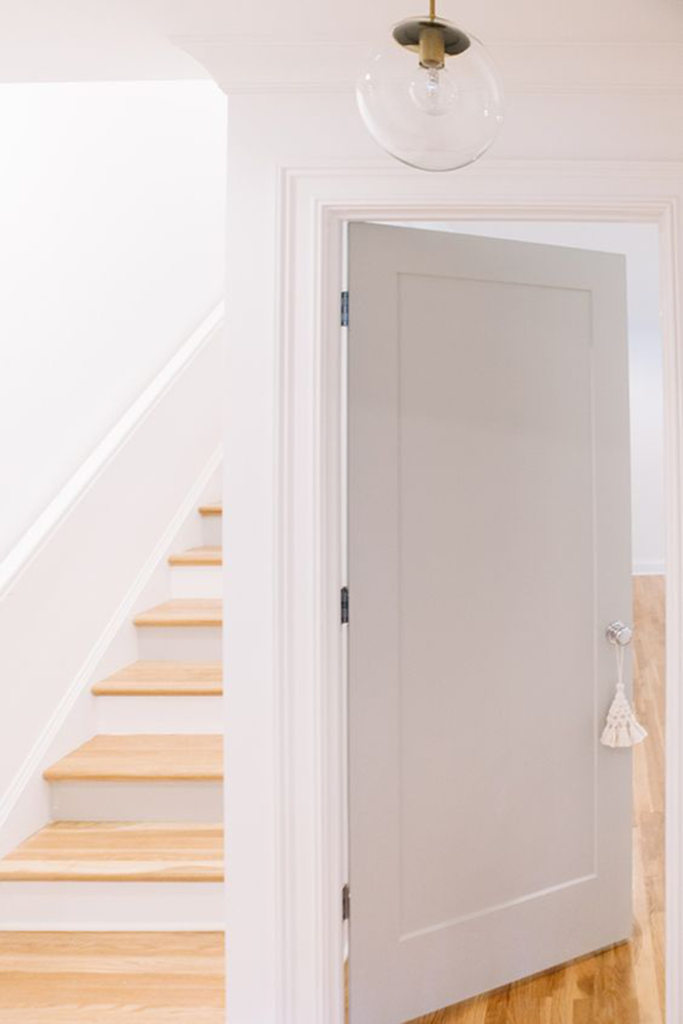
A shaker (or craftsman) style door is composed of a flat center panel and square edge raised panels. These doors have a clean, simple look and are one of the most popular varieties used today.


RAISED PANEL

image source

This type of door is a bit more ornamental in that the panels themselves are created with more detail – sometimes with arched top panels.
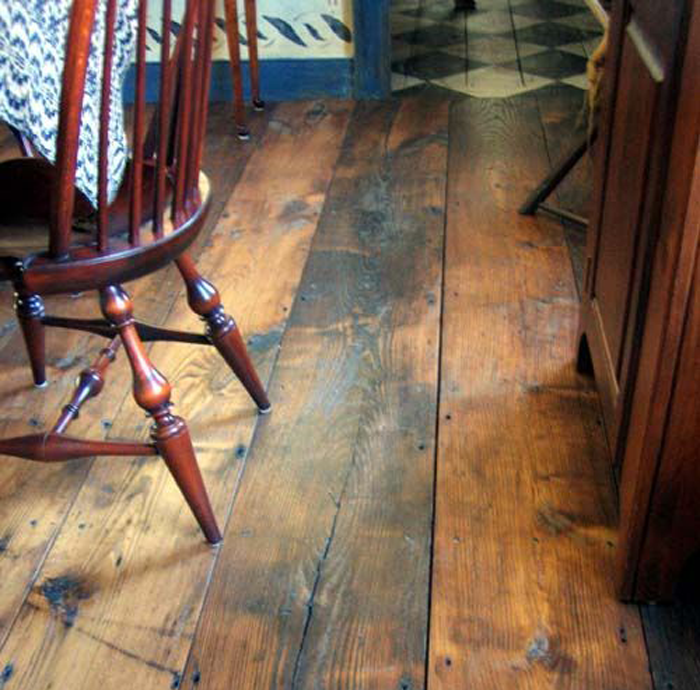
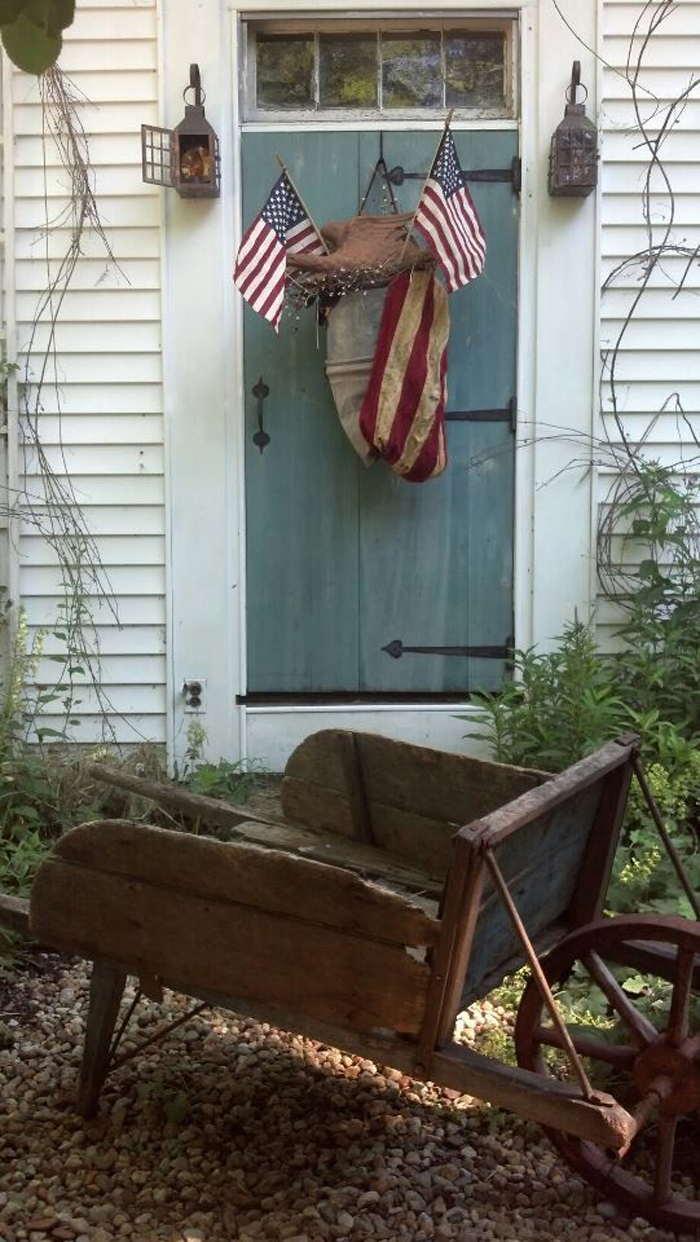


PLANK

image source

Plank doors are composed of a series of boards, or planks – either in a vertical or horizontal application. They are popular for homes with country styled decor.


CROSS BUCK

image source

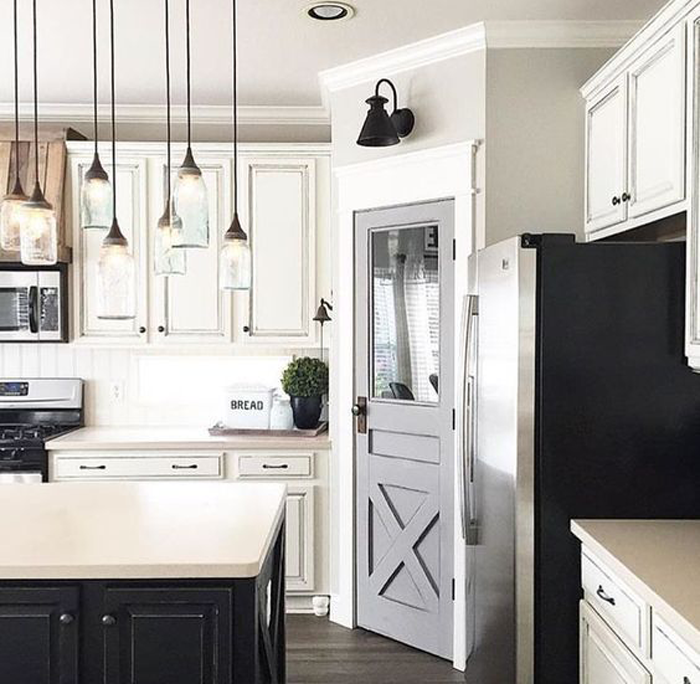
When you see this type of door, you will most likely have visions of barns going through your mind. That classic ‘x’ pattern is called a cross buck. These doors are also becoming very popular with homes designed in the ‘farmhouse style’.


LOUVERED

image source

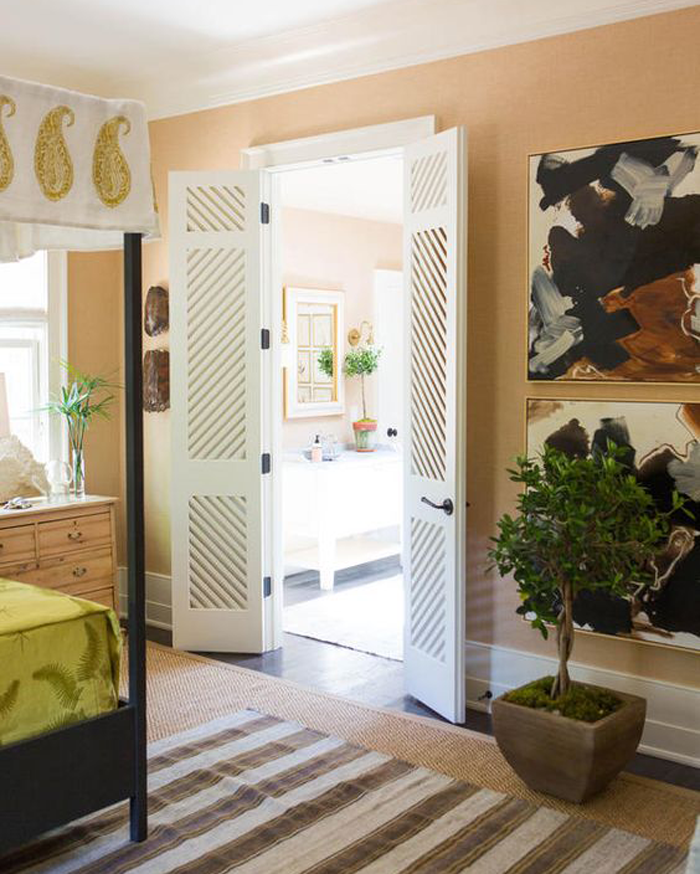
This style features a door that has slats, or louvers. They are a perfect choice for areas that need ventilation but also require a bit of privacy or screening, such as a laundry space or electrical closet. The filtered light that the louvers allow can be a benefit for some design applications.


Again, there are so many choices when it comes to interior doors! I hope that this mini-guide can help you determine the differences between the doors, and allow you to choose the perfect version to accent your home!


THE FIVE PHASES OF NEW HOME DESIGN

In the course of designing your new home, you will walk through a variety of phases – each a bit different in nature. Though they tend to flow into each other slightly, there are five general categories of progression: analysis, preliminary design, development, documents, and construction review.

Understanding what to expect in each phase can be a helpful guide for your home design process. If you are considering designing your home solo – or working with an architect or designer – you can prepare early by knowing what is to come.


PROGRAM ANALYSIS

In this phase you will determine what your needs and wants are for your future home. You will be looking at potential building sites and thinking about the number of bedrooms, bathrooms and common spaces your home will have. You will also begin to think about your project budget. To help you answer these program analysis related questions, visit this blog post and complete a series of worksheets.


PRELIMINARY DESIGN

Through this phase you will be determining the desired spacial relationships within your home and also the connections that will be made from indoors to outdoors. The spaces will begin to resemble a floor plan in it’s very basic sense. Drawings will be created in the form of quick basic sketches.

You will also be thinking about the house styles that appeal to you most, and likely searching Pinterest for inspiration photos.


DESIGN DEVELOPMENT

Just as it’s name implies, this phase of home design refines the spaces and their relationships. You will begin thinking about your home in three dimensions – focusing not only on the floor plan but also how the home will feel on the inside and look from the outside.

Near the end of this phase, you will want to get a better idea of what it would cost to build your home project. By obtaining estimates at this point, you will still be in the position to make major changes to the design if needed for budgetary reasons.


CONSTRUCTION DOCUMENTS / BIDDING

This is the phase when things begin to feel very real. Your drawings will include measurements and notes for the construction crew. Specifics on window and door sizes and styles will need to be made, as will finish material selections. Legal and technical information will be gathered and compiled to form the final ‘blueprints’ of your home.

During this step, you will be obtaining solid construction bids and determine who you will be hiring to build your home.


CONSTRUCTION ADMINISTRATION/ REVIEW

Homeowners vary greatly on the amount of involvement they have in this final phase of the process. While some choose to be on site every day to monitor progress, others pass the responsibilities onto their contractors (or architects) completely. I would advise that it is best to have at least some involvement – to build a great relationship with your contractor and design staff. The truth is that no matter how detailed you are able to get on your construction documents, there will inevitably be questions that will arise during construction; And if you put forth all the effort to be involved in the design of your home, you will want to follow through completely and ensure it is built the way you envisioned.


These five phases should work together seamlessly so that your ideas about home function and comfort can be brought to life. Each phase can be demanding, but the hard work will pay off in dividends when you are enjoying your brand new custom designed home.

FIVE INSPIRING SMALL HOME BLOGS

Thank you all so much for your kind thoughts after my most recent post. Some of you reached out to offer the benefits of living in a smaller home, and many more commented that they actually prefer our revised/simplified design over the original.

I have to say that after a few days of simmering with the thoughts of the smaller design, Craig and I are in agreement that we too prefer it! In fact, I called the contractor last night to tell him to hold off on getting bids on the larger floor plan – and instead to focus his attention on the new configuration.

In turn, I have been focusing my design efforts as well. Here is a view of the revised living room, as seen from the far corner of the kitchen. Do you spy the vaulted wall of windows? The view out of them will be stunning!

interior view from kitchen


interior view from entry

I am very grateful that my husband and I are on the same page when it comes to ‘stuff’. We are both of the mindset that if something doesn’t bring us joy or serve a purpose – it isn’t needed. The same goes for square footage. Once we realized that the smaller living space would suit us just fine, the more elaborate design was no longer appealing.

We never set out to design a large house – in fact, we have said on many occasions that living in a tiny house would be comfortable if it were just the two of us. Our family now includes seven – and so our sights are on a small house instead – one with just enough room for our needs.

It is a joy to search the web and see others living in the same way. I thought it might be inspirational to share with you some of these people, and their amazing SMALL homes.


intentionally small | 1,150 sf | owner: Nicole

Nicole has an entire blog devoted to the small spaces of her readers


mockingbird hill cottage | 950sf | owner: Claudia

Claudia offers a series of posts dedicated to small house living


smoky mountain farmhouse | 1,000 sf | owners: Alex & Susan

This charming farmhouse can be rented via VRBO!


living large in a small house | 1,300 sf | owner: Lynn

Check out Lynn’s amazing home office!


the prairie homestead | 1,100 sf | owner: Jill

Wyoming homesteading + homeschooling family of five


Continuing on with the revised/ smaller design, things seem to be falling into place. All three levels are being re-worked slightly to match the needs of our family. For now, we sit and wait for those numbers -hopeful that construction can begin this spring, but maintaining patience if we need to wait a little longer.


THE 4 QUESTIONS YOU SHOULD ASK YOURSELF BEFORE DESIGNING A NEW HOUSE

Designing a new house is an exciting and exhausting time for homeowners. It seems there are no less than a thousand decisions that will need to be made to create a house that is ‘just right’ for your family. And while each and every decision during the design process is an important one, there are four important questions you should ask yourself BEFORE you ever sit down at the drawing table by yourself or with a design professional.


1. WHICH HOME STYLES DO WE PREFER?

While it isn’t necessary to pick only one home style that your design MUST be based on -it is valuable to understand, at least generally, which types of homes you are drawn to. Are simple, clean lines your thing? Perhaps a modern home will be a good design guide. Do you love the charm of cozy houses? Consider the characteristics of the cottage or bungalow style. You can ask yourself if you prefer an open floor plan or one with more defined spaces, and if your family would benefit from one level living or multiple stories.

Each month I work through a series here on the blog entitled ‘Elements of Home’. I dive deep into what makes each home style unique, with the hope that the information can benefit you in determining which style would be best suited to your family’s lifestyle and preferences. You can access the series HERE.


2. WHERE WILL OUR HOUSE BE SITED?

Location, location, location. It is the mantra of real-estate. You can change a house in many ways, or in this case – build nearly anything you want – but you will not be able to change your home’s location once it is tied to the foundation; That is, unless you are willing to spend major money to do so.

You may be tempted to look at home plan books or online for floor plan ideas. And while these tools can be extremely helpful, you should at the very least have an idea of where your proposed home will be located before considering floor plans. Will you be building a new home in an established historic neighborhood? In that case, the sleek modern home with floor to ceiling panes of glass that you spied online may not be the best choice. Do you love the option of having a home with a basement level that you can walk out of? If so, you will want to make sure that you have a site in mind that will accommodate that type of setup – preferably somewhere with sloped land.

There are more detailed site related questions that you will need to answer, such as how the natural daylight will affect the interior spaces of the home – but these are questions for further in the design process.

3. WHAT DO WE NEED IN A HOME?

Generally speaking, we more easily identify our wants over our needs. Sometimes the two get mixed together, in fact. When designing a home it is very important to establish the difference. The needs are absolute must haves, whereas the wants are not as important – and can possibly be added at a later date.

Size is one of the most troubling aspects to determine. When considering home square footage, a variety of questions may arise. How many bedrooms should the house have? Will 1 bathroom be sufficient, or will we need more? What is a comfortable living room size? These questions about size can leave your head spinning – but they are some of the most important decisions regarding home design. A too small home can leave you feeling cramped; While a home too large will not be comfortable or cozy – perhaps leaving you with the feeling that you are living in a museum or office building.

As a guide to determine how much space you should design for your family, I have created a variety of worksheets – which can be accessed in THIS POST.


4. HOW MUCH CAN WE AFFORD?

It’s the age old question: How much is this going to cost me? It is best to consider the financial aspects of home construction well before you fall too in love with a design. If you speak with a loan professional about what a realistic budget for your project is, you will be able to make better informed decisions as the design process progresses. If you know you will be working with a fairly strict budget, you likely won’t be looking at the granite selection for your counter tops. Better to know what you can afford than to choose those expensive finishes only to be told you will need to downgrade the quality to something cheaper.

Another benefit to determining building budget early is that you can plan your project in phases. Perhaps the entire shell can be built straight away, with the main living spaces finished – and the basement or upper level left to be finished when the budget allows, in the future.

I lay out tips on ways you can save money on your new build in THIS POST.


If you have worked through each of the four above questions, you are well on your way to laying the groundwork for the design of your future home.

For your convenience, I have laid out these questions in a simple, one sheet print out – available in the RESOURCE LIBRARY. Search for the Preliminary Home Design Worksheet – and keep it handy for when you are ready to start thinking about designing your dream home.


7 CHARMING OLD HOUSE DETAILS MAKING A COMEBACK

Charming old house details, such as intricate woodwork and elaborate staircases, are making a major comeback!

When you think of an old house – you may envision rotting siding, squeaky floor boards, and bats in the attic. While these may very well be a reality, there are plenty of merits that old homes have to offer.

The seven charming old house details I’m about to share may have you rethinking your preconceptions. Who knows – you may decide to incorporate some of them in your home as well.

These seven old house details are finding their place in newly built homes

BUILT IN FURNITURE

These showstopping pieces add dramatic character. Because they are designed and built to fit with the house, in a specific space, they are becoming more and more popular with homeowners as storage pieces and as a custom way to add elegance and charm.

buffet


window seat


bookcase


INTRICATE WOODWORK

It’s true that slow growth timber was more readily available when the houses of yesteryear were being built. Craftsmen showcased their skills on detailed woodwork – from stair railings and wainscoting to window molding. Though it may never return to the intricacies of the Queen Anne Victorian era, an increased level of detail in woodwork is being re-introduced in today’s homes.

built in room dividers are one of the old house details that is making a comeback

craftsman woodwork


intricate stairwell woodwork


window trim


HARDWARE

There has been a huge resurgence in adding smaller vintage details to new homes, to give them an extra dose of character. One of the easiest ways to accomplish this is by utilizing decorative hardware, such as door knobs and cabinet pulls. They are generally inexpensive and readily available. Reproductions of these classic styles are also being made.

brass knobs


glass knobs


cup handle reproduction


WOOD FLOORS

Old houses have the best floors. The patina found on aged pine, maple, and oak flooring is hard to match – but even a newer wood floor is a beautiful addition to a modern built home. Wood floors are wonderfully adaptive, lending themselves to be laid in a variety of patterns.

diamond wood floor


charming character floors are more popular than ever

herringbone pattern


aged pine plank flooring


FEATURE FIREPLACES

Before the television became the center of attention, the fireplace was the focal point in most homes. Now, as a way to escape the constant bombardment of electronics, families are opting to gather together in a quiet space more often. In turn, homeowners are opting to give their fireplaces more detail and prominence.

Many new build houses are incorporating feature fireplaces, one of the old house details that is making a comeback

fireplace with shiplap above


arts and crafts fireplace


primitive fireplace


DECORATIVE CEILINGS

Gone are the years of popcorn textured ceilings and flimsy drop ceiling tiles. Homeowners are instead embracing a variety of decorative options, and looking to historic examples for inspiration.

a bright white kitchen with a bead board ceiling is a wonderful example of old house details that are making a comeback

beadboard ceiling


coffered ceiling


pressed tin ceiling


exposed structure


COZY NOOKS

Old houses are full of nooks and crannies – just think about grandma’s attic. The cocooning nature of small, set apart spaces is comforting to many homeowners. From built in dining tables to relaxing inglenooks, these interesting and intimate spaces are becoming more and more popular once again.

reading nook


inglenook


breakfast nook

Which of these seven details is your favorite? Let me know which you would love to try (or have incorporated in your home already) in the comments below.


THE MAIN ELEMENTS OF THE QUEEN ANNE VICTORIAN HOME STYLE

Queen Anne Victorian

Welcome to another installment in the ELEMENTS OF HOME series. Each month I showcase a different residential style here on the blog. It is my hope that this information will not only teach you a little something about the various styles; but also equip you if are designing or searching for a new house – by allowing you to determine which style(s) suit your lifestyle and preferences the most.

Today I will be over-viewing the Queen Anne Victorian home – including the history of the style and what makes it unique.


HISTORY OF THE QUEEN ANNE STYLE

The Victorian style in general spreads over the years 1860-1900 primarily, during the last decades of the reign of Britian’s Queen Victoria. There are six distinct variations of the style occurring during that time period – based, at least loosely, on their Medieval prototypes.

This time period saw rapid industrialization in the American built landscape. The art of balloon framing was rapidly replacing heavy timber framing as the standard building technique. Because of the flexibility of this type of construction, homes were no longer restrained to simple box-like shapes. In addition, house components such as doors, windows, siding and decorative details were beginning to be mass produced, and could easily be distributed throughout the country by use of the expanded railway lines.

image source

When most people think about the Victorian style, they generally imagine a Queen Anne – the most elaborate and eccentric of the the six variations. I will highlight the remaining five variations (Second Empire, Stick, Shingle, Richardsonian Romanesque, and Folk Victorian) in later posts.

The ‘Queen Anne’ name is actually a bit deceiving – as it bears almost no similarities to the architecture produced during the reign of Queen Anne (from 1702-1714). The term ‘Queen Anne Style’ was used by Scottish architect Richard Norman Shaw to describe his work, and it stuck.

brick Queen Anne

MAIN ELEMENTS OF THE QUEEN ANNE STYLE

LOCATION

Queen Anne Victorian homes can be found throughout North America, thanks mostly to the expanding railway of the late 19th century. Pattern books made it simple for prospective homeowners and builders to choose manufactured pieces and decorative details to dress their home in the Queen Anne style. This home style is least likely to be found in the heavily populated northeastern states.

There are also distinct concentrations of the style. Seattle’s neighborhood, Queen Anne Hill, derived it’s name from the architecture used on many of the affluent homes built there. You can take a little mini video tour of the neighborhood here. And of course, San Francisco features a beautiful collection of Queen Anne row houses.

Queen Anne Victorian row-houses

SIZE

Queen Anne Victorians vary in size from modest dwellings with a few special details to elaborate multi-story mansions.

modest Queen Anne home

Queen Anne mansion

As mentioned previously, one of the major shifts that happened with the introduction of balloon framing was the flexibility of the floor plan. It allowed more interesting shapes of houses and in turn many homeowners opted for bay windows, bump outs, and cantilevered second story spaces.

historic floorplan

EXTERIOR TRADEMARKS

To spot a Queen Anne Victorian home, look for these style specific exterior elements.

IRREGULAR SHAPES: Builders and architects of the Victorian era took full advantage of the flexibility that balloon framing provided – by avoiding rectilinear building footprints and instead opting for homes with varied shapes.

irregular shaped Queen Anne Victorian home

SPINDLE-WORK: Nearly 50 percent of all Queen Anne houses have spindle-work, which is also commonly referred to as gingerbread ornamentation or Eastlake detailing. This detail came in the form of turned porch balustrades, lace-like porch brackets, and as gable ornamentation.

spindle-work detail

WALL TEXTURE VARIATIONS: The use of a variety of wall textures is hallmark to the Queen Anne house style. Patterned wood shingles, bricks of different colors and terracotta panels were used to create the illusion of depth and texture on exterior walls.

varied exterior wall texture

PORCHES: Covering the front entrance area, and also commonly extending along one or both sides of the house, these porches were used to highlight the asymmetry of the facade. Some examples of Queen Anne homes include second story porches.

wrap around porch

TOWERS: Also common with Queen Anne homes is the use of towers. They may present in round, square or polygonal form. They were built at varying heights from the ground up or even cantilevered from the second story only. The most popular position for a tower on a Queen Anne home is the front corner.

elaborate Queen Anne home with tower element

INTERIOR SPACES & DECOR

The interiors of Victorian era homes were known for their orderliness and ornamentation. The layout of the interior was formal and spaces were arranged in a manner that promoted entertaining of guests.

LAYOUT: The rooms were often small spaces, and were carefully separated between public and private uses. The parlor was considered the most important room in the home, as it was the first that guests would see when entering the home. The dining room was second in importance, with both the parlor and dining room would be used often for entertaining purposes.

Victorian parlor

FURNISHING: Historically, Victorian homeowners would fill their rooms with art, furniture and objects that reflected their own interests and aspirations. It was thought that a bare or simply decorated room was in poor taste.

Victorian style couch

Furniture was beginning to be mass produced in factories instead of being custom created for the homeowner. In an effort to give a custom look, many pieces featured carved details. Furniture generally were of heavy proportions and featured woods such as walnut, mahogany and rosewood in dark finishes.

carved furniture detail

FINISHES: Botanical wallpaper was popular, as was the employment of embossing techniques. Walls were often embossed with a grain pattern – which was meant to imitate woods of higher quality. Heavy draperies in velvet or needlepoint were favored.

Victorian wallpaper

Elaborate woodwork was in abundance, as was the use of stained glass windows.

woodwork and stained glass in a Queen Anne foyer

There was effort made to emphasize the height of important public rooms in the home – which was accomplished by drawing the eye up with decorative cove molding, lighting medallions and intricate patterns painted on the ceilings.

ornate ceiling in a Queen Anne Victorian parlor

COLOR SCHEME

Soft and muted colors were favored over bright and vivid color schemes. It has been said that people of that era would have been upset by the flamboyant color schemes that some of their homes are being painted during restoration. They preferred delicate rose pinks, grays, lavender and sage – as well as warmer colors such as mustard yellow, burgundy or teal.

Historic color palette 

There were two schools of thought when it came to color selections. The first, “harmony by analogy” favored a palette that utilized two colors next to each other on the color wheel, such as greens and yellows. Another, “harmony by contrast” was geared toward high contrasting colors, or opposites on the color wheel- such as creams and blues.


exterior colors

interior colors


FAMOUS QUEEN ANNE HOUSES

William Watts Sherman House | 1875 | Architect: Henry Hobson Richardson

One of the earliest examples of American Queen Anne residential architecture


Elmhurst Mansion | 1891 | Also called the ‘House of Friendship’


Walter Gale Home | 1893 | Frank Lloyd Wright

Simple Queen Anne Style, designed by Frank Lloyd Wright in his early years


INSPIRING QUEEN ANNE HOMES FROM AROUND THE WEB

These classic homes showcase the Victorian Queen Anne style well. Read along as these homeowners restore their beautiful homes!

Left to Right: 12 | 3

I hope you have enjoyed learning a bit more about the Queen Anne Victorian style. Curious which residential style will be featured next month? Stay tuned!

And be sure to check out the previously showcased styles here.

10 THINGS TO CONSIDER WHEN HIRING A CONTRACTOR

Nobody loves your house like you do. Nobody. Even if that house is still lines on a page – it will never bear the same emotional connection to anyone other than you and those who will reside under it’s roof.

Whether you are looking for someone to build your dream house or need an extra hand with a tricky remodel project, there are 10 things you need to know before hiring someone to work on your house.


1. IT’S OKAY TO ASK FOR HELP

It might be tough for you to hand over the reigns. Maybe you have tackled a variety of projects in the past all on your own and have come out successful. You have pride in your work, no doubt. But it is also okay to realize that maybe you can’t do everything on your own.

Whether it is a time constraint issue or just the fact that you do not have the skills to complete the task at hand, don’t feel ashamed. There are people who are specialized in this work, who are just waiting for your phone call.


2. DETERMINE IF YOU NEED A CONTRACTOR


Do you need a full blown general contractor, or someone who specializes in one specific area. Are you looking for a ‘jack of all trades’ handyman or a license professional? The size of the project will likely be a deciding factor in this decision.

If a small area of your existing home needs new flooring, for example, hiring a handyman may be perfectly fine. The large and complicated projects – and whole house builds – should be left to the seasoned contractors.


3. ASK TRUSTED FRIENDS FOR RECOMMENDATIONS


Who better to get referrals from than the people you know and trust? This is simple, and free word of mouth marketing. It is why contractors are looking to do their best work. They know that their reputation will precede them.

You may also get good results from others living in your same community – by posting on an online message board. You might be surprised to learn that the neighbor next door had the same type of work done on their home recently. If you approach the subject carefully, you may be able to find out what they paid their contractor for their similar project, something that may come in handy when considering the bids you are given.

4. PREPARE A LIST OF QUESTIONS

Call a minimum of two different contractors. Ask them the same questions, and write down their responses. Their answers may give you peace or give you pause. Some of the more common questions to ask include:

How long have you been in business? Obviously, a contractor who has been in the business locally for many years will have the experience and references to back up their work. That doesn’t mean you need to count out the new guy though. They may be hungry to build their business and put forth their best effort.

How many projects like mine have you completed in the last year? It won’t hurt to also ask to see examples of their work.

Do you have a license? The requirement varies from state to state, and also between trades. Check this site for details on state specific licensing requirements.

Can I see your certificate of insurance? Contractors should have both liability insurance and workers’ compensation for the specific job they are doing. Seeing the physical certificates is important.

Who are your main suppliers? Contractors will generally work with supply companies time and time again. Consider them additional references. Go ahead and call the suppliers (tile stores, lumberyards, home improvement stores) and find out if the contractor does reliable work or if they have left a path of unhappy customers. If a contractor is unwilling to offer suppliers names, you can consider he or she has something to hide.

What is the size of your crew? How many people will be working on my project? It is unlikely that the contractor themselves will be doing much, if any of the work on your project. They generally will have a crew, whether that is 2 or 20+ employees. Ask to meet with the foreman who would potentially be heading your project – preferably visiting with him or her on a current job site. You will be working closely with this person, and it is important to determine early in the game if your personalities mesh. Visiting on the job will provide an added bonus of allowing you to witness if their work is running smoothly.

Do you bid estimates or offer fixed prices? If possible, ask the contractor to provide you with a breakdown of how much each portion of the project will cost, including the breakdown of how much will be applied toward materials and labor expenses.

Will you be pulling the permits and scheduling inspections? The answer to this question should be yes. Not only should the contractor be aware of which pieces of the project will require permits and inspections and how to get them, he should also be willing to do the leg work.

What is your timeline for completing my project? Determine when they would be able to start the job. If they are booked up and you have a project that is time sensitive, you may need to move on. Ask the contractor to estimate how long the job may take, and also what factors may delay progress (weather? other jobs they are working on, etc).

What is your typical working day schedule? Determining the core hours your contractor and his crew plan to operate will help you know what to expect. Do they start early in the morning? When are the tools packed up for the night? Also ask what type of noise level can be expected and if they want you to be present at any point during the day.

How will you care for my home during your time there? Find out what the protocol is for storing supplies and tools for projects that span multiple days and learn if you can expect a daily site clean-up. Also be sure to ask what measures will be taken to protect the portion of your home that is not included in the project (if a remodel). For example – will they be sealing off the work zone?

The communication between contractor and homeowner is an important one – and it shouldn’t be a one sided conversation. Before the project is handed to them a good contractor should have some questions for you as well!


5. DETERMINE A PAYMENT PLAN

The Better Business Bureau advises against paying in full upfront for a job that has yet to be completed – but you may have to make an early payment for supplies. From there you will need to discuss how much will need to be paid at what point during the project. Your chosen contractor should be able to give you a reasonable payment schedule.


6. OBTAIN A WRITTEN CONTRACT

Make sure that all the bases are covered and written down. Even if your state does not require a written contract, ask for one. Before signing, make sure it includes all of the following information:

The contractor’s name, address, phone and license number (if required)

Details on the estimated start and completion date

Payment schedule

The contractor’s agreement to obtain necessary permits

Information about how change orders will be handled

A list of materials that will be used – the more detailed the better. Determine who is responsible for choosing the products that will be purchased at a later date, and who is responsible for paying for them (If it is in the budget, know what ‘allowance’ will be given to each item)

A list of what the contractor is or is not responsible for


7. KEEP RECORDS OF COMMUNICATION

Change orders are quite common during construction. They can be as small as moving the location of a light switch or as large as eliminating an entire portion of the project. Whenever a homeowner and contractor or builder agree on a change, it needs to be documented. Keep notes of these changes in a file, including the date they were made, who discussed the changes with you, and if the monetary impact was discussed.


8. BE PRESENT

Very rare is the situation where the homeowner shakes hands with their contractor and walks away until the construction is finished. It is understandable that you will want to know what is going on with the project, but it is important to note that a construction zone is a dangerous place to be.

You should discuss with your contractor early in the process how often you plan to drop in to check on things. It is always best that when walking on the construction site you do so with the job foreman – who can give you a tour of what has been completed and point out what is to come. For job site safety tips, check out this post from Construction Dive – which highlights 5 ways to keep the homeowner safe when they visit the job site.


9. FINISH THE JOB WITH A CHECKLIST

Before that final payment is made, check to make sure these things have been done and/or collected:

The work has been completed to the specifications outlined in the contract. As the homeowner, you should inspect the final product to be sure it meets your satisfaction.

Written warranties on products and services, including who will honor them and the expiration date of each

Written proof that all subcontractors and suppliers have been paid in full

The job site has been cleaned of debris and extra construction material


10. BEWARE OF SCAMS

If you have done your research and walked through steps one through nine, chances are number 10 won’t be a problem; But be aware that there are contractor scams out there. You should be wary of any contractor who:

Knocks on your door asking for work and offering you money for the referrals you make

Pressures you to make a decision more quickly than you are ready

Only accepts cash or asks you to pay upfront for the job

Asks you to obtain the building permits

Offers a ‘lifetime warranty’ or long term guarantee

Doesn’t list a telephone number in the local business directory


I hope that this list of 10 things to consider when hiring a contractor is helpful as you prepare for your next house project.


COLONIAL HOME STYLE ELEMENTS

Learn about the main elements of the Colonial home style in this article. The history of the Colonial Home is important to the fabric of America.


Colonial Home exterior

image source

Welcome to another installment in the ELEMENTS OF HOME series. Each month I showcase a different residential home style here on the blog.

It is my hope that this information teaches you a little something about each style. In addition, I believe that these guides can be useful if you are designing or searching for a new home.

Today I overview the Colonial home style. I include the history of the style and what makes it unique.


HISTORY OF THE COLONIAL HOME STYLE

The Colonial home style is traced back to England, where most of the U.S colonists emigrated from. A large portion of London burned in the year 1666. After the disaster, several architects influenced the city’s reconstruction.

British architects Christopher Wren, James Gibbs and Robert Adam were at the forefront. Their combined architecture was based partly on Roman and Greek ruins. Therefore, influences such as geometric proportions and large columns are seen in Colonial home design.


Colonial Home Style

image source

Most of the original Colonial homes built in the early years have been remodeled. Others are used as historic examples, as museums for example.

It is far more likely that the Colonial homes you see today are Colonial Revival. In other words, they were made to resemble their ancestral counterparts.

Between the late 1800’s and 1950, there was an increased interest in the architecture of early colonists. Because of this, many Colonial Revival homes were built – using more modern materials and amenities.

In this article, I discuss the elements of both the original Colonial homes and their more newly constructed counterparts.

White Colonial Home with black door

image source

LOCATION OF COLONIAL HOMES

There are examples of the Colonial style dotted throughout the country.  Slight variations were developed to withstand environmental elements. These variations were each given their own names.

Most Colonial homes are concentrated in two main regions, the Northeast and the South.  For the purposes of this installment, I focus on the New England Colonial style found in the Northeast region.

Historic Colonial Home

image source


SIZE OF A COLONIAL HOME

The original New England Colonial homes were built primarily during the years 1630 to 1700. They were modest in size and began as one story structures.

As more family members immigrated to the area, a second story was typically added. The two rooms on the main level (kitchen and living space) were then complemented by two upstairs bedrooms. A central stairway and large fireplace divide the rooms on each level.

One story Colonial home

image source

Although the size of the Colonial home increased as construction techniques improved, they continued to retain a compact rectangular form.

Colonial Home floor plans

image source

EXTERIOR TRADEMARKS OF A COLONIAL HOME

TWO STORY DESIGN: Typically, the living spaces are located on the main level and the second level is reserved for bedrooms.

Colonial homes feature steeply pitched roofs. The pitch is essential for shedding heavy snowfall. Dormers are  included in the more contemporary Colonial Revival homes.

Colonial Home with dormers

image source

SYMMETRY: The facades of Colonial homes are almost exclusively symmetrical in nature. For example, if you were to draw a line down the center of the house, the left side would be a mirror image of the right side.

Typically the door of a Colonial Home is located in the center. Two windows are evenly placed on either side of the door on the main level.

The second level generally features five windows. Each window is positioned above it’s main floor counterpart. A central window is immediately above the door. In addition, the fireplace is also commonly found in the center, dividing line, of the house.

Colonial Home with simple front door

image source


WOOD CLAPBOARD SIDING: Wattle and daub cladding was the common practice in England at the time. The American colonists made use of readily available local timber. This meant that their homes were typically clad in white pine instead.

The clapboards offer the functional aspect of shedding rainwater.

Colonial Home front porch

image source


CENTRAL ENTRY DOOR: Colonial homes almost always feature a central entrance point.

The door is generally flanked by a window on either side and/or a transom window above. The original Colonial style homes did not include a porch or portico. In contrast, both were commonly added for Colonial Revival homes.

Colonial Home front door

image source


INTERIOR SPACES OF A COLONIAL HOME

The interiors of a traditional Colonial home had small windows and low ceiling heights. Because of this, most of the interiors were rather dark.

In contrast, Colonial Revival homes many times feature bay windows or a larger window groups to allow more natural light.

Colonial Home living room interior

image source


Colonial homes are often filled with simple furnishings in muted earthy colors. The Windsor chair is a common symbol of this home style. They can be found in more modernly renovated homes as well.

Colonial home dining room with fireplace

image source

COLOR SCHEMES FOR COLONIAL HOMES

Paint colors essential to early Americans were mostly those derived from iron oxide. Colors such as Yellow Ochre, Red Ochre, Raw Sienna, Black, Burnt Umber, and Terre Verde were common.

These earthy tones were somewhat bold, though faded rather quickly.

Colonial Home paint colors

image source


Colonial home entry foyer

image source


Colonial Revival exteriors are very commonly clothed in white. This crisp look is accented by contrasting black on many occasions.

Simple white colonial home style

image source


COMMON FEATURES OF A COLONIAL HOME

Of course, no two houses are exactly alike.  But there are design elements that are seen again and again in Colonial homes, such as these statement features:


LARGE FIREPLACES & CHIMNEYS: The most efficient way to heat the homes during the cold Northeastern winters was with a large, central fireplace.

In addition, fireplaces were also used for cooking purposes. These fireplaces were very important in the early days and remain useful and fashionable in Colonial homes of a later era.

Colonial home fireplace

image source


Colonial home exterior

image source


SMALL PANED GLASS WINDOWS: Glass was expensive and difficult to find. Because of this, and the primitive glass-working techniques, the glass was set in smaller panes.

As a result, windows were later flanked with operable shutters, which would be closed when bad weather arose.

Newly constructed Colonials today will many times include stationary shutters, which serve an exclusive decorative purpose.

Colonial home divided light windows

image source


INTERIOR DECOR FOR COLONIAL HOMES

The early colonists believed in a simple lifestyle. Because of this, the pieces they did include inside their homes had a purpose for everyday living. They added little to nor adorning decorations to their interiors.

Colonial home interior

image source


Traditional colonial home dining room

image source


Traditional furnishings work well in Colonial Revival homes, as do items that are simple in nature. Interior wainscot paneling is used as a simple decorating technique, for example.

Colonial style chair

image source


FAMOUS COLONIAL HOMES

red Colonial home

The Home of Rebecca Nurse | 1678 | Salem Witch-trial accused


Colonial Home with central fireplace

Orchard House | 1690 | Home of ‘Little Women’ author Louisa May Alcott


Original Colonial home

Jethro Coffin House | 1686 | Oldest surviving house on Nantucket


INSPIRING COLONIAL HOMES FROM AROUND THE WEB

These classic homes showcase the Colonial home style well. Take a closer look!

Colonial Home Interiors

Left to Right: 12 | 3

I hope you have enjoyed learning a bit more about the Colonial home style. If you are curious which residential style will be featured next month, stay tuned!

And be sure to check out the previously showcased styles here.


PIN THIS FOR LATER

Colonial Home Style

THE MAIN ELEMENTS OF THE MID CENTURY MODERN HOME STYLE

Welcome to another installment in the ELEMENTS OF HOME series. Each month I showcase a different residential style here on the blog. It is my hope that this information will not only teach you a little something about the various styles; but also equip you if are designing or searching for a new house – by allowing you to determine which style(s) suit your lifestyle and preferences the most.

Today I will be over-viewing the Mid-Century Modern home – including the history of the style and what makes it unique.


HISTORY OF THE MID-CENTURY MODERN STYLE

This style received it’s name partly because of the time period in which the homes were being built. Mid-Century. Mid 20th century to be exact. There is a bit of discrepancy on which years are included; But generally speaking, the Mid-Century Modern style comprises houses built from the years 1935 to 1965.

This was a tumultuous time in history. In the mid 1930’s, the threat of the second World War was looming and various architects, including the pioneers of the Bauhaus Movement – Walter Gropius, Marcel Breuer, and later Meis van der Rohe, fled Germany for America. These men were aiming to unite art and industrial design.

At the same time, American designers were highly influenced by the simplicity and integration with nature that was prevalent in Brazilian and Scandinavian architecture.

image source

At the end of the war, as Veterans were returning to America, the need for affordable and quickly constructed houses arouse. These soldiers were looking to settle down and start their families. While architects designed stunning homes in the Mid-Century Modern style, it was real estate developer Joseph Eichler who is credited with bringing it to the masses – through his tract home development.

image source

MAIN ELEMENTS OF THE MID-CENTURY MODERN STYLE

LOCATION

Typically, these homes were constructed in suburban settings. The first Mid-Century Modern homes started to take root on the West Coast. They became popular in California and then on the East coast. Slowly, the style began to spread sporadically throughout the country.

image source

SIZE

During the Baby Boom, Americans were looking for spacious, open homes that they could entertain in. The Mid-Century style lent itself well to the desires of suburban families. Homes were designed to be between 1,500 and 2,500 square feet – only slightly smaller than 2017’s home average square footage (2,687).

image source

EXTERIOR TRADEMARKS

  • VARYING ROOF LINES: Creative roofs were popular at mid-century. Among those utilized most frequently were flat roofs with deep overhangs, saw tooth roofs, and the most beloved ‘butterfly roof’ – which got it’s name from the shape the gables take on as they connect at midpoint and extend upward.

image source

image source

  • ONE LEVEL DESIGN: Generally, Mid-Century Modern homes are one story structures.

image source

  • SPACE FOR AUTOS: This era of design was the first to begin offering shelter for automobiles. Many homes include attached garages or carports.

image source


image source

  • CONNECTION: Connection to nature was of utmost importance to the designers of the Mid-Century Modern style. As such, these homes feature a wonderful collection of indoor/outdoor spaces – such as large covered patios, enclosed courtyards, and entire walls that open up to allow access to the yard.

image source


INTERIOR SPACES

Whereas homes built before this time period were composed of smaller compartmentalized rooms, the Mid-Century modern home employed the ‘open floor plan’ approach. This was accomplished, for the first time, partly because of improved construction techniques. Heavy/solid bearing walls were replaced by posts and beams.

Typically these open spaces had a fireplace focal point.

image source

These homes were also the first to employ bi-level floor plans – including sunken living rooms, for example.

image source

COLOR SCHEME

The colors used in the Mid-Century Modern style are warm and earthy. The tones are derived from the materials used, such as stone grey and rich auburn wood. There is also a generous use of graphic black and white that accompanies this style.

Other popular colors during the period when these homes were constructed include muted jewel tones – turquoise, emerald and mustard yellow, for example.

image source

image source

COMMON FEATURES

Of course, no two houses are exactly alike; But there are design elements that are seen again and again in Mid-Century Modern styled homes – such as these statement features:

  • PRIVATE FRONT FACADES: The entrance to a Mid-Century home is generally understated and private. These homes are typically oriented so that the backyard entertaining areas receive the mid-day sun.

image source

  • CLEAN LINES: One of the primary goals of this design style is honesty of materials – where the sole ornamentation comes from the materials themselves. The creative and streamlined use of stone, block, glass and wood is prevalent.

image source


image source


  • FLOOR TO CEILING PANES OF GLASS: Continuing with the desire to create a connection with the outdoors, many Mid-Century Modern homes employ large panes of glass – offering stunning views and an abundance of daylight.

image source


INTERIOR DECOR

Generally, the Mid-Century Modern decorating style could be considered sparse. The simple lines of the architecture are mirrored in the furniture pieces; and the furniture market during the Mid-Century era had a life all it’s own. The new materials of the day including plastics, resins, composites, laminate and fiberglass opened up an entire new range of possibilities.

image source

The furnishings best suited in these homes are clean and sleek, with minimal ornamentation.

Walls, ceilings and floors also showcase simple materials. The juxtaposition of different, and sometimes contrasting, materials is common.


image source

image source

FAMOUS MID-CENTURY MODERN HOUSES

You may already be familiar with these stunning examples of residential Mid-Century Architecture. They are classic,  and adored by many.

The Philip Johnson Glass House | Architect: Mies van der Rohe | 1949


The Stahl House |Architect: Pierre Koenig | 1960


Neutra VDL Studio + Residence | Architect: Richard Neutra|1932/ rebuilt 1964


INSPIRING MID-CENTURY MODERN STYLE HOMES FROM AROUND THE WEB

These homes showcase the Mid-Century Modern style well. Take a closer look!

Left to Right: 12 | 3

I hope you enjoyed learning a bit more about the Mid-Century Modern style. Curious which residential style will be featured next month? Stay tuned!

And be sure to check out the previously showcased styles here.

THE KITCHEN WORK TRIANGLE EXPLAINED

Have you ever spent time in a kitchen, maybe at a friend or relative’s house, that just seemed really awkward / difficult to work in? Something didn’t seem ‘quite right’ but you couldn’t put your finger on what it was? I have a guess about what caused the problem….

THE LACK OF A WORK TRIANGLE

What the what?! Has Angela lost her marbles? No. Well, not all of them anyway!

When it comes to functional kitchen design, the triangle is KEY. And I’m about to tell you why.

The quest for efficient kitchen design is not a new one. In fact, the idea of optimizing the layout of the kitchen in an educated way dates back to the 1920’s with a woman named Lillian Moeller Gilbreth.

As an engineer, psychologist and mother to twelve (TWELVE!), she had a very unique perspective to offer on the function and efficiency of the home.  In 1929 her ideas were introduced at a Women’s Exposition.

These ideas on motion and efficiency were groundbreaking and she was hailed as ‘a genius in the art of living’. It is Lillian who is credited with developing the basic work triangle.

Fun fact: She can also be thanked for other modern kitchen conveniences such as the foot pedal trash can, shelves on inside of fridge doors (including the butter tray), and wall light switches!

In the 1940’s, the University of Illinois continued to research kitchen efficiency and developed the fundamental kitchen design principles that are still in use today.


SO… WHAT EXACTLY IS THE WORK TRIANGLE?

The kitchen is an absolute workhorse in the typical American home. Imagine yourself in your own kitchen. Of all the things that go on in that space, can you agree that the primary tasks are carried out between the cook-top/oven, sink and refrigerator?

Three major stations – the sink, the fridge and the oven. THREE. The idea behind the work triangle is this: You are going to be walking between these stations repeatedly during your time in the kitchen. In order to produce efficiency, there should be no obstructions that could make it difficult to get from one station to the next. Likewise, the distance between the stations should not be so great that you tire of walking, or too close that if two people are working in the room together they are constantly bumping into one another.

Consider the center face of each of these stations as one ‘point’ on a triangle.  Those points and the space between them make up the work triangle.


image source

BASICS OF THE KITCHEN WORK TRIANGLE

The principles of the work triangle are used by architects and interior designers when creating residential kitchens. There are some basic rules that need to be followed for the triangle to work properly.

LENGTH OF SIDES: No leg of the triangle should be less than 4′ in length, or greater than 9′. The sum of all three sides combined should be between 13 and 26 feet.

SPACING: There needs to be adequate space between stations to eliminate congestion. The average distance of separation is as follows:

Between the fridge and sink stations: 4 to 7 feet of separation

Between the sink and oven stations: 4 to 6 feet of separation

Between the oven and fridge stations: 4 to 9 feet of separation

image source

OBSTACLES: Cabinets, counters, or other obstacles should not intersect any leg of the triangle by more than 12 inches. In addition, there should be no major traffic flow going through the triangle.

image source

WORKERS: The work triangle is best optimized for one person working in the kitchen at a time. Some of the efficiency will be lost if the triangle is shared by two or more people.


It should also be noted that a kitchen with a work triangle isn’t the ONLY option. If your space dictates that all three work stations be positioned along one wall, for example, it is not the end of the world. There are plenty of high functioning kitchens that do not employ these principles.

EXAMPLES OF KITCHENS WITH WORK TRIANGLES

I mentioned in a previous post that our new kitchen at Arrow Hill Cottage will utilize these principles – but since it isn’t built yet, I thought I would share a few images of kitchens that are rocking the triangle.

image source


image source


image source

So now you know! Next time you hear someone complain about their awkward kitchen, ask them if they know about the work triangle – or better yet, share this post!