I’m back today with another MAKEOVER TAKEOVER! The first virtual takeover, of my own parents bathroom, was received very well and I have since had a few requests come in from readers with tricky spaces they would like help with.
Remember that this is a FREE digital home design consultation, which is available to anyone who subscribes to the Arrow Hill Cottage website. If you would like this free service, simply email me with a few photos and a description of what issues you would like resolved. If chosen, I will offer a solution + inspiration through 3d images and sourced items. Hurry though! I only have the ability to do one Makeover Takeover each month and the spots are filling up quickly!

This post contains affiliate links to products for your convenience. If you purchase via my links, I may receive a small commission at no additional cost to you. Thanks for supporting Arrow Hill Cottage!
For this Makeover Takeover installation, I had the fun privilege of helping with a bathroom that is located in a house that Craig and I used to own! We sold our 1905 American Foursquare to Matt & Harmony about three years ago, and it has been amazing watching them transform it to meet the needs of their own family. It is wonderful knowing that a house you lived in and loved for nearly 10 years is now in the care of people who love it just as much! They have tackled other remodel projects in the home with much success and have decided it is now time to turn their sights on the upstairs hall bathroom to make it their own.
This is the only bathroom on the second level of the house, and serves all four bedrooms. The owners before us had done a bit of repair in the room – to get it clean and updated. They didn’t, however, take the style or period of the house into much consideration and some of the finishes just don’t seem quite right. When Craig and I lived in the house, the most major update we gave the bathroom was removing the plaster ceiling and installing drywall. We also added a new light fixture/ vent fan, installed built in shelving in the corner for extra storage, and painted the room a bright yellow.
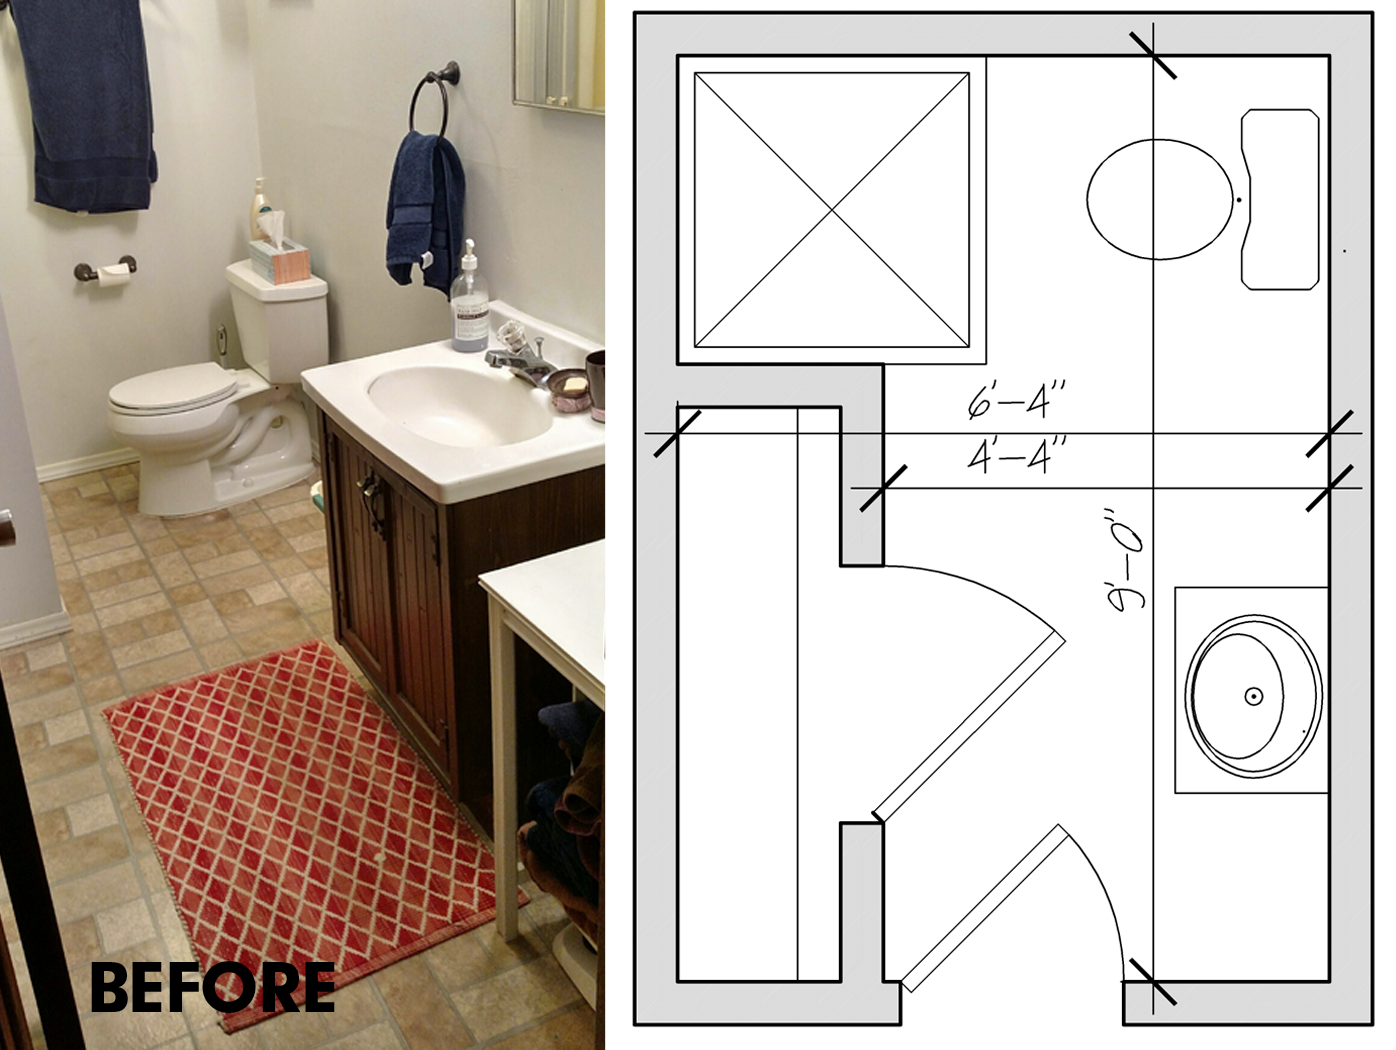
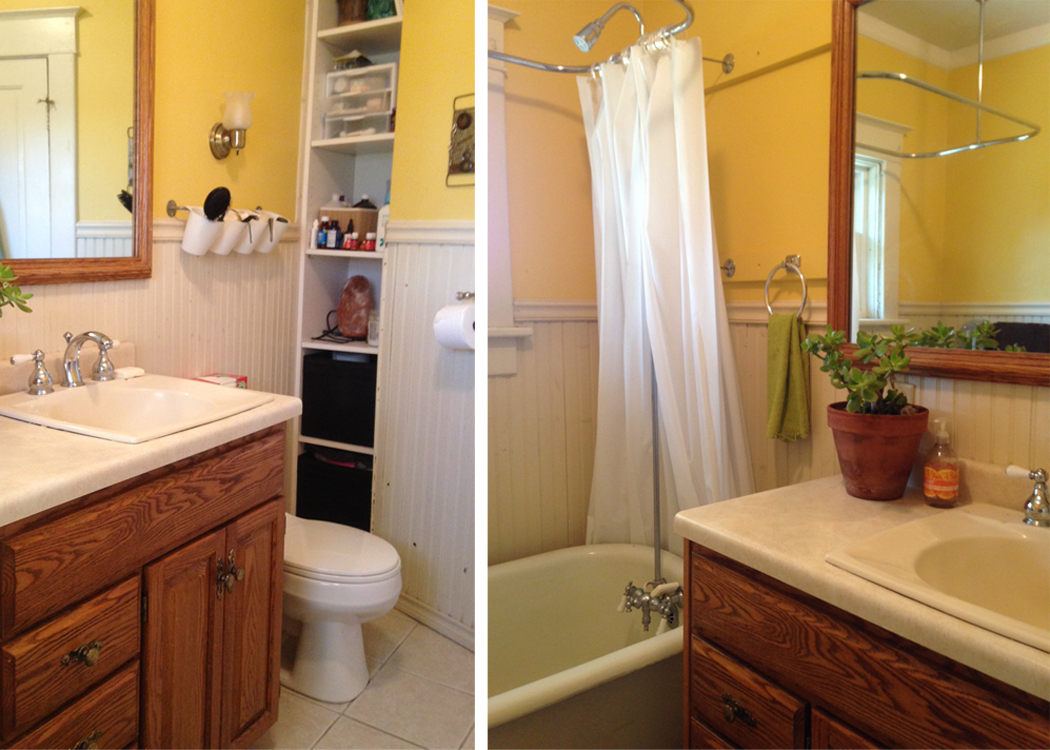
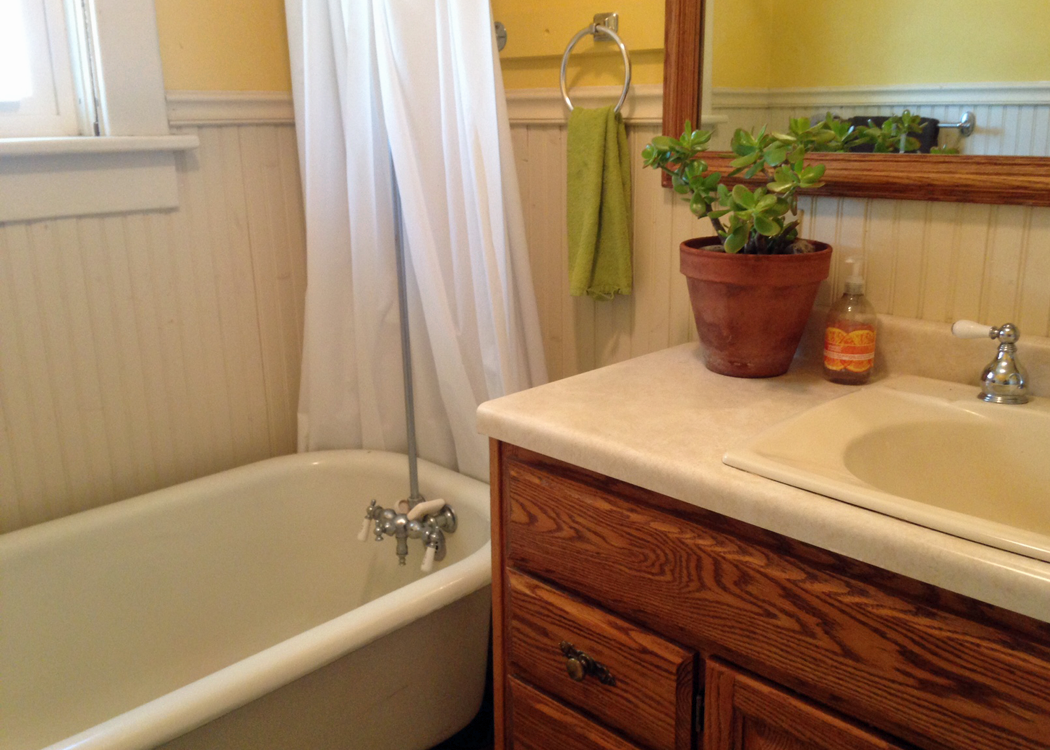
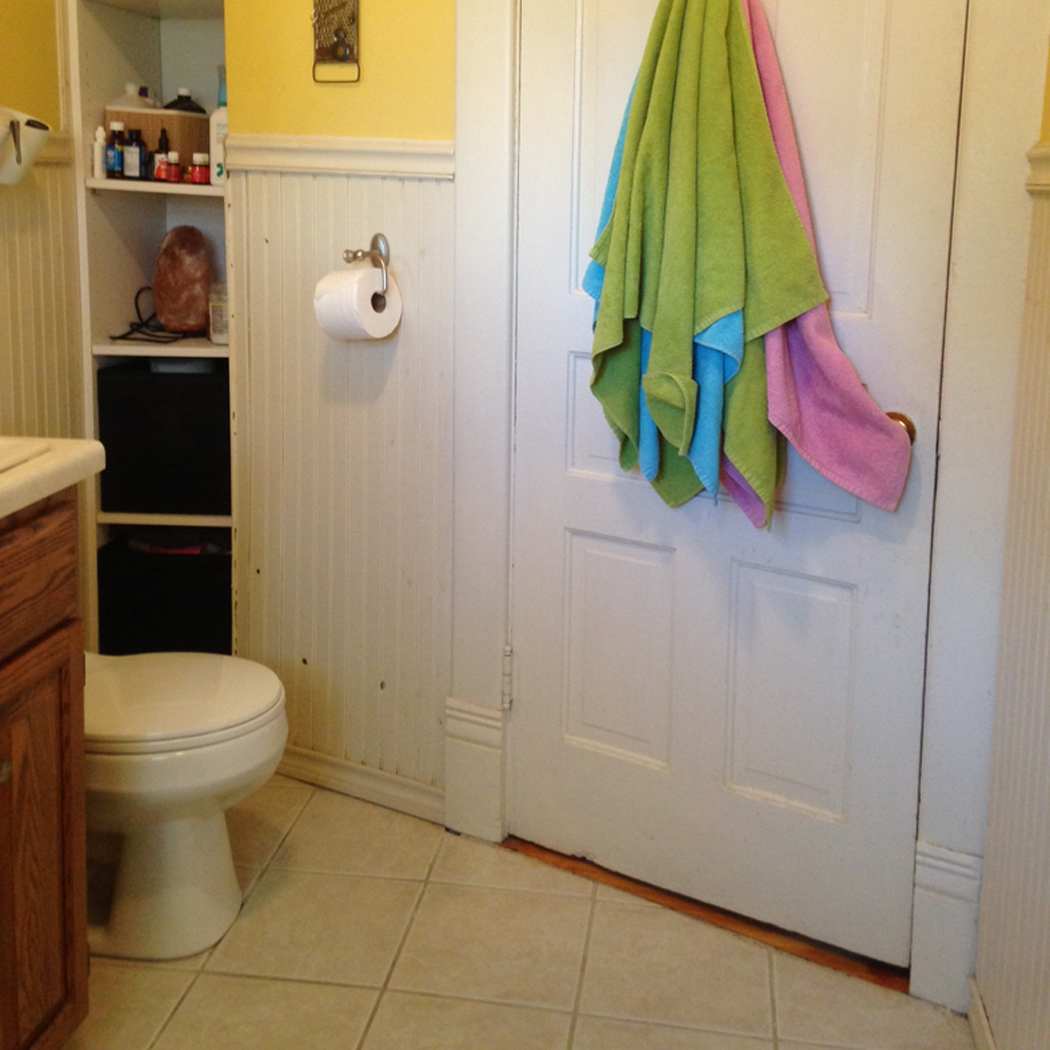
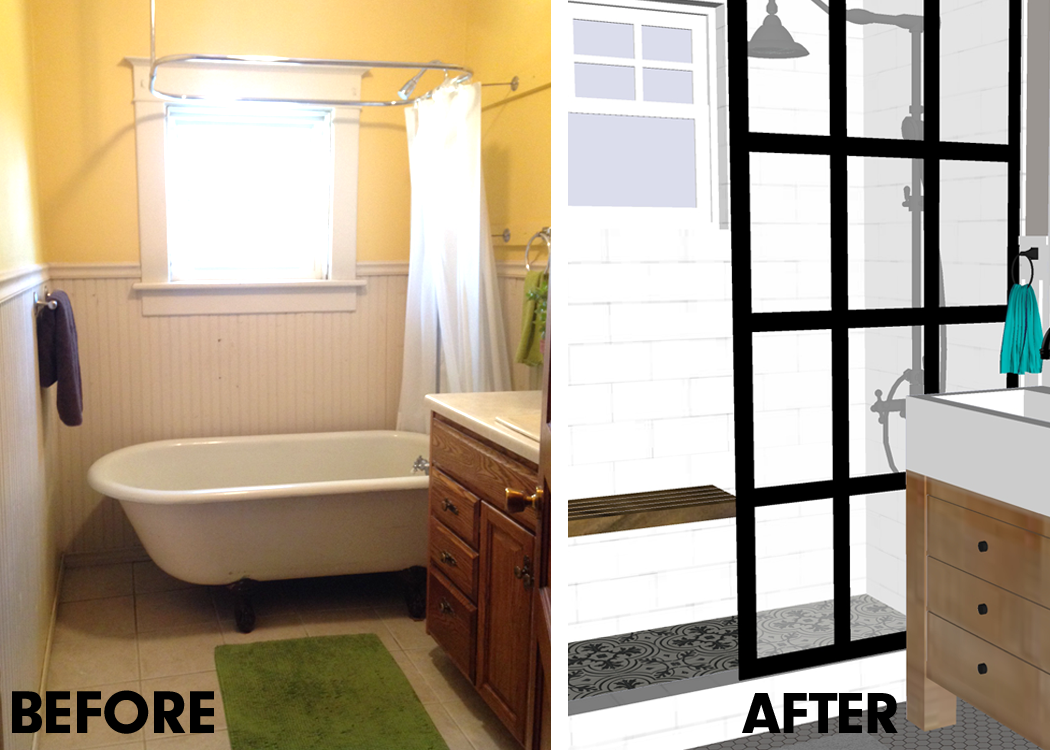
This is how the room looks today:
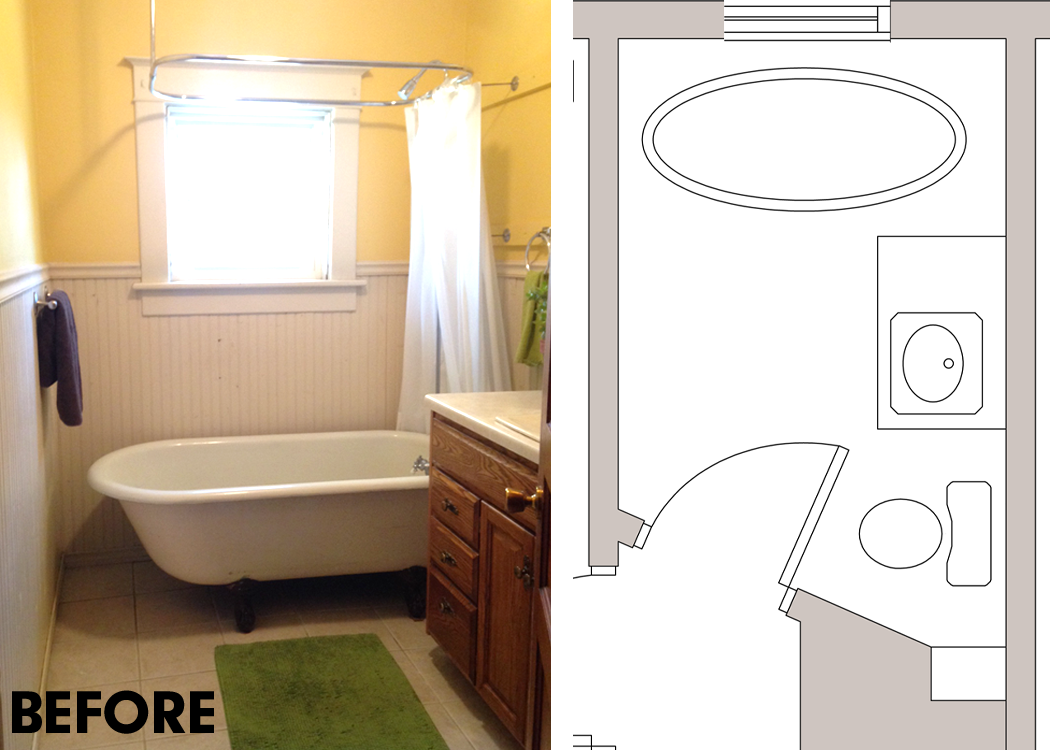
PROPOSED PLAN CHANGES
As you can see by the plan, there are some odd angles in the room. There is ample space though, and some nice natural light brought in by a high square window. There isn’t much of a reason to reconfigure the fixture locations in the room. Thankfully the layout seems logical. Matt & Harmony did request that the large clawfoot tub be removed and replaced with a tiled shower. Though it is a really cool vintage touch, the shape of the tub means that it isn’t super functional to stand and shower in. I’m sure the historic fixture will find new life in another bathroom somewhere.
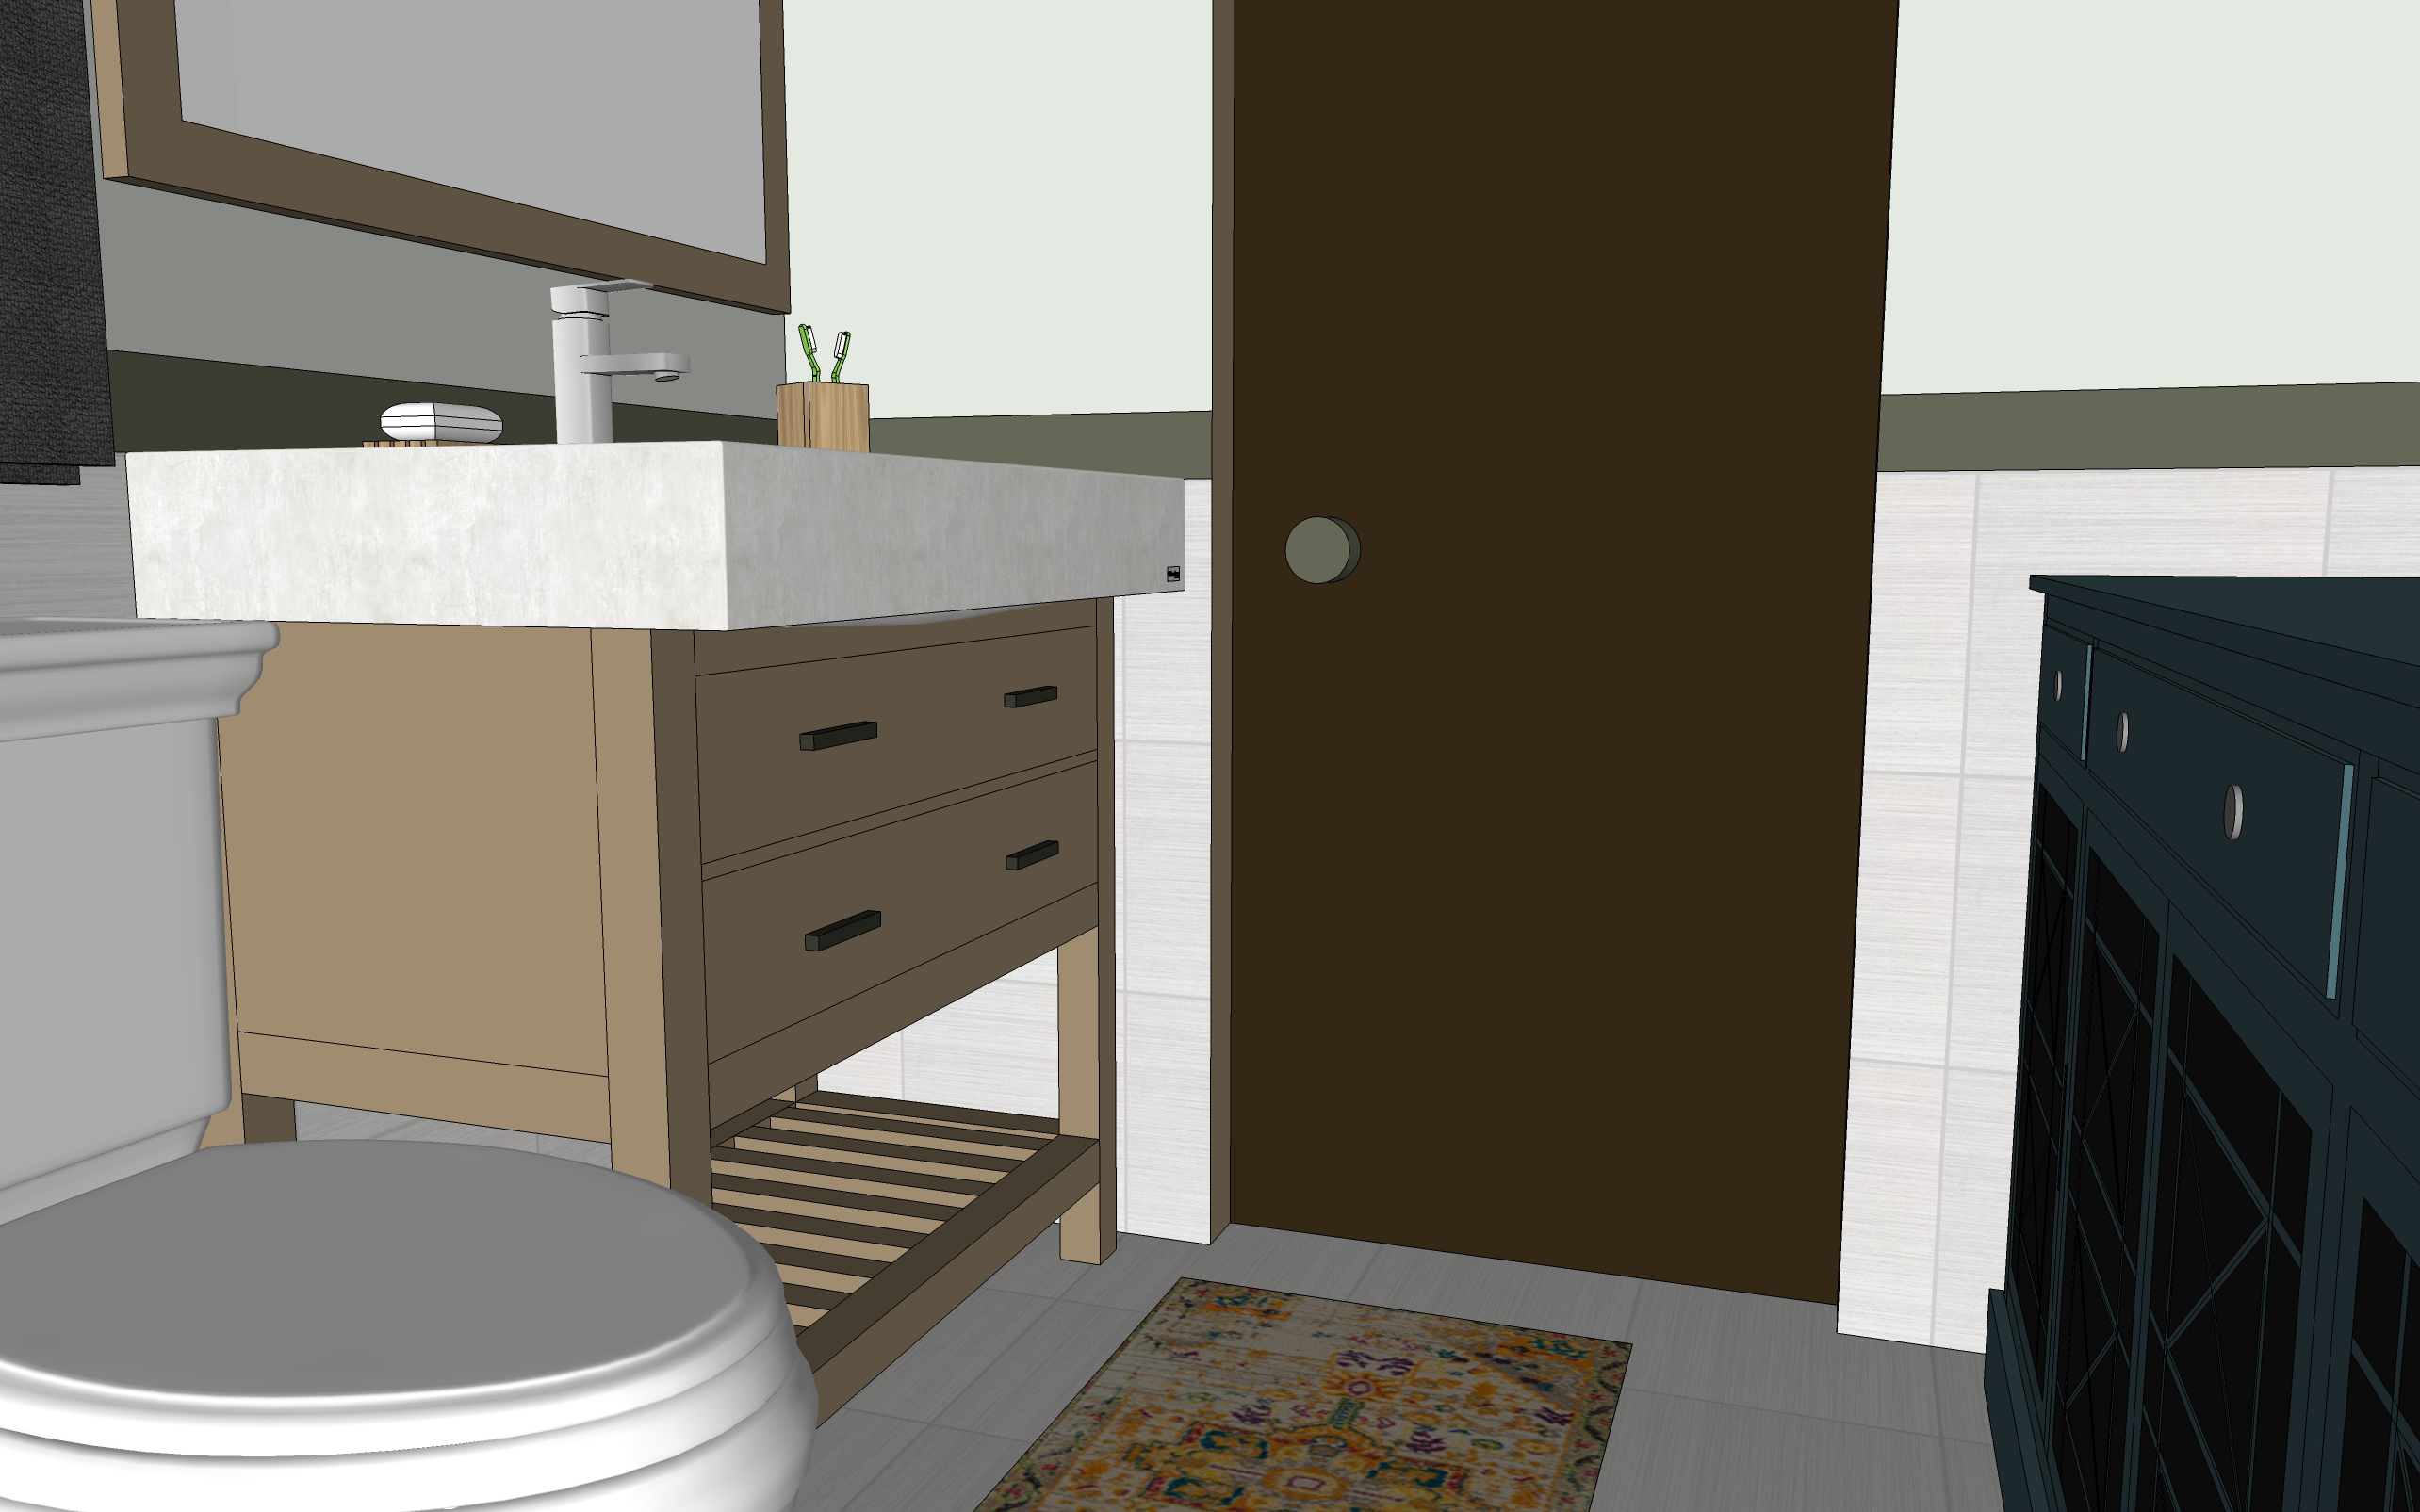
Another major change for the bathroom is the door. Currently the door swings in and hits the toilet. It makes sense to install a sliding barn door. Not only will it free up space in the room, it will look amazing!
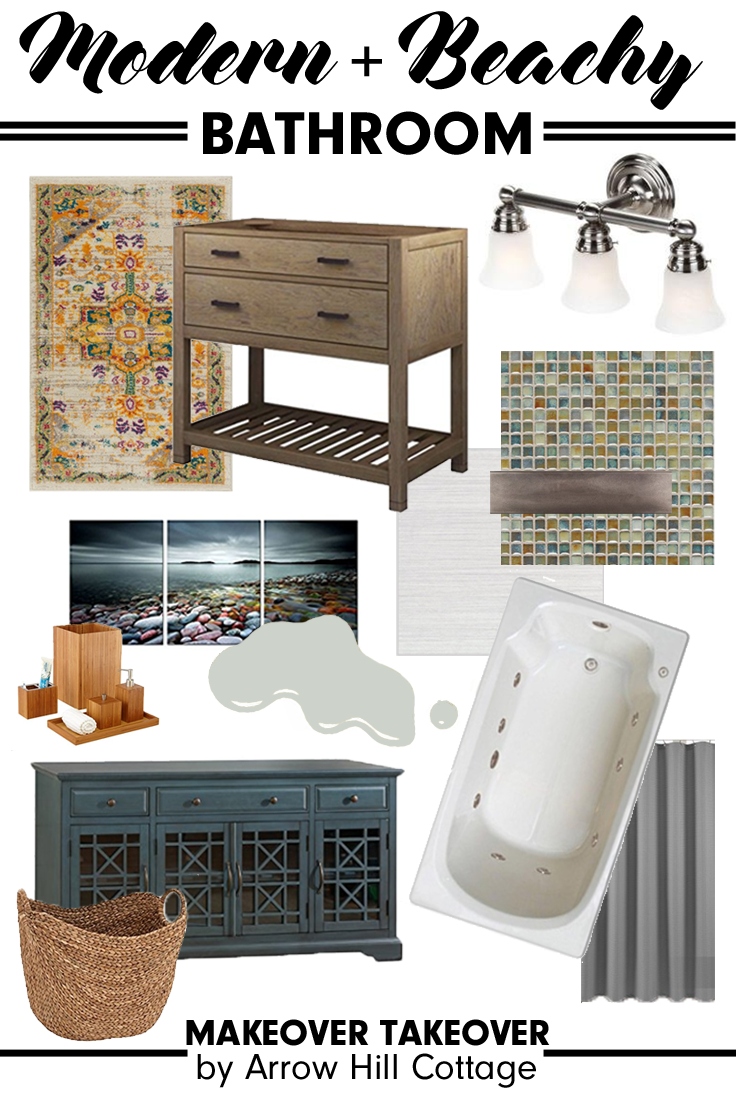
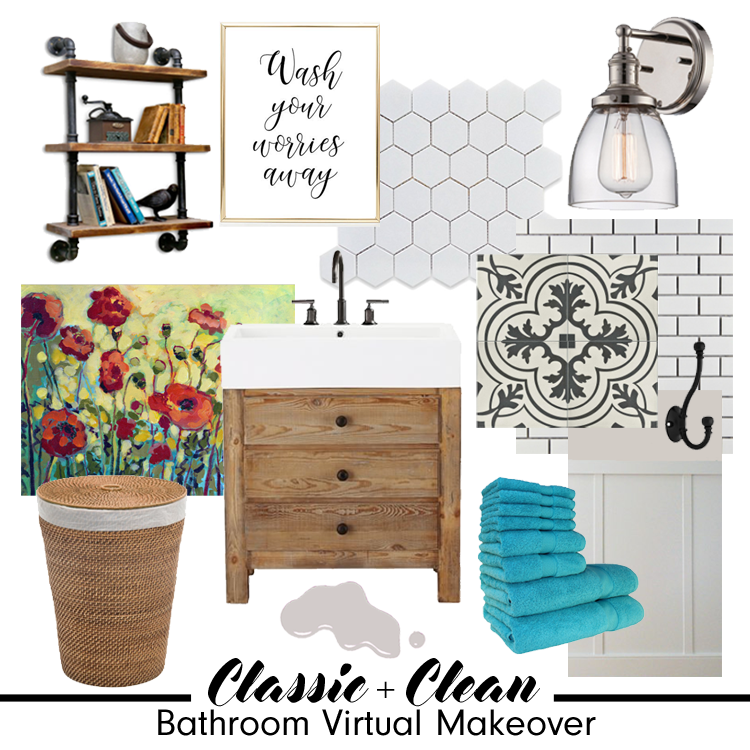
FINISH INSPIRATION
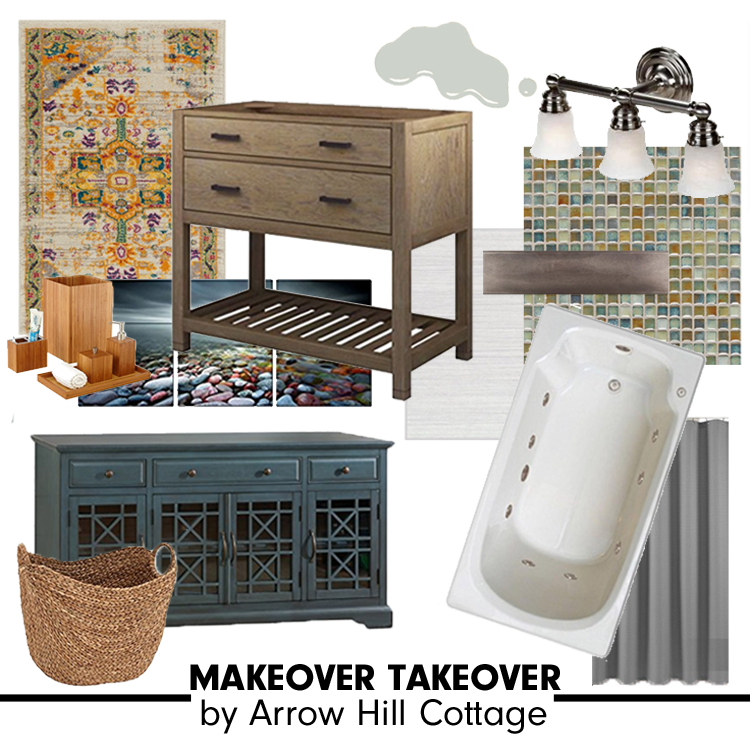
Matt & Harmony shared with me some inspiration images of finish materials they want to see in the space, and let me tell you – they have GREAT style! They really did make my job very easy! I was able to source amazing items from various online retailers to create an inspiration board for an updated traditional bathroom that fits the time period of the house and the classic style of it’s owners. You can learn more about each product by clicking on the titles below.
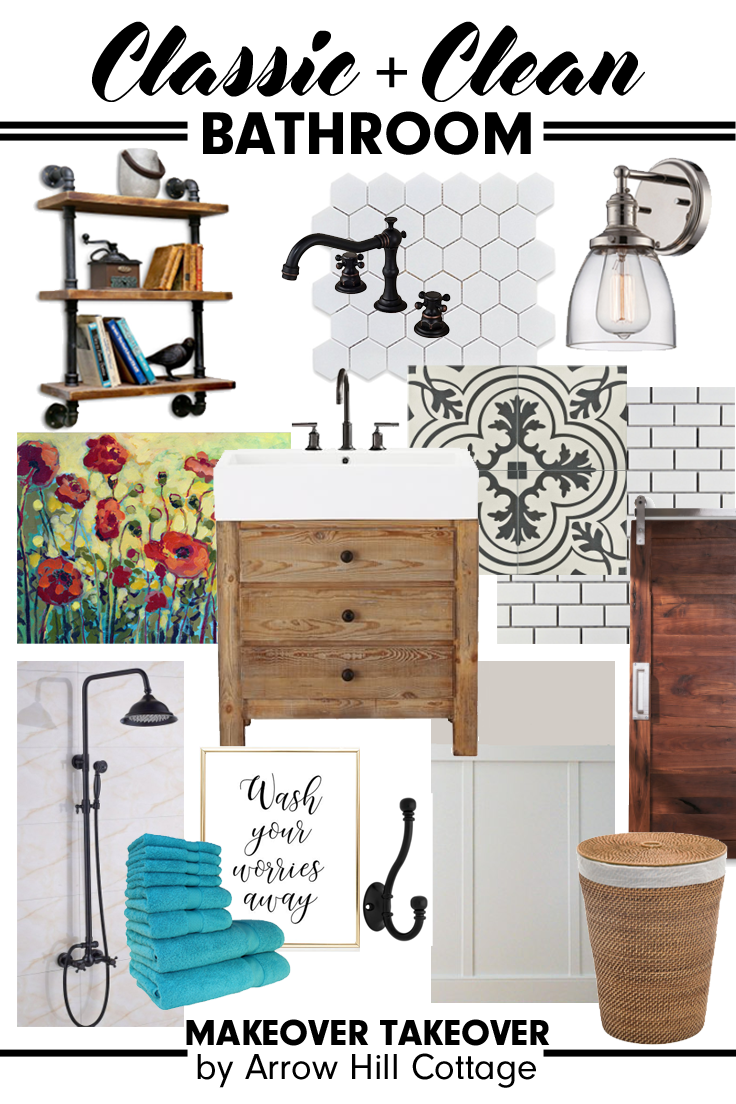
VANITY: This piece is a great focal point for the room. Created using reclaimed lumber, it adds warmth and history.
FAUCET:Dark bronze with an antique look, this faucet complements the vanity well.
SUBWAY TILE: You really can’t go wrong with a simple white subway tile!
HEXAGON TILE: Another all white option, the hex tiles are the perfect choice to pay homage to the period of the home. They were all the rage in 1905!
PATTERNED TILE: The fun pattern adds a bit of whimsy to the room. I added it in the shower only, so as not to make the small room seem too busy.
SHOWER PARTITION: Ties in the other black and white elements in the room.
SHOWER FAUCET: Complete with a rain shower head and a hand held spray, this faucet system is versatile. It also has a matching finish to the sink faucet.
BOARD & BATTEN: A great traditional detail that adds charm to the room. The link will bring you to a tutorial on how to install DIY board & batten.
TOWEL RING: Providing a simple place to hang a hand towel near the sink
MIRROR: This thin trimmed mirror looks great with the other finishes in the room.
WALL SCONCE: An updated light fixture with vintage charm
DOOR HARDWARE: The sliding barn door will require some heavy duty hardware!
RUG: Fluffy white and just big enough for place to stand both at the sink and when getting out of the shower. The bonus is that it is washable and has a non-slip backing!
HAMPER:Large enough for dirty towels and clothes, but small enough to not overtake the small room. Comes with a lid and a liner.
WASTE BASKET: A small metal variety with a lid – fits perfectly in the small niche, under the shelving.
SHELVING: Adding a bit of industrial look to the space, these shelves dress up the niche.
SHOWER BENCH: A shower bench adds a lot of versatility to a shower, allowing even young children to shower safely. This bench is made to fold when not in use.
WORD ART: Fitting sentiments for a bathroom!
FLOWER CANVAS ART: These flowers add the perfect pop of color.
TOWEL HOOKS: One for each member of the family – lined up on one wall.
TOWELS: These colorful fluffy towels are sure to brighten up the room.
WALL PAINT COLOR: I think this light grey color from Behr, called ‘Cotton Grey’ provides the perfect backdrop.
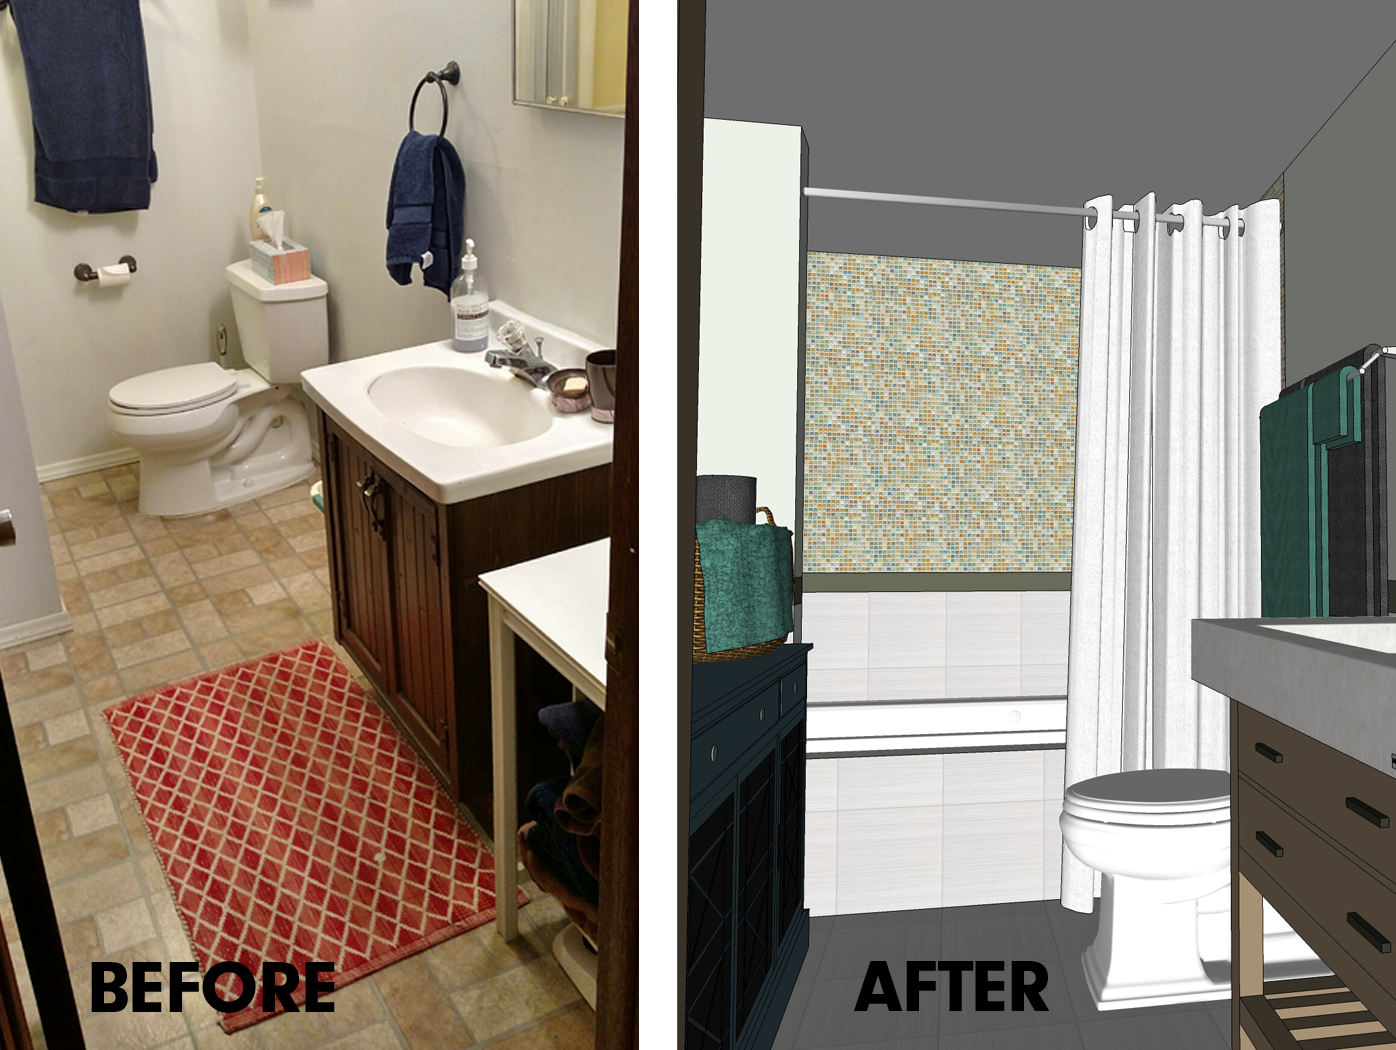
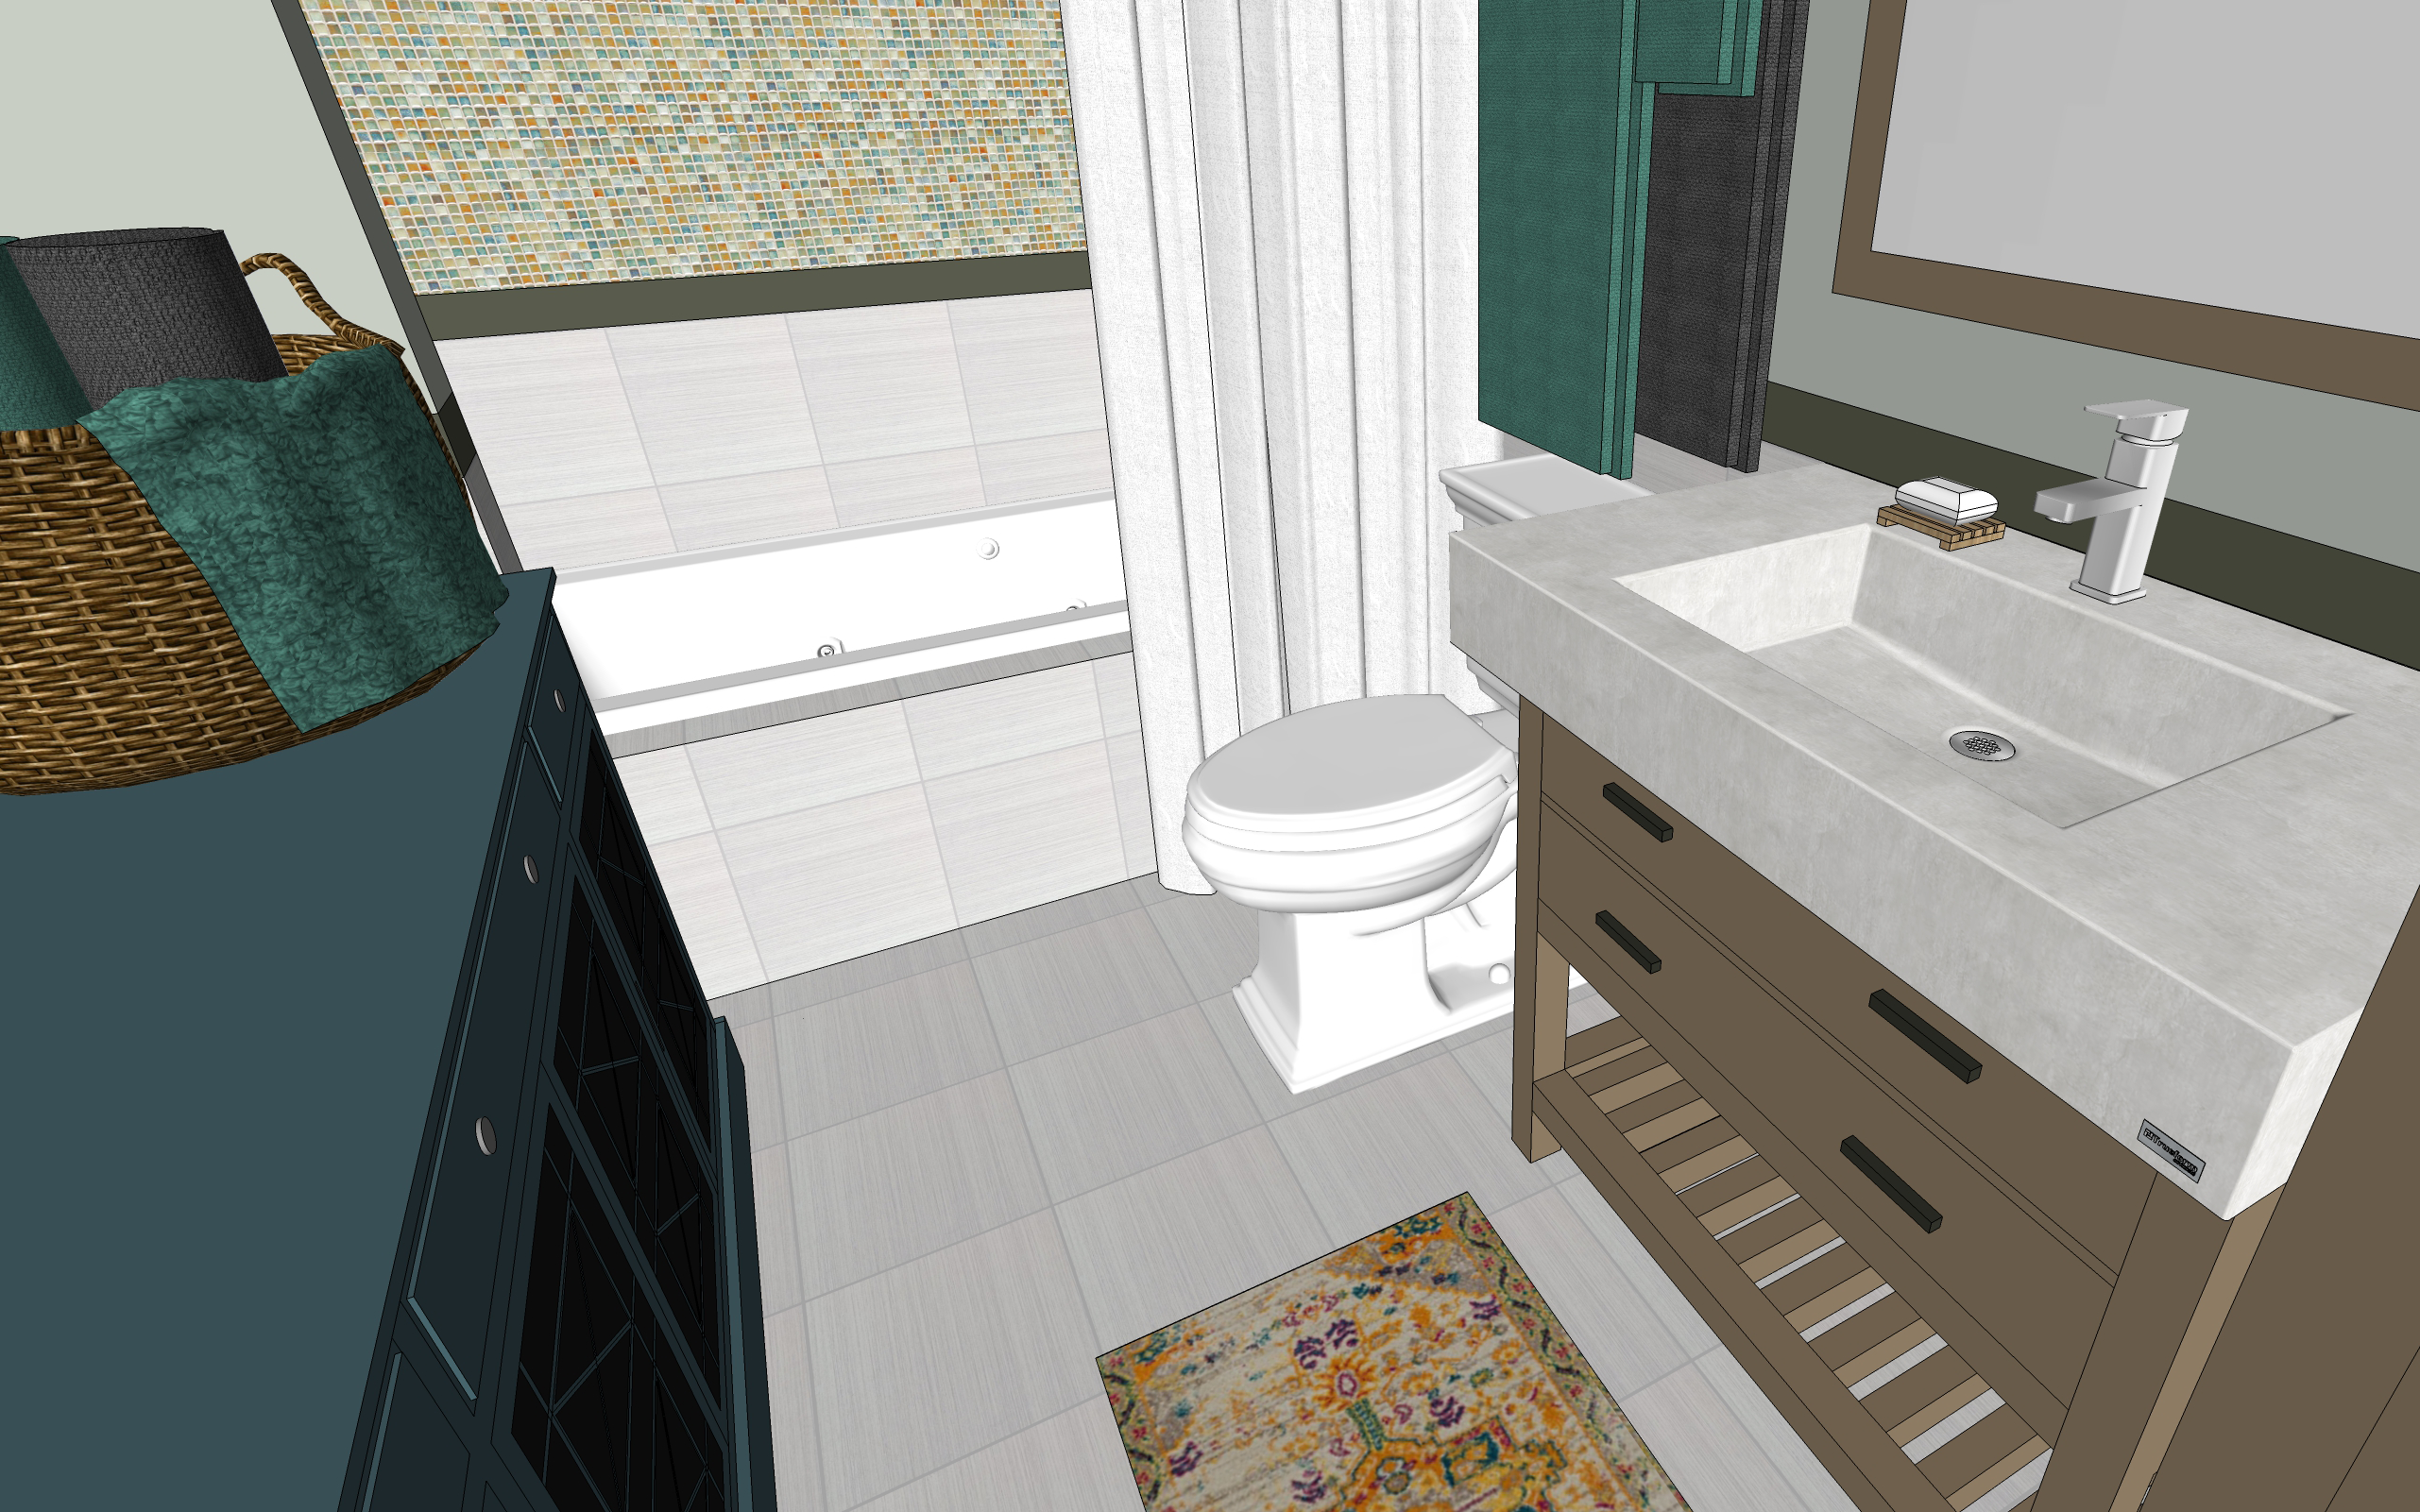
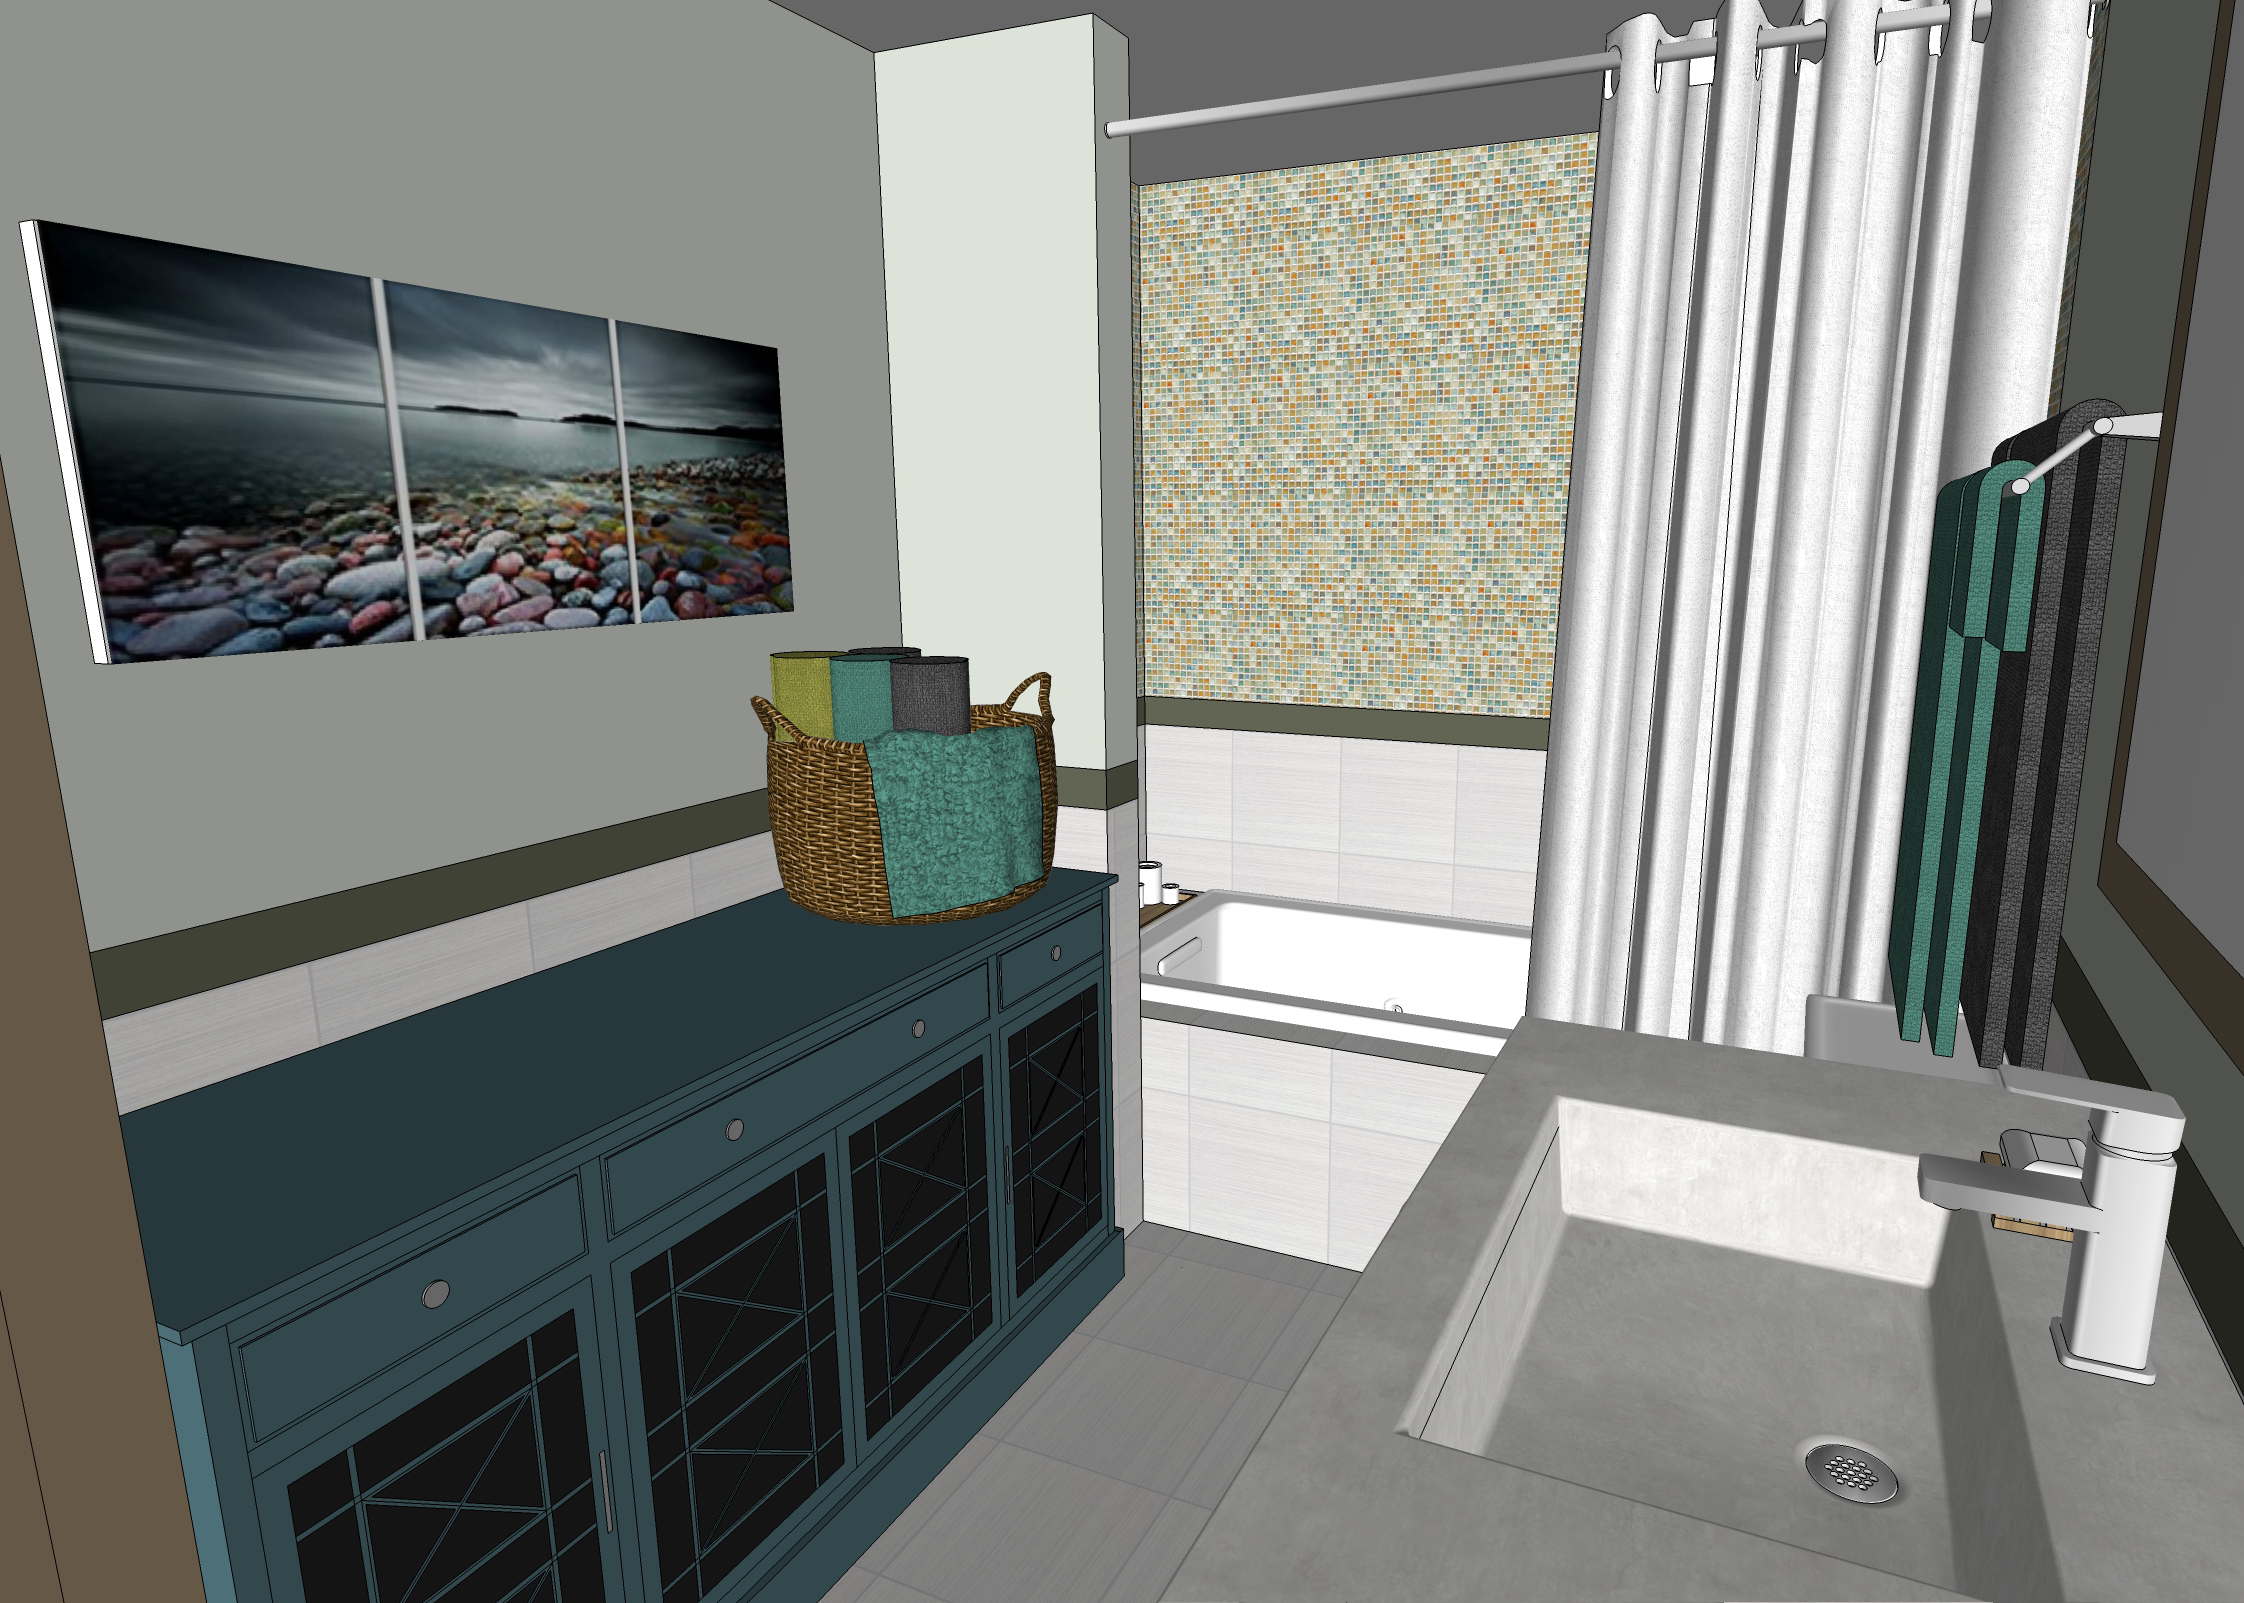
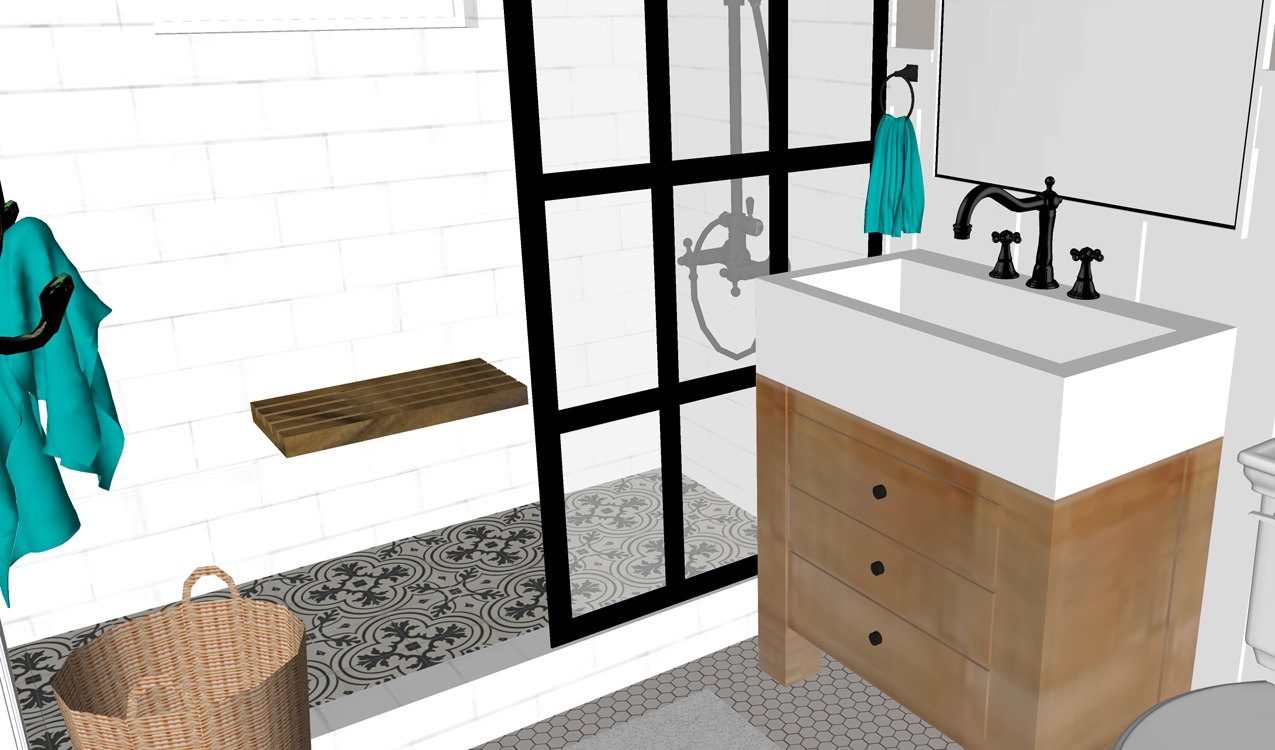
AND NOW FOR THE BIG REVEAL!
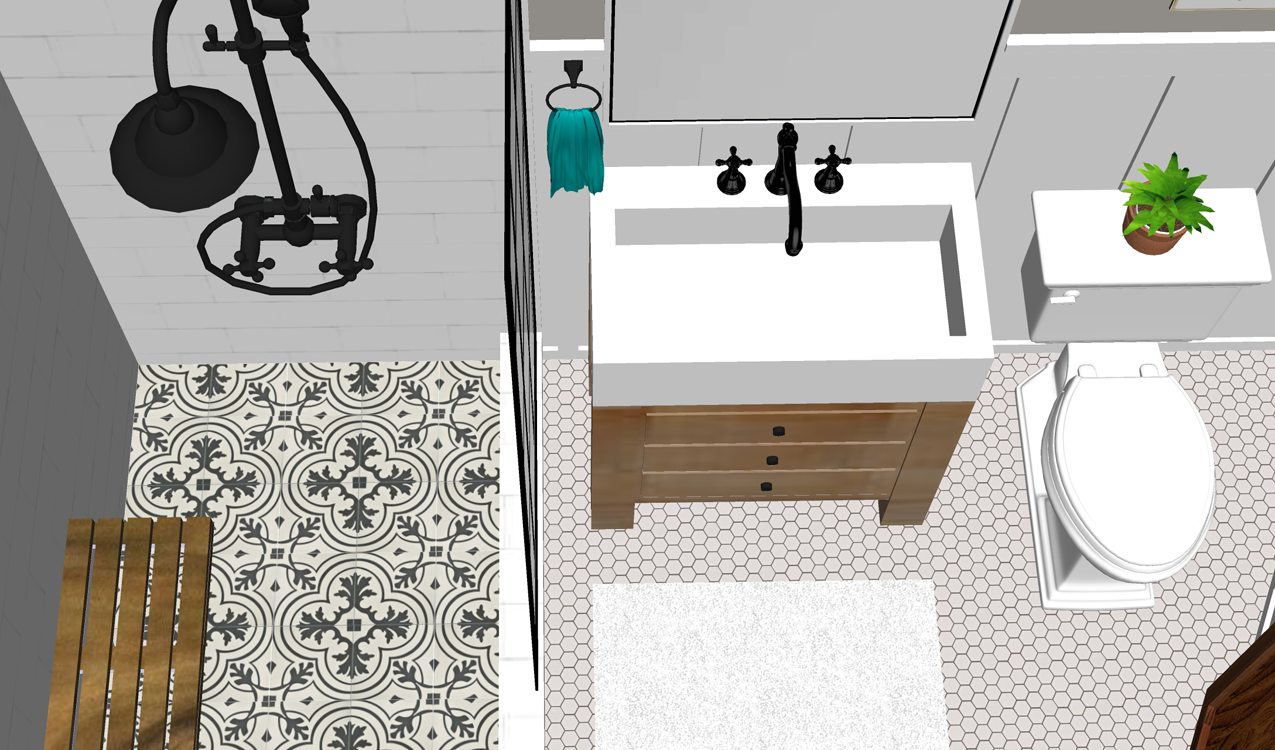
Can you spot the differences? Quite a few changes, I would say. I think the virtual makeover gave the room a much more period appropriate style – and yet the room also has clean and contemporary lines, a fresh look.
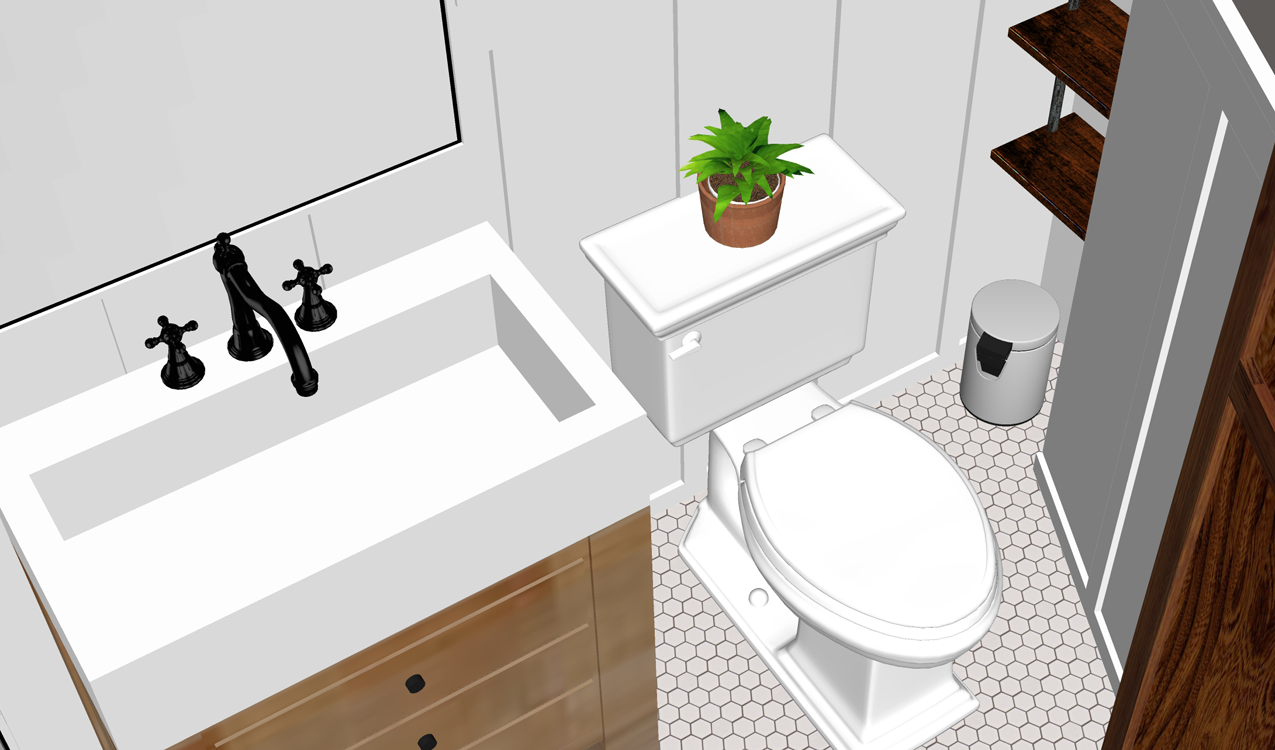
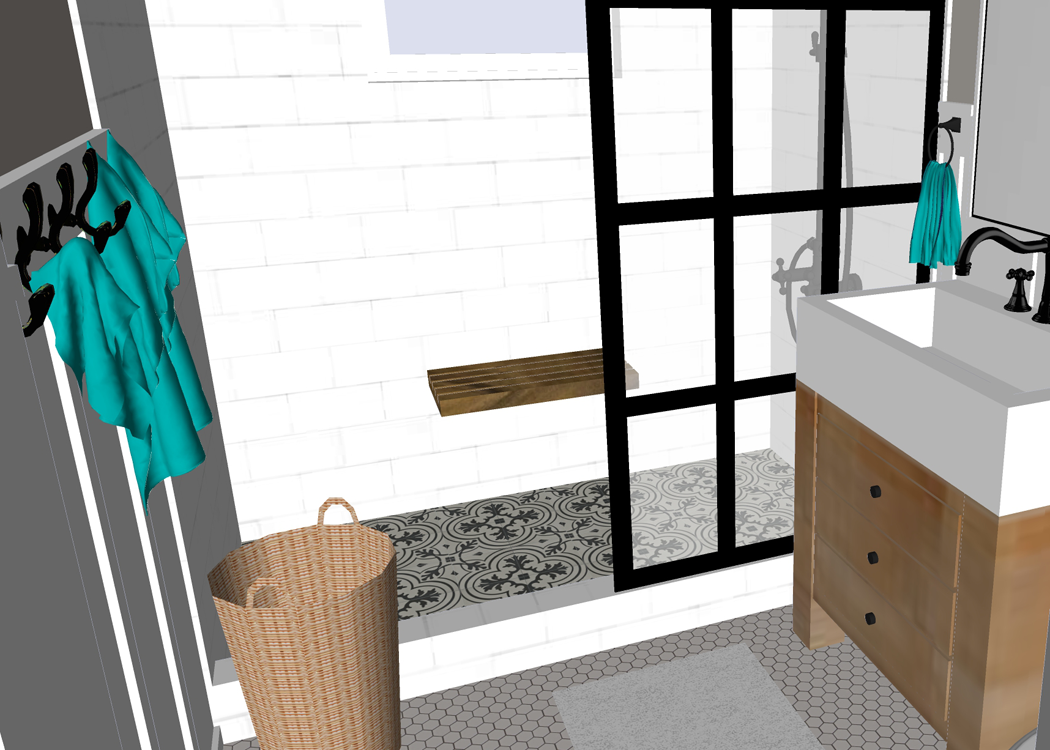
More views of the virtually remodeled space
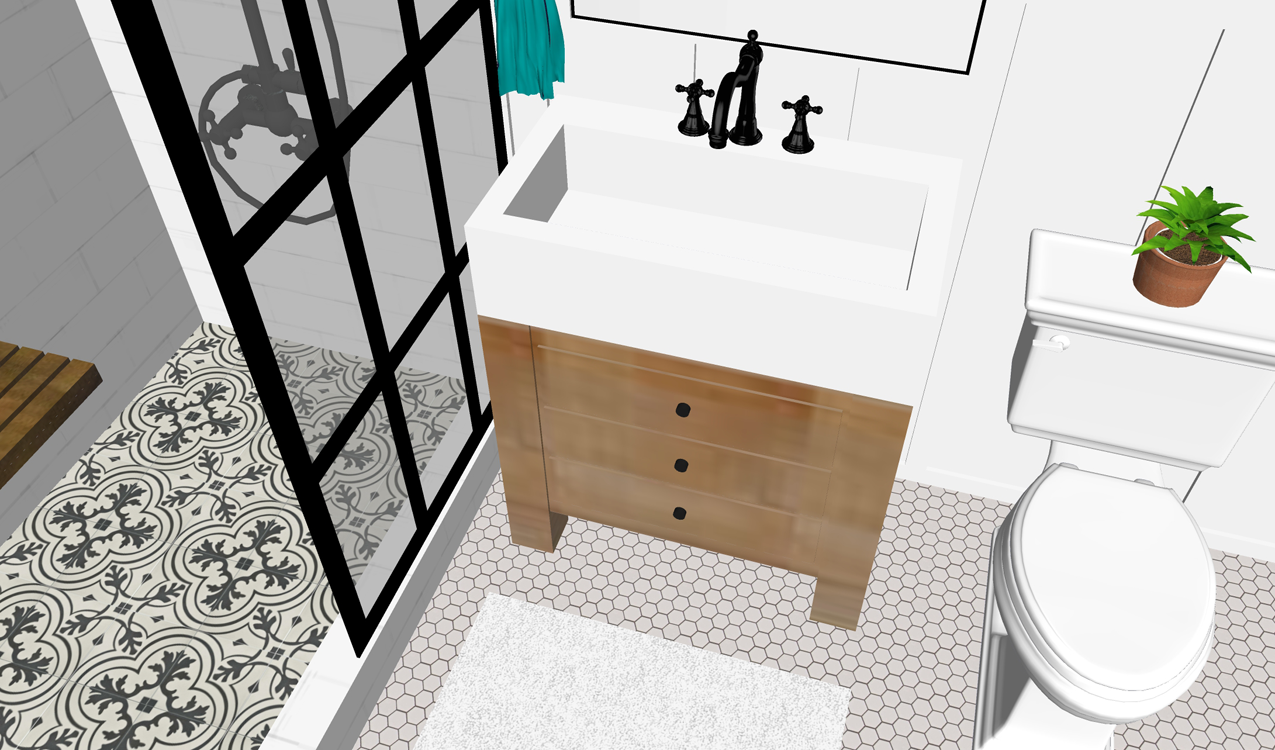
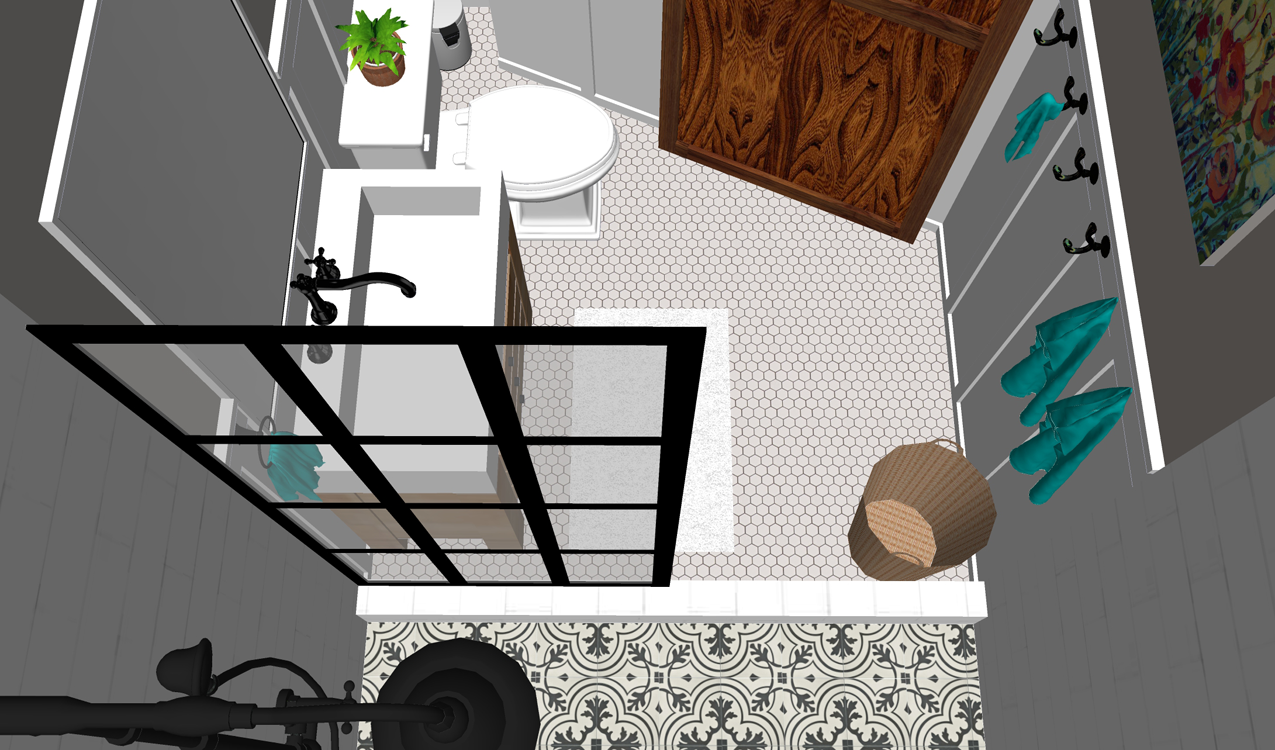
The 3d animation really shows the space changes well. Click on the play button for a virtual tour!
I hope that Matt and Harmony are able to incorporate some of these changes and that they invite Craig and I over to see it in person once they do! Working on their bathroom gave me a lot of fun ideas for our bathrooms at Arrow Hill. Maybe I will work on those next!
If you like what you see, and think a friend could get some inspiration from this bathroom virtual makeover, go ahead and use the buttons below to share this post. Spread the word about the free Makeover Takeover service while you’re at it.
Thanks friends!