THE 8 MOST IMPORTANT ASPECTS OF BATHROOM DESIGN

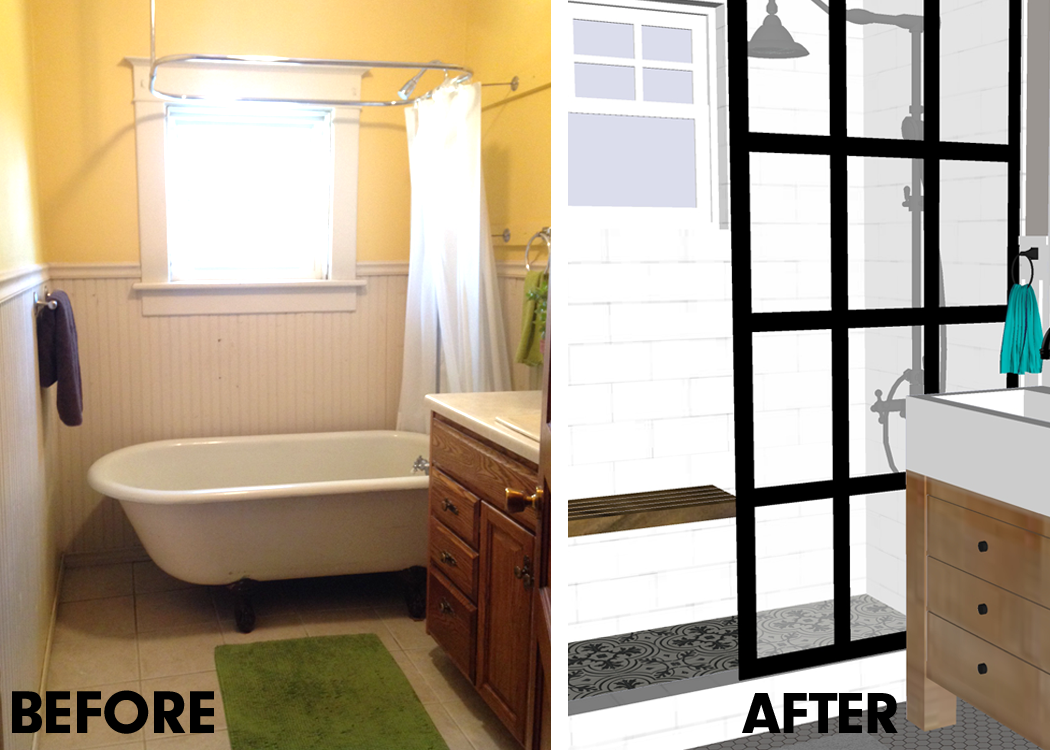
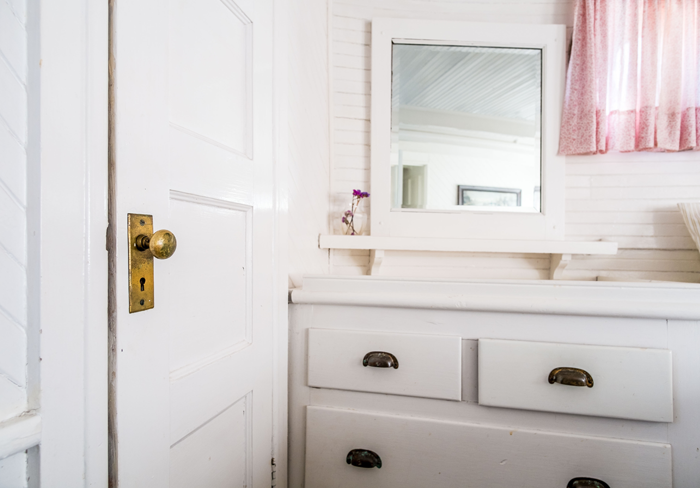
They aren’t glamorous. In fact, they are quite possibly the most forgotten – while at the same time, most useful – room in the house. The bathroom.

Every house needs one; But when it comes to design, homeowners tend to spend very little time contemplating what makes a bathroom perform to the best of it’s ability. Whether you are planning a brand new bathroom or are wanting to spruce up one that is existing – these eight aspects are the ones you should focus on first.


1. LOCATION

The common Real Estate motto should echo when deciding where to place a bathroom: location, location, location. Generally speaking, bathrooms are places where people want privacy. With that being said – the first guideline of positioning a bathroom is that it should not be directly adjacent, or open into, to a very public space in your home – such as the living room.

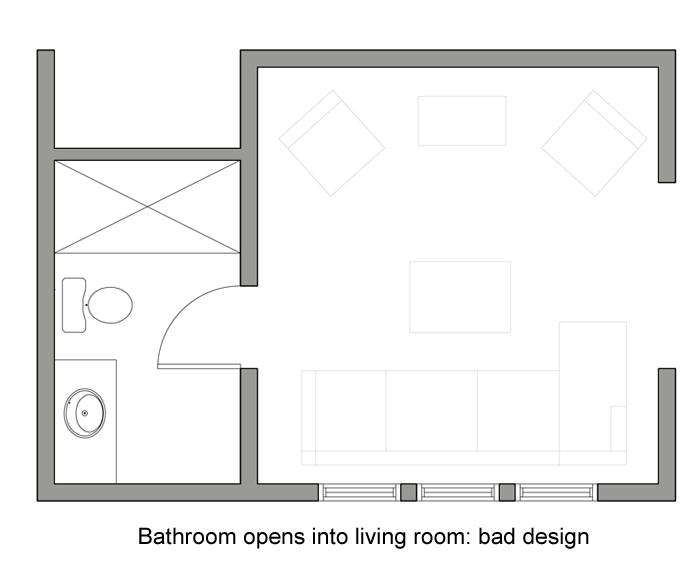
Secondly, there should be a bathroom accessible to everyone who uses the home – from those who live in it, to the guests that visit. If the only bathroom on the main level is the master bath, for example, your guests will have to travel through your master bedroom to access it. Consider a powder room or larger hall bathroom that is easily found.

Bathrooms are also in prime position near bedrooms on other levels of a home. Searching for one in the middle of the night, when needed, can be a dangerous adventure.


2. FIXTURES NEEDED

The next major aspect to consider is in regards to the function of the bathroom itself – by indicating which fixtures the room will require. The most common fixtures include the toilet, sink, shower, and bathtub; But custom fixtures, such as a bidet, may also be requested.

The bathroom count of a home relies more on the number and types of fixtures that each one has than the square footage allocated. Generally, a bathroom is considered a ‘half bath‘ or ‘powder room’ if it contains two fixtures: A sink and a toilet.

A ‘three quarter bathroom‘ will contain these basic fixtures plus a shower; and a ‘full bathroom‘ contains all four fixtures: sink, toilet, shower, and bath-tub. (The bath-tub/ shower can be a combo unit).
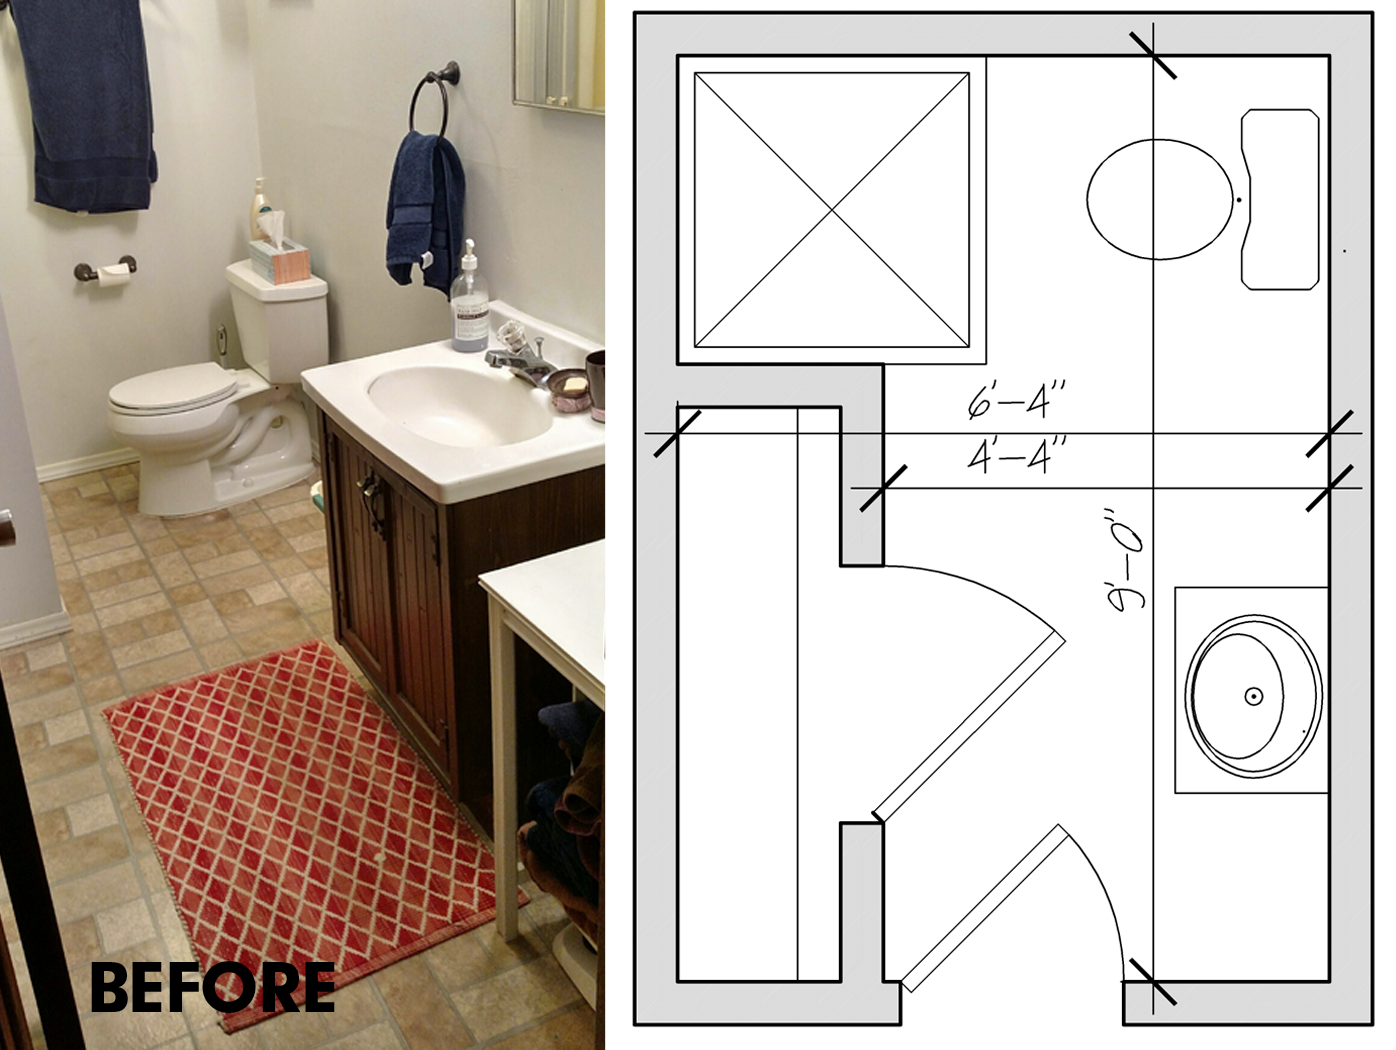
 

3. SIZE

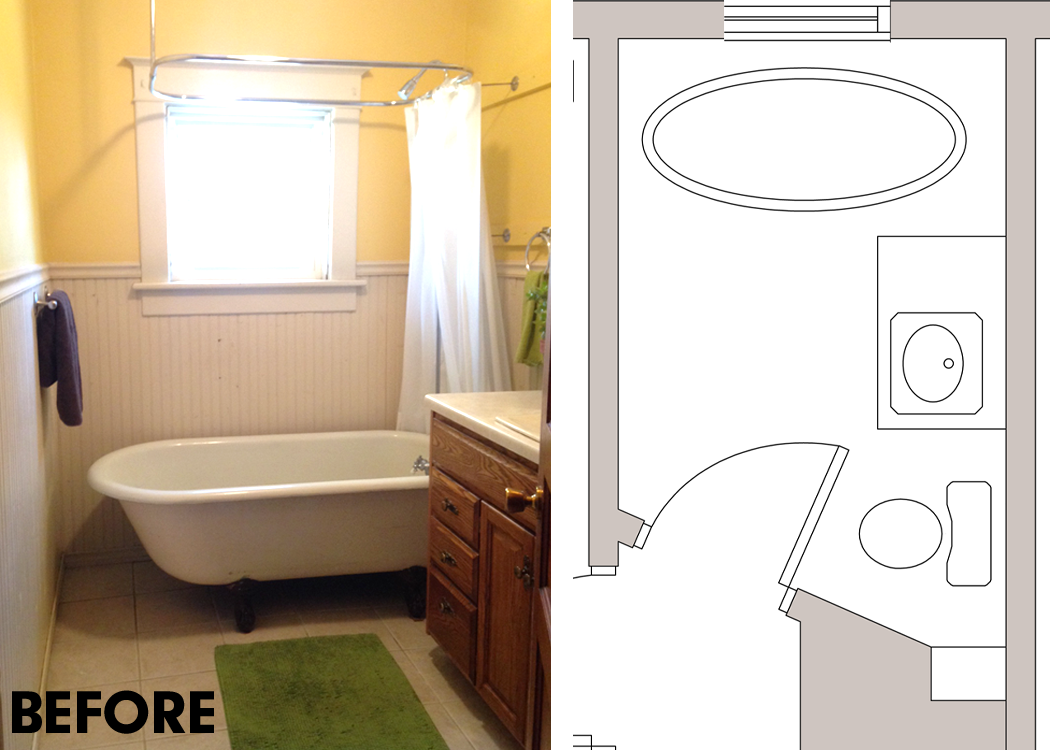
There is definitely a comfort factor when it comes to bathroom size. There needs to be enough space so that each fixture can be accessed and used properly. However, an overly large room can create an uncomfortable atmosphere.The user may feel awkward when using a too large room.

Think carefully about how much space is needed to comfortably use each fixture in the bathroom. You may be surprised to learn that the room can be much smaller than you initially thought!

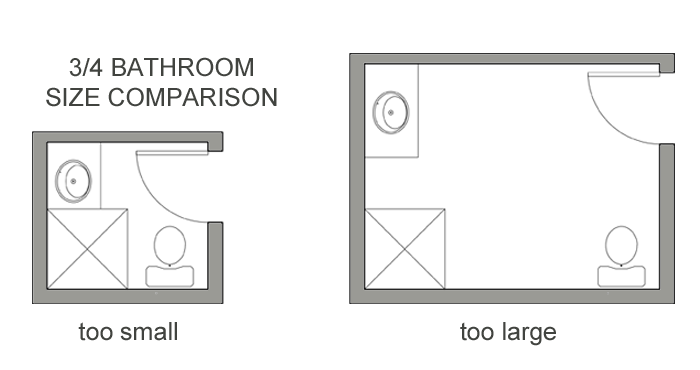
As you can see from this graphic, the bathroom on the left is quite cramped. The bathroom on the right, containing the same three fixtures, is too large – with a large amount of wasted space in the center.
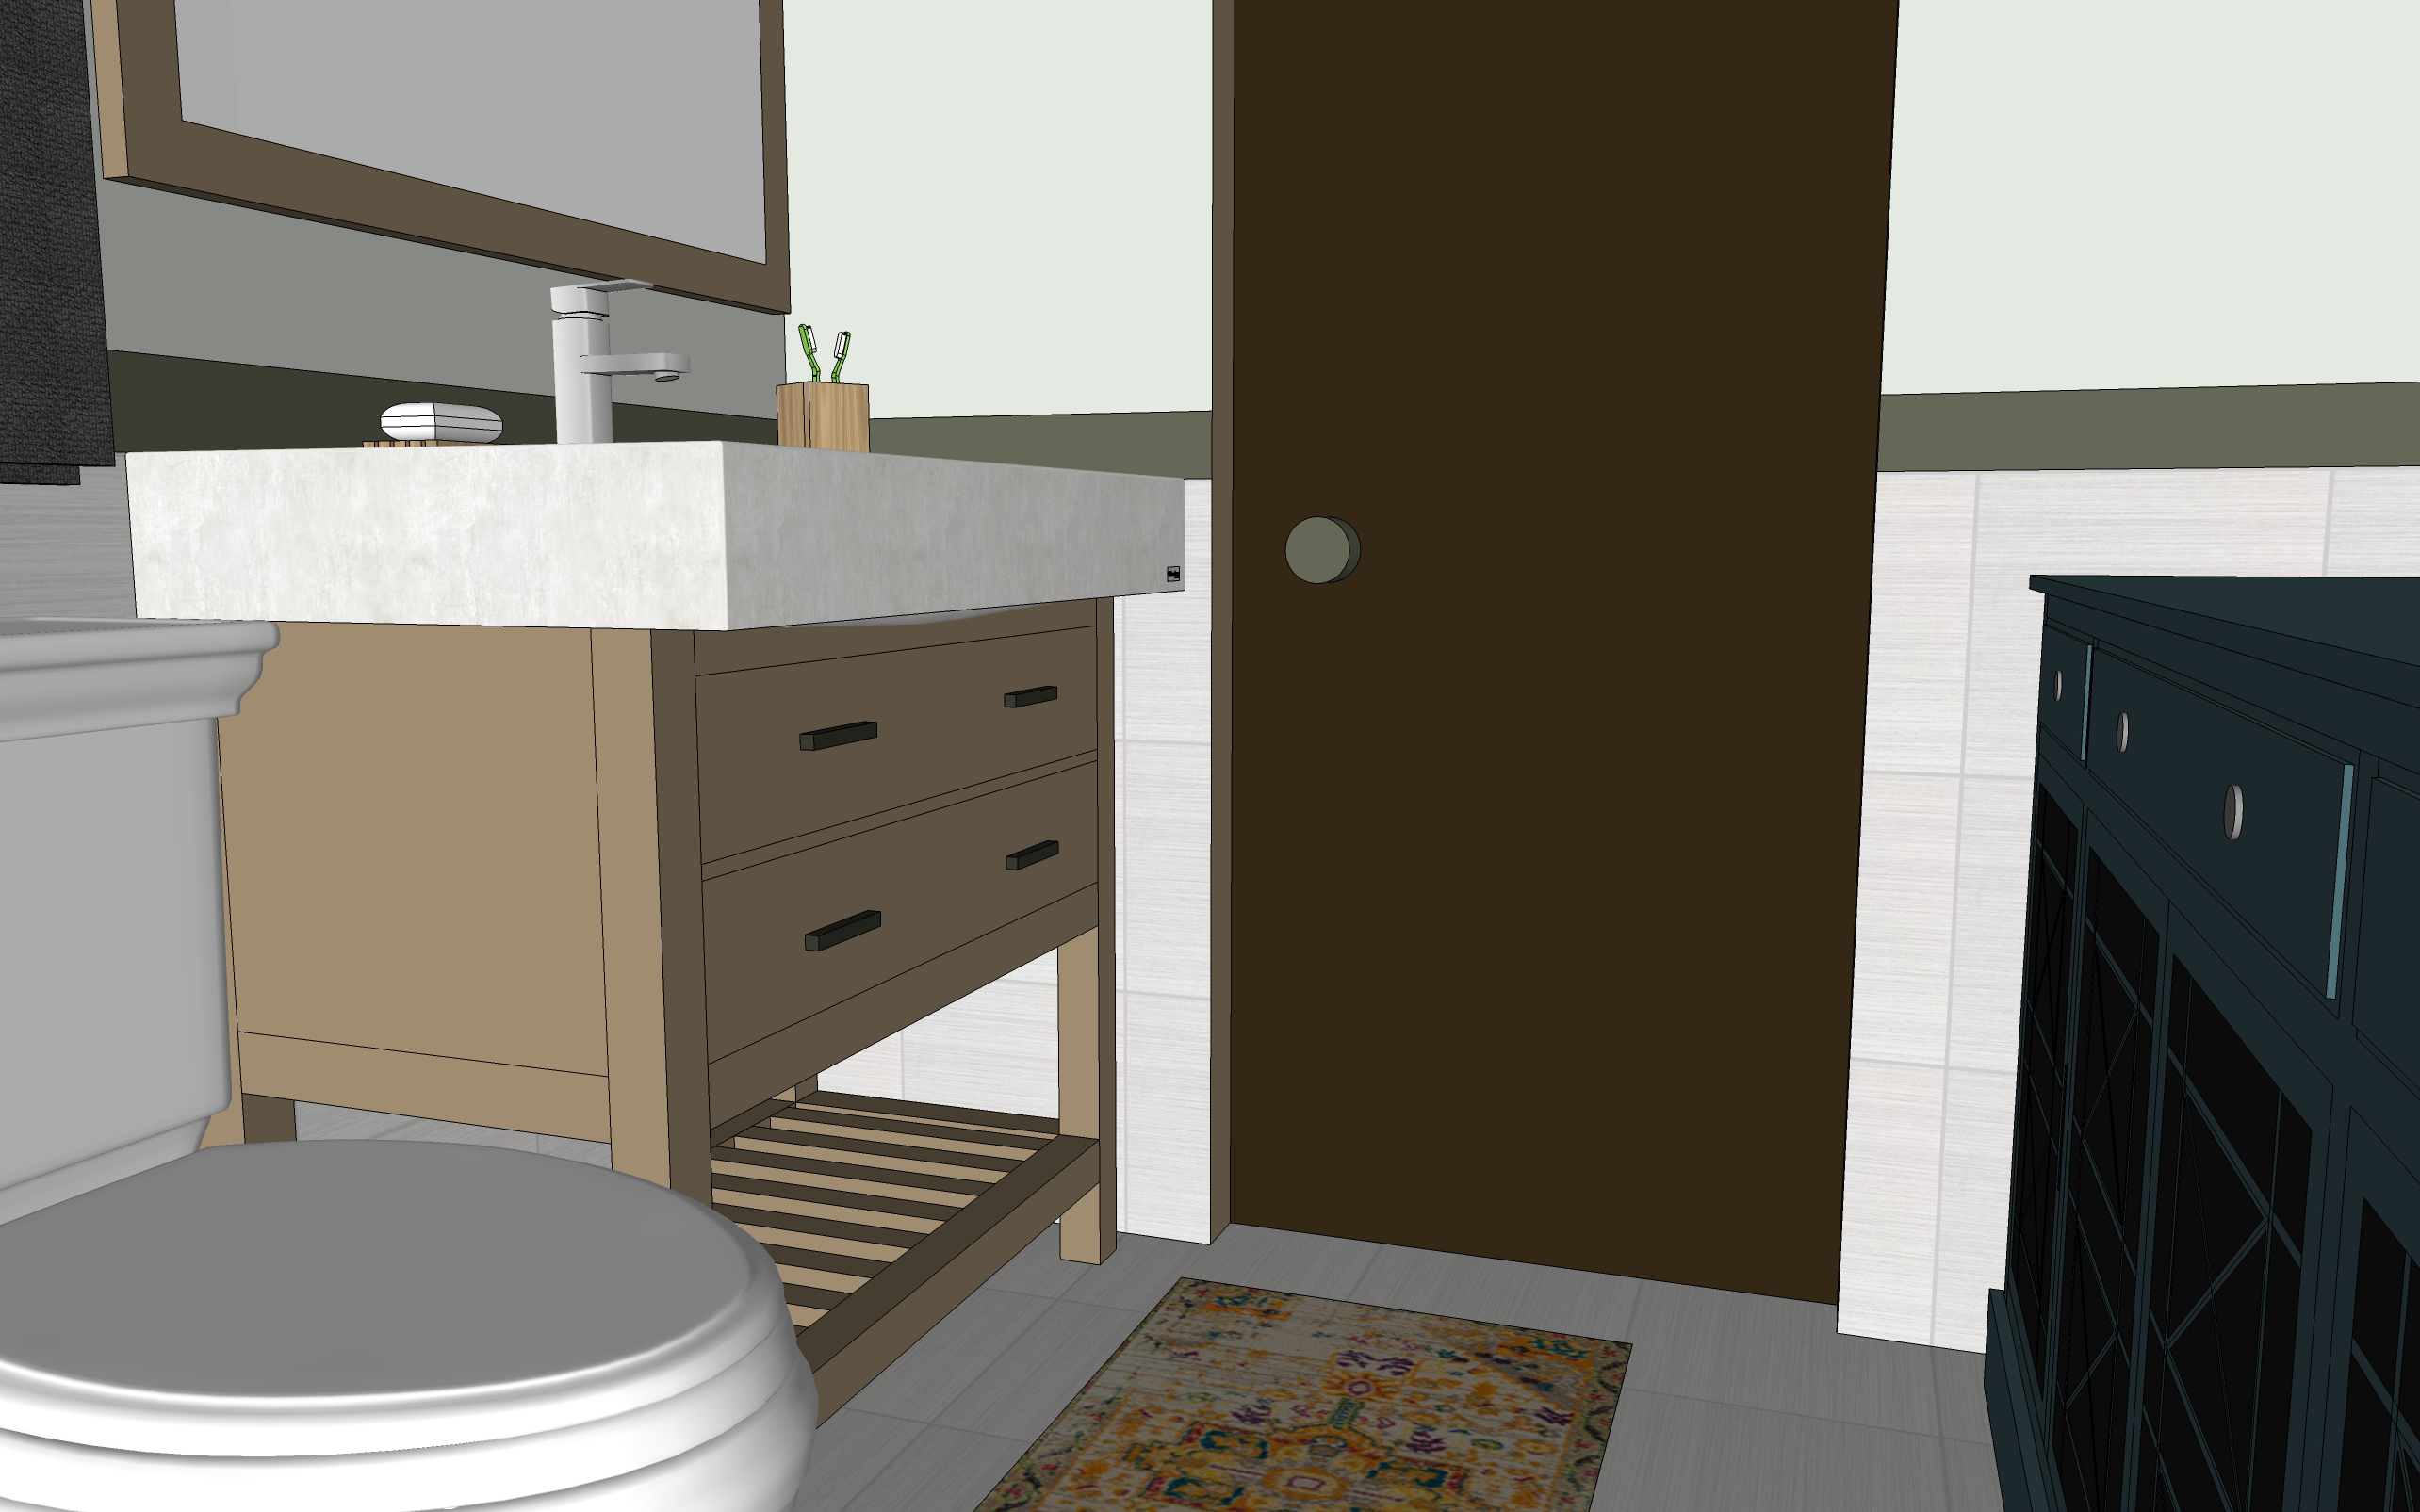
 

4. VIEWS INTO ROOM

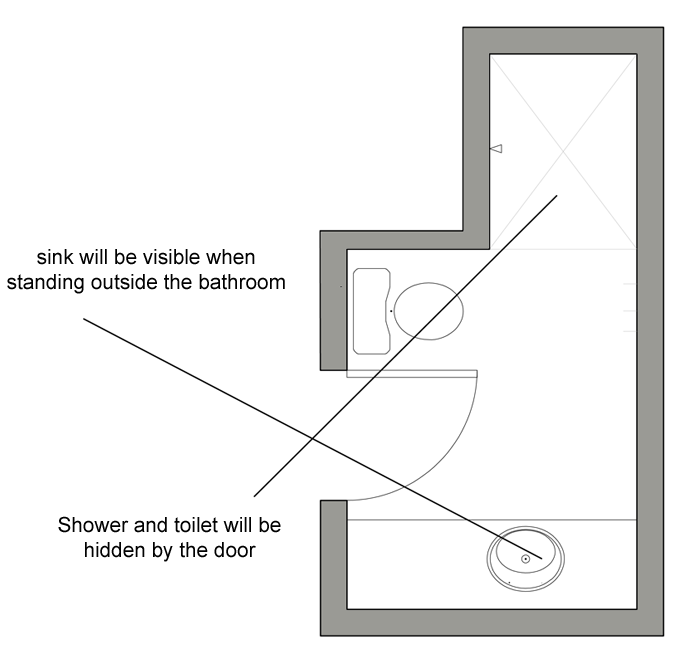
Although the door is typically closed when a bathroom is in use, there are also plenty of times during the day when the door will be left open. Be thinking about what you will be able to see through that open door. Surely it is more pleasing to have a view of the sink, rather than the toilet, for example.

When determining sight lines into a space, take a string or pencil mark and draw straight lines from each fixture to the other side of the door. If these lines pass through a wall (or the door), the view to that particular fixture is private. If the line has no obstruction, the fixture is in view.


5. PROPER VENTILATION

While a window can provide a natural and cost effective form of ventilation – it is not always possible to position one in the bathroom. In those situations, a vent fan is a definite must. In fact, it would be a smart idea to include a vent fan even if the room does have a window. Not only will it allow you to contain unpleasant smells and eliminate them quickly, it will also help with to avoid moisture accumulation – which can cause mold if not dealt with properly.


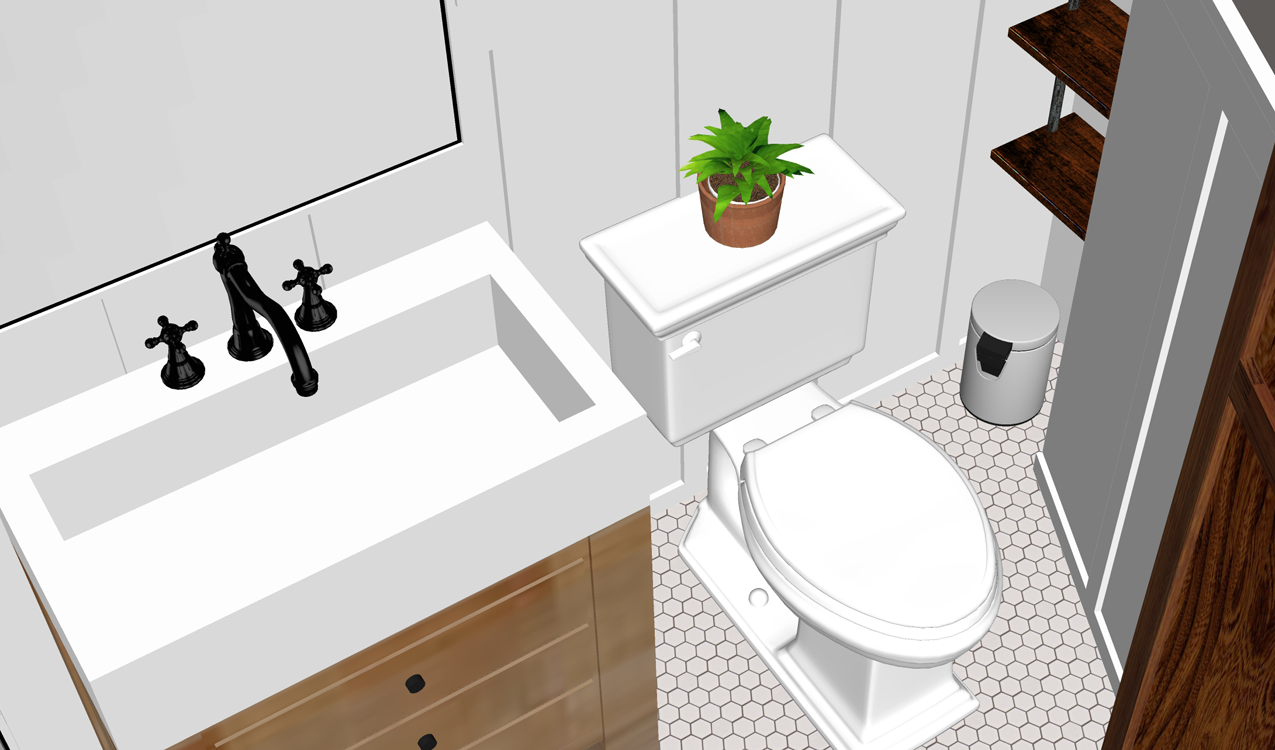
6. POSITION OF THE FIXTURES

The shape and size of the bathroom will help you determine the placement of each fixture. If you are starting from scratch, locating the plumbing along one wall can help reduce the cost of installation.

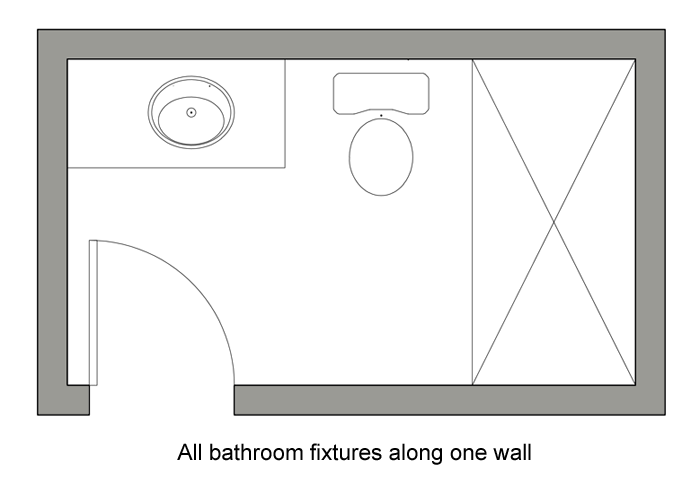
As discussed in topic #4, consider the more private fixtures, such as the toilet and shower, to be out of view when the door is opened.
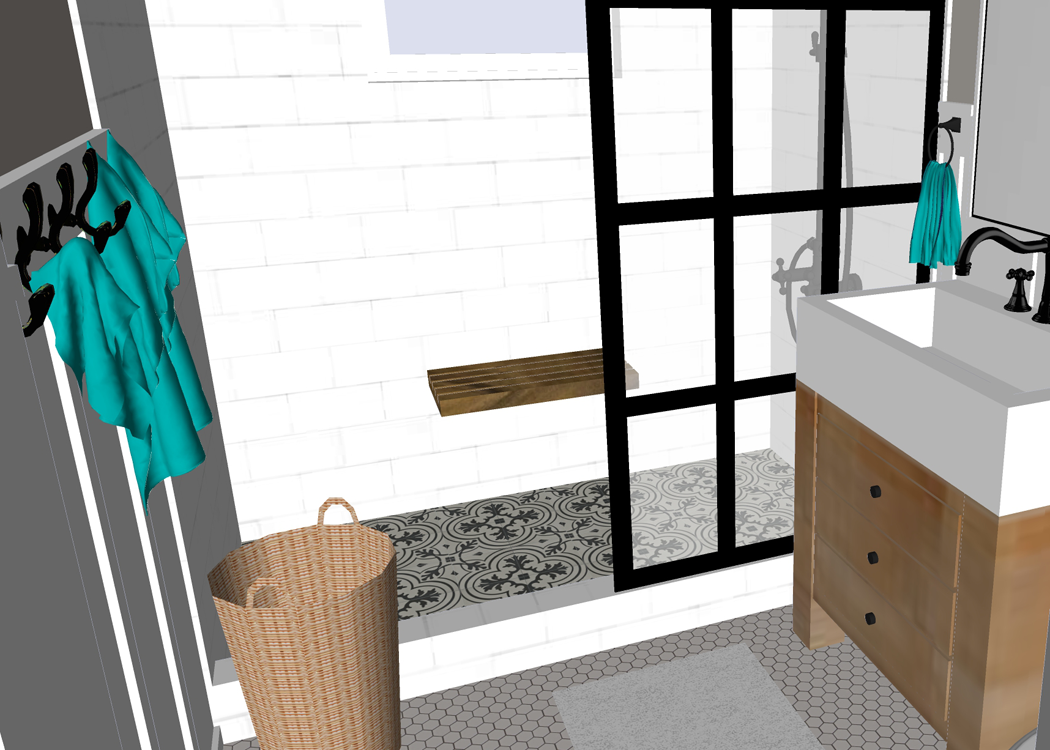
 

7. LIGHTING & COLOR

Lighting is absolutely essential for bathrooms, especially near the sink/ vanity. Natural daylight is desirable, as is soft overhead lighting. Avoid fixtures that cast shadows on your face.

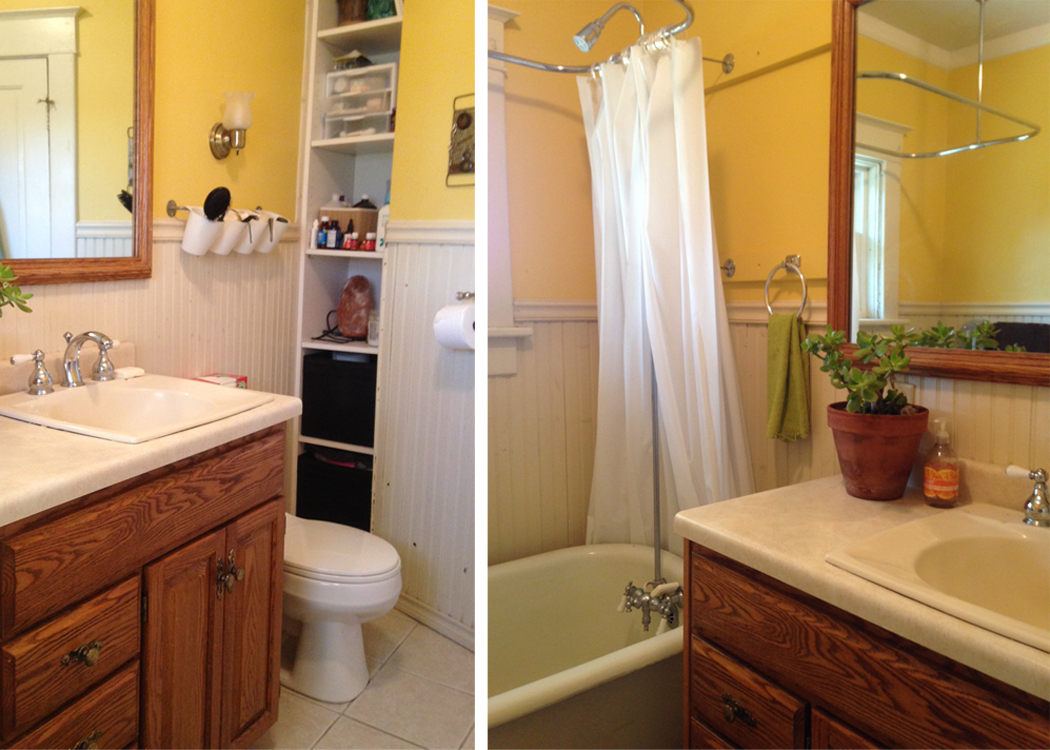
As mentioned in this post, the colors used in a bathroom can affect mood. If you want to create a peaceful and calm atmosphere, consider blues or greens. Yellow is a good option if you want your bathroom to invigorate you.


8. SHARING

Though bathrooms are typically a private space, there are times when two or more people will need to use it at the same time. If that is going to be the case for your family – whether it will be a husband + wife, or siblings using the bathroom at the same time – be thinking about ways that will allow the space to remain private and shared at the same time.

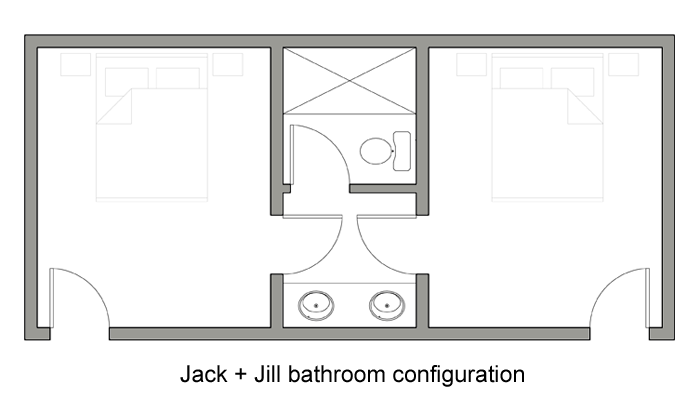
One common solution that designers have adopted is called the ‘Jack and Jill’ bathroom. In this layout, the bathroom is accessed from two entry points (many times, two bedrooms). The sinks are in a public zone of the overall bathroom, and can be accessed at any time, but the toilet and shower/bathtub are positioned behind another door.

Another popular layout option is to give the toilet it’s own ‘closet’ within the overall bathroom – allowing it to be used in privacy, while keeping the rest of the room open.


Of course, there are many more decisions that will need to be made when designing your bathroom. Likely the fun ones – such as choosing flooring and accessories – are more exciting; But if you take the time to consider the eight important groundwork aspects outlined here, your bathroom will be functional and serve the occupants of your home well.
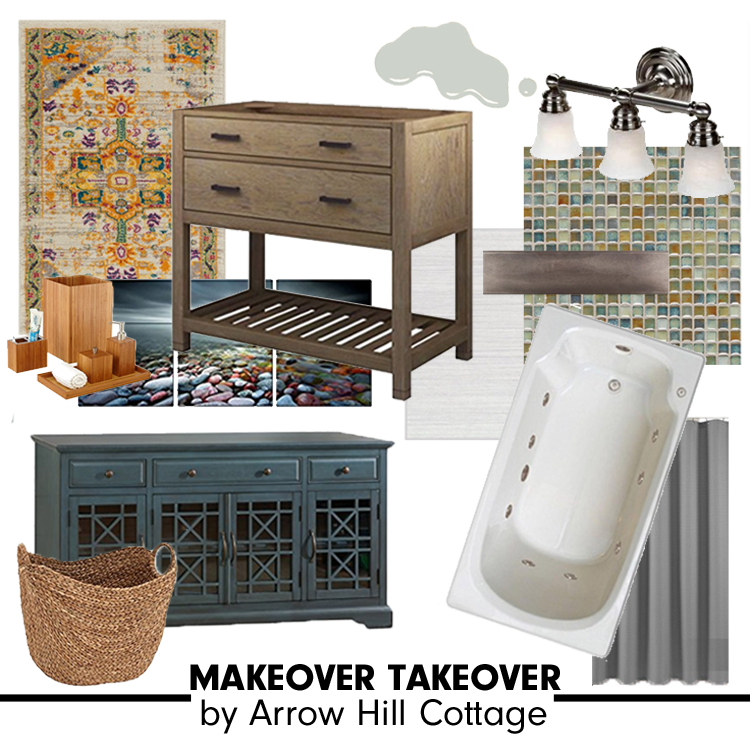
 

PIN THIS FOR LATER

TRADITIONAL BATHROOM REMODEL IDEAS: MAKEOVER TAKEOVER FOR MATT & HARMONY

I’m back today with another MAKEOVER TAKEOVER!  The first virtual takeover, of my own parents bathroom, was received very well and I have since had a few requests come in from readers with tricky spaces they would like help with.

Remember that this is a FREE digital home design consultation, which is available to anyone who subscribes to the Arrow Hill Cottage website. If you would like this free service, simply email me with a few photos and a description of what issues you would like resolved. If chosen, I will offer a solution + inspiration through 3d images and sourced items. Hurry though! I only have the ability to do one Makeover Takeover each month and the spots are filling up quickly!

This post contains affiliate links to products for your convenience.  If you purchase via my links, I may receive a small commission at no additional cost to you.  Thanks for supporting Arrow Hill Cottage!

For this Makeover Takeover installation, I had the fun privilege of helping with a bathroom that is located in a house that Craig and I used to own! We sold our 1905 American Foursquare to Matt & Harmony about three years ago, and it has been amazing watching them transform it to meet the needs of their own family. It is wonderful knowing that a house you lived in and loved for nearly 10 years is now in the care of people who love it just as much! They have tackled other remodel projects in the home with much success and have decided it is now time to turn their sights on the upstairs hall bathroom to make it their own.

This is the only bathroom on the second level of the house, and serves all four bedrooms. The owners before us had done a bit of repair in the room – to get it clean and updated. They didn’t, however, take the style or period of the house into much consideration and some of the finishes just don’t seem quite right. When Craig and I lived in the house, the most major update we gave the bathroom was removing the plaster ceiling and installing drywall. We also added a new light fixture/ vent fan, installed built in shelving in the corner for extra storage, and painted the room a bright yellow.

This is how the room looks today:


PROPOSED PLAN CHANGES

As you can see by the plan, there are some odd angles in the room. There is ample space though, and some nice natural light brought in by a high square window. There isn’t much of a reason to reconfigure the fixture locations in the room. Thankfully the layout seems logical. Matt & Harmony did request that the large clawfoot tub be removed and replaced with a tiled shower. Though it is a really cool vintage touch, the shape of the tub means that it isn’t super functional to stand and shower in. I’m sure the historic fixture will find new life in another bathroom somewhere.

Another major change for the bathroom is the door. Currently the door swings in and hits the toilet. It makes sense to install a sliding barn door. Not only will it free up space in the room, it will look amazing!

FINISH INSPIRATION

Matt & Harmony shared with me some inspiration images of finish materials they want to see in the space, and let me tell you – they have GREAT style! They really did make my job very easy! I was able to source amazing items from various online retailers to create an inspiration board for an updated traditional bathroom that fits the time period of the house and the classic style of it’s owners. You can learn more about each product by clicking on the titles below.

VANITY: This piece is a great focal point for the room. Created using reclaimed lumber, it adds warmth and history.

FAUCET:Dark bronze with an antique look, this faucet complements the vanity well.

SUBWAY TILE: You really can’t go wrong with a simple white subway tile!

HEXAGON TILE: Another all white option, the hex tiles are the perfect choice to pay homage to the period of the home. They were all the rage in 1905!

PATTERNED TILE: The fun pattern adds a bit of whimsy to the room. I added it in the shower only, so as not to make the small room seem too busy.

SHOWER PARTITION: Ties in the other black and white elements in the room.

SHOWER FAUCET: Complete with a rain shower head and a hand held spray, this faucet system is versatile. It also has a matching finish to the sink faucet.

BOARD & BATTEN: A great traditional detail that adds charm to the room. The link will bring you to a tutorial on how to install DIY board & batten.

TOWEL RING: Providing a simple place to hang a hand towel near the sink

MIRROR: This thin trimmed mirror looks great with the other finishes in the room.

WALL SCONCE: An updated light fixture with vintage charm

DOOR HARDWARE: The sliding barn door will require some heavy duty hardware!

RUG: Fluffy white and just big enough for place to stand both at the sink and when getting out of the shower. The bonus is that it is washable and has a non-slip backing!

HAMPER:Large enough for dirty towels and clothes, but small enough to not overtake the small room. Comes with a lid and a liner.

WASTE BASKET: A small metal variety with a lid – fits perfectly in the small niche, under the shelving.

SHELVING: Adding a bit of industrial look to the space, these shelves dress up the niche.

SHOWER BENCH: A shower bench adds a lot of versatility to a shower, allowing even young children to shower safely. This bench is made to fold when not in use.

WORD ART: Fitting sentiments for a bathroom!

FLOWER CANVAS ART: These flowers add the perfect pop of color.

TOWEL HOOKS: One for each member of the family – lined up on one wall.

TOWELS: These colorful fluffy towels are sure to brighten up the room.

WALL PAINT COLOR: I think this light grey color from Behr, called ‘Cotton Grey’ provides the perfect backdrop.


AND NOW FOR THE BIG REVEAL!

Can you spot the differences? Quite a few changes, I would say. I think the virtual makeover gave the room a much more period appropriate style – and yet the room also has clean and contemporary lines, a fresh look.

More views of the virtually remodeled space

The 3d animation really shows the space changes well. Click on the play button for a virtual tour!


I hope that Matt and Harmony are able to incorporate some of these changes and that they invite Craig and I over to see it in person once they do! Working on their bathroom gave me a lot of fun ideas for our bathrooms at Arrow Hill. Maybe I will work on those next!

If you like what you see, and think a friend could get some inspiration from this bathroom virtual makeover, go ahead and use the buttons below to share this post. Spread the word about the free Makeover Takeover service while you’re at it.

Thanks friends!


SMALL BATHROOM REMODEL IDEAS: MAKEOVER TAKEOVER FOR BILL & VAL

As I mentioned in THIS POST – some fun new features were added during the website re-design, including the member only benefit that I am calling MAKEOVER TAKEOVER. Simply put, it is a FREE digital home design consultation, available to anyone who subscribes to this website.  Give me a few photos of a trouble space in your home, or an exterior that could use a little help, and I will offer a solution + inspiration through 3d images and sourced items.

FREE virtual design consultations. See what your home improvement project might look like before you even lift a hammer.

This post contains affiliate links to products for your convenience.  If you purchase via my links, I may receive a small commission at no additional cost to you.  Thanks for supporting Arrow Hill Cottage!

For the very first Makeover Takeover installation, the pilot project if you will, my own parents offered up their basement bathroom. Located in the same home I grew up in, this bathroom is obviously a room that I am familiar with. I know its strengths (linen storage + great ventilation) and weaknesses (lack of counter space and cramped shower stall). As teenagers, my two sisters and I would fight for our turn at the sink and use of the tiny mirror that hung over it.

My parents are no strangers to DIY projects – they aren’t afraid to get their hands dirty. There have been some minor updates to the room over the years. New paint. Different flooring. But a major bathroom remodel, which has been discussed and daydreamed about for quite a while, has taken the back seat to other more important home improvement items.

This is how the room looks today – (photo taken from the door looking in)

It is actually quite a spacious room, at 9′-0″ long by 6′-4″ wide; But the awkward layout of fixtures and the inclusion of the large linen closet (which is ‘mostly’empty) visually squeezes the space, making it seem smaller. On their wish list, my parents requested a larger vanity, jetted tub, and convenient storage.


PROPOSED PLAN CHANGES

Step 1: Demo the closet – opening up the floor plan. Step 2: Move the position of the toilet. Though this will require some extra plumbing work, it should not be too costly and would greatly improve the function of the room. Step 3: Remove the shower stall to make way for a large jetted tub. Step 4: Replace the existing small vanity with a larger, more up to date model.

FINISH INSPIRATION

I sourced some really amazing finds to create an inspiration board for the space. My goal was to make the bathroom feel like a relaxing retreat – a place to go to unwind at the end of a busy day. You can learn more about each product by clicking on the titles below.

Modern + Beachy Bathroom makeover. This small bathroom virtual makeover will give you plenty of ideas for your own small bath remodel. Links to each and every product in the inspiration board!

1. JETTED TUB : Who wouldn’t love to soak at the end of the day in one of these?

2. VANITY: By re-arranging fixtures, I was able to place a 3 foot vanity – a full foot longer than the previous one. I think the open bottomed vanity, which looks like a piece of furniture, helps to keep the room feeling open and uncluttered.

3. LINEN CABINET: Ok, really – how cute is this?  I love the style, the shape, the color.  Love, love, love! Includes plenty of storage space, both in drawers and shelving. It’s technically an entertainment cabinet – shhhh!

4. VANITY LIGHT FIXTURE: Simple, sleek, and polished.

5. FLOOR & WALL TILES: I chose to keep the field tile a light neutral color because it covers such a large area. It provides a nice basic backdrop to all the other fun pieces in the room.

7. ACCENT TILES: Pretty with a bit of iridescence. This blend is called ‘Lake Illumini’ – quite fitting!

8. BORDER TILES: This bronze border pulls colors out of each of the main tiles, and is really complimentary.

9. WALL ART: Just looking at this art can transform your mind to a more relaxing place.

10. RUG: The colors of this rug are beautifully muted, adding the perfect accent without stealing the show.

11. LARGE BASKET: The generous size of this basket serves as a great place to store rolled towels.

12: BATHROOM ACCESSORIES:With a bamboo finish, these accessories really fit the theme, and the price is great too!

13. TOWEL BAR: Another chrome accessory to tie with the light fixture.

14: SHOWER CURTAIN: A simple grey color helps to pull the wall color throughout the room. The fabric adds some much needed texture to the space.

15. WALL PAINT COLOR: The color name says it all.  Sea Salt.


AND NOW FOR THE BIG REVEAL!

Looking at the Before and After side by side you can easily see the changes.

A few more images of the proposed space:

I also put together a fun little video, which I think probably shows the room better than still images can – like a virtual tour!

I’m happy to report that my parents are excited about the ideas I laid out for their bathroom. If they decide to go ahead with the project, I will get to enjoy this space in real life – super pumped about that prospect!

NOW IT’S YOUR TURN

Do you have a home project you are struggling with? Do you want an extra set of eyes to take a look? I’m here to help. Simply subscribe to this blog – then email me at angela@arrowhillcottage.com with a few pictures and a description of the problem you are having, and your wish list of how you would like it to function and/or look.  If your project is chosen for a digital makeover, I will contact you via email and ask for additional information such as dimensions and more insight into your personal design preferences.  My goal is to have at least one Makeover Takeover per month.

Go ahead and use the share buttons below to show others this amazing bathroom transformation.  Or if you know someone else who could use this free service, make sure you get them the information on how to sign up!