UNDERSTANDING WHAT MAKES HOME ‘YOURS’

We are in waiting mode, as three local contractors are pouring over our house plans in an effort to get us accurate bid numbers. They have seen plenty of house designs in their day – and no two exactly alike I’m sure.

There were some questions when we had our meetings with the contractors – and some comments made by friends and family, regarding the design choices we have made that make our home what it is. And I have been thinking a lot lately about how tailor fit this house is for OUR family.

I just wanted to take a little time today to encourage each of you to understand the home that YOU want to live in. What works for you and your family may not be the norm. It might not be what the real estate market expects, or trending on Pinterest. And guess what? That’s okay!


This is a list of a few of the unconventional features that have been incorporated into our new house design, and why we are happy with our choices:


LACK OF SQUARE FOOTAGE:

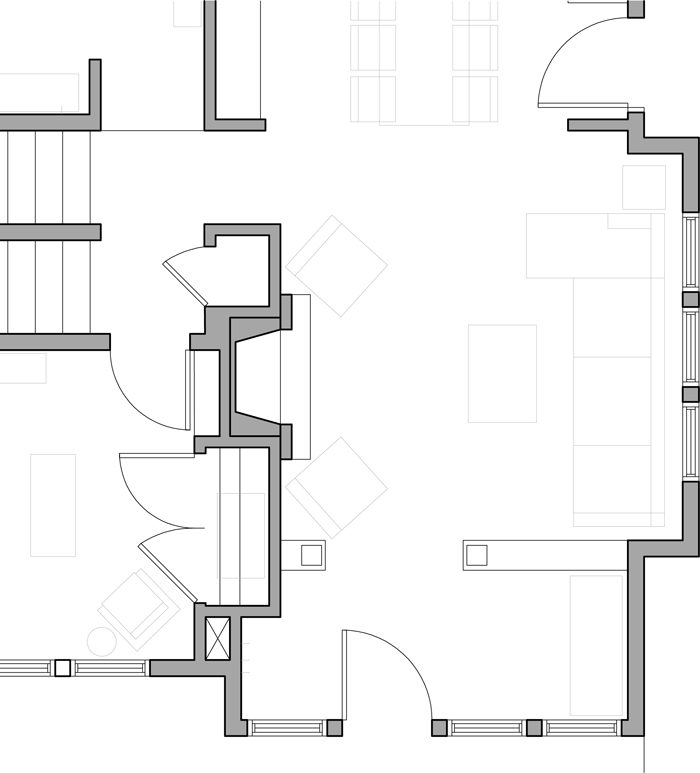
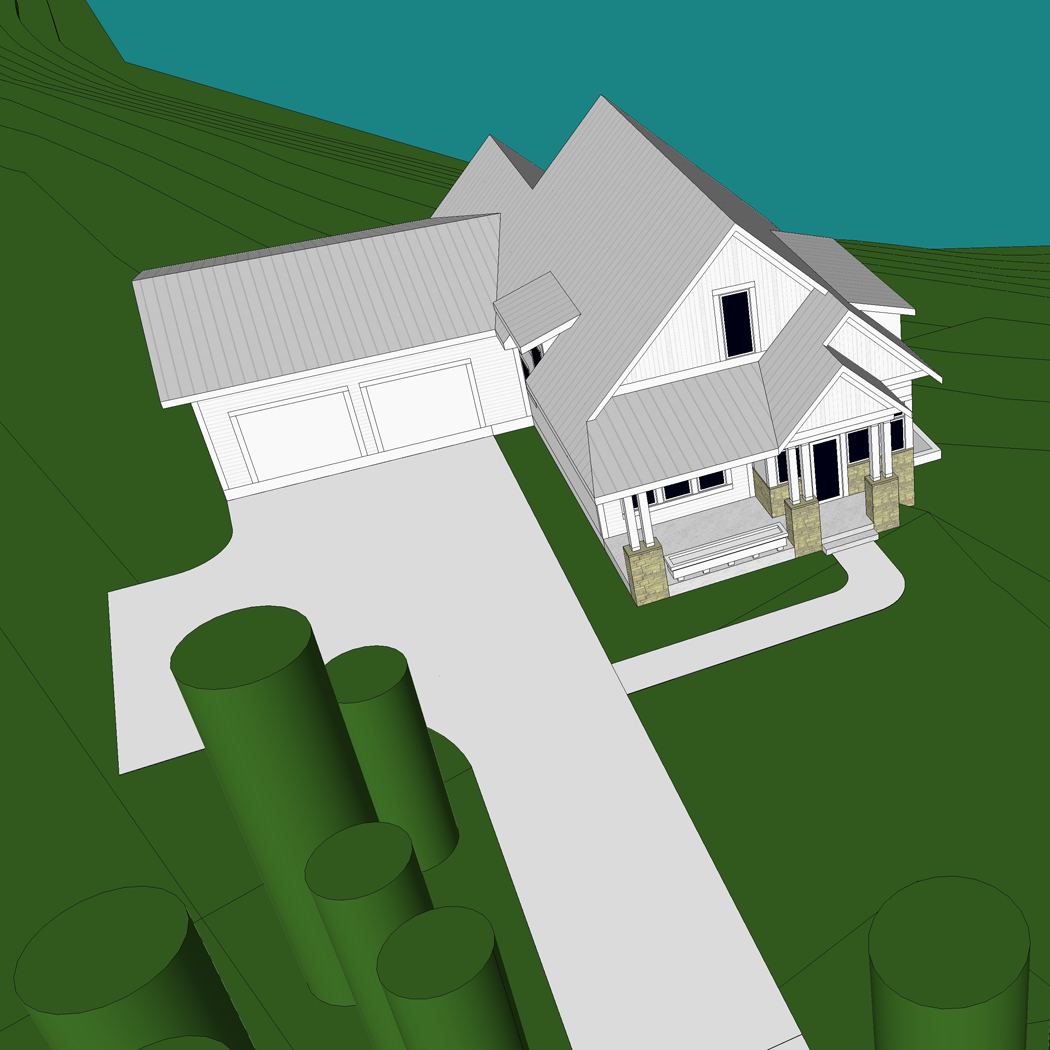
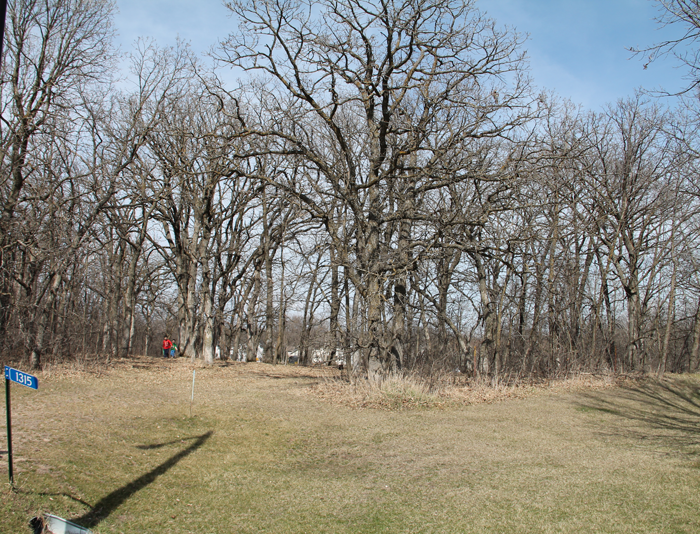
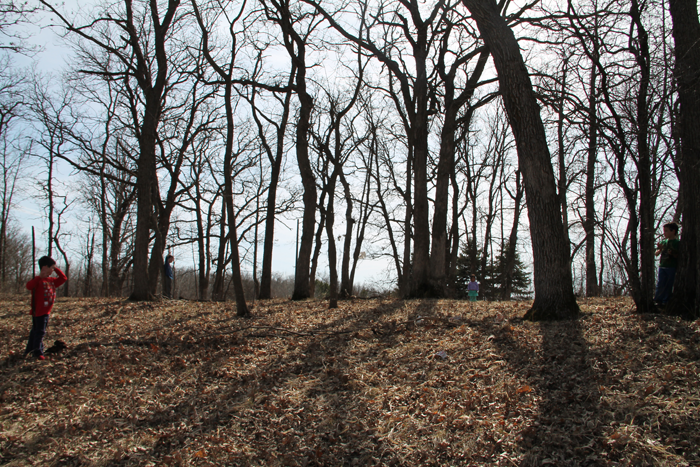
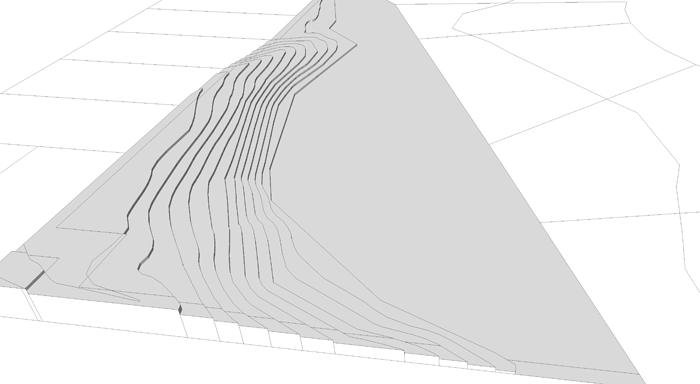
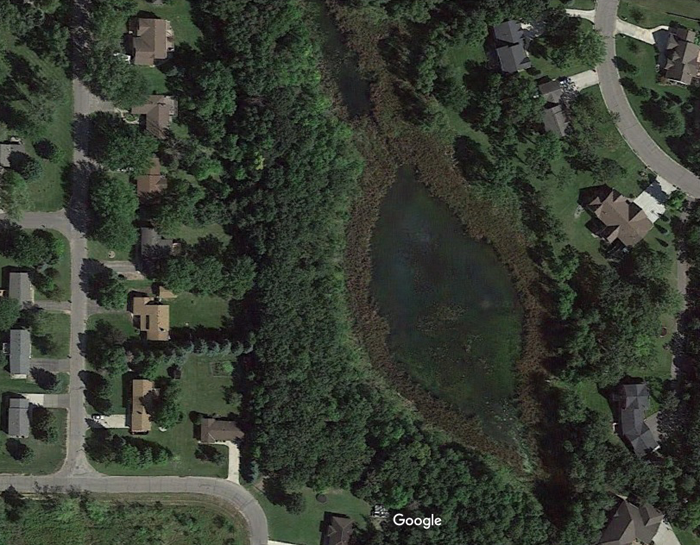
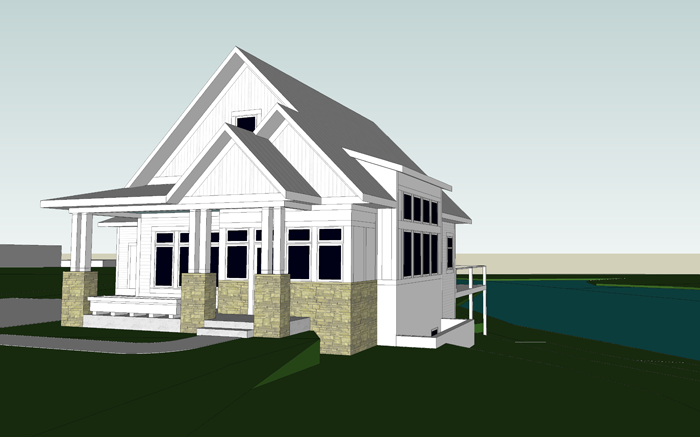
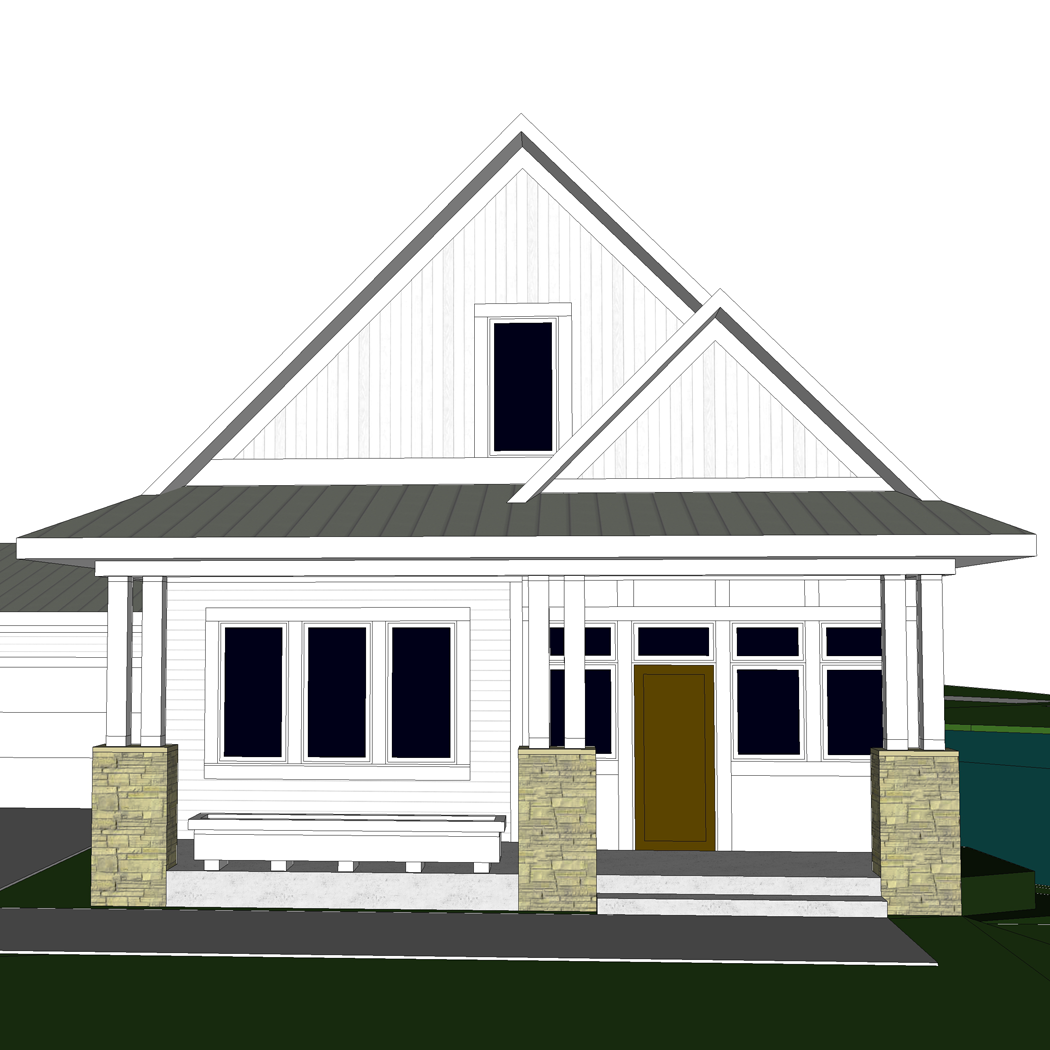
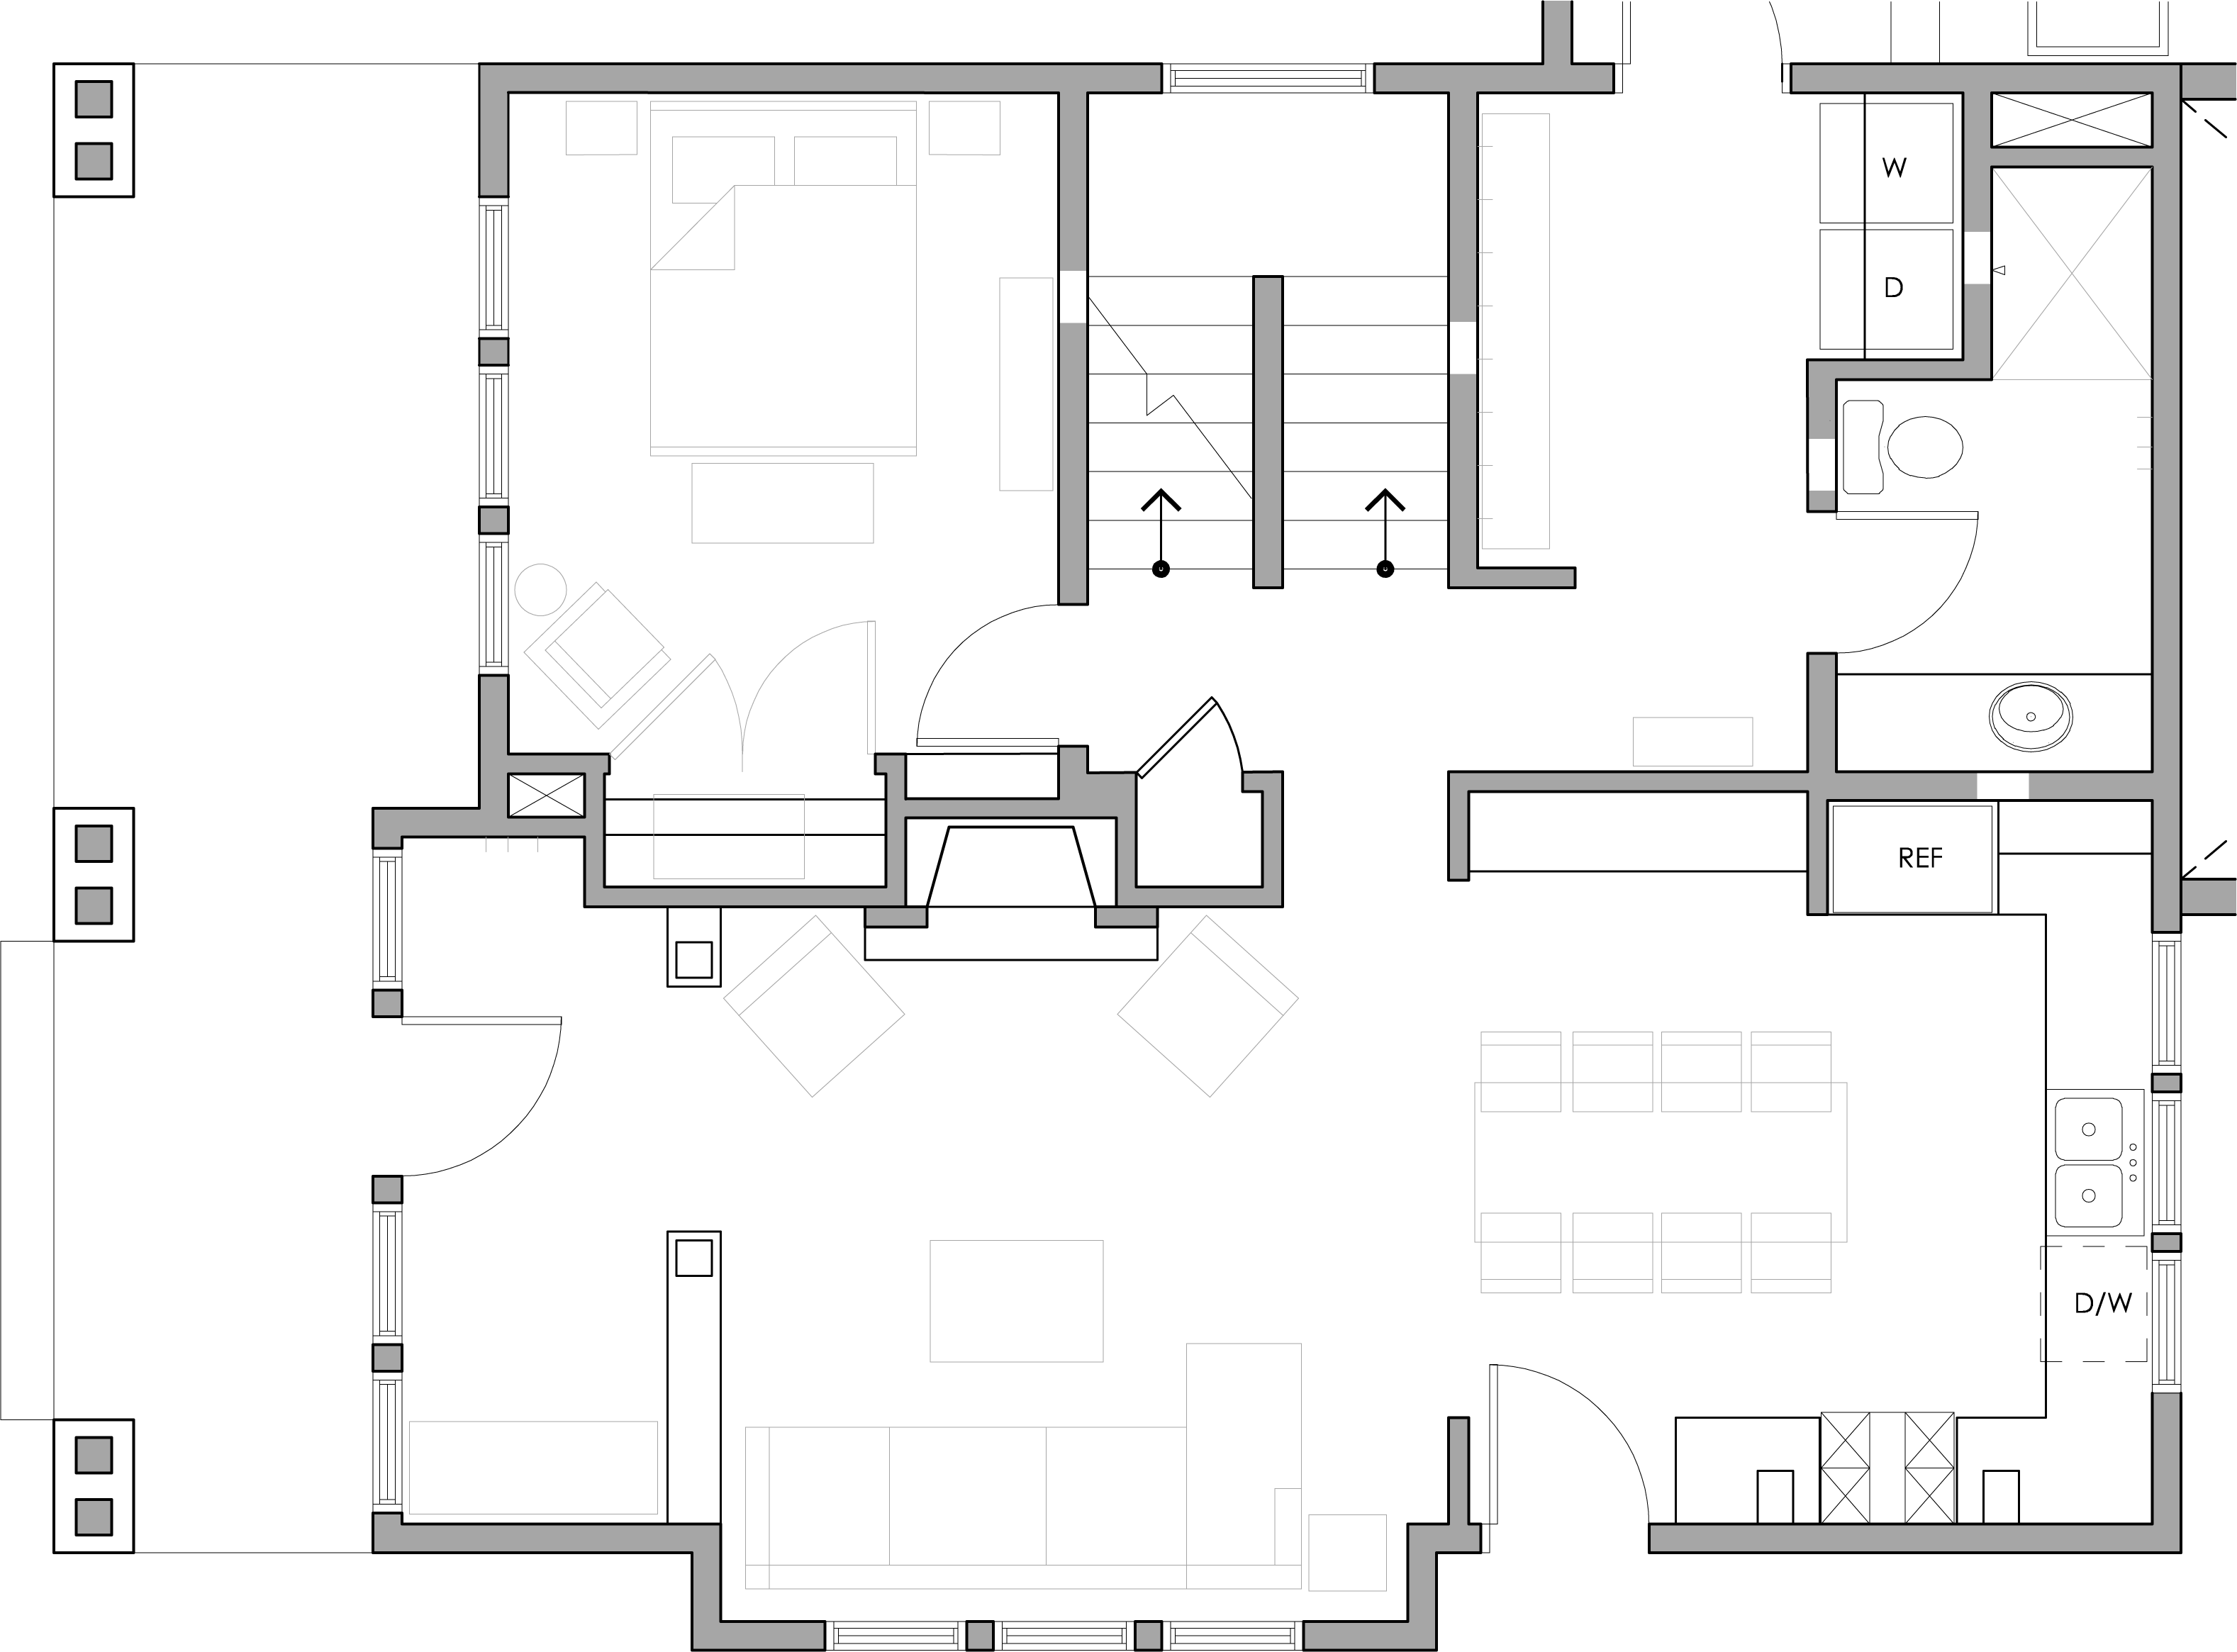
We understand that our house is on the small side. The primary dimensions of our house are 28 feet by 32 feet, making a rectangular footprint about the size of a standard two car garage. The smaller footprint was a function of both our challenging site, and also for monetary purposes.

We have said all along that we do not wish to live in a large house; but rather one that can accommodate today’s needs while we raise our five children, and won’t seem too spacious when they are all grown and gone. All told, the finished square footage of the cottage, including lower level and upstairs half-story, will be just over 2,000 square feet.


NO MASTER SUITE:

Most newly built homes feature a main level bedroom, complete with a large walk in closet and attached on-suite bathroom. Though our cottage will indeed have a main floor bedroom, so that we can age in place, the room will not have the features to make it a ‘suite’.

We have instead opted to have a large shared bathroom on the main level, near the mudroom/ back entry. It is only a short, accessible, distance from the bedroom; But it’s location through a public shared space will make it convenient for guests as well.

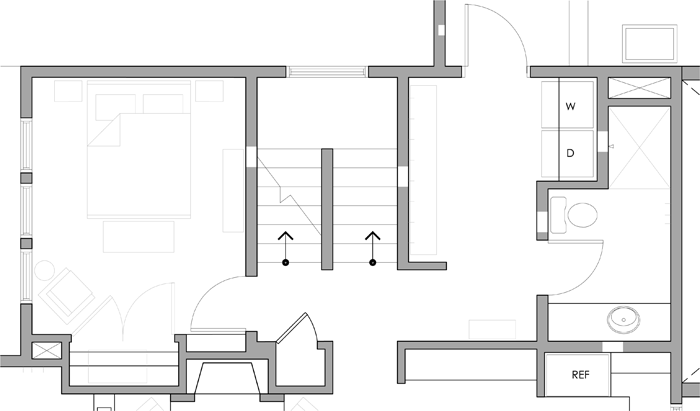
The closet for the main level bedroom is large – about 5 feet in length – but it is not a walk in style. We have justified the smaller closet space by realizing that we try not to keep items that are not useful to us. In fact, the only other closet on the main level is a small broom closet near the bedroom door.


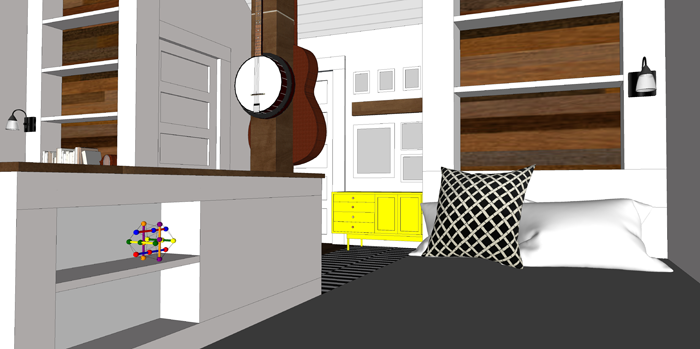
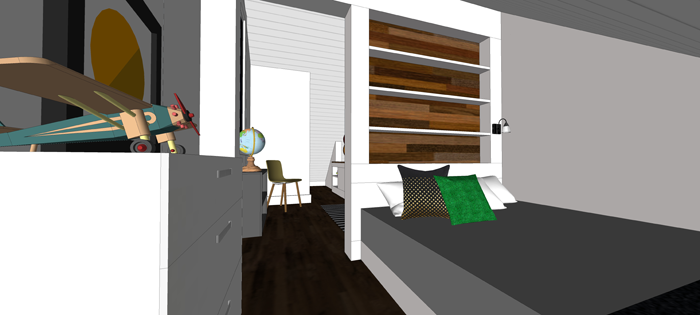
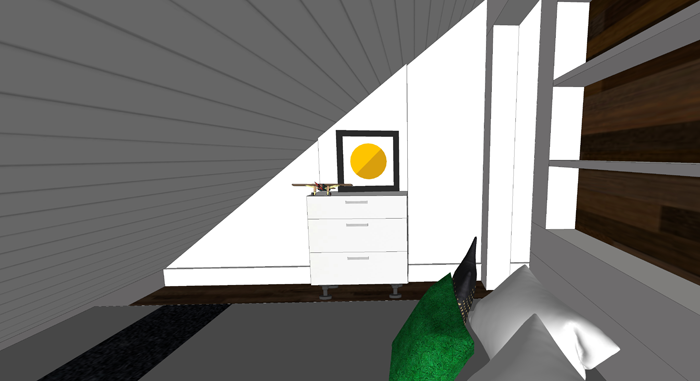
SHARED KID BEDROOMS:

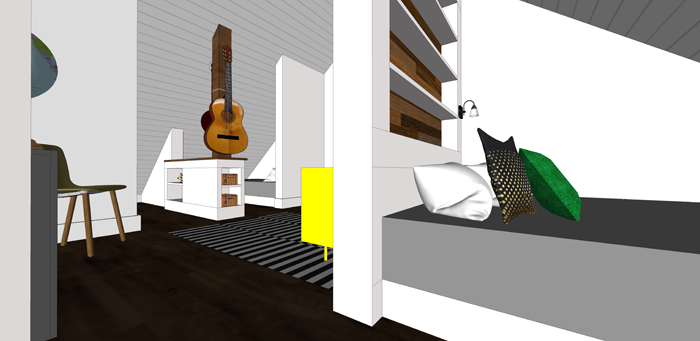
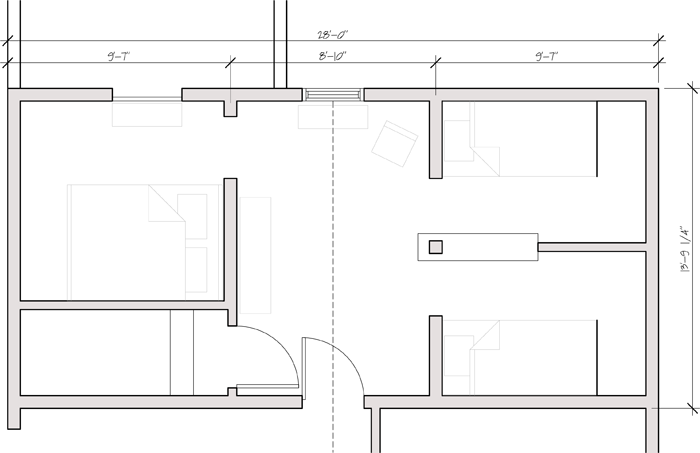
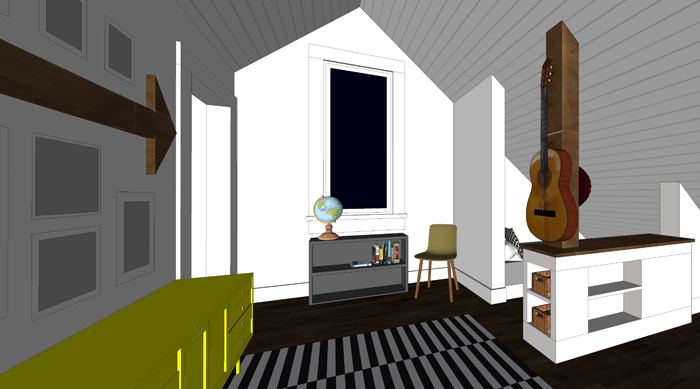
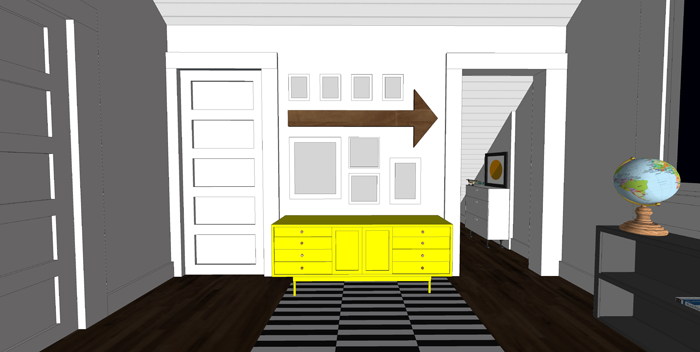
This design item seems to get a lot of attention. The idea that we can fit five children into two bedrooms gets a few raised eyebrows. For us though, it is the perfect set up. The kids will have the entire second level, which simply features two bedrooms (one for the girls, and one for the boys), and a hall bathroom to serve both rooms.

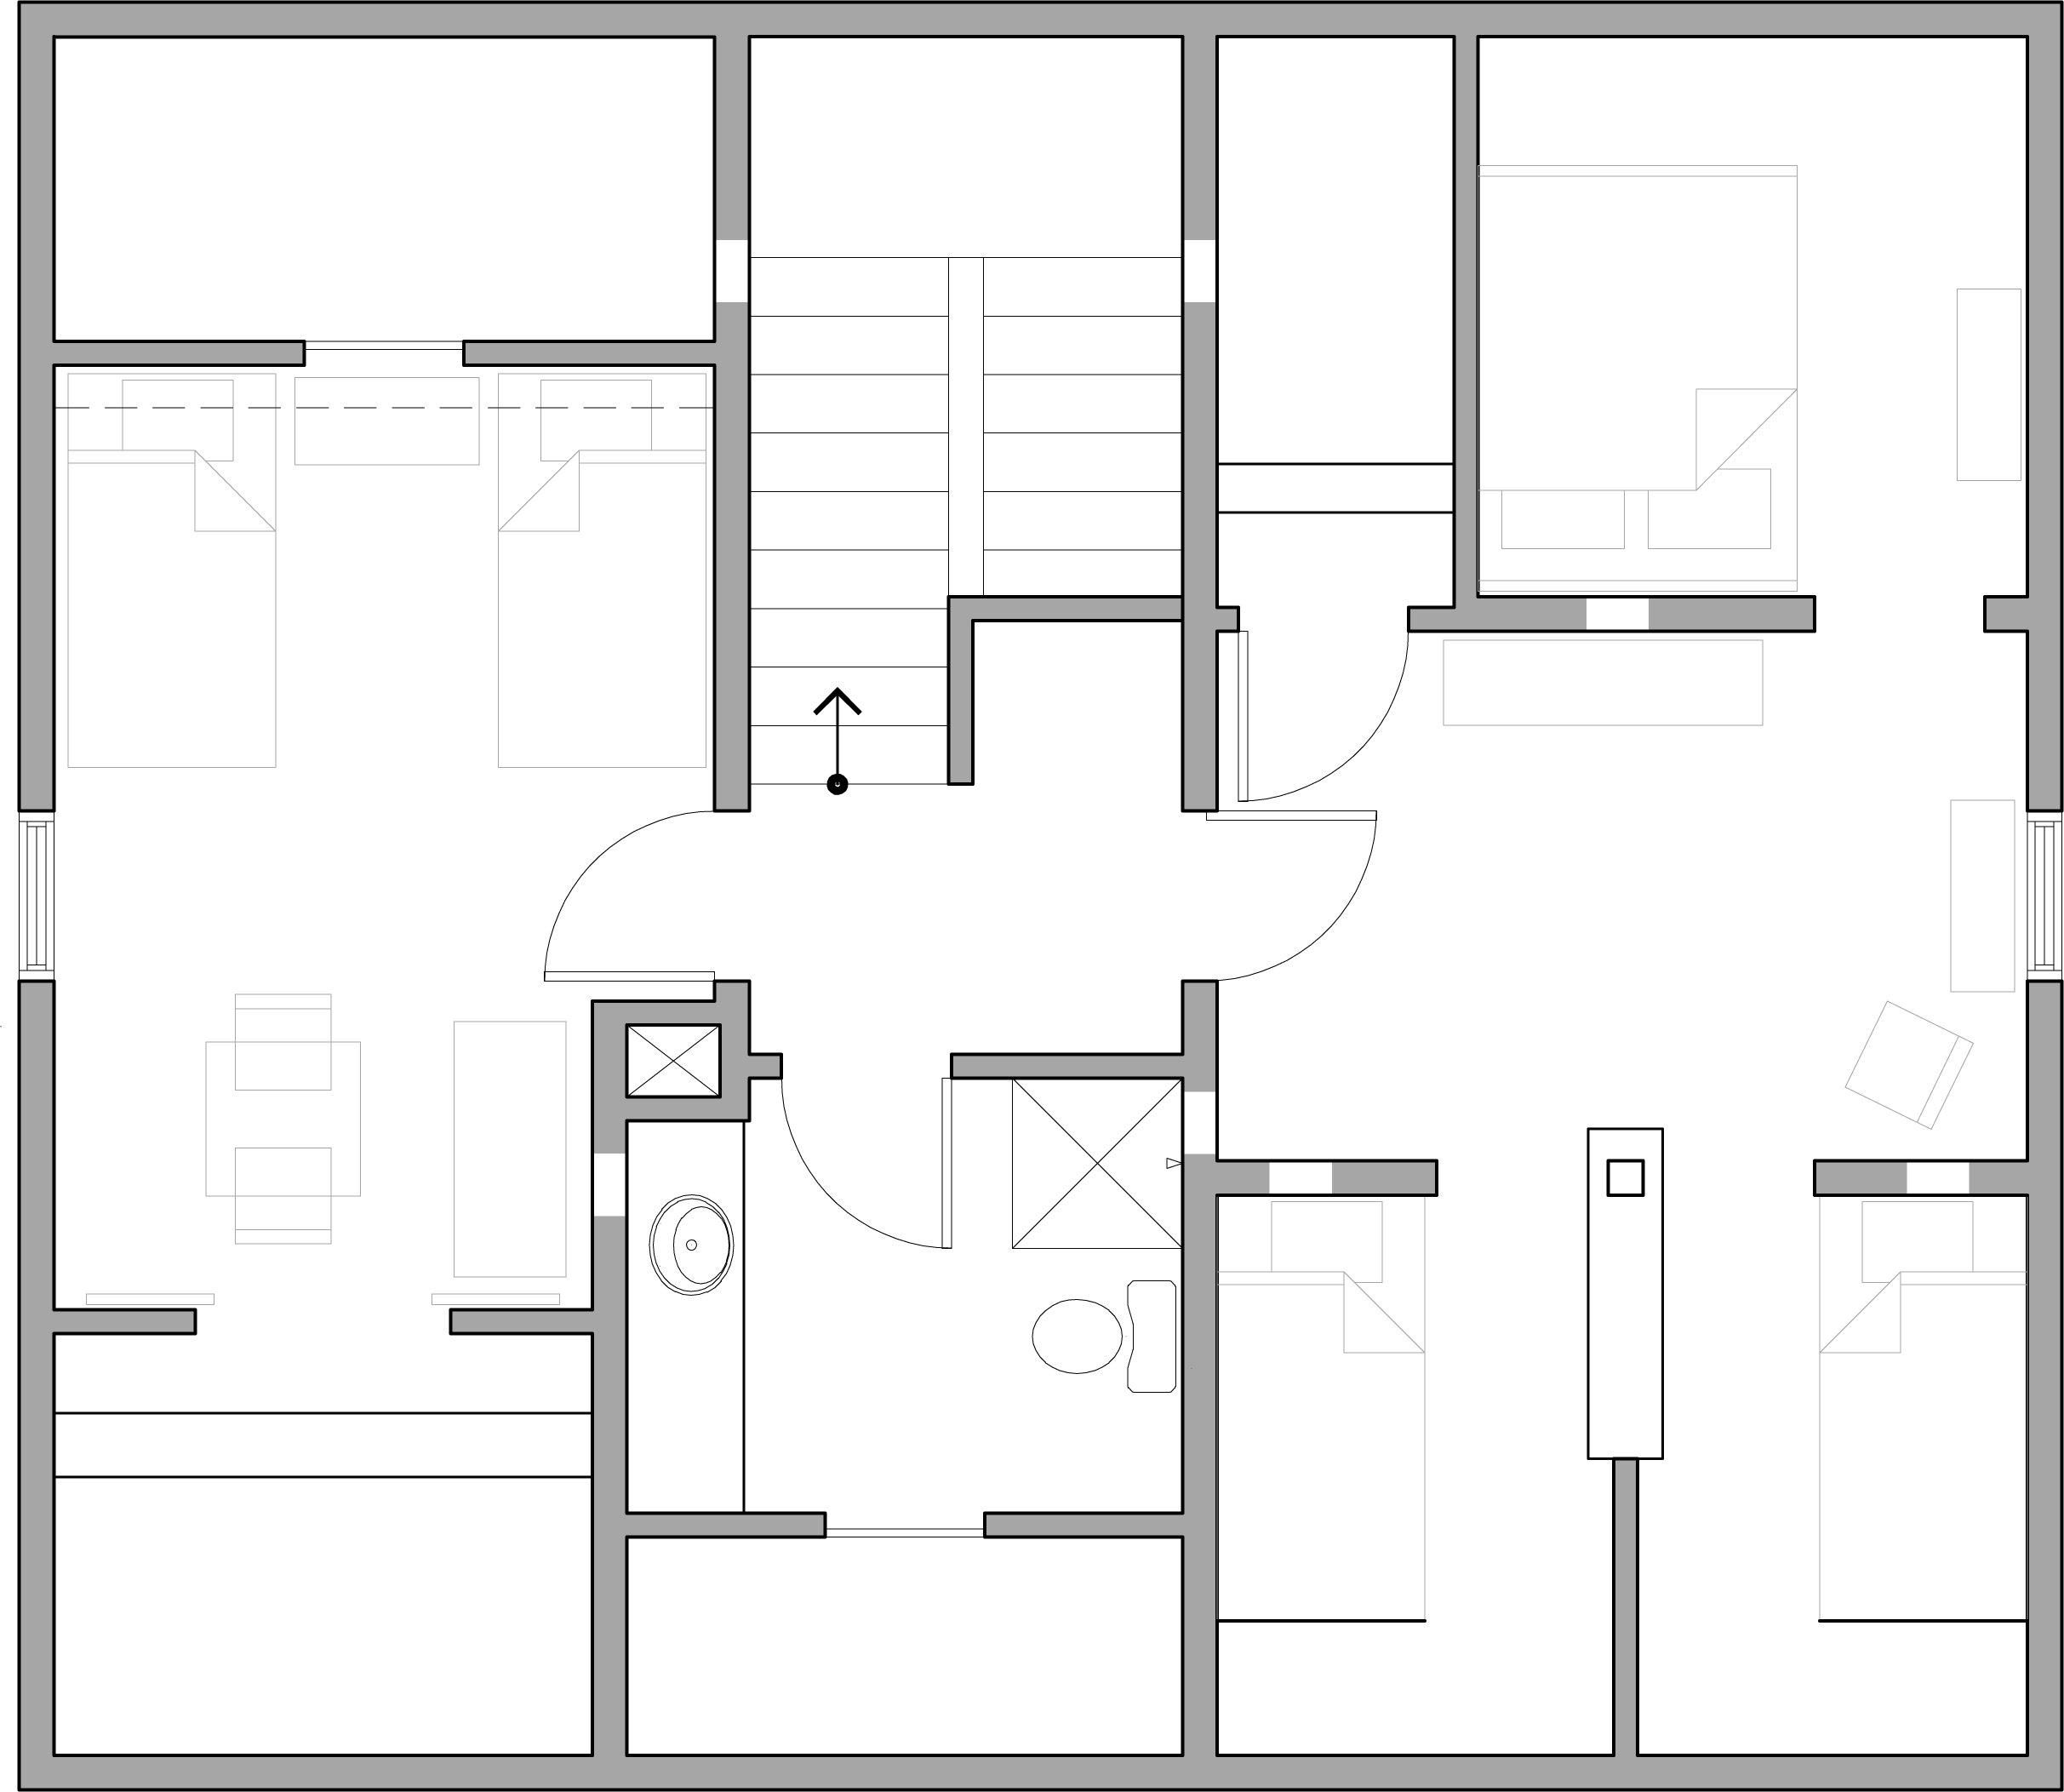
To be honest, our kids have always shared bedrooms and I think they would be a bit lost having a room all to themselves. We do, however, anticipate that as the teen years approach (our oldest son is 11) – they will want more privacy. The sleeping nooks in the boys room will aide in that regard – while still keeping them close.

Fewer bedrooms mean less nagging from mom and dad to get the rooms in order, and hopefully will develop some shared responsibility among the siblings to do their part in keeping things clean.


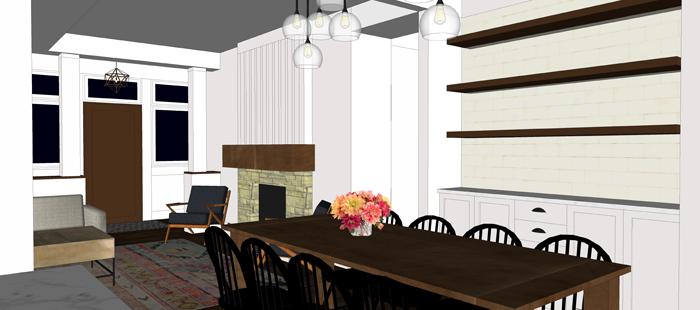
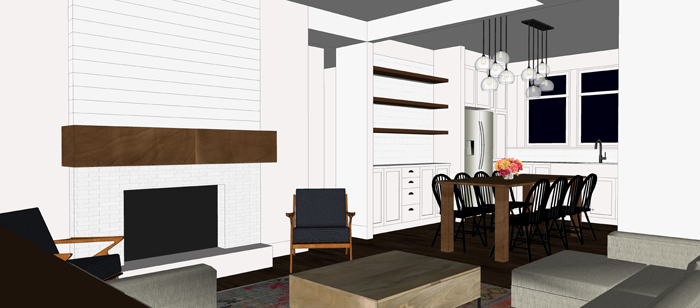
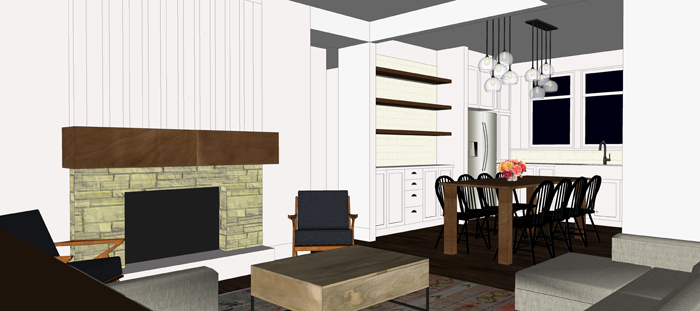
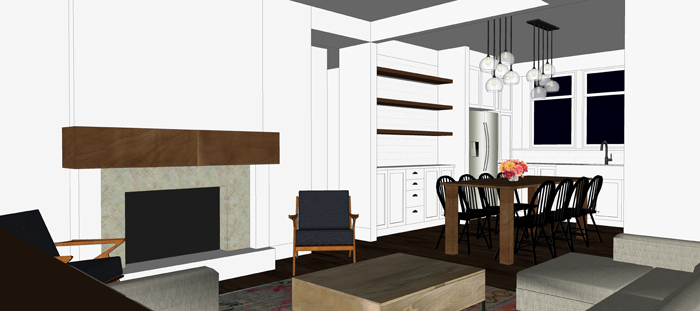
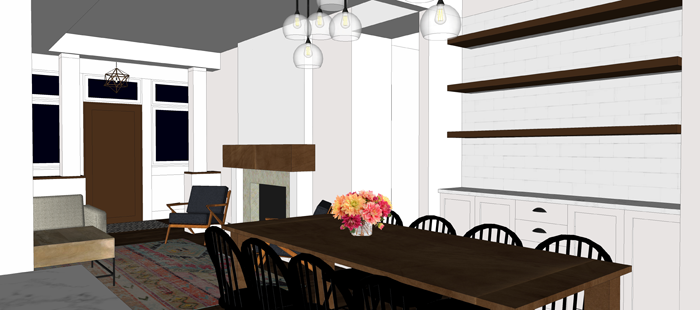
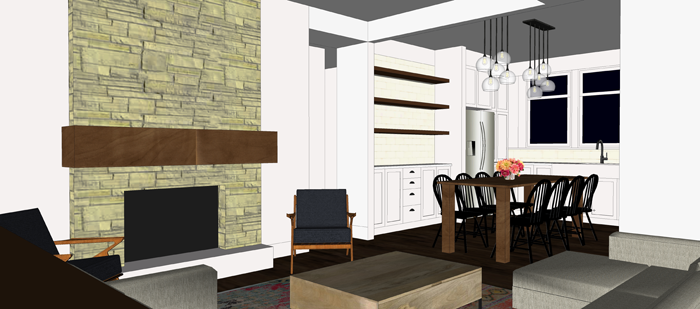
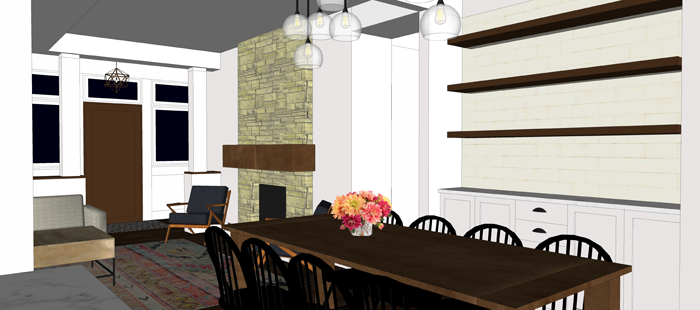
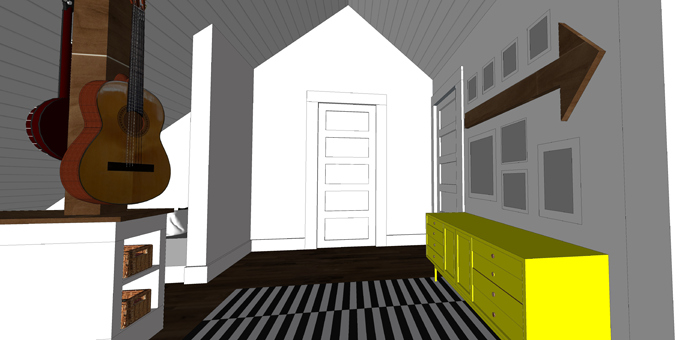
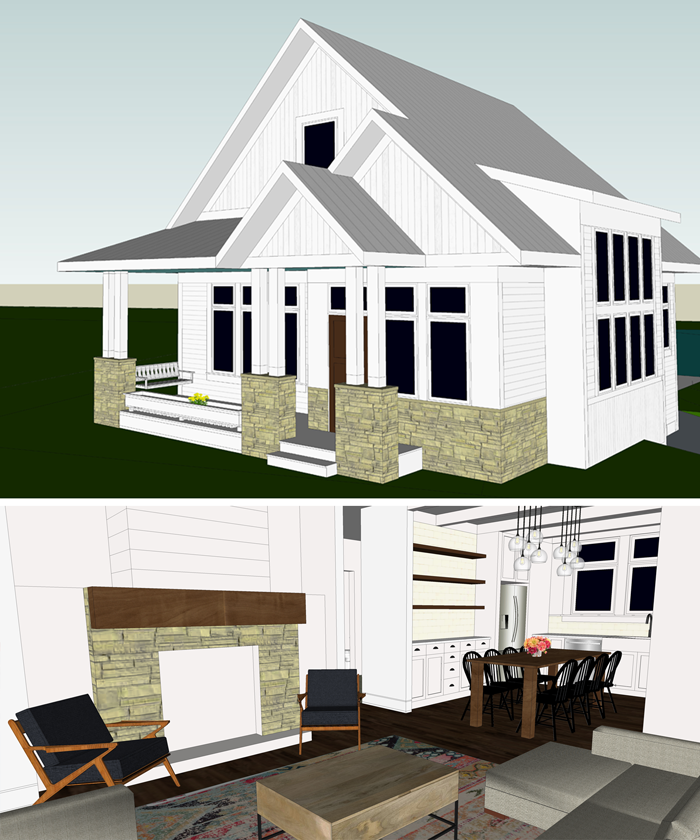
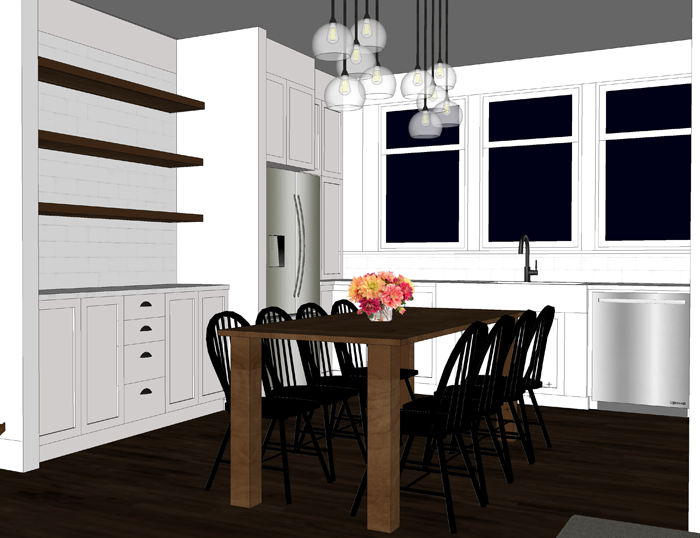
COMBINED KITCHEN/DINING:

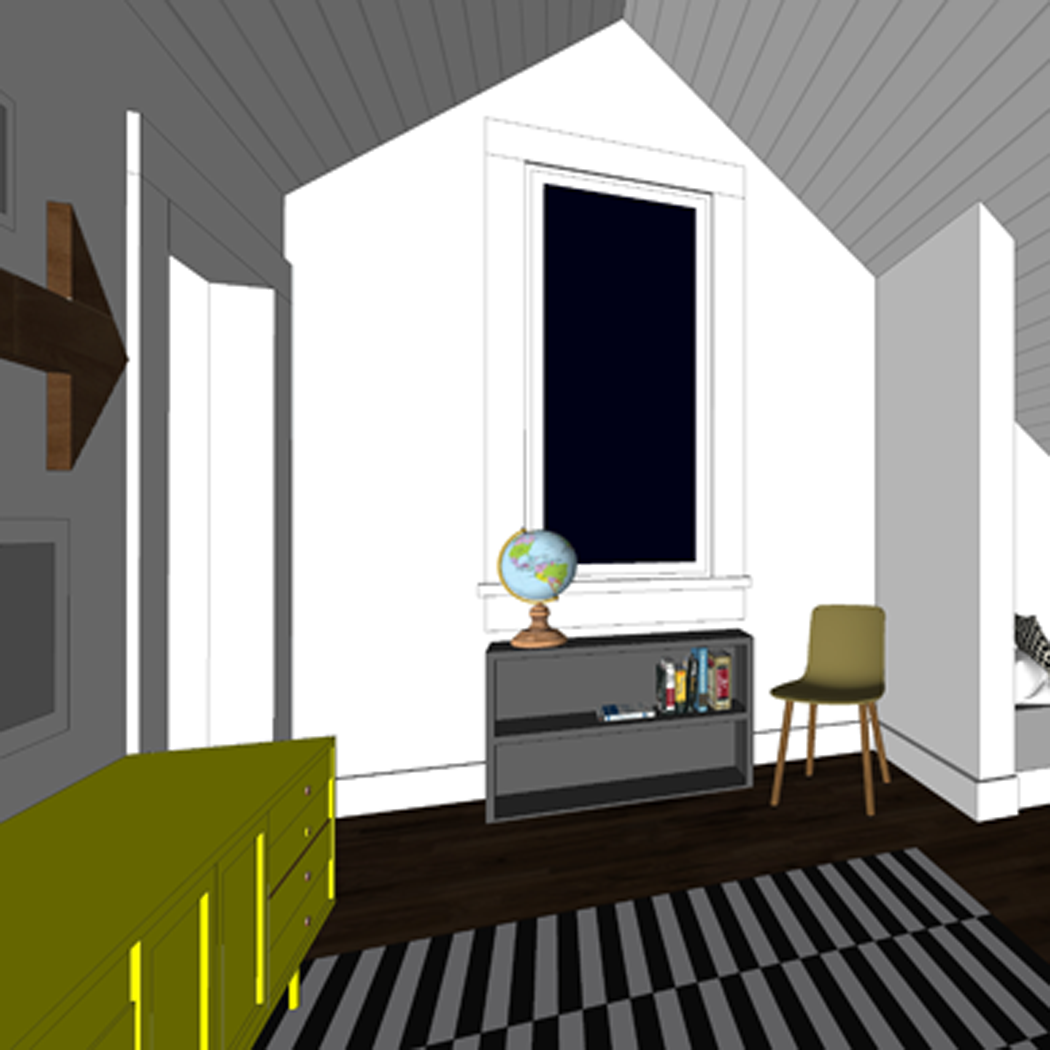
While this design decision was driven primarily by the budget, during the simplification process, I have to admit that I am actually looking forward to the combined kitchen and dining space. The table, though standard height, will serve somewhat as an island if need-be.

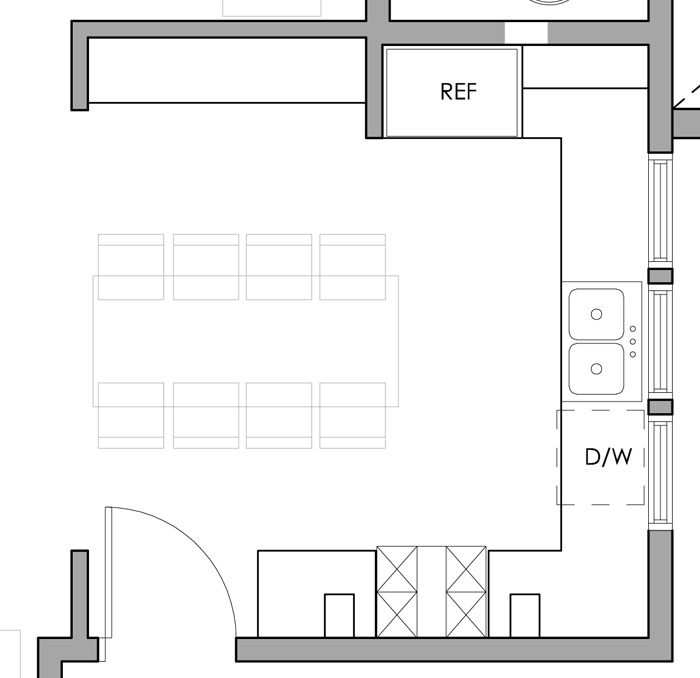
I have been tinkering with the plan, and was careful to maintain a functional kitchen work triangle – with the table slightly offset from it. The large area of open shelving, with shallow cabinets below, almost mimics a hutch – which signifies a ‘dining’ space ever so slightly


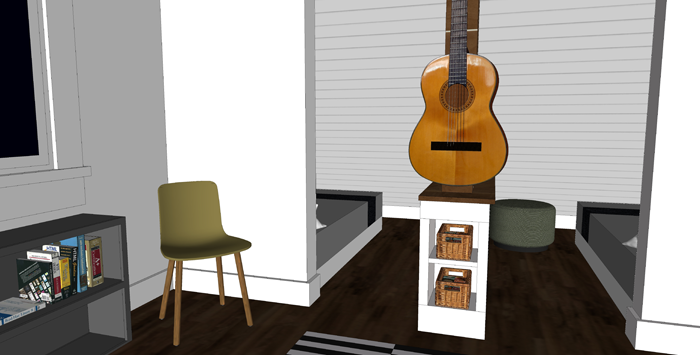
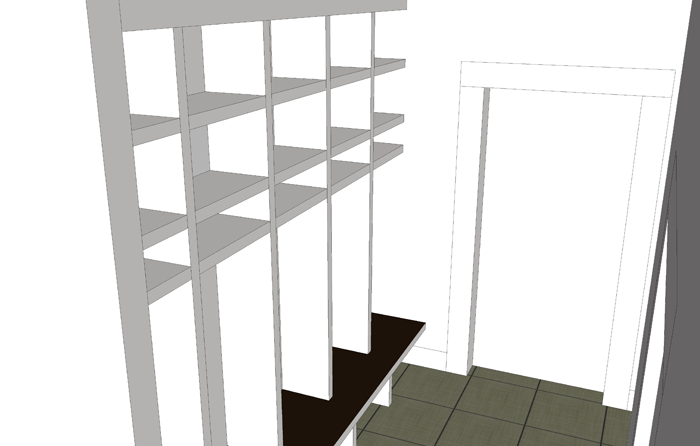
RELATIVELY LITTLE STORAGE:

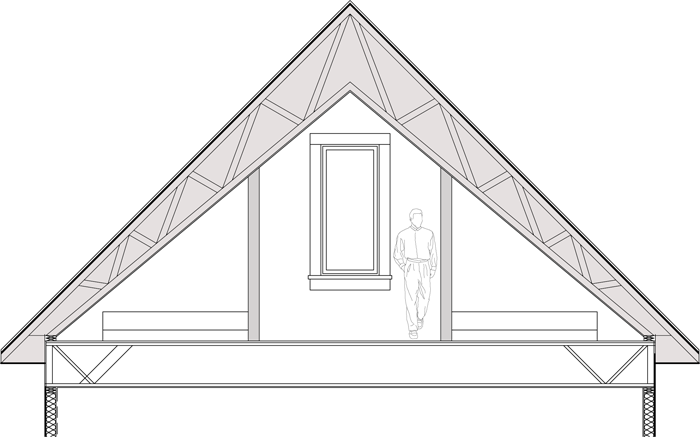
Because we know that, for us, items stored behind doors rarely get used, we have opted to have very few storage/closet spaces in the cottage. There is one small broom closet incorporated in the plans for the main level, but no coat closets. Instead we will use cubbies or hooks in the mudroom to house our outerwear. Upstairs, each bedroom will have a closet, and there are a couple of small unfinished storage areas in the eaves which will be useful for Christmas decor and other seasonal items.

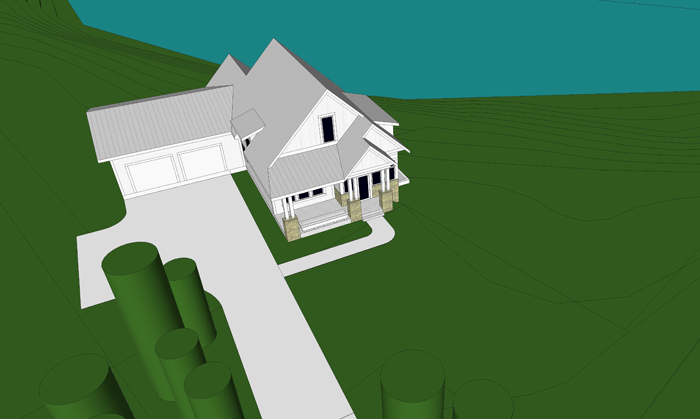
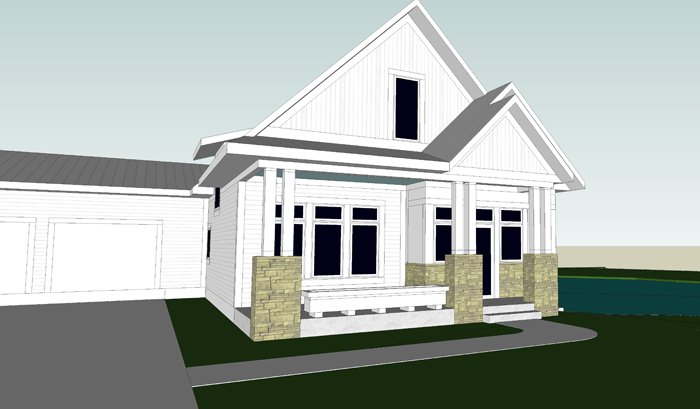
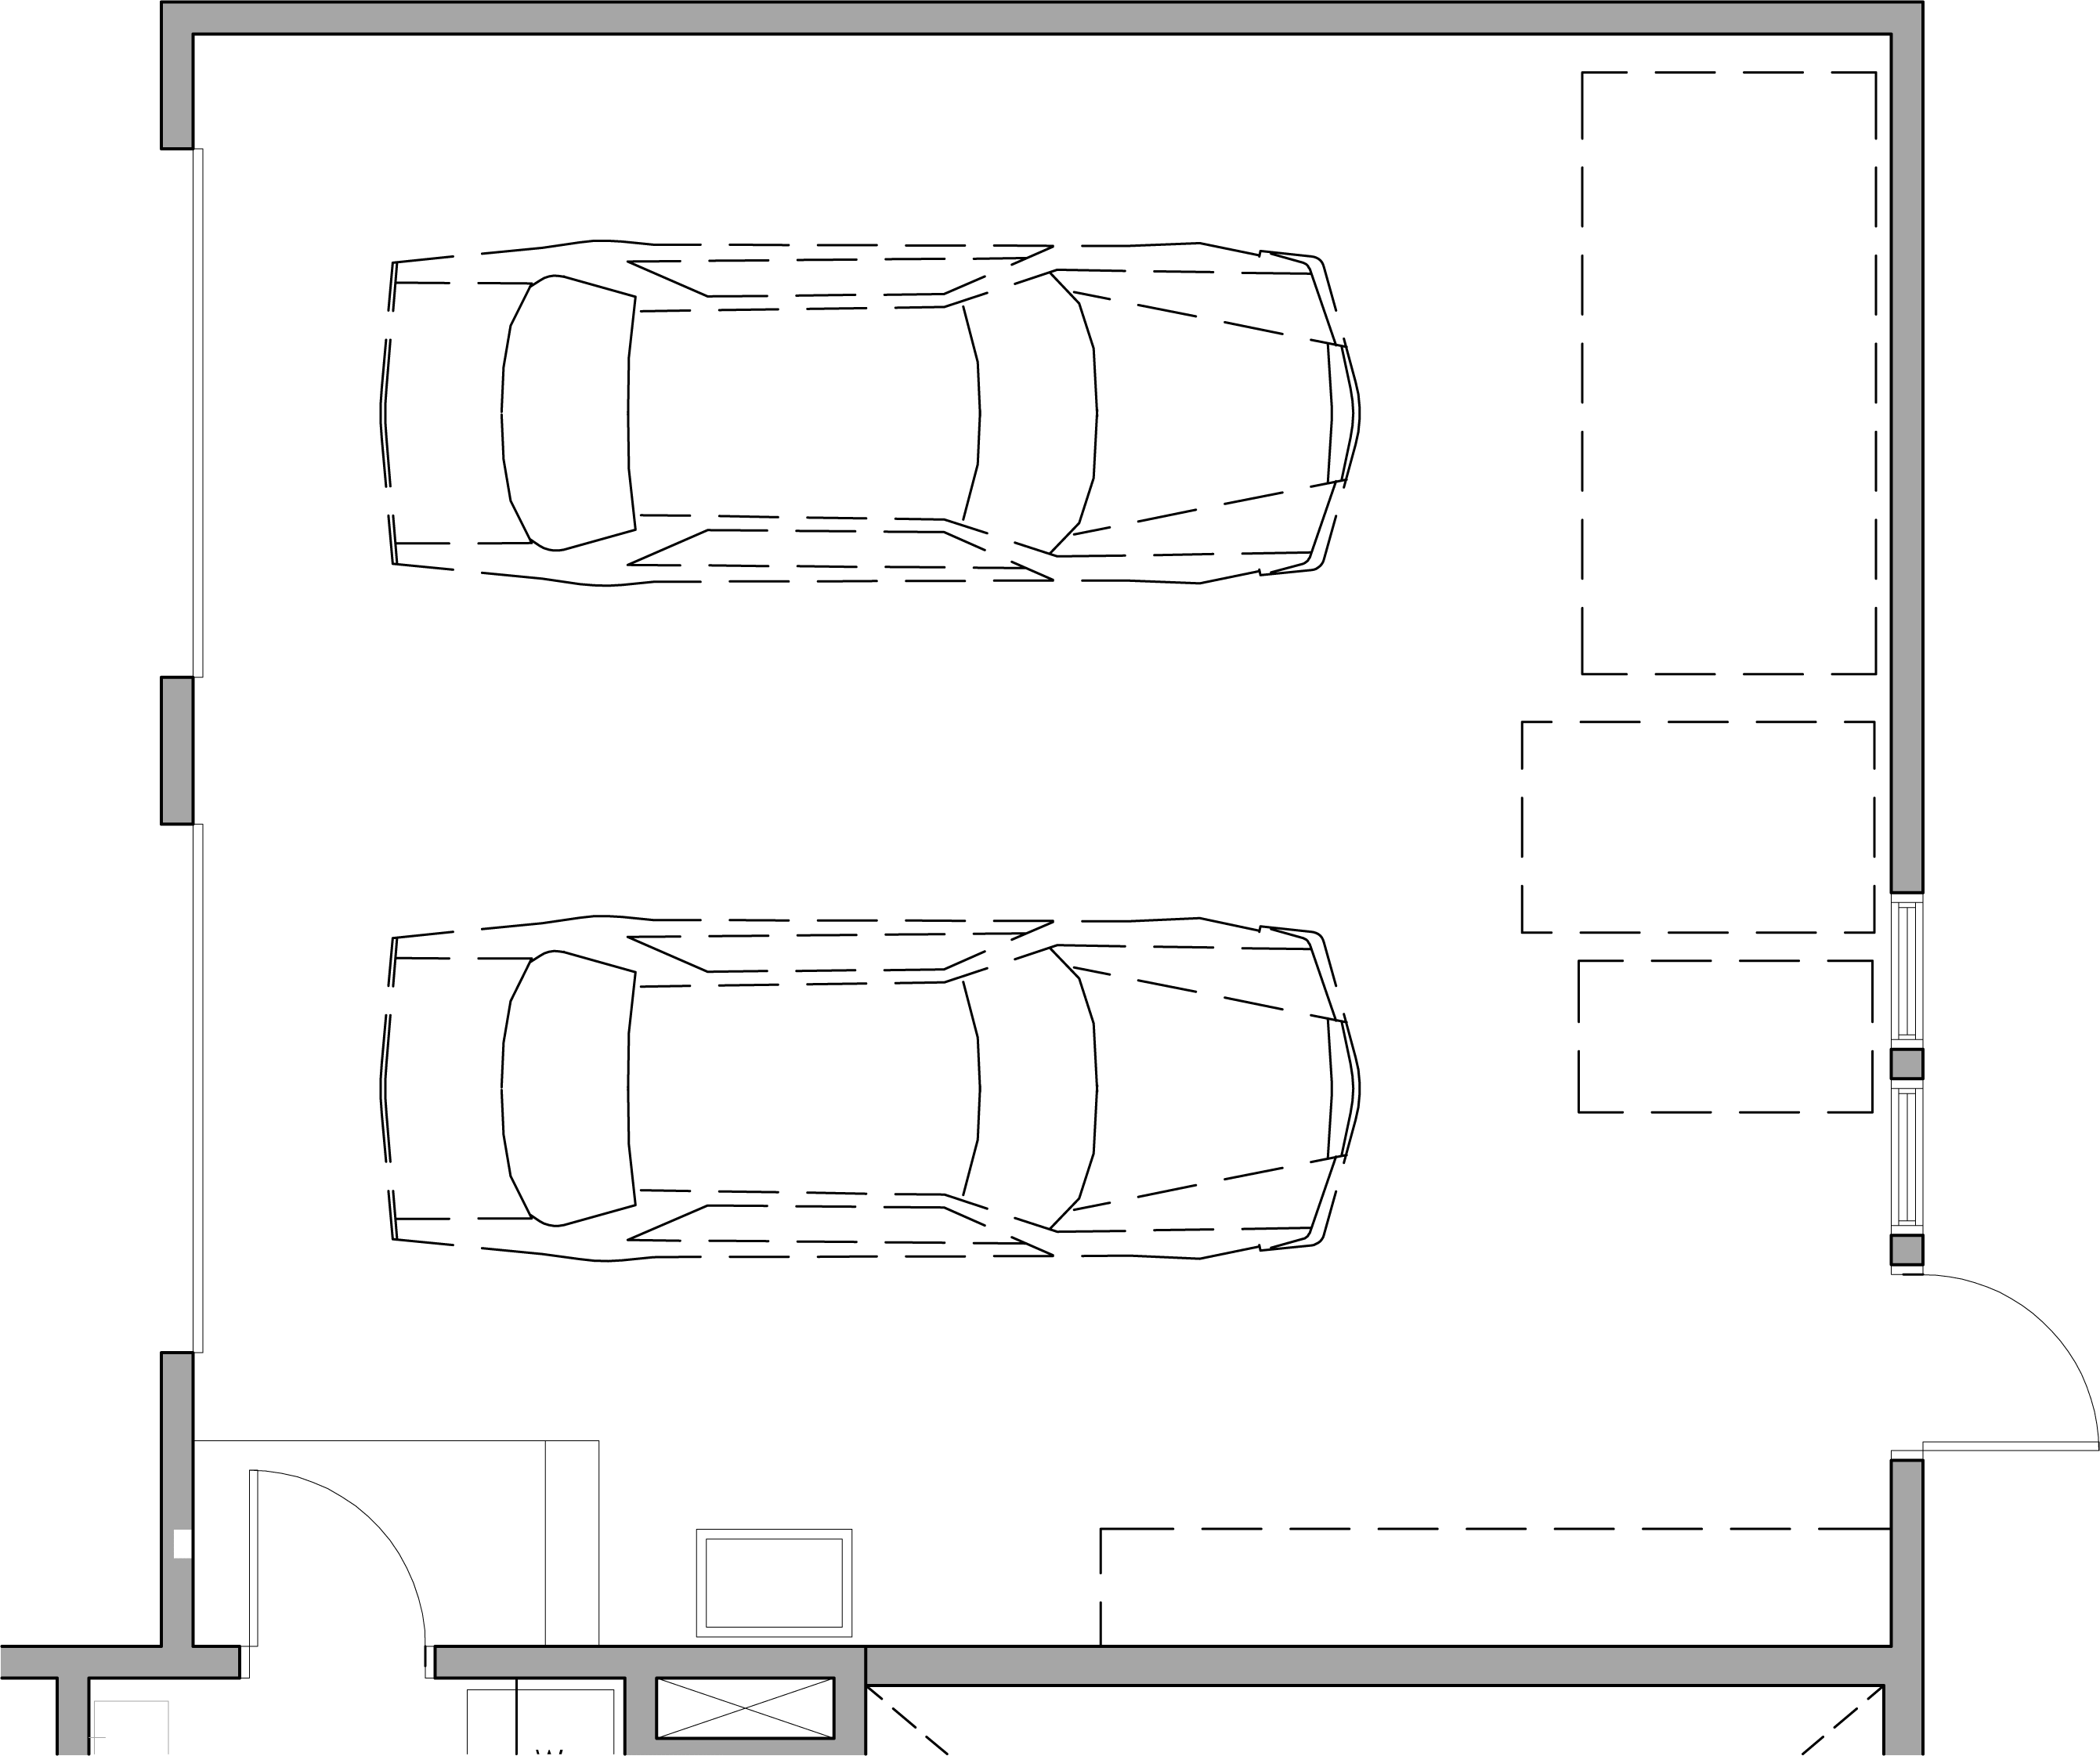
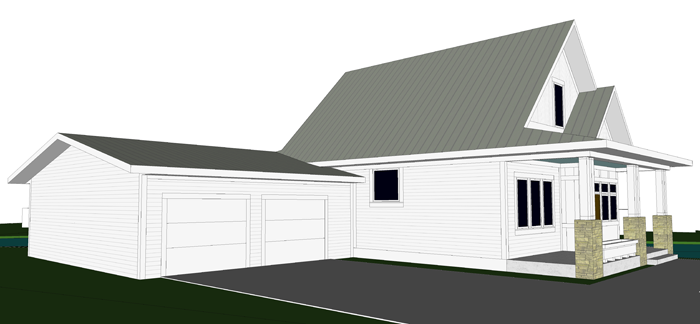
It is standard to build three stall garages for new homes. Most families now have two vehicles, and will use the third stall for either an accessory item such as a boat/ ATV, or as storage space. Though we have been told that garage square footage is cheap and we should consider making ours larger – perhaps with a bonus space above – we have decided that a two car garage will be just fine for our needs. We are hoping that by setting the garage back from the house and making it only one story, it’s appearance will be minimized from the curb view. The fact that the garage will be attached is a huge bonus for our family, as we have never owned a home with that luxury. It will especially be appreciated during the cold winter months!


There you have it! Though these design choices may not be popular in today’s market – we aren’t looking to ever sell our house (instead hoping it will passed down through the generations) – and so feel no hesitation in making these changes that will allow the cottage to function in the best way possible for our family.

What makes your home personal? A unique shade of color on your walls? No formal entry space? Mix-matched cabinetry? I would love to hear, in the comments below!


AROUND HERE: APRIL 2018

Around here we have been…


REMINISCING on an entire year with {K}. We met in China in April 2017, and spent two weeks in country before returning home. It is really hard to believe that we have had a full year of adventures with this sweet girl already!

{K} home one full year!


Days after meeting {K} in China – April 2017


Throughout the year, Angela has interviewed {K} – asking her about her favorite things. It is amazing to look back on these videos and realize how much easier it is for her to communicate with us now. Her looks have changed quite a bit also! If you are interested in the videos you can see them here: 4 months home, 9 months home, and 1 year home.

Easter, April 1st, was the very last holiday that we had yet to spend as a complete family of 7. We had a wonderful celebration.


WATCHING the snow melt. Spring weather has finally reached the Midwest! Though the last snowstorm created a muddy mess of things, we couldn’t be more excited to be outside after such a long, cold winter.


RELAXING on our days off. With the warmer weather of Spring, the after school activities and sport camps are beginning to fill the calendar. The days we have to just snuggle up at home are precious. The kids always seem to find new and fun ideas to explore.


CELEBRATING Craig as he retires from the Fire Department. He has been a volunteer fire fighter for eleven years. We are so proud of him for the selfless sacrifice that he has made through those years. He finished off his duties by coordinating a beautiful memorial service for the firefighters who passed away this past year in the state of Minnesota. It was an incredibly touching program that included a vocal solo from {D}. We found it symbolic that {D} was just a newborn when Craig got accepted into the department and that he was able to help his dad to end his service.

We are absolutely overjoyed that we will be able to spend more time with this incredible man. Wonderful memories are yet to be made!


This is just a glimpse at what our family has been up to. If you’d like a closer look, be sure to check out our weekly ‘mini vlogs’ on our YouTube channel ARROW HILL FAMILY. Be well everyone!

SATURDAY SKETCHBOOK: FIREPLACE IDEAS


My husband and I have lived in 3 old houses over the course of our marriage – a 1905 farmhouse, a 1904 American Foursquare, and a 1920’s farmhouse. And although each of these houses have had their own share of character items, not a single one has had a fireplace.

We love the ambiance that a fireplace can add to the spaces it serves, and so for Arrow Hill Cottage we are working one into the design. For ease and safety reasons we are going to be utilizing a gas insert unit. I’m thinking something simple and not too large – maybe a model similar to this.

I have a feeling the firebox insert will be the easy decision to make. The more complicated endeavor will be determining what the fireplace surround should look like! Initially, I had designed in bookcases on either side of the fireplace; but ultimately decided that a larger bedroom closet, and a broom closet were more important for the function of the house; And so the fireplace itself will be positioned on a wall in our living room and serve as a stand-alone feature piece.

I have been tinkering around in Sketchup with a few different options of how to finish the surround, and thought it might be fun to share with you today and take a poll about which is everyone’s favorite. All four options include a chunky wood mantle, which we hope to have milled out of a tree that will need to be removed from our property for the construction of the house. I’ve intentionally left the top of the mantle bare, so that your eye can focus on the fireplace itself – but you’d better believe I will have a TON of fun changing out the decorations to dress it up!

I am sharing multiple images of each fireplace option, so that you can see how it relates to the spaces around it.


OPTION 1: WHITE BRICK + SIMPLE SHIPLAP


This is a really clean look, and pretty straightforward. It is also probably the most cost effective of all the options. If I have one concern about this option, it would be that it may be TOO white – and wouldn’t stand out enough as a focal point in a room that has all white walls and a white ceiling.


OPTION 2: STONE WITH BOARD AND BATTEN


The exterior of the cottage utilizes a bit of cultured stone on the porch column bases, as well as board and batten siding on the gable ends. I thought it might be nice to connect these element to the interior by using the same stone and paneling technique on the fireplace.


OPTION 3: CLASSIC WITH TILE


This is the fireplace finish that first comes to mind when I think about a historic home. It is clean, simple, and stately without much fuss. We have friends who had their tile laid in a herringbone pattern, which gave their fireplace a more contemporary feel and looks great! The portion above the mantle could be accented with a different color of paint, perhaps a bright pop of something dramatic.


OPTION 4: ALL STONE


This option has me a bit worried about the budget – as stone is not cheap! I do like the ‘cottage feel’ that it seems to give the space though! And it definitely draws your eye toward the fireplace as a focal point.


What do you think? Which fireplace option is your favorite? If you have any real-life personal experience about fireplaces – whether it is something not to do, or something you have done and love – please let us know by commenting to this post or on one of our social media locations!

Have a great Saturday everyone!


SATURDAY SKETCHBOOK: MORE SIMPLIFYING?

This week has been a busy one complete with my birthday, the kids starting school after Spring break, yucky weather, and the planning of a luau themed Father/daughter dance. In the midst of it all, we received a cost estimate for the building of Arrow Hill Cottage.

The estimate was higher than we thought/ hoped it might be. I want to be completely transparent with this process for all of you. Designing a house and having it built is going to be full of ups and downs, and in documenting them I hope to encourage anyone who is following a similar path.


I want my readers to understand that the process is not a straight path from point A to point B, but that each step will eventually lead to a final finished home. 


Craig and I are not complicated people, we have said all along that we want our house to be simple. Big enough for now, when we are raising 5 growing children under it’s roof – but not so large that it becomes a burden when we are empty-nesters.

When we first got the dollar figure, I will admit that we were a bit flustered once again. Not long ago, when we were told VERY preliminary costs to build, I had done a huge reduction in the size and complication of the design. We thought that these bold moves would get the number down to a more comfortable level. And surely, they did reduce the overall cost – just not enough.


Even though the bank may loan us the full amount that this contractor is estimating, we aren’t comfortable with what that would mean in terms of monthly payments.


We do not intend to be house poor. When you have a family, there are so many situations needing monetary attention that could potentially arise. If all of our monthly income is tied up in a house, it would  definitely add more stress during those times.

And so, we are at a cross roads once again. I am taking a look at the design to see where we could save and have identified a couple of areas that could be revised to be more cost effective if need-be. We will also be taking a close look at this post, and heeding our own advice. Even though we are friends with our preferred contractor, it is important to get second (and maybe third) opinions/quotes on cost.


In the end, I am confident we will be living in the house of our dreams – but that house might be a little different than what we had first imagined going into the process. And that is okay.

AROUND HERE: MARCH 2018

Around here we have been…

WISHING Spring weather would arrive!  We have had small warm ups; but after each warm up came a large temp drop or inches of snow a few days later. There are rumors going around that another storm is on it’s way, and that the first half of April is expected to be colder than average. It is frustrating, but we know that warmer days are on their way.

In the meantime, the kids have been making the best of things – creating snowmen and ice skating on puddles that had melted – and frozen again.

the kids with ‘Jeff’ the snowman


ice skating on a frozen puddle


GOOFING AROUND. This long, drawn out time indoors has given us a touch of cabin fever – and we aren’t afraid to let our true crazy shine!

Yes, we are weird sometimes… and we like it like that!


EXCITED about {L} turning seven years old!  He is our little athlete – one who is constantly on the go. {L} is always ready for an adventure, and can add humor to just about any situation. He loves hamburgers, super heroes, and Imaginext toys.

some of his birthday gifts


With his big smile, and handsome brown eyes – we know he will turn heads some day; But for now, he has his mommy’s heart – and is quick to proclaim that he is the ‘baby boy’ of the family. For always.

such a handsome 7 year old!


CREATING all sorts of projects at school. The kids seem to be coming home with a new project every other day. In an effort to keep the clutter down, I have been documenting these projects by taking photos of each child holding their work. At some point, I want to get all the pictures arranged in photo books – one for each kid.

It has been fun watching them pose with their creations. They are so proud!


PREPARING for Easter. As Christians, this is the most important holiday we celebrate each year. Without Jesus dying for our sins, and raising from the dead three days later – we would be lost and condemned. We are so thankful for the grace of our Lord and Savior.

the kids on Palm Sunday


Each year our church acts out a Passion Drama – with scenes including the crucifixion. It is sobering to experience, and difficult to watch at times; But we attend as a family, as we feel it is important for even our young children to understand the true meaning of Easter.


This is just a glimpse at what our family has been up to. If you’d like a closer look, be sure to check out our weekly ‘mini vlogs’ on our YouTube channel ARROW HILL FAMILY. Be well everyone!


SHARED BOY BEDROOM IDEAS

Read on for ideas on how we are designing our future home to incorporate a shared boy bedroom for our three sons. These ideas can be useful for anyone whose children share a bedroom.


private sleeping nook in shared boy bedroom


As a family on the journey toward minimalism, it only makes sense that the design of our future house, Arrow Hill Cottage, would reflect our desires. Because of this, we have been striving to build the least amount of square footage necessary for our large family to feel comfortable. One minimalist technique we are implementing is shared bedrooms for our children.


I wrote about the design of the shared boy bedroom in a previous post, when things were still very conceptual. Since that time, I have worked on structural drawings, determined window sizes, and fine tuned the overall floor plan. At this point, I feel fairly confident about what will be built.

The upper floor of our cottage will have three total rooms. A shared bathroom off of the hallway, plus a bedroom for each gender. One for the girls and one for the boys.

Our three boys are currently 11, 9 and 7 years old. They share a room in our rental house and enjoy it. However, we know that as they age they will be looking for more privacy and personalized space. Because of this, I designed their room so that it can grow with them.


THE ROOM LAYOUT


shared boy bedroom floor plan

This is the floor plan of the room. Overall, from edge to edge it is 28’0 wide x 13’9″ deep. The room is vaulted at a high point of 11’5″. The ceiling slopes from the vault all the way down to the floor.


bedroom in eaves of second floor

Generally speaking, the room is divided into two different zones. The center core area will be common space, shared between all of the boys. In the image above it is the space with the large window and the grown man figure ‘for scale’.


In the lower sloping portion of the room, along the outer edge, will be private sleeping nooks. One for each boy. The nooks for our younger two boys will feature twin mattresses, while our oldest son will have space for a queen sized bed.


CENTRAL ‘COMMON’ SPACE

This is the view of the room as you walk into it from the hallway. The center space is about 8′ wide, but seems much more spacious because of the vaulted ceiling.  I plan to keep this portion of the room very simple and neutral style-wise, with furnishings that can grow with the boys.


clean and simple boys shared bedroom design

As you can see in the right of this image, the younger boys sleeping nooks are a bit more open to the center space. The larger nook is more private and is tucked behind the wall on the left.


boy bedroom design ideas. minimal home design

On one wall of the common space, I envision a large dresser painted in a bright color. Above it, I would like to add a gallery of photos of the boys and some fun art pieces – such as this, this and this.

Because the ceiling slopes all the way to the floor, I want it to be covered in a durable material. Perhaps whitewashed pine boards, for example. This application could add texture and visual interest as well as provide a durable surface.


shared bedroom for three boys

Looking back toward the bedroom entrance, you can see the closet door to the right. This one closet and the dresser will be shared by all the boys for their clothing. I imagine as they grow they will eventually be in generally the same size, at least for shirts and socks. This will help cut down on the amount of items they will need to store.


PRIVATE SLEEPING NOOKS

Although this is a shared boy bedroom, I wanted to be sure to incorporate a semi-private are for each boy to retreat to when he needs space from his brothers.


shared boy bedroom design

In their individual bed nooks, each boy has plenty of storage and places to display his personal belongings. The beds will be positioned not far from the floor, similar to platform beds – but I would like to at the very least allow for a 6 inch rolling drawer under each bed. Will perhaps try to tackle something similar to this DIY.

Each nook will have it’s own little lamp, as well as shallow shelving built into the wall studs. Barn-wood accents on the back of each of the shelves would add some warmth and extra character to the space. The partial height built in between the younger boy’s nooks will provide more storage, while the post will be the perfect spot to hang up their musical instruments. In this way, the instruments can also serve as room decor.


beds positioned in roof eaves of second floor


I imagine that each of the boys will put some personal touches in their own little nooks – with bedding, books, and accessories.

built in bed in boy shared bedroom

minimal shared boy bedroom


LARGER, PRIVATE NOOK

On the other side of the room is the larger sleeping nook. It will be given to our oldest son starting out. Once he moves out of the house, it will be passed down to the next in line – age wise.

As I mentioned before, this space is large enough for a queen sized bed. I appreciate this aspect while looking into the future, when our kids are all grown up with families of their own. We can see this room serving as a very nice family guest suite.

kid sleeping nook in shared bedroom space


There is room for a small dresser and some art on the side wall.

bed in eave space of shared boy bedroom


SHARED BOY BEDROOM THOUGHTS

I know that some of you reading this will be skeptical about three teenage boys sharing a room. I totally understand that, and will admit that I am a tad nervous myself. However, each family uses their house so differently. For us, the bedrooms have always been used as a place to read and sleep.

In our home we allow the kids to have musical instruments, books, and perhaps a few toys in their rooms. We do not, however, allow electronic devices (computers, tvs, phones, etc). By doing so, we hope that the shared boy bedroom will serve it’s intended purpose as a relaxing space. And, if they need to get their energy out, they can always go shoot a few hoops in the basement rec room!


We are all super happy with how the room is coming together conceptually and the boys, of course, can’t wait to see it built!


PIN THIS SHARED BOY BEDROOM

shared boy bedroom ideas for the minimalist family home


100TH BLOG POST!

Ten months ago I started this blogging journey with my first post.  I was excited, and very very nervous.

It began as a way to document the design process of our family’s future home – Arrow Hill Cottage – and as time went along I realized that I loved educating my readers about all sorts of aspects of home design, decorating and upkeep. In October, I organized the website into three major post categories: DESIGN your home, LOVE your home, and IMPROVE your home.

I have had the joy of featuring reader’s homes – and helping with their design dilemmas through the Makeover Takeover series. The connection I have made with my audience has been one of the most amazing and unexpected benefits of this journey so far.

I’ve learned some tough lessons, and made some mistakes. I’m still learning how to be a blogger – but I’m excited to continue doing what I’m doing here, in my own little corner of the internet.

We will find out soon if we will be able to build our cottage this Spring/Summer – and in anticipation I have been doing a lot of work behind the scenes in preparation. I have a ton of content just ready to hit the blog!

To be sharing this journey with all of you is a privilege. Thank you for encouraging me through 100 posts!


SATURDAY SKETCHBOOK: POSITIONING THE COTTAGE

The building site where a new home will be constructed is so, so important. Generally, it is recommended that you don’t even begin designing your house until a potential building site has been selected – so that the house can be developed to utilize the best features of the land, and avoid the pitfalls.


We purchased our building site in 2009. You can read more details about how we found and fell in love with our 4.5 acres in this post. Through the years, as I have been sketching ideas for the cottage, I have been careful to keep the lay of the land in mind – at least conceptually. I am now far enough in the design that I need to look more closely at how the cottage will actually be positioned.

This week I spent quite a bit of time fine tuning design details – the garage placement, the driveway configuration, and where the walkout door from the basement will be. Each of these decisions were heavily based on the site.


Our site is super unique, and has some interesting challenges. These are some of the site related issues that have been guiding our design:


SLOPED LAND

I’m sure that this particular parcel of land was passed over by multiple people solely because of its most dramatic natural feature – the slope. From the roadside there is a bit of flat land, but the slope down to the pond below is quite dramatic.


SETBACKS

The red area shown in the above graphic is the ‘flat’ land. The portion of land closest to the road (shown outlined in blue) is not build-able, because of setbacks and easements. Right from the start, we knew that we would likely have a longer driveway than most because of these setbacks alone.


MANY NEIGHBORS

Our land borders quite a few properties – both on the south and west property lines and, visually, across the pond. 14 parcels border ours. While this could be seen as a major drawback, I have been working strategically on the design so that our privacy within the home is maintained.


DENSE TREES

the kids standing by one of the many large trees that will need to be removed (2017)

One of the reasons we fell in love with our building site was that it was absolutely FILLED with mature trees: oak, maple, and other varieties. Sadly, there will be tree removal when the time comes to build. There is absolutely no avoiding that fact. By minimizing the overall footprint of the cottage, we hope to remove as few trees as possible.


EXPOSURE TO THE ELEMENTS

A view from our property, looking south. Our mini van is parked on the curved portion of the road.

An often overlooked, but important aspect of home design is the orientation it has in regard to the sun and wind. Because we live in a Northern climate, our strongest sunshine comes from the south. It is generally advised in this climate that you position your home with windows facing south (both for daylight, and for heating purposes in the winter). Thankfully, once a few trees are removed, we will have quite a bit of southern exposure.

It can get very cold in our state during the winter months – and the prevailing wind direction is from the northwest. I plan to rotate the cottage so that the garage can be used a bit for protection from those strong winds.


THE IDEAL POSITION FOR OUR COTTAGE

With all of these site issues in mind, I have narrowed down the placement of our cottage. I am working on finding the best angle of rotation and also determining how exactly the driveway will function – but we are getting close!


Just for fun, here are a few 3d images showing the cottage positioned on the land.

The cylinders are place holders for privacy trees (some of which are existing, and others that we hope to plant in the future. 


I worked a long time to find an appropriate position for the garage. I was sure that I wanted the garage doors to be set back from the front of the house/porch. For a while I had the garage rotated 90 degrees so that you accessed the doors from the side – but I eventually realized that this would not create ideal conditions for the driveway, making it both awkward and extremely long.  The garage is now accessed head on and set to the very back of the house so that it isn’t visually imposing.


The wall of windows on the southeast elevation will let in a ton of wonderful natural daylight. It is one of my favorite features so far, and never would have happened if we hadn’t talked to our contractor about current building prices – which prompted us to make a major change to the design.


You can see from this image how the cottage interacts with the slope. There will be a bit of excavating and retaining involved in creating the lower level walkout patio.


As the weather warms up, I hope to make a trip to the land again – and maybe stake out the corners or use spray paint to get an even more visual perspective on what we will see out of each window of the cottage.

Exciting times ahead!


A TOUGH LESSON LEARNED

I had an entirely different post prepared for today, but I need to take a moment and acknowledge something that happened this week, which will change the course of how I blog going forward.

I started this website in July 2017 without much knowledge at all of what I was getting myself into. Sure, I took a few free online courses and read a ton of material about best blogging practices, but nothing quite teaches you the ropes of blogging than a tough lesson learned.

On Thursday afternoon I had just laid our youngest daughter down for her afternoon nap when I heard the doorbell ring. The postal lady was standing there, certified mail in one hand and a digital scanner in the other. I immediately got the feeling that this was bad news. After signing for the package, I said “I’m nervous to open this!” then closed the door and walked over to my dining room table.

Inside, just as I suspected, was bad news – a letter from the legal counsel of an online presence with proof that I had infringed on their copyright with a graphic that I had used in one of my posts. They requested that I remove the graphic immediately and send them a large monetary damage settlement.


This felt like a punch to the throat.


Here I am, less than a full year into my blogging journey – being dealt what felt like a giant blow. It took me a second to really wrap my head around what I had just read. It was true. I HAD used their material in my post, there was absolutely no denying that. In fact, I hadn’t even tried to hide that the material wasn’t my own.  In the post I had included a link back to the original source of the graphic, which in my ‘baby blogger’ mind was what I was supposed to do in order to be sure that nobody reading my post thought that the graphic was my own.


That was naive reasoning, and it bit me back big time.


My next step was to get in touch with my blogging friends, and ask them if they had ever been through anything similar or if they had any advice. One friend pointed me to this blog post – which scared the living daylights out of me.

I immediately removed the graphic from my blog, then contacted the email address listed in the letter to beg for forgiveness. I’m thankful to report that they agreed to show me mercy and reduced my fine significantly. The check is in the mail.


So, what dos all this mean you might ask?

It means that I spent a good portion of Friday scouring through my past 93 blog posts and picking out the 14 that have material that could be considered questionable. It means that I will be spending the next couple of weeks contacting the owners of these images/graphics and asking them for permission to use them on my site.

It means that from this moment forward I will be strictly using my own photographs and graphics, or paid stock photos from reputable sites. Be expecting a lot of original content from this website from here on out!

It means that I have learned my lesson. And as tough of a lesson that it is to learn, I am actually very grateful that this wake up call came now – when my blog is still establishing itself – and not in the future when I have 993 blog posts to sort through instead of a mere 93. Goodness, I’m grateful for that.


I hope that my mistake can be a lesson to you as well. Do your research and know the rules.

Behind every image on the web, whether a photograph or informational graphic, is a person who worked to create it. They made the effort, and they have the right to choose where it is shown and how it is portrayed. And as I work to add more original content to my website, I will want the same protection and rights. Lesson learned.


AROUND HERE: FEBRUARY 2018

Around here we have been…

CELEBRATING {I} and his 9th birthday! It seems like just yesterday this little man entered our lives. He is a kind, gentle and committed friend, a brother who is always willing to lend a helping hand. He is our little inventor and has a very mechanical mind – spending large amounts of time taking things apart and putting them back together.

We love watching the story that God is writing in his life!


ENJOYING what will hopefully be the last portion of winter. We finally got a big snowfall at the end of the month. Those 11 or so inches gave us more accumulation than we have seen all winter long! The kids are now able to do a bit of sledding and snow fort building, and they are thrilled.


WORKING hard at school. In February, the kids celebrated their 100th day with some fun activities. They continue to bring home colorful art projects, and good grades. We have parent / teacher conferences soon and are excited to hear how they each have grown academically over the school year. It’s hard to believe that there are only about 12 weeks left until summer vacation!


FINISHING up the basketball season. It has been a lot of fun to watch {D} progress through the games. He has gone from looking confused on the court, to taking initiative and making plays. He really shines on defense and is able to out-hustle his opponents regularly. When the weather warms up this spring and summer, I am sure we will see him and his brothers honing their skills with the garage basketball hoop.


DESIGNING Arrow Hill Cottage, our future house. We made a big jump this month and began talking to a banker about loan options and visiting with a contractor about pricing. We are getting the house design buttoned up so that we can get some accurate cost estimates and see if it is at all possible to break ground this spring! We have been thinking all along that we would build the spring of 2019, so this would get us into our new house a year earlier than planned if it all works out. We are excited about that prospect, but are also willing to be patient another year if the timing (and pricing) isn’t right. You can follow along with our home design here.


This is just a glimpse at what our family has been up to. If you’d like a closer look, be sure to check out our weekly ‘mini vlogs’ on our YouTube channel ARROW HILL FAMILY. Be well everyone!