I’m happy to report that another item from my PROJECT BUCKET LIST is well underway. The dining chairs have begun their transformation from brown to black! And I am loving them!
First, a quick recap on what my plans are for these chairs.
For our future dining space at Arrow Hill Cottage, we are hoping to create a unique harvest table – partially out of lumber harvested from large trees on the property. This will be a long and narrow table, with seating for ten people. We want to make sure that we always have room for guests to dine with us.

Our dining space will be directly off of the kitchen – in an area of about 9′-0″ x 14′-0″. Not a very large space by any means. And so, in order to include seating for ten people, I intentionally searched for chairs that had a small profile.
I found the perfect chairs at a local antique store. This set of 8 had been recently refinished with stain.
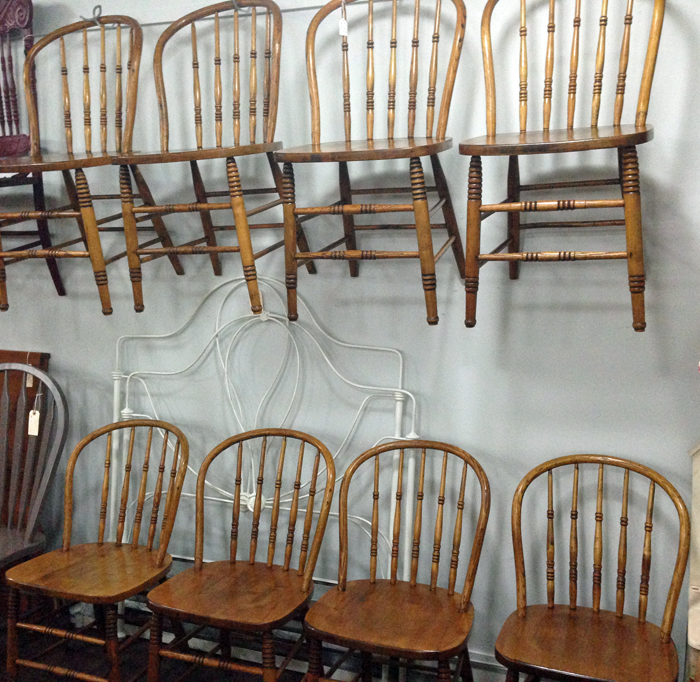
An additional 2 matching chairs were were found at a different antique store. These chairs were not in as good of shape, and were covered in quite a few layers of paint – some of which had already begun to peel off.
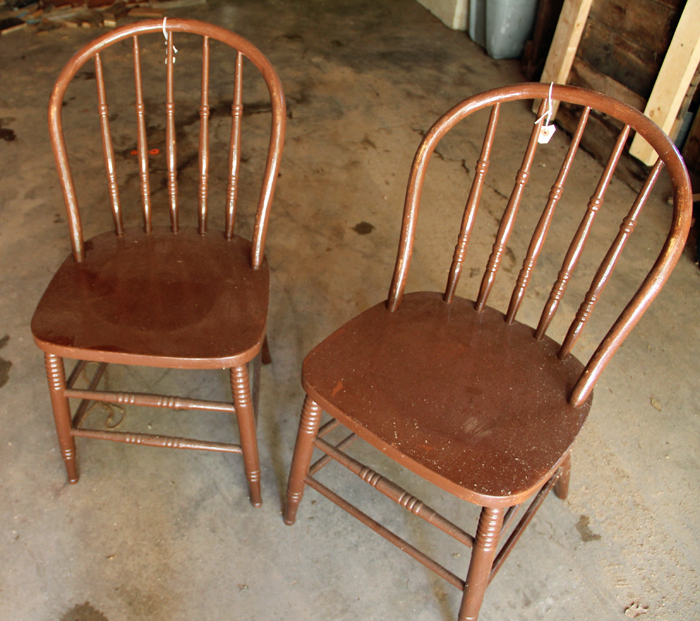
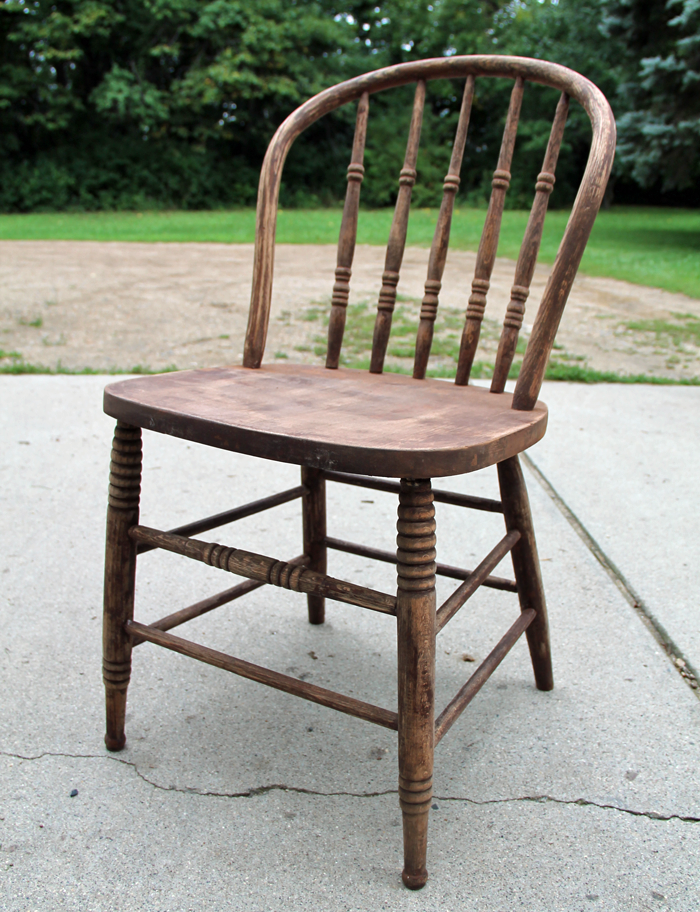
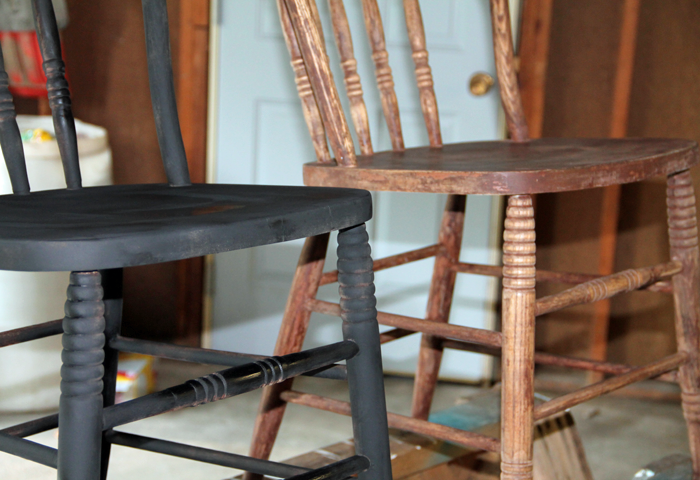
I’ve decided that with a stained wood dining table, and stained hardwood floors – our chairs will look best painted black. I started the transformation process with the two brown painted chairs.
Today I will share the 6 simple steps that I used to refinish the first two chairs. Hopefully this post can serve as a guide to anyone planning a similar project!
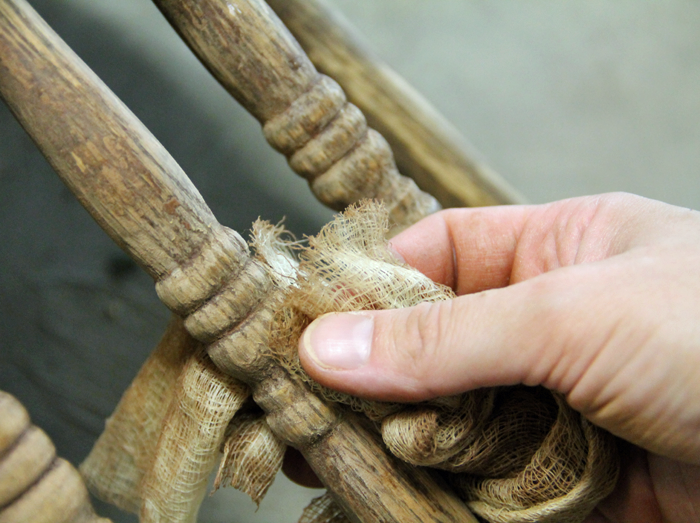
STEP 1: REMOVE EXISTING PAINT LAYERS
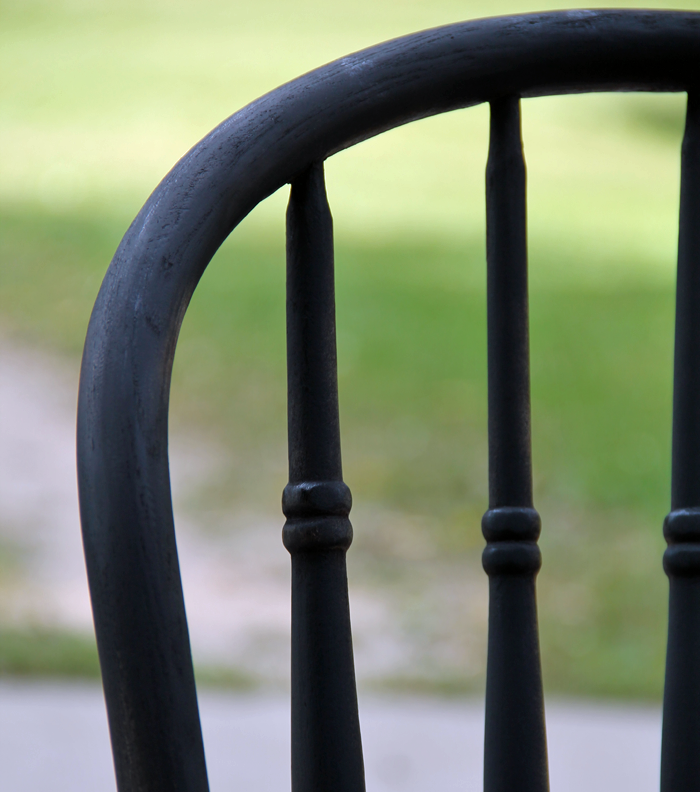
These chairs were covered in many layers of paint. While you might be able to sand some furniture pieces down to the bare wood – that was not be possible with these chairs. A power sander would have changed the shape of the spindles. It also would not have been able to get into the small turned details.
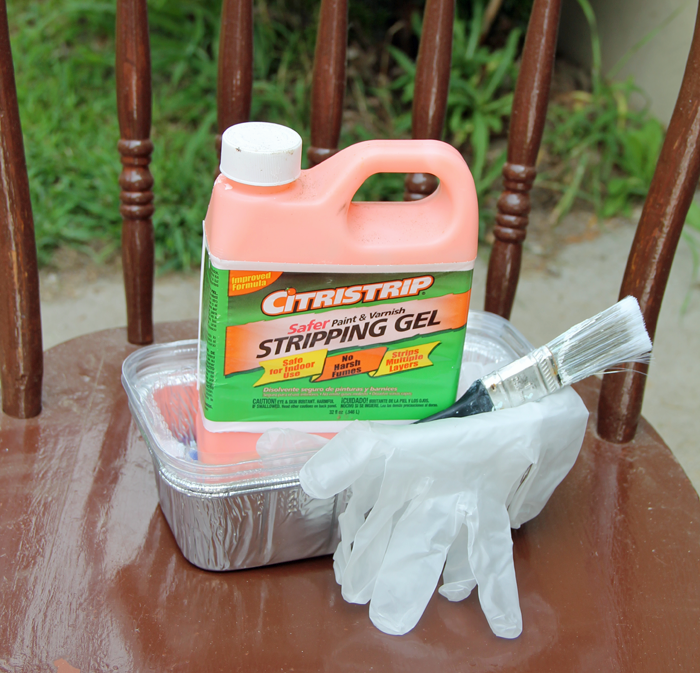
Instead, I decided to use a stripping agent to remove the paint layers. I have had great results with Citristrip Stripping Gel. It is powerful, but has a smell that isn’t overwhelming. Even still, you want to be sure to wear a face mask or respirator. Other items you will need for this step of the process is an inexpensive paintbrush, a small container to hold the gel, a scraping tool, a stiff scrub brush, a rag, and a bucket of warm soapy water (dish-washing soap works well).

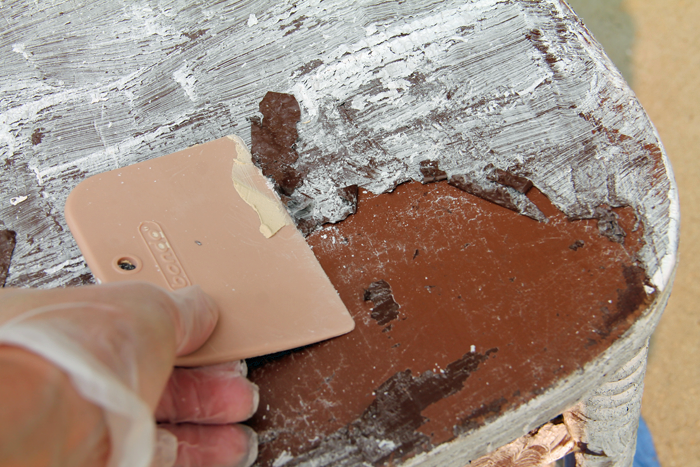
Apply the gel liberally over all areas that need paint removed. Let it sit for approximately 30 minutes and you will notice the paint start to bubble and then turn white. At that time you can begin to scrape. You may want to experiment with different tools to find the right fit for your project. If using a metal scraper, be sure not to gouge into the wood with the sharp edge of the scraper.
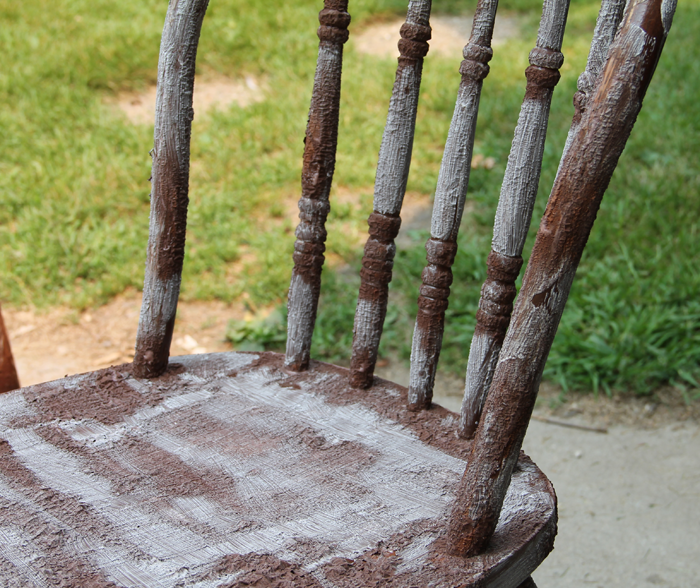
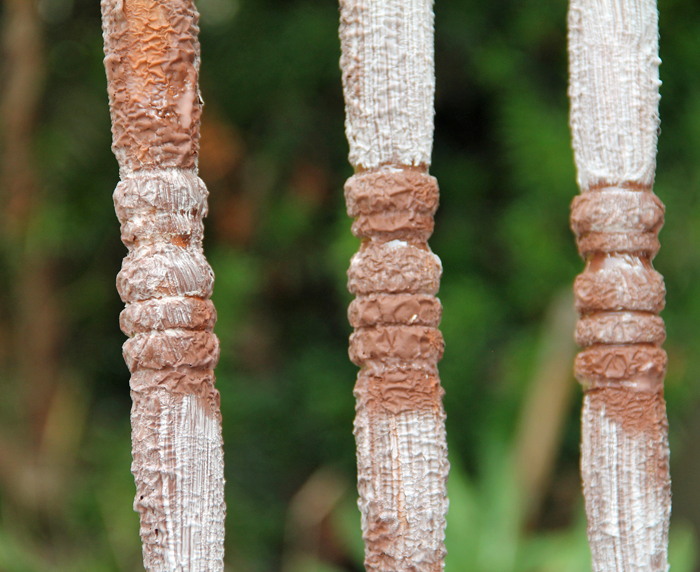
In my experience, the paint will be stripped off one layer at a time. You will need to apply multiple applications of the gel to reach bare wood.
As the paint is coming off, I like to take a water/soap soaked rag and clean off the surface. This helps to get the more fine bits of paint that may be stuck between spindles, for example.
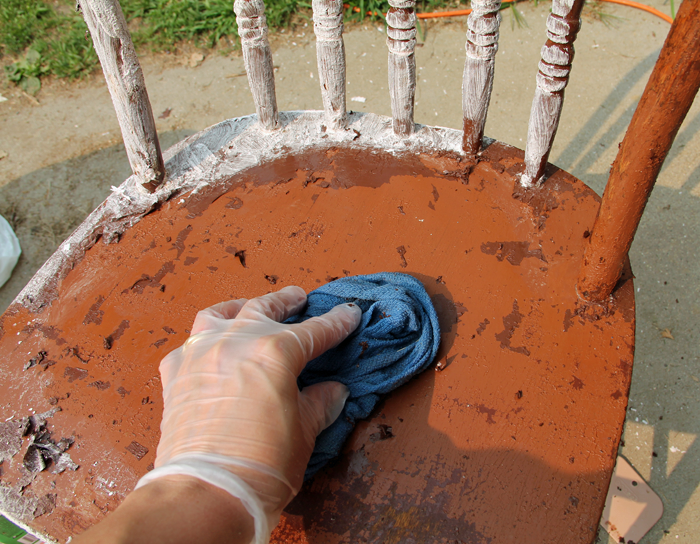
Repeat this process until you have reached the bare wood layer. At this point you will want to use your stiff brush to remove all extra debris.
Let the chair dry completely before beginning the next step.
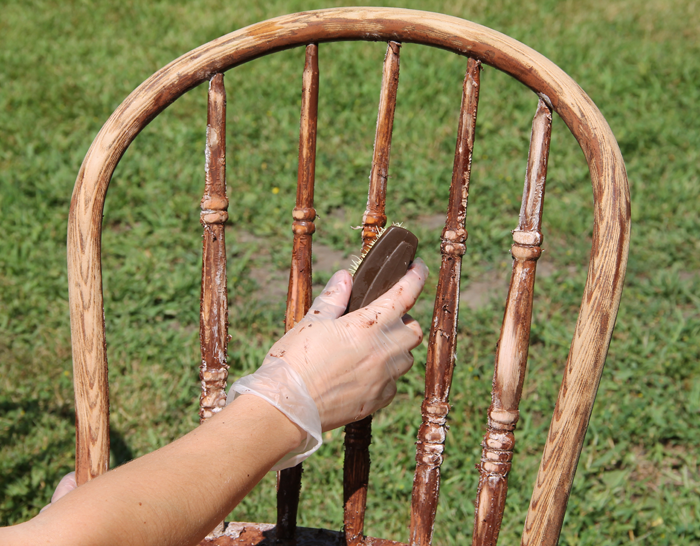
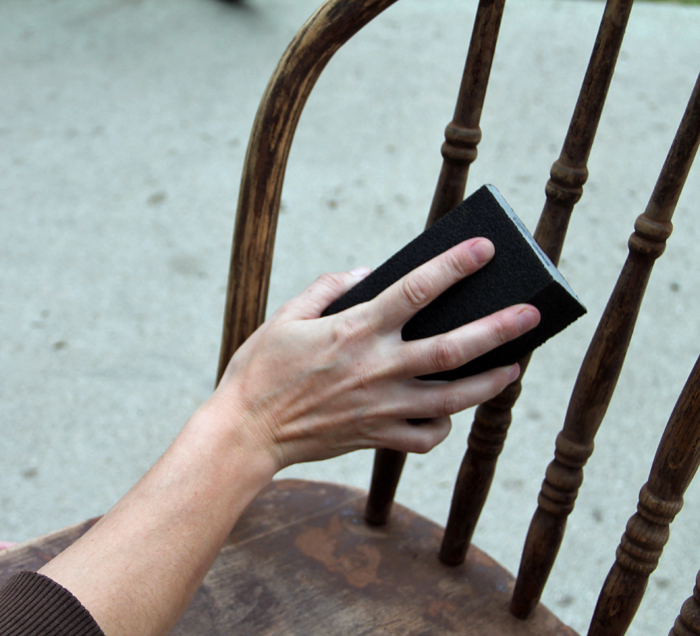
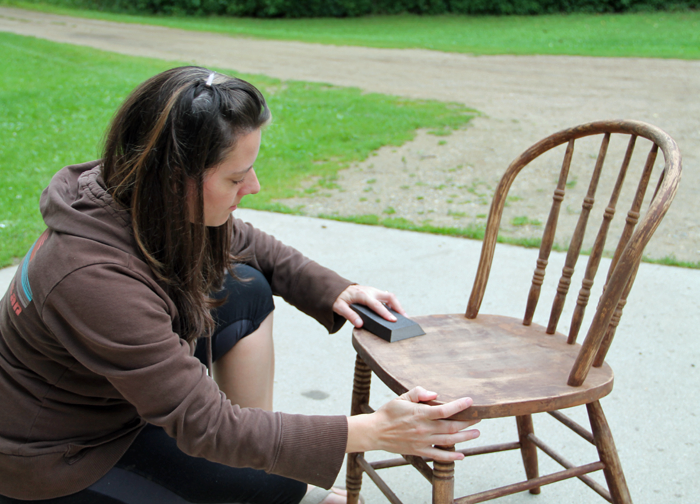
STEP 2: SAND
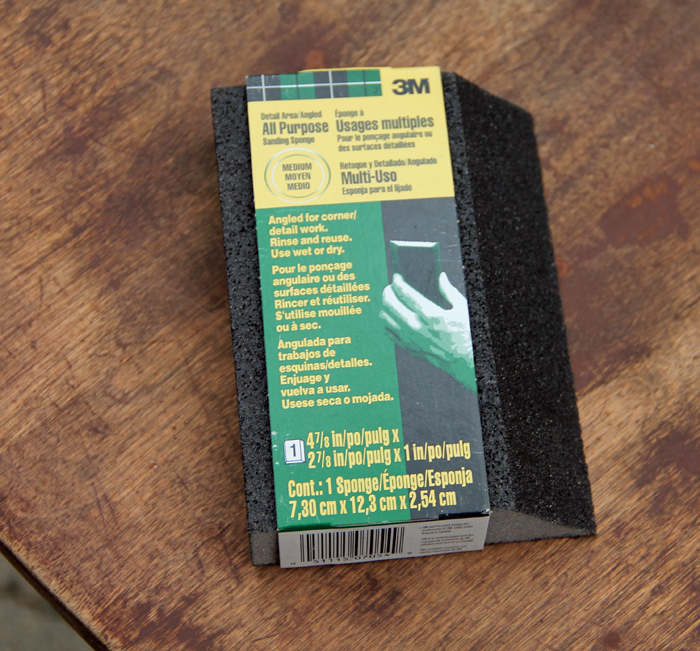
As mentioned previously, it is not a good idea to use an electric sander on fine detailed pieces of furniture. Sanding by hand can be tedious, but it will yield the best results. Instead of using flat sandpaper, I prefer to use 3M sanding sponges. They don’t rip apart like traditional sandpaper sheets – and the beveled edges of the sponge work perfectly for the detailed sanding.
Sanding is pretty straightforward. Be checking to make sure the surfaces are feeling smooth and that the detailed areas are not still filled with paint.
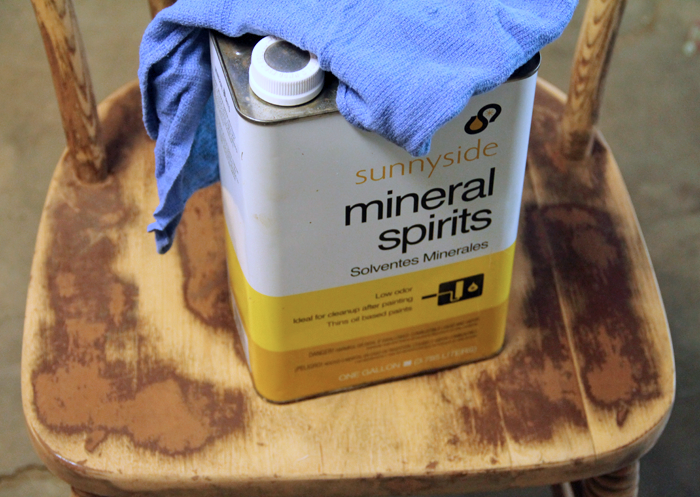
STEP 3: CLEAN
Using a tack cloth, wipe all of the sanding dust off of the chair. Again, be sure to get into all of the detailed areas.
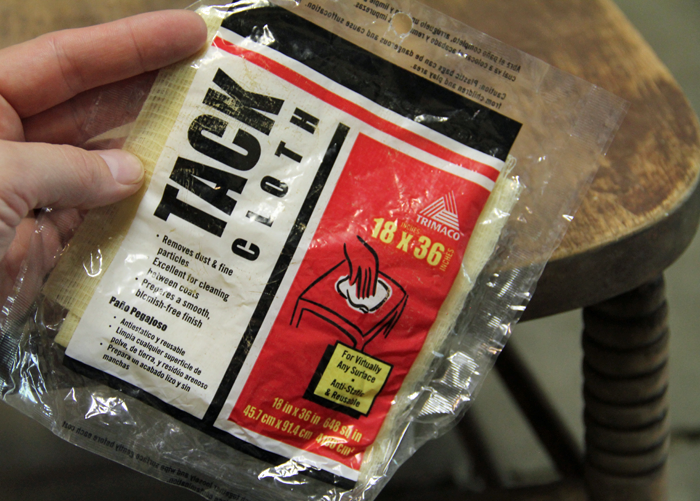
As a final cleaning measure, I like to dab a bit of mineral spirits onto a rag and wipe it over the wood that will be painted. It is a quick and easy task, but will get any last bit of gunk that may be left on the furniture piece.
STEP 4: PRIME
This step is the most often forgotten or eliminated, yet it is absolutely essential! The purpose of the primer is to give the paint the ideal surface to adhere to. Even if the paint you plan on using indicates that it is a paint + primer combo, add a coat of primer first. Wood that is primed before it is painted is much more durable and will hold up better than a piece that is covered only with paint.
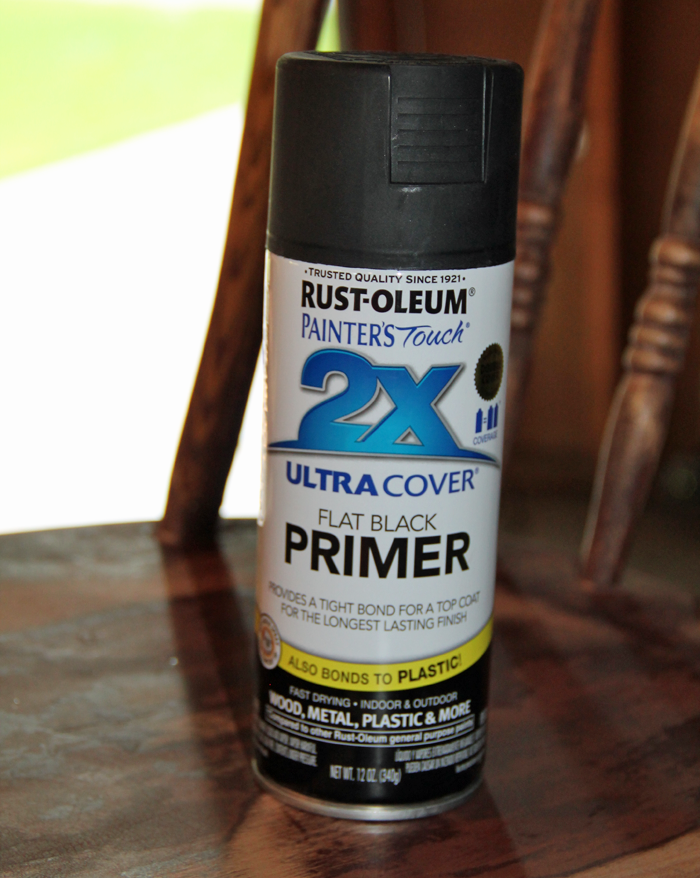
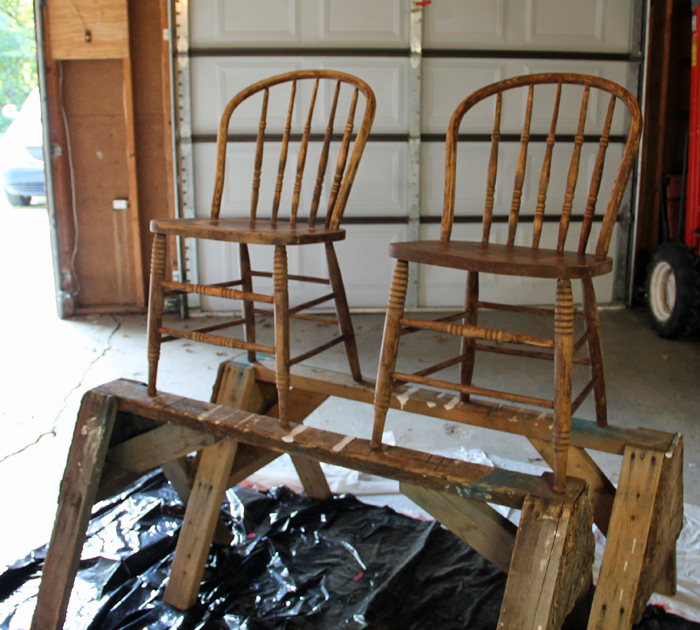
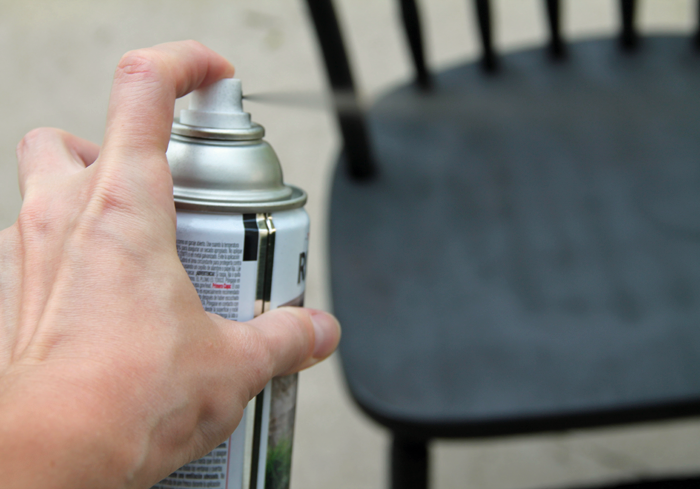
Primer can be brushed on or sprayed. I personally love the ease and simplicity of spray paint. This Rust-Oleum flat black primer went on super smooth and in one coat. One can of primer was enough to cover both of the chairs I worked on. I set my chairs side by side on a set of saw-horses, which allowed me to get access to all parts of the chairs (including the underside) at one time.
Allow the primer to dry according to directions, then lightly sand with a fine grit sandpaper or sanding sponge and clean with a tack cloth before beginning the next step.
STEP 5: PAINT
Of course, this is when the real magic happens! Choose a color that suites your decor style. Again, I used a spray paint product – Rust-Oleum Black, in a Satin finish. I recommend a finish that is either satin, semi-gloss or gloss. A flat finish will showcase every imperfection your piece may have, and is generally not as durable.
Between each layer of paint, you should sand lightly with fine grit sandpaper and clean the dust off with a tack cloth to ensure that the surface is smooth.
STEP 6: SEAL
This final step is optional, but can be important – especially on furniture pieces that will be used on a daily basis. Sealing with a clear coat can give you a surface that more easy to wipe clean should the need arise. It also adds protection from nicks and dings.
If you choose not to add a sealer product, let the piece sit for a minimum of 30 days before use. This will cure the paint to it’s maximum potential. If you are sealing your piece, wait a minimum of 24 hours after the final coat of paint has dried.
I’ll admit that I have yet to complete this step on my chairs, but I will be adding the sealer. Heaven knows that dining chairs + kids = lots and lots of wiping clean! I will be using a product similar to THIS to get the job done.
After applying the sealing coat, wait approximately 24-48 hours before using the piece.
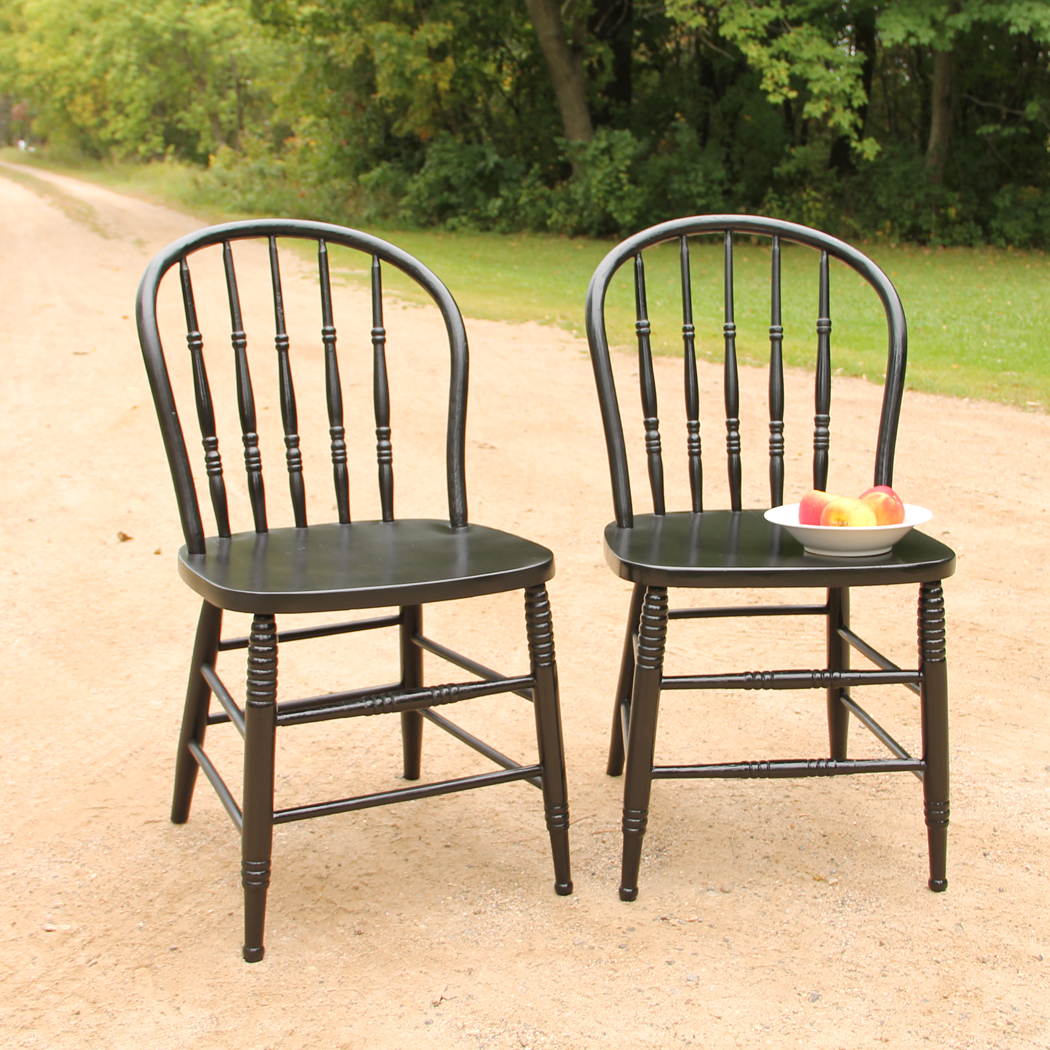
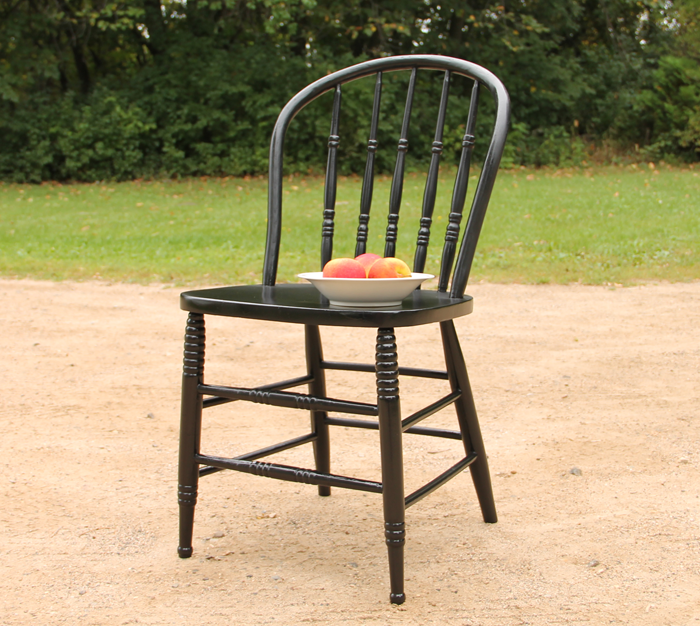
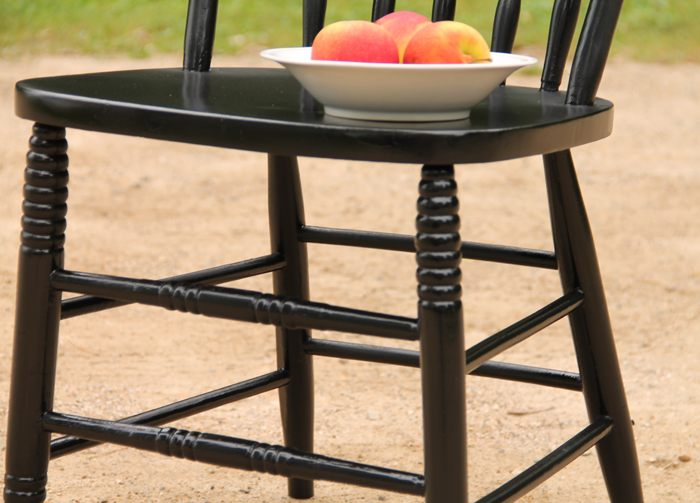
Below are a few pictures of our newly refinished black chairs. They make my heart happy!
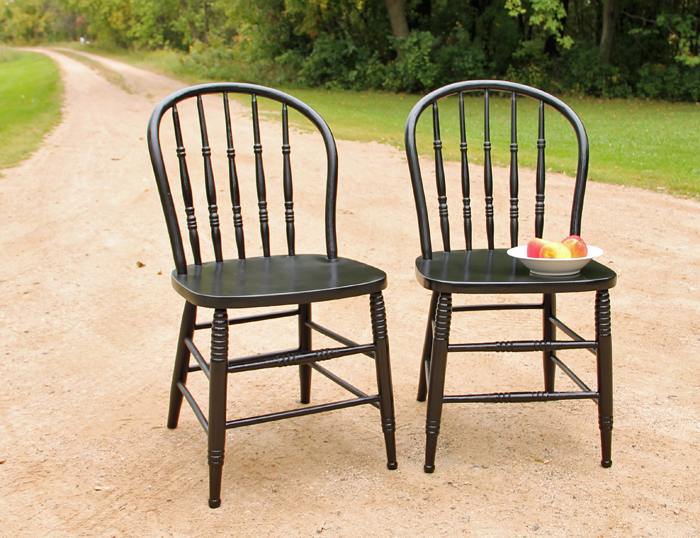


Two down and eight to go! I might work on one of the other items on my list first though, to give myself a little painting break.
*this post contains affiliate links*
they look awesome! i loved this article as i have aa few projects myself and am going to try it out! thanks!
The chairs you’ve done so far look Great ! You are a hard worker and we are so Proud of your dedication to each project to not only save money but add a piece of your heart to each thing you do to make your house a HOME 🙂