ONE ROOM CHALLENGE : DEEP CLEANING

Join me for the third installation of the December Declutter series. This week I attempted a One Room Challenge, deep cleaning one room in our home. Read on to see how I did!

One room challenge deep cleaning

Welcome to Week #3 of the December Declutter challenge. During this month, I am tackling various challenges to help us sort through our household belongings. Our end goal is to bring only those with great value and purpose to our new home, Arrow Hill Cottage.

I have previously taken on a KonMari declutter of our family’s Christmas decorations, and performed a speed declutter – finding 60 items in 60 minutes to either donate or sell. While both of these techniques were effective and freeing, neither provided a radical visual improvement to any one space. The One Room Challenge is different.


ONE ROOM CHALLENGE PRINCIPLES

The basic idea behind the One Room Challenge is to, obviously, focus on one room only. Decluttering and cleaning efforts should be concentrated in that space to create an environment that is functional and pleasing to look at. Because the entire room will be sorted through, decluttered and organized, it is also a great time to do a deep cleaning.


OUR ROOM CHOICE

Of all the rooms in our rental farmhouse, the mudroom is by far the one that becomes cluttered most often. In actuality, it is a multi purpose space. It is the entrance point into our home, as well as a laundry room. And, because our only bathroom on the main floor is very small and located on the other side of the house, we also use the space to get ready in the morning.

It is a hard working room, to say the least. So it isn’t a huge surprise that it gets cluttered easily.


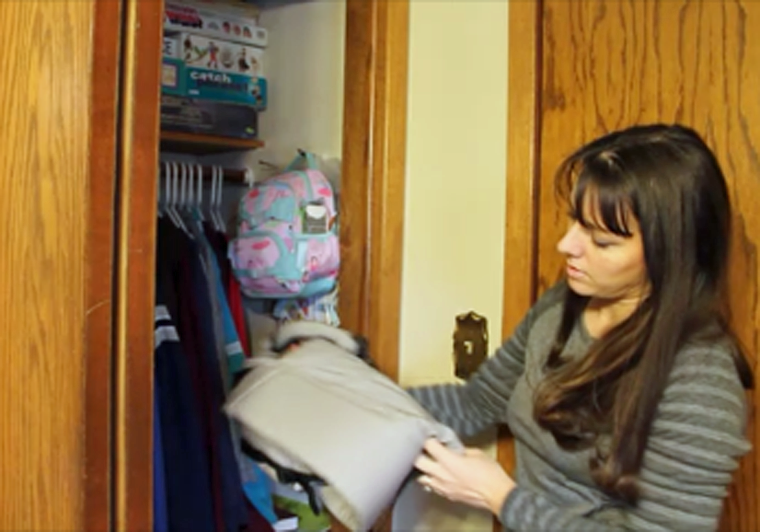
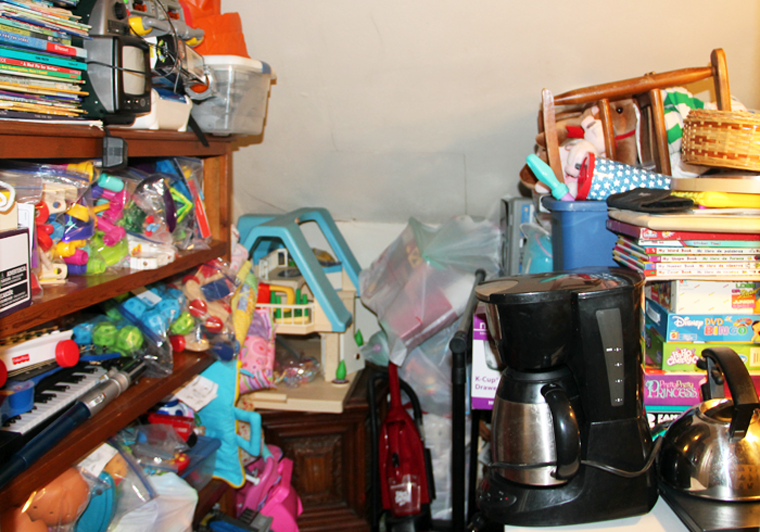
THE CLUTTER PROBLEM (BEFORE)

Keep in mind that we are renting this farmhouse. It was built in the 1920’s and later remodeled in the 1960’s. The style of finishes isn’t what we would have chosen, nor is the layout of the rooms. As renters, we have no ability to change these features. However, we don’t have a great excuse as to why the clutter has gotten so bad, except that we haven’t kept on top of it.

You can see a video tour of what the space looked like before the cleaning, later in this post. First though, I will share a couple of the more difficult aspects I was facing when starting the One Room Challenge.


LOW THRESHOLD

The floor in the front entry has been built up over the years with layer upon layer of linoleum, meaning that there is very little threshold. Because of this, there is no way that a welcome mat can be placed in front of the door. This becomes a problem in the winter months when the Midwestern skies open up in all of their snowy glory.

one room challenge cluttered entryway

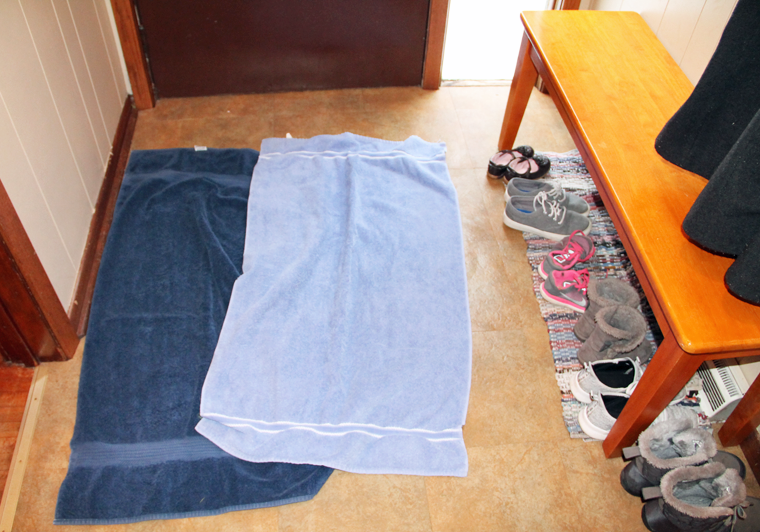
We have, at times, resorted to throwing a few bath towels down so that we don’t immediately slip when walking through the door. Tacky, yes. Functional, kind of. We are looking for a more permanent and eye pleasing solution.
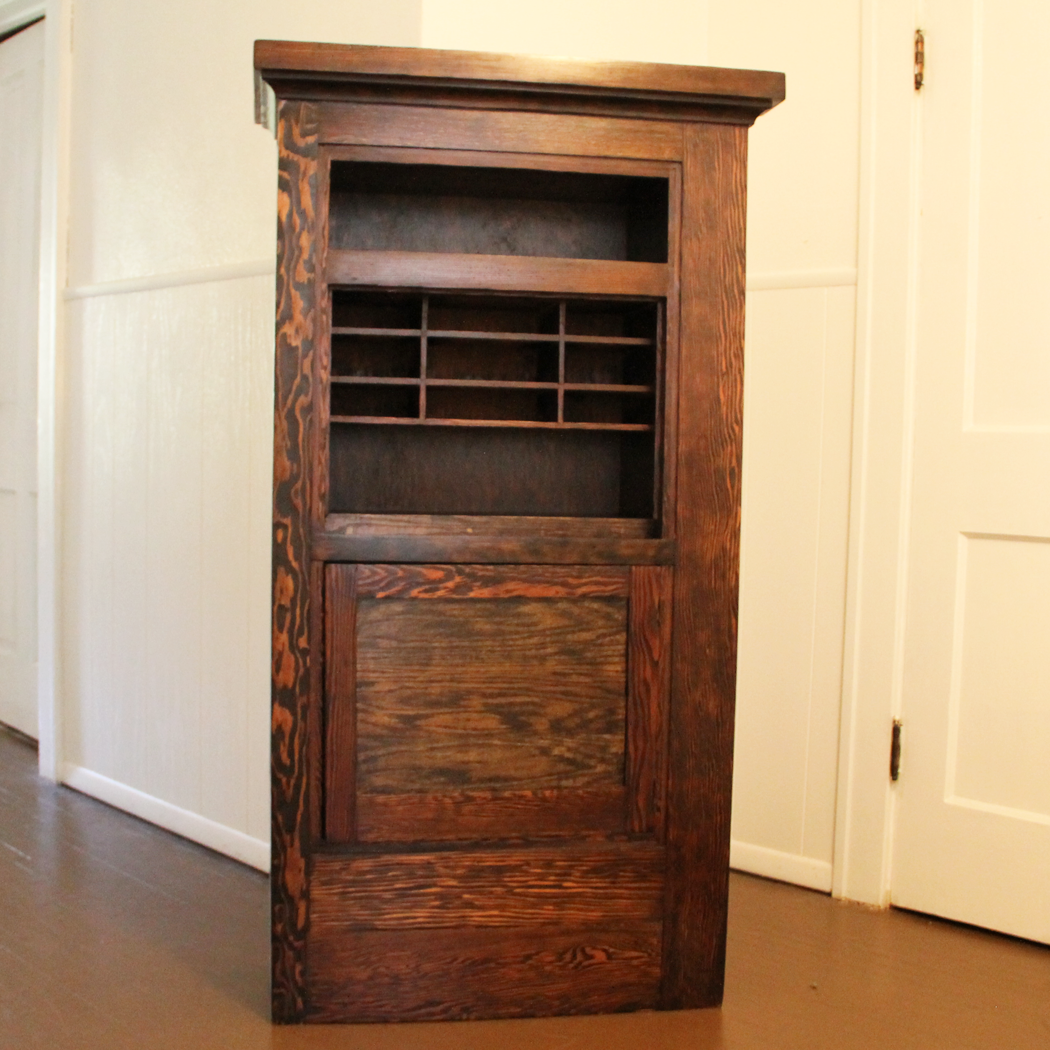
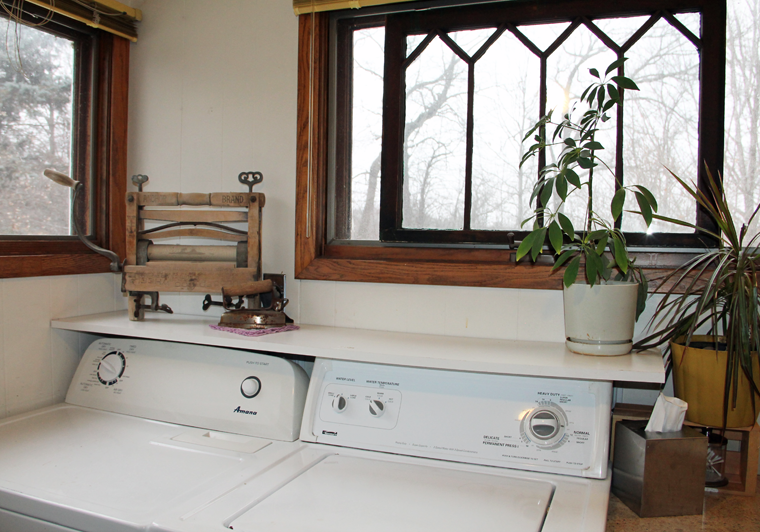
 

LAUNDRY SHELF

Flat spaces seem to be a magnet for clutter. As you can see, our laundry shelf is no exception. While I had Craig add this soon after we moved in, as a place to temporarily set folded clothes, it has become a catchall. It seems that any random knickknack that didn’t have a place anywhere else found a home here.


cluttered shelf before. One Room Challenge 
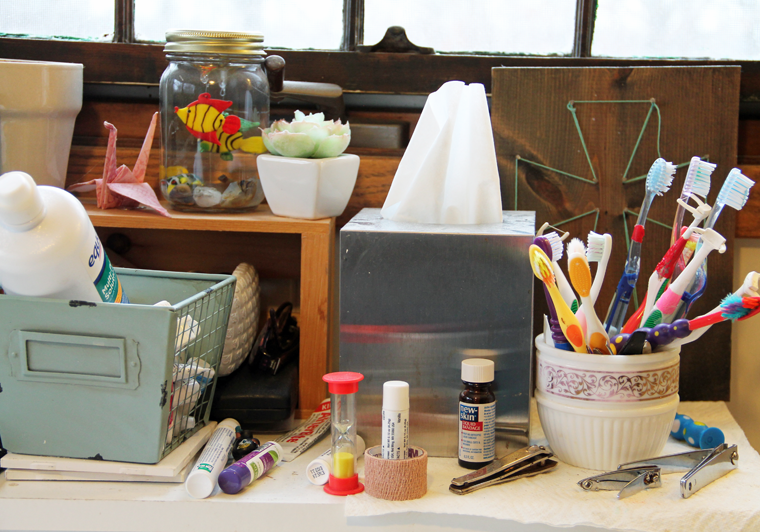
Worse yet, our family’s toothbrushes were also stored here because it is the most convenient and accessible space to brush our teeth.


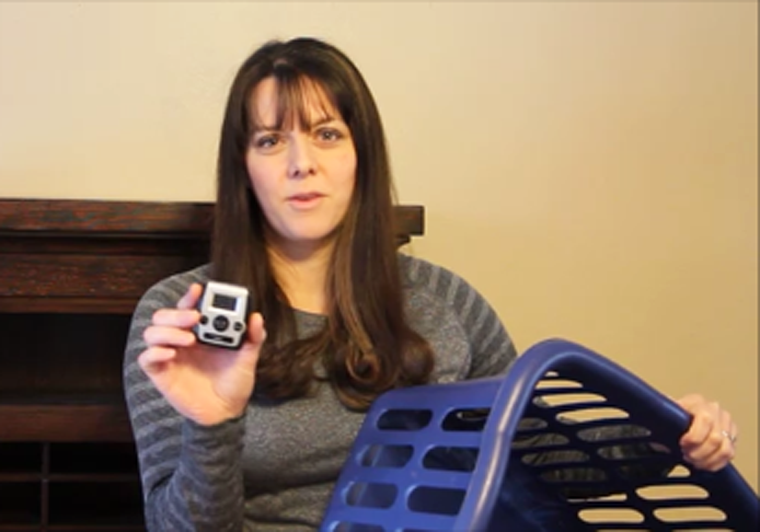
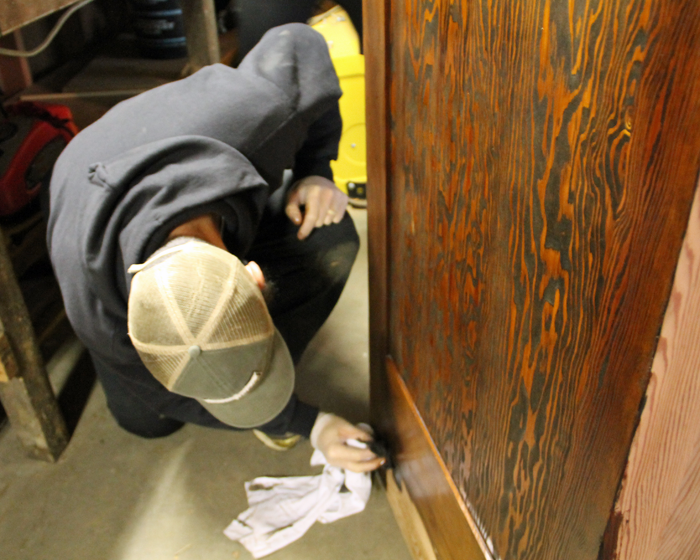
WATCH ME DEEP CLEAN AND DECLUTTER

The room needed a lot of work, and an entire afternoon of focused concentration. Take a look at what it looked like before, and watch me whip it into shape!


THE RESULTS (AFTER)

I am absolutely thrilled with the way the room looks now. More importantly, our entire family is happy with the way the space now functions.


clear entryway after One Room Challenge

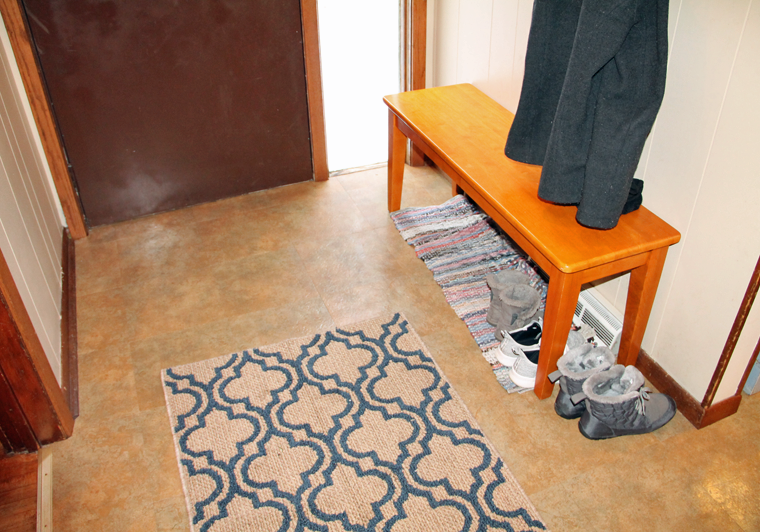
The entryway rug, pulled away from the door a bit, is a place where we can step while we take off our shoes. It is simple, yet pretty. Goodbye old towels!


minimalist family home. cutlery try as toothbrush divider 
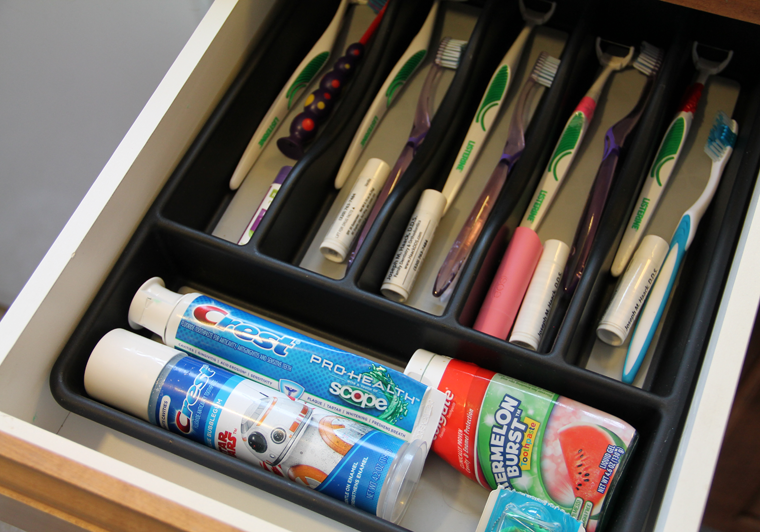
The drawers were thoroughly decluttered, and then organized with our everyday essentials. An inexpensive cutlery tray was the perfect fit for the top drawer, which now is a clean and safe spot for our toothbrushes. Each family member, besides the girls who do all of their brushing upstairs with help, has their own divided space. The perfect size for a toothbrush, flosser, and personal chap-stick.


minimalist family home. Organized drawer with personal care items.

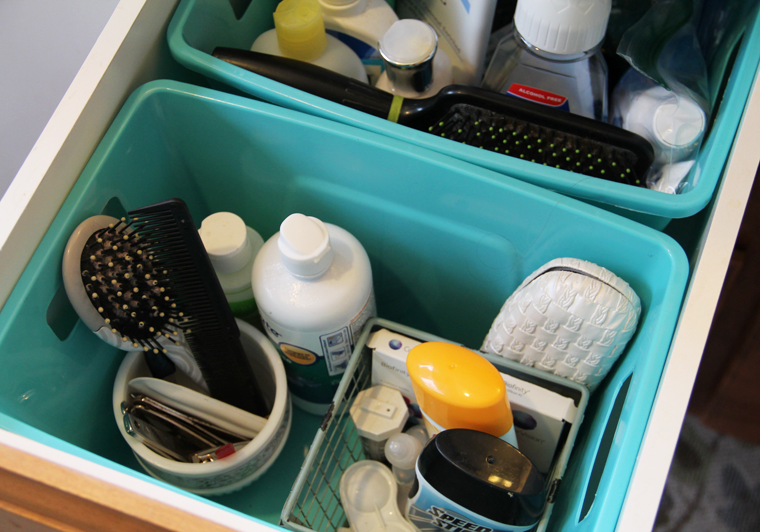
The second drawer was emptied of the many reusable and disposable plastic bags that it housed. Smaller bins were placed in the drawer, and organized with personal care products.


antique anchor brand washer wringer. Laundry room decor. One room challenge 
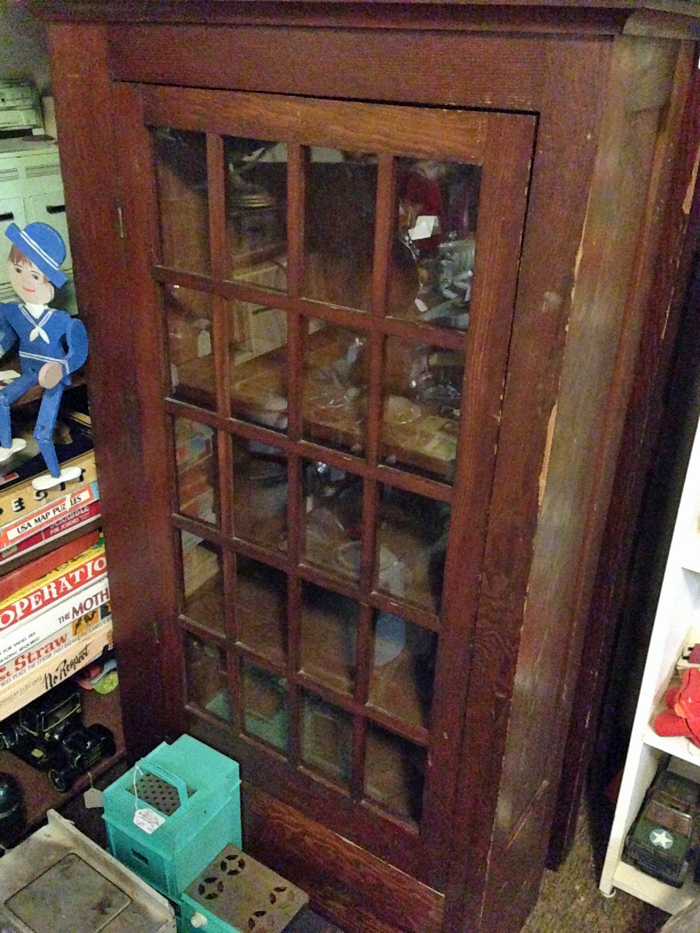
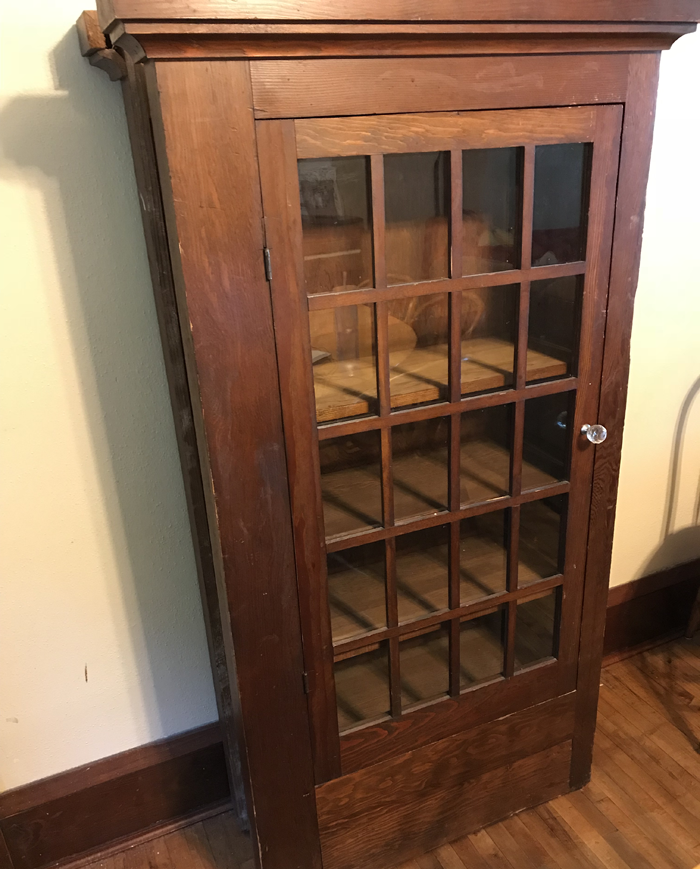
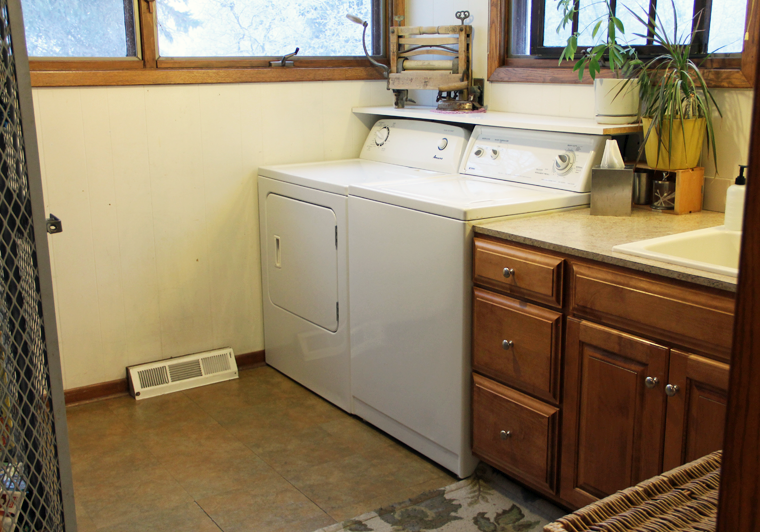
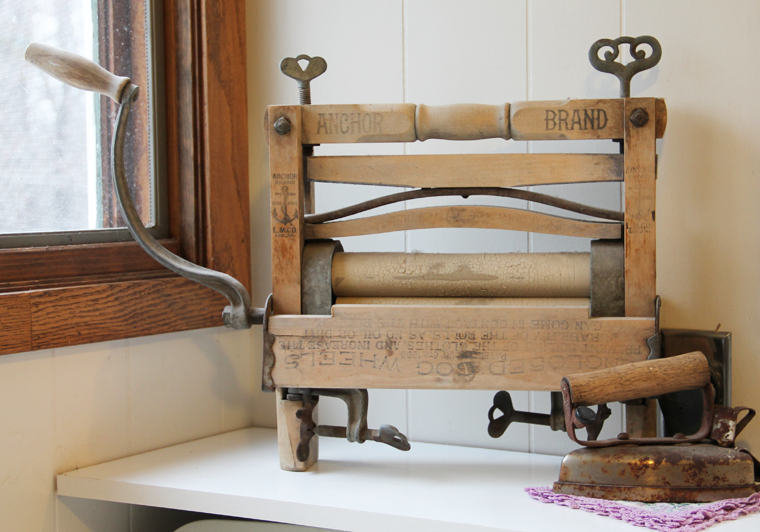
Perhaps the greatest visual improvement is the open shelf. With all of the clutter gone, the vintage clothes wringer and steam iron take center stage. Two houseplants serve to soften the space, as well as camouflage oddly placed outlets. And my antique window adds a bit of charm.


one room challenge after. clean laundry room The room is bright and clutter free, and I think it seems larger than before!


WHAT I LEARNED FROM THIS CHALLENGE

I have to say that it feels great to have this one room cleaned top to bottom. Even though the rest of the house has a lot of decluttering left to do, this room is like a breath of fresh air. Because it is the first space we enter in our home, the impact is even greater. It now brings a smile to my face rather than anxiety. That’s a great ‘welcome home’ feeling.

clean minimal laundry room after One Room Challenge


I do have a few words of advice if you would like to take on the One Room Challenge for yourself.

Depending on the size of the room you take on, this may be an all day or multiple day exercise. In order to achieve a true deep clean, you want to allocate enough time.

Also, know that when items are removed from one room they may make their way into another. In our case, most items that I didn’t want to keep in the space were put into the garbage or a donation bin. But there were a few things that we have yet to decide the fate on. They were moved into another room, for now.


I definitely appreciated the finality of this challenge. I could see using the same technique on other rooms in the future, until each has been gone through. The Spruce has some great tips on how to tackle each type of room. Until then, we are going to focus on keeping this one room clutter free and organized, because it feels great!
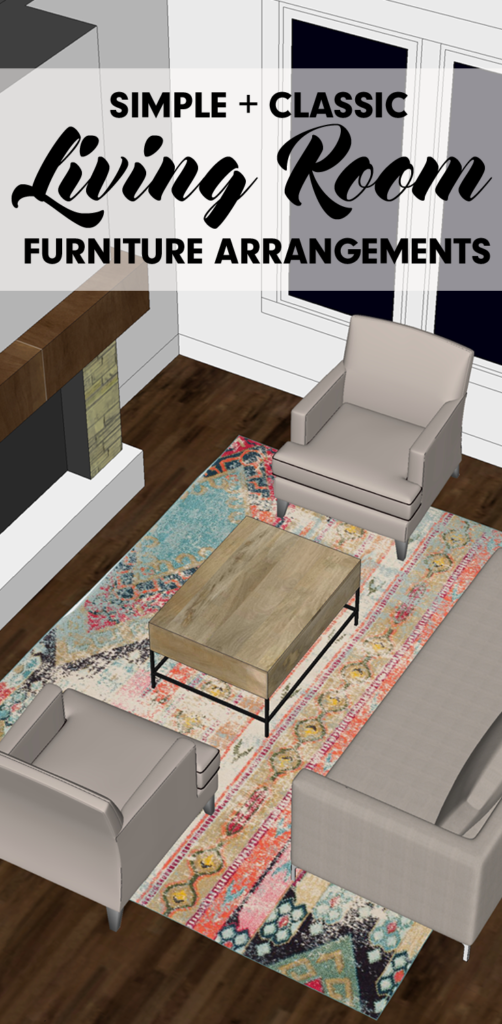
 

PIN THIS FOR LATER

If you are thinking about taking on your own One Room Challenge, but aren’t quite ready to dive in quite yet, pin this image as a reminder!

One room Challenge. Minimalist family home. Declutter and deep cleaning

SPEED DECLUTTER: 60 IN 60 CHALLENGE

It’s Week TWO of my December Declutter Challenge! Follow along as I attempt to speed declutter my house using the 60 in 60 technique!

declutter challenge

Last week, I decluttered our entire Christmas decoration collection, using the KonMari method. That was an effective technique, and we were left with only our favorites, which made decorating a breeze! This week I am trying a brand new method of decluttering, one that involves quick decisions. It is called the 60 in 60 challenge.


60 IN 60 BASIC PRINCIPLE

Essentially, this is a speed declutter challenge. The idea is to set a timer for 60 minutes, then use that time to find 60 (or more) items to donate or sell. While doing this challenge, do not look for items that could be thrown. That would be too easy! Instead, find items that you are no longer using, but might have value to somebody else.


WHAT YOU NEED

There are only two things you will need to complete this speed declutter challenge. A timer, or a clock, and a basket or box to put your found items in. I personally chose an egg timer to count down my minutes. This allowed me to pause the task if I was interrupted, which I was. Several times.

speed declutter


SPEED DECLUTTER TECHNIQUE

While the KonMari method suggests that you pull similar items out of their storage spots before you begin sorting, this challenge is almost the opposite. Drawers are to be opened, closets rummaged through. Honestly, it feels like a bit of a scavenger hunt! Decisions are to be made quickly and on the spot.

speed declutter technique

My speed declutter challenge found me digging through bins in our storage closet, drawers in my kitchen, and our shoe rack, among other spots.


WATCH ME SPEED DECLUTTER

It’s amazing how quickly a person can make decluttering decisions when a time limit is involved! Check out all the items that made it into my basket!


ITEMS THAT WILL BE DONATED

The basket filled up pretty quickly. As a result, I eventually needed to start setting items on my bed. Though I didn’t count as I went through the process, I was surprised to find that I had set aside exactly 60 items! That could not have been planned any better if I tried! Here are a few of the items that will be sold or donated.

decluttering challenge 60 in 60

This high quality Pottery Barn bedding has been taking up space in our linen closet since we moved into the rental farmhouse. Because we do not currently have a guest bedroom, and do not have plans for one at Arrow Hill Cottage, it is time this bedding becomes useful for someone else.


60 in 60 decluttering challenge

We are a large family of seven, and this smaller crock pot just doesn’t get much use. To make meals for our crew, we need the jumbo sized version, which we already own.

whole house speed declutter

As our youngest child grows, I am steadily going through the clothing that no longer fits her. These shoes, for example, still have a lot of life in them. For another little girl.


WHAT I LEARNED FROM THIS CHALLENGE

I will admit that I was a bit nervous starting this challenge. We have been decluttering our home over the past few months. We even have an entire storage closet dedicated to items for our upcoming summer garage sale. Because of this, I was worried that it would be difficult to find 60 items that we could easily part with.

minimalist family home

I was wrong! Once I started to open cabinet doors and drawers, I was finding items that I didn’t even remember existed. If they had been hiding for months, or in some cases even years, it was obvious that they were not necessary to keep. Into the basket they went!

Perhaps the greatest obstacle to this challenge was that I couldn’t finish what I started. Because this is a speed declutter, there was not time for me to thoroughly sort through each space I looked. In some ways, that aspect was hard on my brain. For example, it is a bit of mental burden knowing that my kitchen is still filled with many items that we don’t need.

Certainly though, this feeling will help me remember to go back and finish, which is a good thing!


In conclusion, I feel that this speed declutter challenge was a quick win toward my overall simplifying goals. I would definitely recommend that you give it a try!

Join me next week, when I take on a new challenge for the December Declutter!


PIN THIS CHALLENGE FOR LATER

Try it for yourself!

speed declutter

PLEATED TABLE RUNNER DIY

This simple table runner is striking, yet inexpensive and easy to make! If you have 30 minutes and a few dollars, your table can be dressed for success!

pleated table runner

I love staple decorating pieces that can be re-used season after season. To fit that bill for me, they generally need to be neutral and quite basic. But nobody said that basic had to be boring! While this table runner would be the perfect compliment for a Thanksgiving table, it could just as easily dress up a Christmas or Easter table setting.

The best part of this do-it-yourself project is that it can be made inexpensively and quickly!


SUPPLIES YOU WILL NEED

DIY table runner

A roll of Kraft brown paper. I used a 30″ wide roll

sharp scissors

pencil

sewing machine / thread

straight pins (optional)


DETERMINE A RUNNER SIZE

The first step in this project is to determine the width of table runner you will create. Because working with the full 30″ roll of material would be difficult, I decided to cut the kraft paper in half. This left me with a finished table runner that is 15″ wide.

Feel free to play around with the material a bit to determine the size that will work best for you.

If you do decide to cut the material down, try to maintain as straight of an edge as possible. Having a straight edge will be helpful when folding the pleats. Don’t fret if you can’t get the edge perfect though, as any unevenness can be trimmed later.

table runner tutorial

You will also need to think about how long you would like your finished table runner to be. Because of the way that the paper will be folded, you will need 3′ of length for every 1′ of finished runner. For example, if you would like to create a 6′ table runner, you will need the roll of kraft paper to be 18′ long.


CREATE THE PLEATS

The pleats in this project are accomplished in a very similar fashion to folding a paper fan, with one important difference. The folds used to make a paper fan are ‘accordion folds’ – meaning they are all even. For this project, we will be using what is called a ‘knife fold’. The pleats for this technique are done at a 2:1 ratio. Learn the basics about the knife fold in the first few minutes of this video.

I chose to make my pleats 1″. That meant that the other fold needed to be 2″. If you choose to do a different size of pleating, just be sure to remember the 2:1 ratio. A 2″ pleat would require that every other fold be 4″, for example.

diy table runner tutorial

It helps me when I give myself small guides to work from. You can see in the above photo that I have a mark at 2″, and another 1″ further. I continued this marking pattern all the way to the end of the paper, on both sides.

Pinch slightly at the first 2″ markings on either side, then fold upward.

table runner DIY steps

Pinch at the next two markings, and fold downwards. Continue this process, folding up and down alternately.

table runner project


Be sure to make the lines as crisp as possible. I like to use my fingernail to get a nice clean line.

pleated table runner


When you have pleated a few feet of paper, it may become difficult to keep the folds laying flat. At that point, consider placing some temporary straight pins to hold things together. You may instead choose to move onto the next step.

DIY pleated table runner


SEW THE PLEATS TOGETHER

Sewing the pleats down will allow the table runner to stay flat. A simple straight line stitch, set 1″ from the edge, can get the job done.

sewing a diy pleated table runner


Or you may want to play around with the settings on your machine to find a more decorative stitch. This zigzag stitch looked really cute!

stitched pleated table runner


Finish by cutting the extra thread, erasing any visible pencil marks, and cutting the edge if needed.

table runner for holidays


ENJOY THE TABLE RUNNER

Your neutral pleated table runner is now ready for action! Layer it over a table cloth for extra dimension or place a bit of lace on top for extra texture. Add seasonal decorations for the final touch to a festive tablescape.

neutral pleated table runner


simple homemade table runner


pleated table runner project


ALTERNATE IDEA

If the idea of creating an entire table runner seems overwhelming, consider this alternate. A smaller version can be created with less material and used as place mats.

pleated place mat

Kraft paper place mat


PIN THIS PROJECT FOR LATER

simple diy table runner


LIVING ROOM FURNITURE ARRANGEMENTS

Rearranging furniture is a great way to add variety and interest in your home. In this post, I share the living room furniture arrangements I have designed for our cottage. 


living room furniture arrangment

Even as a little girl, I enjoyed rearranging my bedroom furniture to give the space a fresh look.

When Craig and I got married, this was an even more exciting adventure as I began to develop my decorating style. I must have come up with about 8 different living room furniture arrangements in our first house.


It is no surprise then, that while designing Arrow Hill Cottage I have had the idea of furniture placement in the back of my mind. With our original main floor layout, there wasn’t much wiggle room in terms of where the pieces could be situated. This sort of bummed me out, but I figured that if I could come up with one great placement I could learn to live with it long term.

I was excited though, once I made the major plan breakthrough that opened up the main level. Not only does the layout have a more relaxed and spacious feeling, it also allows for multiple furniture arrangements!


FURNITURE PIECES FOR THE LIVING ROOM

We have not yet selected our furniture, but I have in mind a few key pieces to search for.


Couch: I would like to find a sleek, tailored back couch – perhaps around 7 feet long. Nothing too stuffed or with a high back. Since this will be the largest piece on the main level, besides our long harvest dining table, I want to be sure that it isn’t overpowering.

A Pair of Side Chairs: Again, preferably not overstuffed. I will be looking for simple chairs with a basic and classic shape.

Coffee Table: This piece may have a bit more visual weight to it. I haven’t decided yet if it will include storage or not. In my mind right now, I envision it with black metal legs and a wooden top.

Small Side Table: To coordinate with the coffee table. A simple place to set a book or a drink.

Area Rug: In the following images, the area rug is an 8′ x 10′ size. Potentially, we could purchase a larger 10′ x 12′ size. I envision this to be a semi colorful or patterned piece.


ARRANGING THE FURNITURE

I love the ease of planning furniture placement through computer drafting. Obviously, it is much easier to move the pieces around and come up with a variety of ideas quickly. I was able to determine four living room furniture arrangements that I think would work well for our cottage.


Arrangement 1

This layout is very fireplace focused. From the front entry, a person can easily see the fireplace and the furniture is arranged to make it a focal point as well. Even though the side chairs are positioned in front of the large wall of windows, I believe there will still be a very open feel and a great view to the woods and pond.

The couch serves as a bit of a visual divider between the living room and the kitchen/dining space.


Living room furniture arrangement 1


In the 3D images, you can see that the view from the windows is not greatly compromised by the chairs. One note for this arrangement is that I might want to consider adding a sofa table into the furniture mix, so that there isn’t so much couch back exposed.


Arrangement 2

For this next layout, I used the exact same furniture placement but rotated it 90 degrees. The fireplace is flanked by the chairs, which makes the living room more intimate and cozy.

The flow between living and kitchen/dining is open, with plenty of space to walk.


The couch back is one of the first things a person entering the house from the front door would see with this furniture layout. Again, this might be a good opportunity for a sofa table. It is also one of the reasons that a lower profile couch will be a priority when making the furniture selection.

Living Room furniture arrangement 2


Arrangement 3

This living room set up gives off a more formal vibe. The couch is placed with it’s back to the large wall of windows and the chairs directly across, with the coffee table in between. The benefit of this layout is that the room feels open from both the entry and the dining space, since the couch isn’t visually dividing the passage from either direction.


Again, a low profile couch will be important so that it does not block any of the wonderful natural light that is sure to spill through the living room windows.


Arrangement 4

This combination is what I am calling the ‘Holiday Furniture Placement’. This layout might be my go-to when we have company. In the living room, the chairs and couch are set up for maximum conversation in a U-shape facing the fireplace. Additional chairs could be brought for more seating.

There is also a bit of a configuration change that could happen in the kitchen/dining space. By rotating the table, the counter space overlooking the windows could be opened up for seating as well.


I can see that there would be plenty of space for a Christmas tree in the corner closest to the entry. This would allow it to be visible, yet out of the way.


I will need to work through my ideas for this a bit more to determine if setting the cabinets a bit might be worth the compromise of less storage. The very valuable aspect of this furniture placement, and why it would work so well for large gatherings, is that it would allow us to seat 14 for a meal. For a house that has a small main floor, that is a big deal!


BENEFITS OF ARRANGING FURNITURE

Rearranging furniture is worthwhile, and not just because it provides a good cardio workout! There are many other benefits that make re-arranging furniture a good idea.


Deep Cleaning: It’s amazing the amount of toys and cracker crumbs that can be found when furniture is moved. By arranging furniture more frequently, those dust bunnies will have no place to hide.

Furniture Wearing Evenly: People have a tendency to find their favorite spot and stick with it. By moving furniture, you just might make someone give another place to sit a try.

Sunlight also has a tendency to fade certain types of fabric. By rotating which furniture has a place in front of the windows, the sun fading will be less noticeable over time.

Appreciating the Space: When a room is always set up in the exact same way, it has a tendency to become visually stagnant. By changing furniture pieces around you can invoke new life into the space. This fresh perspective can allow you to appreciate the room again.


GIVE YOUR SPACE A FRESH LOOK

If you’d like to try out some new living room furniture arrangements without sweating, check out this link from Better Homes & Gardens!

Better Homes & Gardens Furniture Arrangement Tool


Do you have tips on how often you like to re-arrange furniture? Which of the four living room furniture arrangements of the four shown above is your favorite? I would love to hear from you!


PIN THESE FURNITURE LAYOUT IDEAS FOR LATER

living room furniture arrangements


TRENDING IN HOME DESIGN & DECOR: BOLD WALLPAPER

There is a saying ‘What goes around comes around’. It’s true in fashion, entertainment, and even home decor. Wallpaper is in the middle of a revival moment that doesn’t appear to be going away any time soon.


WHAT IT IS

Machine printed wallpaper was introduced in the late 1700’s, as a means to decorate interior walls of domestic and public buildings. It is most commonly sold in rolls, with graphics in repeating patterns. These patterns overlap so that they look continuous when installed.

Unlike the wallpaper of years gone by, the newer versions are much more simple to install and don’t require the paste to be awkwardly applied to the back of each piece before being hung. Some types are even removable, meaning that if your style changes, you can switch it out easily.

The patterns and colors available today are so diverse that there is sure to be something that matches your style.


OVERSIZED FLORALS

source


TEXTURED/3D

source


GEOMETRIC

source


WHERE/HOW TO USE IT

Wallpaper is most typically used, well, on walls of course! From the bathroom to the kitchen, homeowners are finding a pattern they love and making a major statement!


FULL ROOMS

Mix & Match Design Company


ACCENT WALLS

Claire Brody Designs


Creative people have proved that wallpaper is useful for other purposes as well! These are some interesting applications:

ACCENT THE BACK OF CABINETS

Practically Functional Blog


LINING DRAWERS

Duece Cities Henhouse


FURNITURE

Salvaged Inspirations Blog


STAIRS

Bower Power Blog


If the thought of installing wallpaper is what is holding you back, read this article from dwell titled ’12 Pro Tips For Installing Wallpaper In Your Home’. It is well written, and the step by step guide proves that this DIY project can be done easily.


WHERE TO BUY

Wallpaper can be purchased in home improvement stores, as well as Interior Design shops. The most common place to find the widest variety of options though, is online.


This a collection of my favorite finds from Amazon

From top, left to right

1 | 2 | 3 | 4 | 5 | 6 | 7 | 8


MY THOUGHTS ON THIS HOME DESIGN TREND

Wallpaper has notoriously had a bad reputation of creating a ‘dated’ look to a home, and is typically one of the first things removed when new owners move into a house, along with popcorn ceilings and shag carpeting. That fact has more to do with the personal nature of wallpaper than anything else. Though one homeowner may find a print that they love enough to make a statement on a wall, or in an entire room, that print might not be a favorite of someone else.

With that being said, I think that wallpaper is a great way to personalize. If you are living in your ‘forever home’ then by all means, go with what you love. But, if you will be selling your home in the near future, you might want to consider something in a neutral tone or with a simple pattern, or better yet with a peel + stick backing so that it can be removed before the house is listed.

If you would like more wallpaper inspiration, check out my Pinterest Board on the topic!


***This post contains affiliate links***


FALL DECORATING IDEAS

Today I share some of my favorite Fall decorating ideas. The natural elements and rusty hues are sure to make an impression!


Rainbow leaves Fall decorating

We are officially in the heart of the Fall season. Most of the leaves have already changed colors and fallen off of the trees in our area. A bit of snow has even been seen, though thankfully melted away.

This is our last Fall living in our rental home. We are hopeful that by this time next year we will be in Arrow Hill Cottage. It is likely we will be cozy by the fireplace and decorating with pumpkins and foliage. Decorating our new home for the holidays is something I am very excited for!

Until then, I will be collecting decor ideas to use as inspiration for when I do get the chance.

Fall decorating ideas with pumpkins

Today, I want to share some of the unique and beautiful Fall Vignettes that are inspiring me! Click on the links below each photo to learn more about the creative people behind these beautiful decorating ideas!


Fall decorating front porch ideas

gina.marie.home


painted acorns fall decor

homestoriesatoz


Thanksgiving table decorating ideas

our1880sfarmhouse


Front porch Fall decor

beckmanhomes


Thanksgiving interior decorating ideas

the_canary_cottage


Painted pumpkins fall decorating ideas

justaboutnoon


Thanksgiving themed mantle

ourfigtreecottage


Thanksgiving door wreath

jordang106


FALL DECOR IDEAS FROM ARROW HILL COTTAGE

Nature Inspired Fall Centerpieces

Printable ‘Thankful’ Art


Enjoy Fall everyone!

ANTIQUE CABINET RESTORATION

In this post, I describe the steps we took during our antique cabinet restoration – taking a beat up old cabinet and making it look new again!

antique cabinet restoration


Last winter, I happened to be driving through a nearby town and noticed an antique store I had never been in. I decided to stop and have a look around.

It was packed with all sorts of treasures, which made it a bit hard to see individual items. I get a little claustrophobic when I am surrounded by things. And so, if i’m honest being honest, I was walking through the shop quickly. Just as I was getting ready to head out, I spotted a pair of antique cabinets in the corner.

They were so wedged in that it was hard for me to determine their condition. I asked the store owner to pull them out a bit so that I could take a look. She did the best she could. However, it was impossible to see all sides of the cabinets without rearranging a ton of items.

She told me about the cabinets history, mentioning they had been salvaged from an old house during a recent remodel. The notches on their sides indicate where they had been built into walls. She also informed me that she would only sell the cabinets as a pair. And that the one in back wasn’t in great shape.


THE CABINETS

Undeterred, I texted Craig this photo and asked for his consent to purchase. This is the cabinet that was more visible. I loved the glass door, and the size of the cabinet seemed to be good for a variety of purposes

vintage cabinet in an antique store


Though he was skeptical on what we would do with them, he has known me long enough to realize that once I fall for an item, it is pretty hard to shake it from my mind. He agreed that the cabinets could become ours. A couple of weeks later, he went to retrieve them.

Upon arriving home, Craig announced that the second cabinet was basically falling apart, and that it probably wasn’t worth salvaging.

The ‘nice’ cabinet was given a spot in our rental home. The ‘ugly duckling’ cabinet was left in the garage.

vintage cabinet with glass door

the nicer cabinet,  in our dining room


THOUGHTS OF RESTORATION

Sitting in the garage, the cabinet was something we saw every day. Perhaps Craig became annoyed seeing an unfinished project, or perhaps he began to see it’s merit. Either way, he eventually decided to take it on as his personal restoration project.

I was all for it! If he was going to do the work, I certainly wasn’t going to get in his way!

antique cabinet with many scratches and dings


Unfortunately, I didn’t take many good pictures before he started the antique cabinet restoration. I can tell you though, it was in really rough shape. The door was barely hanging on by it’s hinges, the glass was broken, and some of the wooden grilles were missing. There was a large crack on the top, and a broken piece on the side.


ANTIQUE CABINET RESTORATION

Craig spent many long hours in the garage sanding, gluing, and sanding some more.

antique cabinet restoration steps

making old new again. steps to restoring an antique cabinet

repairing an antique cabinet

There sure was a lot of sanding and gluing to be done! He mostly used an orbital sander with varying grits of paper. For the finest details, he used a sanding block.


broken piece on an antique cabinet

sanding the corners of an antique cabinet so that it can be restored


Craig took pieces of the cabinet apart…

antique cabinet pieces to be repaired


… then put them back together

sanding an antique cabinet


REFINISHING THE ANTIQUE CABINET

After literal months of very hard work, the cabinet was once again standing tall and ready for it’s finishing. Once the sanding was complete, it was much easier to see all of the beautiful wood grain details.


repairing an old cabinet during an antique cabinet restoration

The lighter wood pieces are replacements. Although they are the same wood species, they are not aged in the way that the rest of the cabinet pieces are.


how to restore an antique cabinet


CHOOSING THE STAIN COLOR

It was a difficult decision on what type and color of stain to use. The cabinet is made of 100% red oak – but some of it has a tighter grain, while other parts a more loose and wavy grain.

We had some samples made up at a local Sherwin Williams, then brought them back to the house to look at for a while.

stain color options for an antique cabinet


Ultimately, we agreed upon a Minwax stain called ‘Dark Walnut’. We felt that it gave us a nice deep color, which would help to neutralize the grain a bit. The Sherwin Williams associate suggested a Minwax water based urethane in a semi-gloss finish. Popular Woodworking has a great post about how to properly apply stain.

finish for an antique cabinet


The cabinet absolutely soaked up the stain. The wood looked amazing, but wasn’t quite as dark as I had wanted after the first coating.

Antique cabinet restoration. Applying stain to an antique cabinet


front and back of the restored antique cabinet after one coat of stain

Cabinet after one coat of stain (sitting in the garage)

As you can see in the photos above, the newer wood pieces were still pretty obvious after the first coat. We waited a couple of days, and then applied another stain coating. This time we had success with the color. We brought it indoors to dry for another two days, and then added two coats of the clear semi-gloss finish. The spar urethane really made the cabinet shine, and darkened the color a bit more.

antique cabinet restored. Amazing old cabinet with storage and mail sorting

Finished cabinet with lower door open


vintage cabinet with mail cubbies - antique cabinet restoration

Detail of cubbies. Might be perfect for sorting mail!


vintage cabinet detail - antique cabinet restoration

Detail of the molding and repaired cabinet top


antique built in cabinet with writing showcasing their original location

The original writing on the side of the cabinet – which indicates the part number, and the early 1900’s homeowner. 


restored antique cabinet with new stain and urethane


FUTURE FOR THE ANTIQUE CABINETS

Now that the antique cabinet restoration is complete, we are dreaming about it’s future. We love that this historic piece will be given a prominent spot in Arrow Hill Cottage – to define our entryway from the living room! You can read more about our first floor layout in THIS POST.

antique cabinet restoration - pair of cabinets restored and ready for their spot in a new house


We are also very excited to see how the ‘nicer’ cabinet turns out. And to see BOTH of the cabinets, together once again in the new house, will be such a thrill!


PIN THIS ANTIQUE CABINET RESTORATION

If you enjoyed seeing this old cabinet become new again, be sure to follow this blog to see the other restored!

antique cabinet restoration - steps to move from trash to treasure


THE MAIN ELEMENTS OF THE BUNGALOW HOME STYLE

Welcome to another installment in the ELEMENTS OF HOME series. Each month, I showcase a different residential style here on the blog. It is my hope that this information will not only teach you a little something about the various styles; but also equip you if are designing or searching for a new house – by allowing you to determine which style(s) suit your lifestyle and preferences the most.

Today I will be over-viewing the bungalow home – including the history of the style and what makes it unique.


HISTORY OF THE BUNGALOW STYLE

The very term ‘bungalow’ has roots from the Indian/ Hindi word ‘bangala’ – which describes a one story house with a low, extended roof. During the British occupation in India, troops created bangalas in higher elevation ‘hill stations’. The home’s wide, covered verandas, provided shade in the hot climate as well as a comfortable cross ventilation in the hot stuffy months.

Bangalas were later built in the UK, presumably by the British colonials who had finished their tour of duty in India. Coined as ‘bungalows’, they were adapted once again for America in the early 1900’s, popping up first in the temperate climate of California. From that time until the early 1930’s, the bungalow style’s popularity reached nearly every state in the union.


When Bungalows were introduced in America, they were seen as a progressive ideal – and in many ways an opposite way of life to that of the Victorian era. The straight-forward use of materials, informal plan layout and accessibility to the outdoors that bungalow homes provided were attractive to middle-class families in particular – those who felt secure enough about their social standing that they didn’t need their home to be a status symbol or showcase their worth.

Similar to the American Foursquare home, the Bungalow style were widely available through mail-order catalogs. For those with limited means – the bungalow provided more than just the need for shelter, they provided fulfillment of the American dream.

There are also examples of architecturally designed bungalow homes. The most notable architects of this style were the Greene brothers, who practiced in California in the early 1900’s – focusing their work on the Arts & Crafts movement.


MAIN ELEMENTS OF THE BUNGALOW STYLE

LOCATION

Bungalows first began to make their U.S appearance in Southern California – that is where the most iconic examples still stand today. However, there are bungalow examples scattered throughout North America.

This housing style fills neighborhoods that are near the city center, which is an attractive asset to homeowners looking for close proximity to schools, work, and shopping districts. Generally these neighborhoods are pedestrian friendly. It is not uncommon to see multiple Bungalows situated next to one another long the street – something that creates a strong sense of community for the people who call the neighborhoods home.


SIZE

These homes are often small, with efficient, yet flexible, floor plans. Their economical use of space is especially appealing to first time homeowners and young families.

Though relatively compact, Bungalows make efficient use of every available square foot – with built in cabinets and cupboards for organization.


EXTERIOR TRADEMARKS


  • LOW PROFILE: Because they are meant to be unassuming, bungalows keep a low profile to the street. Generally they are one story in height. If a second floor is included, the living space is typically built into the roof structure. Exterior detailing of bungalows accentuate the horizontal lines, further grounding their facades.


  • PORCH: most Bungalow homes feature large front porches. Not only do porches give the homeowners a direct connection to the outdoors, they also promote neighborhood interaction – both important Bungalow ideals.


  • DOMINATING ROOF WITH DORMERS: Bungalow generally have roofs that slope toward the street – aiding in their one story appearance. Those with second floor living space may have dormers that accentuate the roof line.
  • USE OF REGIONAL MATERIALS: Builders of the original bungalows favored the use of regional materials for their lower cost and reduced maintenance. Those built on the west coast tend to employ stucco as a primary exterior material, where those in the Midwest – such as Chicago and Milwaukee – feature brick. Northeast bungalows were, at least partially, clad in shingles.


INTERIOR SPACES

Interior layouts lack redundant walls and useless space. Hallways are not common. Compared to their Victorian ancestors, the Bungalow features an open first floor plan – with rooms that have overlapping functions.

Continuing the function of space, many Bungalows feature built in cabinetry as room dividers – as opposed to full height walls. These built ins allowed rooms to flow into one another, while at the same time maintaining some separation of space.

image source

COLOR SCHEME

The original bungalow owners would often strive to use warm colors and textures that would make their homes feel welcoming and cozy. Earth tones such as tan, brown and harvest gold were, and still are common both on the exterior detailing and interior finishes and furnishings

traditional bungalow colors 

from the book Bungalow Colors: Exterior, by Robert Schweitzer


NOTABLE BUNGALOW HOUSES


‘Bungalow City’ | Boise, Idaho | Houses built between 1910-1930

This neighborhood was nicknamed ‘Bungalow City’ because of the vast amount of Bungalows that were built there in the early 1900’s. There are many prime examples of the style that are well maintained.


INSPIRING BUNGALOWS FROM AROUND THE WEB

These classic homes showcase the Bungalow style well. Take a closer look!


1916 Bungalow


Itty Bitty Bungalow


I hope you have enjoyed learning a bit more about the Bungalow style. Curious which residential style will be featured next month? Stay tuned!

And be sure to check out the previously showcased styles HERE.


18 CREATIVE COLLECTION DISPLAY IDEAS

If you have a collection of items you love, but are unsure of the best way to display them, check out these 18 creative collection display ideas.

Because homes are personal spaces – and are reflective of the people who live within their walls – it only makes sense that they would be filled with the things the homeowners love.

And for many people, if they love something enough, they may just want to have more than one of that item. After awhile, a little collection may begin to take shape.

These 18 creative ways to display collections can help you showcase the items that bring you happiness. Visit the links below each image to learn more about these collections ideas.


SET THEM ON SHELVES

Probably the most basic way to display collectibles is to set them together on shelves. The similar objects play off of the beauty of one other when placed side by side. This display option allows you to easily add more shelf space as your collection size increases. The downside is that you may find yourself doing a lot of dusting to protect your collectibles!


teapot collection display

Teapot Collection


Shelves Of Lunchboxes


collection display shelving

Vintage Record Collection


FRAME THEM

For flat or uniquely shaped items, consider frames or small cubes that can act as miniature gallery podiums. If the items you collect are flat – such as vintage prints or handkerchiefs – you may be able to get UV protective glass for your frames, which can add a layer of protection.


Display of handkerchief collection

Framed Handkerchiefs


camera collection display

Vintage Camera Display


postcard collection on display

Stamp Collection


GROUP THEM IN GLASS CONTAINERS

Smaller items can find a place in clear containers such as glass mason cans or apothecary jars. These containers are easily moved and can themselves be grouped together for an additional level of display. You will not be able to see each and every angle of your small collectible items if they are displayed this way – unless you pick them out to look at them. This may be a downfall for some collectors.


vacation collection display

Vacation Memory Jars


collection of cookie cutters

Cookie Cutter Collection


glass jar collection

Items In Dome Displays


HANG THEM UP

A fun, and ‘outside the box’ way to display your collection might have you looking UP. Create a floating mobile of postcards, or a lampshade of old love letters. A hanging line might even allow you to pin up items that are heavier.


button collection

Pins on a Lampshade


hanging tin collection

Tin Collection


postcard mobile collection

Postcard Mobile


CLUSTER THEM TOGETHER

Perhaps the items you collect are large and bulky. Or perhaps you have a collection of items that are still in regular use – such as picnic baskets or tableware. These items might be displayed easily by simply clustering them together on a side table or even on the floor.


large crocks on display

Vintage Crock Collection


collection of vintage picnic baskets

Picnic Basket Group


globe collection

Globe Collection


PROTECT THEM IN A CABINET

For the more delicate items that should not be handled often, consider protecting them behind glass doors. A hutch or curio can be a safe place for items that are easily breakable. Some cabinets may even have the option of showcasing your display with light.


collection in a cabinet

Stoneware Collection


silver collection

Vintage Silver


pottery collection on display

Pottery In A Cabinet


MORE DISPLAY INSPIRATION

Aren’t these ideas so fun? If you’d like more inspiration, be sure to take a look at my Pinterest Board ‘Collection Displays‘ – I am always adding to it!

If you collect books, consider reading this post on 9 creative ways to decorate with them.

I would love to hear which of these collection ideas is your favorite and/or if you have found other unique and inspiring ways to display the things you cherish most. Please comment below!


PIN THESE IDEAS FOR LATER

collection display ideas


THE IMPACT OF FRONT PORCH DESIGN

A covered front porch is considered a major asset to a home – one that many buyers would be willing to pay more for. The indoor/outdoor and public/private qualities that a front porch provides can add to the overall enjoyment of a home.

front porch design ideas


The detailing of a porch can also greatly impact the look of a home’s exterior. The combination of the porch’s roof-line, rails, and columns are of great importance; And determining the right proportions and styles of each of these elements can be tricky, especially if you are starting from scratch.

If you have an older home that has since lost it’s porch, you may simply need to see some historical photographs of similar homes to get a good grasp of what the proper detailing should look like. You can also take cues from these historic examples if you are designing a new home – but you may have more leeway on what might be deemed appropriate. You may need to play with a few different ideas before you land on the styling you prefer.


VISUAL EXAMPLES OF FRONT PORCH DESIGN

I will use the porch of our home, Arrow Hill Cottage, as an example of how a front porch can greatly impact the look of a home’s exterior.

Obviously, I have been going more for a ‘cottage’ look while designing the exterior – But the truth of the matter is that our home is basically a simple rectangular shape. It’s the porch that helps it come to life.

simple front porch design


Because our porch is only 14″ off of grade, we will not be required to install a railing around it. Instead we will incorporate a large planter box to help define the space. I can’t wait for my husband to build it for me (wink, wink). The columns are doubled up and positioned on stone bases that match the height of the window sill.

I would like to show you some other examples of what the house might look like with different porch detailing. First, lets take a look at this same house WITHOUT it’s porch.

Home design without a front porch


THAT’S A VISUAL SHOCK!

Insert all of the sad emoji’s here. Can you see how much character was lost with the elimination of the porch? The entire facade looks flat and uninviting. The entryway is not defined and the windows seem to have little balance. I think it’s clear that this house needs it’s porch!


The use of thinner columns and the elimination of the stone bases would have created a look that has a bit more of a Colonial styling. This set up might have looked more appropriate with a railing. For us, it wasn’t the right fit.


simple home with front porch


A thicker column profile atop brick bases might have given the house more of a Craftsman/Bungalow look. I personally love craftsman detailing; But I felt that with the steep pitch of the roof, they wouldn’t complement the house correctly either.

front porch with brick columns


Color can also play a role. Stained brown columns may have given the house more of a Modern Farmhouse vibe. Lovely, but not what we were going for.

farmhouse style front porch


All of these options are unique and none would be considered ‘wrong’ in this situation. Our choice came down to a matter of a styling preference.


If you have a home that could benefit from a front porch, but aren’t sure what it might look like – please contact me about doing a MAKEOVER TAKEOVER for you! I would be happy to offer up some options that could really make your house shine!